(If you aren’t yet familiar with X-Wing Solo Play, check out the article index here for important background on the gametype.)
It has happened! On September 4th, FFG released Open Alpha 0.2, the “second draft” of their Solo Play rules. This article will talk about the changes made in the update, initial impressions, and then run through two battle reports with the new AI rules. (I know 9/4 was a long time ago. 2020’s been rough, alright?)
While the intent of earlier articles in this series was to assess the balance and “intelligence” of the Solo AI as compared to existing AI alternatives, this article explores the boundaries of what Solo AI can do. The two battle reports intentionally feature Solo ships with unusual chassis abilities, pilot talents, and upgrades to see how flexible this “one-size-fits-all” approach to AI really is.
The battle reports are less data-driven than prior ones, and exist to show the feel of flying against the newly-revised Solo AI. Do these games feel more like flying against a real opponent, or do they look like a step backwards?
What’s changed in the Open Alpha 0.2 rules?
First off, it’s easy to have missed the update – FFG didn’t publish a new article, but instead “stealth updated” their original one. The link to the rules now goes to the Open Alpha 0.2 document, replacing the original one. It’s disappointing that FFG didn’t do a short new article to announce the update and invite players to try it out – if the intent of the Open Alpha is to get feedback, why not try to attract as much as possible instead of hiding it?
As with their Rules Reference documents, FFG has helpfully highlighted the changes here in a different-color font. To summarize, aside from minor language changes and clarifications, the substantive changes are:
- Addition of tally markers, which are used to indicate when a Solo ship always uses a specific location or object as its tally. This will be used in objectives and scenarios, much like the “Hunt AI” in Heroes of the Aturi Cluster. For example, an enemy ace might place a tally marker on your most expensive ship to represent it homing in on the big kill while ignoring lesser fighters. This is a minor addition to the rules, and has no impact on regular play, but is exciting in that it hints at scenario/mission packs yet to come.
- The attitude system has had a major overhaul, introducing a fourth attitude (recovery) to the existing ones (offensive, defensive, balanced). Having more attitudes allows for action-selection decision trees that can better accommodate less-common actions (jam, coordinate, rotate, reload, etc.) and increase the odds that these actions all have the opportunity to happen. On the downside, combined with actions now having the opportunity to change three or more times a round (!!!) for each ship, this additional complexity has potential to slow a game down. Attitudes for each ship are indicated on the tabletop by placing shield or charge tokens next to them, and taking or causing damage causes attitudes to shift.
- When selecting a tally, Solo ships now use the nearest ship they have locked (unless they have a tally marker on another). Past articles pointed out how difficult it can be for Solo ships to get locks, so homing in on locked ships is a good way to help ensure that valuable munitions go off successfully.
- There are various ways to alter the maneuver roll for a Solo ship based on its attitude. Being stressed, damaged, or having munitions to reload will cause a ship to modify a die to an eyeball result, which prioritizes table results that cause blue-maneuvers. Modifying the die to an eyeball also causes the ship to move toward the recovery attitude, which has an action tree that allows for crit repair and reload actions.
- The approach charts have been tweaked, and – strangely – appear in two different locations in the document in slightly different forms. I personally find the new ones, at the end of the document, much easier to reference at a glance.
Also of note are some new terms in the newest Rules Reference released on September 24th, shortly after the Solo Play Open Alpha 0.2 update.
- Allied (pg. 4): This is very interesting, since in this context the word “allied” refers to different ships being controlled by the same player rather than having multiple players fight on the same team (as we’ve seen with some scenarios in the existing Epic Battles expansion). How this will be incorporated into the game remains to be seen, but the most obvious idea is to be able to hire allied bounty hunters into other factions. Other movie moments, like the final battle in Rise of Skywalker, also lend themselves to allied ships.
- Structures (pg. 21): The section for “structures” currently reads: “Structures are an upcoming game mechanic that some cards reference for the sake of future compatibility. There are currently no structures.” Whether these future structures take the form of models or (more likely) cardboard pieces like those used in Heroes of the Aturi Cluster remains to be seen!
Between these mysterious additions to the Rules Reference, the latest update to the Solo Play rules, and the inclusion of Epic Wing cards and the hyperdrive ring in the new Eta-2 Actis expansion (supposedly only for scenario play)… the future is looking very bright indeed for X-Wing games beyond the standard 200pt, 6-obstacle dogfights!
Ease of Reference
One thing that needs to be addressed before we go into the battle reports is the Solo Play rules document. Regardless of the quality of the rules, the layout continues to be a mess – if anything, it has only gotten worse with the additional complexity introduced in this latest Open Alpha 0.2 update.
For my own sanity I wrote up a rules summary that eliminates most of the filler and presents the rules more clearly, broken down by game phase. This summary also includes two quick reference pages, which contain all the information you need to play the game. You should be able to lay these two pages out and rely on them almost entirely during your game, without needing to flip through a cumbersome document.
I highly recommend you download and print this rules summary, or at least the condensed maneuver tables on page 5 and reference on page 8, to keep handy while playing. Otherwise, frankly, the complexity of the new attitude system makes the game extremely frustrating and clunky to play.
Game 1: Resistance vs. Solo Galactic Empire
The Resistance squad I picked was a simple one. Three tanky T-70s with heavy laser cannons to punch through damage, and a Fireball tricked out to be a swiss-army knife of extremely irritating tricks. It’s a fantastic blocker with both the BB Astromech and Afterburners working well with the SLAM action, allowing for all sorts of tricky repositioning, and the Spare Parts and Deadman’s Switch allowing it to stress or damage enemies who are too close. The Fireball is too annoying to ignore, so it should draw fire away from the more valuable T-70s.
- Black Squadron Ace: Heroic, Heavy Laser Cannon, Integrated S-Foils (53)
- Black Squadron Ace: Heroic, Heavy Laser Cannon, Integrated S-Foils (53)
- Black Squadron Ace: Heroic, Heavy Laser Cannon, Integrated S-Foils (53)
- Colossus Station Mechanic: BB Astromech, Spare Parts Canister, Afterburners, Deadman’s Switch (40)
- Total: 199pts
The Galactic Empire squad was built to showcase ships with uncommon actions (reinforce, coordinate, jam, cloak, reload, and SLAM) so I could see how the Solo AI utilized them. Decloaking the TIE Phantom and adaptive ailerons on the TIE Reaper also introduced unusual movement “decisions” for the Solo ships.
- Echo: Juke, Fifth Brother (70)
- Morna Kee: Proton Bombs (80)
- Countess Ryad: Outmaneuver (86)
- Major Vermeil: Admiral Sloane (58)
- Major Vynder: Proton Torpedoes, Advanced SLAM, Os-1 Arsenal Loadout (56)
- Total: 350pts
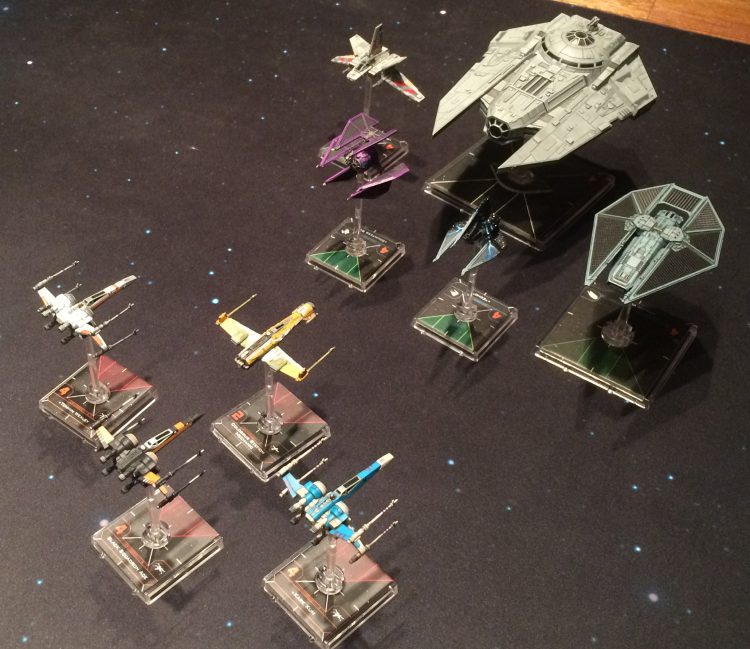
This game introduced a few elements that are not addressed in the Solo Play document, so I made house rules before going in.
- When activating Solo ships of the same initiative, I would start with those at range 0 of enemy ships and work my way out to finish with those beyond range 3. This seemed a little less arbitrary than alternatives like “work left to right across the table” and like less work than randomizing each turn.
- Countess Ryad would use her ability to flip around only if it would bring her tally into her firing arc.
- In the System Phase, a ship would decloak only if it could do so and catch an enemy in arc.
- Any reposition or maneuver with multiple options (adaptive aileron, decloak, etc.) would select the option that brought it closest to an enemy in its firing arc.
- The Force charge on Echo (thanks to Fifth Brother gunner) would be spent following the same guidelines as focus tokens, at the first opportunity it would add or prevent damage.
I decided to start with all the Solo ships on the table except for the Decimator, which would arrive on turn 6.
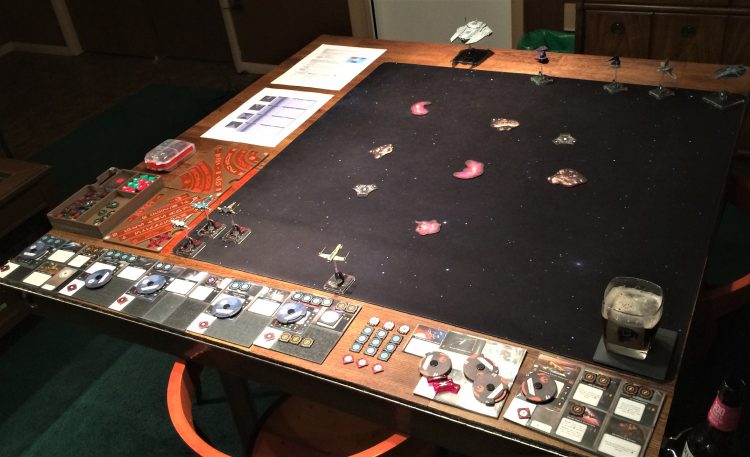
- Turn 1: Game begins, with ships moving up quickly to engage.
- Turn 2: Major Vermeil rolls “fastest advanced toward tally,” causing him to 1-flip in the opposite direction. This 1-flip being the fastest advanced maneuver will plague the Reaper through the game. Echo 1-banks into an asteroid and takes a damage – combined with the TIE Reaper flip, these early moves bode ill for the revised AI.
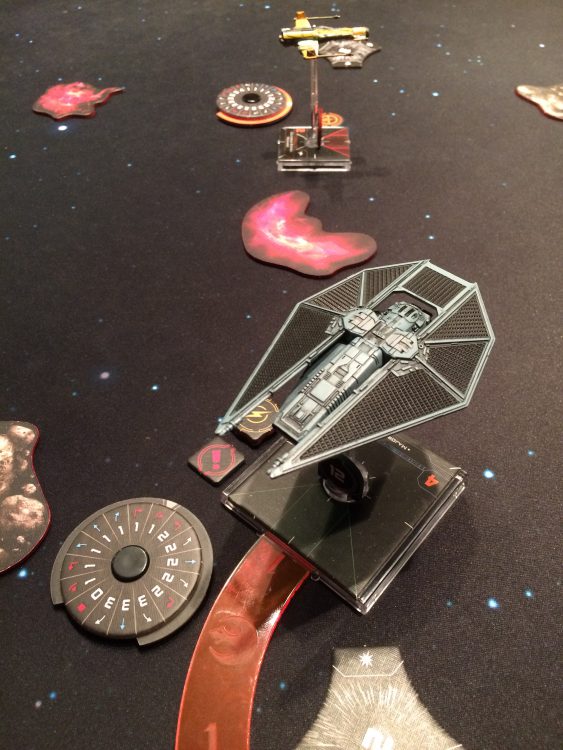
- Turn 3: The Colossus Station Mechanic almost SLAMs into the perfect block of Countess Ryad, but just falls short. Vynder SLAMs to gain an arc, but the maneuver smashes him into an asteroid. Two Heavy Laser Cannon shots from the T-70 X-Wings leave Ryad with one hull.
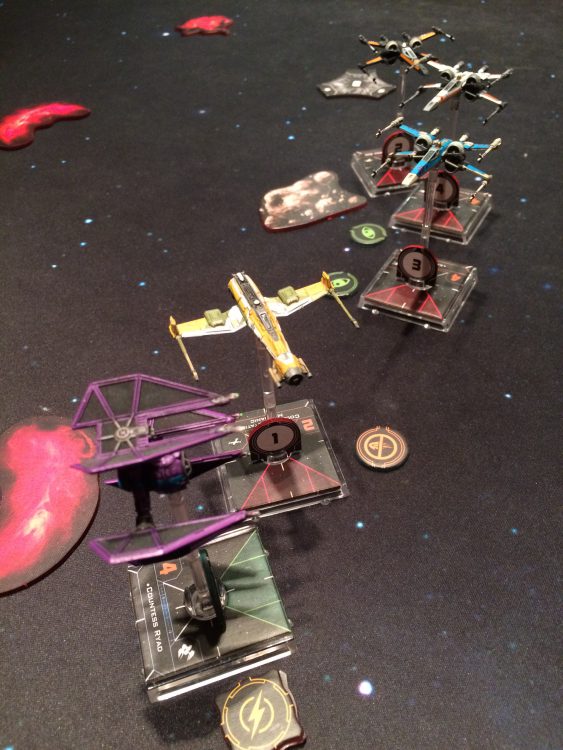
- Turn 4: Ryad hits the table edge and, per the rules, rotates to face back inward.
- Turn 5: Vermeil 1-flips away again. The Colossus Station Mechanic finishes off Ryad, while the T-70s finish off Vynder. Looking very good for the Resistance.
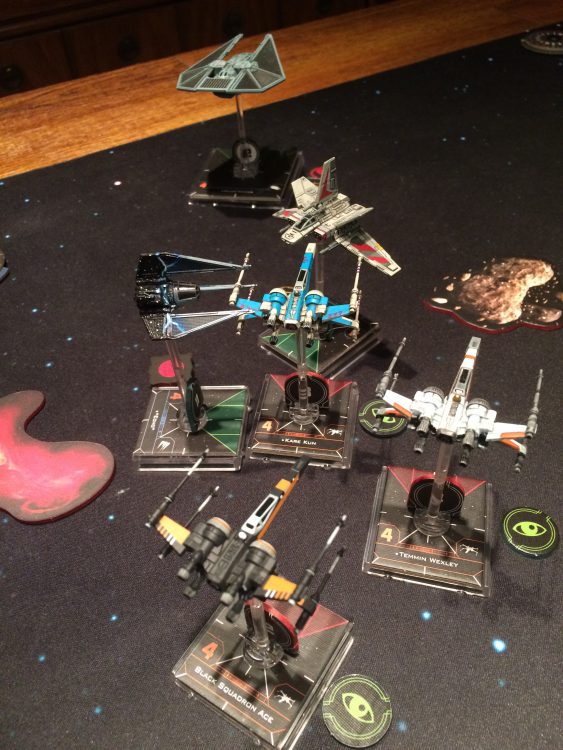
- Turn 6: Morna Kee arrives from hyperspace and immediately executes a stressful 1-turn right into an asteroid for one damage, despite it being intentionally placed to minimize the chance of collisions from hyperspace arrivals.
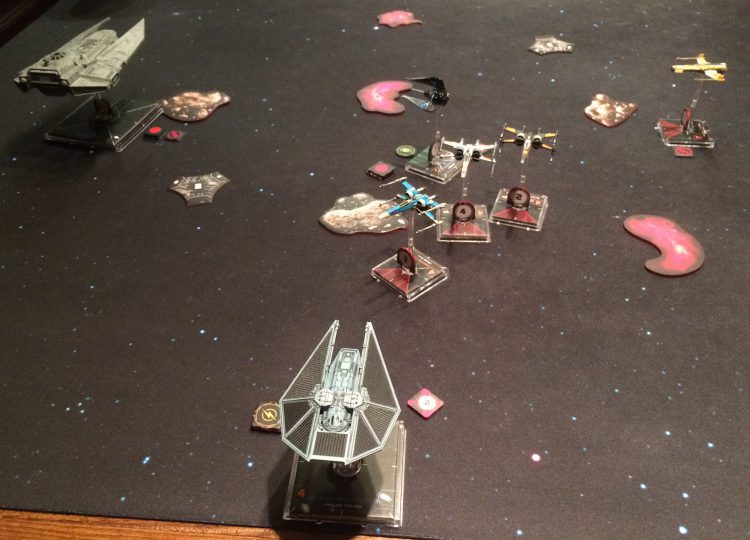
- Turn 7: Morna continues scraping along the rock, taking another damage.
- Turn 8: Nothing of note.
- Turn 9: The Resistance fighters begin homing in on Echo, seeing the TIE Phantom as easy prey.
- Turn 10: Echo takes an evade token and then naturally rolls EIGHT straight evades, only taking one damage when an excess red die pushed through the flawless rolling . Ending the turn with an evade token, the TIE Phantom cloaks!
- Turn 11: Echo proceeds to lead a wild goose chase. The TIE Phantom decloaked, took an evade as per the chassis rules, blocked two T-70, and retained the token to RECLOAK AGAIN with one hull remaining!
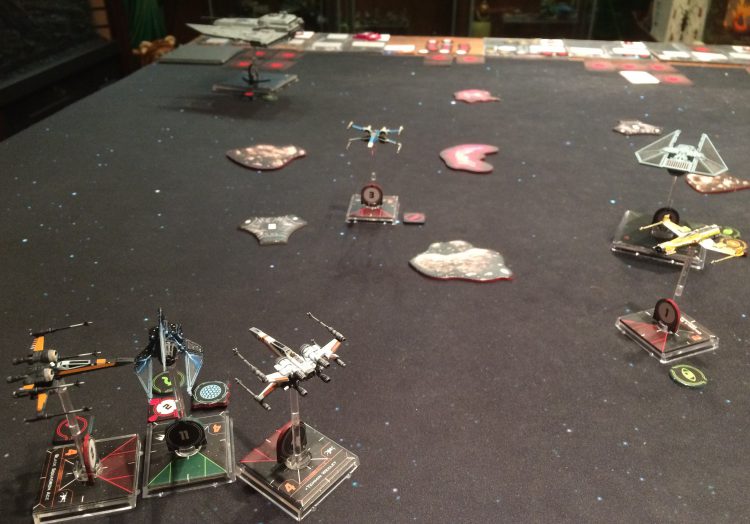
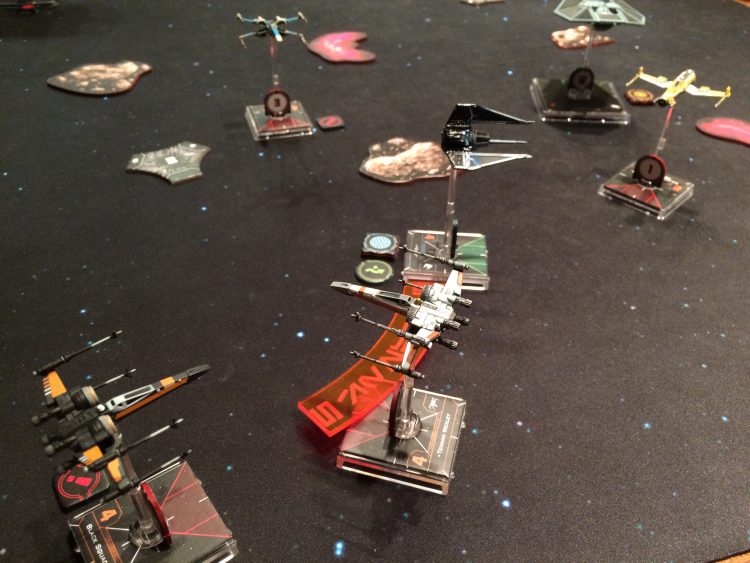
- Turn 12: There is no decloak option that puts an enemy in arc, so Echo remains cloaked. With only two hull remaining, the Colossus Station Mechanic sees an opportunity to die a hero. It executes a 3-bank, uses its Afterburner to boost, and then SLAMs into a 3-turn to land at range 1 of the one-hull Vermeil. Morna predictably shoots and damages Fireball, then the unwitting Vermeil finishes it off… killing itself thanks to the Fireball’s Dead Man’s Switch.
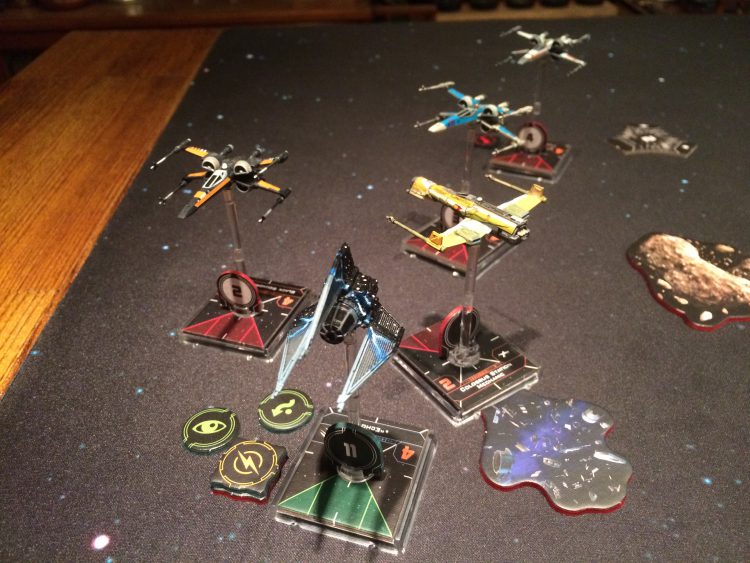
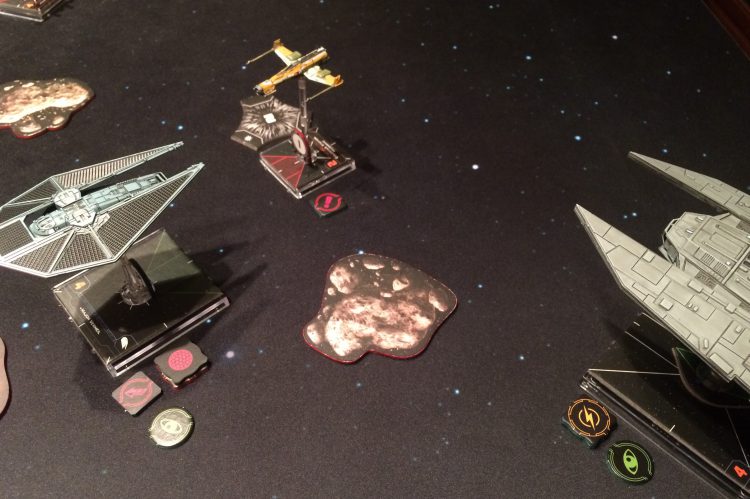
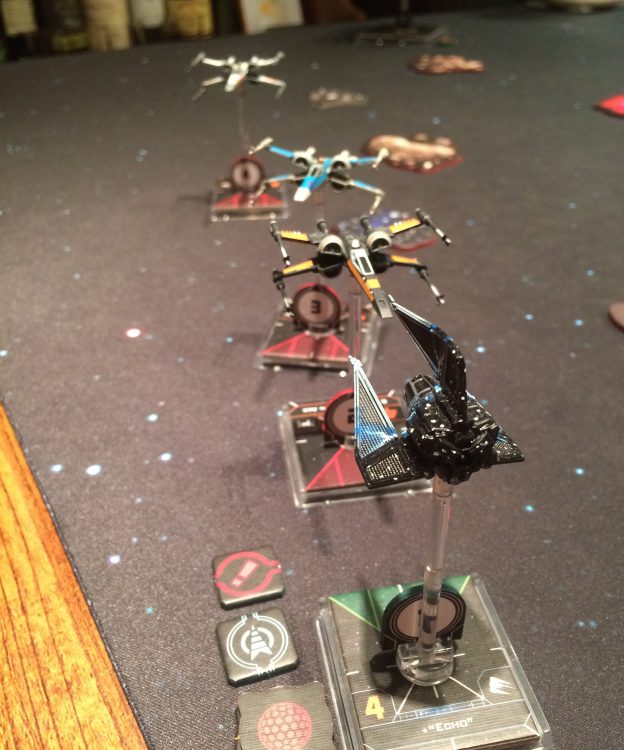
- Turn 13: The lumbering Morna Kee continues to bumble around in the middle of nowhere, hitting the same rock for the third time, and Echo finally falls to the guns of the T-70s. Only the Decimator remains.
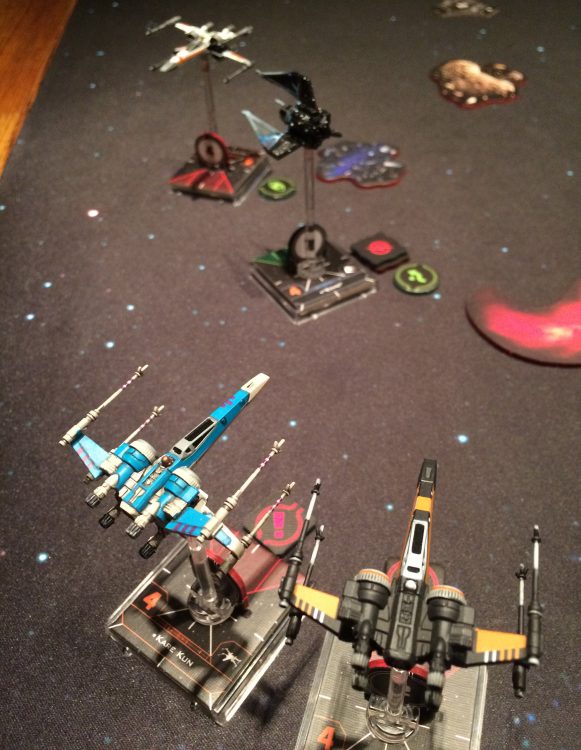
- Turn 14: The T-70s have only 1, 2, and 3 hull remaining. They turn to approach Morna Kee, who shows their panic by executing a fourth asteroid collision.
- Turn 15: Morna is nothing if not consistent, colliding with a rock for the fifth time before taking seven damage from the approaching T-70s. Its large base makes an easy target for the Heavy Laser Cannons.
- Turn 16: Morna’s flaming hulk of a Decimator is finished off by the T-70s.
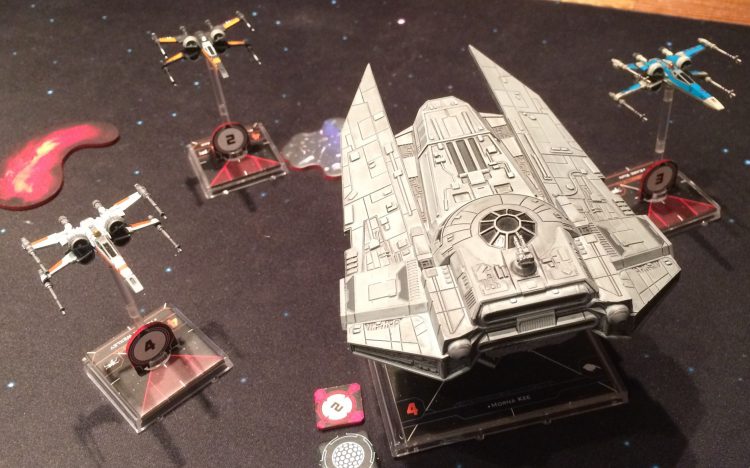
Score: 350 for BuffaloChicken, 121 for Solo.
Final Thoughts: This was not an encouraging first game with the revised AI. Collisions were still a huge problem with no attempt at a fix from FFG. And while the Hunt for Echo was fun, the decloaking mechanic had to be house-ruled. Even then, the Defensive Attitude needs an action option for cloaking.
On the topic of Attitudes, the new system was annoyingly clunky and time-consuming while adding relatively little to the game. The final game will need to streamline this significantly, ideally limiting changes to once per round. On a more positive note, adding a fourth Attitude does seem like it opens potential for decision trees that result in more options on the tabletop.
All being said and done, the game was still a fun one. After house-ruling the Adaptive Ailerons and decloaking mechanic, the Solo core rules were able to handle all these unusual vessels.
Game 2: Rebels vs. Solo First Order
After feeling like the last game wasn’t much of a challenge, I decided to up the ante. The Solo squad would have 400pts in this next match, up from 350 in the last.
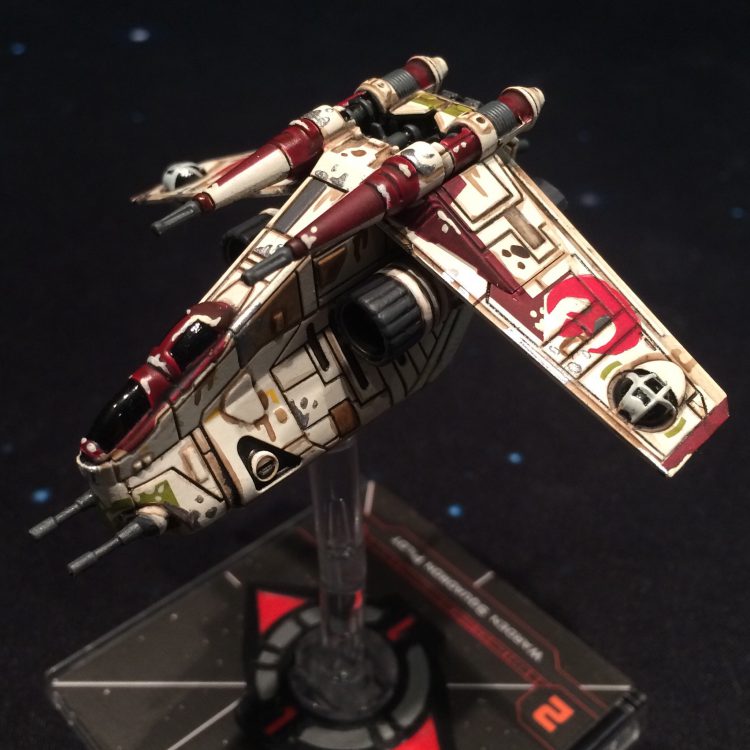
I had two goals for the Rebel squad – try out my converted counts-as K-Wing (made from the new LAAT model, altered to look like a Rebel Alliance salvage and retrofit) and experiment with the wacky new Concussion Bombs upgrade. Combined with delayed fuses and two tractor beams, as well as tractor or ion bomb effects from Sabine, the goal is to have fun dragging Solo ships into bomb fields. The Tala Squadron Pilot is there for blocking and opportunistic 3-dice missile shots while Ten Numb and Braylen Stramm fly as a heavy-hitting couple – one shoots and then tractors, while the other delivers the coup de grace to the tractored foe.
- Warden Squadron Pilot: Delayed Fuses, Skilled Bombardier, Sabine Wren, Concussion Bombs, Seismic Charges, Cluster Missiles (54)
- Braylen Stramm: Tractor Beam, Fire-Control System, Stabilized S-Foils (59)
- Ten Numb: Tractor Beam, Fire-Control System, Stabilized S-Foils (55)
- Tala Squadron Pilot: Intimidation, Cluster Missiles (31)
- Total: 199pts
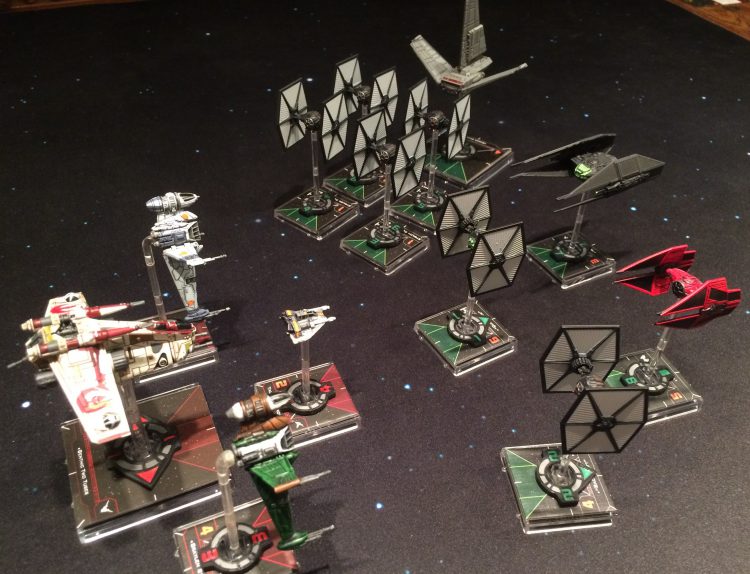
Like many others, the first list I built after seeing the new Xi-Class Shuttle involved Gideon Hask and a handful of Epsilon Cadets. To build on the theme of a bunch of native two-dice ships that can get beefed up with different tricks, I added Backdraft with the new Deadeye Shot upgrade – with the mobile arc facing backward and the new talent facing front, he’s got tricks coming out both ends. I then added three aces to arrive as reinforcements, giving the Rebels a significant challenge… being outnumbered 9:4 and out-pointed 400:199 should make any fight feel like a tough one!
- Gideon Hask: Tactical Officer, General Hux, Sensor Buoy Suite (56)
- Epsilon Squadron Cadet: Automated Target Priority (26)
- Epsilon Squadron Cadet: Automated Target Priority (26)
- Epsilon Squadron Cadet: Automated Target Priority (26)
- Epsilon Squadron Cadet: Automated Target Priority (26)
- Backdraft: Deadeye Shot (40)
- Avenger: Outmaneuver, Proton Torpedoes, Pattern Analyzer (80)
- Holo: Proud Tradition, Deuterium Power Cells (64)
- Quickdraw: Special Forces Gunner (56)
- Total: 400pts
A few other notes before the game:
- As mentioned earlier, the converted and repainted LAAT counts as a K-Wing. Unfortunately, the appropriate cardboard base for the K-Wing arrived from eBay the day after the game… please ignore the placeholder U-Wing base!
- The Snowspeeder mini counts as a Headhunter.
- The ship ID markers and locks in these photos were made by the owner of the Lothal3Industries Etsy store after a lot of discussion and design back-and-forth. While he’s still finalizing the designs, if you’re interested in buying a set, feel free to shoot him a message – they were super cheap compared to similar acrylic components, and I absolutely love them!
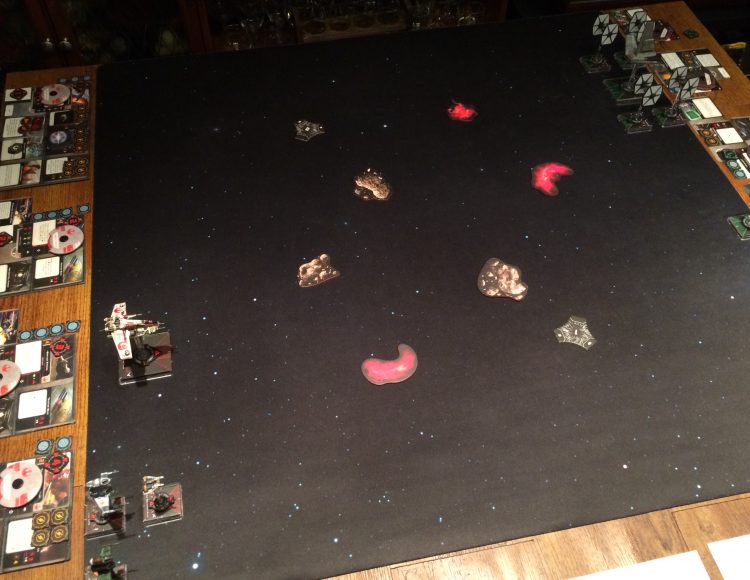
- Turn 1: All four of the TIE/fo, incredibly, make the exact same blank/hit roll for their maneuvers. This allows them to approach in formation ahead of the Xi Shuttle.
- Turn 2: The TIE/fo continue to maintain formation ahead of the Xi Shuttle, which bodes well for their future firepower. Ten Numb takes two shields off Backdraft, who approached quickly across the board. The K-Wing triggers a sensor buoy and is locked by the Xi.
- Turn 3: The Xi Shuttle uses its buoy lock to deal damage to the K-Wing, which has brazenly swooped in front of the entire TIE/fo mini-swarm to set up its bombing run. Braylen Stramm takes the last shield off Backdraft, then uses his Stabilized S-Foils to spend his lock and tractor Backdraft into a rock. With Backdraft pinned in place by the tractor beam, Ten Numb scores the kill.
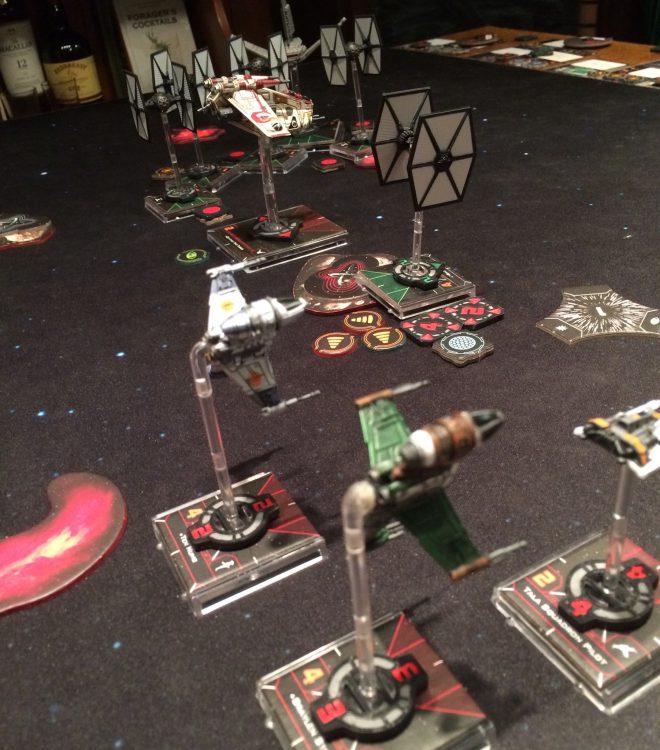
- Turn 4: The K-Wing drops the first Concussion Bomb, and blocks the entire enemy squad… but is also blocked in return, getting locked in place right ahead of the TIE/fo mini-swarm. Had the K-Wing stayed with the originally-planned 3-bank and simply flown into the gas cloud, it would have been a very different game. Instead, I changed to a 1-forward at the last minute (intending to SLAM out of enemy arcs if needed). The detonating bomb damages three TIEs and the K-Wing, then the TIEs finish the K-Wing off. This one miscalculation – going with the cocky slow maneuver instead of safely jetting out of the TIE/fo killbox – is an enormous setback for the Rebels!
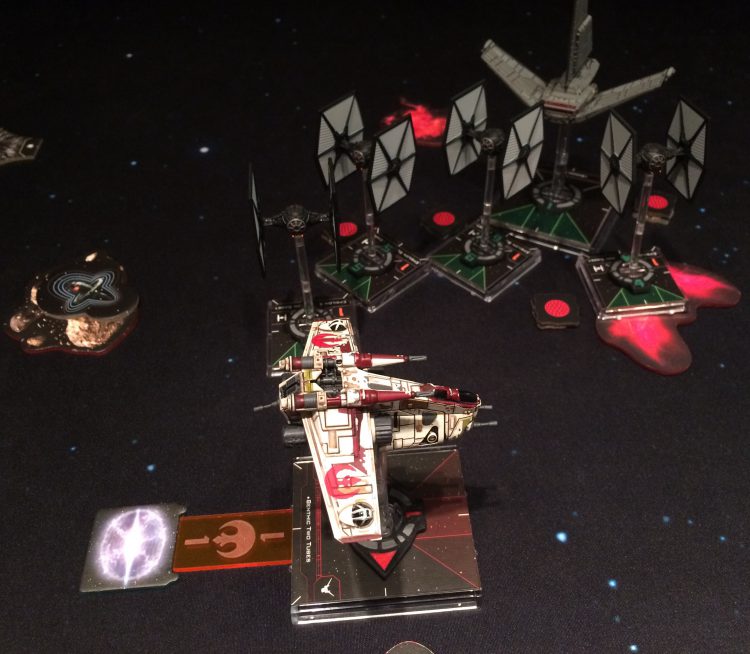
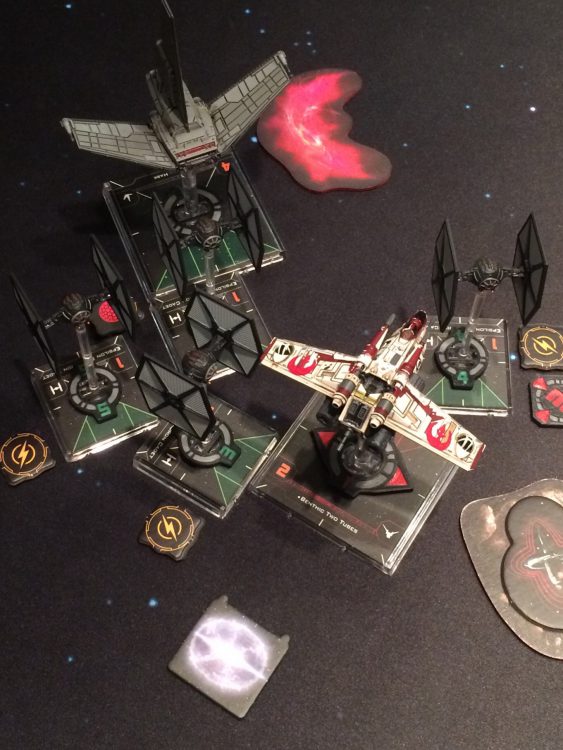
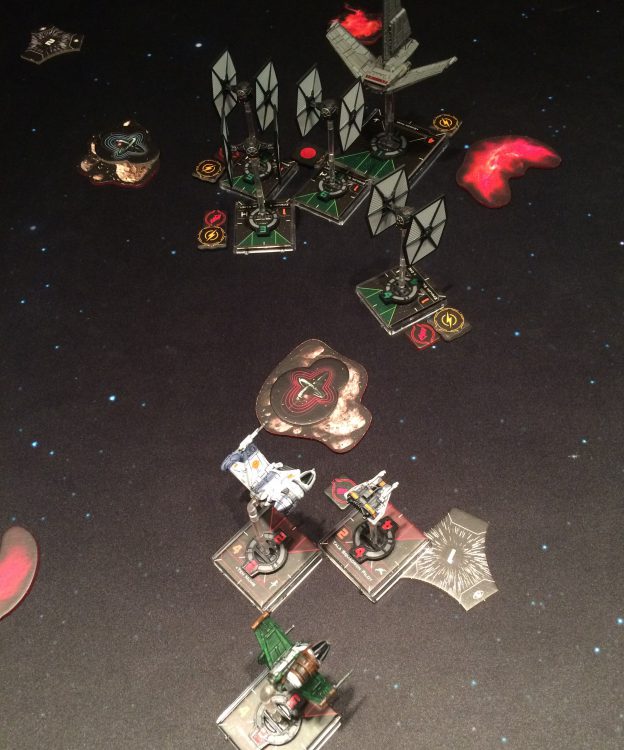
- Turn 5: The TIE/fo that killed the K-Wing crashes into an asteroid and perishes. Good riddance!
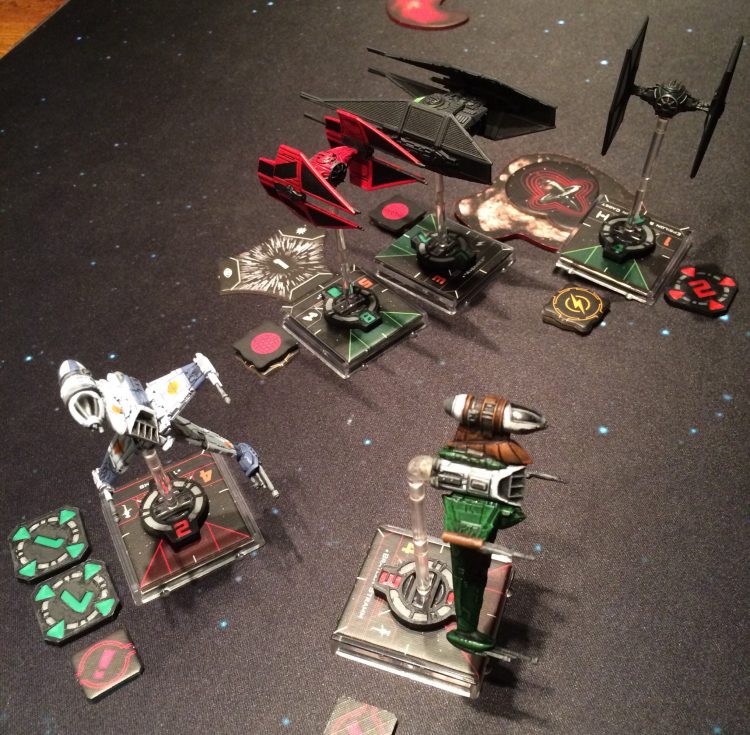
- Turn 6: Avenger appears from hyperspace far away from the action, luring the Rebels into a false sense of security. Immediately Avenger swoops forward, acquires a lock, gains a focus token when a nearby TIE/fo is killed, and proceeds to one-shot the full-health Headhunter with a Proton Torpedo. The Xi Shuttle makes good use of the controversial “fastest turn toward obstacle” maneuver, perfectly looping around an asteroid with a 3-turn maneuver. While this maneuver sometimes results in Solo ships crashing, this ability to hook around a nearby obstacle is clearly what the designers intended.
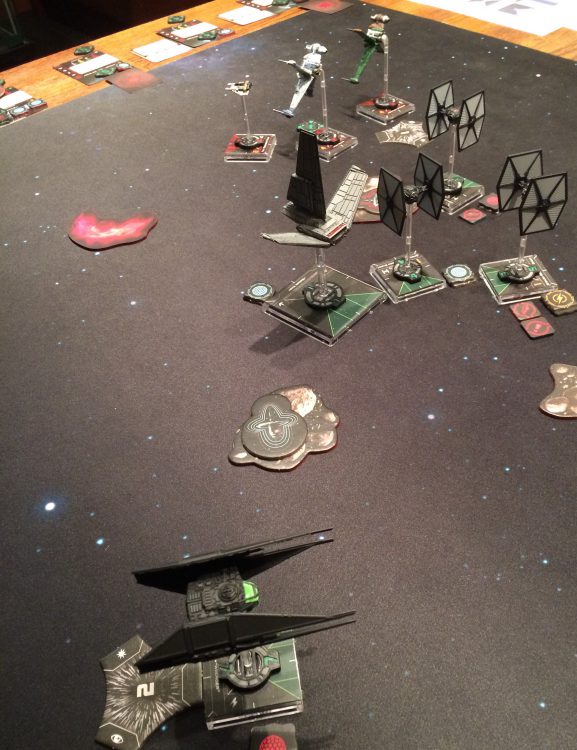
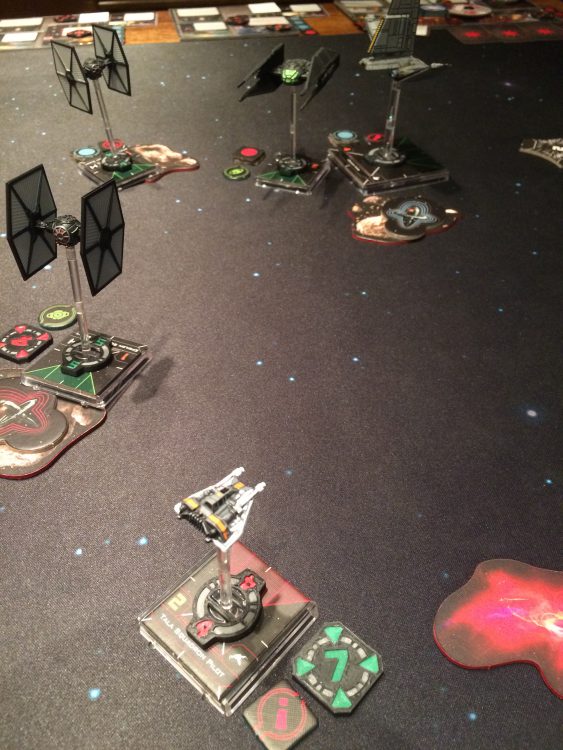
- Turn 7: Losing the Headhunter so soon after the K-Wing is another frightening blow for the Rebels. Fun fact: it turns out that the “average blue forward” for a TIE Silencer is speed 4. After rolling that maneuver and zooming ahead, Avenger lands in front of an asteroid and uses their action to barrel roll out into the clear. Impressive flying for a Solo ship! A B-Wing kills a TIE/fo and Avenger takes a focus in response, which he immediately spends to avoid taking a critical hit from the second B-Wing. Avenger is proving to be a frightening foe.
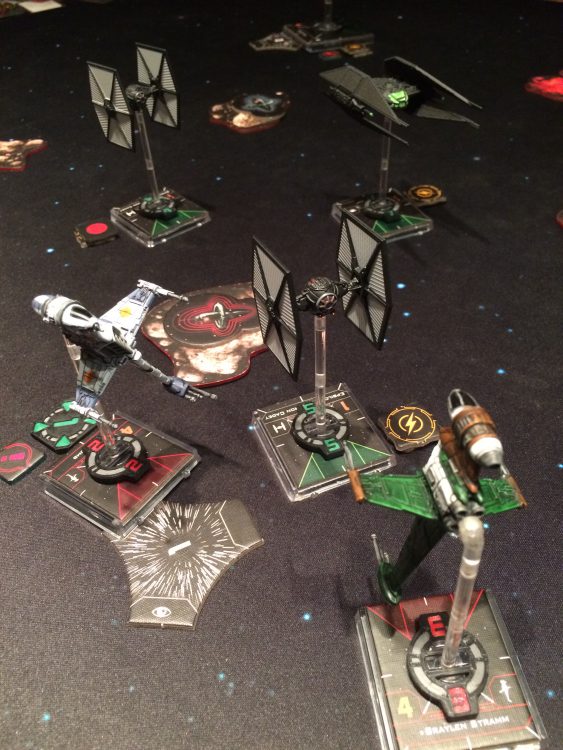
- Turn 8: Nothing of significance.
- Turn 9: Holo arrives from hyperspace, appearing to give Avenger a high-five in passing. Holo immediately executes their slowest move forward, just enough to avoid leapfrogging into the B-Wing fire arcs as expected, and takes a shield off Braylen.
- Turn 10: Nothing.
- Turn 11: Avenger somewhat sullies their reputation as a devilishly smart AI by attempting to Tallon roll off the table, winding up facing toward the center with two stress tokens.
- Turn 12: The final First Order ace joins the party. Quickdraw arrives from hyperspace as Ten Numb falls to Holo’s guns, leaving just Braylen Stramm alive on the Rebel side. The Xi Shuttle is on a roll, having rolled five evades on its six evade dice over the past three turns, but it finally loses both of its shields to the B-Wing’s guns.
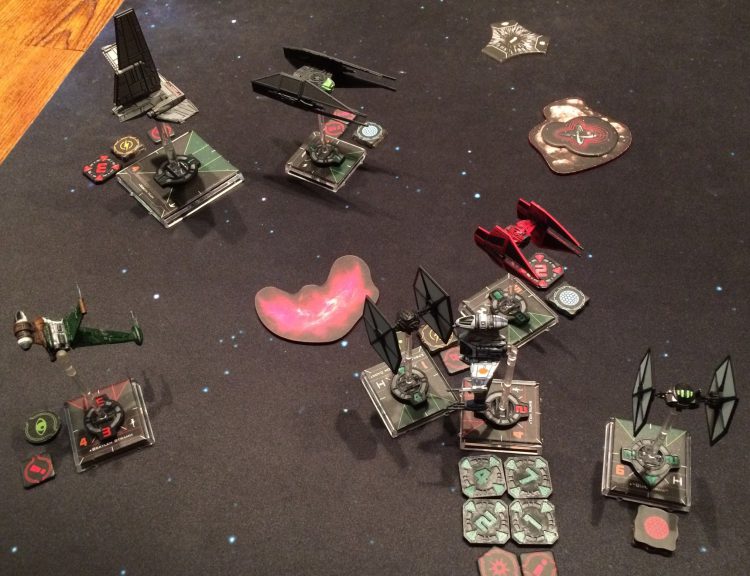
- Turn 13: Quickdraw elegantly barrel rolls around a gas cloud, leaving Braylen in the open, and knocks the last shield off him.
- Turn 14: Braylen miraculously dodges all enemy firing arcs and deals the deathblow to the Xi Shuttle.
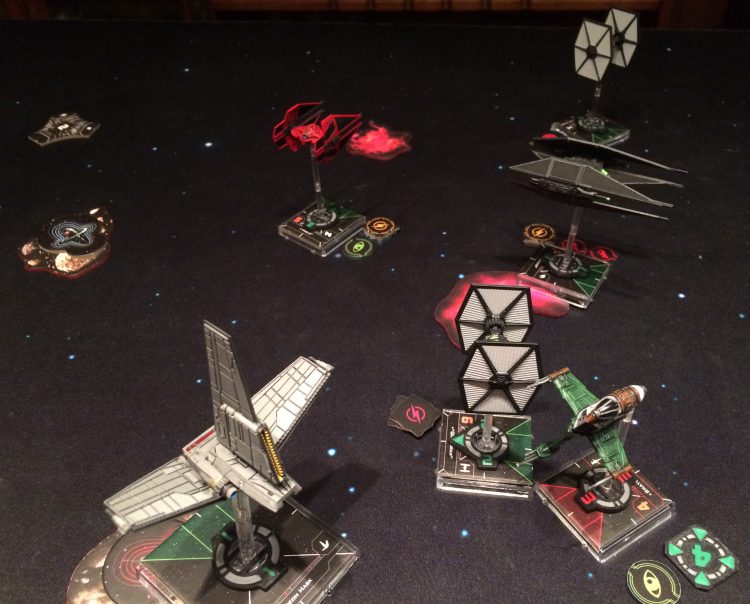
- Turn 15: Braylen flips around and takes Avenger below half health.
- Turn 16: Quickdraw pops two dice out the rear arc at Braylen, landing a hit and a Console Fire critical hit. Braylen takes a damage from the fire, and fires four dice at a strained TIE in the hope of finishing it off. Braylen, who ultimately took a target lock after thinking long and hard about taking a focus, of course rolls one hit and three eyeballs. The target lock turns this into two hits total, and the strained TIE rolls two evades to escape unscathed.
- Turn 17: As Braylen lines up a follow-up shot to kill the TIE that escaped last turn, Holo initiative-kills Braylen and ends the game before he can inflict this final blow.
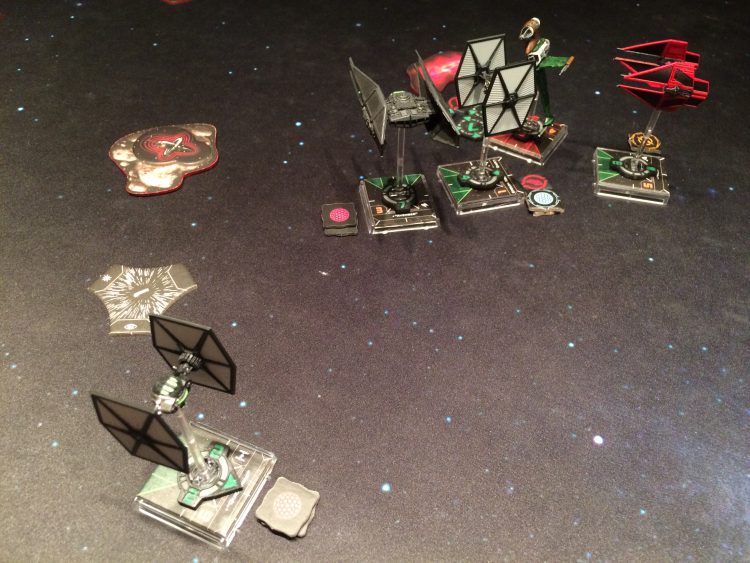
Score: 214 for BuffaloChicken, 200 for Solo. While I did kill more points, it’s a pyrrhic victory at best – the game ended with the First Order in control of the table. Seeing as my goal was complete First Order annihilation, I’d call this a solid loss to the Solo squad.
Final Thoughts
This wound up being a very different game from the last! Not only did I get my butt handed to me, but the Solo ships actually felt like they were being played by a real opponent. The Imperial aces, with their intelligent maneuvers and action selection, stayed close to the Rebel ships and had impressive time on target.
The attitude mechanic also felt much more organic and smooth the second time around. While it would still be preferable to limit attitude shifts to once per turn, they’re much less annoying when you get in the groove of knowing when to check and change them as part of the normal turn order.
Takeaways
The Solo AI is vastly improved in this rules revision. I mentioned in an earlier article that that in the first version, the AI ship maneuvers seemed little better than random – shooting down enemy fighters was like chasing down houseflies trapped in a room, buzzing about aimlessly. With the new tweaks to the maneuver tables, they act a bit more like the dangerous Heroes of the Aturi Cluster ships we love to hate. This was less evident in the first game, but the second game was truly impressive.
It also seems like we can safely say that flying against 300pts is easy mode, 350pts is medium mode, and 400pts is hard mode. Having the three waves of reinforcements in game two lent a fun, frantic air to the game.
I came away from these games more convinced than ever that Solo is a great asset to the X-Wing community. Here are a few reasons to try flying Solo:
- Fly your brand-new new ships! The fantastic part about Solo is that you can fly literally any ship right out of the package, without needing to wait for an opponent (or for fans on the internet to spend months writing their own AI rules for you to hunt down). If a new wave drops and you buy two ships of different factions, you can fly one against the other as a Solo ship. After that game, switch factions and try the other one. It’s a great way to get familiar with ships as both pilot and opponent.
- Try silly Solo squads! There are plenty of fun upgrades that might not see use in regular games, or ridiculous squads that nobody in their right mind would ever fly. What would it be like to face a squad of TIE Bombers all loaded with Electro-Proton Bombs? Or a swarm of Headhunters all with Deadman’s Switch? Even if these aren’t “good” squads, they’ll make for memorable games.
- Fly your favorites! Even in casual games, few people find losing fun. But against Solo, you have the perfect opportunity to use the ships you love even if the meta has left them behind. Take your models that have been gathering dust and let them have a moment of glory against a Solo squad.
- Practice your own flying! Even if the Solo ships aren’t as smart as human opponents, they still give you ample opportunity to test our your own squad synergies and practice remembering triggers. This experience will help keep you sharp and ready for your next flesh-and-blood opponents.
- No COVID!
Solo still isn’t perfect, but it’s moving in the right direction and I’m thrilled that FFG is continuing the public-input feedback forms in anticipation of another revision. Feedback to streamline the attitude system will probably be near-universal, which should lead to a smoother experience in the future. I’ve also submitted input about some of the missing options (decloaking/ailerons) and the need for an obstacle avoidance mechanic. If you haven’t yet, please try the game out and share your comments with FFG – every bit of feedback shows interest, and the game will be better off for it.
This series will return after the next revision drop. Until then, happy flying!
Have any questions or feedback? Drop us a note in the comments below or email us at contact@goonhammer.com.
