
Another lovely Underworlds preorder day is here. We are graced with Borgit’s Beastgrabbaz, a brand new Destruction warband as well as Edge of the Knife, a brand new Rivals deck. If you want to read about the new deck, you can do so here. In the meantime, let’s talk about the newest goblins in town! Thanks to Games Workshop for providing this warband to review.
Borgit’s Beastgrabbaz are the latest Destruction warband in Warhammer Underworlds, which brings that Grand Alliance’s total number of options (in organized play) up to 8. If you’re counting all the warbands, including those without bespoke warscrolls, this brings the total up to 12. Destruction’s starting to catch up!
This five model warband is flagged as filling the Flex archetype according to Games Workshop, for whatever that means to you. After getting some more time with the warbands and decks in this new edition, I’m considering those guidelines to be less and less definite and more along the lines of nebulous vibes. I do think flex suits these little guys though, since they’re innately going to care about feature tokens (specifically delving them) and sport some pretty decent stat lines for being mostly a bunch of little guys.
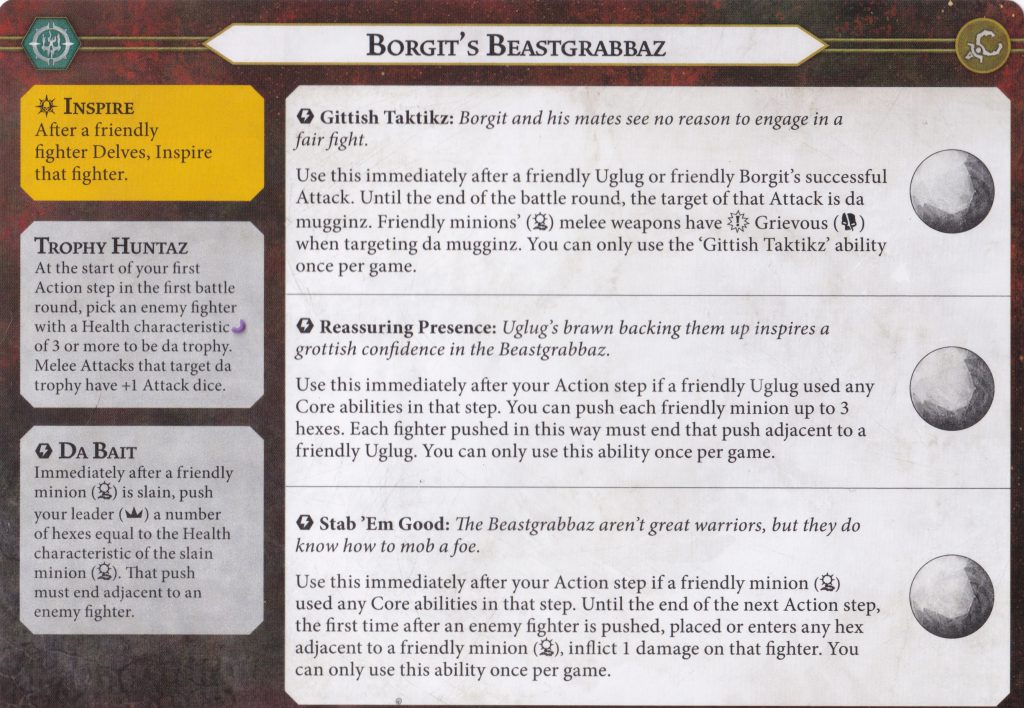
As hinted at earlier, this warband is one of the few that has incentive to delve baked into them. Any time one of the Beastgrabbaz delves, they inspire. This is incredibly reliable and fast – you’re going to be able to inspire one of your fighters during your first turn with next to no recourse from your opponent. You’ll be able to routinely get your key fighters inspired and, spoiler, you really want to inspire some of them to unlock superior stats.
It’s worth noting that the phrasing of the inspire condition doesn’t specify that you delve treasure tokens – you can inspire from flipping a treasure to a cover, or a cover to a treasure.
Trophy Huntaz is the first one-use ability on their warscroll. Being able to grant a warband-wide +1 attack dice against an enemy of your choice for the entire game from the first turn is a tremendous boon. Ploys which grant this as a one-time bonus are already solid inclusions in most cases, and this not only lasts forever but also doesn’t take up one of your card slots. Sure, you’re restricted to only choosing models with 3 or more health… but let’s be real, that’s all you’re going to want to target with this anyway. It does only apply to melee attacks, which means Dregg won’t be able to benefit from it, but that’s a small price to pay for juicing up the other four members of the Beastgrabbaz against your opponent’s most valuable model. Aside from making all your attacks more accurate, this is also going trigger any of the critical weapon abilities your fighters have – notably Borgit’s critical grievous as well as the critical grievous granted from Gittish Taktikz.
Next up is Da Bait which shows just how expendable Borgit considers the three minions in this warband. I believe the flavor this ability is supposed to evoke is if an enemy kills one of the minions and Borgit scuttles up behind them while they are distracted, but the actual ability is much more flexible. Being able to push your leader 2-3 hexes, even with the restriction that he has to land adjacent to an enemy, can be used to get him out of some tough spots, slingshot onto a treasure token, provide a flanking bonus for Uglug (or any others in the crew), etc. Even just using it to tee up a 4 hammer, critical grievous attack from an inspired Borgit onto da trophy, can be painful. It’s also not limited to one use, so as long as Borgit can stay alive, you can keep using this each time one of the three minions are slain.
Gittish Taktikz is probably the weakest of the warscroll abilities for the warband. Granting critical grievous isn’t the worst thing to do, but only two of your minions can even benefit from it – Dregg doesn’t have a melee weapon, so he won’t be able to make use of targeting da mugginz. There’s also the fact that you can only use this after a successful attack from Borgit or Uglug, so you’re gating an unreliable effect (as all critical weapon abilities inherently are) behind a random dice outcome that can only be used by two of your weakest fighters. To top it off, if you want to use critical grievous that means you can’t use the baked-in weapon abilities of stagger or grapple that those fighters already have.
If you aren’t suffering from being British, you might not know that “muggins” is British slang for “a foolish and gullible person.” I did not know that before seeing this warband!
Luckily, Reassuring Presence is a more appealing ability. As if having one way of pushing a fighter 2-3 hexes wasn’t enough, this ability is going to potentially allow 3 fighters to get pushed up to 3 hexes each. Most of the time, I foresee Uglug being the one to land on a treasure token, but if for some reason he was only able to get adjacent to one, this could allow one of the smaller goblins to scuttle onto it and secure it for your side. It’s also a great way to set up flanking or surrounded situations, form a 3-wide wall of fighters to help zone out certain areas of the board, and score positional objectives. I foresee getting Uglug inspired early on to be a common tactic, so the Troggoth will be activating pretty early on while your minions are still alive and you’re able to make the most of this ability.
Stab ‘Em Good is the last ability on offer here, and I quite like it. It seems that turning fighters into areas of lethal hexes is a Destruction theme at this point, and this lets you turn all three of your minions into bubbles of danger for one action step. Don’t gloss over the fact that you can only use this ability after a friendly minion uses a core ability, but the effect itself applies to all of your minions – not just the one who did something. By itself, this can serve as a deterrent against your opponent moving/charging any of their fighters into certain areas of the board, but with some power card support you can leverage this into a potent pinging problem. Confusion, Lure of Battle, Damned if You Do, and Violent Blast (if near a stagger hex) all can push or place an enemy fighter and trigger this damage.
All in all, this warscroll offers a nice assortment of movement, area denial, and an accuracy boost. Their inspire condition is going to naturally have them spend some time in cover hexes, which also serves to increase their defensive abilities. Quite a nice assortment of tricks, but how do the fighters themselves hold up?


Starting with the leader, Borgit immediately stands out by starting on 2 shields. That’s proving to be a very durable save value in this game, and not even tower shield wielding Stormcast, giant scaled lizards, or heavily armored chaos warriors are rocking this degree of defense. It’s a good thing Borgit has such a nice save, because 3 health is a much squishier value and leaves him in one-shot range for a non-zero amount of the field.
Like all of the goblins in the warband, Borgit starts at 3 move and inspires to 4. That’s a respectable amount of ground for those little legs to cover and gives all of the goblins a nice bonus for inspiring even before looking at any of their other stat changes. With a bounty of 2, you’re not going to be ultra penalized for getting him into the fray and taking advantage of his surprisingly good stats if and when he eventually is slain.
Borgit’s attack profile starts with a variation of the “leader stick” that so many warbands have – in this case, he loses out on the option to attack from 2 hexes away and instead gains critical grievous on his attacks. At only 2 dice, this isn’t going to be a reliable thing but after inspiring Borgit will pick up an extra attack dice, and if you factor in Trophy Huntaz that’s going to add yet another dice against the trophy target for a much more reliable chance of landing a 3 damage hit. For being a little guy, he can land a solid hit.


Speaking of solid hits, we come to Uglug. He’s a scrawny little Troggoth but that still puts him head and shoulders above most creatures. A save of 1 shield is respectable, but once inspired he picks up another save dice and sits at the previously mentioned very good value of 2 shields. If you take into account the fact that the way to inspire him is (usually) going to involve him standing on a cover hex afterwards, it’s even more impressive – 4 of the 6 sides of a save dice will be a success in that situation. Behind that comfortable save is a meaty 5 health. He’s not as beefy as Mollog, Blackpowder, or Kainan but none of those fighters (or most in their league) get up to 2 shields.
Uglug is the only fighter in this warband that doesn’t get any faster upon inspiring, so you’ll have to settle for his plodding speed of 3. It’s not the worst, but it’s certainly going to be tempting to give him some speed boosts in the form of upgrades or ploys. At 2 bounty, he shares the position for being the highest valued fighter with Borgit and all the pros that brings.
Offensively, we’re looking at the powerhouse of the warband. Starting at a very impressive range 2, 2 hammer, 2 damage attack with cleave, Uglug will inspire and also pick up grievous on this attack. Cleave is a substantial accuracy booster against any fighters that are on shields for their saves, especially if you’re going after da trophy. As a reminder, you can only choose one weapon runemark when making an attack, so once inspired you will need to pick cleave or grievous before rolling any dice, so choose appropriately.
Just being able to threaten a 3 damage swing from 2 hexes away is going to play havoc with your opponent’s positioning and risk assessment.


These little goofballs in a squig costume are the first of our three minions in the Beastgrabbaz. They possess the highest health of the runts at 3, but otherwise their non-weapon stats are identical. Starting at 3 move and inspiring to 4, always having 2 dodge for saves, and only being worth 1 glory means all of the minions are going to be fairly expendable. Being on 2 dodge is nice because, again, delving treasures into cover hexes and standing on them will give these minions a pseudo 2 shield save (since 3 of the 6 save dice results will be a success).
Offensively, these are probably your least effective fighters of the warband. They sport the least accurate attack at the (tied) lowest range with the (tied) lowest damage of the entire warband. They do offer stagger on their weapon, but Dregg does that from three hexes away so…


The other melee minion, Snagz, is the first of our truly weedy gitz with only 2 health, so be prepared for him to get a love tap from most of the adequate fighters out there and fall over dead – if they hit him.
Despite being melee like Rigg and Shamm, Snagz at least can poke with that big ol’ grabber from two hexes away and does so as accurately as the (uninspired) boss and Uglug do. Once inspired, he has an honestly respectable profile that goes up to 2 damage. One of the few fighters in the game with grapple, Snagz is going to be able to play havoc with the opponent’s positioning and can do it from relative safety when cowering behind another fighter.


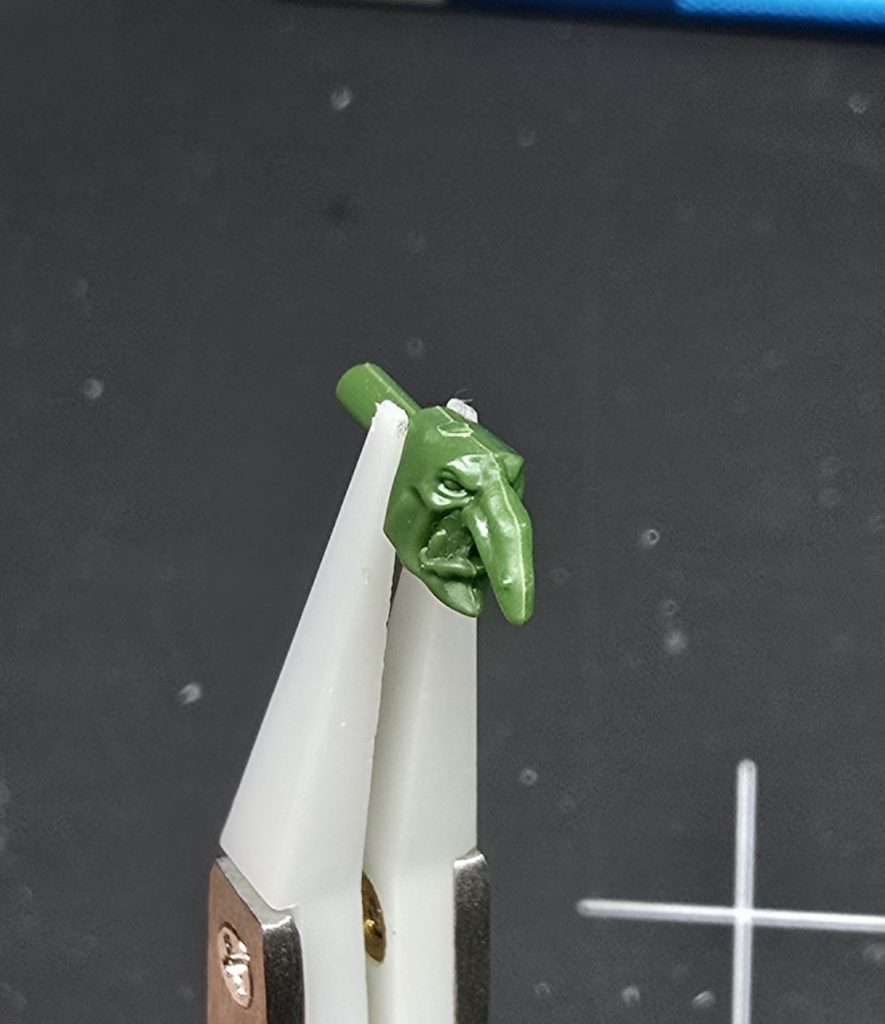
Defensively, there’s nothing new here so let’s skip straight to Dregg’s weapon. Sporting the only ranged attack in this warband (despite the typo… the card has the melee icon, but any range 3 or higher attack is a ranged attack), Dregg effectively has the same profile as Rigg and Shamm but at three times the range. The only disadvantage here is that he can’t take advantage of Trophy Huntaz or Gittish Taktikz at all since those only affect melee attacks, but being able to (inaccurately) plink away from 3 hexes and hand out stagger tokens is a tradeoff I’m willing to make. Plus he looks so damn happy! Check out that big ol’ grin.
It’s worth pointing out that this card has a typo on it. The icon for the attack should be a ranged attack icon, not melee. This is because the rulebook defines a melee attack as being one that has a range of 1 or 2, and a ranged attack is one that has a range of 3 or more.
Deck Pairings for Borgit’s Beastgrabbaz
Much like Zondara’s Gravebreakers, the fact that this warband has an innate desire to delve immediately makes the Pillage & Plunder deck a strong contender. It doesn’t hurt that P&P is already a solid choice for many warbands, so you’re getting to double dip on the rewards from performing the delve action. It’s almost such a no-brainer option for Rivals that it feels bad, but I simply choose to not feel bad over playing my fun little goblin game and will take it every time. My suggestion is that you also make peace with this and don’t feel guilty for taking a strong pairing.
For Nemesis, your options are a little more open because you can still take the solid option with P&P and pair it up with any of the other decks out there. Currently, we have six options when you include the new Edge of the Knife deck. Despite coming out at the same time as this warband, I don’t actually feel EotK is a great choice considering you only have two fighters that start as tempered. Countdown to Cataclysm offers a nice suite of objectives to complement the ones from P&P as well as solid upgrades like Great Fortitude and some weapons to help your minions contribute more which makes me think it’s going to be the strongest pairing right now. Blazing Assault was what I took in the one Nemesis game I tried, and it was nice being able to let my little (and not so little) guys punch up even better. Wrack and Ruin offers multiple cards to help force damage when you use Stab ‘Em Good as well as generally solid power cards.
Honestly, the flexible nature of both this warband as well as Pillage & Plunder means you can probably do any pairing and be at the very least somewhat successful.
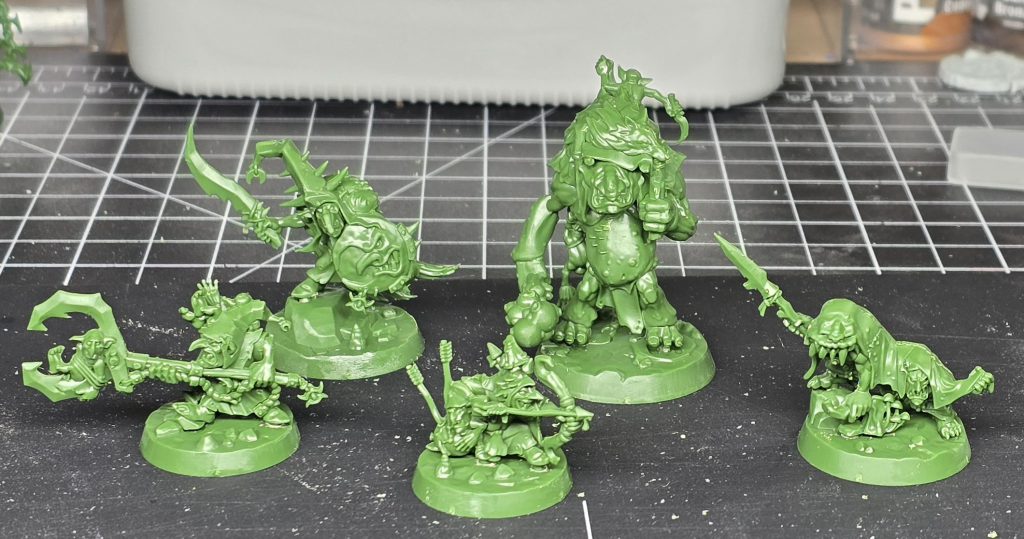
Models
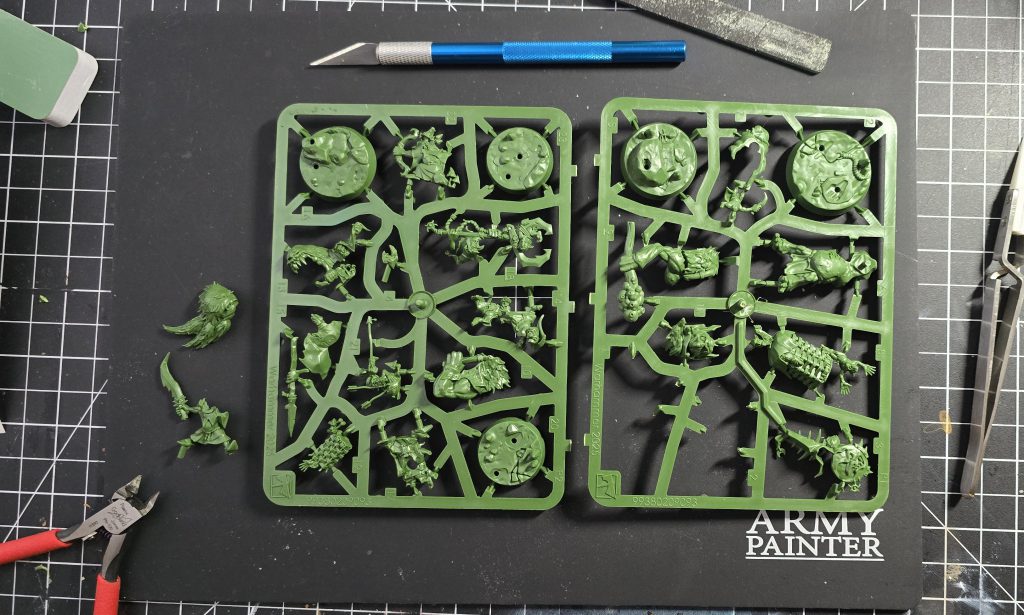
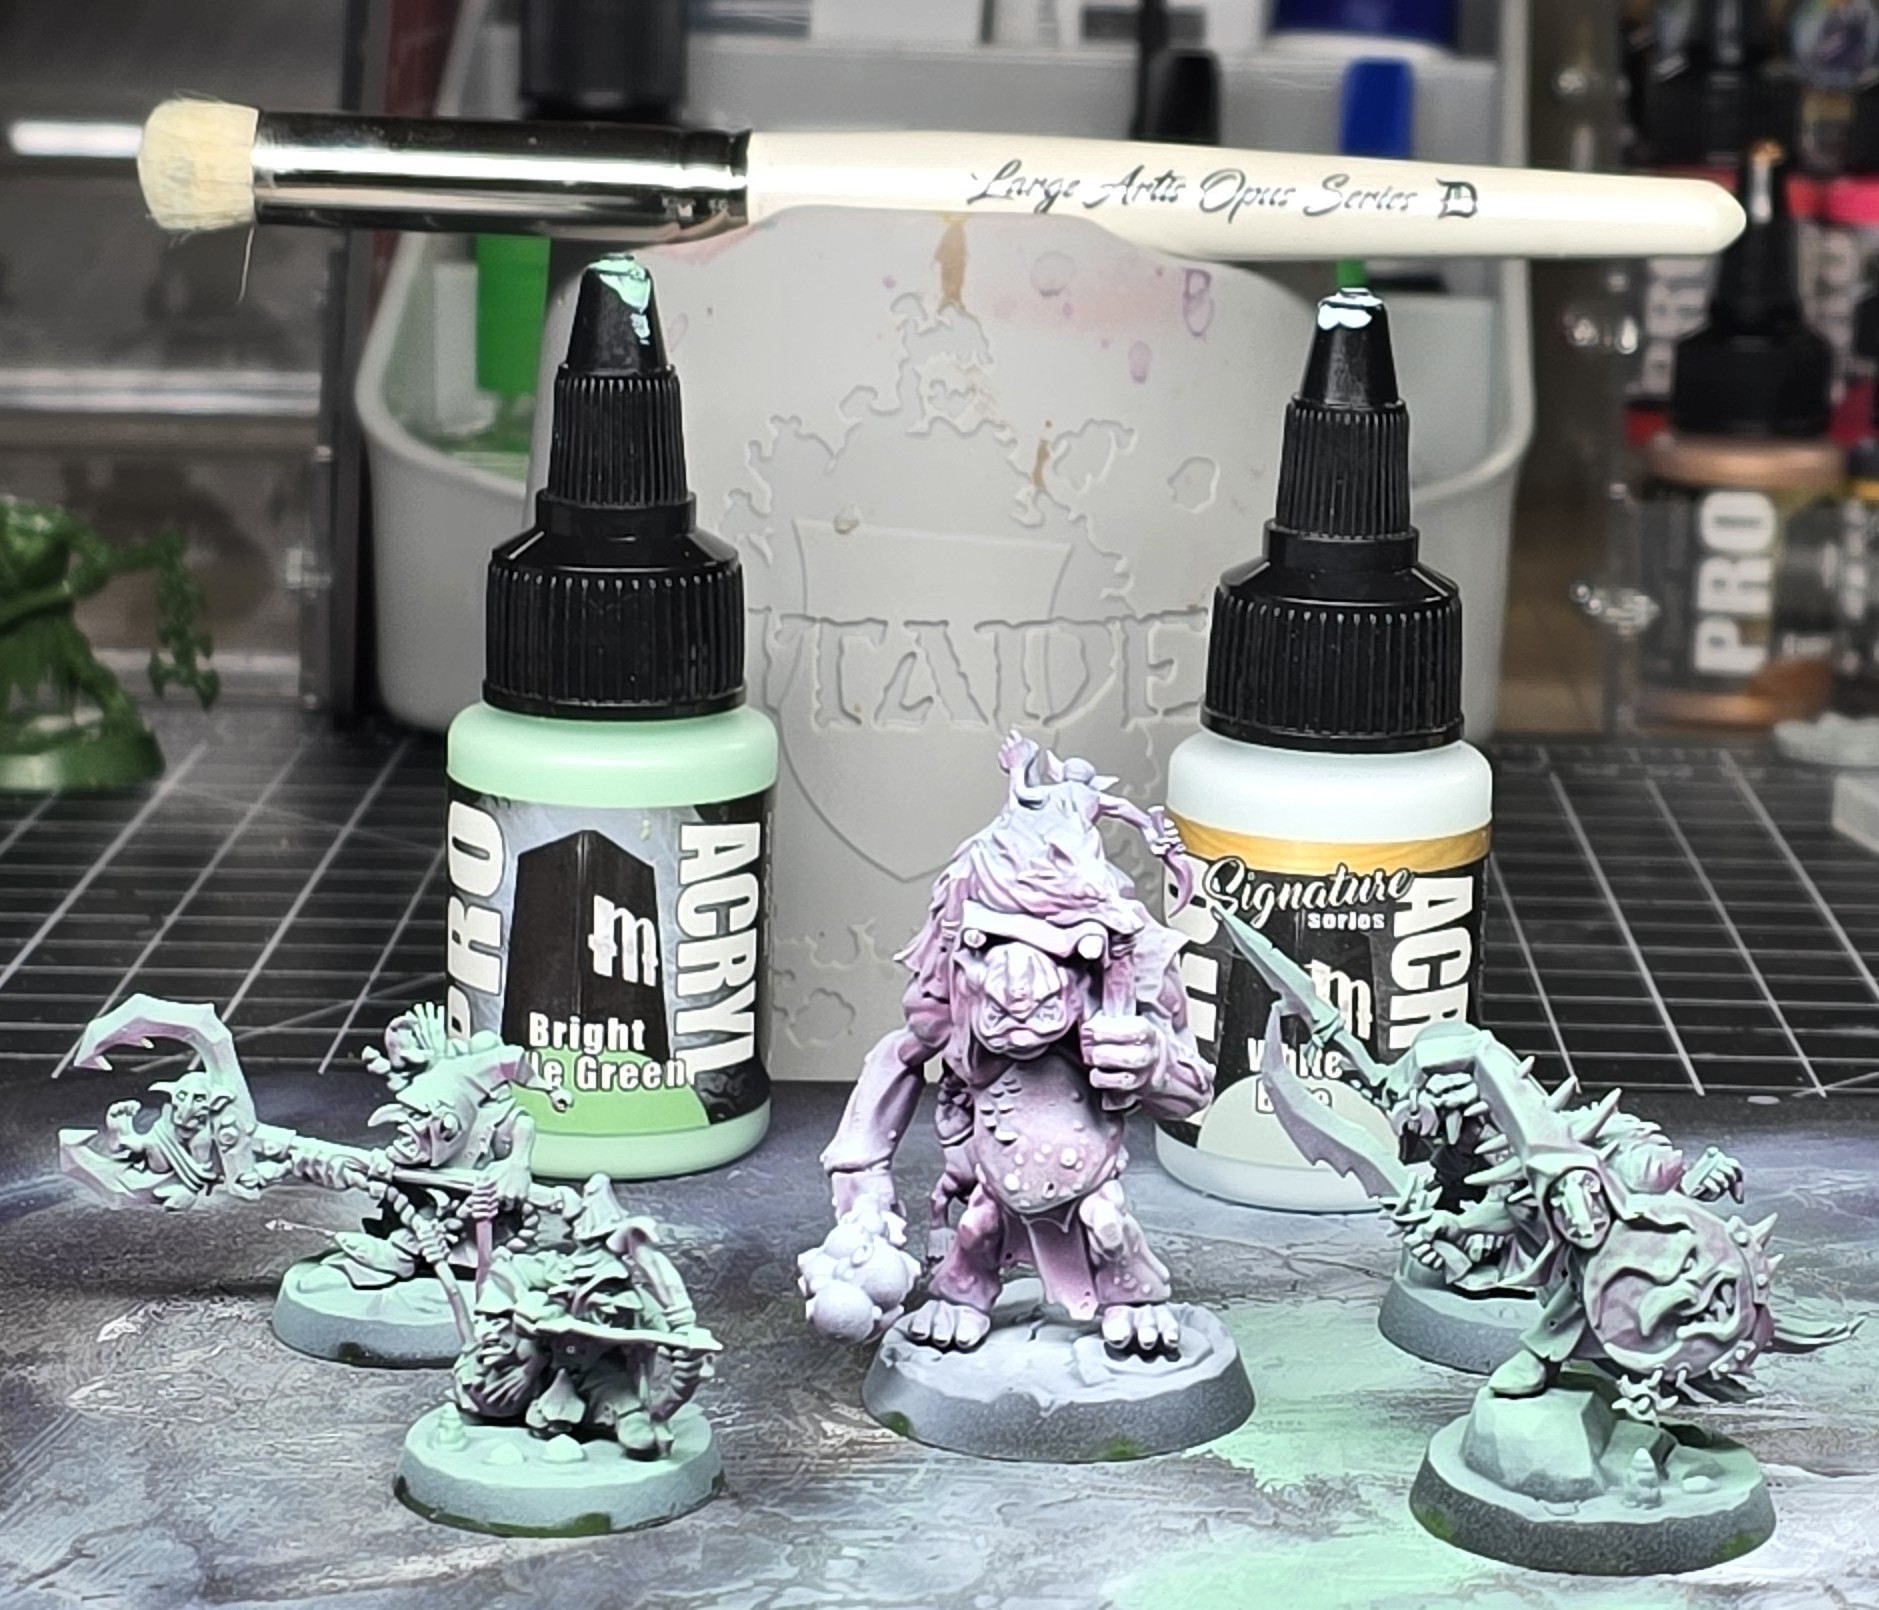
I wasn’t able to complete my paint job on these five by the time this article goes live, but I did have the chance to assemble them and get parts of them painted up. During this process, I noticed a genuinely surprising level of mold lines across the two half sprues. This is the kind of thing I would expect from a mold that’s been in use for years and is starting to wear out, not one that is fresh off the press and spitting out its very first sprues.
Every single piece had a prominent mold line to clean up which made assembly take longer than it should have. It’s nothing insurmountable, and it’s not even something uncommon in GW kits but generally only after they’ve been around for a while. The fact that this is a brand new mold and it’s already experiencing this issue made me want to bring it up. Maybe I got unlucky with this box and others are going to be better? Let me know if yours is similar or better.
Aside from the mold line cleanup, the models assembled well and without any unexpected issues.
I used my usual method of building these push-to-fit / easy build models from GW and it continues to work well for me – I simply coat the peg and hole with a layer of Tamiya Extra Thin plastic glue, maybe run some around the seams where the two pieces will be joining together, give it approximately 10 seconds and then push the pieces together. The Tamiya softens and lubricates the plastic of the peg and hole, so they slide together without any fuss. I haven’t had to do any peg trimming or snipping since I started this method.
I’m not among the elite of the Goonhammer painting team. In fact, despite being in this hobby for multiple years I am very much a beginner painter still and learning things the hard way. Such as how a model with an arrow being held across its body can make painting it a right pain in the butt. In hindsight, I wish I had left Dregg in some kind of subassembly because those nooks and crannies are difficult to access once built. Many other painters don’t bother with this and constantly put out phenomenal pieces, but I just don’t see how they do it.
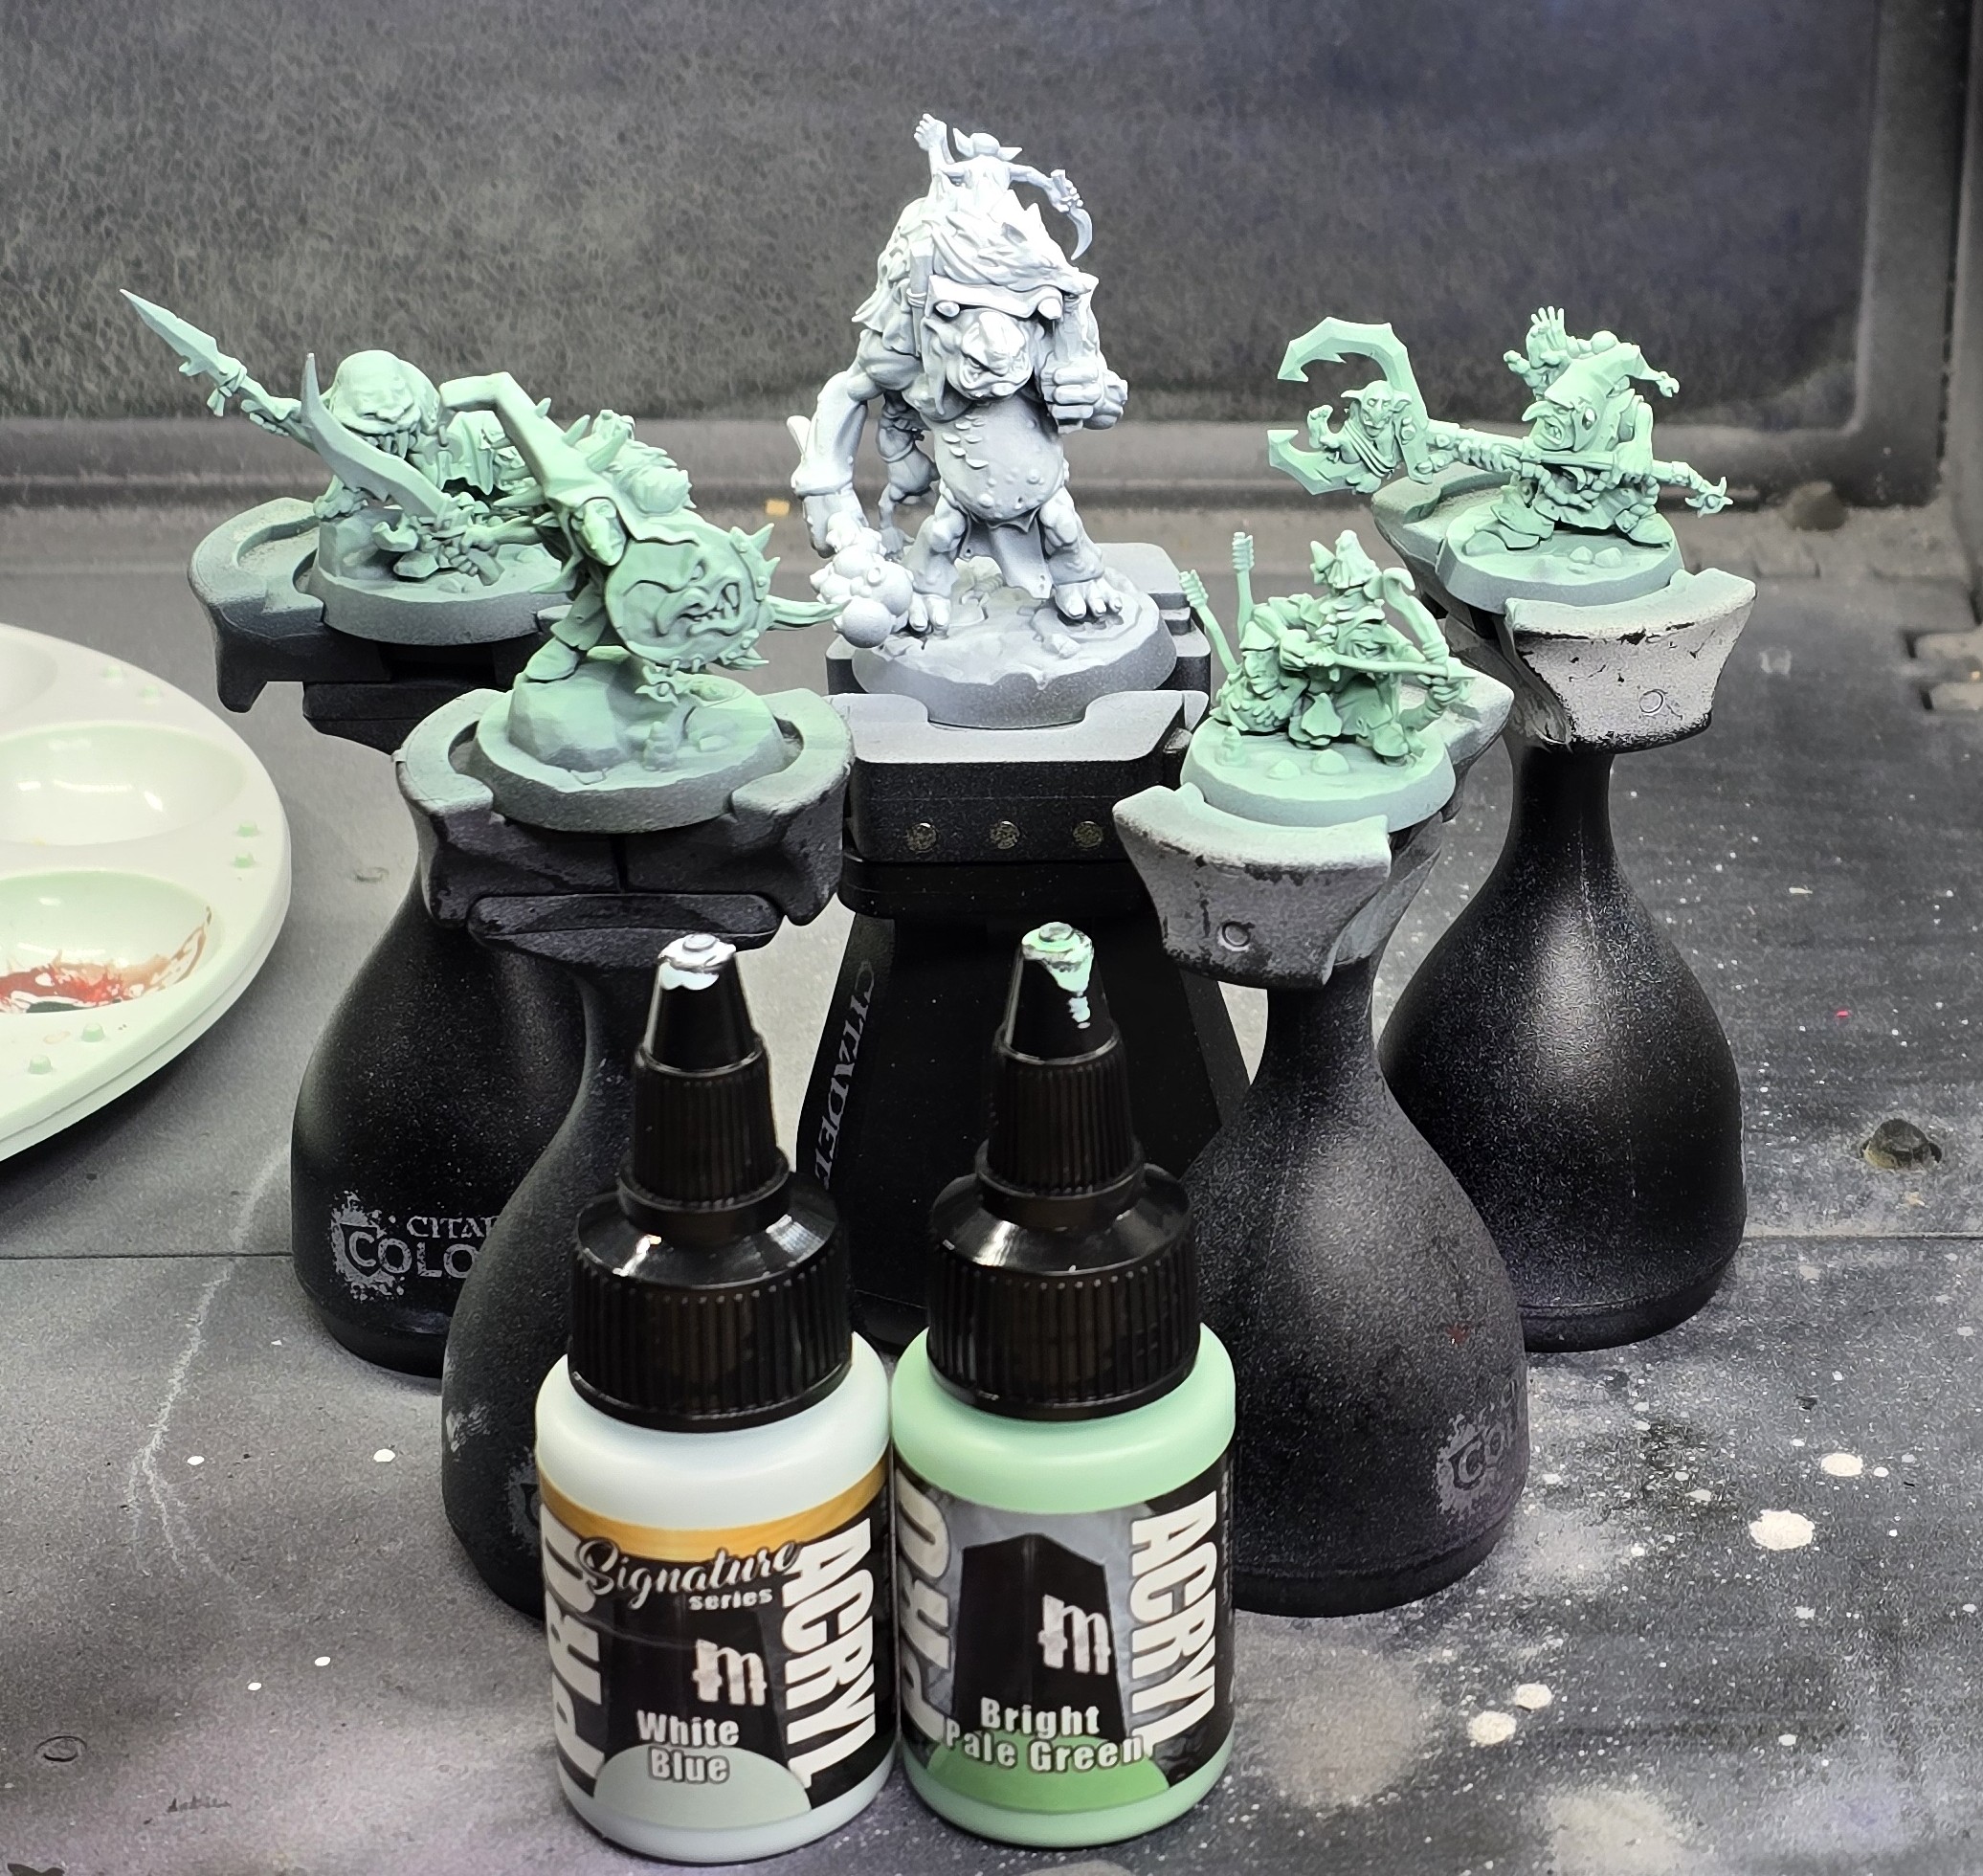
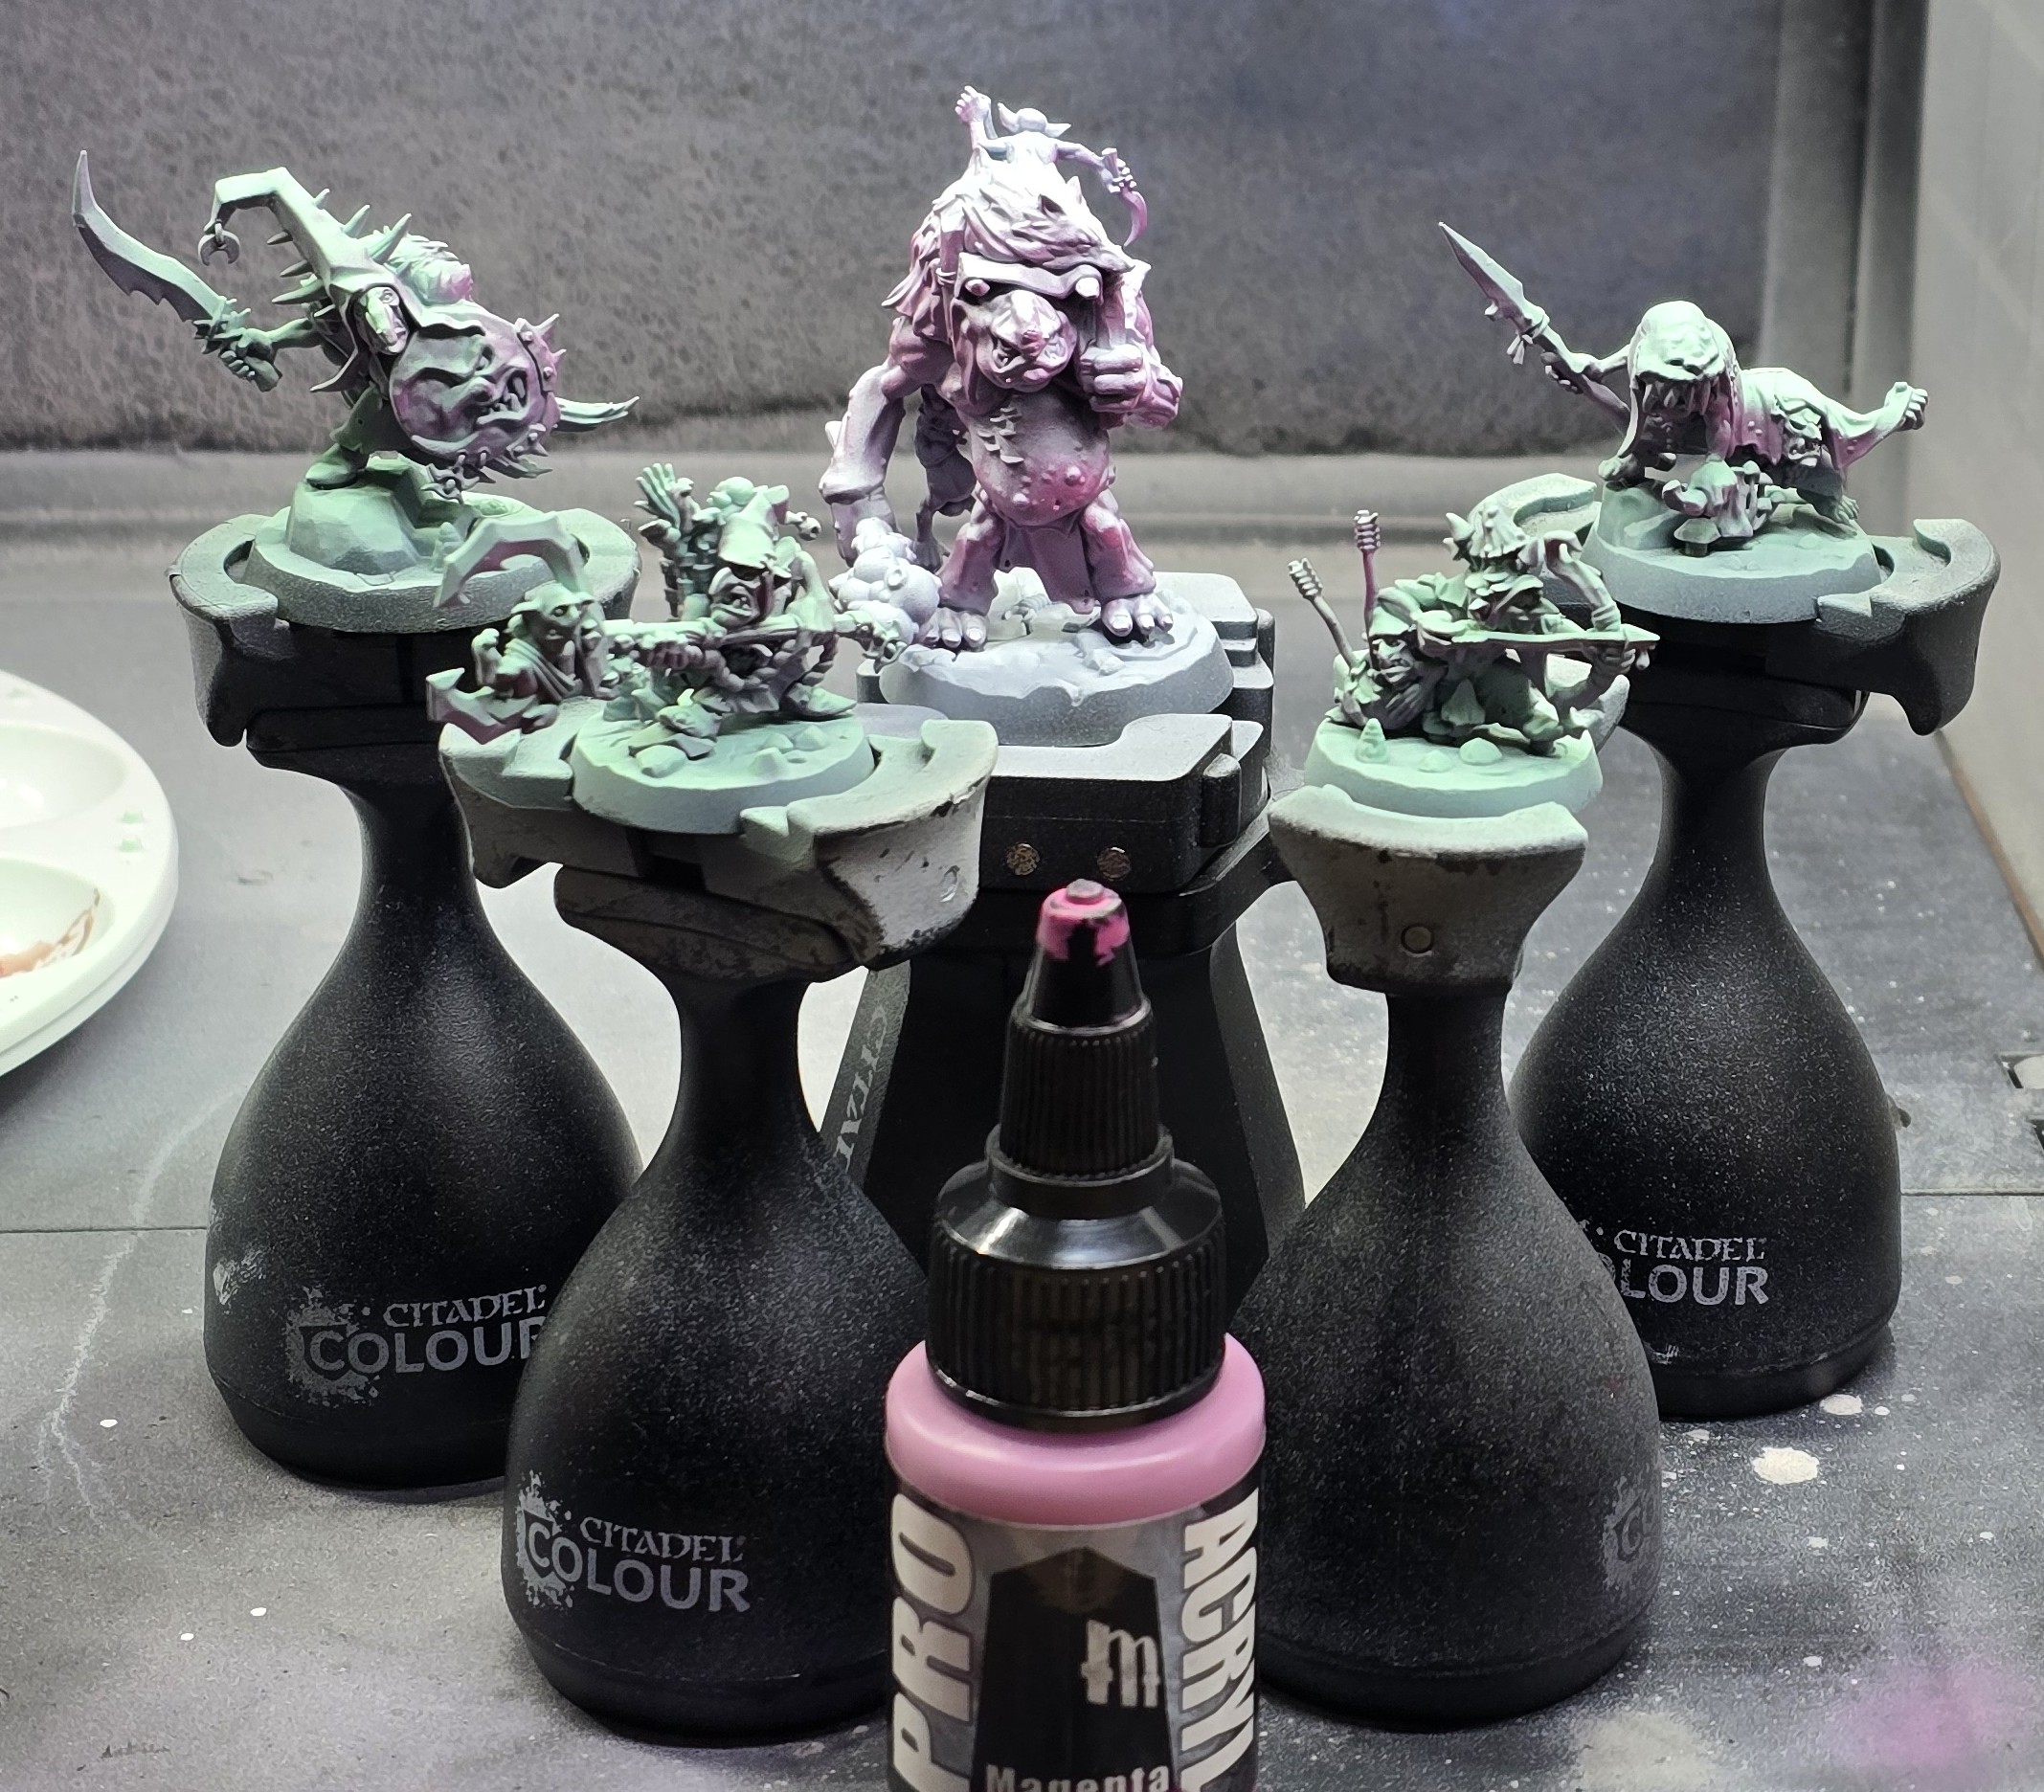
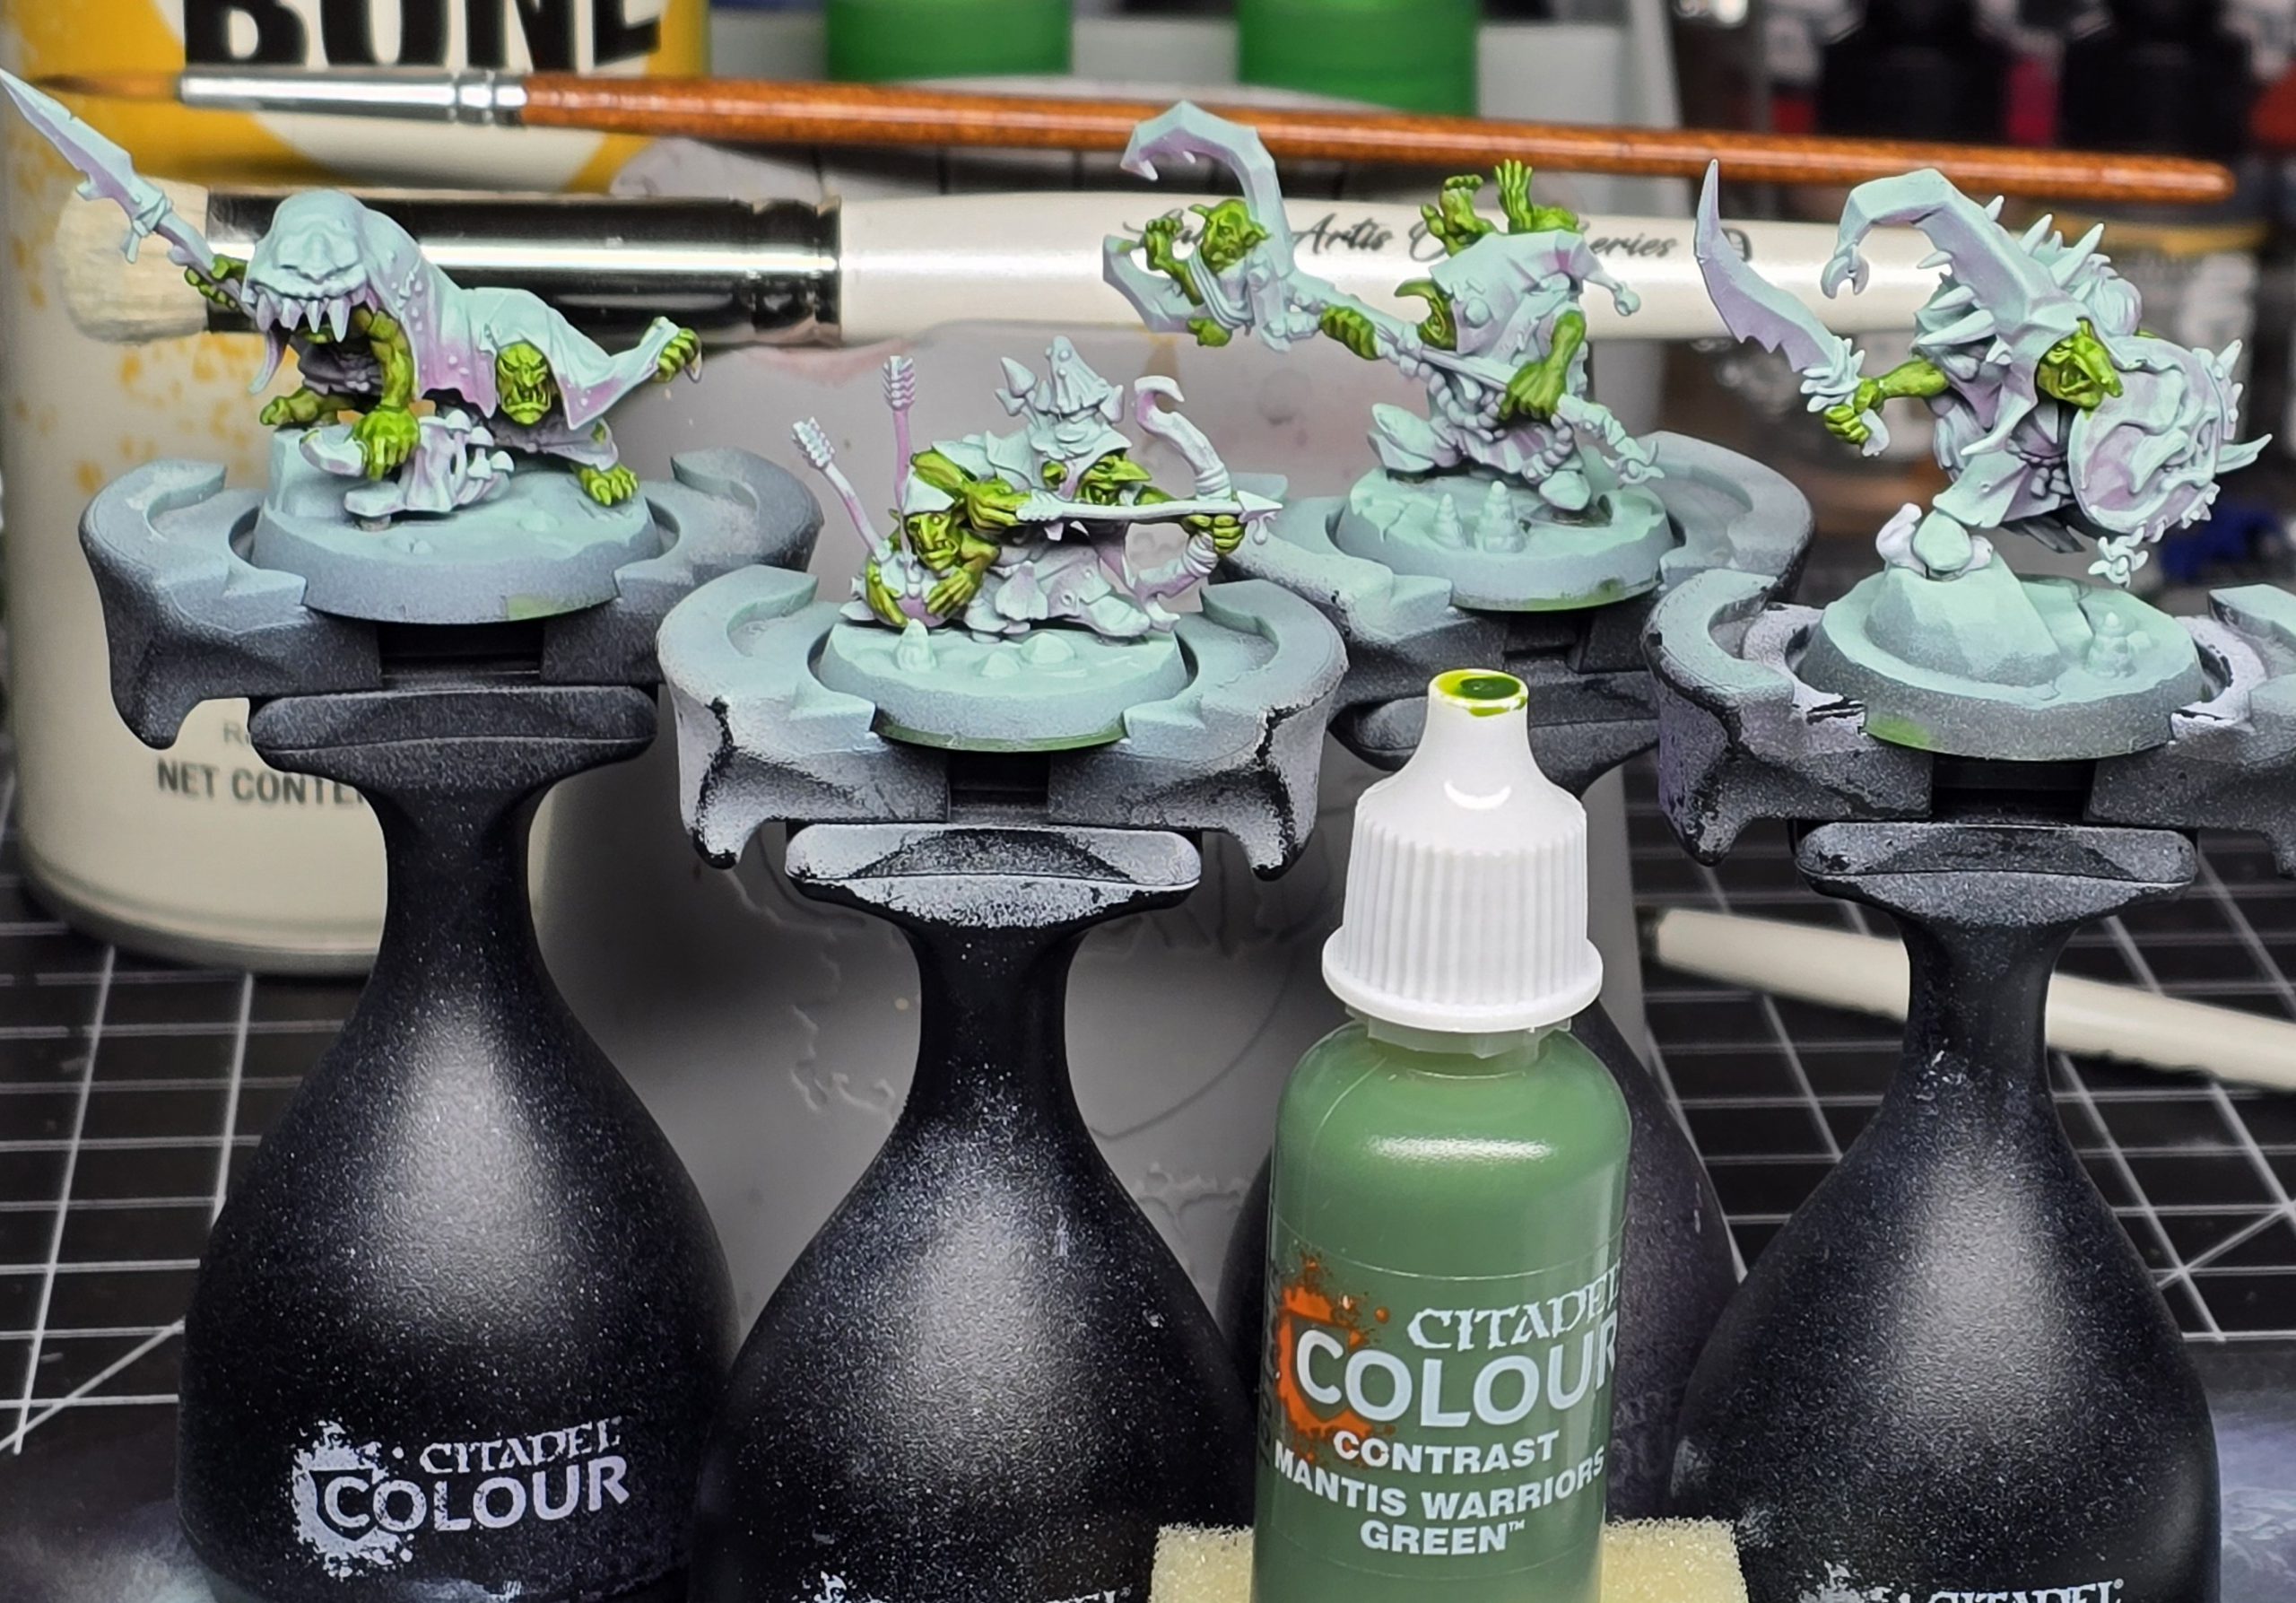
Ignore Uglug in all of these pictures, because I didn’t like where he wound up and started him over at one point.
For painting, I wanted to try some fancy under shading so I went with a base coat of Pro Acryl’s Bright Pale Green which I then hit with a reverse zenithal (nadir?) shade with Pro Acryl’s Magenta. I felt like this went a little too far, so I reapplied Bright Pale Green via a drybrush. I applied a single coat of Citadel Contrast Mantis Warriors Green over this and honestly, I love the skin tone here. This bright, yellowy green nails the colorful vibe I wanted on these goblins.
And that’s about as far as I got before Real Life reminded me that I had other responsibilities so they’ll have to be finished up later. If nothing else, I’m quite happy that such an easy and satisfying skin method has been unlocked for my future greenskins.
I am surprised to admit that I am quite excited about this warband. I am not generally a fan of Destruction and/or Orcs & Goblins and/or Orks, but between the characterful models and fun gameplay, I am looking forward to getting more games in with Borgit’s Beastgrabbaz. I think my next Nemesis game will be using a Pillage & Plunder plus Countdown to Cataclysm deck that looks something like this.
Have any questions or feedback? Drop us a note in the comments below or email us at contact@goonhammer.com. Want articles like this linked in your inbox every Monday morning? Sign up for our newsletter. And don’t forget that you can support us on Patreon for backer rewards like early video content, Administratum access, an ad-free experience on our website and more.
