
In the world of Monsterhammer(™) we often see a lot of griping online about how this edition just has too many dragons, too many monsters, and not enough dudes and dudettes running around slaying these big beasties and leading their massive armies to victory against all odds.
Well, I have good (or terrible…honestly, it’s not great) news for you big block enjoyers; it seems that the mighty “Death Stars” of eighth edition are in fact coming back and may be the best meta pick to counter a wide variety of threats. In order to understand the term Death Star, let’s take a little walk through memory lane.
The Origins of the All-in-One Solution

We see it in our 5-1 shampoo; our pocket devices that can do everything; even tool kits that can change into any tool we need. We like one-size-fits-all solutions because they are easy! The genius of this approach was captured by the dastardly Galactic Empire back in the original Star Wars. They had built a moon-sized battle station that could single-handedly defeat any threat it faced (except for a spunky kid and his space ghost wizard uncle). The battle station was called the “Death Star” (why not the death moon…it was not star sized…) a weapon capable of obliterating planets, battleships, and resisting attack with “impenetrable” defenses.
We use this iconic term today in wargaming to describe a “one solution for every problem” unit. A unit must meet certain requirements milestones to be truly considered an effective Death Star:
- Points Denial: Death Star units are typically 50% or more of your total points allotment in a list. This creates a single point of failure, but also gives you a giant denial piece that you can leverage to control the pace of the game. Many Death Star builds rely on this giant block of points to swing end results in their favor (or take an early lunch…)
- Offensive Hammer: Death Stars have to hit hard…very hard. A Death Star should be able to both hit hard after being charged AND hit hard on the charge. Death Star units leverage linehammer and special rules/magic/etc to achieve this.
- Defensive Anvil: This unit needs to be exceptionally sturdy. It needs to have high leadership, good defensive stats, volume of bodies, and other support to completely stall out the hardiest threats (like other deathstars and dragons)
- Mobility: A death star needs to be mobile. Whether through magic, high movement, or some other rule like drilled, this unit must make up for its clunky footprint by being highly maneuverable and adaptable. This will make more sense as we break down the Death Star archetypes.
- HeroHammer: Good Death Stars use a variety of heroes to support both within and outside of the unit. The best Death Stars make optimal use of their in faction heroes to buff them to extreme levels, fight above their weight class, or handle specific threats that would normally hit the “exhaust port.”
With the above defined, we can now get into the nitty gritty of Warhammer Death Stars and how they work in game. Let’s start with general archetypes.
Innovative Diversity
There are four major types of Death Star floating around in Warhammer The Old World:
- Pegasus Flock
- Cavalry Wave
- Archer Horde
- Melee Castle
Different factions can build one or more of the above archetypes with the Pegasus Flock being unique to Bretonnia. Each archetype focusses on a key interaction to leverage its full capabilities and each one has its own unique game plan. Let’s break down the archetypes themselves and get an overall understanding of their general approach for building and gameplay.
The Pegasus Flock
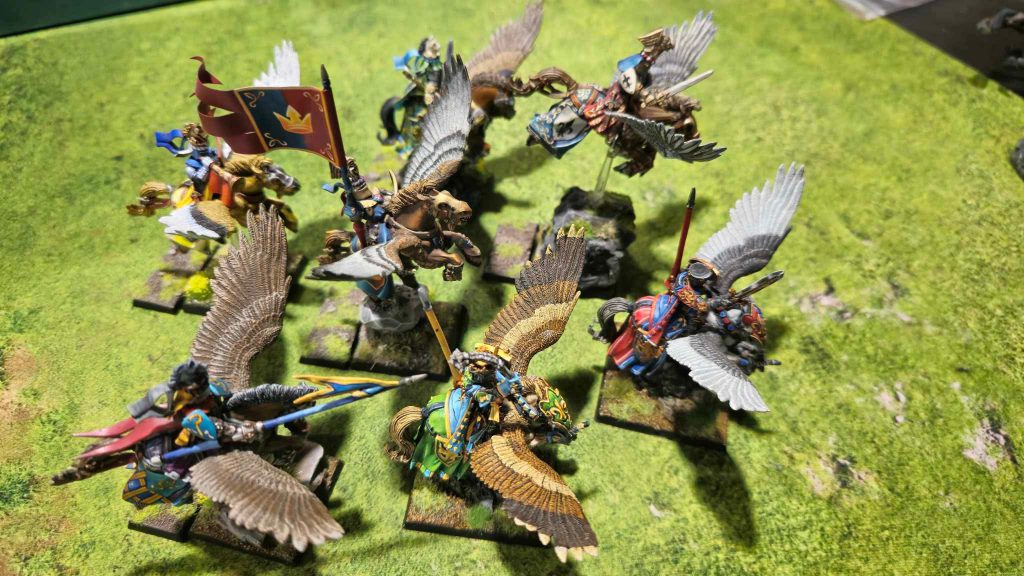
We all have been horribly impacted by the atrocity that is the Bretonnian ruleset. What I find fascinating about this faction is that the entire crux of their power rests on the abuse of the best unit and hero combo in the game – Pegasus Knights and Duke/Baron on Royal Pegasus. The general strategy for the flock is to:
- Utilize its high movement and 360 degree line of sight to choose its engagements.
- Leverage the most powerful Heroes in the game to beat up hard targets.
- Stay away from questionable combats and clean up points while the rest of the army supports or hangs back to prevent opponent scoring.
There are two main ways to build this unit and we will cover that more in depth when we do faction-specific builds.
Cavalry Wave
This Death Star has not caught on because it requires practice and good knowledge of layered support in the faction you’re using to make work. This unit is also unforgiving if you make a positioning mistake or get caught out in the open. Despite these two weaknesses it is one of the most offensively devastating builds you can run and has extreme flexibility in its movement compared to most other units. The general game plan for this archetype is:
- Utilize drilled to make the unit exceptionally flexible, maneuverable, and increase frontage to maximize attack volume.
- Choose engagements to collapse an enemy’s weak points before closing in on remaining targets.
- Leverage screens and cheap move blocking support units to prevent exposure and countercharge.
- Deny large areas of the table with their extreme threat range and frontage/footprint.
- Utilize Strong combat heroes to swing melee grinds and decimate units on initial charges.
This Death Star is one of the most difficult to play but can be exceptionally rewarding when done properly. It is also beautiful on the table and inspires every wargamer to remember the mighty cavalry charges of cinema or our imaginations.
Archer Horde
Do you like shooting? Are you sad that The Old World has punished traditional shooting? Do you just want to darken the skies and roll buckets of dice? Well this Death Star is for all of the dishonorable pragmatists who answered yes to the above questions. The archer star is an exceptionally popular answer to the current top dog meta threats like dragons, other Death Dtars, and the increasing number of behemoths floating around. Archer hordes rely on the weight of attacks and powerful magic support to bring down key targets in an opponent’s army, all while staying safely out of danger. An Archer horde needs the following to work:
- Magic: Two Level 4 wizards with Debuff and Shooting supportive magic. This includes Spells like Plague of Rust, Dark or Necromantic Magic debuffs, reroll hit spells, and other support that makes the humble bow a serious powerhouse.
- Mobility Support: Archer stars need to be mobile. They need to get to targets that an opponent might be hiding or back away from a potential threat. The best way to do this is through spells like Travel Mystical Pathway, which can take the unit and place it 12” anywhere from its current location.
- Large Numbers: Archers rely on the weight of dice to accomplish their goal. Typically units are 60+ in number before characters.
- Melee Resilience: Archer stars need to have defensive capabilities for when they do inevitably get in combat over the course of the game. This can be accomplished through combat heroes, magic support, or other special rules native to the unit (like unbreakable)
- Poison: A key way to cheat the reduction in power from the “hit, wound, save” dice filter is to just skip one of the steps! Poison allows this by skipping the to wound step which increases wounds suffered dramatically.
Archer stars are a very popular pick in the meta. Different factions have unique approaches to this death star build but all of them utilize the above core characteristics.
Melee Castle
In stark contrast to all of the above units, we have the tried and true melee block. This is a block of elite infantry that uses a number of rules to make up for its lack of inherent mobility, and all of the other issues native to infantry. The best components of these hordes of power are:
- High Leadership/Resiliency: A melee castle needs to be able to take a loss in combat and have little to no chance of fleeing. This is usually accomplished by ensuring the block has one or more of the following:
- Stubborn
- Unbreakable
- Veteran
- BSB
- LD9 or Higher
- Strong Heroes: A melee block usually houses the General and BSB. It may also include other characters that support it in some way. These heroes should:
- Be durable
- Add offensive power
- Provide a support capability (LD, Offensive/Defensive buff, etc.)
- Static Combat Rez: A good melee castle usually has +7 or more static combat rez. There are multiple ways to accomplish this depending on the faction, but the minimum is +7. This usually means a good melee castle can take the worst charges and still win.
- Mobility Support: While not as mobile as the other Death Stars, a melee block needs support in moving around the table to leverage its power and force the opponent to acknowledge it. This can be achieved through spells, banners, or other rules that open the melee block to better be an active presence on the board.
Melee blocks are traditionally boring, no-frills units, but they can also be absurdly effective at denying the opponent’s game plan and creating a serious problem that they must solve.
Faction Death Stars
Every faction has options to run Death Stars and some have more than one that fall into the above archetypes. Below we are going to give a brief overview of each of the factions and one of the Death Stars that they can run. Each of these options are roughly 1000+ points all together.
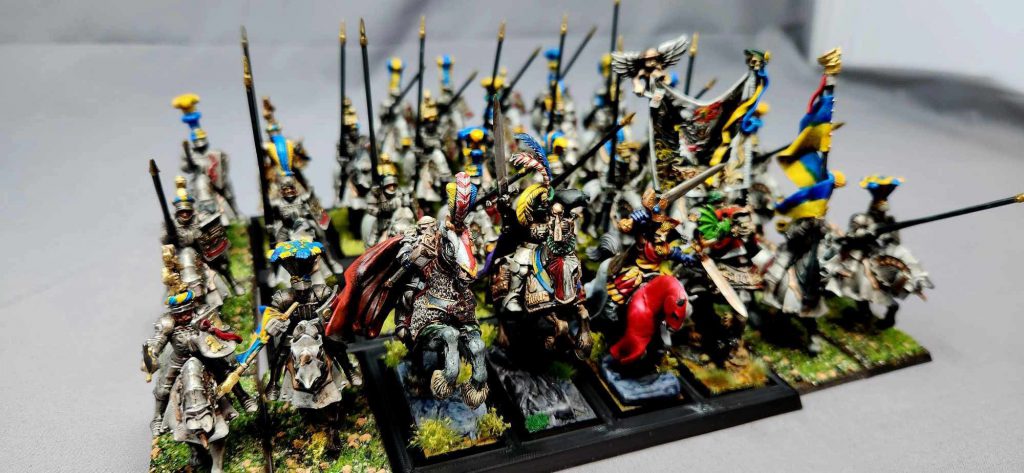
Bretonnia: Pegasus Flock
Effectively this is a maximum unit of Pegasus Knights with 2-3 heroes embedded in the unit. The most common version of this unit is in the Bretonnian Exiles List to leverage the Banner of the Zealous Knight which gives the wielder and their unit Vanguard. It is probably the single most broken unit in the entire game.
Key Models
- 1-2 Barons on Royal Pegasus. One always runs Frontier Axe which gives +2 S 3 AP, and multiple wounds 2 and the virtue of Knightly Temper which gives +D3 attacks to the rider on the charge and Hatred. The other usually tries to take a HKB item and 1-2 Lucky Heirlooms to fish for instant dragon slaying. Salt to Taste on other items.
- 1 Paladin BSB on Royal or Regular Pegasus. Usually takes the Falcon Horn and the Standard or War Banner.
- 5 Pegasus Knights with Full Command. Usually a Magic standard. Either the Banner of the Zealous Knight (if not on the BSB) or a War banner for combat rez.
Key Special Rules
- Skirmish: Perhaps the best unit formation and special rule to have in the game. Skirmish allows for 360 Line of Sight, Hyper Flexible charges, resilience to templates, and absurd mobility. You are playing 40K while everyone else is playing rank and flank. (Feel free to read the Skirmisher article on this topic.)
- Countercharge: Combined with Skirmisher and their high movement this makes the unit almost impossible to deal with in melee. Infantry are too slow to catch them, and faster units will get counter charged and die to the metric ton of high initiative, high strength attacks the unit puts out.
- Vanguard: You can walk the unit 10” forward before the game starts. Leveraging their 19” declare charge threat with an average charge roll being about 18”…yikes.
General Gameplay
This unit plays like how you would expect a giant laser cannon with a planet sized fortress around it to. It picks its engagements by being faster and more maneuverable than anyone else on the table, it has a solution to every problem, and even if you do manage to pin it somewhere it has a bucket of High save wounds at reasonable toughness. It requires very little finesse into the average opponent other than target selection.
On the flip side a smart opponent will abuse Skirmish to cause issues. For example, units cannot have more characters than rank and file models in the front rank. This means if a unit has a small enough frontage you may only be able to get one of your heroes up front and minimize the unit’s attack output.
It also matters for how skirmishers “form up.” You need to ensure your opponent measures every single model’s charge distance. If they cannot make it base to base that model MUST form up in a rear rank and is not eligible to fight. Many people get this wrong when playing this strategy and it’s really the one main way to fend it off. The key here is that many players just assume every model makes it into the fighting rank but even if they are .5″ out of base contact the models have to “form up” instead of fighting.


Finally, the unit will want to use terrain to avoid hardcore shooting lists. It can still die from massive weight of fire from overpursuit into combat. See below for some examples of how to hug terrain and avoid getting shot by dedicated gunlines.
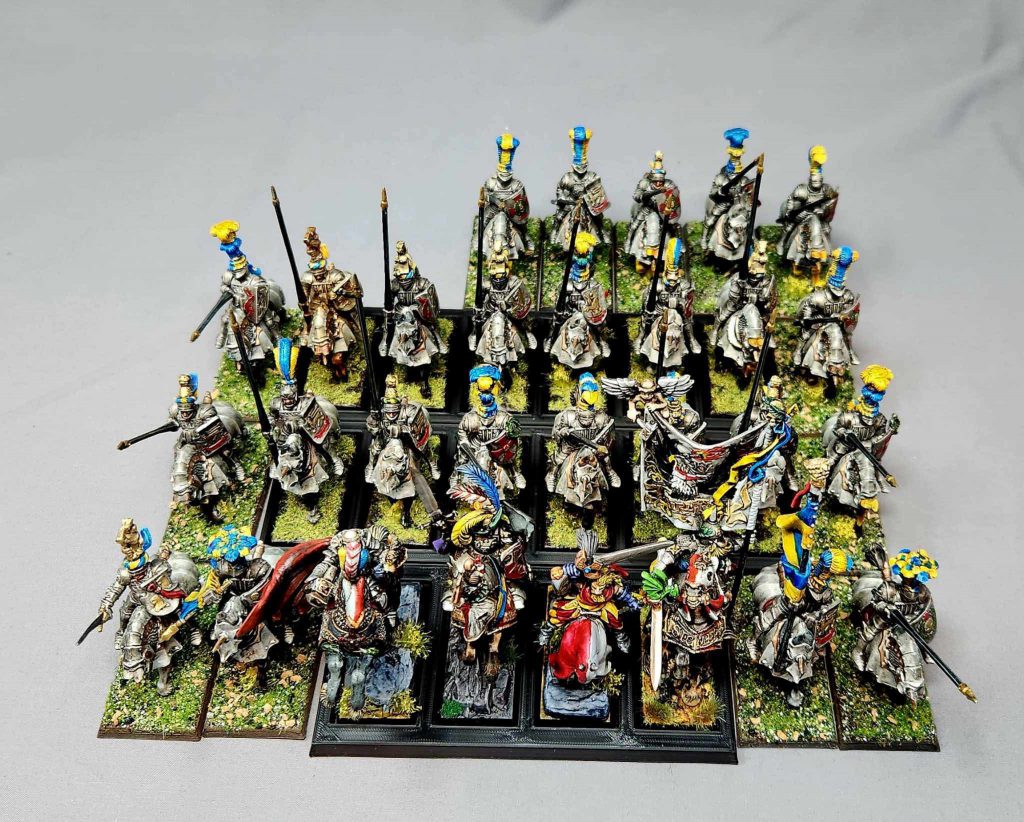
Empire: Inner Circle Bus
Empire’s new Arcane journal gave a pretty fascinating Detachment where you can take Inner Circle Knights as core (The Knightly Order Detachment). There are a number of ways to build this brick out and you can also play the Death Star without it being a core choice if you want to leverage a more diverse supporting roster, like taking cannons. We will be focusing on the General Detachment using the order of the white wolf and hero support.
Key Models
- 1-2 Level 4 Wizard Lords on Pegasus (not inside the unit). One with Lore Familiar and the Other with the Twin Tailed Wand. Recommended Double Necromancy or Necromancy and Elementalism.
- Grand Master – General – Order of the White Wold – Barded Warhorse.
- Captain of the Empire – BSB Rampaging Banner (reroll charges) – Barded Warhorse.
- High Priest of Ulric – Barded Warhorse.
- 20+ Inner Circle Knights of the White Wolf. Champion takes the Witch Hunters Ward for Magic Resistance 2. Banner takes Tapestry of Sigmar’s Triumph for reroll 1s to wound in the first round of combat.
Key Special Rules
- Spellcasting: Use spells like Spiritual Vortex and Spirit Leech to bomb a unit’s leadership. This will ensure your big Death Star breaks whatever it charges. You can also use debuffs like Curse of Years or Plague of Rust to hit above your weight class and take down harder targets or opposing Death Stars.
- Drilled: Drilled is one of the most powerful rules in the game. Use this to keep your frontage small while you maneuver and then create a larger frontage for combat. See the examples Below:


- Stubborn: When the unit does get caught out or charged, you can use stubborn to ensure you do not flee. Units with Swiftstride can add the extra D6 to their fall back in good order meaning it’s more difficult to catch them and likely to set you up to countercharge the following turn.
- Countercharge: Combined with high movement the unit can bite back at charging units like dragons and Pegasus Knights or monsters.
- Prayers of Ulric: The priest has three major prayers that all give significant bonuses:
- Battle Howl gives the unit +d3 to charge rolls. This increases your average charge roll from 14 to 16” (before rerolls)
- Wrath of Winter gives the very powerful multiple wounds 2 to the entire unit. This is brutal into monsters and other multi wound infantry.
- Winters Chill is somewhat of a “bad” rule. It only forces reroll of 6’s to hit for your opponent in the combat phase. It can stack if you get a -1 to hit from a spell or if you have no use for the other two.
General Gameplay
This Death Star requires more finesse than others because it can have a large frontage and relies heavily on the charge to win combats. As a result there are some key components to leverage that support this game plan:
- MSU Cav units to redirect and screen. These units block enemy threats, cover your approach from shooting, and can tango with opposing flankers or screens. They can also use drilled to get benefits of marching column to position and then charge or go wide to screen when the time comes.
- Magical Might: The list really needs two level 4’s to hold its own. These spellcasters hang behind the death star and support it with debuffs, buffs, and magic missiles or vortex’s. The diversity of spell options for the empire means that combinations are many and smart players will be rewarded for creative combos.
- Choose your engagements and leverage your high speed and reliable charge threat to punish enemy units. Leverage countercharge to beat down enemy units that dare to charge you and you will crush them. Remember…you get to drilled off a countercharge!
High Elves and Wood Elves: Sisters of Avelorn/Deepwood Scout Cloud
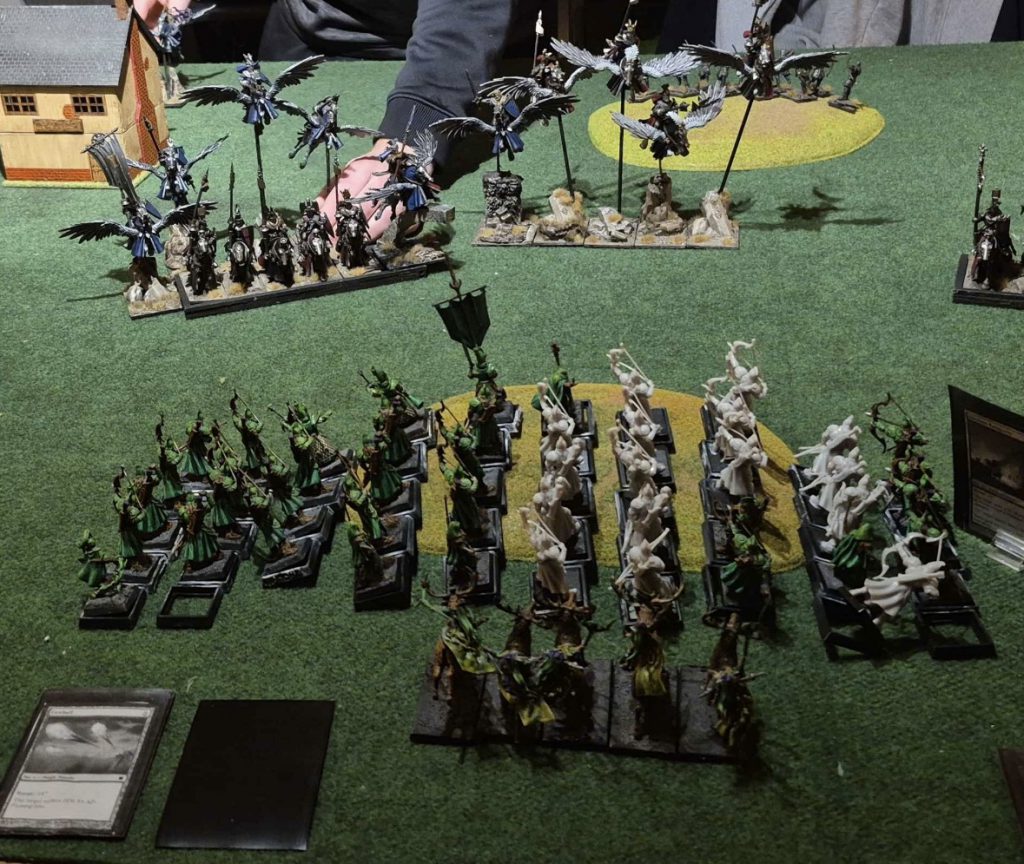
Elves have a fascinating build revolving around the abusing skirmish rules (go figure), ignore cover, and poison stacked with strong magical support. These archer blocks typically do not have characters nested inside them (except for maybe a BSB) but they do leverage magic users and items to bring a disgusting number of high quality shots down on any target.
Key Models
- Two Level 4 casters usually on mounts. One with Elementalism and lore familiar to get plague of rust (-2 armor hex) and travel mystical pathway (teleport 12”)
- BSB with magic standard. For High Elves he usually runs the Battle banner for combat rez bonus and for the Wood Elves he runs the Banner of Midsummer’s Eve for ignore cover.
- High Elves take the Handmaiden of the Everqueen as the general who allows for Sisters of Avelorn to be core. She takes the Horn of Isha for a once per game +1 to hit and wound.
- 50-60 Sisters/Deepwood Scouts with full command. Deepwood Scouts take Hagbane tips for poison.
Key Special Rules
- Magic support follows the same trend as discussed above. You use it to both help the unit maneuver through teleportation, increase its damage through hexes, and also buff its durability through support spells. Plague of rust and curse of arrow attraction being standouts for elves.
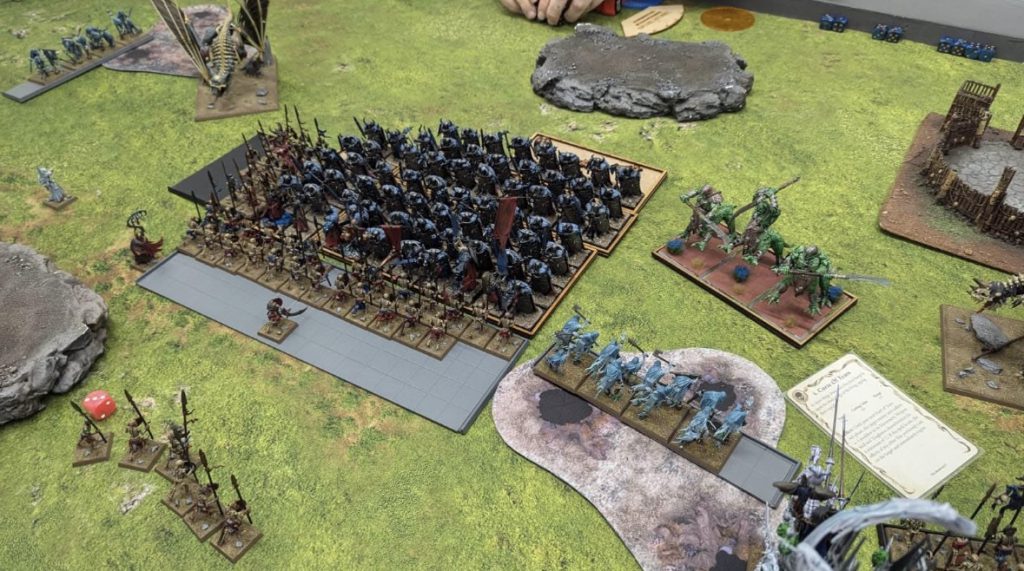
- Skirmisher + Ignores Cover lets you create a “staggered” unit footprint that gives every model 360 LoS down “sight lanes”. The reason you need ignores cover is because skirmishers cause obscured line of sight to one another and can grant cover to enemy targets. Ignore cover negates this penalty entirely. To best demonstrate this see the image below (my goblins are cosplaying as elves…)


- Poison: The bread and butter of a good archer death star. Poison drastically changes the math on killing targets and when combined with rerolls to hit or with debuffs to armor can make the unit absurdly threatening to every model in the game.
General Gameplay
Another very simple unit. Because they move around in their formation all the time, the only thing to be mindful of is drawing line of sight with every model individually. You will need to ensure your sight lanes are lined up with the target so every model can draw a sliver of a line to the target unit. Otherwise it plays like a big blob of idiots that throw dice and delete every unit they shoot at. Use magic and your other units to focus down one key target at a time. Don’t forget to leverage stand and shoot to get a “free” shooting phase against a charging unit.
This is a perfect example of the broken state of the core rules. Abusing skirmish in this way for a 360 Line of Sight death ball throwing 60 or so dice (120 with stand and shoot) every turn sounds like something out of 40K, not Fantasy.
Dwarves: Longbeard Castle
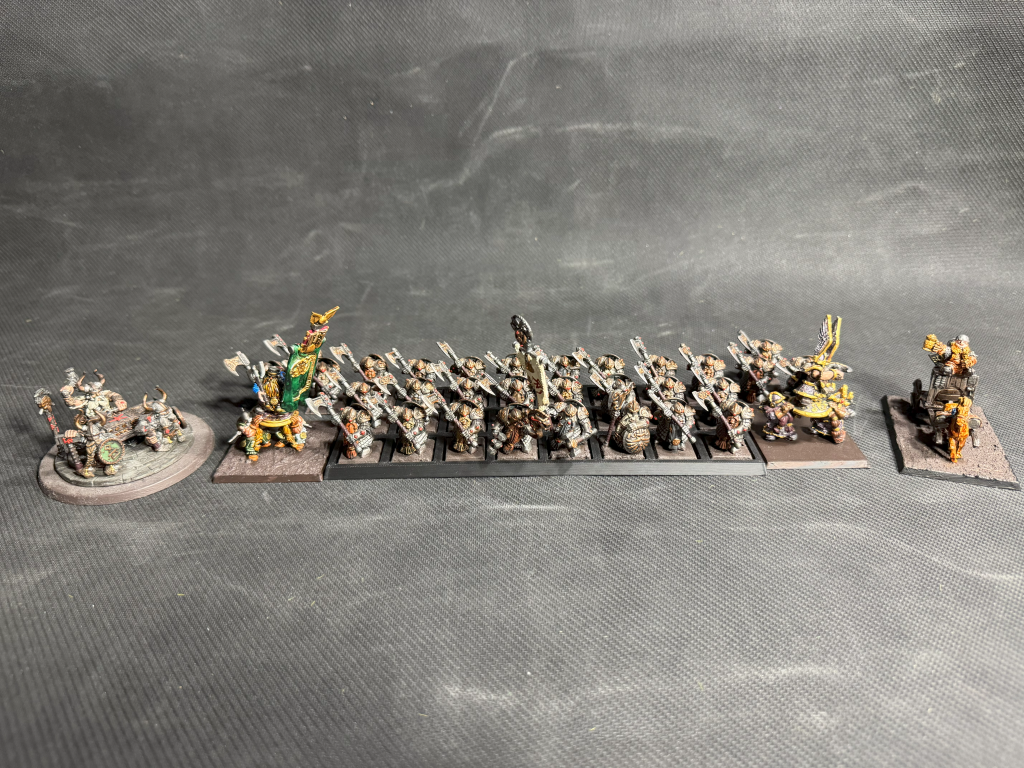
Ah…the humble dawi castle. Sturdy, stout, breathtakingly bearded. I love the idea of a big unit of tough jerks that bully the table just by existing. No frills, no fancy interactions, just 85% of your army in a single unit of study high stat infantry. This is the ultimate dawi way and it is sure to infuriate anyone who dares face you.
Key Models
- Anvil of Doom will be a lynchpin model for your army. Its tough, and its provides two key spells that are needed to make the castle pop off.
- King on shieldbearers. Give him smiting (Multiple wounds D6), preservation (immune to KB and Multiple wounds), and any other runes you want to make him go pop!
- Thane BSB on Shieldbearers. Give him:
- Master Rune of Grugni: Gives the unit a 5+ ward save
- Rune of Confusion: Enemy units count as having made a disordered charge in the units frontage
- Rune of Battle: +1 combat res is always great
- Dwarf Cart – Bugmans Cart for +1 movement
- 50+ Longbeards with great weapons, shields, and drilled. Give the Banner the Master Rune of Hesitation. This banner means the unit that charges them in the front rank does not count as having charged for special rules or weapons they have!
Key Special Rules
- Anvil Spells: There are two bound spells that are vital to this playstyle:
- Rune of Oath ands Steel: This is a 7+/11+ to cast. If cast at 7-10 if lets the unit reroll failed armor saves. If cast on an 11+ it also improves their armor save by 1! Major buff for the longbeards and their characters.
- Rune of Haste and Urgency: This lets you make an additional move during the movement phase. Dwarves in marching column with +1 move from the cart can march up to 24”!
- Stubborn and Shield Wall: The unit can essentially negate a charging unit entirely the first time it’s charged. Stubborn means you automatically fall back in good order, and shield wall lets you turn that into a given ground. This will essentially neuter any unit short of a dragonlord.
- Drilled: Just like with the Knight Death Star, drilled becomes a vital component of the list. It applies to ANY movement. This includes: give ground, fall back in good order (though you reform at the end so who cares), flee, charge, pursuit, follow up, and so on. The possibilities here are limited to your own imagination.
- Veteran: The unit has LD 10 with rerolls for ALL leadership tests. Let that sink in. The unit will almost never fail a leadership test.
- Big Boy Stats: Do you like stats? How about the best core infantry stats in the game? WS5, S6 with great weapons, 5+ armor (4+ with shields) and the ability to go very wide with a linehammer to pile on those attacks.
General Gameplay
One of the best ways to play this unit is to start in the marching column, march up 12”, then use the anvil to move again, go out of the marching column and move up another 8” with a massive frontage. Then you just force your opponent to acknowledge the unit and more than likely you will win the slow attrition grind that follows.
In addition to the above, you can leverage small shooting units like gyrocopters and irondrakes to clean up targets that are hard to catch, or hold down a flank for you while your longbeards clean house.
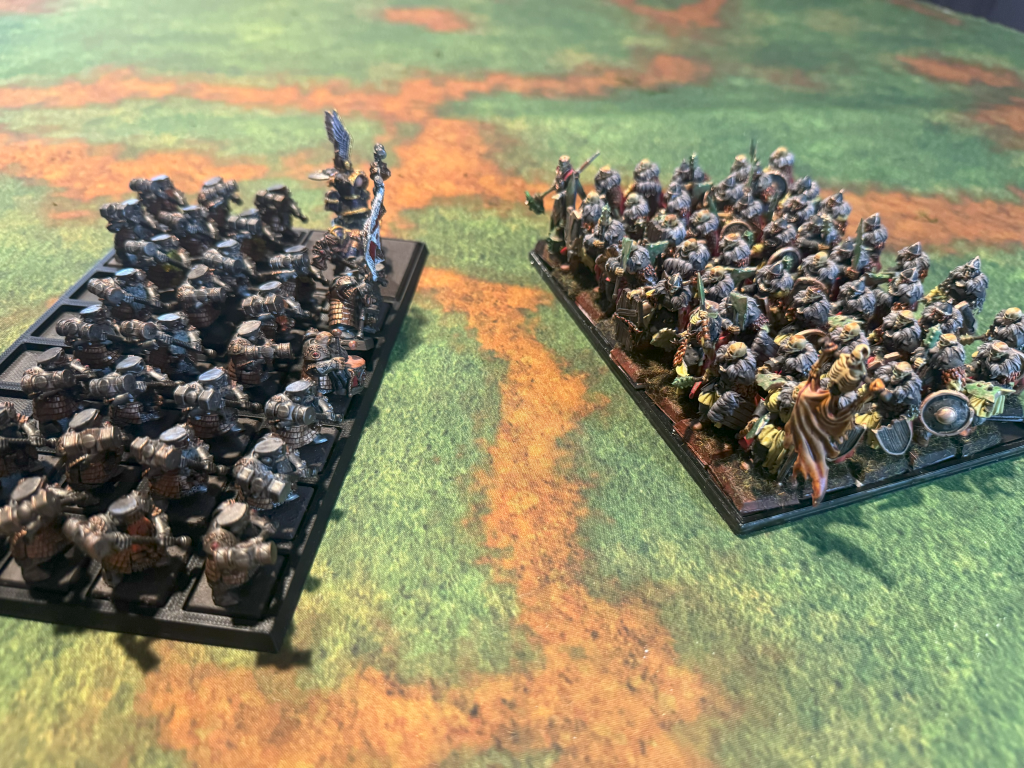
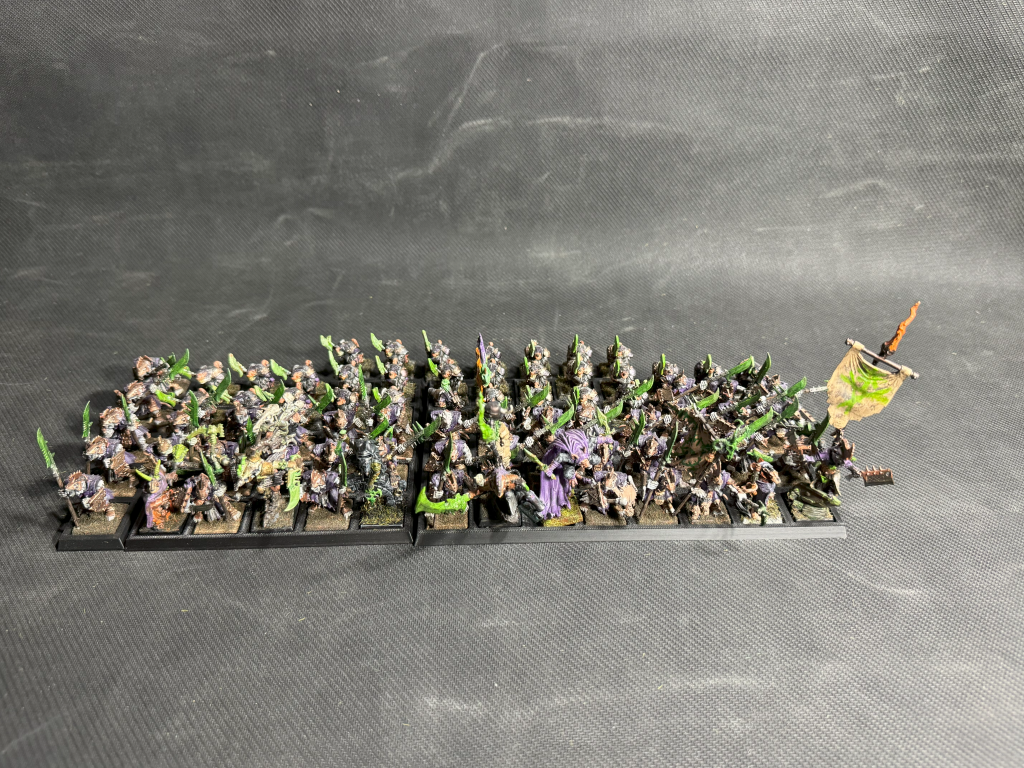
Orcs and Goblin: Night Goblins Archer Horde
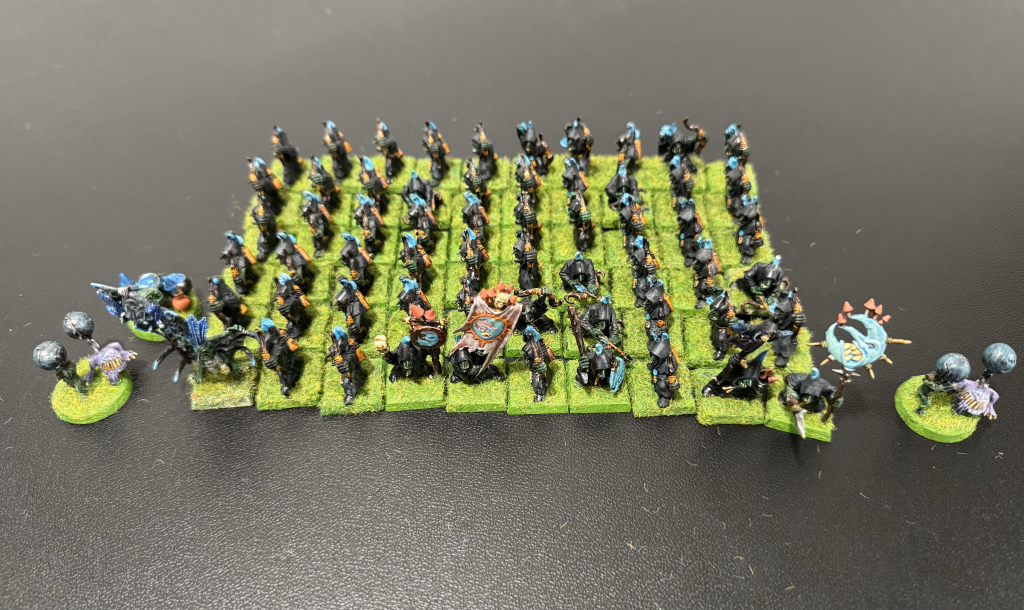
Orcs and Goblins are a wonderful faction, and they can emulate a lot of Death Stars. One of the best builds in the factions involves taking a large unit of night goblins with magic support and dumping buckets of shortbow shots into single targets. There are some key features to this archer horde that set it apart from its elven competitors.
Key Models
- Two Level 4 Goblin shamans. 1 Night goblin with wagh magic and idol of Gork for +3” spell range and a single reroll to a casting roll. 1 Goblin shaman with lore familiar and elementalism who takes Plague of rust, travel mystical pathway, earthen ramparts, an wind blast.
- Night Goblin big boss BSB with war banner or the Big red Raggedy flag (+1 WS and +1 combat rez)
- Night goblin big boss with wollaps one hit wonder. Add other big bosses for extra magic weapons or dragon food.
- 60+ night goblins with bows, netters, fanatics, and the Spider Banner (poison attacks)
- Give night goblin heroes fungus wine which gives the unit immune to psychology till your next command phase (once per item)
Key Special Rules
- Like other archer stars you heavily rely on spells to accomplish your works:
- Itchy Nuisance: A hex that is 18” range with the Idol and drops a target’s Toughness and Initiative by D3! Absolutely insane when combined with all those low S bow shots
- Evil Sun Shinin: A self spell that gives all friendly units within command range reroll 1’s to hit and -1AP on their weapons (it’s adding up now isn’t it?)
- Plague of Rust: -3 Armor on a target? Sure why not
- Travel Mystical pathway: Teleporting your giant block is vital to gameplay
- Earthen ramparts: Give your idiots a 5+ ward and force disordered charges? Yeah now we are talkin.
- Poison and Quick Shot: Goblins have significantly shorter range and LOS restrictions vs elves, but makeup for that by always being able to stand and shoot, and to move and shoot without penalty. This makes the unit reliably tap enemy units on 5’s to hit which starts adding up with the volume of fire.
- Fanatics: We know that this is one of the most broken and interactive models in the game. It’s your failsafe for when all goes wrong. You get charged and it’s looking grim. Well force your opponent to take 3D6 S5 AP3 hits and you should be fine.
- Fungus Wine and IPT: You are a goblin, even with warband you are at LD7 which gets modified to 10. The problem is Terror sucks and can randomly lose you games. This item removes the risk factor of terror, making you brutally good at taking down monsters!
General Gameplay
This unit relies heavily on lining up wide (13-15 or so) and teleporting on key turns to position for a strong volley or get out of harms way. You need to be careful how far you expose this unit as it can get pinned down easily. A big component of the list is managing your obnoxious footprint and leveraging it to your advantage.
In addition this unit plays the game very passively. It waits to commit all in until your opponent has overextended or exposed a key threat. You have to be patient with this unit and only engage it when you are sure you can pin your opponent with a killstroke.
Finally this unit is surprisingly hard to shift. Leverage your high static combat rez and butload of poison attacks (evil sun works in melee too!) to create a formidable block of goblins that can even spook mightier units and grind them down over time.
Do not pop your fanatics too early or too late. You need to time your fanatic turn to be the most destructive and disruptive as possible. Whether it’s to punish an opponent who thought he finally had you on the ropes, or ot finish off a dragon that survived your double volley of arrows. You can also leverage them by not deploying them. This forces the opponent to play around them the whole game and can make your unit untouchable.
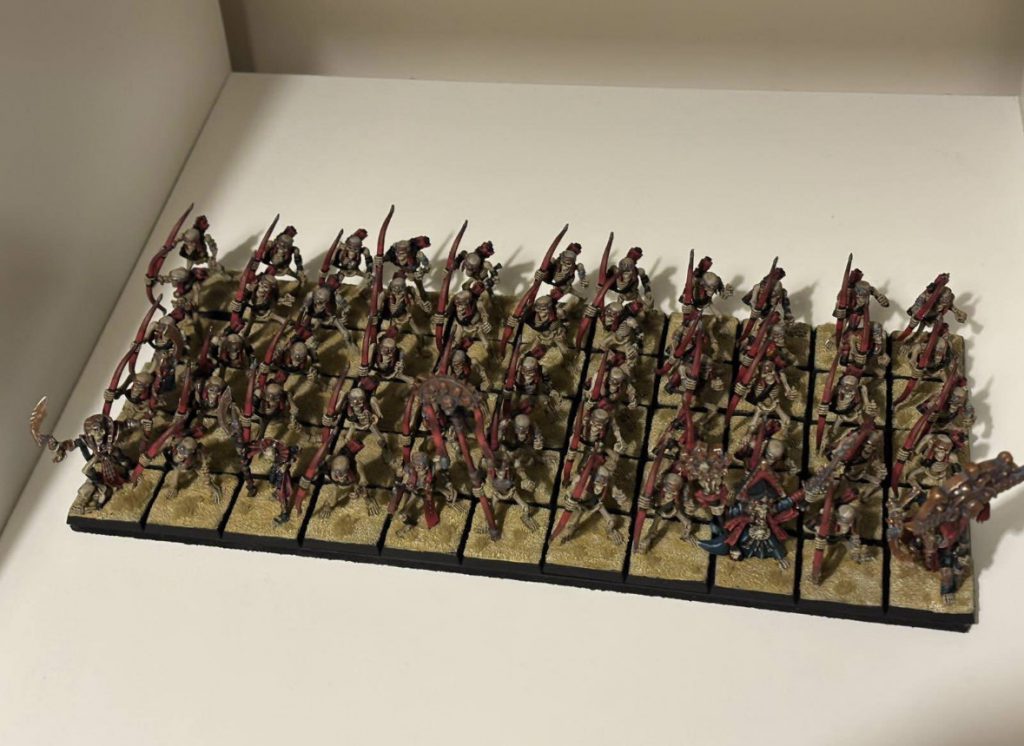
Tomb Kings: Royal Host Archer Horde
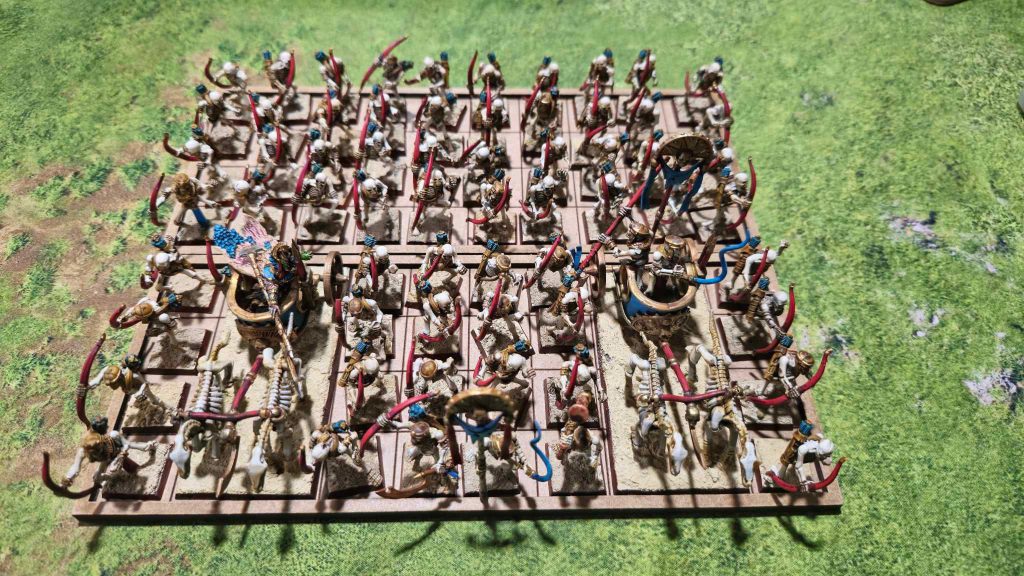
This is the best archer horde in the game. Leveraging the absurd rules tomb kings have and doing everything archer hordes want to do but to the highest level.
Key Models
- 1-2 Level 4s, possibly on a bone dragon. Take necromancy, debuff things and reduce leadership. Punish your opponent with wizard magic. Use Elementalism as well to leverage travel mystical pathway and plague of rust like the other archer blocks
- If in a royal host, take a tomb king and a herald BSB on chariots. Embed them in the unit and juice them with powerful magic items. Give one of them the Amulet of the Serpent to give the archers poison attacks.
- 60+ Skeleton Archers
Key Special Rules
- Like the other archers, this Death Star leverages poison, shot volume, and magic to become incredibly deadly.
- Royal Host: This detachment allows for the unit to always be allowed to volley fire even when moving. This means they can move and still shoot with their full payload.
- Arrows of Asaph: No modifiers to hit rolls means you always hit on 5’s and with this many shots that means you are cooking with gas.
- Unbreakable and Arise: This unit will need to be completely wiped out. Otherwise it will just keep sticking around and coming back from the dead. Its incredibly durable and hard to shift.
- Tomb Kings and Princes in Melee: This gives the unit some absurd melee power. Tomb kings on chariots are brutal in combat and can both tank and cause damage to attacking units. I have seen this unit take charges on all sides, and still grind the opponent down just because the tomb kings can consistently outperform while the skeletons die and are revived.
General Gameplay
One of the things about this Death Star is it is cheap compared to others of its kind. Even after you add the heroes. The Same general rules apply to it that apply to the other archer stars, but this unit is tougher, hits harder, has stronger magic support, and can be revived over time making it an attrition nightmare. You can be more aggressive and more bold with this unit since it can bully other units that would normally counter an archer star.
Honorable Mentions
I could not cover every single Death Star in this article, and some overlap with the above archetypes or are not really true Death Stars. Below are some brief summaries and some cool photos of honorable mentions to show some alternatives to the traditional big block strategies floating around.
Beastmen: Minotaur Bus
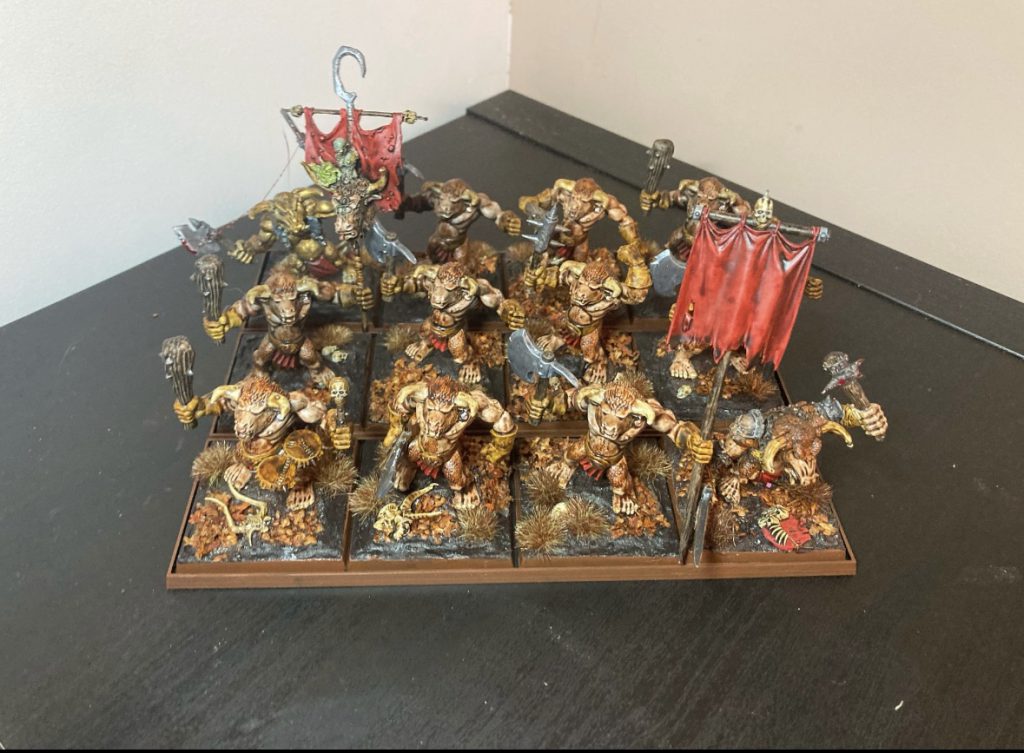
A Doombull and his horde of angry moo men walk into a bar and everything dies! You basically take a giant mountain of cow muscle and use it to deliver very violent Doombulls/Gorbulls into your opponent crushing everything they fight.
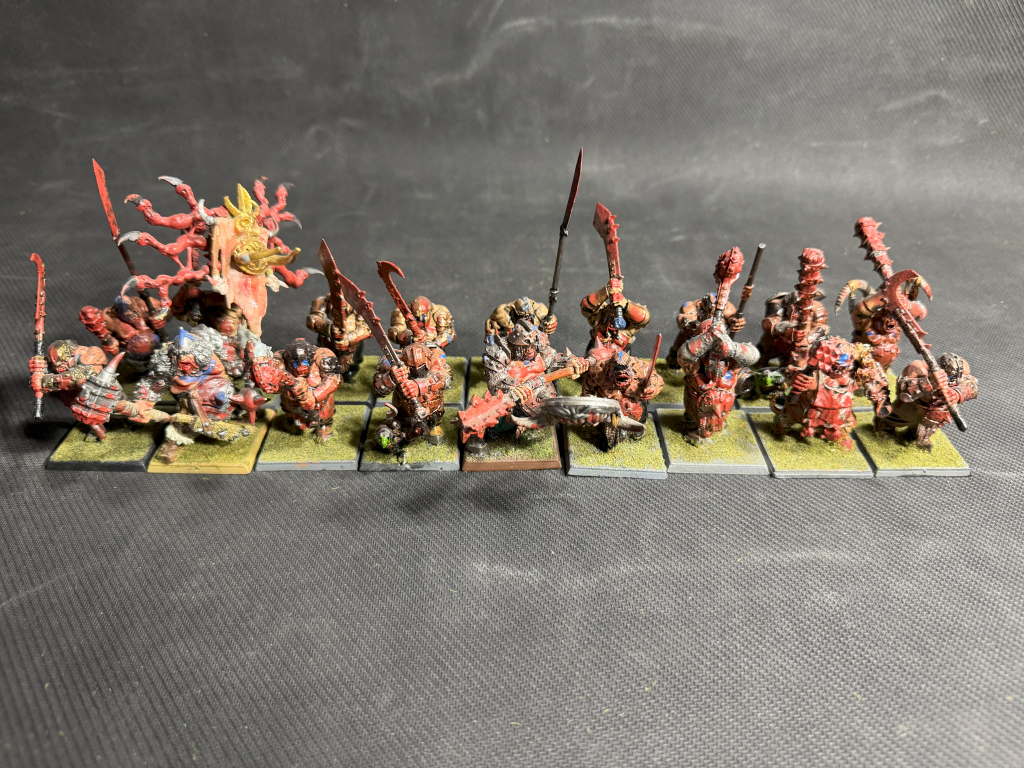
Warriors of Chaos: Chaos Warrior – Chosen Horde
Much like a longbeard Death Star, this uses the best infantry in Chaos, piles in some heroes, and walks around as a giant death square that can take charges and come out on top!
Ogre Gutstar
Tried and true from editions past. Pile 20 or so Ironguts into a unit and then fill with Ogre Heros. Take a Butcher or two, and watch your unit single handedly fight and kill everything that touches it.
Skaven Stormvermin Character Bunker
This bunker takes 1 demonology grey seer, 5 or more chieftains and a chieftain BSB and abuses verminous valor. You swing with the chieftains at initiative 6 (or higher on the charge or with spell support). They then hide in the rear ranks after fighting so they cannot be targeted back. Combo with spells, frenzy, and other abilities and the units are hilariously deadly.
Blood Knights Murder Brick

Blood knights are supermen in stats. Effectively an entire unit of hero level grunts. You take 9 of them, a BSB, and a Vamp Lord and use drilled and your smaller footprint to do everything the other knight buses do but better. They hit like a train, can be revived, have better saves, and have stupid strong heroes before factoring in magic support.
Final Thoughts
Death Stars are terrible for the game; awful to play with and against. This is a big reason why so many people got tired of eighth edition. Sadly I truly believe this is the future meta. Death Stars are the best counter to the worst offenders of game balance. How do you counter the Bretonnian Pegasus blob? By taking a larger, more broken unit of unbreakable poison archers! The only reason you do not see more of these units is due to collection limitations, and I think most players just…do not want to play this way. Regardless I will be reserving my Death Star builds for sweaty events unless I am running with some meme, like 40-50 black orcs waddling around. Keep your eyes open for the next article where I discuss the “exhaust ports” that these archetypes each have and how to counter them on the table!
Have any questions or feedback? Drop us a note in the comments below or email us at contact@goonhammer.com. Want articles like this linked in your inbox every Monday morning? Sign up for our newsletter. And don’t forget that you can support us on Patreon for backer rewards like early video content, Administratum access, an ad-free experience on our website and more.
