Thank you to Wargames Atlantic for providing this kit for review.
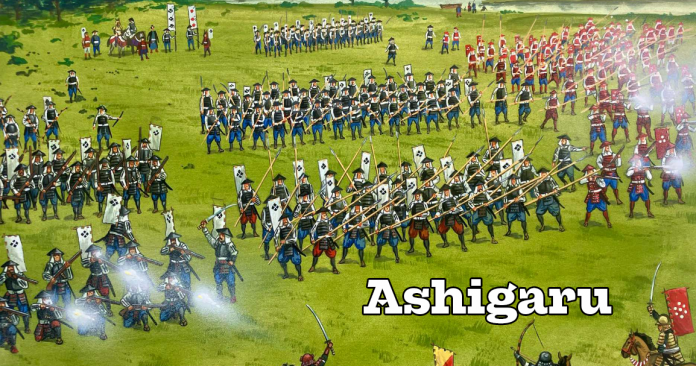
Ashigaru were the common foot soldiers of the armies of the Sengoku period. Simply armed and armored, they were massed ranks of soldiers led by Samurai into battle. The introduction of matchlock firearms would see them become incredibly important to armed conflict, as the new weapons required relatively little training to use and were very effective when massed.
The Models
The box contains 328 models, divided between spears, polearms, bows and muskets. There are four sprues in the box, and while basing in two ranks I was able to get three bases of melee troops (combined spears and polearms) and three bases of ranged troops (combined musket and bow), giving me 24 bases in total. This is a pretty good amount of models, and even if you split them between two armies to make opposing forces you’ll be able to play very full feeling games, especially when combined with the samurai box.
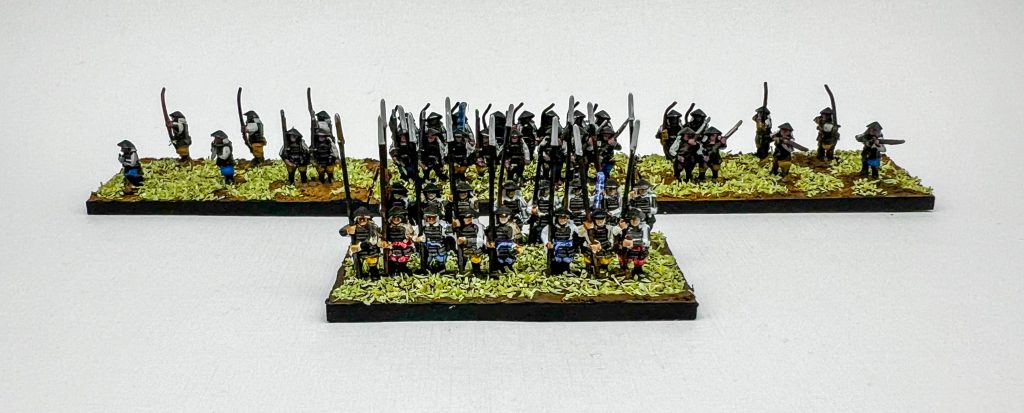
The troops come in different sized strips, giving you groups of 2, 3 and 5 soldiers along with individual models. This gives you lots of options, whether you want to really pack soldiers in for that massed rank feel, or spread them out to give a skirmishing look. I did a mix of both for my ranged troops, to give the impression that they’re marching but spreading out a bit on the flanks to get angles for shots.
The models are well detailed, with nicely defined facial features and ridges on the armor. There are only a few different poses for both the individual soldiers and the strips, and they aren’t super different (outside of the kneeling musket troop, he’s cool), but distinct enough to give some variation if you pick up the bases and look at them real close. There’s a lot of flash in the strips of troops, which I didn’t notice at all when I was getting them off the sprue but it became an issue when I was painting. The sheer amount of sprue gates you’ll have to clean is a bit annoying as well, but doable with a few notable exceptions.
The Elephant in the Room
The weapons in this kit are extremely thin and fragile. The spears are the worst offender, but the bows can snap pretty easily as well, with one of mine breaking during painting. A friend of mine had several spears break while removing models off the sprue, and that’s been a common complaint I’ve seen on different WGA social media pages. I was able to mitigate this by using a pair of sharp, single bladed side-cutters, the kind of tool that’s popular in the gundam model community because they can cut plastic nubs without leaving a mark on the plastic. These are normally complete overkill for wargaming kits, but this kit requires the precision and delicacy of that specialized tool. Most of my breaks occurred either during the cleanup phase, when my scalpel wasn’t razor sharp, or when the models were sitting on the painting desk and I accidentally brushed against them with my hand.
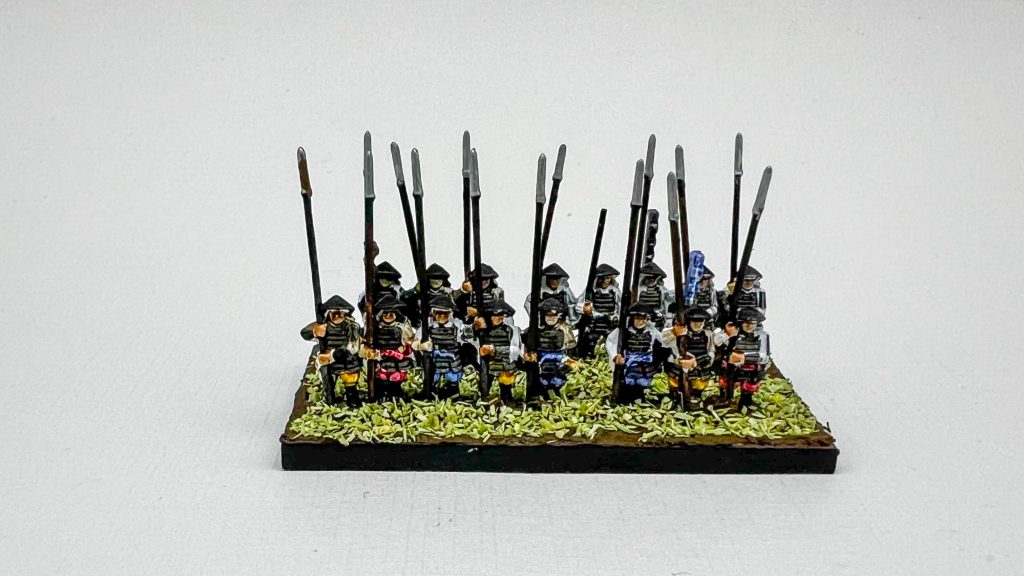
I’d like to just chalk this up to growing pains and say it’s just a cosmetic issue, but the fragility makes interacting with this kit at every phase of the hobby difficult. You have to pay careful attention while modeling and painting, while transporting, and while playing, because things will break as soon as you don’t handle them with absolute care. For me personally, these issues changed the kit from something I was looking forward to learning new games with to something that will be placed into a diorama and left on a shelf.
If you do want to take these out and play with them, I’d recommend some kind of magnetic storage solution, as I think foam would ravage them. Wargames Atlantic is coming out with some 20x40mm bases that will have predrilled magnet holes, so those will work pretty well if whatever game you’re playing supports that base size, but anything should cover it.
Painting and Basing
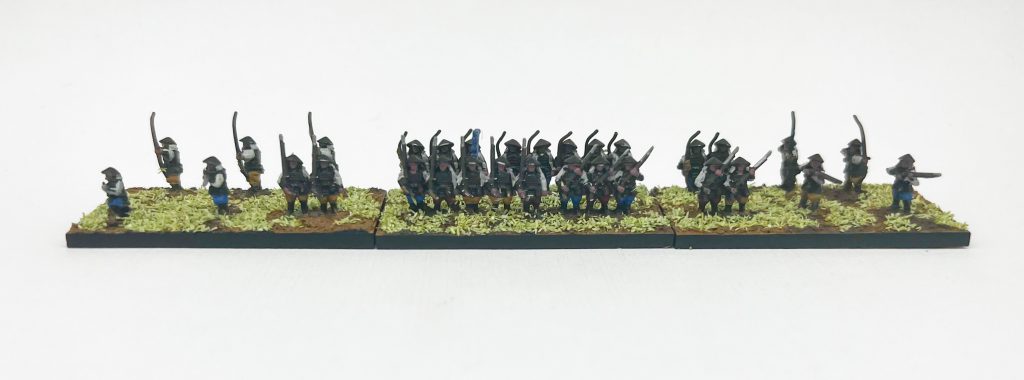
My first try at painting the ashigaru used Vallejo’s Xpress Color paint line, because if I was going to end up painting 24 bases of models I wanted to try and do it quickly. It went… okay? The base I did in Xpress Color is the spearmen pictured above. I primed them white and used Hospitaler Black for the armor, one of either Storm Blue, Velvet Red, or Desert Ochre for the pants, and either Mummy White or Templar White for the shirts. Japanese weapons were lacquered, so I did a mix of Hospitaler Black and Willow Bark.
I had two issues that led me to change off of this approach. The first is pretty minor. At this scale, I feel like the Xpress Colors work leave things looking a bit desaturated. It isn’t the end of the world, but when models are this small I’d like the colorful parts to be bright and stand out so you can really differentiate each model in a group. The real issue for me was that priming the strips of models white makes the flash stand out and look hideous. I had to go back over each strip and try to carefully black out the flash between the arms and try my hardest to not get any paint on the sleeves of their white shirts, it was a nightmare. When the flash is all painted black it’s pretty much fine, it just looks like additional separation between units, but getting there is a huge chore if you don’t just prime them black.
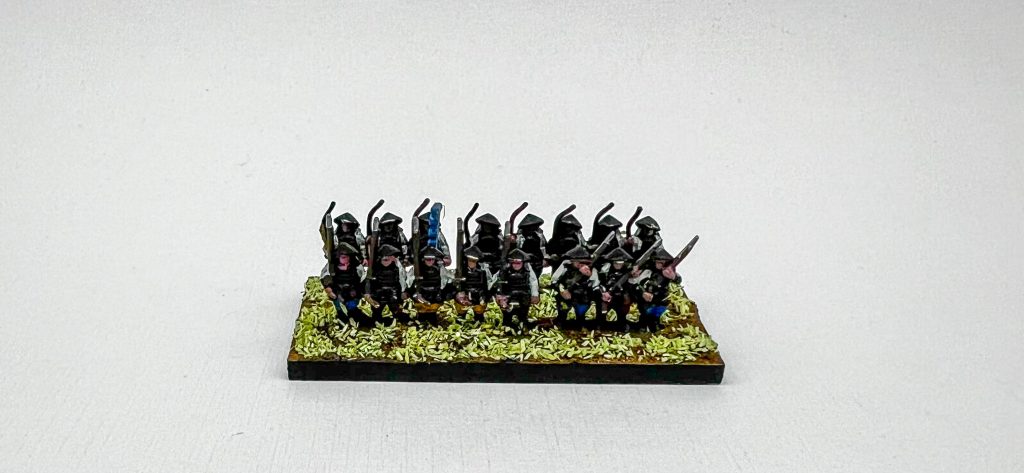
So, for the ranged troops, that’s what I did. After a coat of black primer, I switched to traditional paints and gave the armor a coat of Army Painter Fanatic Matt Black, and also used APF’s Carnelian Skin for flesh. Shirts got a coat of ProAcryl’s Dark Ivory, and the pants got one of their Blue, Burnt Red, or Orange Brown. Wood parts Metals are Army Painter Fanatic Shining Silver for the spears and Gun Metal for the muskets.
I really enjoyed this approach. It wasn’t any more difficult than painting with the Xpress Colors, and I liked the control over the finish I had. I should have pushed the highlights a bit more, but ultimately I’m happy with how they turned out.
For basing, I used ProAcryl’s Golden Earth basing texture, and gave it a coat of ProAcryl Dark Golden Brown to introduce some variation and interest into the dirt. I also used it to paint between models’ feet and other areas where it was hard to get the texture paste in. This was a bit of a pain, because the “puddle” bases the models are on are pretty thick. You have to be careful when you put the paste on to avoid the look of everyone standing on tiny, localized hills. This is another reason I’d recommend the Wargames Atlantic bases when they come out, the recessed side lets the puddles sit low and put the models’ feet even with the base edge, and you can be a little less careful putting in your basing material.
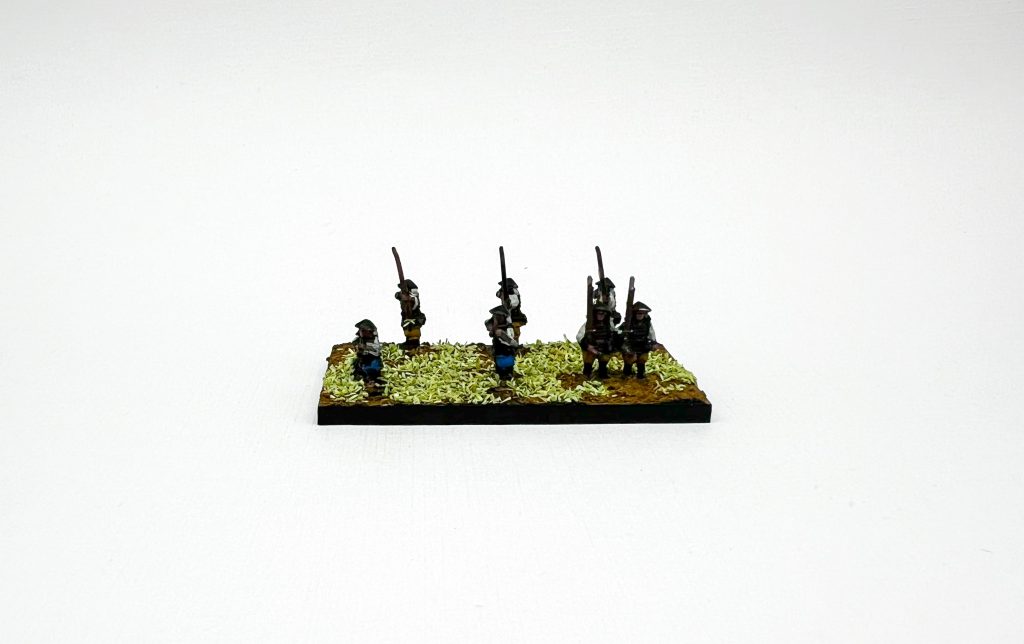
For the grass I used a bit of sawdust flock, because it was the smallest scale thing I had. I wouldn’t do this again, I don’t love the way it looks. This is my first kit of this scale, so if anyone has any good tips for basing let me know in the comments.
Final Thoughts
This is a kit I really want to like and recommend. I had a great time painting it, the detail is great, and you get a lot for your money. Unfortunately, I think they fail as gaming pieces. Nobody feels great about models they’ve spent a lot of time and energy to make look good being ticking time bombs. Every time you pick up a base, put it in or take it out of a case, or even just move it on a table is another chance to lose a spear, and while one or two being gone arguably doesn’t look terrible it still sucks. I can only recommend them if you either don’t care about that at all or want to make a big 10mm diorama and you’re comfortable enough with your tools and cleanup skills that you think you can get them off the sprues without breaking.
If you’d like to pick up this Wargames Atlantic kit and support Goonhammer while you’re at it, get them through our affiliate link.
Have any questions or feedback? Drop us a note in the comments below or email us at contact@goonhammer.com. Want articles like this linked in your inbox every Monday morning? Sign up for our newsletter. And don’t forget that you can support us on Patreon for backer rewards like early video content, Administratum access, an ad-free experience on our website and more.
