Once again, hot off the presses (I’ve pulled another late one to get this out for the deadline), it’s time for another Kings of War event report! This weekend I attended War Up North #3, at Element Games Stockport.
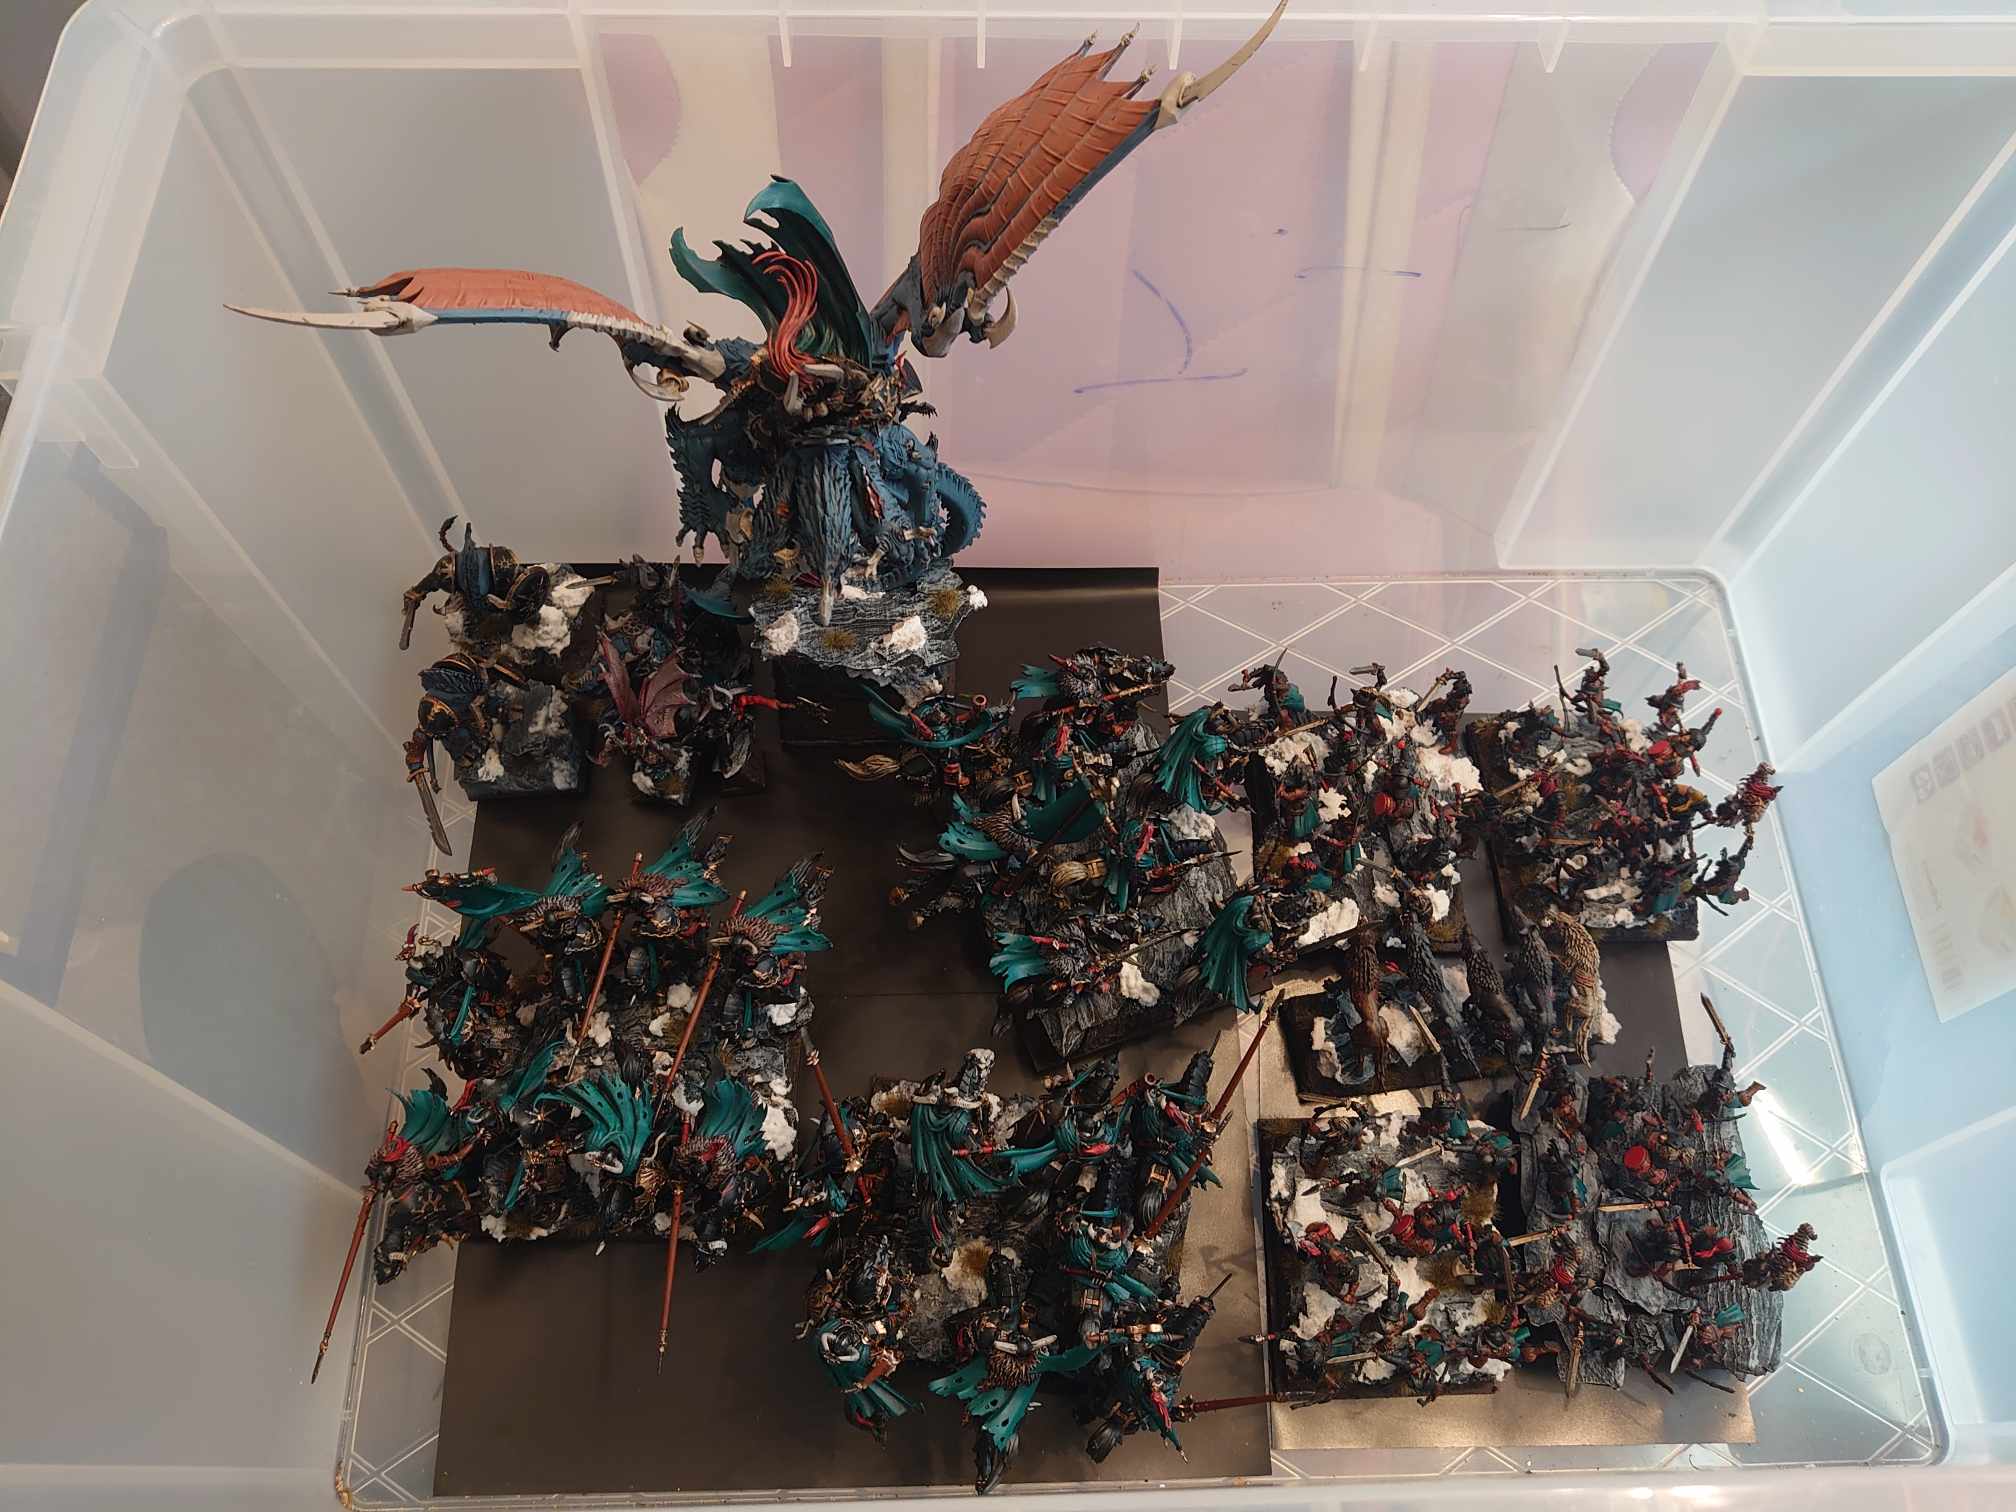
As a reminder, this is what I was taking to the event.
Army list - click to expand
I talked about my prep for this and what the stakes are pretty extensively elsewhere, so I won’t repeat myself. Suffice to say, after much testing I was feeling confident and really needed a good score. Time to see if all the work paid off!
We knew in advance that the scenarios would be:
- Salt the Earth
- Dominate
- Loot
- Push
- Control
We also knew Allies were allowed, and that there would be no Turn 7 in any game. This is A Choice, but love it or hate it it’s how the event is. Kings of War events often have their own little foibles, and it’s certainly much better than some of the other wackiness I’ve seen out there.
The last bit of helpful knowledge, thanks to TO Robert putting the round one draw up early, was that I’d be facing Lukasz Jarochowski in the first round. Delightful.
Round 1 – Salt the Earth – Lukasz Jarochowski, Salamanders
What a way to start the event. If I’m going to have to go up against one of the best players attending, I’d certainly rather do it in the round where I get five days to prepare, and on the table with a decent amount of relevant terrain to cower in. That said, playing Warmachine for many years has taught me to have great respect for the skill of anyone with even the slightest hint of Polish in their name, and I didn’t intend to make an exception here.
Army list - click to expand
I’m fortunate enough that my boyfriend recently switched to playing Salamanders, funnily enough after seeing Lukasz do well with this exact list at Clash of Kings 2024. So, I’ve had a decent number of reps against it, and am reasonably confident in the matchup. Stealthy on my entire army is obviously a huge help, and I can shoot back with decent power. That said, the sheer volume of guns here will entirely delete one of my units from full to dead if I let Lukasz concentrate fire.
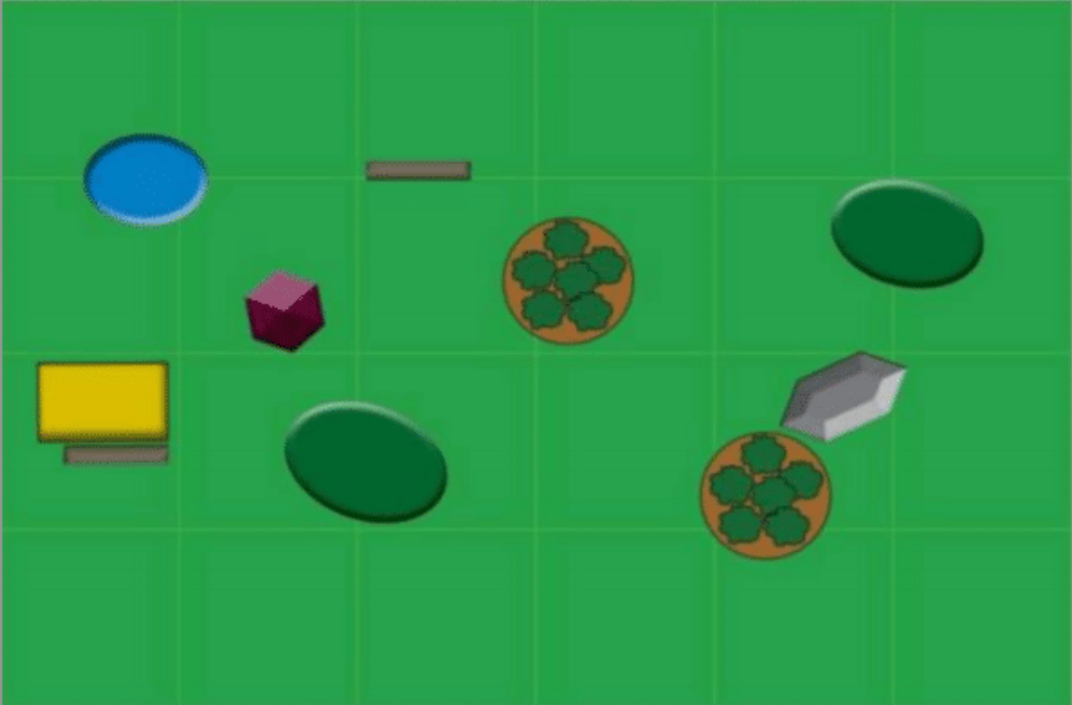
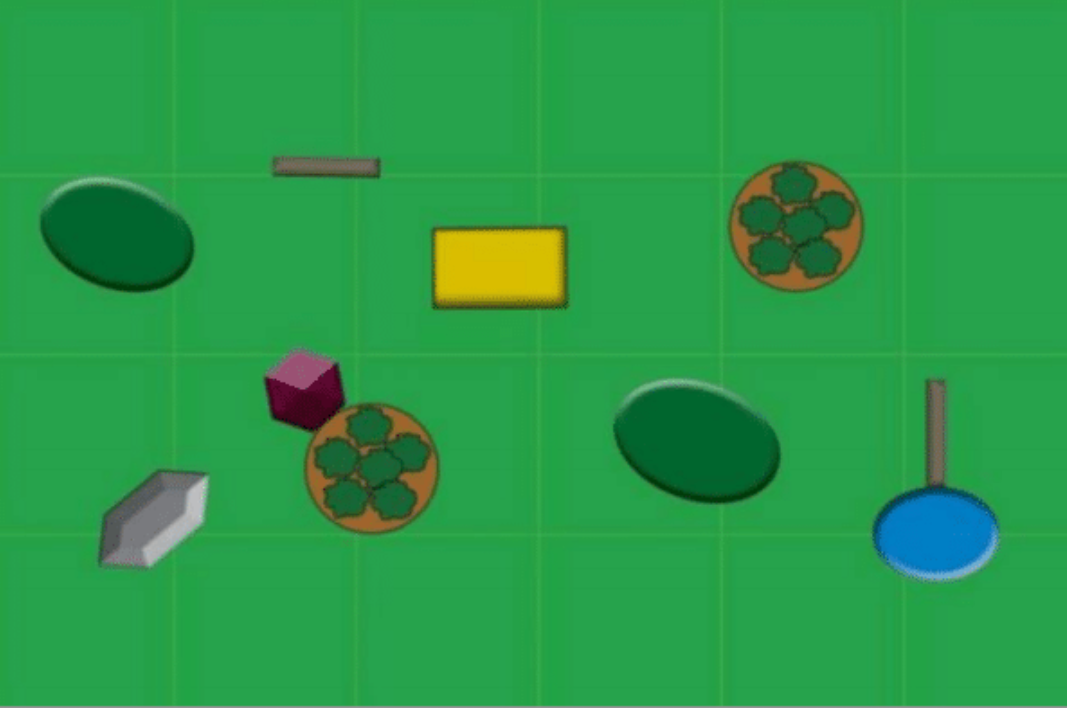
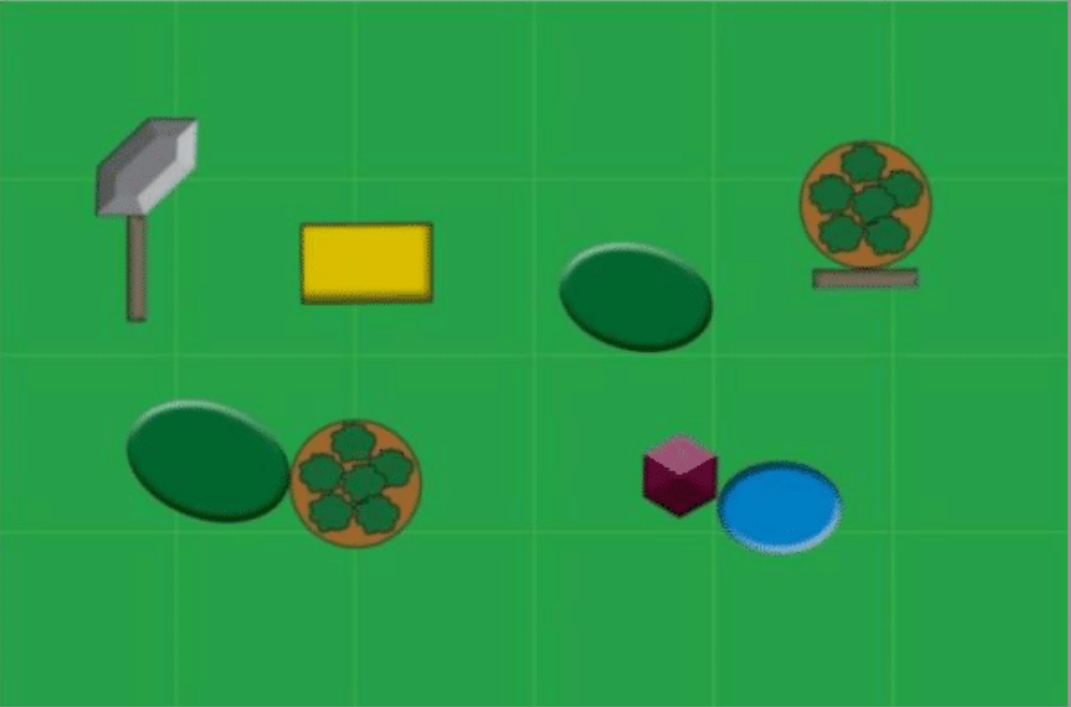
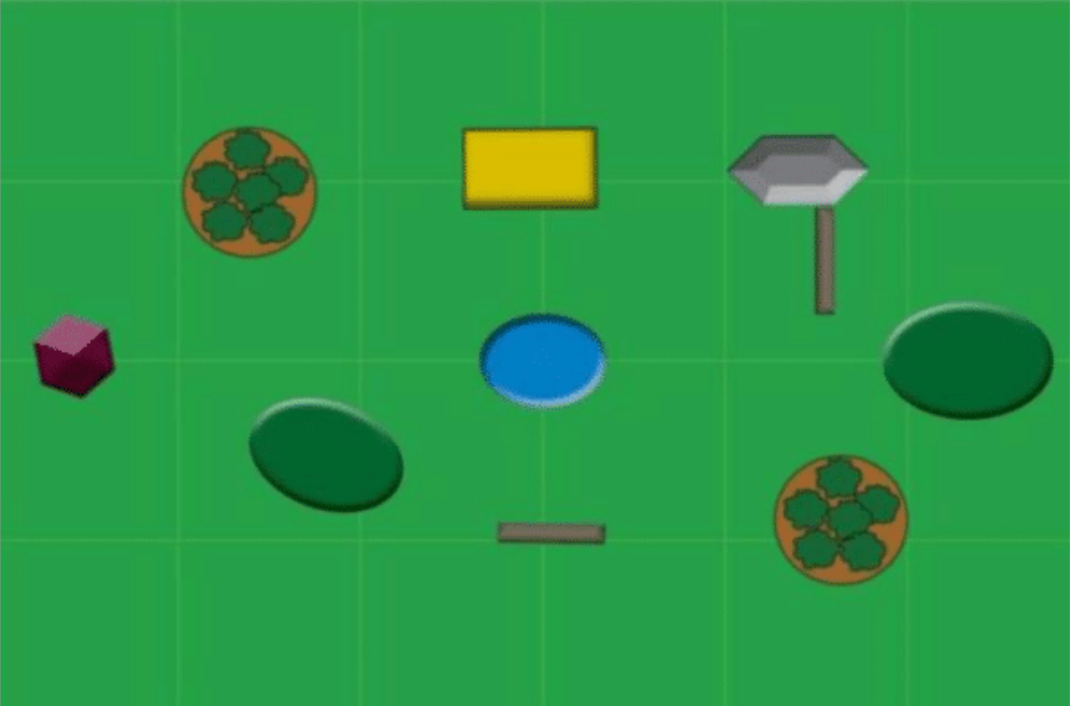
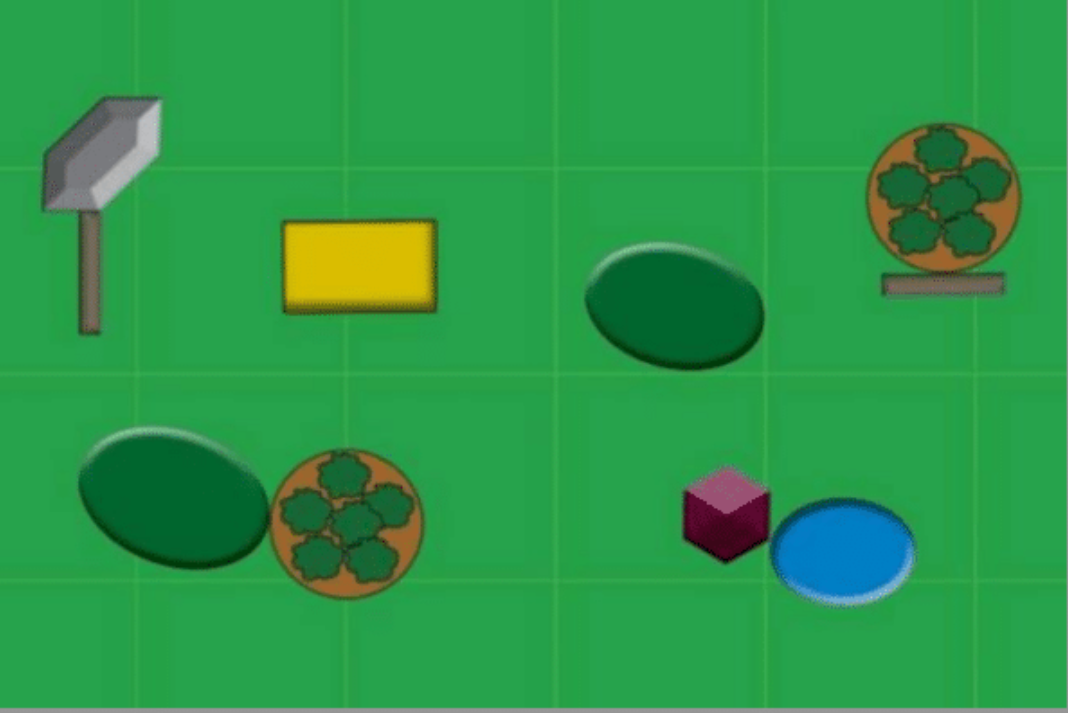
I reviewed the terrain and scenario pretty extensively in the lead-up, because I am very normal and spend a normal amount of time looking at things. I actually went as far as exporting our lists into Google Slides on a scale mock-up of the map, complete with objective placement, just to get an idea of how the game might play out. Here’s what the map looks like in the tournament pack – I’ll put the rest above each subsequent game.
The result of all this research was a pretty pessimistic take on things. When preparing for a matchup, I usually invoke the spirit of the Imaginary German. This is an old mental construct I use in wargaming, where you basically imagine a player (German, naturally), who is your superior in skill at the table, and try to work out how they would play it by a trial-and-error of ‘what screws up my plans the worst’. The Imaginary German lives rent-free in my head and has helped me many a time, and here was no exception – I knew I would probably want Lukasz to have to split his forces rather than refuse a flank, because most of the refused flank imaginings led to messy losses for me. So, I’d have to get my objective placement exactly right.
Having done all this planning, I arrived at the event. The draw was made live, and we’d been re-paired due to a Companion error. After some carousing about wanting anyone but Lukasz please, I learned to be careful what I wish for – the redraw stood, as it would be too much hassle to realistically ask the TO to go through and redo it. I’m going to take a minute to complain about Companion here, because between Clash ‘24 and this it’s not been ideal compared to every other app I’ve used over the years. I’m aware the TO could have fixed it. The issue is that he shouldn’t have to fix it, and it makes me a bit grumpy for the rest of the day.
So, let’s try this again.
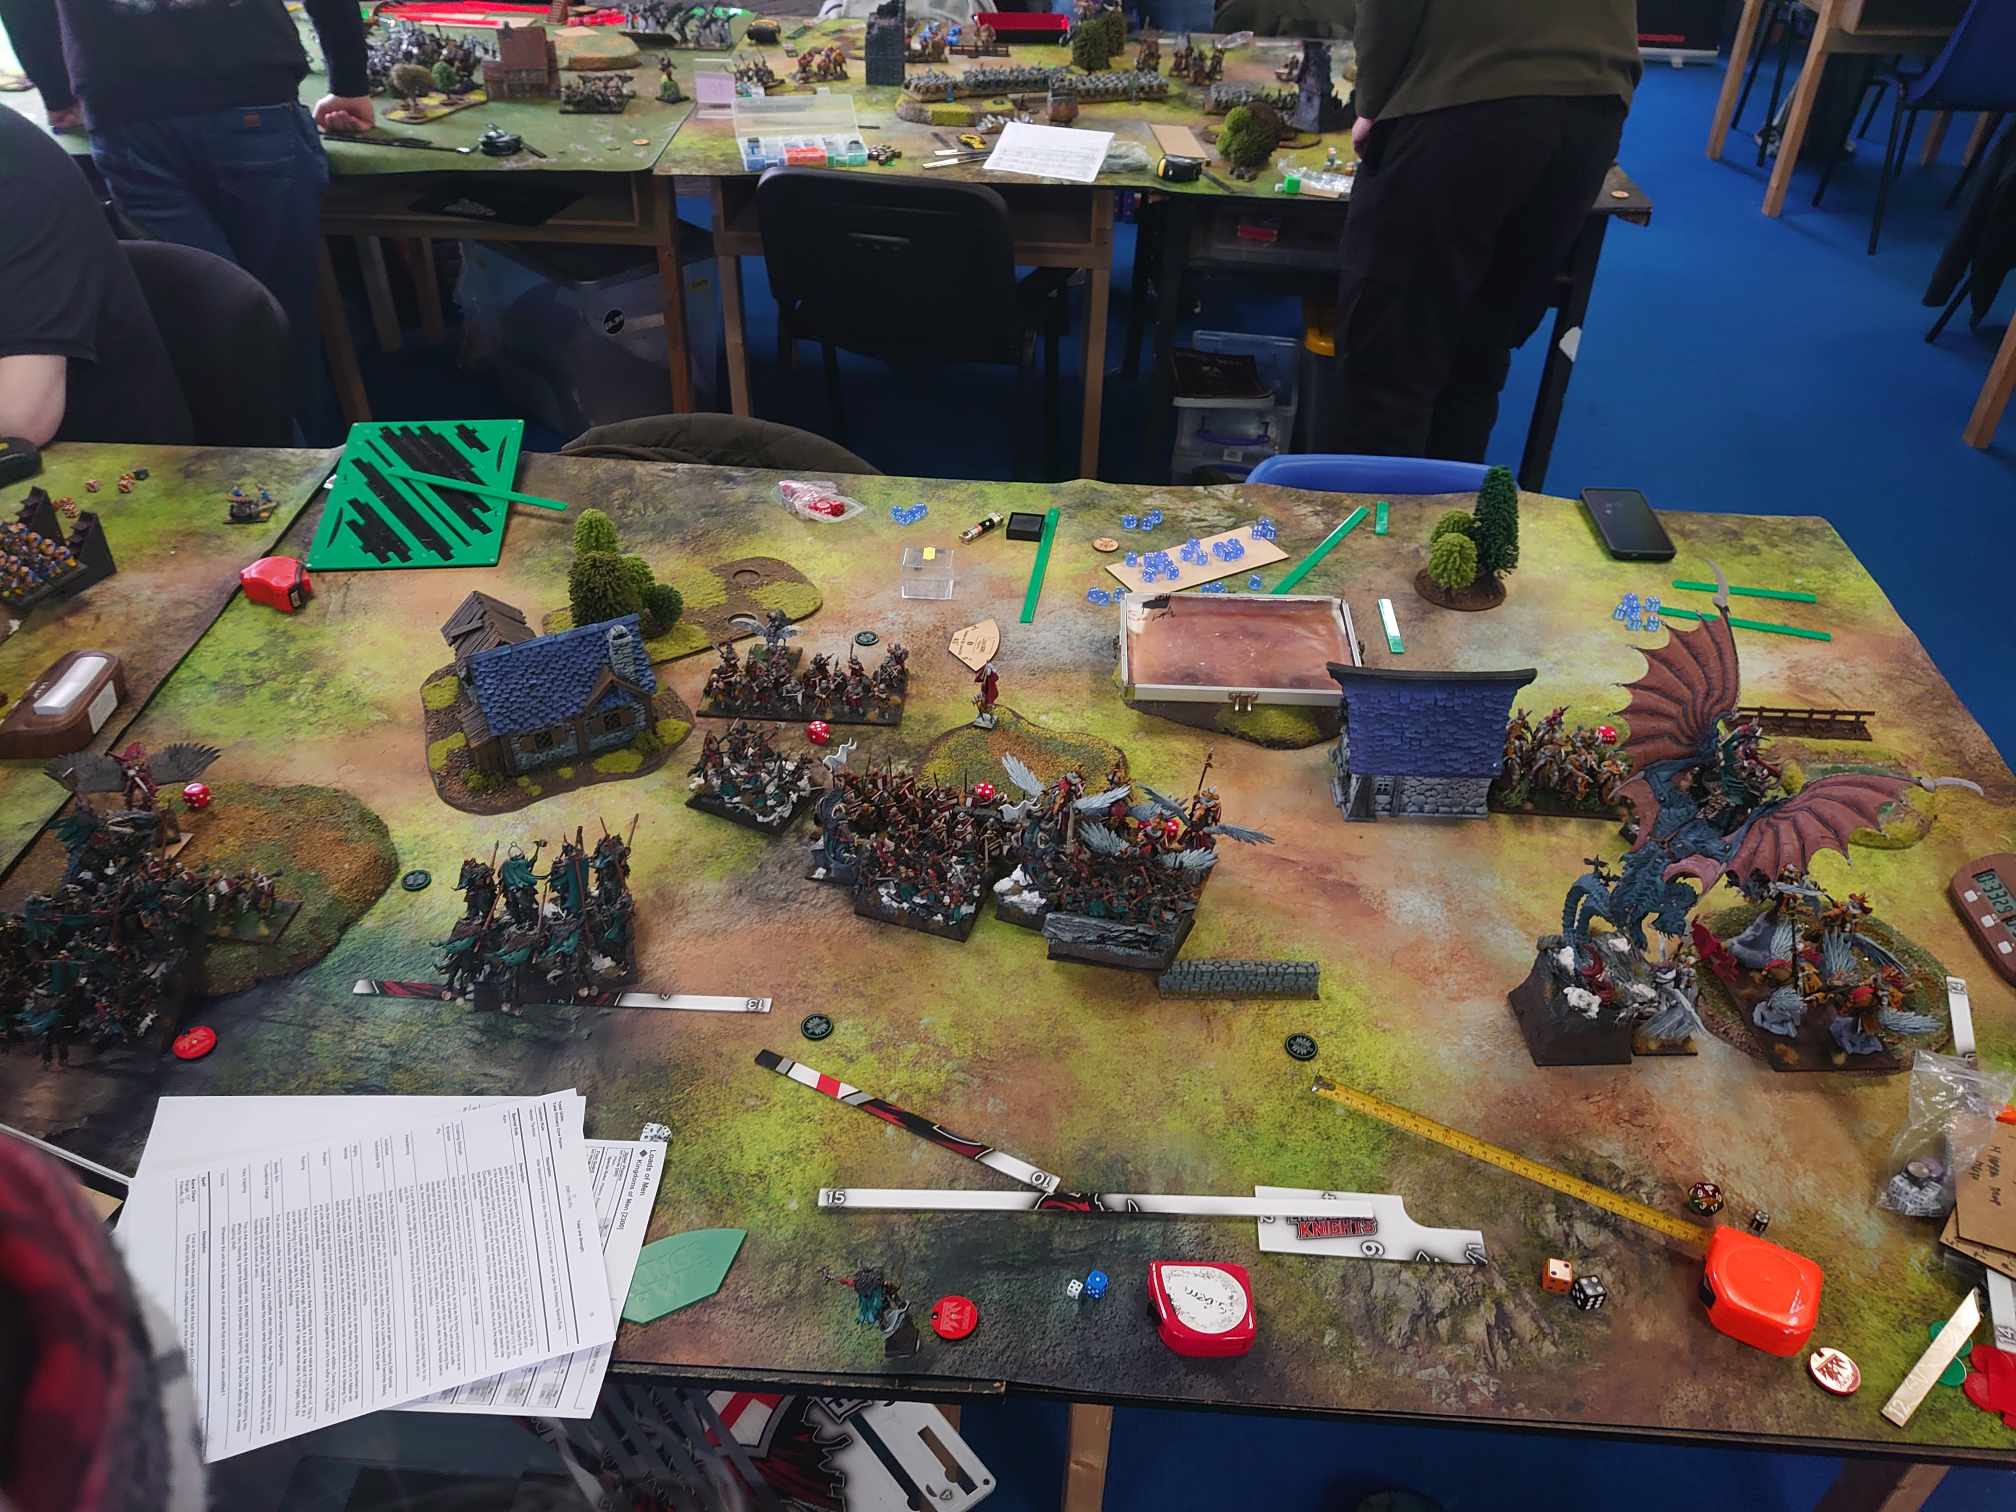
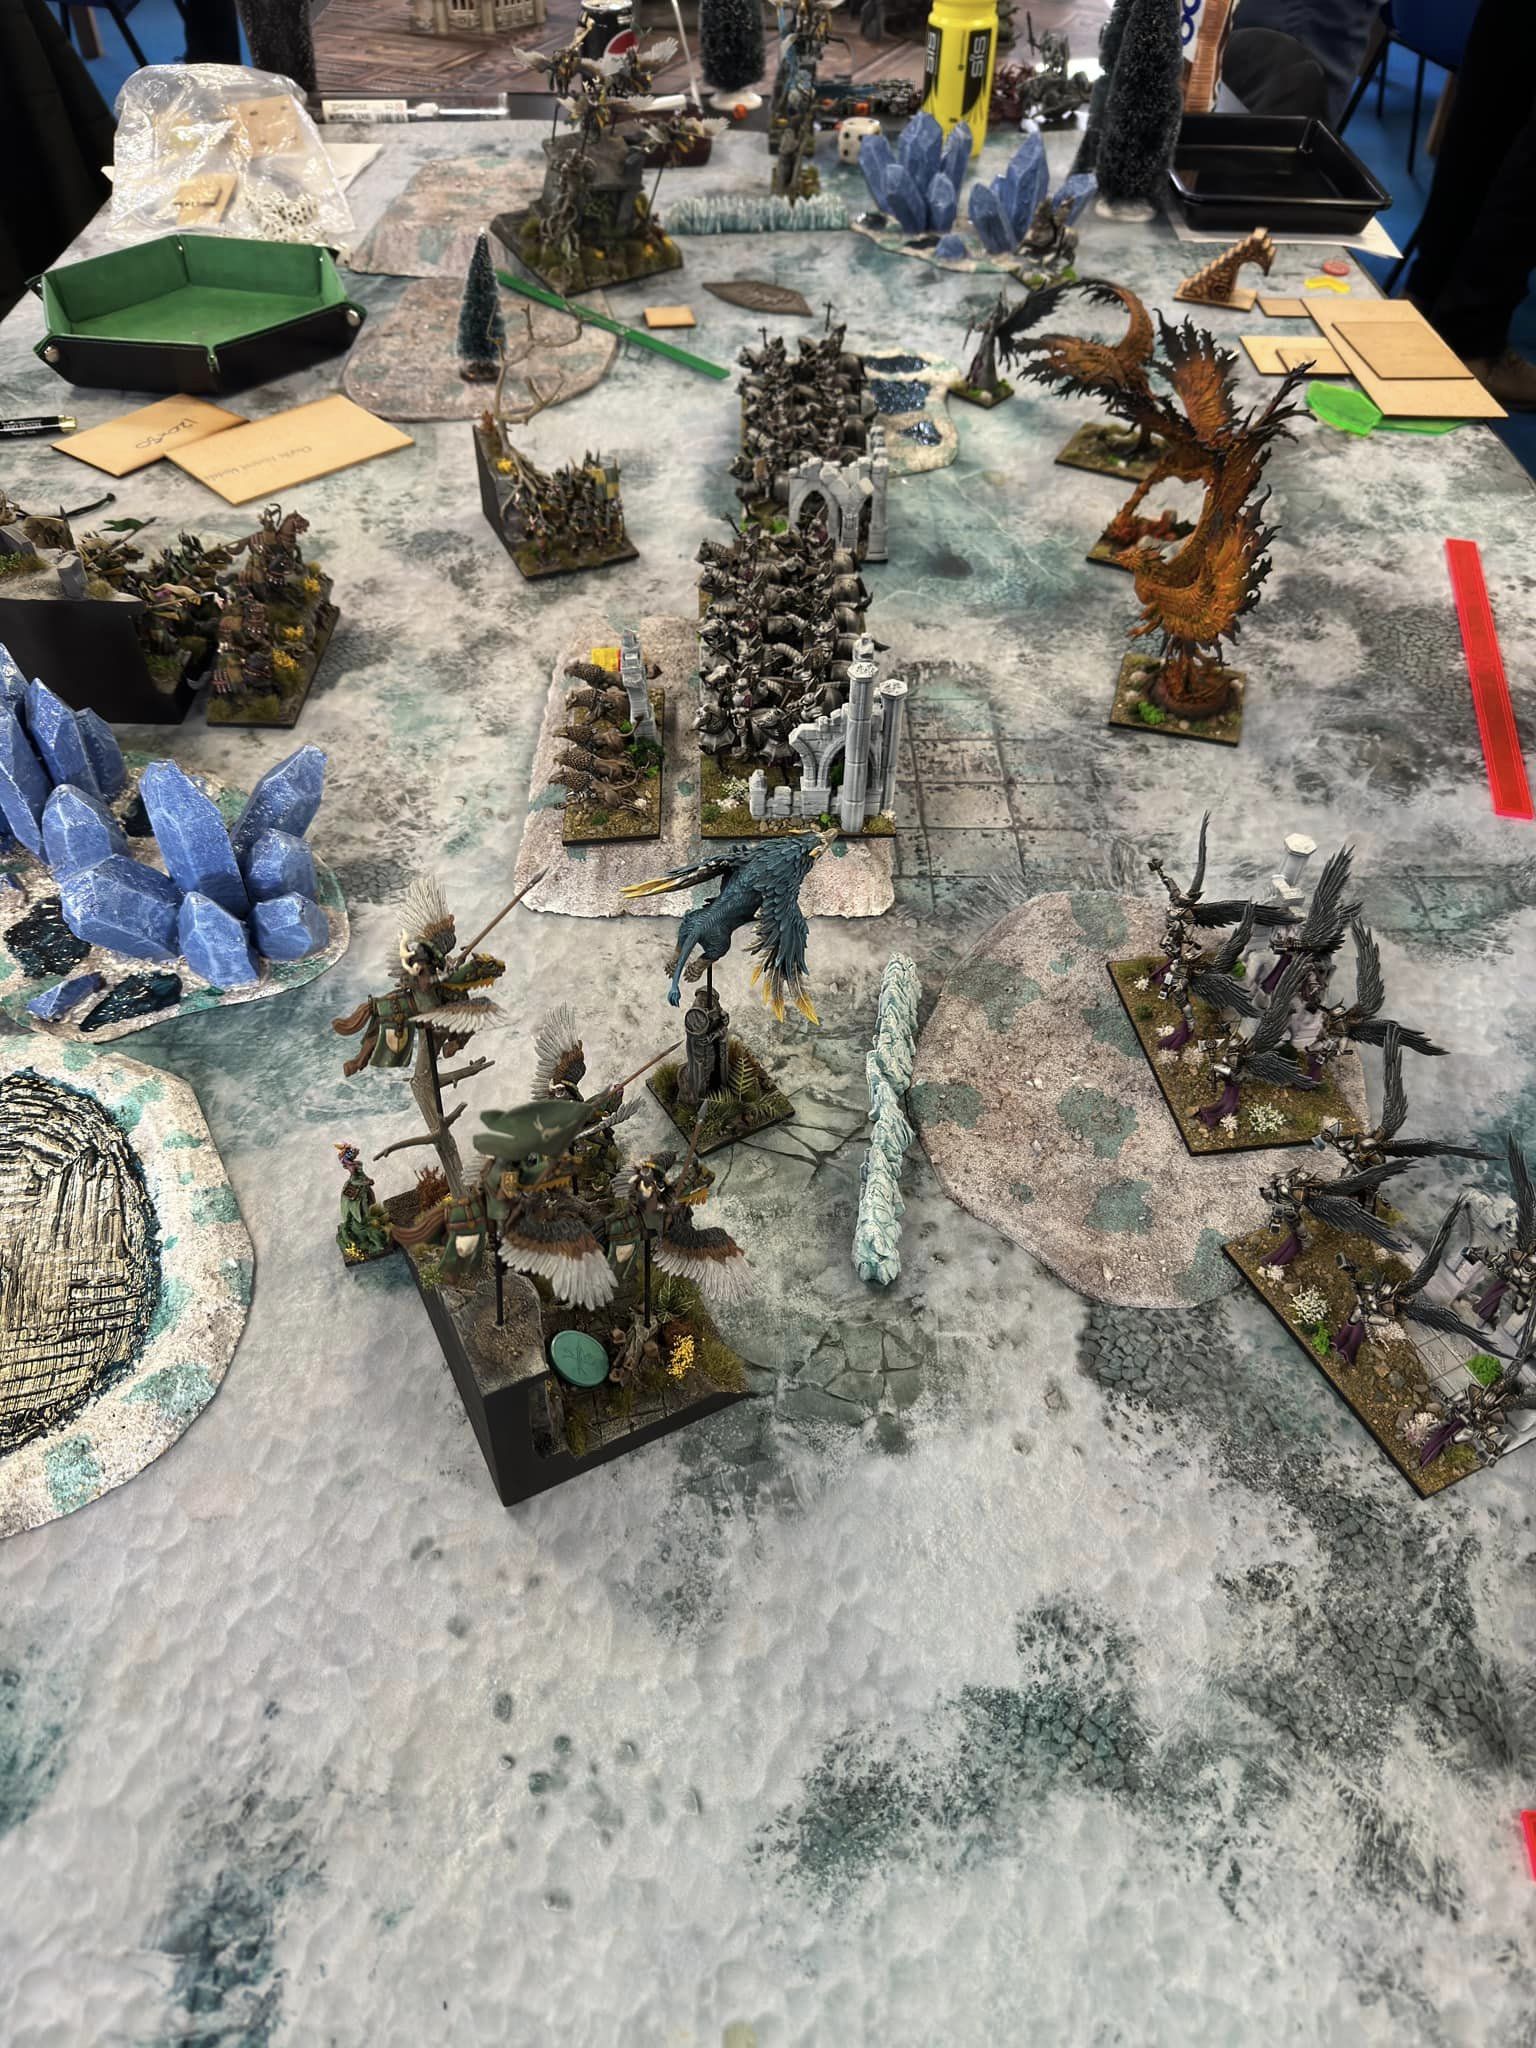
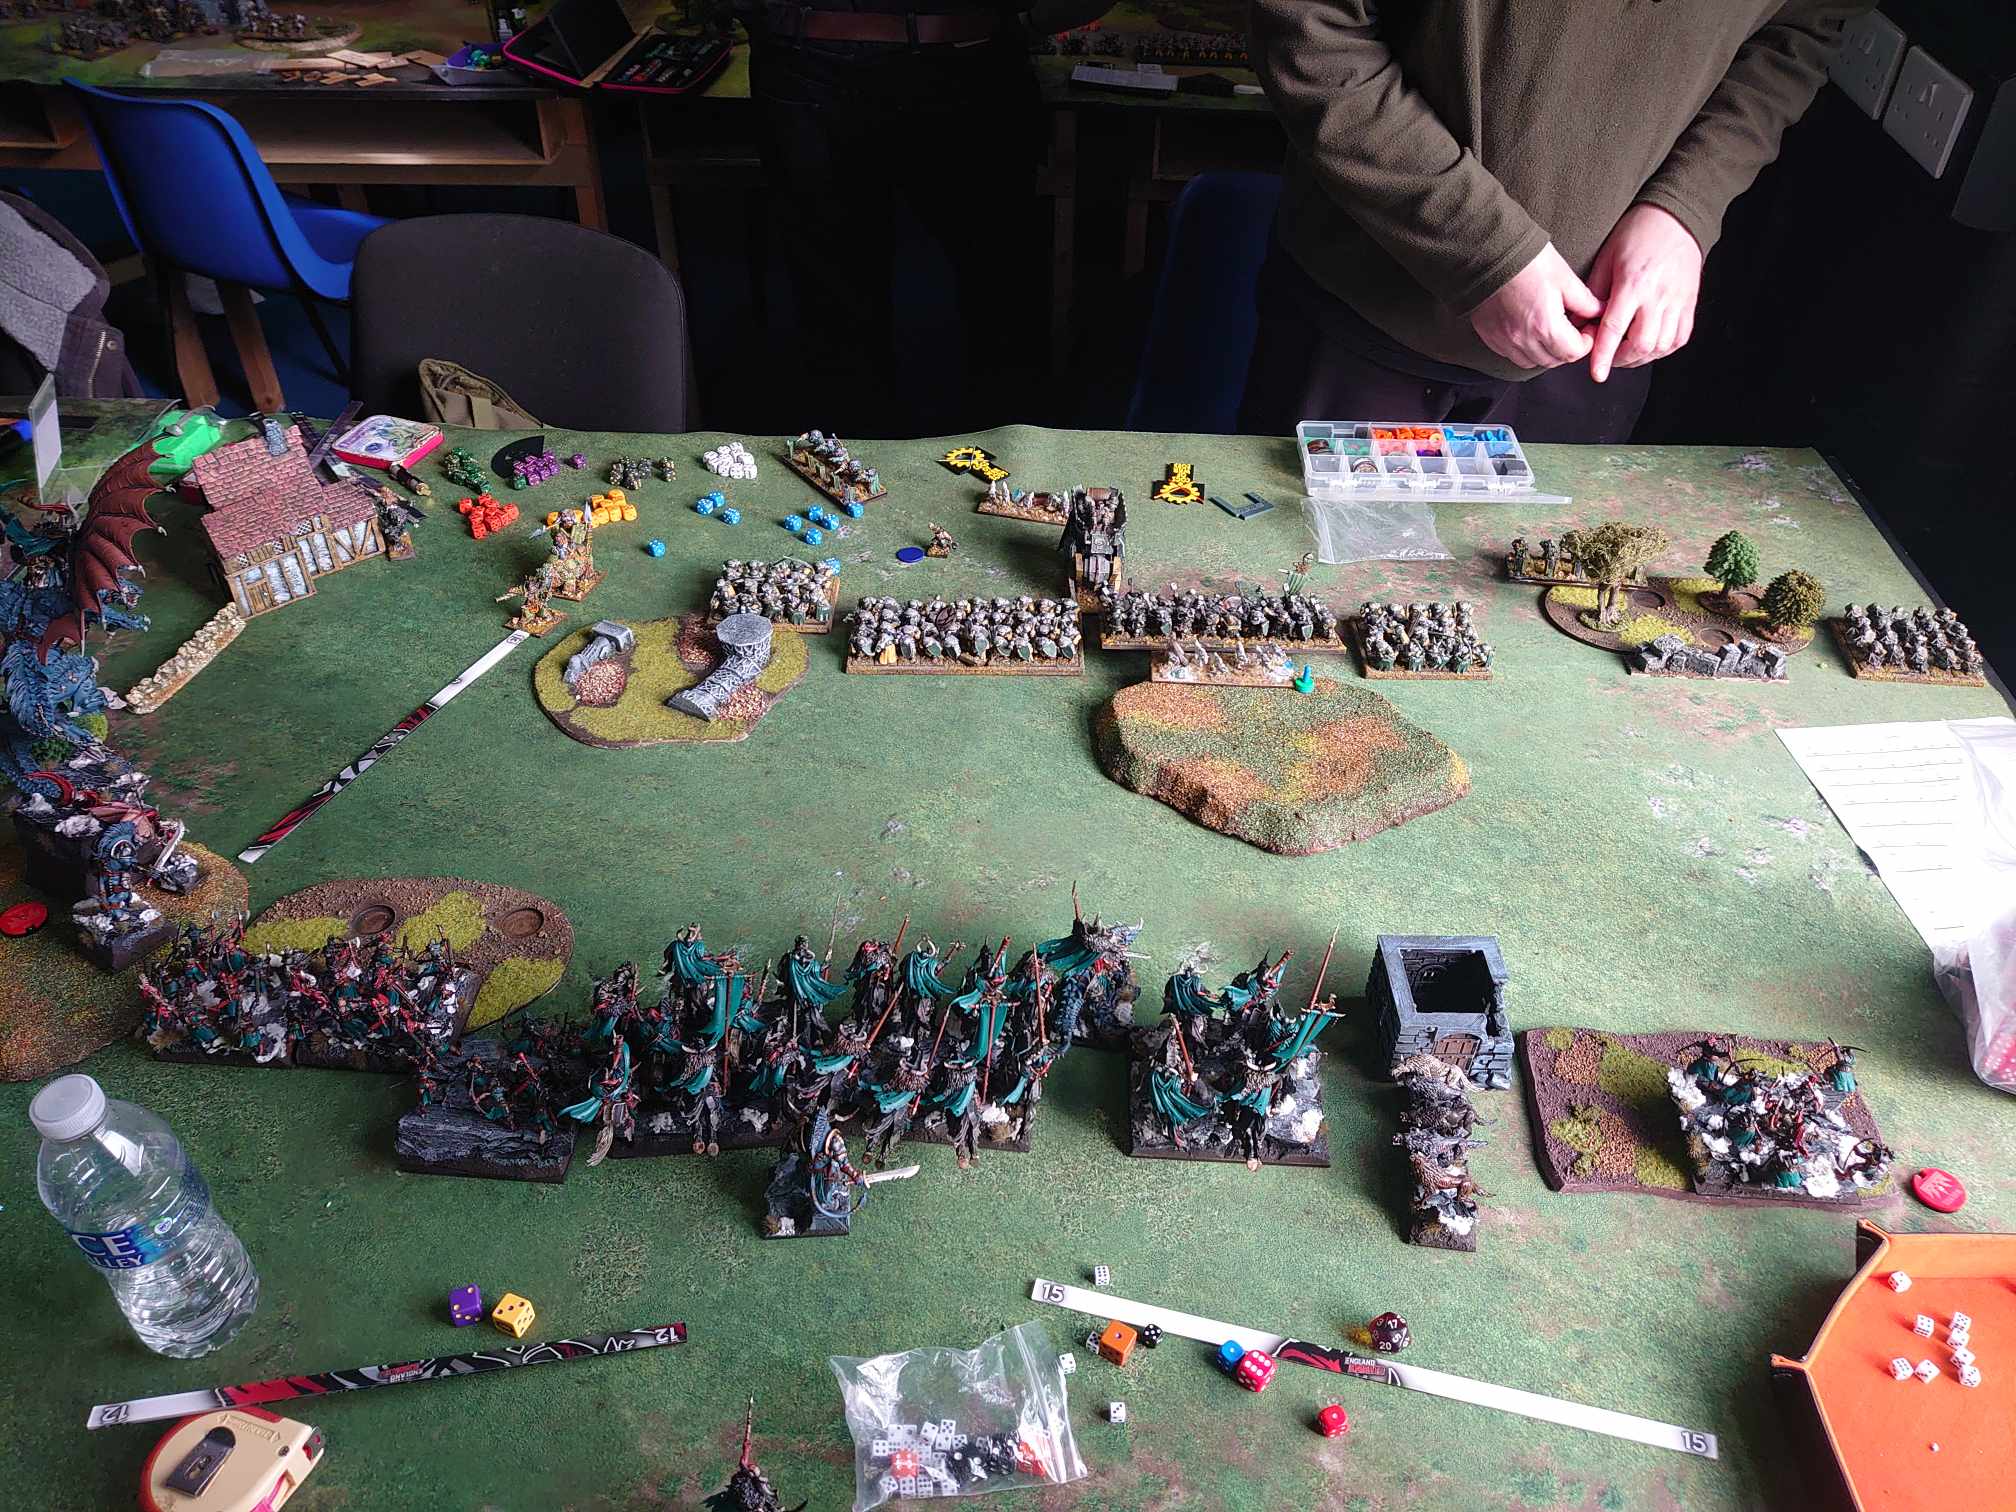
Round 1 – Salt the Earth – Ged Courtney, Kingdoms of Men
Uh-oh. Ged was originally paired against my friend Jake, so I had specifically not looked at his list much beforehand as I wouldn’t need to in round 1. However, Jake is playing Northern Alliance, who are very similar to Varangur. The upshot is that Ged has been preparing for basically me, whereas I’ve been preparing for the complete opposite of him. Instead of a gunline, I’m now playing against a bag of melee hammers, backed up with big blocks of infantry.
Army list - click to expand
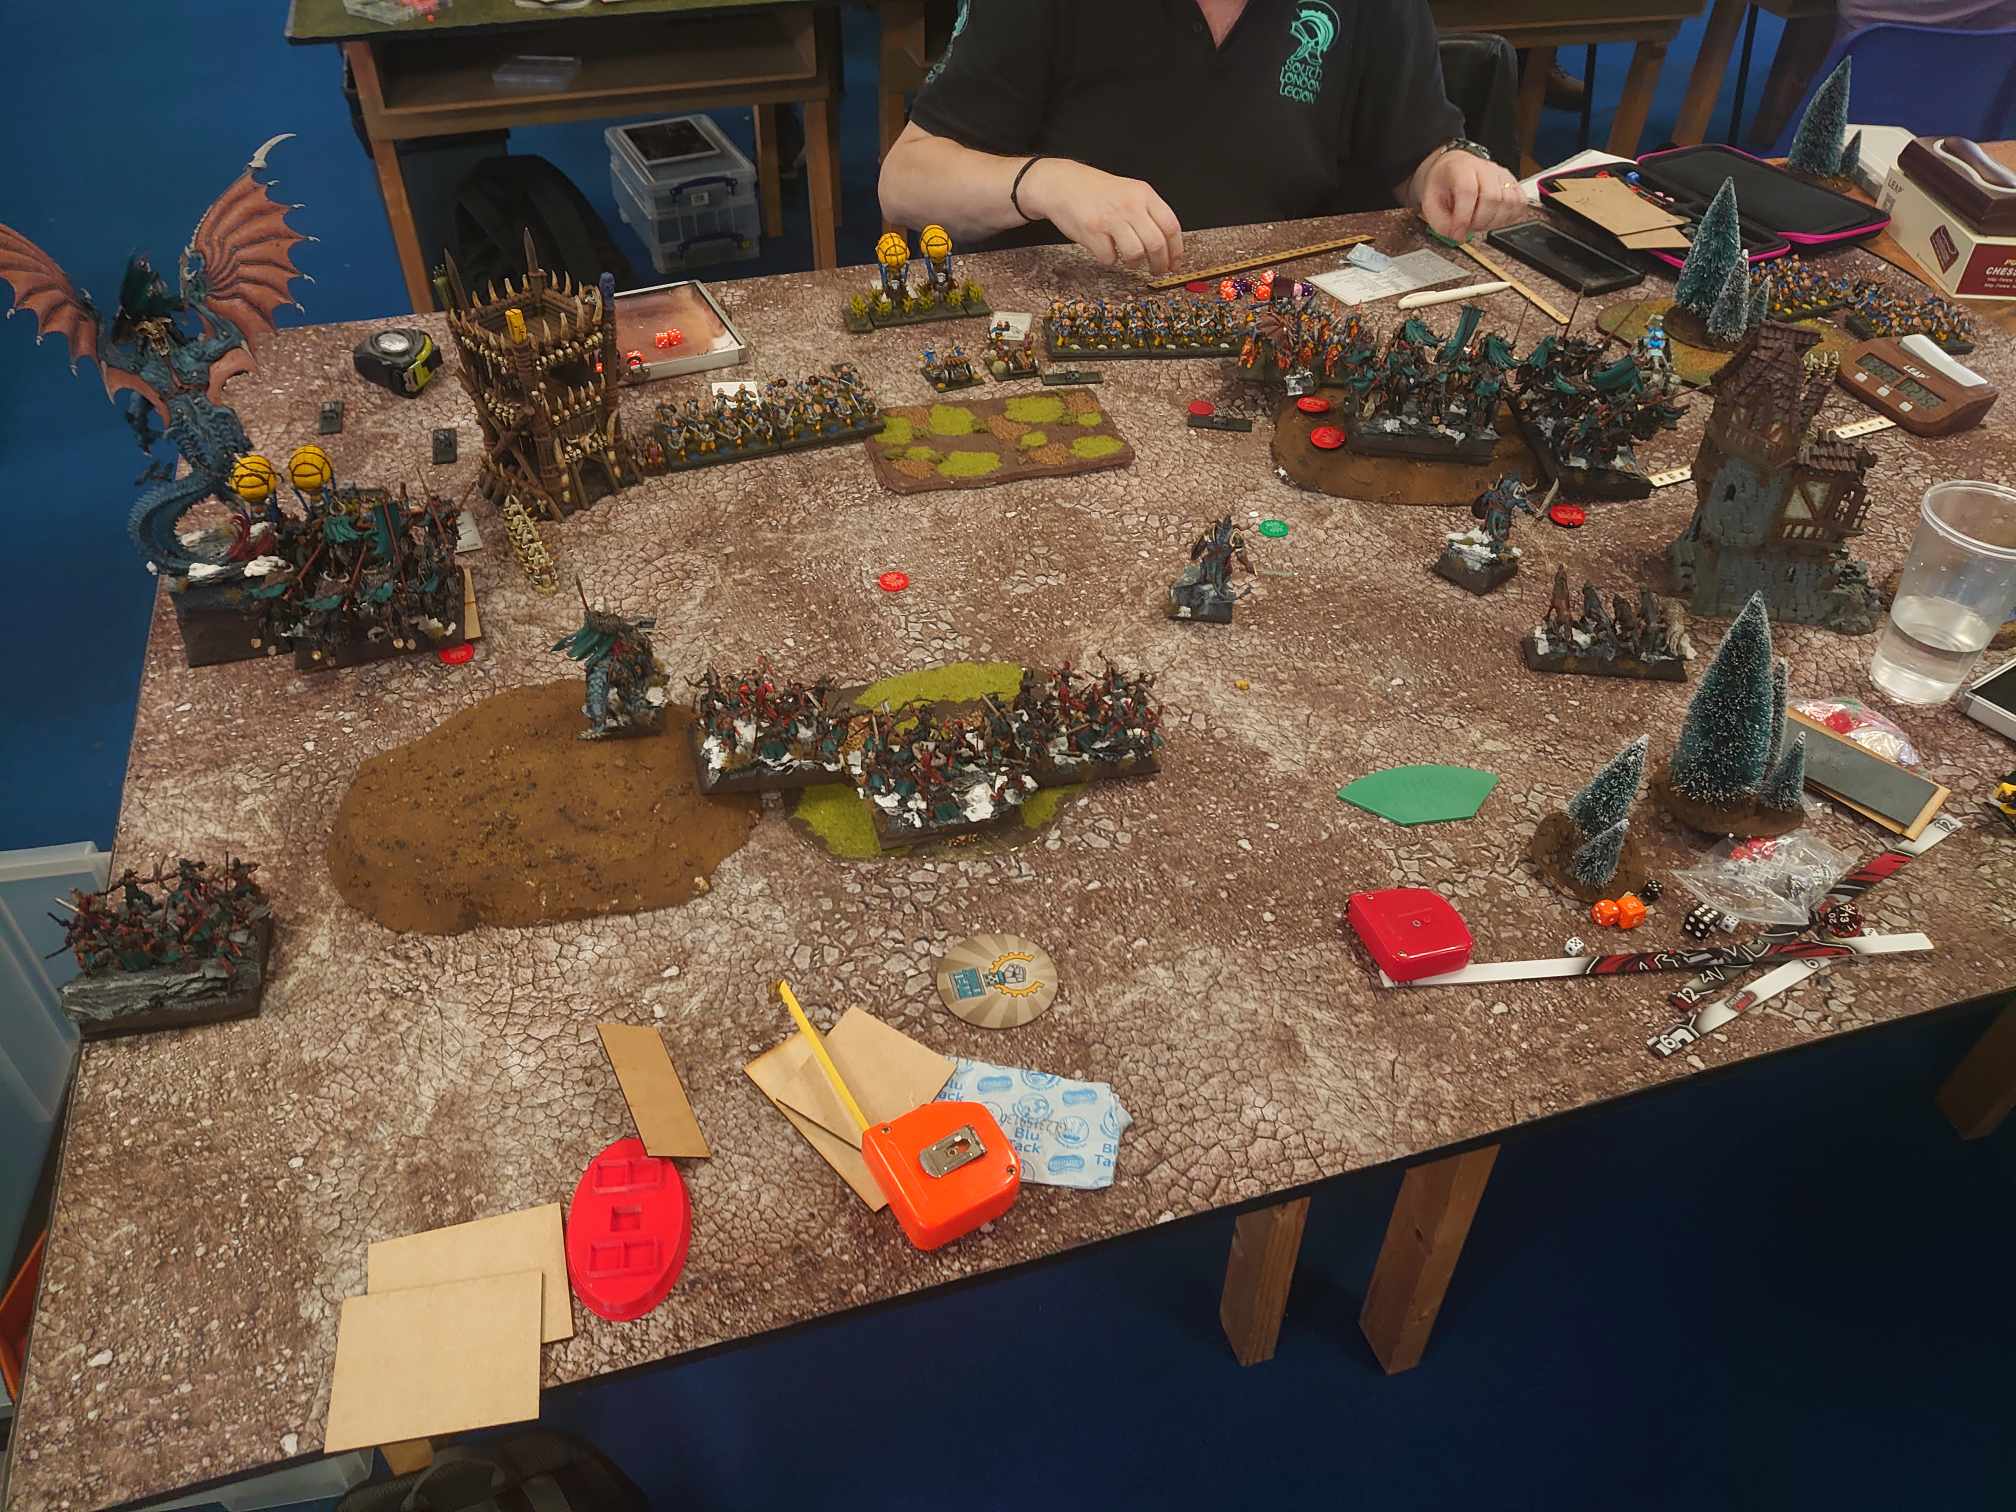
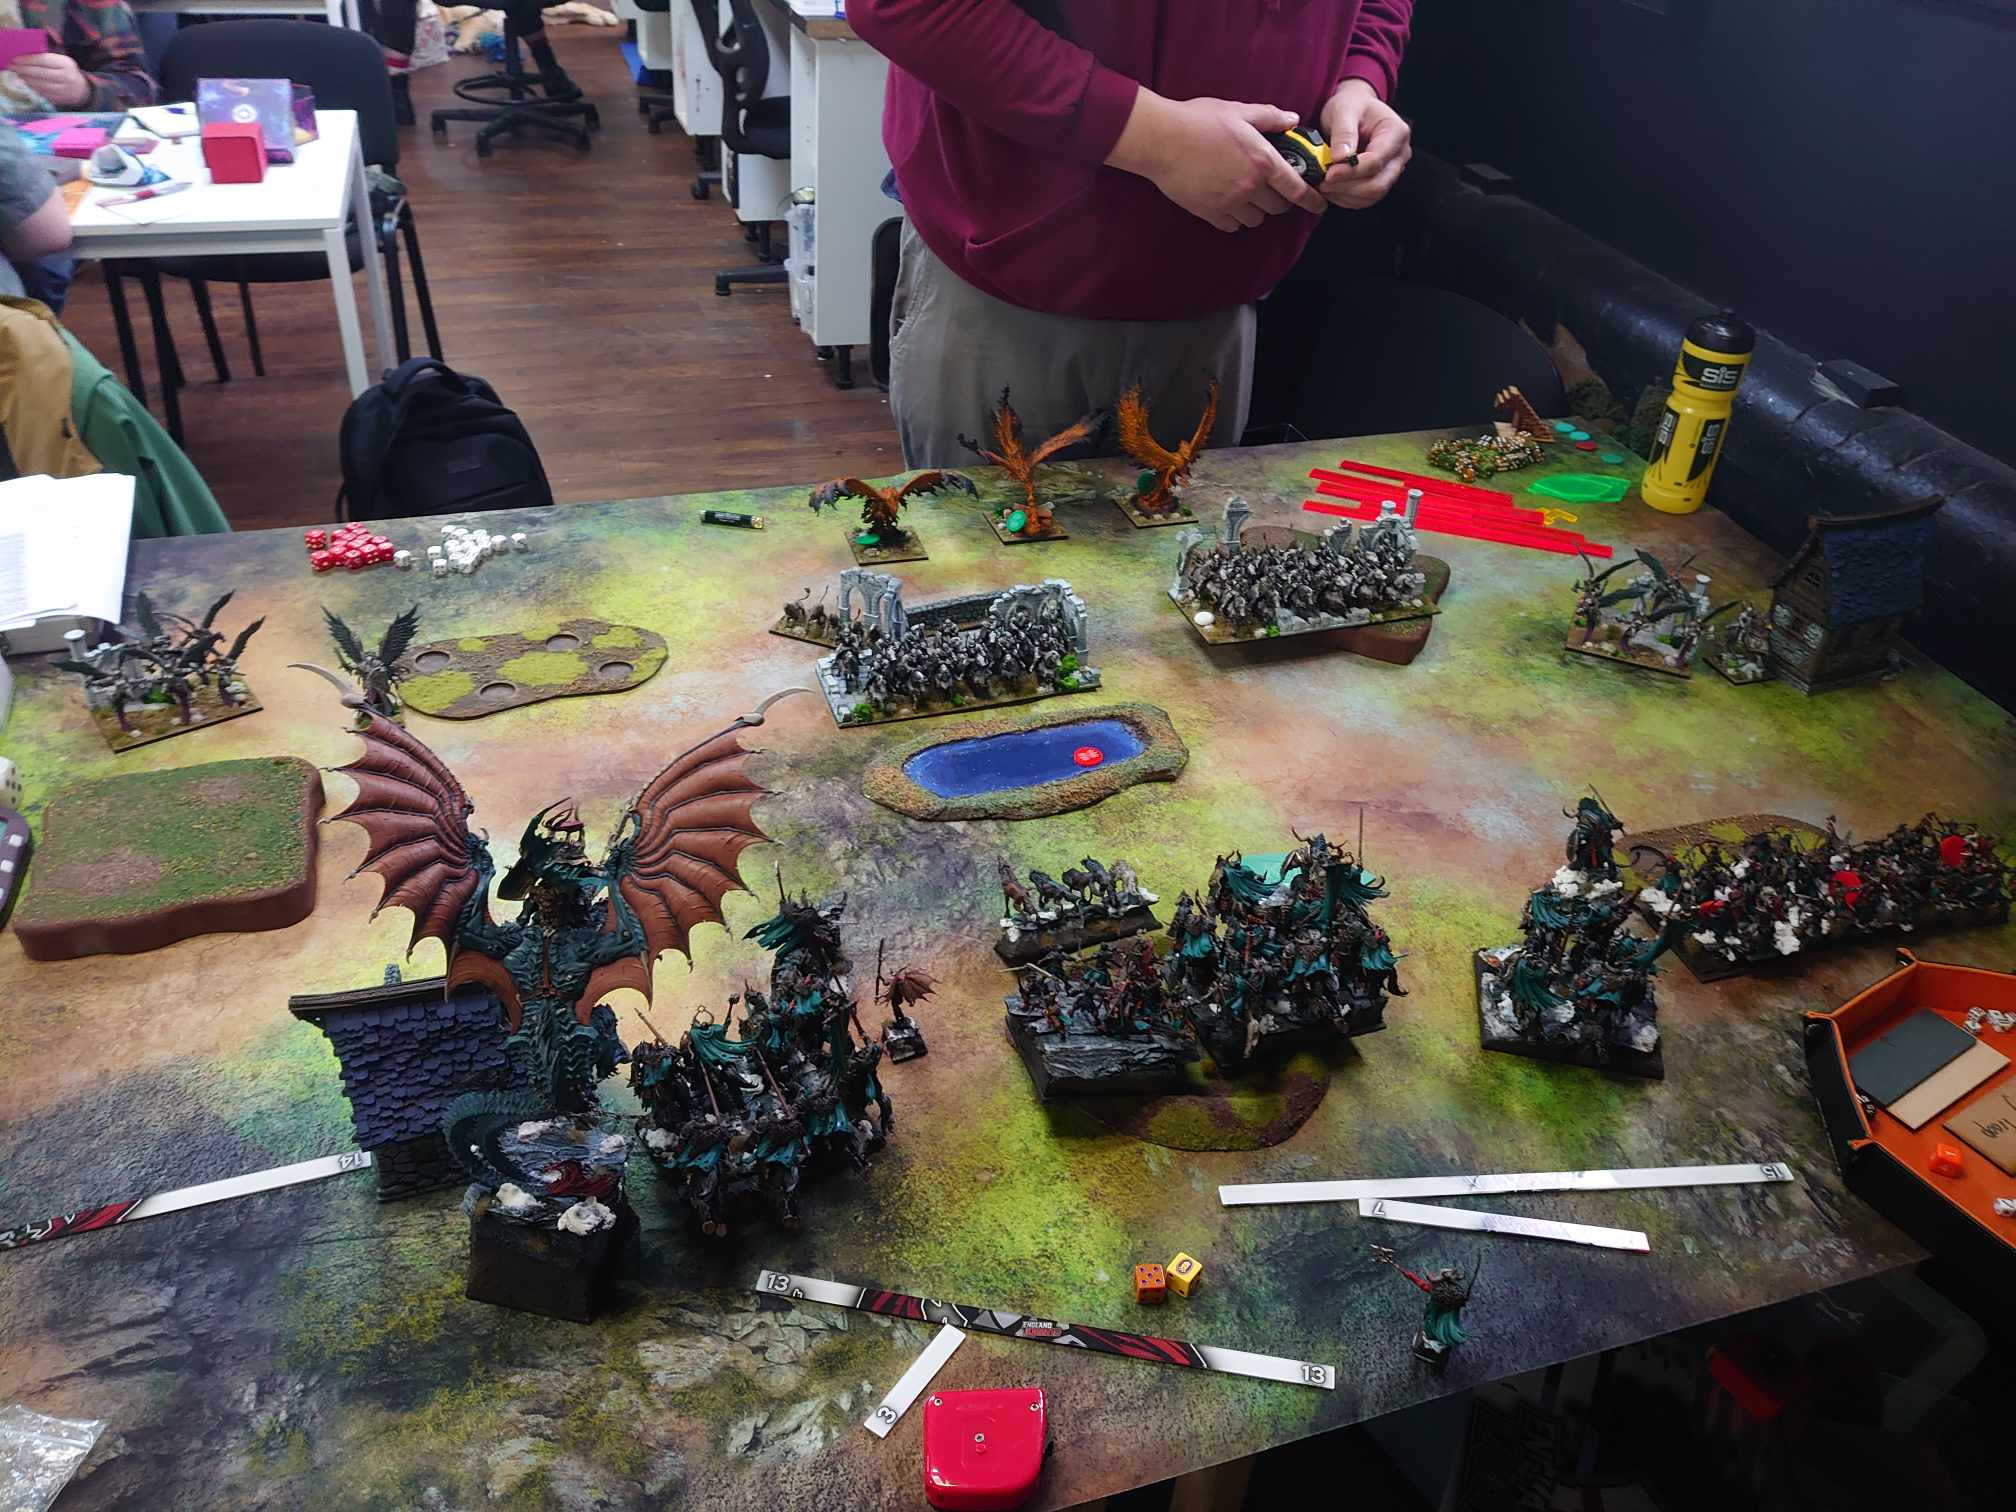
I’ve been up till the small hours getting things ready round the house, as we’re hosting in the evening, so my brainpower is a bit limited. I therefore fumble my objective placement, essentially playing the matchup I previously had rather than the one in front of me. This means I’m going to be fighting in some less than ideal places, against an army faster than mine. This couldn’t get much worse. As a reminder, here’s the map:
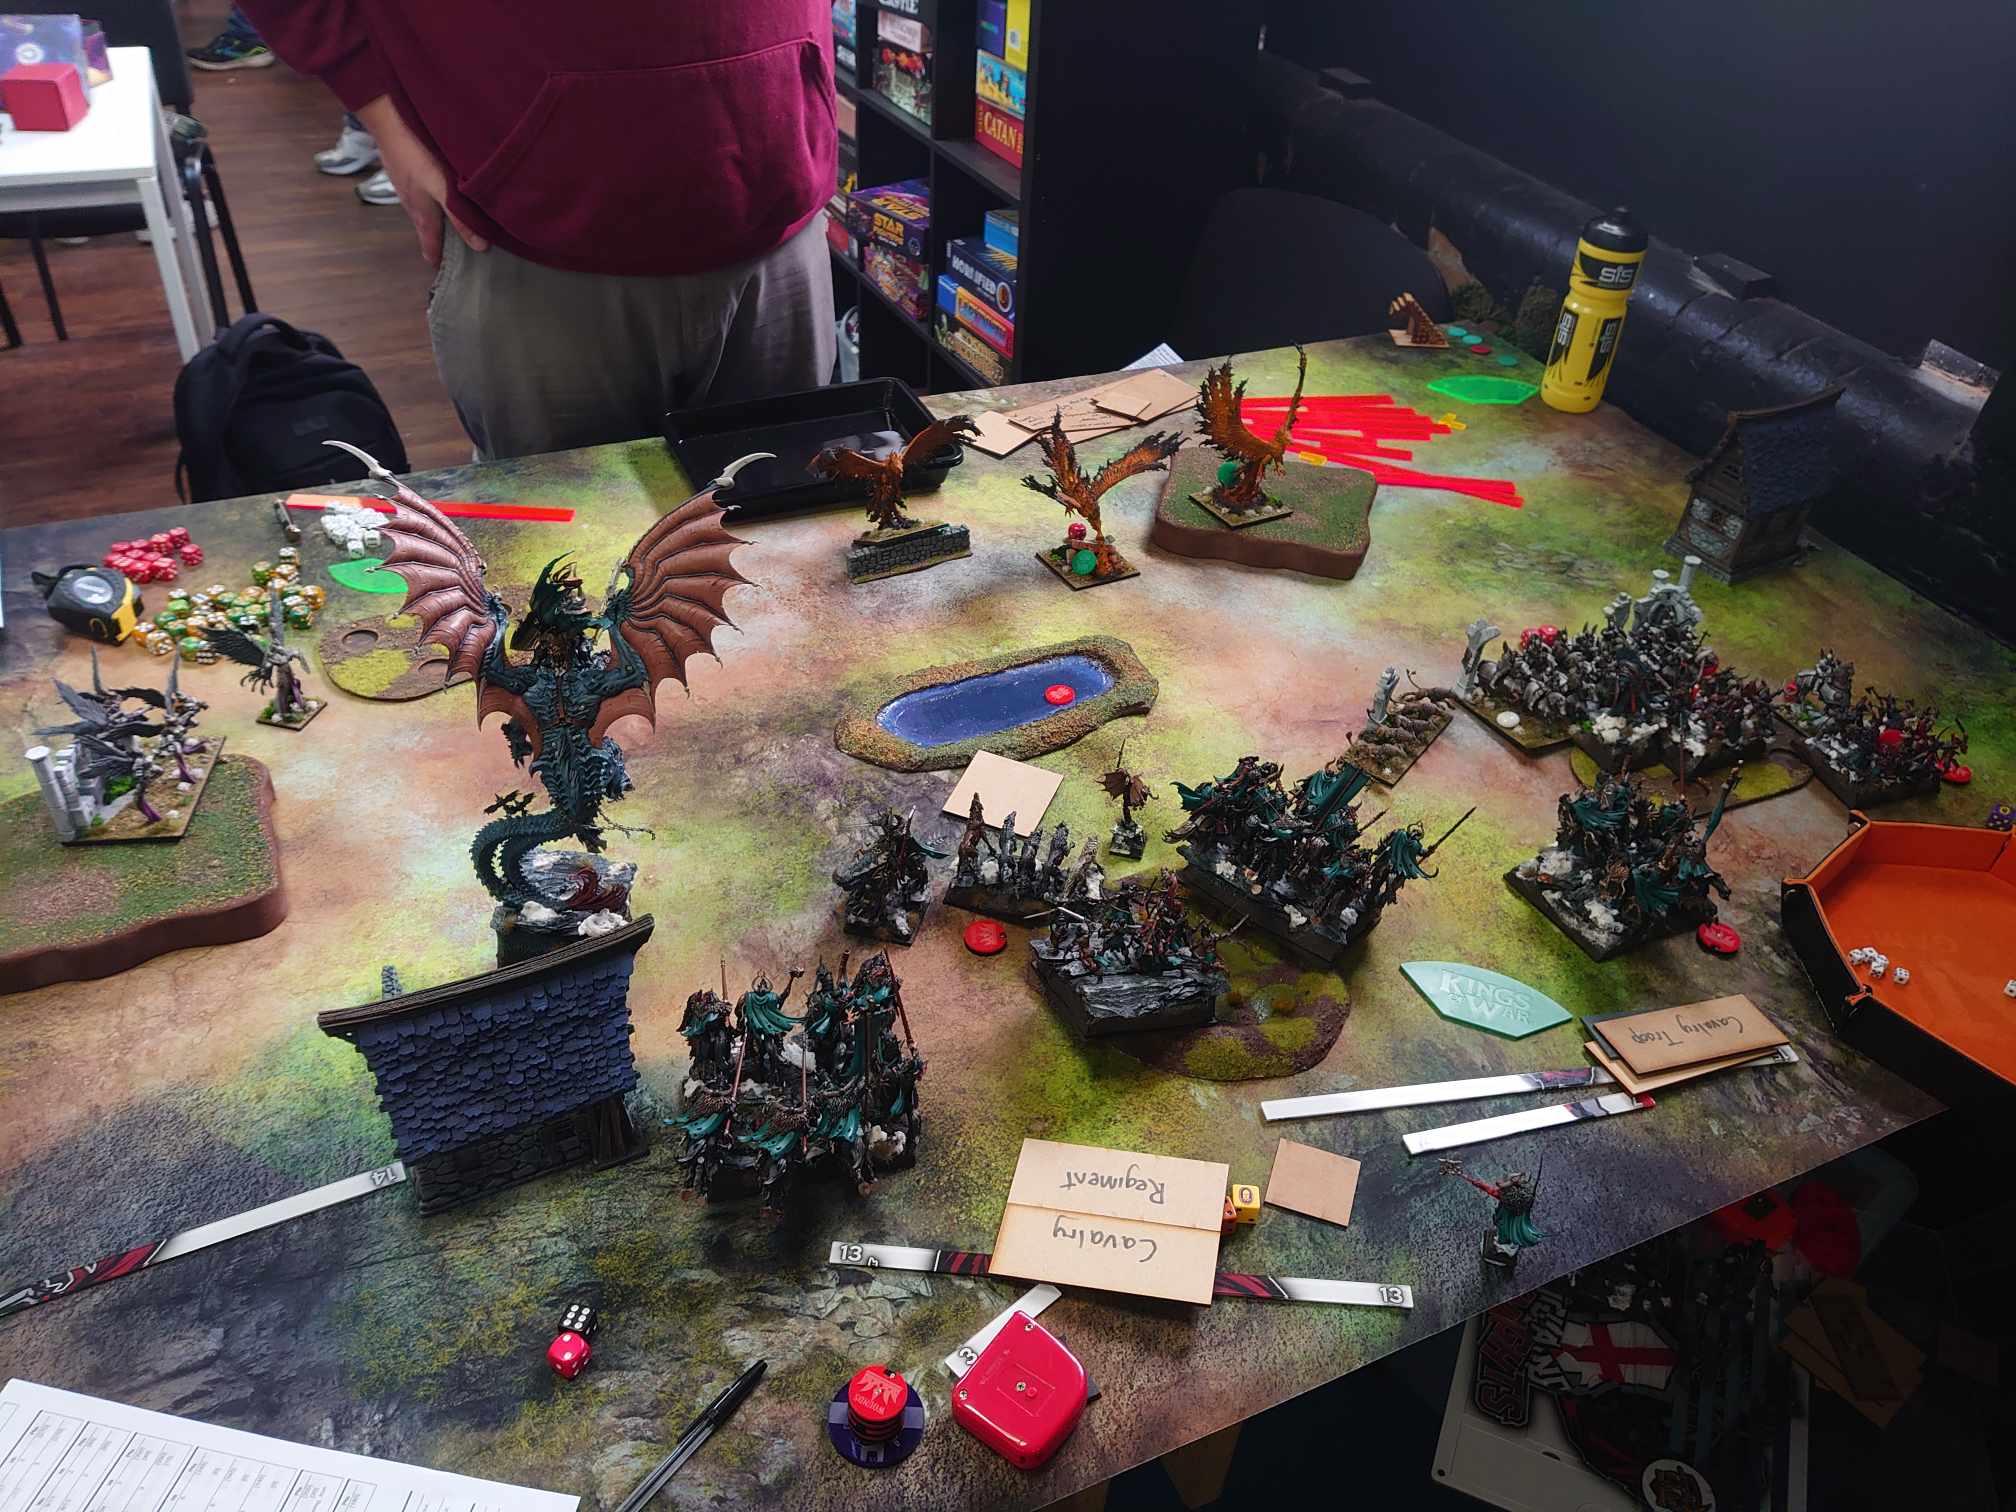
I lose the roll to take first turn, and it gets worse. Ged immediately piles the pressure on my vulnerable right flank. I burn the objective there, but eventually I’m going to get rolled up, and there’s not much I can do about it. Compounding things is the blunting of my left flank by an unfortunate double 6 to Waver my Mounted Sons of Korgaan, and a failure to pick up or even Waver some Beast Cavalry in the centre.
My misery deepens when I make an error, not measuring a General on Winged Beast charge into my Sons of Korgaan on the right – I just didn’t notice the guy was there, so honestly inexcusable. This takes them from a survivable single charge to a wipeout double, so the right gets rolled up much faster, everything eventually dying by turn 4-ish. The centre is very much going okay, but because reinforcements are filtering round it’s a losing proposition. Ged also has the ideal counter for the Celestial Restoration Magus – a Ht4 wizard with Mind Fog and Hex, the only two spells with range long enough to reach into the literal back board edge and damage potential enough to pop it – so I lose access to healing after Celestial Restoration-ing too close to the sun.
Ultimately, the game goes against me, and I take a heavy loss. Varangur historically struggle with flyers in my experience, and this game was no different to the usual outcome. I do claw back some points with careful positioning, and manage a cheeky objective burn to limit the blowout, but the event scoring isn’t differential-based like Clash ‘24 was so it doesn’t actually matter. Not a happy start to things, considering that I really need some decent ranking points right now, but Ged was lovely to play against and was a new opponent, which is nice when I’d played like a third of the field elsewhere. I apologise that this part of the writeup is a short one, as it’s a disservice to Ged’s solid play, but I’ve effectively written about Round 1 twice here and if I’m bored of it y’all probably are too!
Ged would go on to secure a respectable 3-2, placing 8th of 22 players in a nice return to form for him.
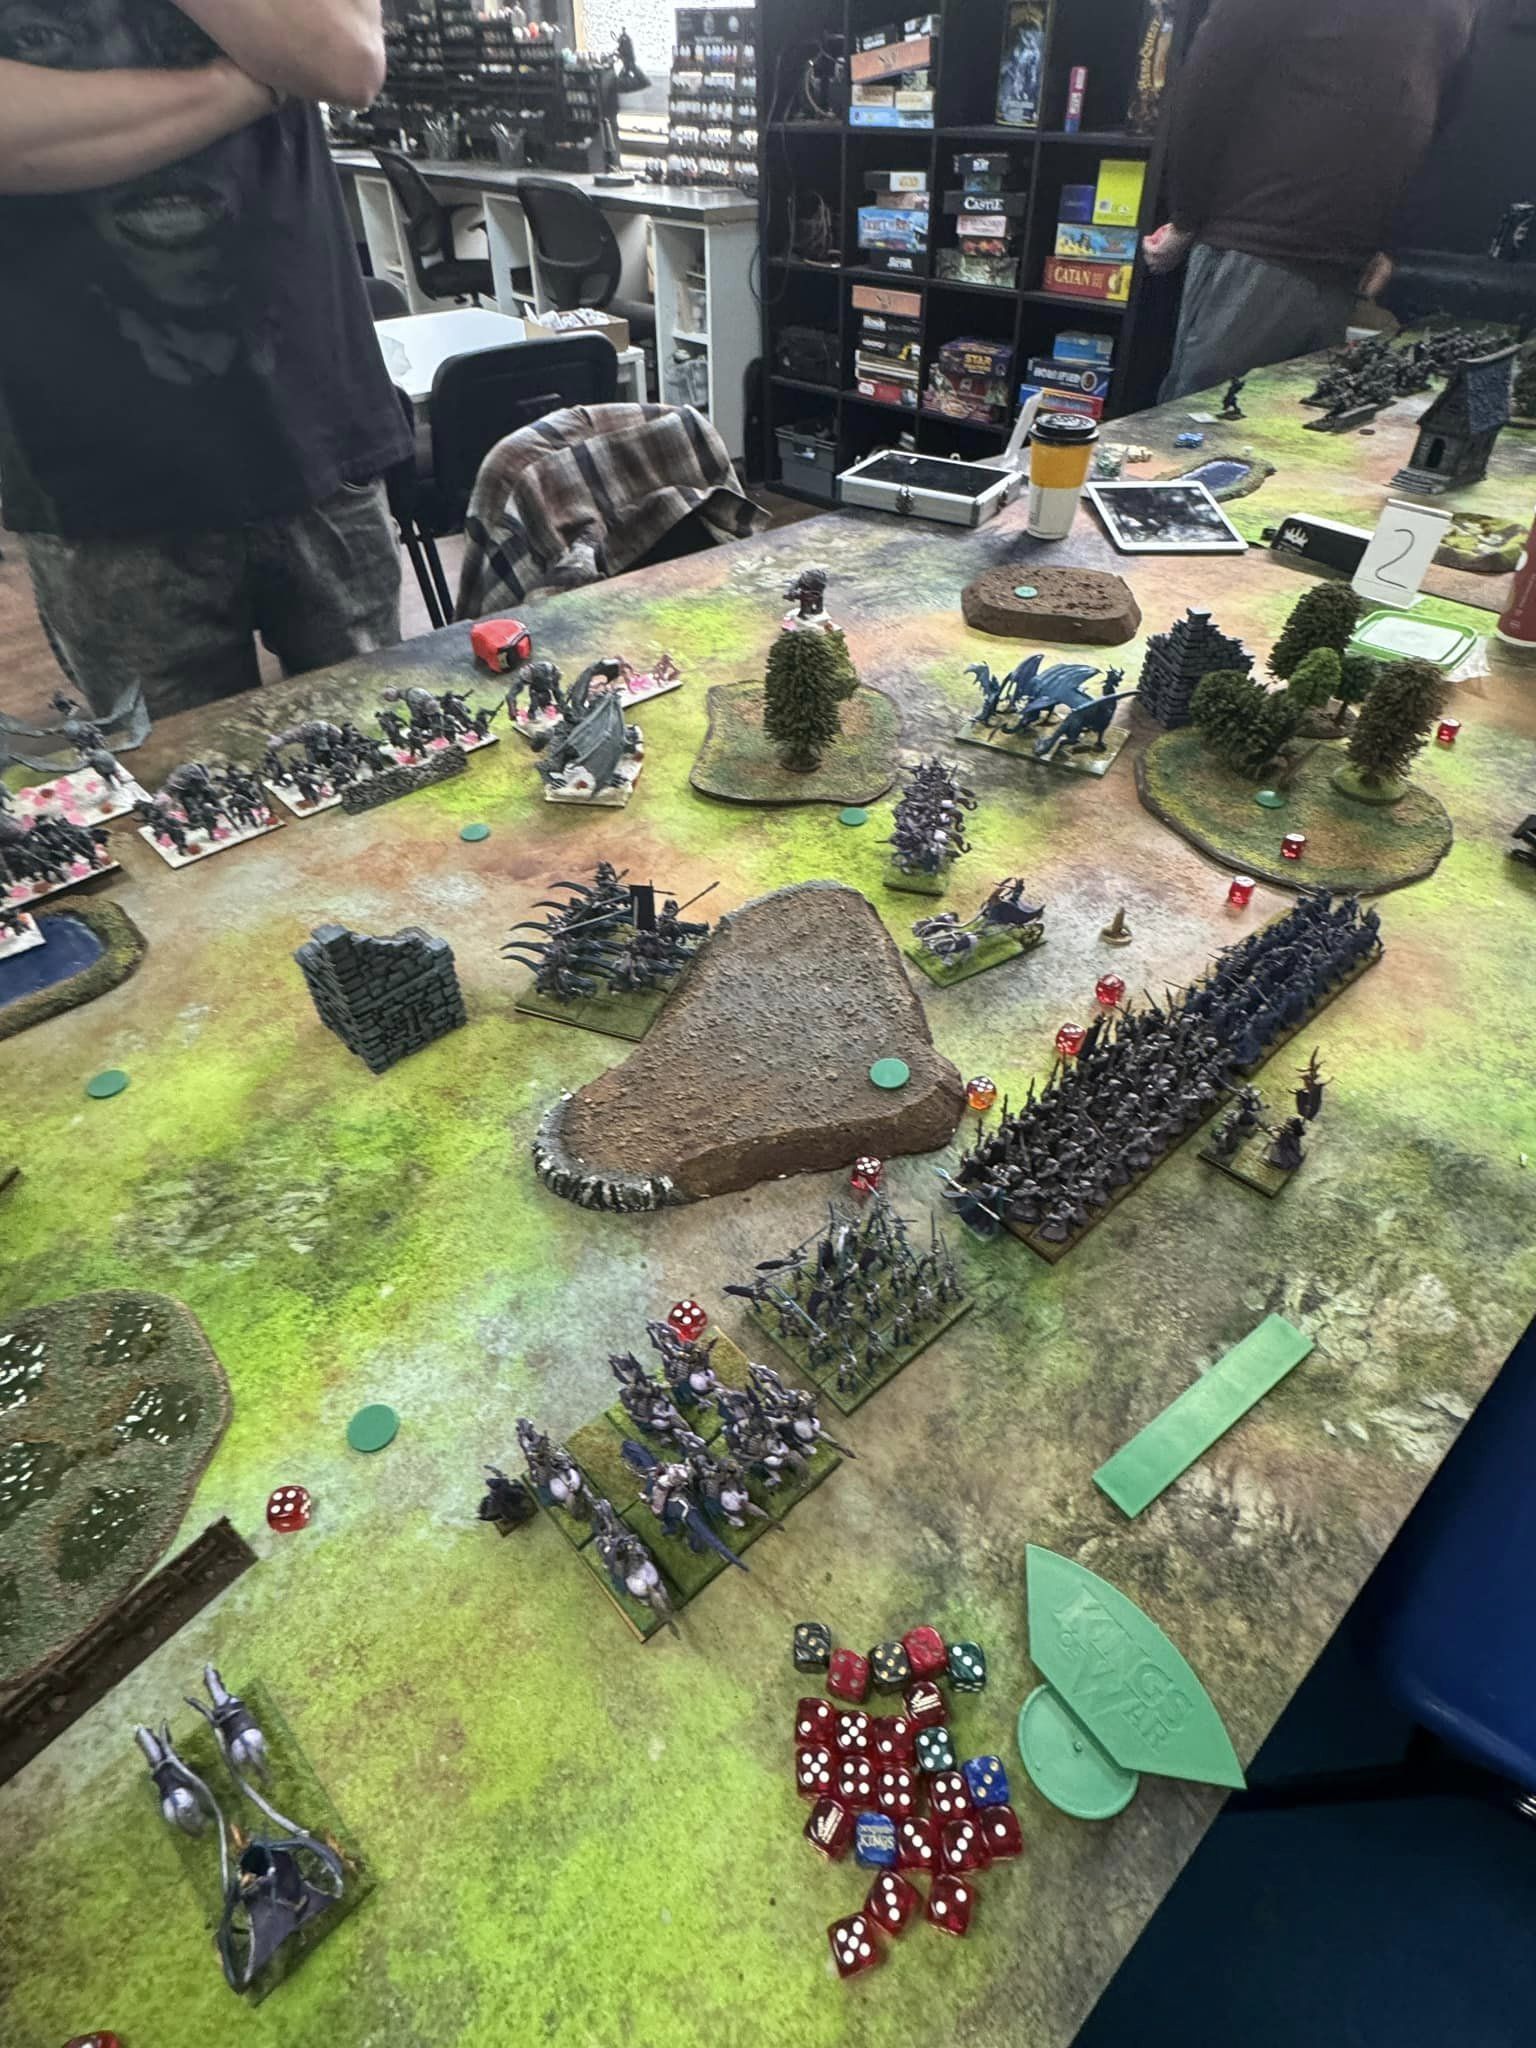
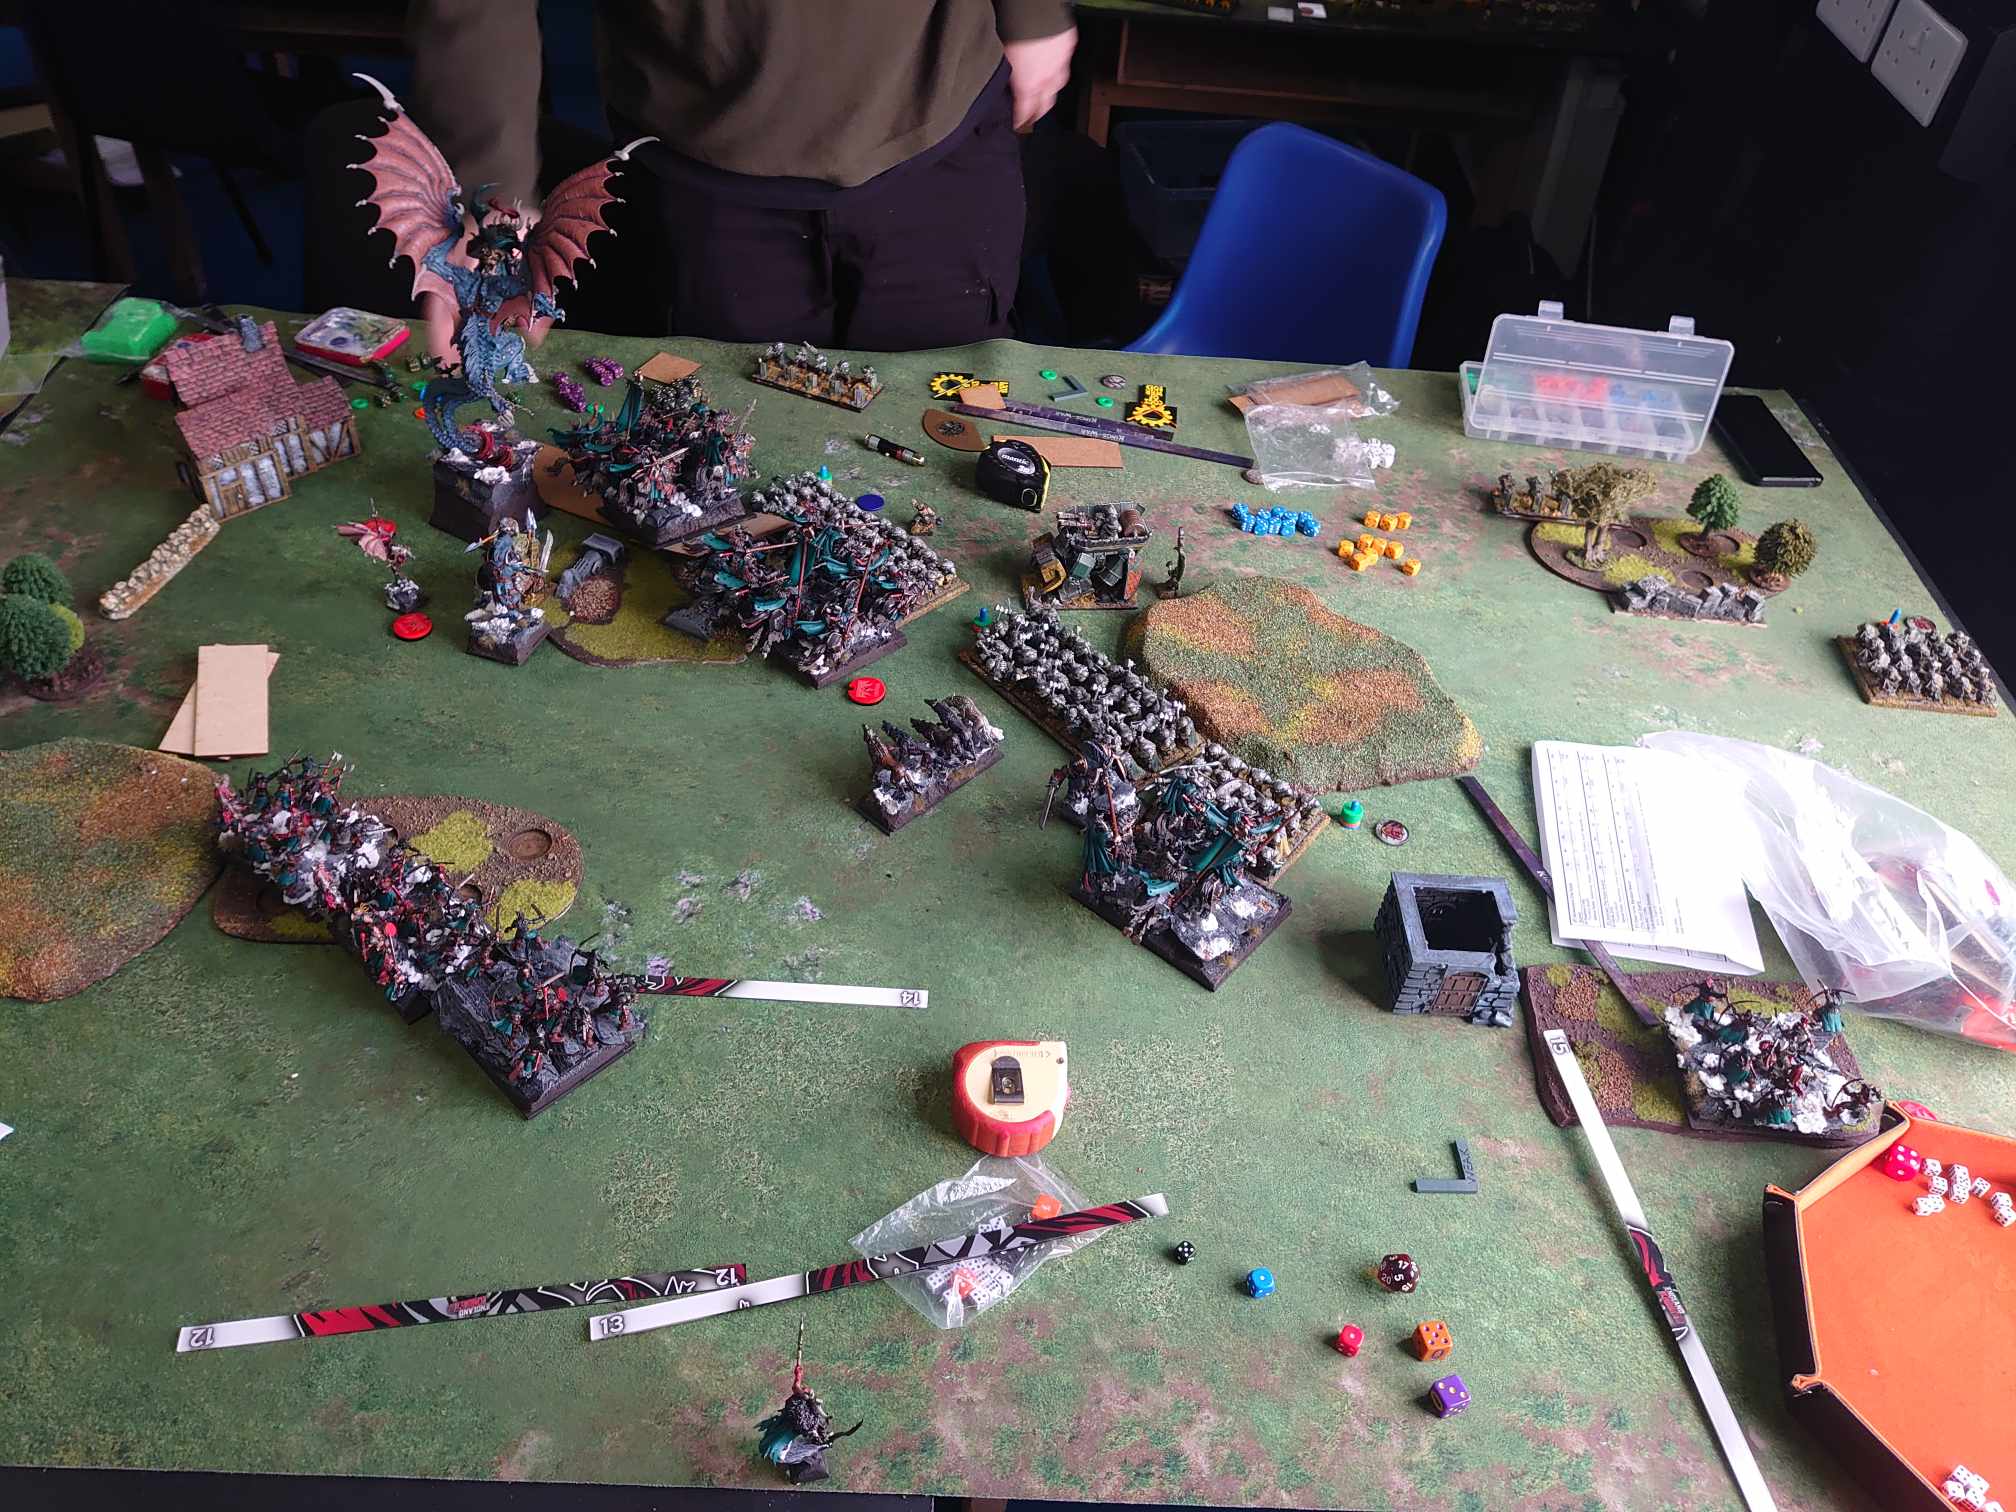
Round 2 – Dominate – Tom Wiggins, Undead
Well, I’m likely not seeing the podium, but I need to win this if I’m to have a realistic hope of improving my Masters score. Tom and I know each other from Ye Olden Days, and we spend a long time before and after the game chatting about a million and one different things; really just a delightful way to spend a round two to be honest. He’s playing a grab-bag Undead list with a gorgeous Revenant King on Great Flying Wyrm, and we take a moment to flex about our membership of the Big Dragon Model Club (better name pending).
Army list - click to expand
The bad news is the scenario. Dominate is absolutely the bane of my life – I detest playing it and frankly think it represents almost everything bad about scenario design. But, I knew it was here when I signed up, and accept it as part of the price of playing competitive Kings of War. Nevertheless, we go on.
I set up my guns in good gunning positions, and make sure I can get cavalry to good places. Our dragons take opposite sides, as a noble clash of Titans serves neither of our interests, and away we go. The opening is defined by two things – a cheeky pincushioning of some Wraiths, who I honestly just shot on the off-chance of damage, and a bait setup on the Revenant Cavalry to the right, where they’re offered a front charge into some of my cavalry. Magnilde surprises Tom by getting into a slap fight with his dragon, but I’m happy to take it to ensure my baiting goes well.
Tom is indeed baited, and goes in. He bounces, as is likely, and I get to turn my right flank into a possible win rather than a slow loss as I originally planned it. I go for it, committing two of my cavalry units, aaaaaannd I double-1 the Revenant Cavalry. It’s not gonna help them out, as they’re Devastated, but the key is that my flanks are now exposed to a thrust from a Goreblight and some Wights (who I forget have Fly, because Tom has only given them teeny tiny little coward wings and I am an idiot who forgets the rules of factions I play against). This means that, again, the right flank starts rolling up fast. Sigh.
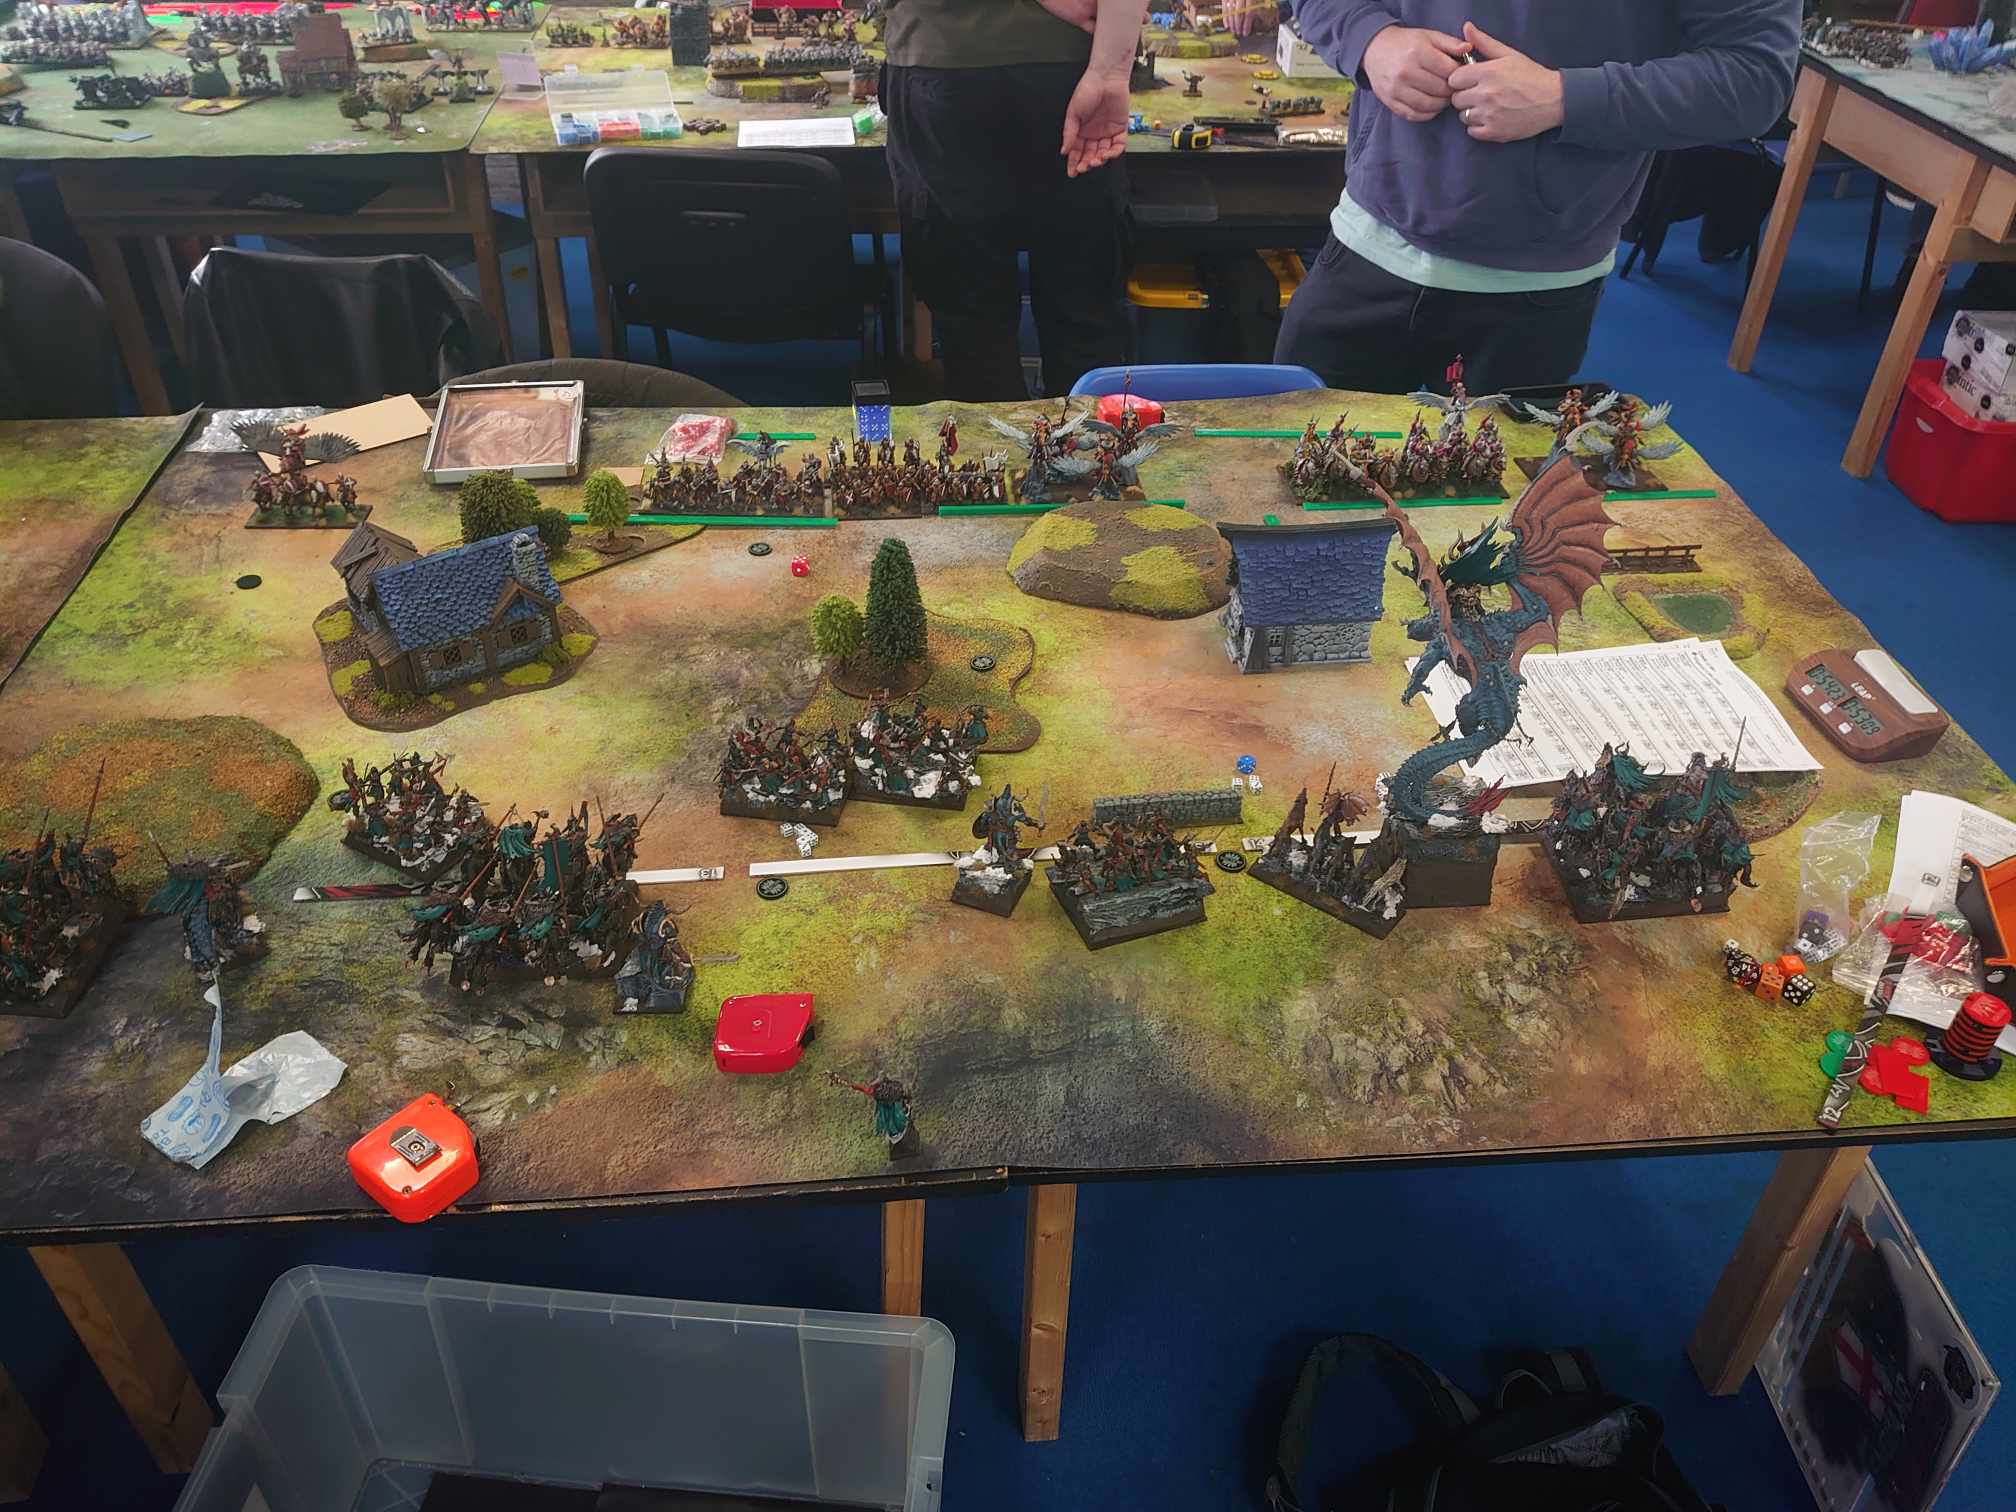
I forget to take pics of this game from this point sadly, so instead you get to see some random ones the TO took from around the venue. He kindly agreed to bail me out in my time of need, and I am very grateful to him (and for his fruit selection, which more TOs should provide).
I also get pranked by forgetting that Wraiths can Fly too, which means my Lord on Chimera is randomly tied up. It’s a fight he’ll win, but the game is well and truly over by the time he does. In the meantime, I’m trying to take off as much of Tom’s stuff as I can, but everything I try just isn’t working out. That doesn’t mean I stop trying though – an approach we discussed after the game is to just throw things at long odds when the battle starts to turn, as while things can’t really get worse they sure can get better. Both of us have that in common, so Tom is unsurprised when I start yeeting my Night Raiders at things and just hoping I do ten damage. Reader, I do not do ten damage.
This, overall, snowballs into a loss. It’s not as punishing a loss score-wise as the last one, but it pretty much puts paid to any realistic hope of a decent enough placing to improve my ranking. I’m not super despondent though, as I take the opportunity to buy my ticket for an upcoming event by the same TO that’s recently been announced – so, in my head, the event has effectively been replaced for ranking purposes.
This is good, as I’ve essentially brought a meta-counter to the event based on the heavy shooting my group saw at Clash ‘24, only to be confronted by two relatively straightforward melee punchy lists that don’t care one jot about my investment. The other good news is that our relatively quick finish (I believe there was about half an hour or so left on my clock) means Tom and I have plenty more time to catch up, which is genuinely a highlight of the event for me.
Tom would unfortunately end up so ill that he dropped out midway through the event – I hope he’s feeling better by the time he sees this, and that his army makes it back to him (especially the Revenant King on Great Flying Wyrm, that thing is seriously gorgeous).
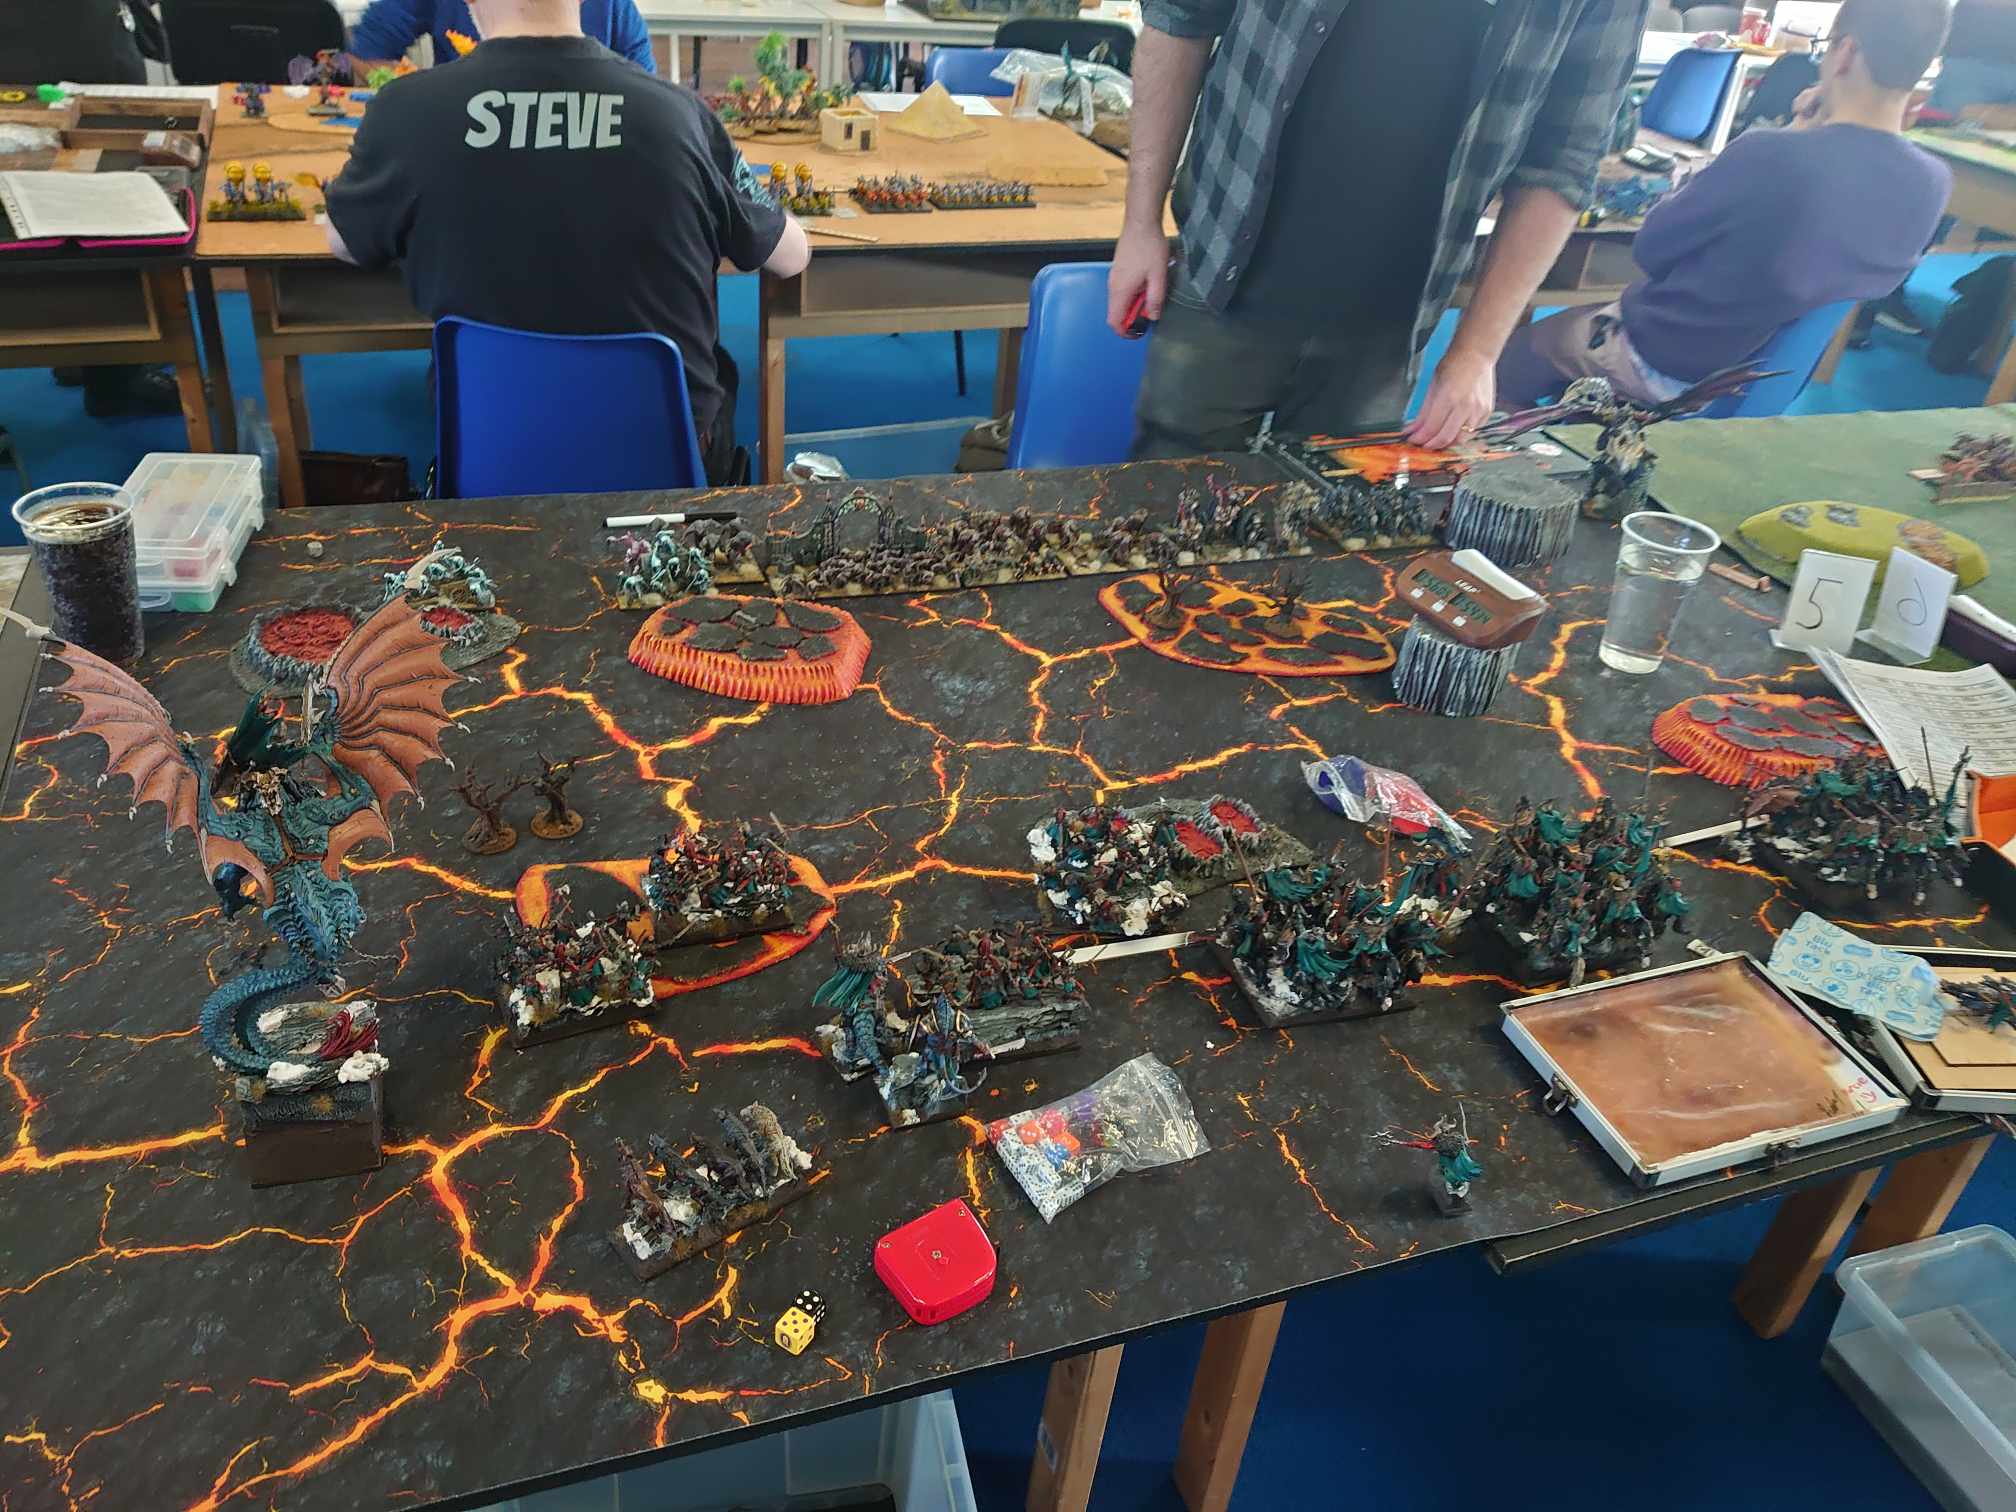
Round 3 – Loot – Stephen Stead, Halflings
Well, at least I’m going to end the day on something I know inside and out by this point (my boyfriend played Halflings extensively for most of the season), and on a table and scenario I feel are favourable for me. With no disrespect intended to Stephen or his listbuilding, his list wasn’t especially stand-out to me – not because it was bad, but because I have seen very similar builds to this literally 100+ times over the past year, to the point where it just doesn’t really register to me any more! The highlight reel of differences contains a battery of Volley Guns and a Horde of Stalwarts, but I’m writing this while really tired so just look at the dropdown if you’re desperate for specifics.
Army list - click to expand
We place a central counter, then have one each of our own to put down. Stephen puts his to the mid left, and I seize the chance to put mine on the far left – this is the exact area of the board I want to be fighting over the most, giving me precisely the terrain I want, and being able to put all the Loot counters there means I can fight on chosen ground.
Stephen deploys conservatively, rightly respecting my ability to just gun off his Aeronauts if given the chance. His other elements line up, but a key error is that he puts the Volley Guns behind the rough terrain – which will give Cover to small stuff he shoots through them. I, meanwhile, put most of my Mounted Sons of Korgaan in the centre, anchored by the building to the right, and my Night Raiders on the left with a Lord on Chimera and more Mounted Sons of Korgaan to keep them company.
The caution continues early on. Stephen castles up with his fast cluster on the left, and takes hilly positions on the hill to the right, but makes a fatal error – he gives me a Magnilde charge into the Juggers. Perhaps he doesn’t think she’ll do too much, but she goes on an absolute rampage, tying up his anchoring heavy cavalry for ages then going on to donk various other things. This means the tempo is in my favour, and now it’s gaming time. Next turn, I fully send, charging in all my cavalry and starting work shooting off these Volley Guns. I kill all of the Poachers, but bounce on the left.
This costs me. The Aeronauts spike high and remove some cavalry in one go, and another cavalry unit to my right is Wavered. Not ideal, but not unrecoverable. To engineer the Aeronaut charge, the Muster Captain on Winged Aralez has to go to a bit of a weird position, which exposes its flank to the Thegn on Frostfang. Thus, I got to take it off pretty much for free, and mostly clear up that flank – combined with the collapse of the right, I can focus on clearing up the flanking Aeronauts (who have went on a bit of a leftward voyage into some Night Raiders).
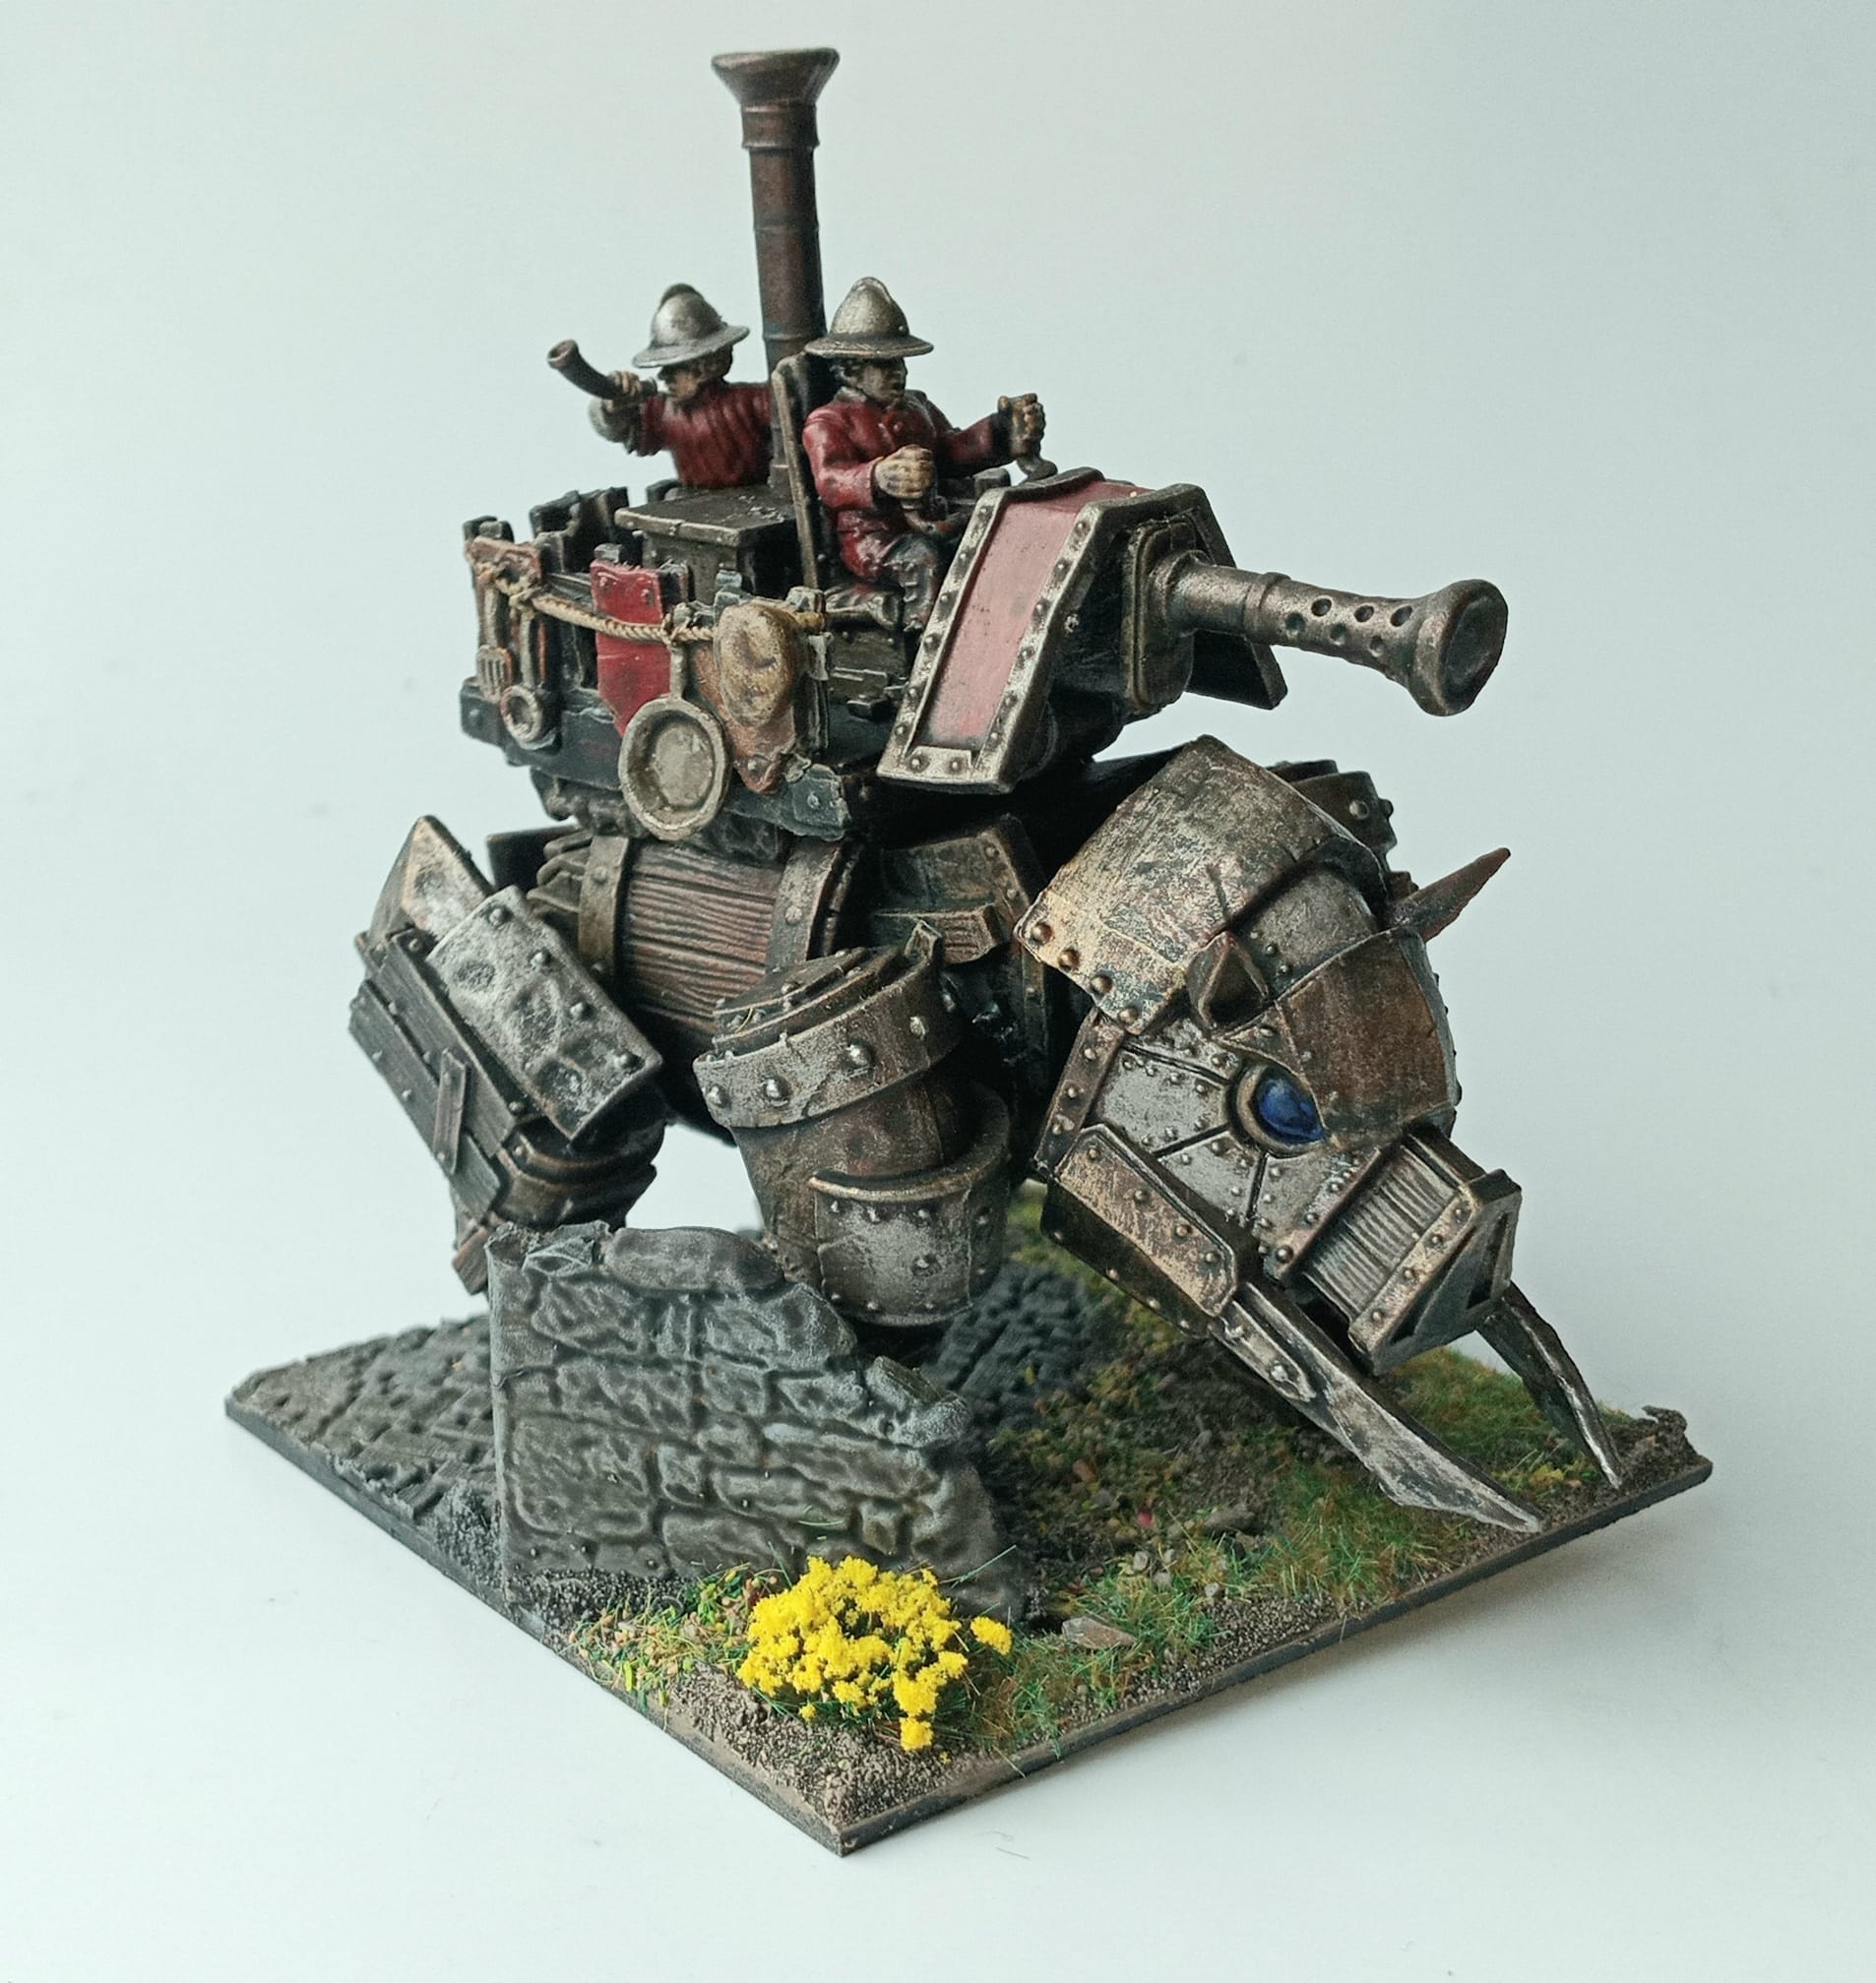
You may be wondering what the central Hordes have done this whole time, and the answer is pretty much to stand there. Stephen clearly doesn’t want me running up for the Loot counters without reprisal, which is fair, but it does take the pressure off in the centre, and means I get to keep shooting. Now, though, the dynamic changes, and these lumps of lads start moving in my direction. Fortunately, the Hammer of Measured Force is effectively a buff for my Night Raiders, as it means they get hit less hard than they actually should! As such, Stephen’s final few charges accomplish little. I don’t have to work too hard to clean up, and sit myself quite happily on all three counters, despite the Iron Beast kicking the stuffing out of whatever it can touch.
Stephen’s a bit glum, as going 0-3 day one always sucks, and it’s his first time playing into Stealthy heavy cavalry (which is kind of the the Varangur experience). So, we have a good natter after about takeaways from the game. Instead of trying to focus on the macro of a matchup he’ll likely not play again for a very long time (given my faction’s rarity), we talk micro, highlighting three corrections to make that’ll help him out – namely, better positioning on the Volley Guns, aggressive use of the Muster Captain, and varying his deployment composition. I’d recommend doing this in your post-game talk if your opponent is feeling the drain, as it can be a lot easier to take in small improvements than a big plan that’s going to need adapting to their next opponent anyway.
Stephen had a bit of an upturn after our game, which I naturally credit to my expert advice. He’d end up in 19th place, but with a win and a draw to his name, meaning he had naught to fear from the dreaded wooden spoon.
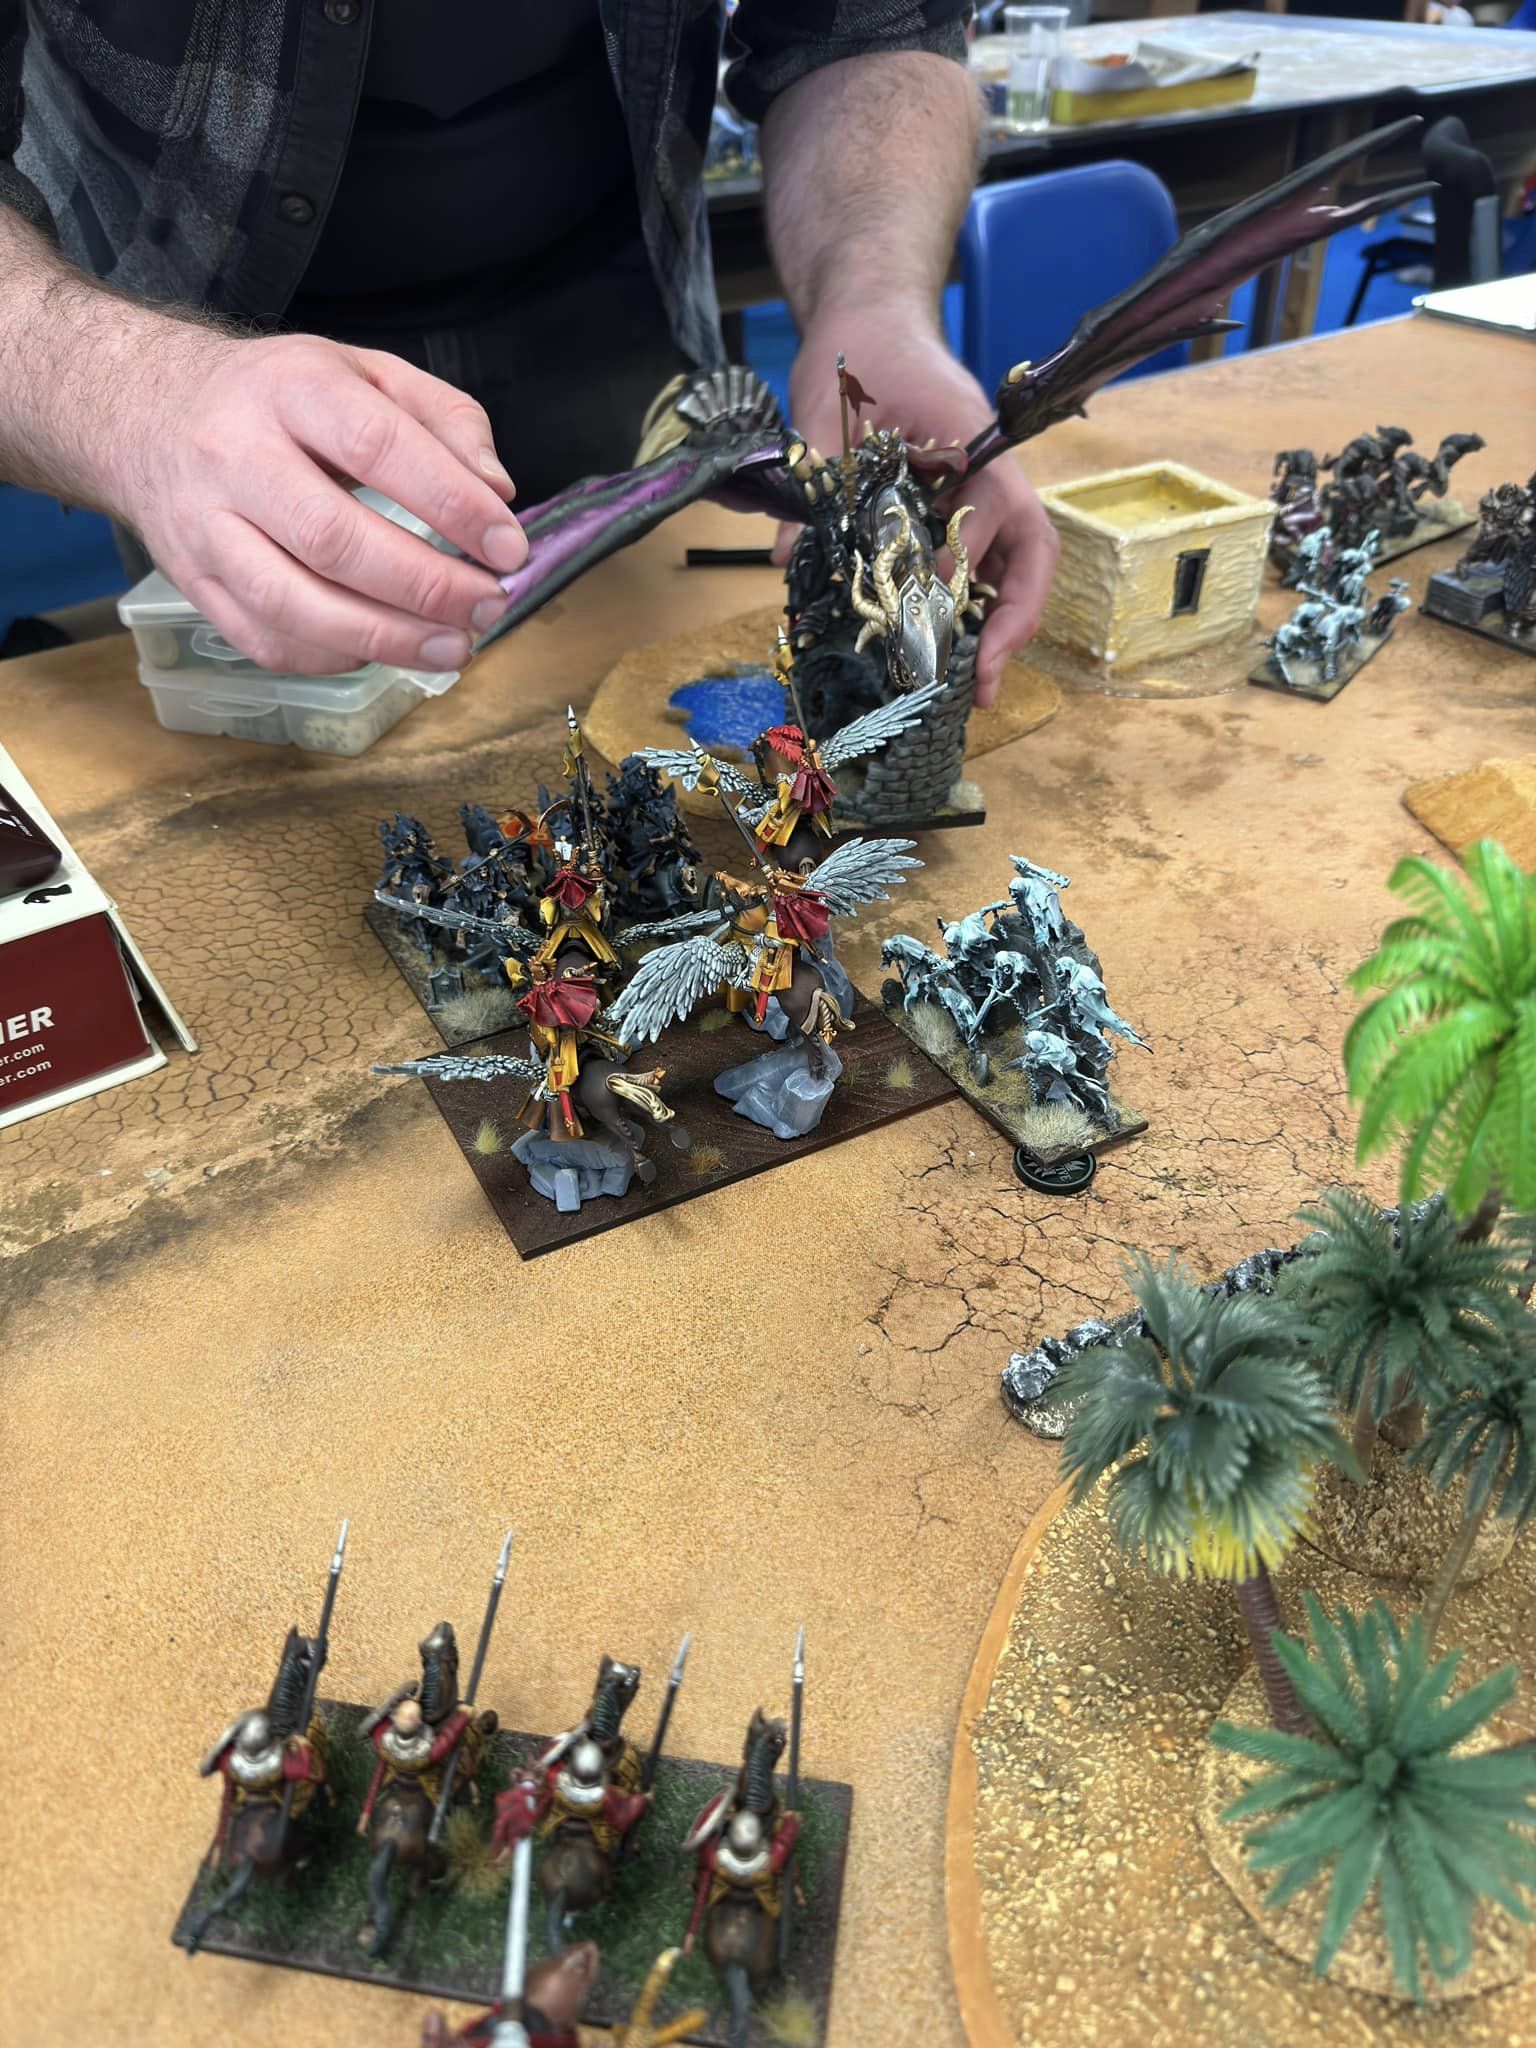
Round 4 – Push – Alistair Vowles, Basileans
I know what you’re thinking, but no, he does not to my knowledge have a brother called Alistair Consonants. That’s not generally how family names work over here. Alistair has the distinction of being both an excellent player and an excellent opponent – he’s currently 4th in the national rankings, and has glowing reviews from the two team members he’s faced so far. So, it’s fair to say this is a game I’m really, really hyped for going into the next day.
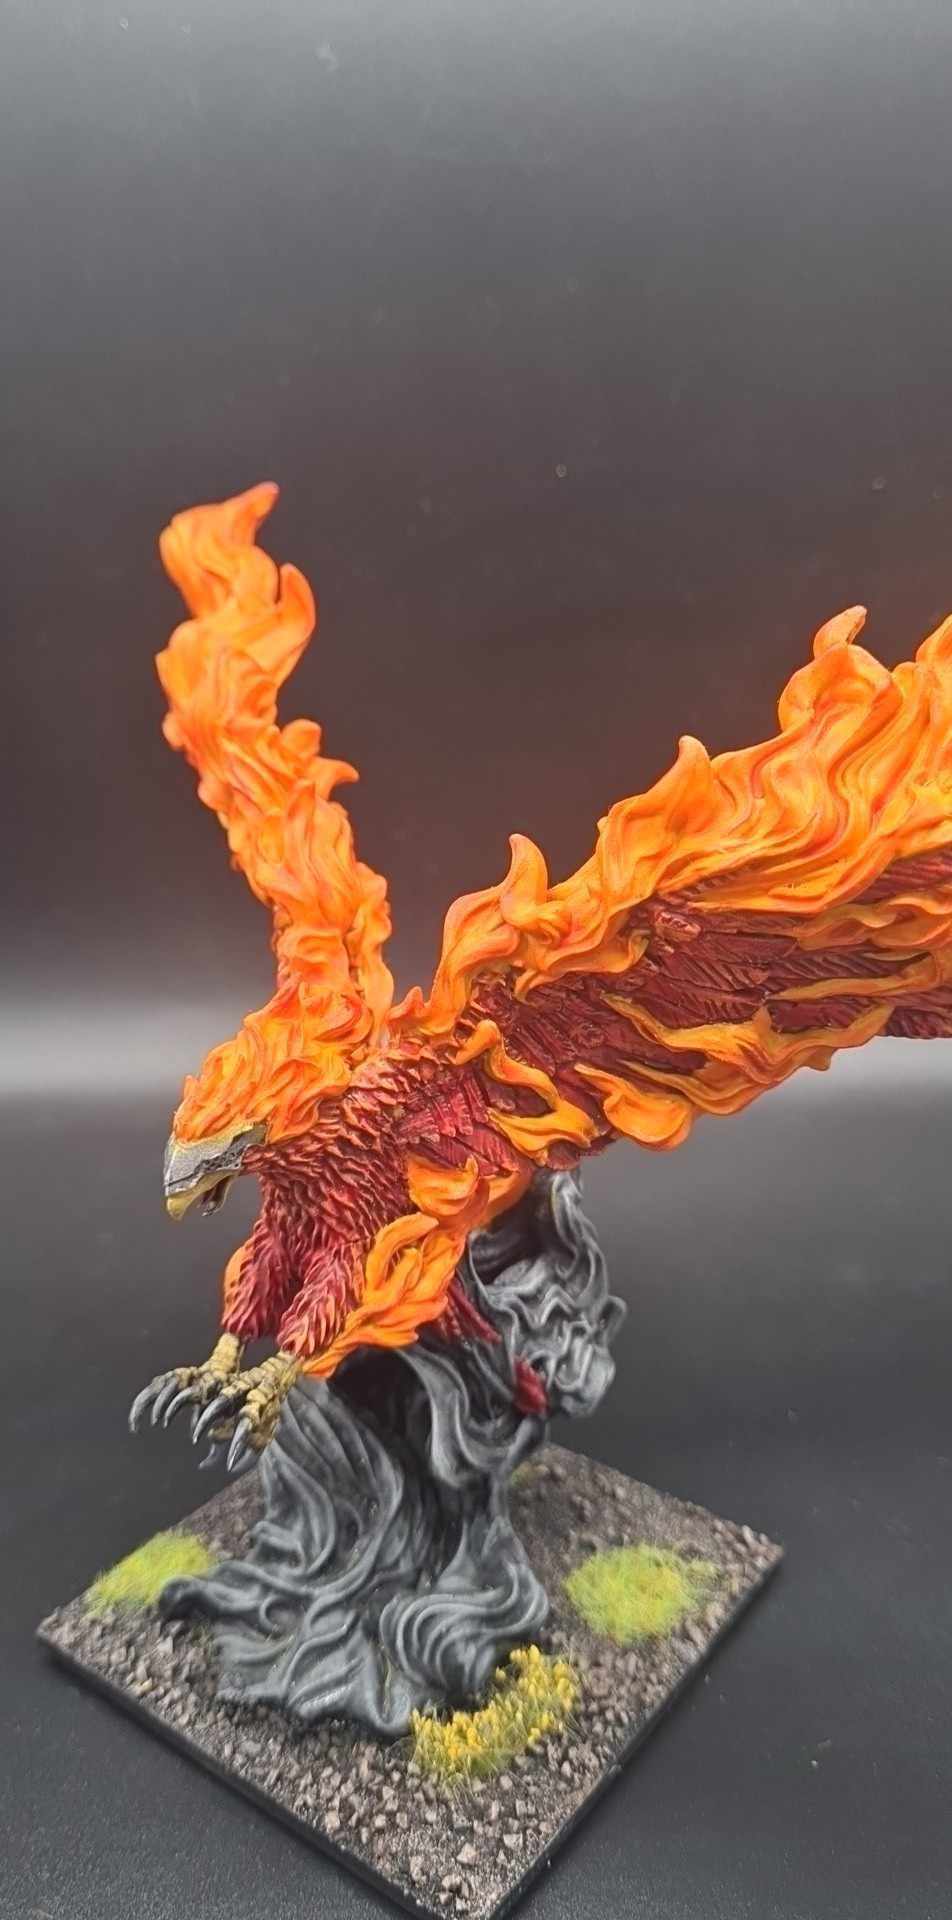
In terms of list, he’s found the Good Model Buttons, and has pressed them until the Good Model Buttons Have Went Red, with a staggering four Hordes and three Phoenixes for me to chew through. This list is going to be in my face incredibly fast and with incredible force, so I need to get my chaff placement exactly right.
The trouble is, it’s maybe going to be able to shoot me fairly decently on the way. I’m going to have to thread the needle of not getting my chaff killed, while being able to block my stuff off enough that it doesn’t take a faceful of Paladin Knights. So, I’ll be pouring on the firepower against anything that so much as peeks out of cover, and hoping for the best.
Army list - click to expand
The one factor in my favour is the scenario. Push is not an easy prospect when you lack good token-caddies, so it’s likely going to be the Phoenixes – which means they’ll be slower, and also tempting targets for Night Raiders. Fire-Oil finally paying off baybee! (spoiler: it didn’t). Meanwhile, I have perfect Night Raider-shaped caddies, and if they just hide in terrain they can pretty easily tank an Elohi charge for a turn.
Alistair gets to go first, and absolutely blitzes at me, taking care to position very well and not give me anything cheeky. The pressure is immediately on, as two Hordes of Paladin Knights can and will one-bomb anything I give them in a straight fight, so in return I castle up hard. I’m actually really proud of my positioning in response, which basically means I get to choose the fights next turn, and stops me getting chaffed up too hard. I’ve baited the line, so it’s time to see if Alistair takes it.
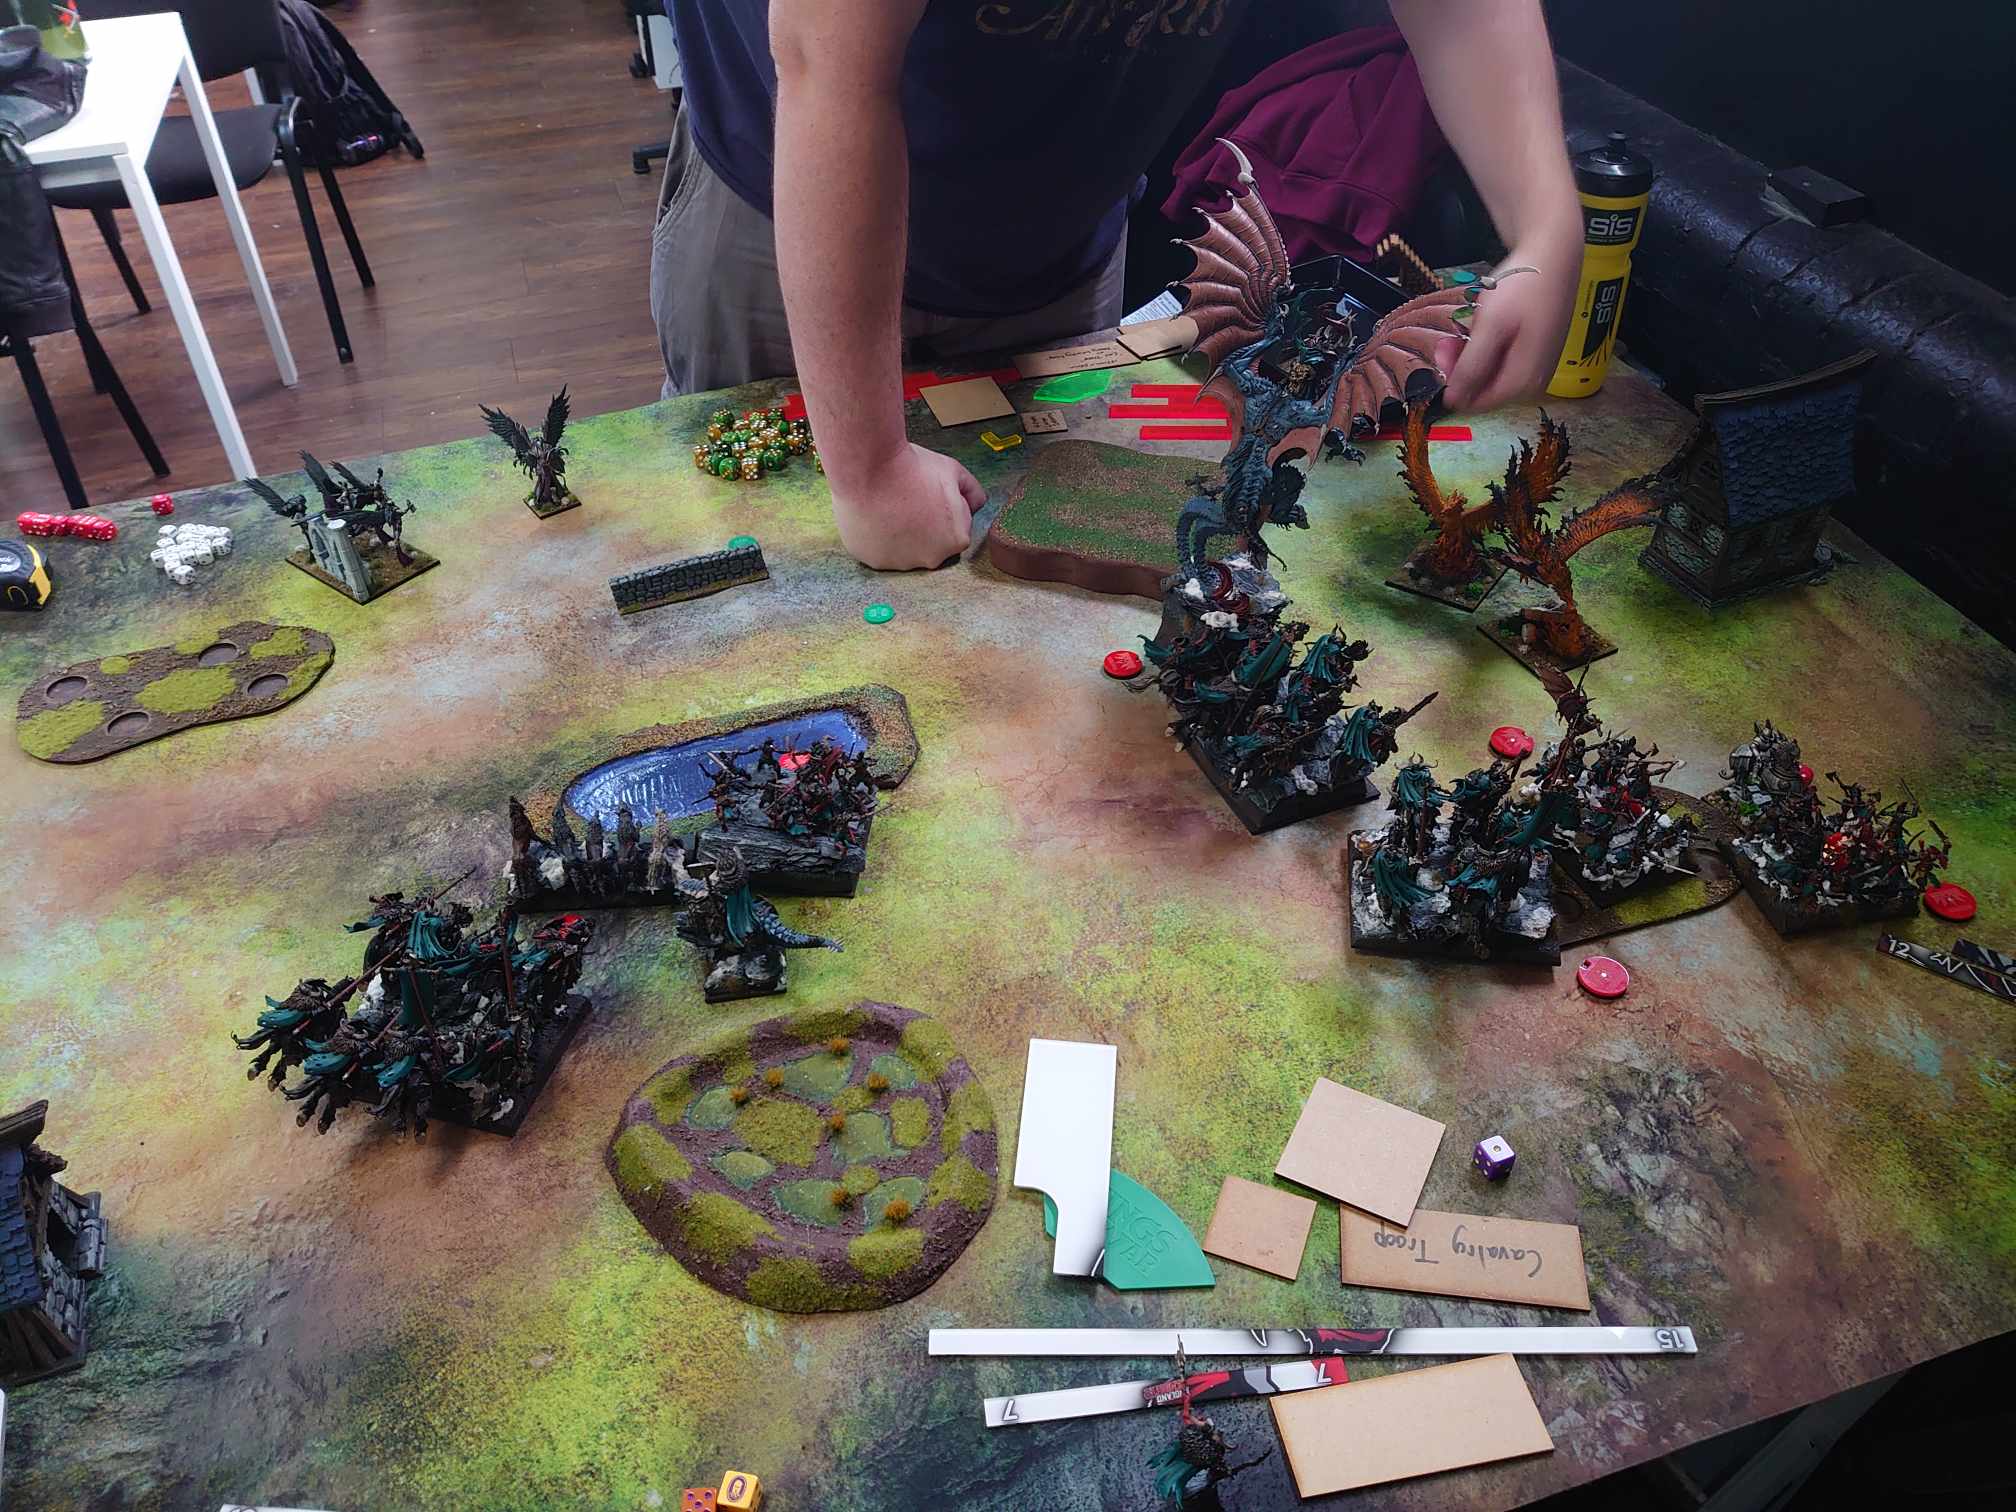
Alistair takes it. His punch is rough, both Paladin Knights units taking off their charge targets, but given that those targets are a Snow Troll Prime and some Night Raiders I’m not actually losing too much sleep. He chaffs me up well, so while I do have a counterattack, it’s going to be Hindered in a lot of places. Gnaeus Sallustis begins his fight with a unit of Night Raiders to the extreme right, where he will stay for almost the entire game – truly, they were his mortal enemy. The Elohi I chipped earlier with shooting go in for some Mounted Sons of Korgaan, but don’t do much damage at all, and can’t actually prevent me from flanking them in response. I therefore take off a whole bunch of stuff. The cavalry Horde to my left is atomised by the combined efforts of 700 points of my army, which I will take every single time, as are the damaged Elohi and some chaff. Suddenly, this is looking playable.
The remaining Paladin Knights Horde continues its rampage, bopping another Snow Troll Prime, and Alistair makes a critical error – he consolidates to the right after he’s set up a screen for their flank with Gur Panthers, meaning that there’s now a Magnilde-shaped hole that she promptly pops into. Meanwhile, our positioning dance on the left continues – I keep giving Alistair bad trades, and he rightly continues to avoid them, opting instead to keep the pressure on my Lord on Chimera. This means that the Phoenixes have to start doing some work, and they do, leaving a trail of dropped Loot counters behind them like some bizarre egg-laying.
I therefore need to start clearing some stuff out. While I don’t kill much, I do well and truly tie up the right flank, and move my central position to something a little more aggressive, threatening to send my Lord on Chimera in again next turn. Alistair has to respond, and he settles on a cute trick – realigning into Magnilde, killing her (hopefully), then Overrunning into the Mounted Sons of Korgaan nearby. This takes three judges to resolve, so I dash away from the table to avoid outright cackling with excited glee, as I absolutely adore tormenting judges with complicated board states and cannot be normal about it. I even got a photo of them all looking confused.
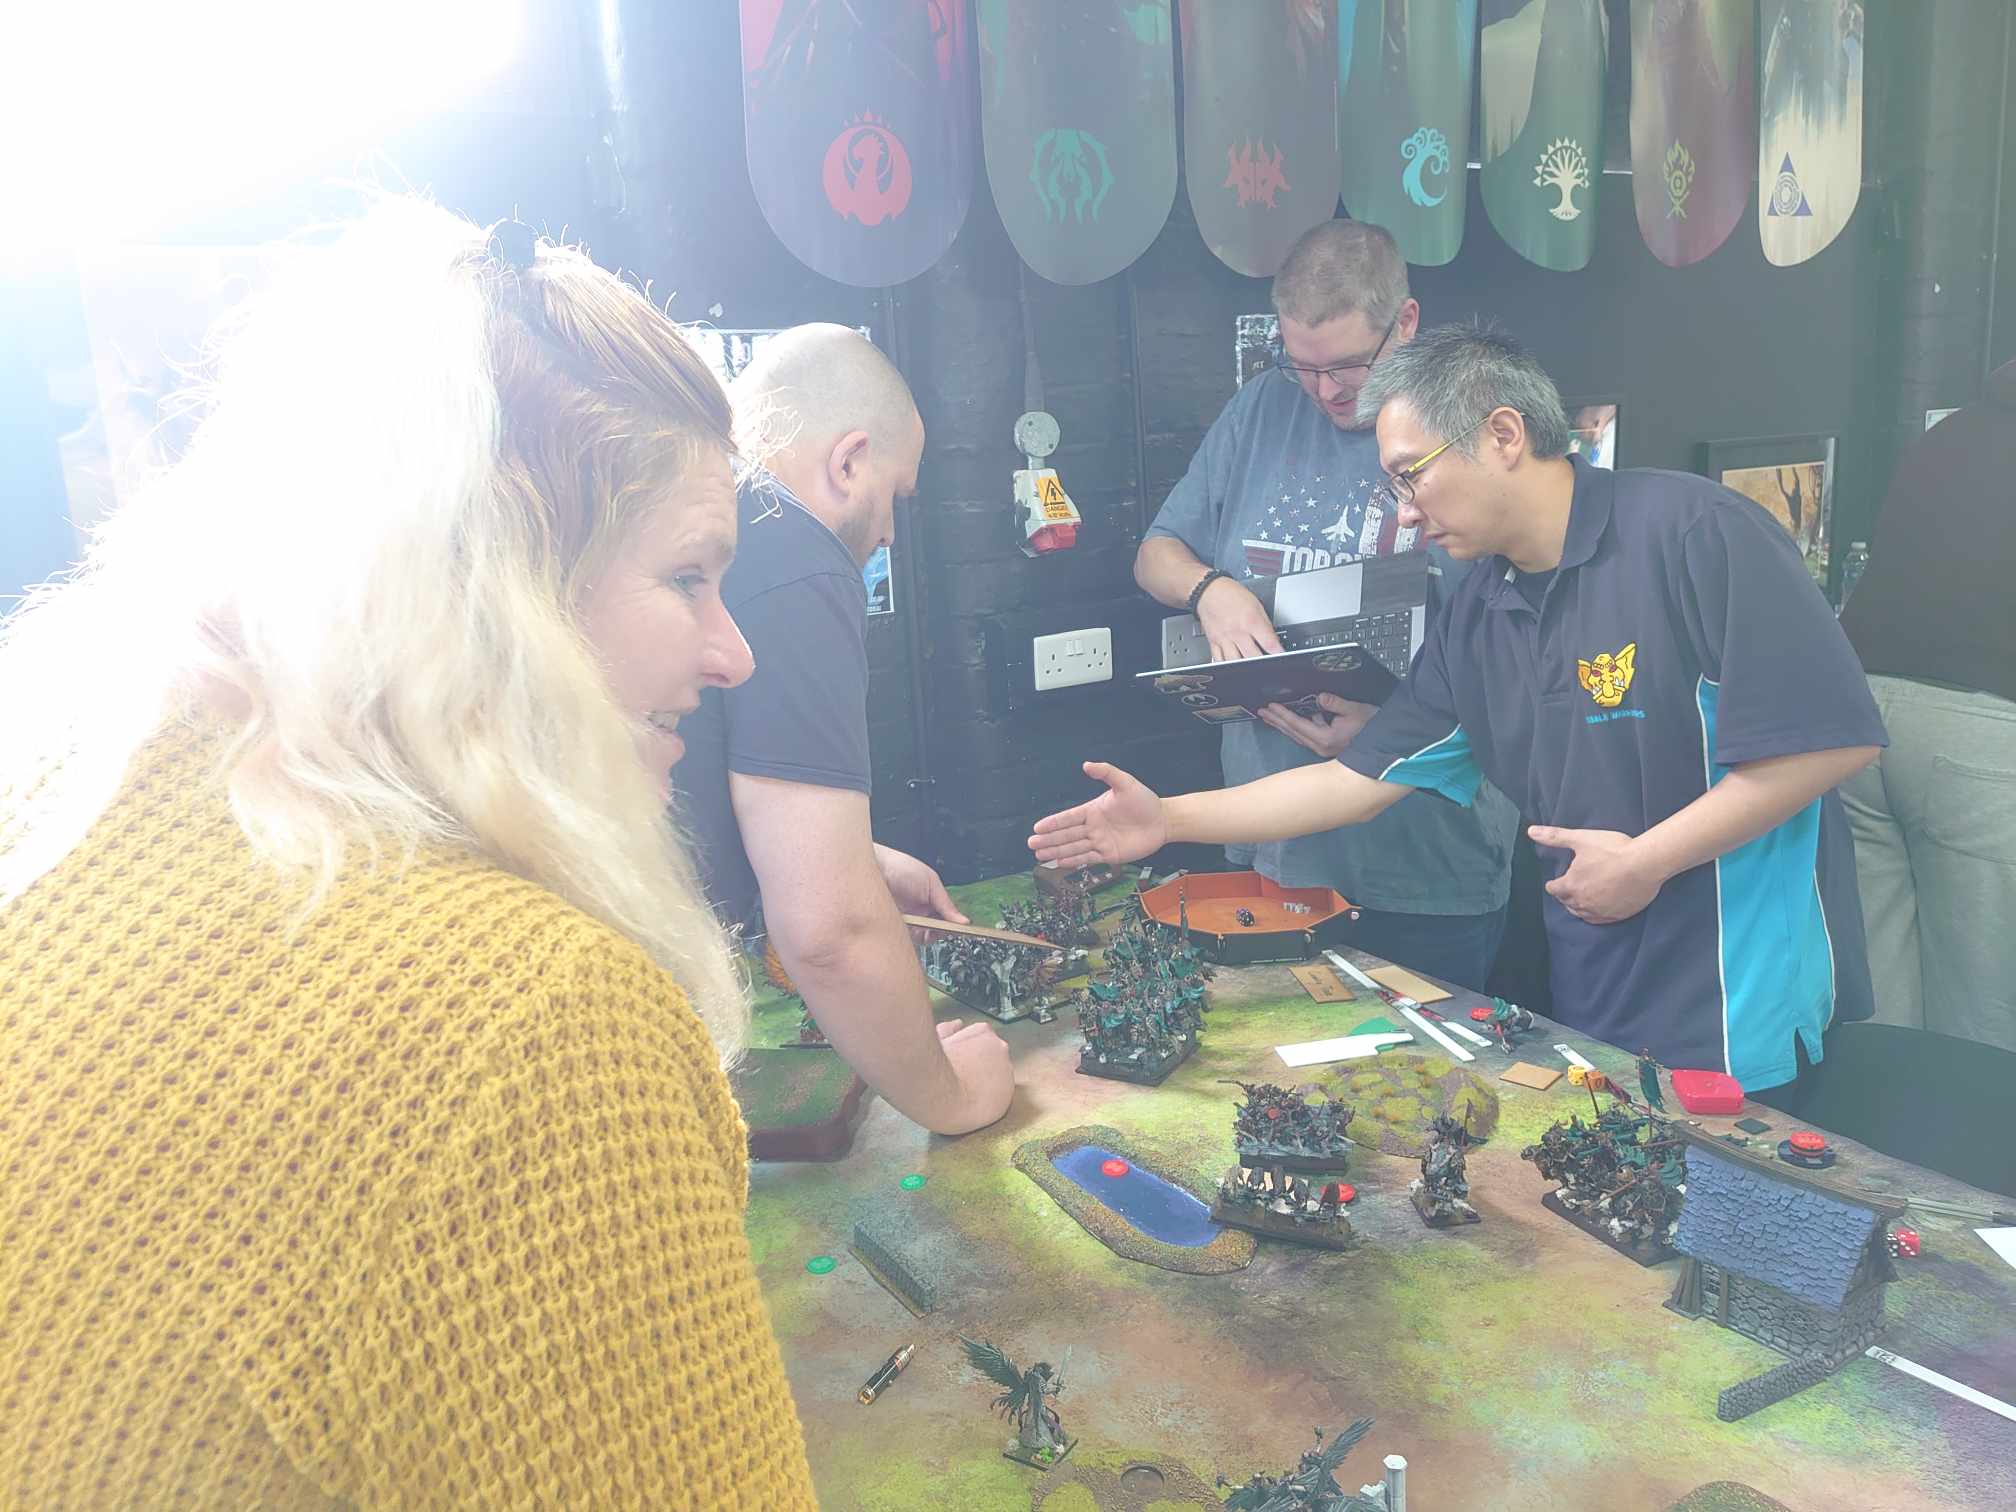
The eventual resolution is that Alistair can do it, and I wish him luck. He goes for it, and… double 1. OOF. That’s huge, and Alistair knows it – accepting his defeat is likely inevitable now, and being a very good sport about it all. The overall play wasn’t bad on the numbers – with average damage and getting the right Overrun, it works out at about 57%ish – but was risky enough that I don’t feel too awful. Plus, y’know, Magnilde’s still alive. Truly, that model is like a vortex of improbability when I play her, it’s amazing.
From there, it’s all over bar the final scores. I eventually take off almost all of Alistair’s army, getting another maxed-out score, and while Gnaeus finally wins his struggle with the Night Raiders he’s one of very few survivors. We have a nice chat afterwards about our hopes and fears for the next edition, and I depart with a very good impression of someone I went in already expecting to be really nice and experienced.
Alistair had a rough weekend overall, going 1-2-2 and finishing 16th. This very much isn’t the norm for him, as he’s had several top finishes this year, but I’m sure he’ll bounce back once he finds a list he likes more.
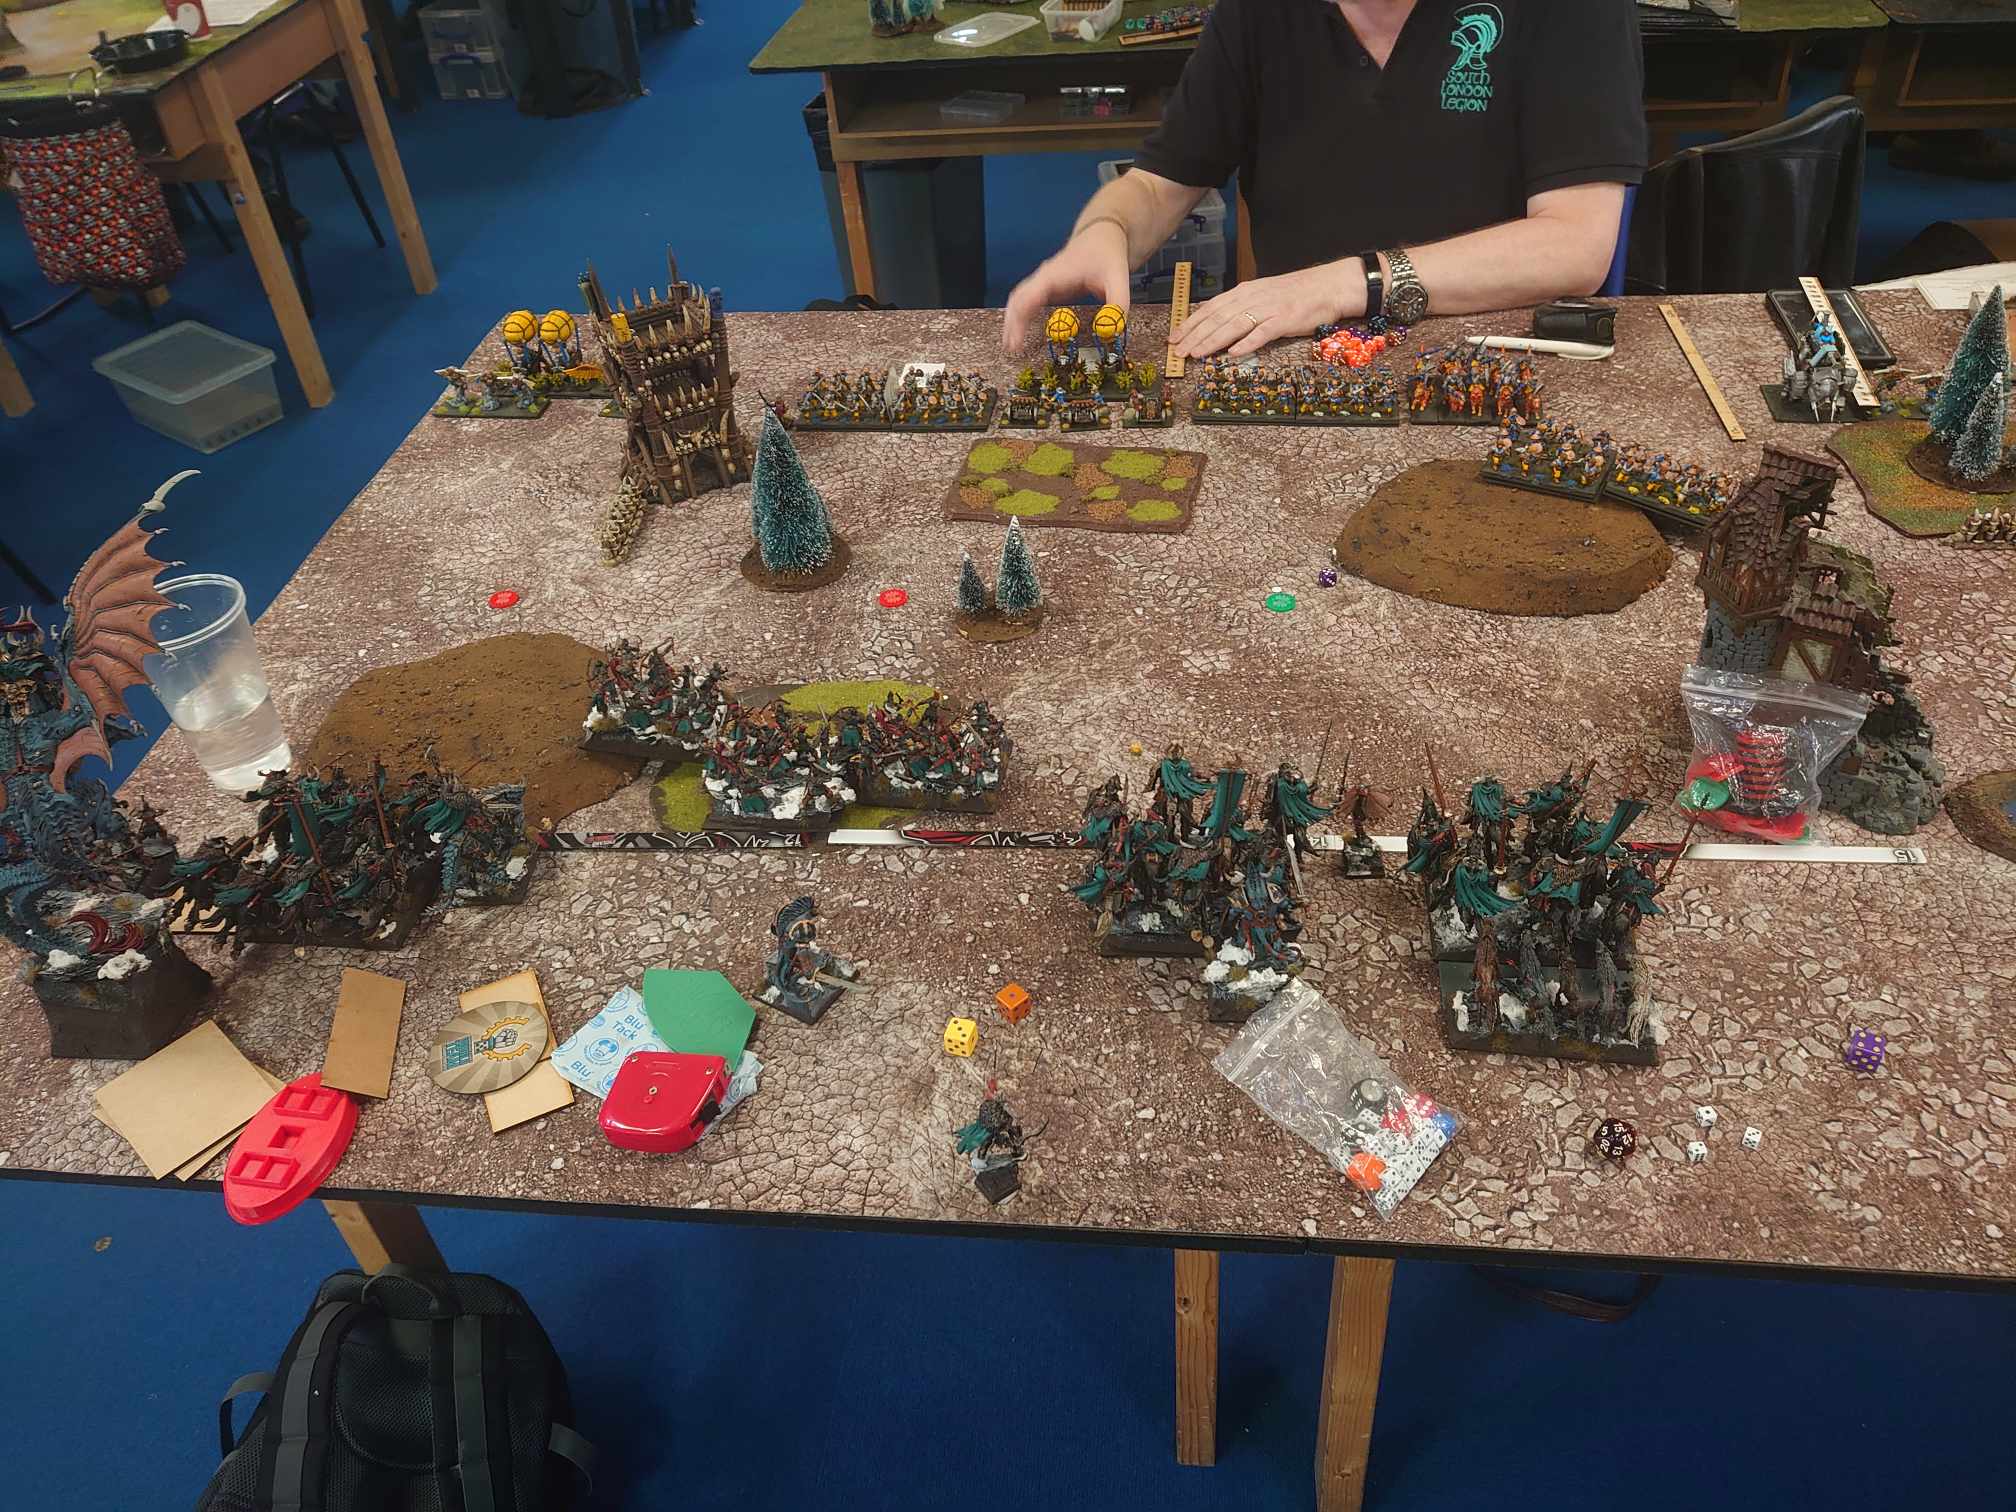
Round 5 – Control – Jeff Horton, Dwarfs
Once again, I end a War Up North event with a game against Dwarfs on Control. I like to think I’ve improved a lot since back then, and I also have a winning record on the line here, so I am very much actively trying my hardest in this game. Playing Alistair has also got me fired up, because he’s really fun to play against, so that effort level is matched by some major neuron activation. It’s 3-2 or death, and I’ve already beaten death at a tournament before (true fact about me! I actually got an official ruling that if you die while on the clock, it counts as a clock win for your opponent), so let’s see if I can secure the former.
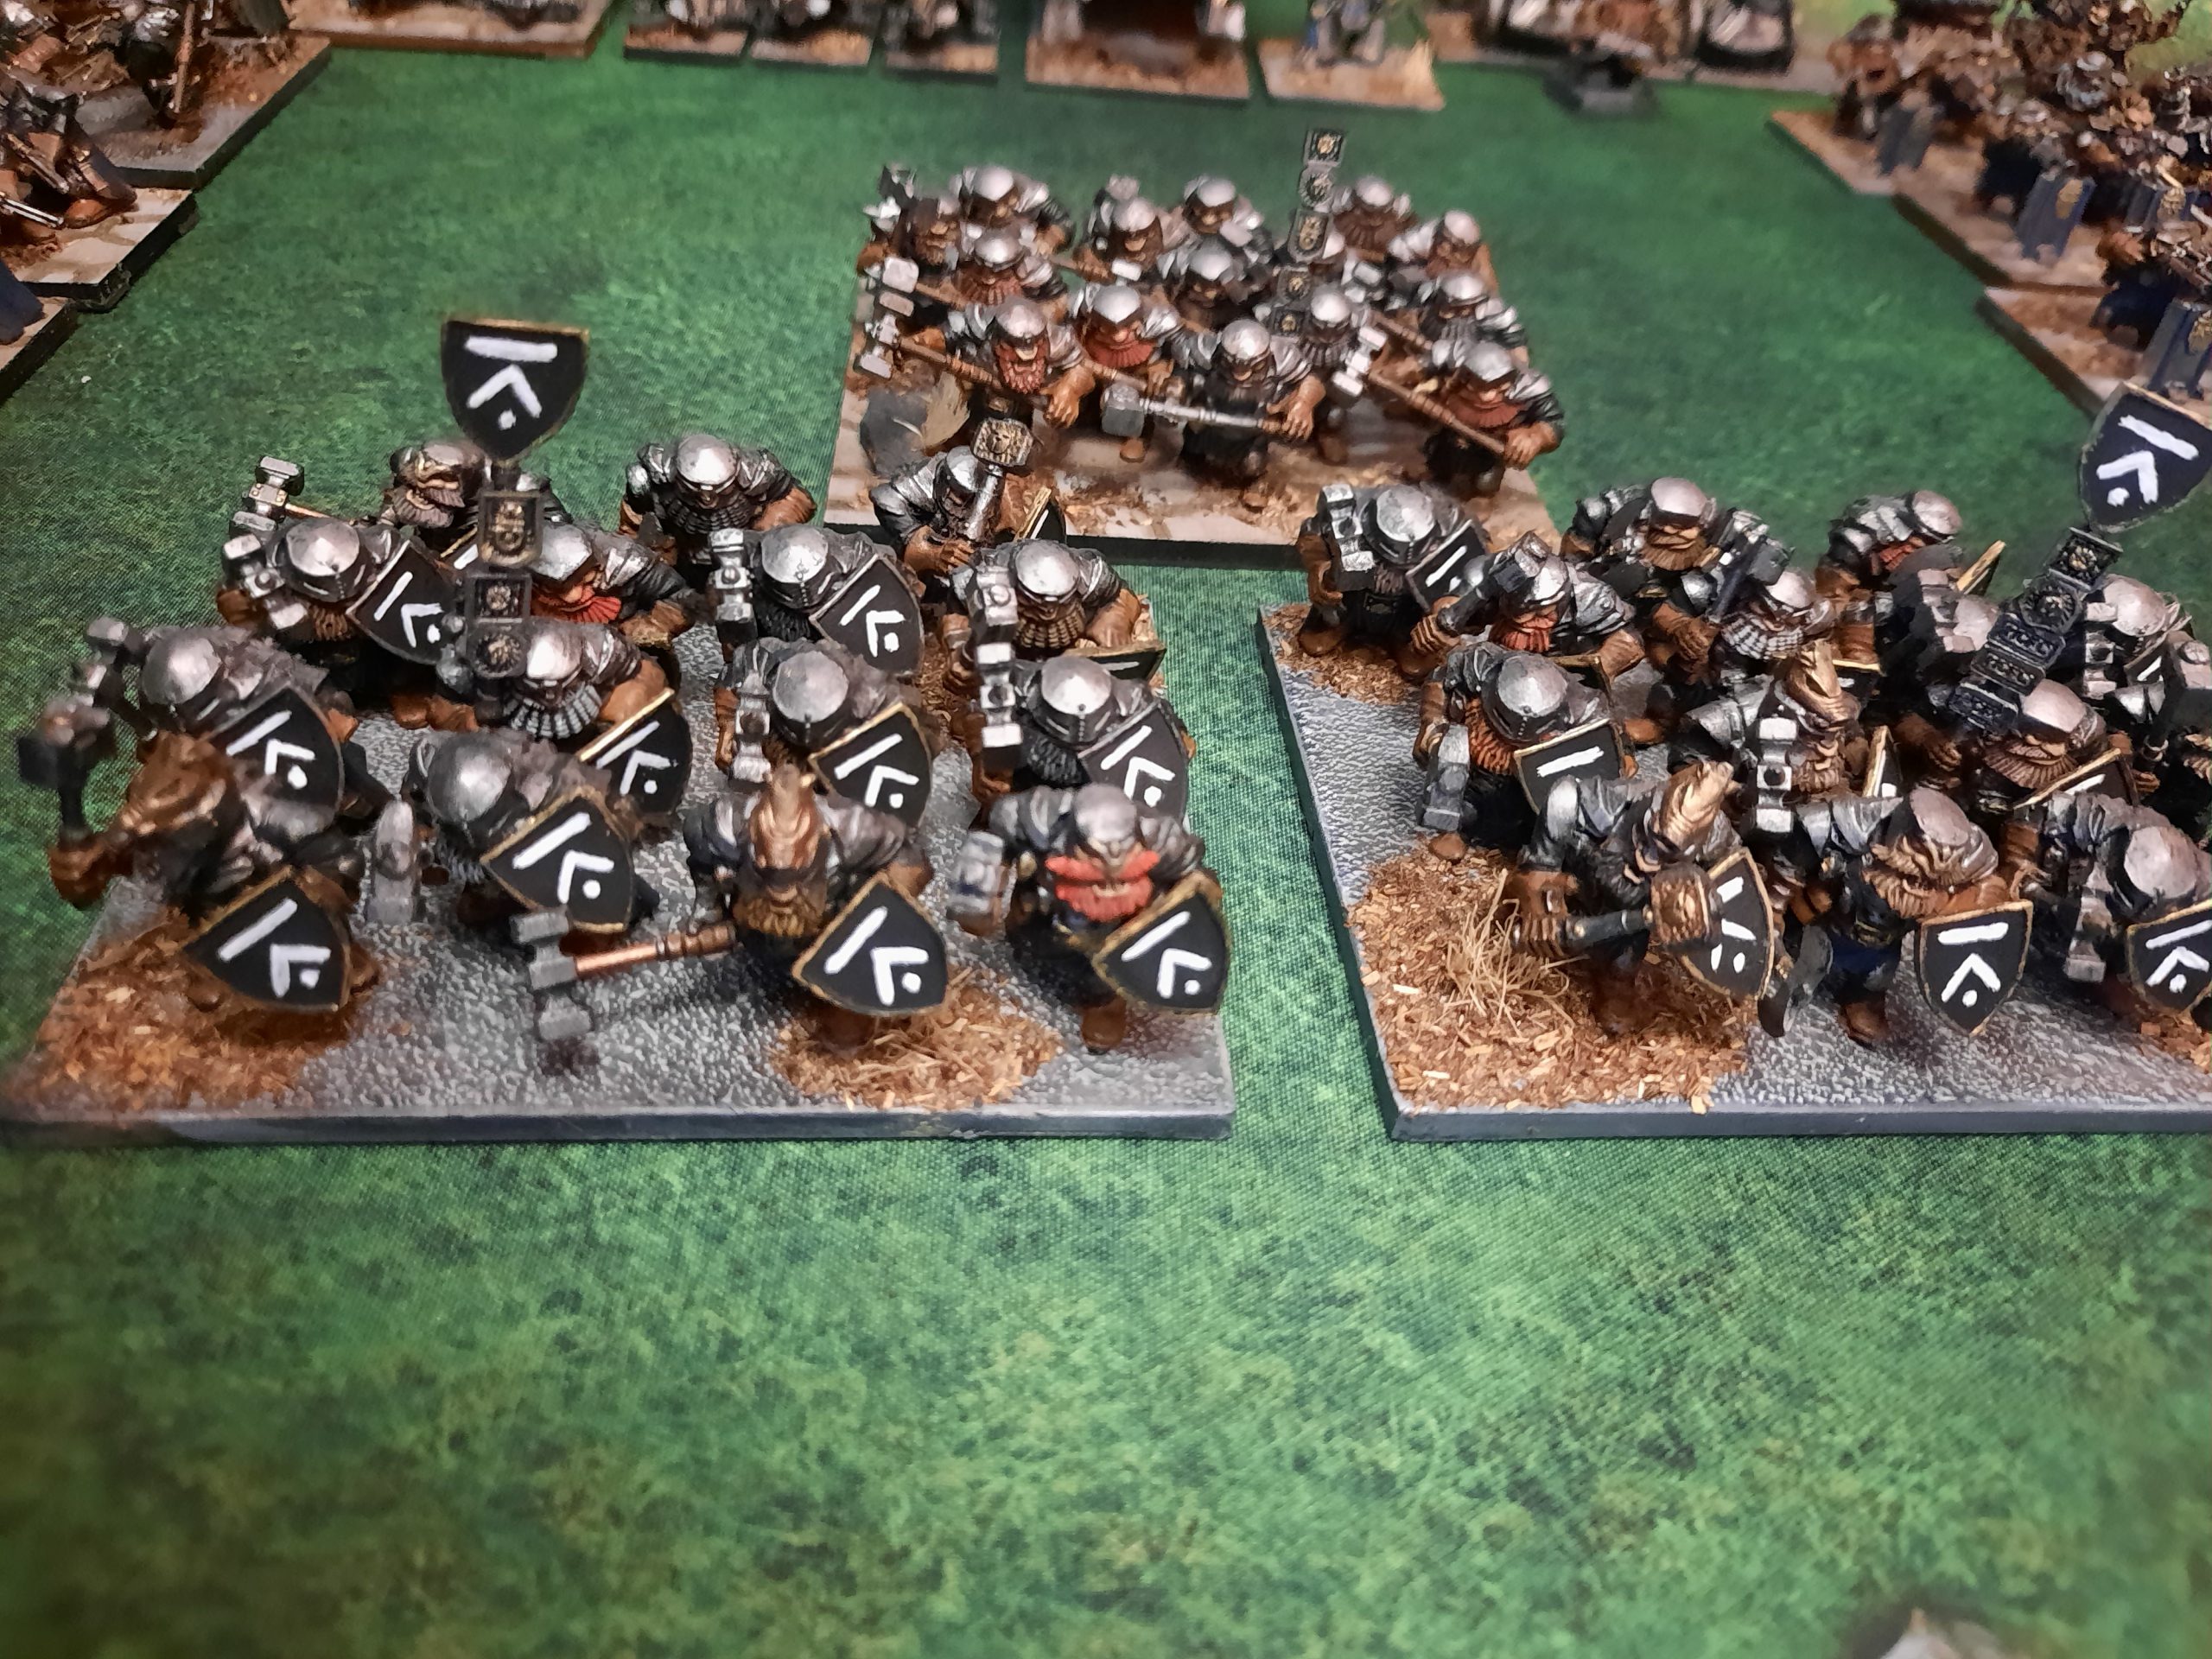
Jeff’s list will be a tough nut to crack. He’s just came off a loss to my friend Jake’s Northern Alliance, who as mentioned earlier have a bit of crossover with Varangur – so, he’s going to be on guard for a bunch of my tricks. I’m going to need every ounce of extra melee punch I have, though, because he’s playing two very stodgy big blocks of lads, with Bulwarkers to cover their flanks, and enough guns to keep me honest even with Stealthy across the board. That said, he lacks for substantially speedy elements, so I’m going to dictate when the first hits go in, and also kinda struggles with the terrain a bit here, owing to the standard Dwarf lack of Pathfinder or Strider. If I’m careful, I can dictate this fight.
Army list - click to expand
He starts by putting his two Hordes down pretty early, along with the Bulwarkers. I’m pretty happy about this, as while their position is predictable, it means I can set up exactly in response to his biggest stuff, then respond with my faster pieces to any flanking elements he puts down. This is essentially what I get to do, with a nice tag-team of Magnilde and the Lord on Chimera against all his characters, and some Night Raiders hunkered down in a pond, where they will sit until something shifts them.
Jeff gets the first turn, and respects my melee threat ranges. Nothing special happens other than some damage plinking on the flanks, because this is a Dwarfs turn one and therefore there are no major positioning tricks beyond ‘put block of Lads in Place and Wait’. Of note is a battle-cluster of characters on the left, where Jeff does his best to give me some rough trades. I don’t take the bait, and instead activate my plan to control the engagement. This means chipping down his Mastiff Hunting Packs with extreme prejudice, so that he can’t deliver his stuff behind a screen of chaff, while taking cautious positions with my main elements.
Jeff therefore has to move up into the teeth of my army, and has a lot of threats to respect. His lone remaining Mastiffs do their best to screen, but he knows they only have one turn left to live, so they use their Throwing Mastiff (how many Mastiffs could a Mastiff chuck if a Mastiff could chuck Mastiffs? 8 attacks worth, apparently). However, he leaves me a couple of openings.
The first is that I can basically tie up his Horde of Ironclad in the centre with my Thegn on Frostfang, and block the Shieldbreakers from getting any relevant charges in. The second is that I can double-charge his left hand Bulwarkers in the flank and front, which means I’m probably popping them even through Phalanx (in the front) and being Hindered by terrain (for the flankers). Between that, and a Magnilde/Lord on Chimera tag-team into Faber Ironheart (who I judge to likely be the worse thing to be in a long fight with compared to the Dwarf Lord on Large Beast), I’m committed to my full send, and execute it. The end result is that Jeff has quite the knot to unpick on his next turn, and doesn’t have much in the way of resources to do so – though, thankfully, Faber does survive his drag/mag encounter on a low Nerve roll.

The unpicking honestly does not go that well – not through fault of Jeff, as he played around it to the best he could, but through design of Me (love to toot my own horn, but I was legitimately proud of this, so deal with it). He clears what I’ve given him fairly comprehensively, and even engineers a very clever charge with the Steel Behemoth (which takes a lot of explaining, but was a useful exercise in discussing movement concepts in the game, so I was grateful to Jeff for going through it as clearly as he did) that puts it in position to start threatening my left-hand breakthrough. But, it’s not enough to deny my most important charges. As such, those begin in earnest next turn, with a cheeky Snow Troll Prime flank and Mounted Sons of Korgaan front into the right hand Bulwarkers (currently screening the Shieldbreakers’ flank), and work beginning on the cull of his Heroes on the left. Finally, I go all-in on popping the Ironbreakers, committing the Bulwarker-killers from earlier to take some more Dwarf heads. The Hero-cull works well, but otherwise I kinda just… not bounce, but do less than expected? This is more than made up for by the Shieldbreakers getting absolutely lit up by Night Raiders, all of whom put major damage out to the point where the chip healing Jeff has isn’t nearly gonna fix them up. The end result is that most stuff is left alive, but that’s not major – I can clean it up next turn.
Next turn comes for me sooner than expected. The Shieldbreakers finally join the fray and kill a Snow Troll Prime, and the Ironclad plus Steel Behemoth clear out a unit of Mounted Sons of Korgaan, but other than that Jeff just Keeps On Bouncin’ off my stuff. As such, my endgame is really just cleanup – I eventually pretty much table Jeff, shooting off the Shieldbreakers and meleeing off literally every model with a US characteristic above zero over the final couple of turns, scoring every section of the board and maxing out my score again. Bit anti-climactic, I know, but honestly it’s just nice to end on a win and against a lovely skilled opponent too.
Jeff ended the event on 2-3, placing unlucky 13th, but with a very healthy kill %.
Wrapping Things Up
So, after five rounds, I’ve clawed my way back to a passable 3-2. I feel much better, and my early fears of a descent into Paris Syndrome are avoided (read more about this in the next Road article), but I’m not expecting too much in terms of my final standing. I’m shocked when I end up 6th of 22, which is honestly pretty high considering my two rough losses, but then I did absolutely smash three people in a row so I suppose it balanced out. Sadly, this is an absolutely infuriating one point short of moving the needle on the Varangur rankings for me, so my elation is quickly snuffed out. I can’t be too miserable, though, as my boyfriend Ben has took second place with their first run-out of Salamanders, and I’ve had five great games against new and wonderful opponents. It’s a real credit to the Kings of War community in the UK that I’ve had such good experiences, and long may it continue.
Overall, it was a good weekend. I have a few tweaks in mind for my next event, but that’s likely gonna be covered in a Road, because a. it’s a lot of talk about something I’ll probably have tweaked to unrecognisability in two weeks anyway, and b. I’m typing all of this up to go straight into the Content Forges instead of snuggling my dog, who I haven’t seen all weekend, and boyfriend, who I have had few opportunities to snuggle. The latter is a state of affairs I want to change immediately upon finishing this paragraph, so thanks for reading, and I’ll see y’all on the Road!
Have any questions or feedback? Drop us a note in the comments below or email us at contact@goonhammer.com. Want articles like this linked in your inbox every Monday morning? Sign up for our newsletter. And don’t forget that you can support us on Patreon for backer rewards like early video content, Administratum access, an ad-free experience on our website and more.
