Welcome back, Dear Reader, to my ongoing blog of competitive and hobby progress for 2025. Last Time Around I jumped right into my year so far, talking about my first RTT of the year over at Ettin games. I went 3-0 at that event with a Creations of Bile list and while I’ll probably continue to refine that list over the course of the year, I wanted to test some other things out over the weekend.
In particular, we’ve been working on the review for the upcoming Codex: Astra Militarum behind the scenes here, furiously scribbling review notes down, editing articles, coming up with lists, and working on scripts for videos. Between those, I had a chance to get in a game with Andrew “Hero of Team Imperium” Corban, who was helping us work on the review. Andrew is a pretty good Guard player – he beat the pants off me at Rise of the Empire in December – and he had a bit of a breakout year in 2024, finally taking the next step as he graduated from “taking multiple units of Intercessors in every army” to “playing competitively for realsies.” I hit up Andrew about getting in a game over the weekend, and he came over with his Guard so we could test the new book.
For this game, I decided to try something new. Specifically, I wanted to give the Flyblown Host Detachment a chance. I hadn’t played it yet and while I don’t believe it’s better than the Plague Company, I did see Oscar Ruiz at the Ettin Rtt playing it and finishing 2-1, and he had high praise for it. There are certainly good things about it, and I felt like it needed a test or two before I fully wrote it off.
Building a Flyblown Host List
Let’s talk about what goes into building this list and how I do things. Right now Deathshroud Terminators are among the most powerful units in the Death Guard army – they’re incredibly tough, not too expensive, and they offer some of the only 2-damage melee attacks you can get. They’re also INFANTRY and so any Flyblown Host list has to start with three full-size units of them. I only have two, but I can proxy a third with Blightlords for now. After that I need leaders, and that’s going to be Typhus and two Terminator Sorcerers. The Terminator Sorcerers have solid shooting attacks and their -1 damage in melee is huge for just blanking some armies.
From there I need a unit of Poxwalkers to hold the home objective. Normally that’s not such a big deal but with no sticky objectives in the detachment things are a bit tougher. Oscar’s list went heavy on Poxwalkers – and I think there’s a likelihood I try this again with Typhus leading 20 in the future – but I only have 20 painted so I’m going with Plague Marines right now. Rounding that out are a trio of Blight-Haulers, since they give me both anti-vehicle punch and the ability to protect my units via a Stratagem – Myphitic Invigoration will give an enemy unit -1 to wound if their strength is higher than my toughness for a phase on a unit within 6″ of a Blight-Hauler, so it’s worth having them and keeping them by Plague Marines. I also decided to just not run transports and spend the points on more dudes, hoping that the extra volume coupled with the 5″ Scout move would make up for the slow speed.
Because Transports don’t give you the benefit with this Detachment, I think half the value of it is building without them – saving the points for an additional unit of Plague Marines + character. So that’s what I did.
Here’s what I ended up with the morning of our game:
My Flyblown Host List - Click to Expand
That’s a lot of dudes! I’m not super happy with this final list, and will probably look at reconfiguring some characters at the end. I put in the Tallyman to get +1 to hit and because I thought I’d need more CP, but I’m probably better off with a second unit of Nurglings and Insectile Murmuration instead of Droning Chorus, though I like being able to Advance and shoot a unit of Deathshroud quite a bit.
The Game: vs. Andrew’s Astra Militarum
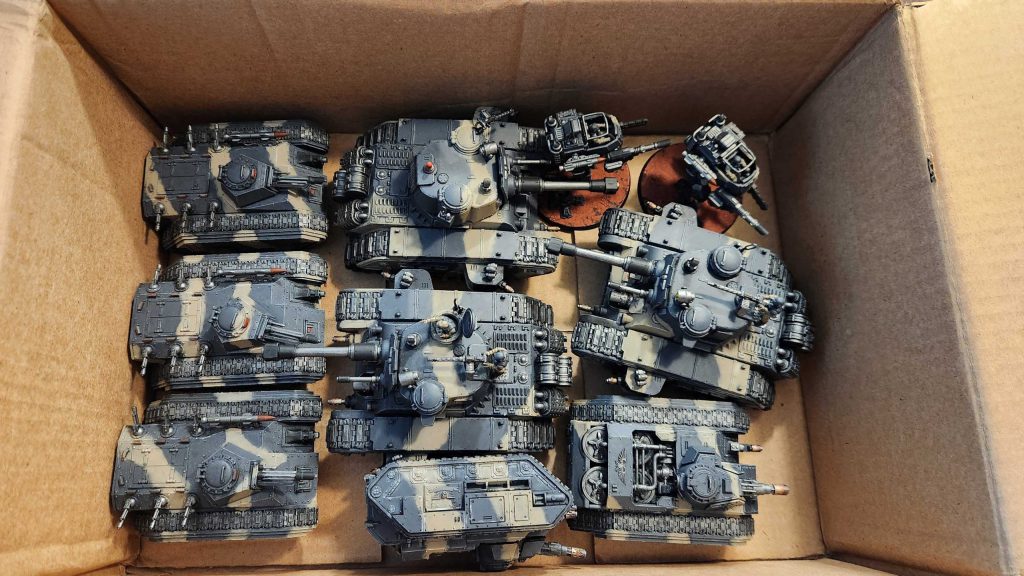
Andrew brought over new Guard. I don’t know exactly what he’s bringing but I know it’ll include multiple Rogals Dorn and at least one of them will be a Tank Commander. He has three painted, so I’m planning on seeing at least two.
Here’s the list he ended up bringing, and I was surprised to find he was running the Combined Arms Detachment:
Andrew's List - Click to Expand
There’s plenty of beef here besides the Kasrkin, and the Dorns aren’t my favorite thing to see when I’m running 18 3W models on the table. That said, Dorns are a lot less scary when they don’t have Lethal Hits, and the combination of permanent -1 to be hit and -1 to be wounded for almost all of their weapons should blunt their impact quite a bit. The mortars are another issue – I wasn’t sure how much damage they’d do into my Poxwalkers, and without the ability to sticky my home objective, losing them could be a real problem. I got a little help from the mission on that front… well, kind of.
The Mission: Purge the Foe / Rapid Escalation / Crucible of Battle
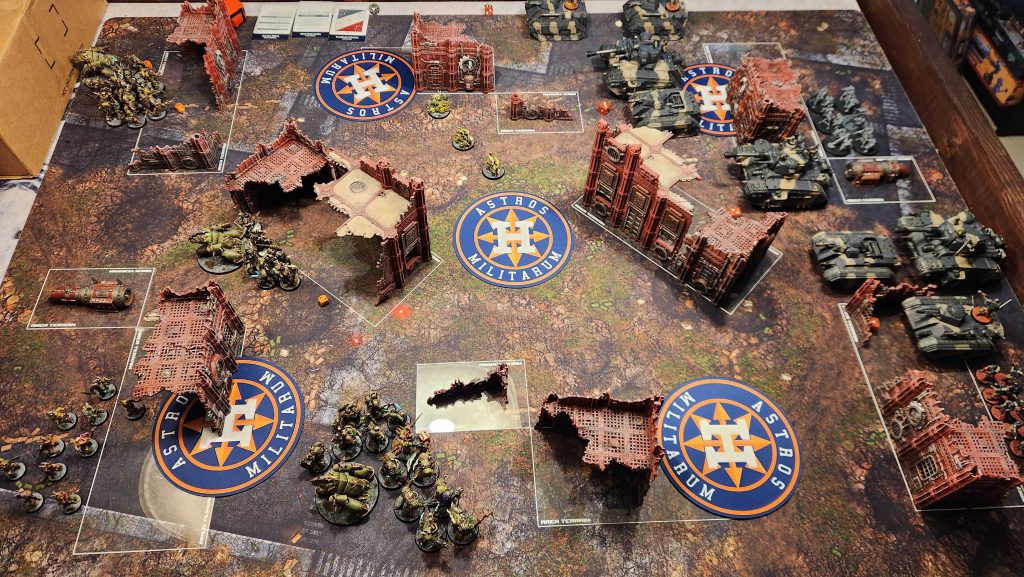
My plan is pretty simple: Pressure. I want to stuff Andrew in his zone and control the board at the middle of the table. In Purge the Foe you don’t need to hold all three objectives, just one and match – especially if you’re going second. I put one unit of Plague Marines into Strategic Reserves for a turn 1 arrival using the mission rule, and Andrew does the same with a unit of Cadians. I put two units of Deathshroud into reserves to deep strike. Andrew’s Chimeras Scout but he has no Infiltrators, so I hold my Nurglings for last. If I end up going second I want the ability to completely stuff his moves. That’s easy – I drop the Nurglings in a line parallel to his Deployment Zone (see photo above), about 11″ from the long table egdge – his Chimeras can’t fit that gap, and so basically can’t Scout forward. The Nurglings are also in a good position to blog movement on the Hellhound and Dorn, and if I go first, they’re in a good position to charge.
I’m Going First.
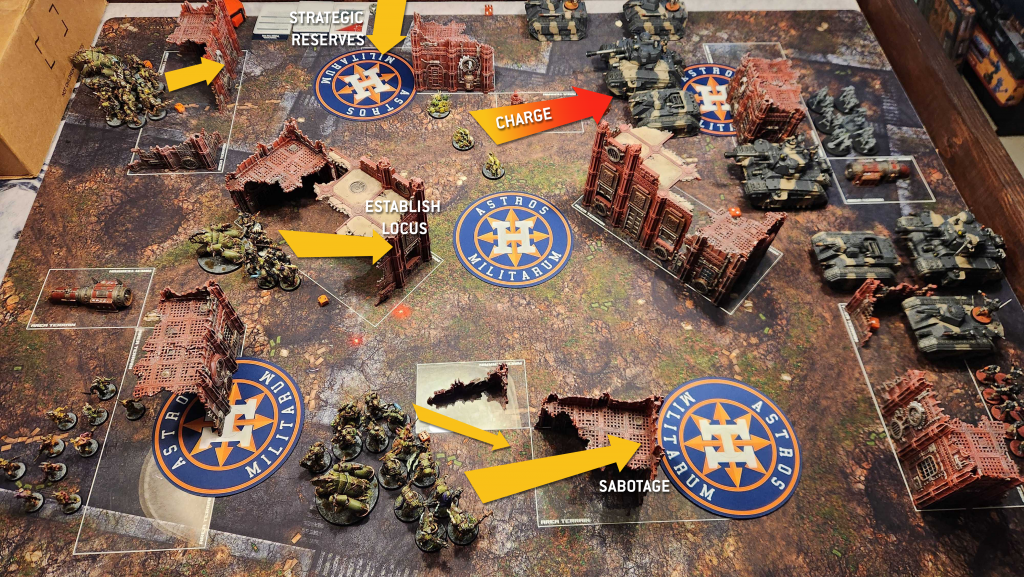
That’s not ideal on this mission but I can work with it. I scout forward with everything into good positions in cover – at top I put the Plague Marines into the ruin, and at the bottom of the table I go as far forward with the Plague Marines and Deathshroud as I can. I draw Sabotage and Establish Locus on my first turn, then the Nurglings push forward, survive a round of Overwatch, and double charge the Dorn and the Chimera. I bring in my Plague Marines onto that top ruin and the objective and this is where I make a big mistake – I overestimate their durability and put them on the ruin instead of behind it. They’ll get picked off the following turn and earn me nothing. I also don’t get a kill on turn 1 but I score 5 on Secondary. The Dorn and Hellhound can’t kill a single base of Nurglings in melee – though they come close – ensuring they’ll be tied down the following turn and at least unable to move forward without a desperate escape test.
Andrew draws Area Denial and Establish Locus turn 1 but opts to stay out of the middle of the table, fearing a charge in from my Plague Marines that might cause him lasting problems. This I think was a mistake – I’ve over-estimated how durable my Plague Marines are and how impaired the Dorn and Hellhound are. They both tag my Plague marines and blow through all five and both characters, giving Andrew 4 for Kill on the turn and keeping me off a second objective, holding me to 4 for Primary on turn 2. That said, Andrew is playing it way too safe – I’ve trapped him in his zone up top and he’s trying to avoid moving out to the middle where I’d otherwise be afraid of him clogging it up with Dorns and Hellhounds I’d struggle to bring down. That said, he’s decimating me on my home objective, killing me off it with five mortars’ worth of shooting per turn. That’s not great and when I kill a Kasrkin unit he drops it back into reserves using Reinforcements! to send it to my home on turn 3.
On turn 2 I drop my Deathshroud reserves – one unit on the north objective and another in the midtable ruins – then proceed to press toward the objective at the bottom of the table. I’ve drawn Storm Hostile and Bring it Down and despite popping off shots with my Blight Haulers and connecting with four, I manage to leave two tanks each alive on 1-2 wounds, ensuring I score 0 for secondary objectives this round. I hold on to Bring it Down and huck Storm Hostile because Andrew doesn’t seem interested in walking onto objectives at the moment. My plan is to try and beat him on Primary.
On turn 2 Andrew draws No Prisoners and Bring it Down, then proceeds to blow up two of my blight haulers trivially – he literally kills one in a single melta+4 shot with a hellhound – then picks up the rest of the Poxwalkers with Mortars to score 5 on No Prisoners and 4 on Bring it Down. Not great!
On turn 3 I draw No Prisoners to go with my held Bring it Down and this is where I start to turn things around. I’m able to score Hold and Hold more (8), then I press forward. My Deathshroud and Plague Marines up top finish off a Chimera and a unit of Kasrkin (the ones he puts back into Reserves), while at the bottom of the table I bring five Plague Marines out of the ruins at the bottom of the screen. I use those to double charge a depleted unit of Cadians sitting on my objective, using higher OC to steal it from my Deathshroud. I needed to kill them for No Prisoners, but killing a few Cadians with a bunch of Deathshrouds and Plague Marines is overkill – what I really needed was to get into combat with those tanks on the other side of them, but those were nearly 12″ away – how was I going to pull that off?
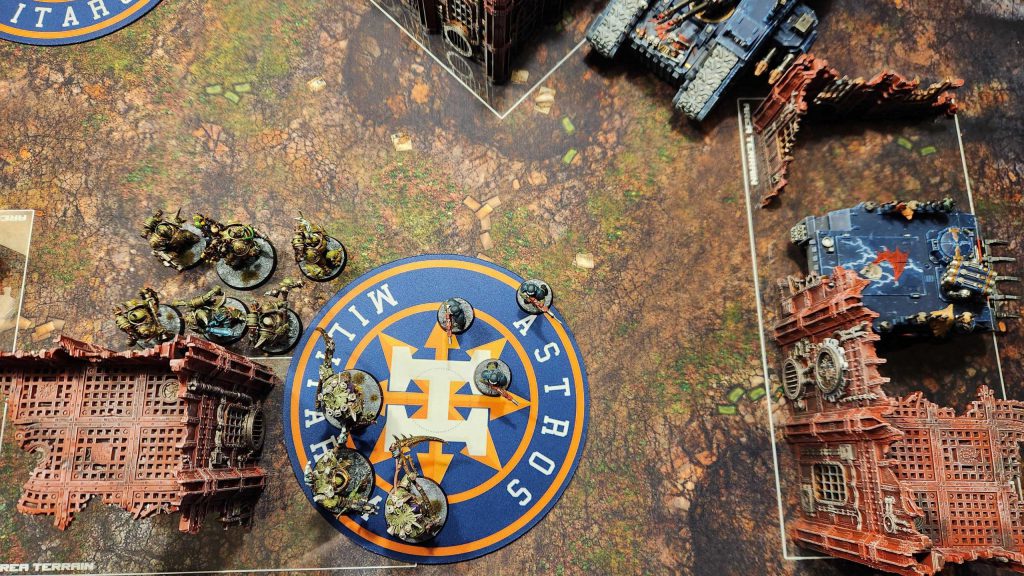
The key here is the Vermin Cloud Stratagem for the Flyblown Host, which allowed me to turn a double charge into a very tricky long bomb. Here’s the general gist of what I did, recreated with models I had lying around:
Here’s the starting state, more or less – the Land Raider is standing in for the Dorn, while the Rhino is a Chimera. Those are something like 11″ away from the Plague Marines. Or it might have been 13. I did 11″ here because I think I rolled a 5 on this charge but it might have been a 7.
The Deathshroud make the first charge. I want to use them to block out Plague Marines from base-to-base contact, but not make the charge impossible.
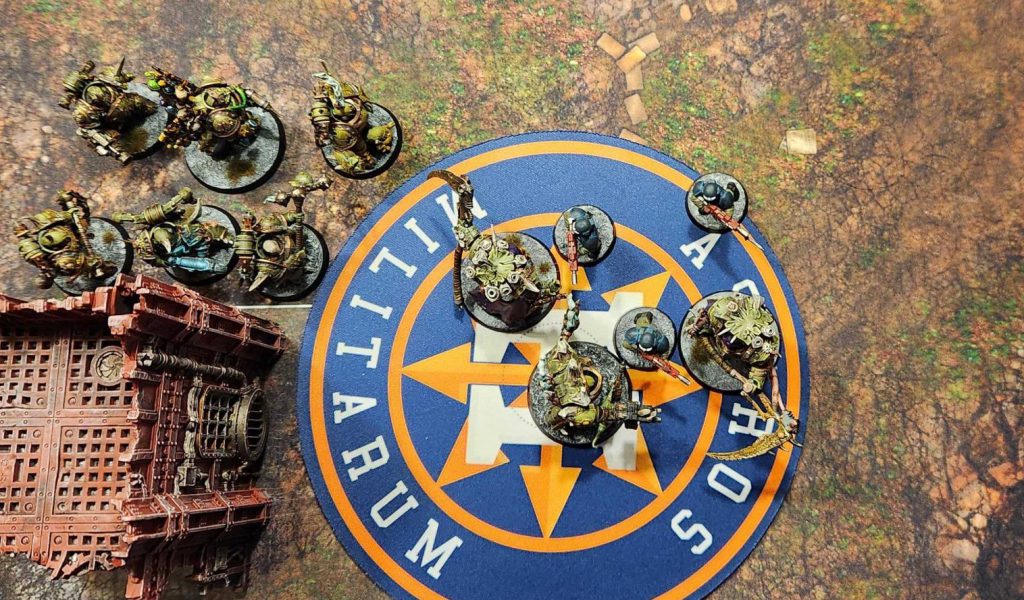
They tag the remaining Guardsmen in base-to-base contact, then it’s time to roll for the Plague Marines. In this example, I roll a 5, and move the Plague Marines in, moving the front two guys as far as I can while still touching in base-to-base contact. I want them to get as far as possible here.
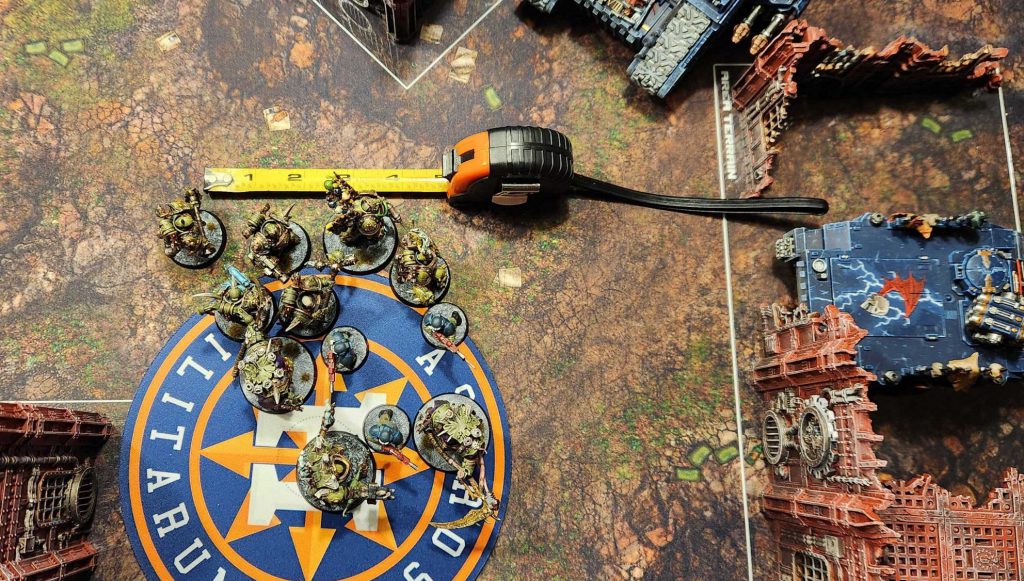
Once those guys have piled in, it’s time to start fighting – Andrew doesn’t have the CP to interrupt, and even if he did, he can’t stop my first fight. This is done with the Deathshroud, who trivially pick up the three remaining Guardsmen and Consolidate closer to the point. This leaves the Plague Marines, who are still eligible to fight because they made a Charge move this turn. At this point I use the Vermin Cloud Stratagem – they can move 6″ when they make Pile In and Consolidate moves this turn. They’re within 6″ of both the Dorn and the Chimera with two models – intentionally on my end- so I pile in to those.
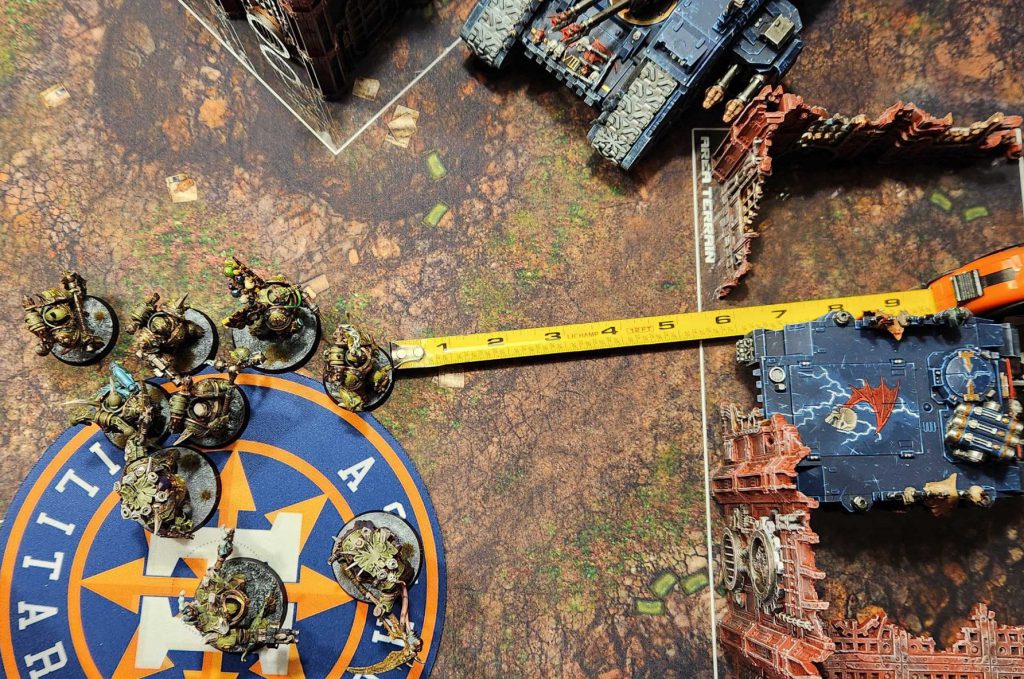
This lets me catapult across the table, shooting into the far vehicles. The thing to watch for here is that the land raider might be closer to the guy in front, but that wasn’t true in the actual game, where the final pile-in looked like this:
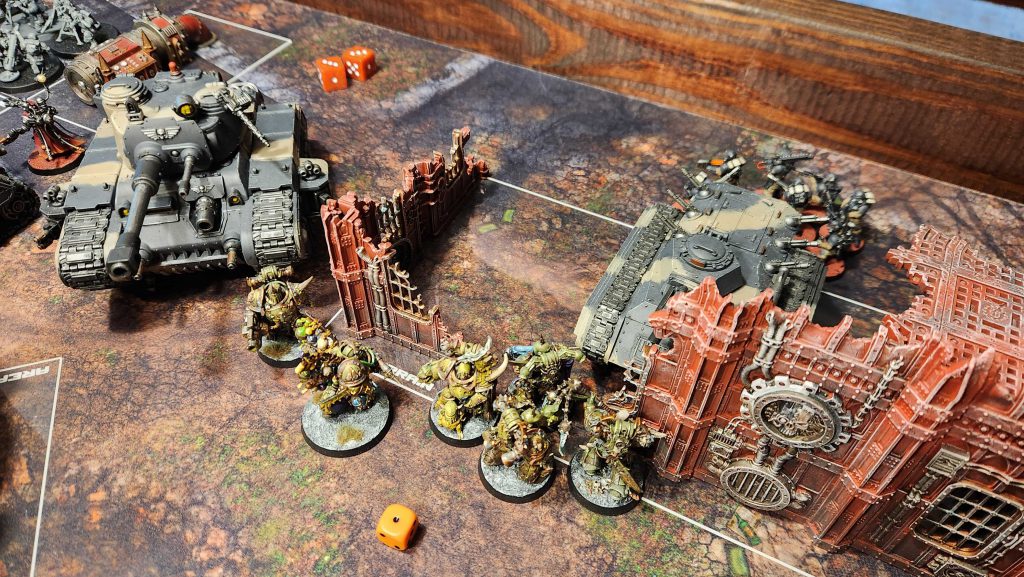
This was massive. Those three Plague Marines with heavy weapons bodied that Chimera, taking it out completely, and ended up tying up the Dorn for multiple turns. This isn’t technically as useful when all your guys have Stealth but I couldn’t have done this at all without the Flyblown Host Stratagems, so it felt pretty good to do.
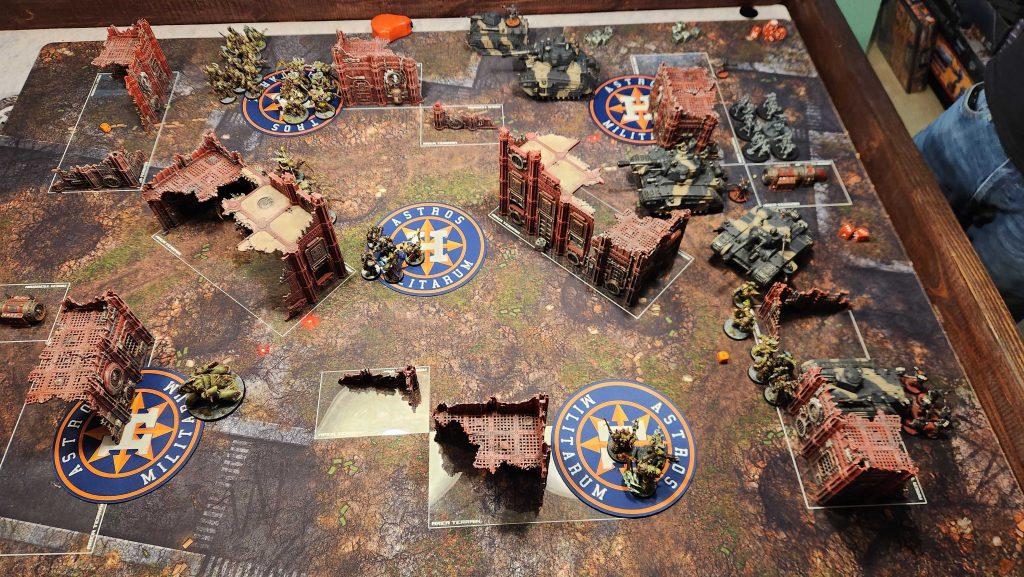
Andrew gets completely boned with Secondaries turn 3, pulling Recover Assets and Secure No Man’s Land. He drops behind me and takes my home objective with Kasrkin, destroying the Blight-Hauler I had put on it after losing my Poxwalkers, then runs out to the lower objective to steal it from me for a turn and score 2 on Secure No Man’s Land. He can’t afford to do Recover Assets and chucks it.
It’s blood in the water now and Andrew’s luck has dried up when it comes to his Dorns – he’s rolling 1s for shot counts now and just bouncing off my Terminators and they’re pressing forward into him. I take one down in melee and consolidate into the other. Andrew gets lucky here on Secondaries, though – I draw Recover Assets and and Containment, and I’m not really in a place to do either, thanks to a poorly-timed failed Battle-shock test. I gotta move up and kill him and hope I can stay ahead. I’ve pulled 12s on primary in rounds 3 and 4 to Andrew’s 8s, so I’m ahead by 4 there but he’s going second and liable to catch up on round 5.
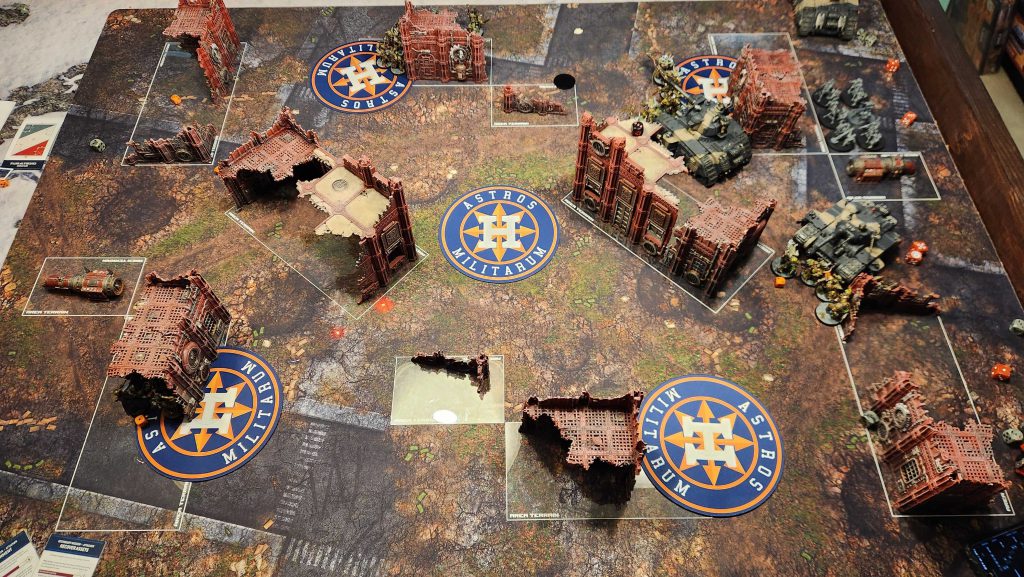
And he does – on primary at least. I pull Assassination and Defend Stronghold in Round 5. I’ve used Plague Marines to take Andrew off my home objective, recapturing it, and that means I’ll score 8 for the round, taking me up to 78. I press up with my lone Terminator Sorcerer to take him off an objective and probably get too greedy – Andrew draws Assassination and Defend Stronghold on his final turn to score 8 after he kills that Term Sorcerer (it only had 2 wounds left), bringing him to 76. It’s a very close game but I’ve managed to squeak by with a win.
Result: 78-76, Victory
What a great game. Andrew was rolling me on dice at the start with some of his shot/damage rolls but by game’s end things had evened out and I was actually starting to see how good Stealth could be, particularly against an army that wasn’t going to challenge me in melee. There are some definite things I liked about the army – being able to slingshot that big charge bought me a lot of breathing room – and the untargetable relic made holding the top left objective a breeze when mortars and Dorns just couldn’t touch me. The MBHs were fine, I guess – they did an OK amount but I never used their Stratagem, in part because I mostly had Deathshroud out front and it’s useless on them. I think the big mistake I made was just completely giving up a unit of plague marines on turn 1 – I didn’t need to do that and it was an easy 4 VP for Andrew. For Andrew’s part, I think he really should have put a unit near the center turn 1 to drop a Locus – that would have at least tied the game.
Either way this was a blast and while it’s not a great matchup for Flyblown Host, it’s not a bad one, either. I’d need to test them against something that’s a heavier melee army I think – that’s likely to be where I miss the -1 WS/BS contagion the most. But I didn’t hate this nearly as much as I thought I would, and having an extra 150 points from not taking Rhinos was interesting.
Hobby Progress
I’ve been painting Terrain! I mentioned last week that I’d been doing Volkus terrain in the style of Sky Serpent. This week I painted more and did a little tutorial of my own, scaled-down method. Here’s the play-by-play.
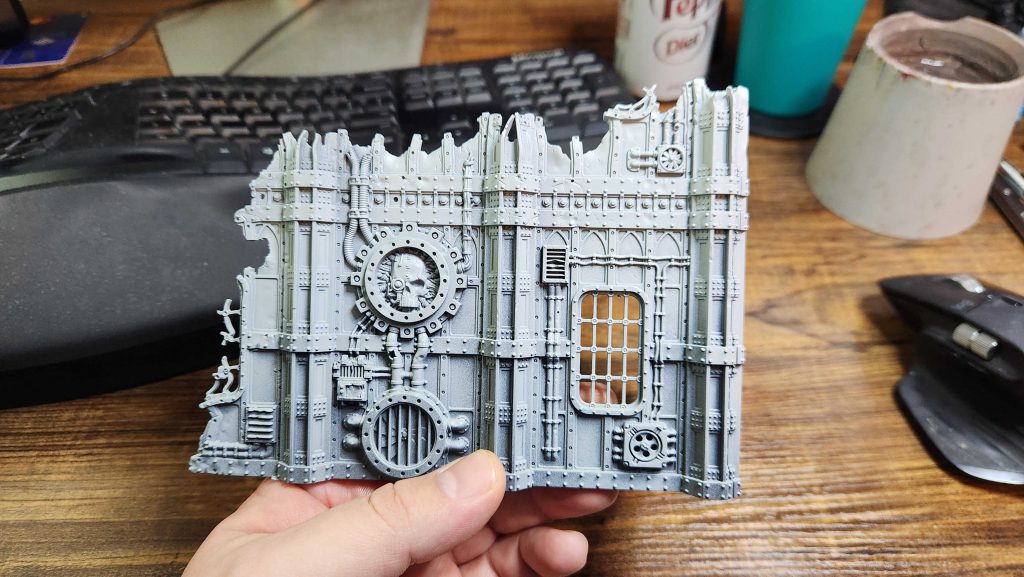
I start by doing a zenithal prime – Mechanicus Standard Grey and Grey Seer.
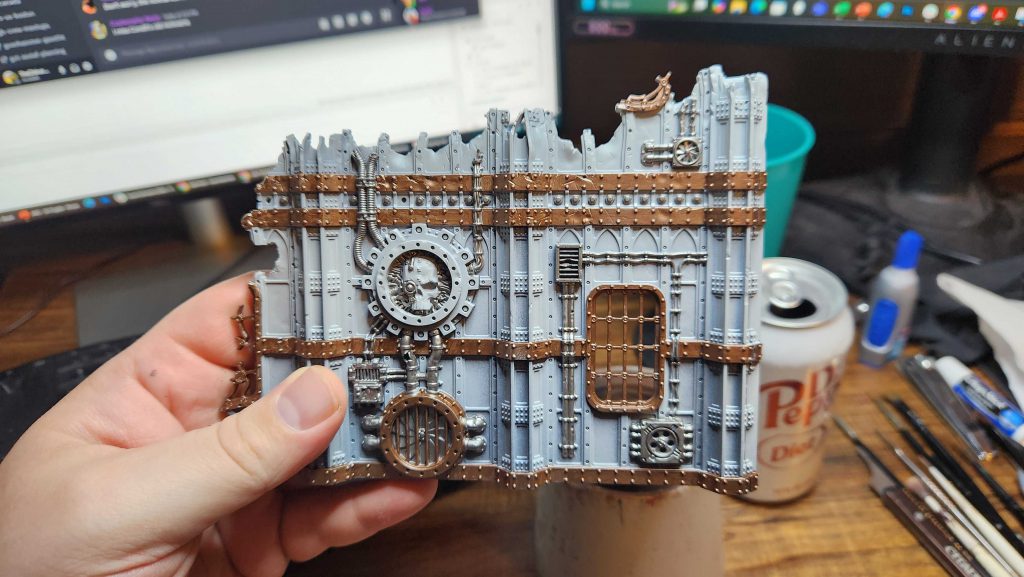
Next up – metallics. The metal parts are Leadbelcher, while the bronze parts are Sycorax Bronze.
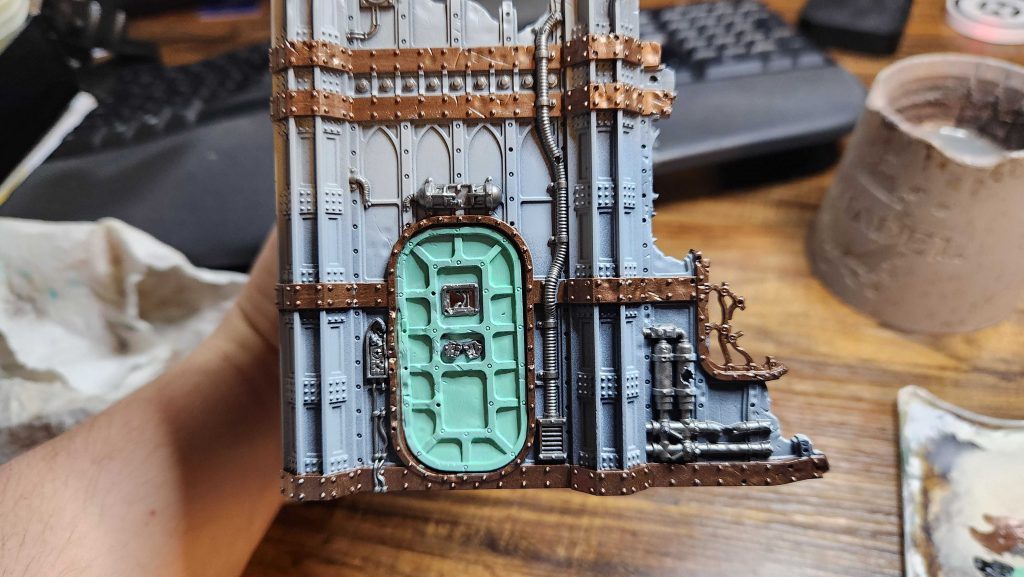
The doors are Gauss Blaster Green.
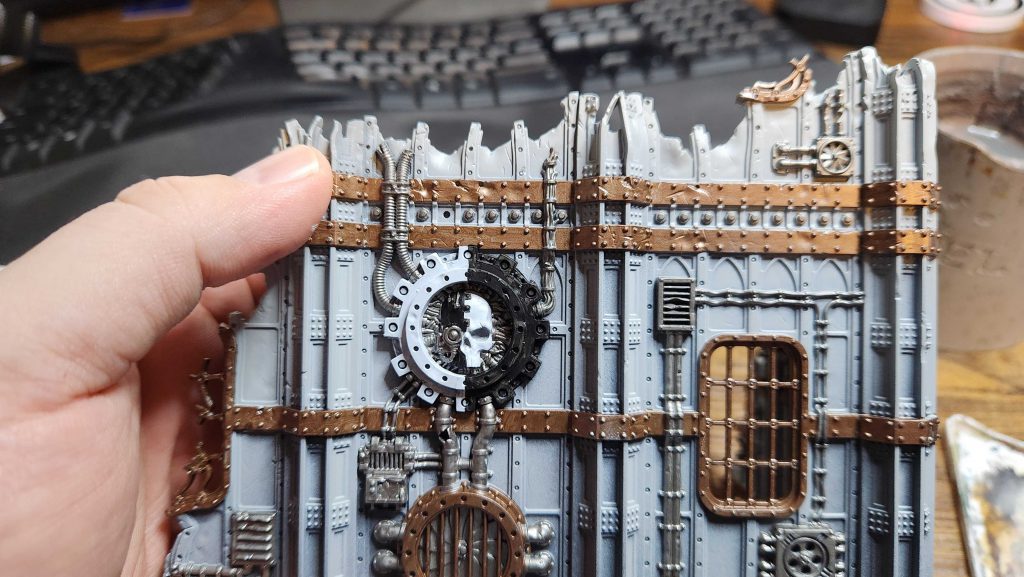
Then I paint the Mechanicus symbol, using Abaddon Black and Corvus Black for the dark half and Reaper Ghost White for the white half.
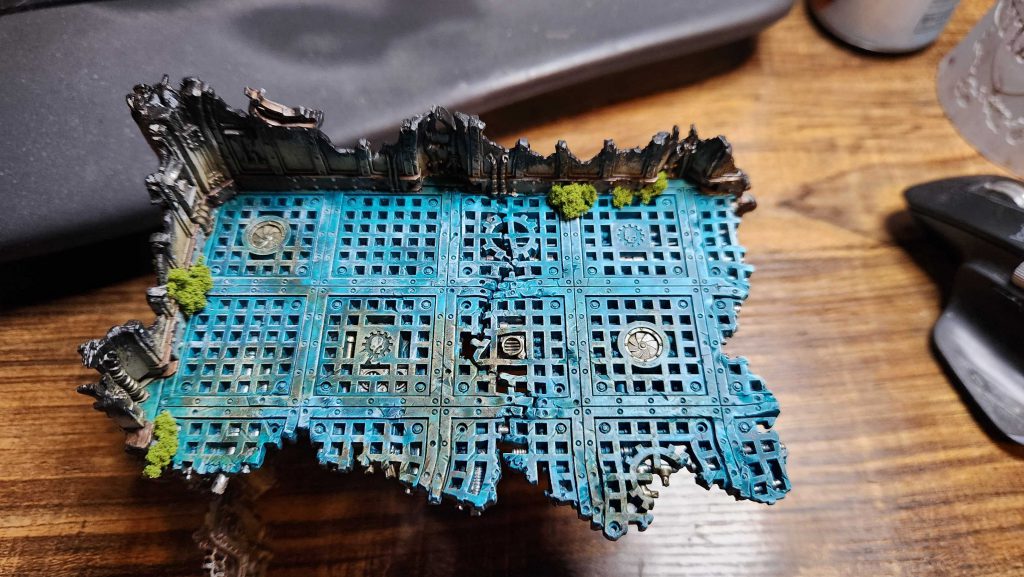
This is jumping ahead a bit photo-wise because I forgot to take a photo, but I paint the floor with Kroxigor Scales Contrast paint.
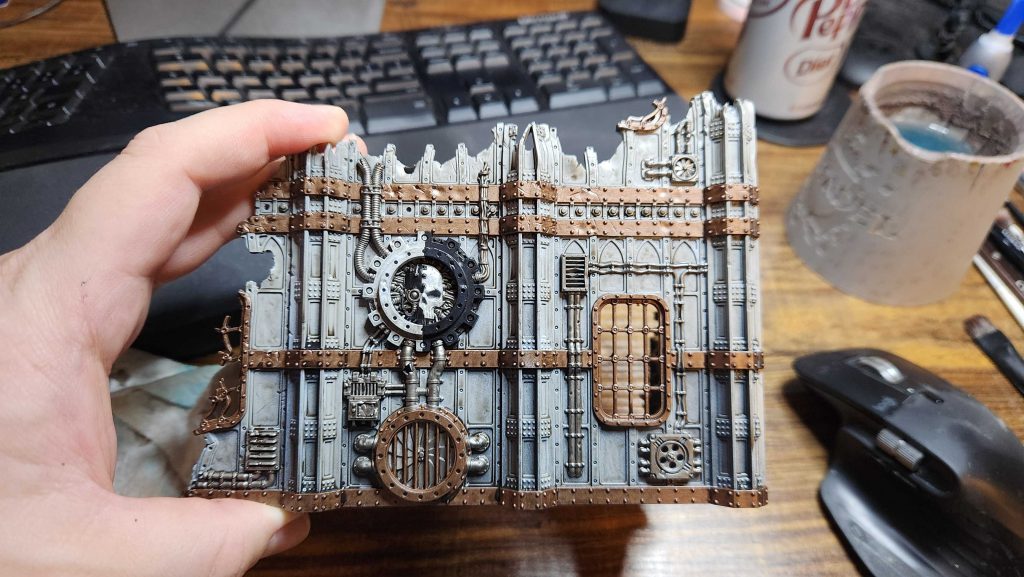
Then I wash the whole thing using a 3:1:1 mix of Agrax Earthshade, Nuln Oil, and Contrast Medium. This is all mixed in a small pot of Agrax I had used most of. It gives me a good, dark brown wash that isn’t super over-powering.
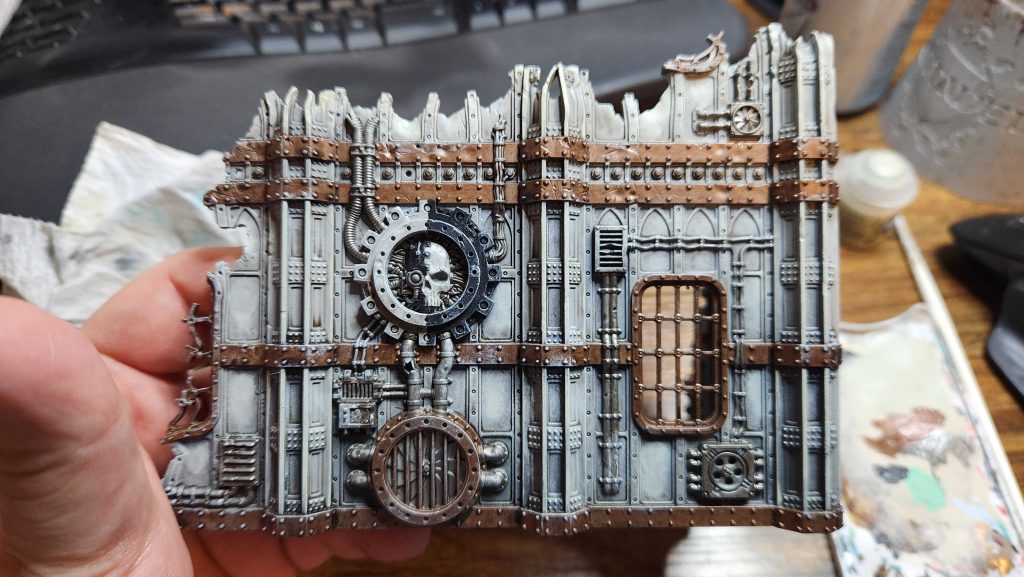
Next I come back over and drybrush the whole thing with Deepkin Flesh. I also mash the drybrush into the panels a bit to give them some texture. So far this is all the same as SkySerpent’s tutorial, but next is where I diverge.
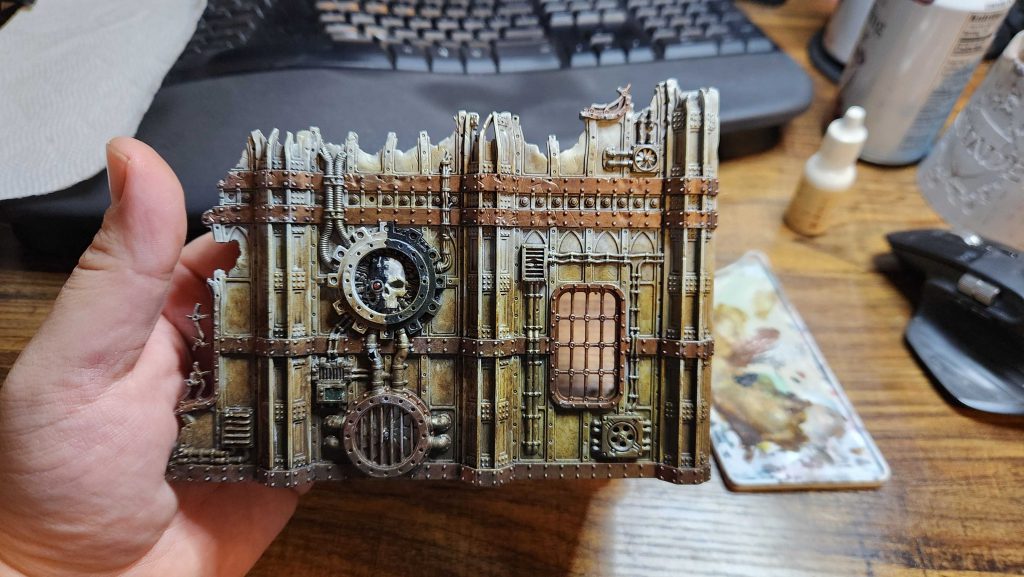
Next I use a 2:1 mix of Typhus Corrosion and Plaguebearer Flesh contrast paint, and paint up the sides of the terrain. I’m not a big oil wash guy, but I find this gets me a look very similar to streaking grime and it works well. I’ll vary up the mix a bit as I go but the idea is to get some good greenish brown streaks in there. I’ll clean off parts with my fingers as I need to preserve some of the sharper light edges.
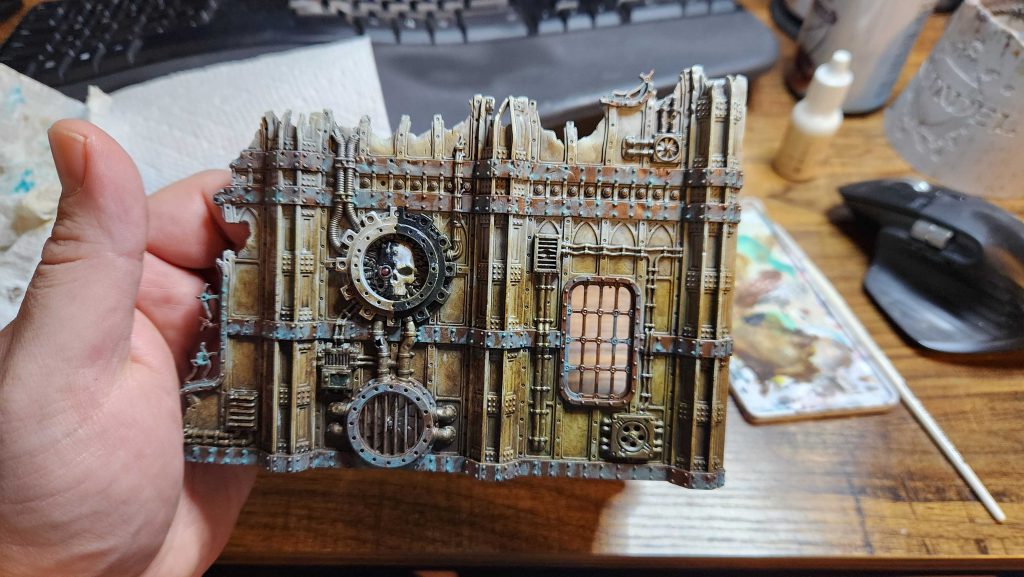
Next I go back and add verdigris to the copper parts using Nihilakh Oxide. This is also when I clean up the mechanicus skull, doing edge highlights with white and painting the lens for the eye.
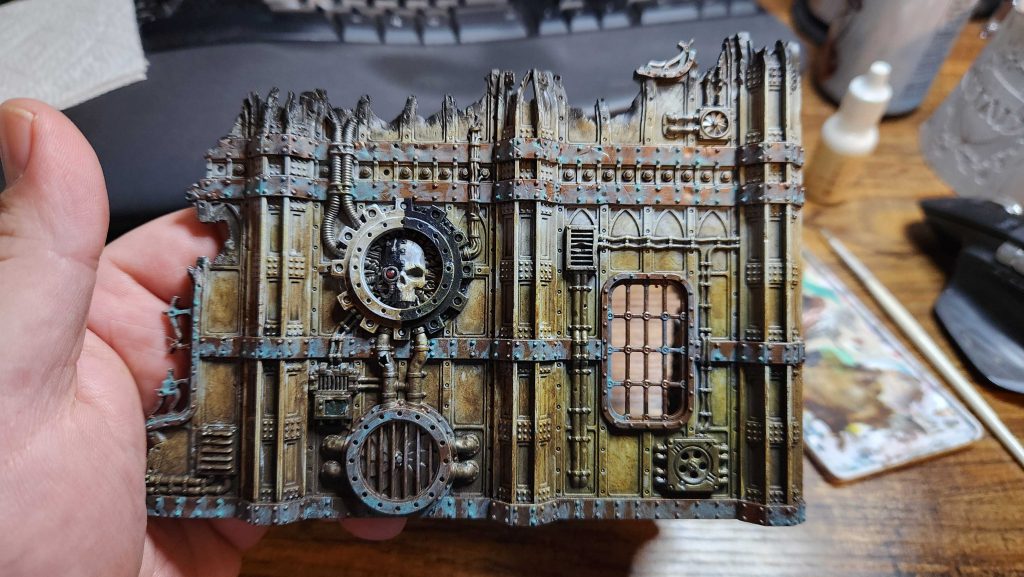
In this semifinal step I drybrush the top of the ruin with Abaddon Black, giving it a burnt look.
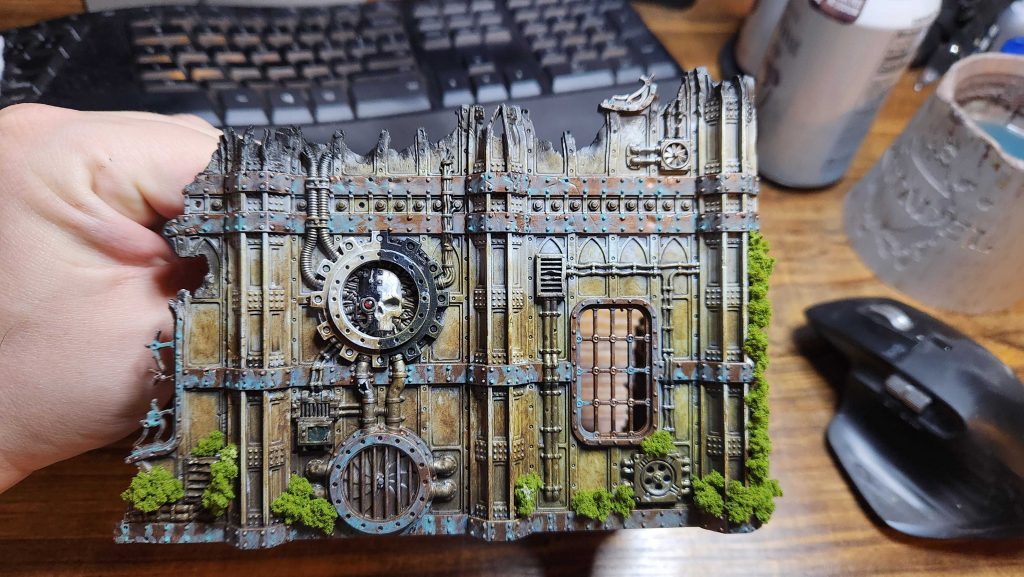
Then I use PVA glue to add a bunch of Woodland Scenics green clumps all over the thing, creating a real overgrown look that adds some great color and makes the whole thing pop. Again, props to SkySerpent for the original here – I love how this turned out and I couldn’t have done it without his tutorial.
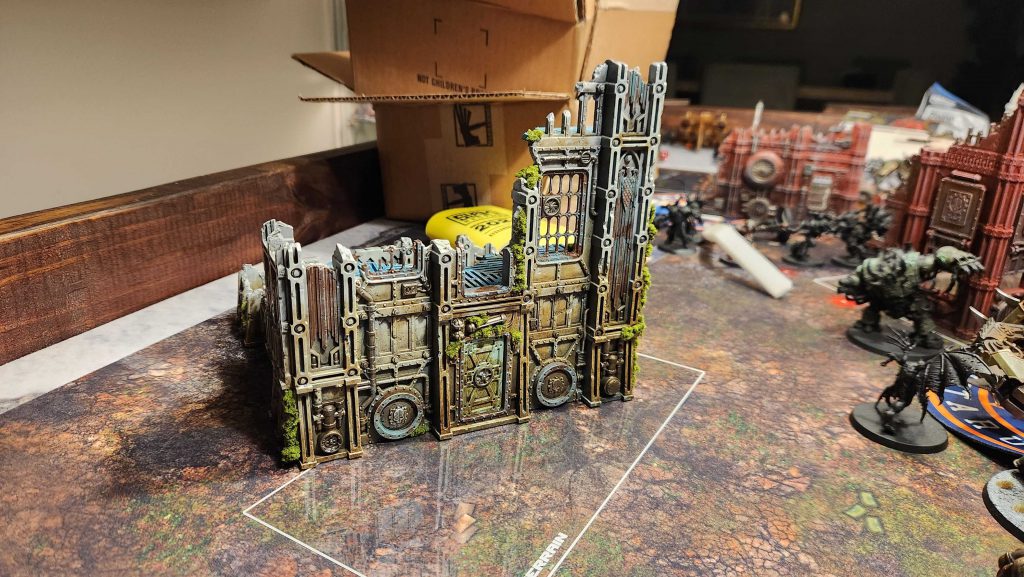
I went ahead and used this to do one of the larger buildings afterward, leaving me with just one more large ruin and a bunch of scatter pieces to do.
Next Week: The League
That wraps up this week’s game and hobby adventures, but tune in next week for more, as usual. I’ve signed up for a 12-week league at Ettin, and that should keep me pretty busy for a while here and help me keep ahead of my “two games per week average” goal – though I’m already on good pace right now with 5 games logged in the first two weeks of the year. I’ve got more terrain to paint still, and I suspect I’ll need to go ahead and buy the final 6 Deathshroud and get them done, just so I have them.
See you next Thursday.
Have any questions or feedback? Drop us a note in the comments below or email us at contact@goonhammer.com. Want articles like this linked in your inbox every Monday morning? Sign up for our newsletter. And don’t forget that you can support us on Patreon for backer rewards like early video content, Administratum access, an ad-free experience on our website and more.
