Welcome back, Dear Reader, to my ongoing progress series that follows along with my journey to attend a slate of competitive events through the end of the 2021 season and get to a 3-digit spot on the ITC leaderboards. Last time around I spoke about my first event of the season, a 4-2 finish at the Lone Star Open. You can find that write-up here. It’s been a couple of weeks since my last update and that’s mostly because I’ve had most of the army painted and done, so there isn’t a ton of hobby progress for me to track. Meanwhile I haven’t played a ton of games, but I will be talking about the practice games I’ve been able to get in.
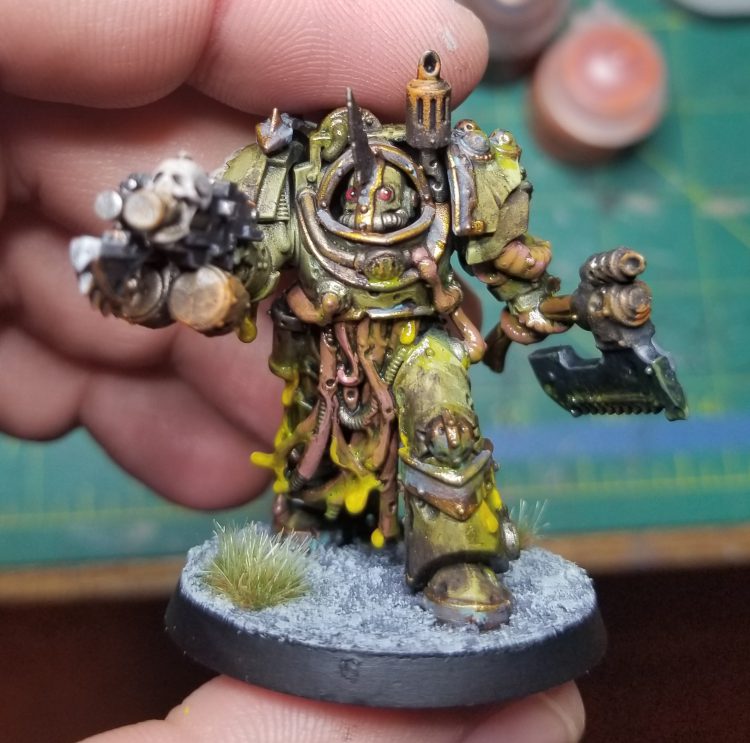
The next big event I’ve got coming up is the US Goonhammer Open, in Maryland on Labor Day weekend. That’s only two weeks away and while I certainly had a solid amount of time for practice, it ended up being relatively light for me gaming-wise. Because of that, I’m hesitant to make a lot of major alterations to my Death Guard list – I’m very comfortable with how the list currently plays, so I’m not super enthusiastic about making changes to it right now. My Blightlords and Deathshrouds did finally arrive, but based on the list’s performance at the Lone Star Open I think I’m going to keep things to the general format of the list I’ve been playing. I’ll swap out one Blightlord, since one of my models was running a sword instead of an axe, but for the moment I’m going to avoid making massive changes. There are however a few things I am considering as changes at the moment, namely:
- Changing the Plague Company. I’m not using the company contagion in my list at the moment, but that could change. I have a lot invested into the Daemon Prince at the moment , but I could reasonably consider moving some things around and giving him a different warlord trait/relic combo if I don’t think it’s worth trying so hard to protect him. If I don’t change the DP, then the big question is “which of the Plague Company Stratagems will give me the most value?” I’m currently running Mortarion’s Anvil, where Relaptic Assault gives me the ability to Heroically Intervene with the Plague Marines, Terminators, and Rhino, but only after an opponent charges. That’s decent in a certain set of situations, but hasn’t proven useful all that often. Realistically, my other options are: Inexorable (-2 to charge rolls), Harbingers (re-roll hits for Poxwalkers), Ferrymen (Give a foetid virion aura +6″ of range), and the Wretched (re-roll one psychic test per turn, know +1 power). Poxmongers might have play here but I don’t have enough daemon engines to really make this worth looking at. I really like Ferrymen here for turning the Stench Vats on the Blightspawn up to 12″, but it carries the downside of being a Command Phase Stratagem, which means I will probably forget to use it most of the times I need it. That’s not ideal but I’m going to give it a shot and try to remember it in practice.
- Changing the Deadly Pathogen. Viscous Death on the Blightspawn has been my go-to, but there’s a case to be made for swapping it out for Corrosive Filth instead, since +1 damage vs. vehicles is a pretty potent upgrade and I’m likely only saving 1-2 CP per game at most with the Blightspawn getting free re-rolls. That said, it’s also 10 points cheaper and ensures I have the CP left to use on my Plagueburst Crawlers, who will need to re-roll if they roll low on a Disgusting Force mortar shot. I may leave this one as-is for now, but I’ll be reconsidering strongly for my next event.
- Toning down the Daemon Prince. Having a 2+ save with ignore AP1/2 attacks seems good but it seems like most of the time the Daemon Prince is actually being attacked, it’s with AP-3 weapons that will take him up to his 5+ invulnerable save regardless. The flip side of this is that I’m spending both a Warlord Trait and a Relic on keeping him on this strategy, and I can theoretically take a completely different angle with him, giving him something like Gloaming Bloat – which turns off re-rolls to hit and wound, also protecting him – and give him the Warp Insect Hive relic, which give him re-rolls to hit and wound and make him significantly better as a fighter. Doing this means staying in Mortarion’s Anvil, but I was already running that way anyways.
After some tests with Ferrymen I decide to keep Mortarion’s Anvil and switch out the Daemon Prince’s options for Gloaming Bloat and the Warp Insect Hive. In addition to making him more of a melee monster this also opens me up to be able to use the Flash Outbreak Stratagem more effectively, and that combos with the Deathshrouds and their Chime. This doesn’t require I paint up anything new, so all I have to get done for the event is my final axe Blightlord, who I finished up over the weekend. No, I’m not drilling his barrels. The barrels on the Blightlord are all variable sizes and some are too small to drill effectively so I don’t bother on them. I may put black dots on there, though.
The Practice Games
Over the last few weeks I’ve had time enough to get in two additional practice games with my army, in between playing games of the new Kill Team. People like to run their mouths about review copies but for us, getting a review copy is a lot of work: Upon receiving the box I have to immediately mail the models off to Colin and Greggles so they can start painting them for our How to Paint articles, take photos and write up a section for our unboxing article, and start reading the rules and playing practice games so we can write our reviews. By the time our review goes live I’ve already logged a dozen games, and the following week’s review content will eat up a bunch more of my 40k game time. Sure, we could just post a few images of the book or make a Youtube of us reading it on camera to save time, but that’s not the level of content people come to us for and I personally do not like reviewing games or books without games under my belt – this is also why we tend to have players who actually play the armies in question work on Codex reviews and Start Competing articles. Anyways, the point is I had less time than I’d have liked, but I’m also fairly happy with the army so it’s not the end of the world. Over the last month I’ve had time to get in two tournament practice games: One against Klobasnek and his Adepta Sororitas, and one against my common opponent Swiftblade and his Drukhari.
As a quick reminder, here’s the army I’m playing with:
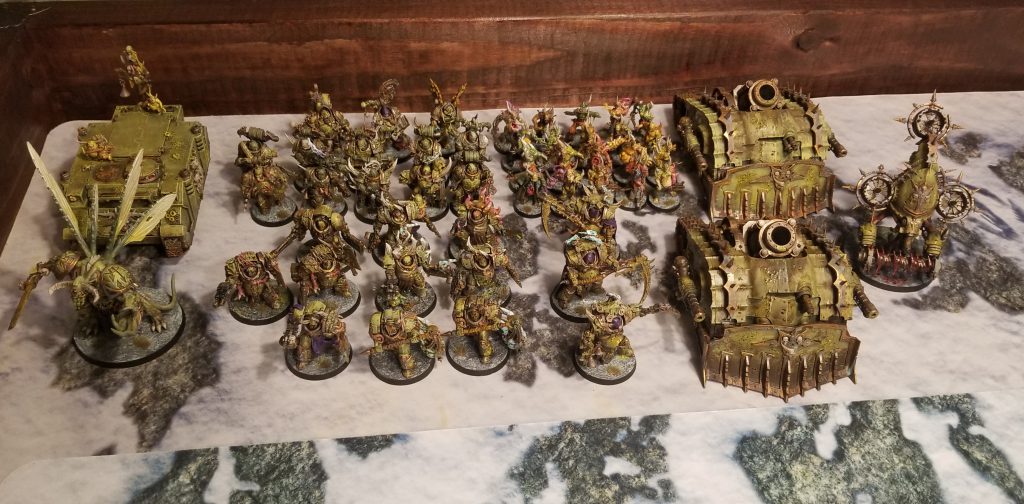
My Death Guard - click to expand
For my game against Klobasnek I don’t change anything up, but against Swfitblade I’ll try out the Ferrymen as my Plague Company.
Game 1: Klobasnek’s Adepta Sororitas
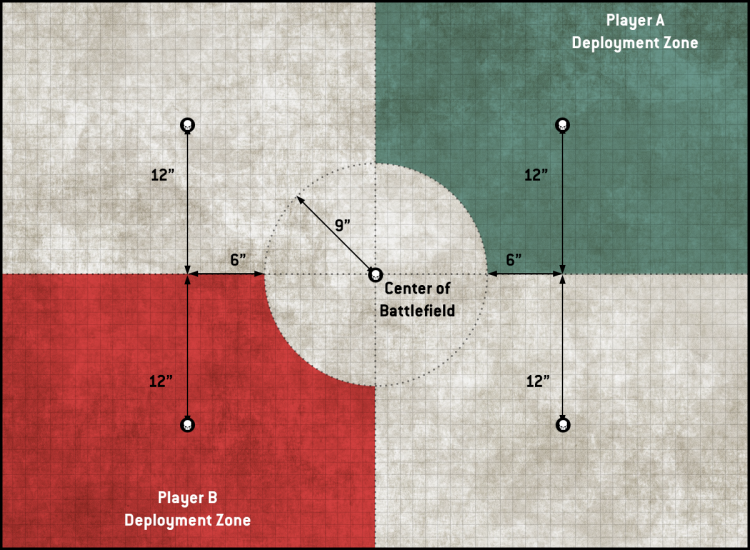
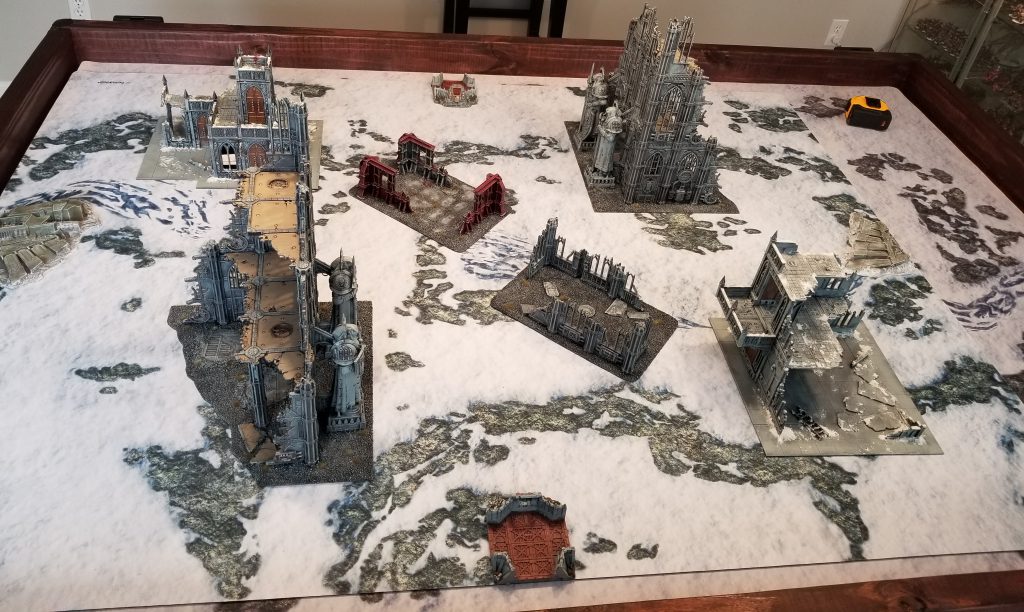
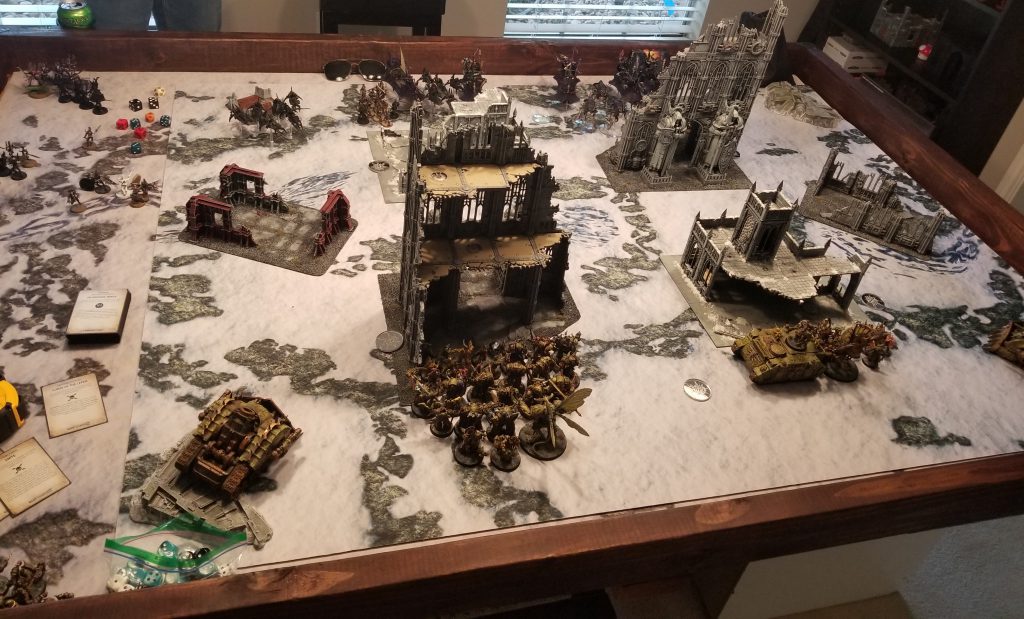
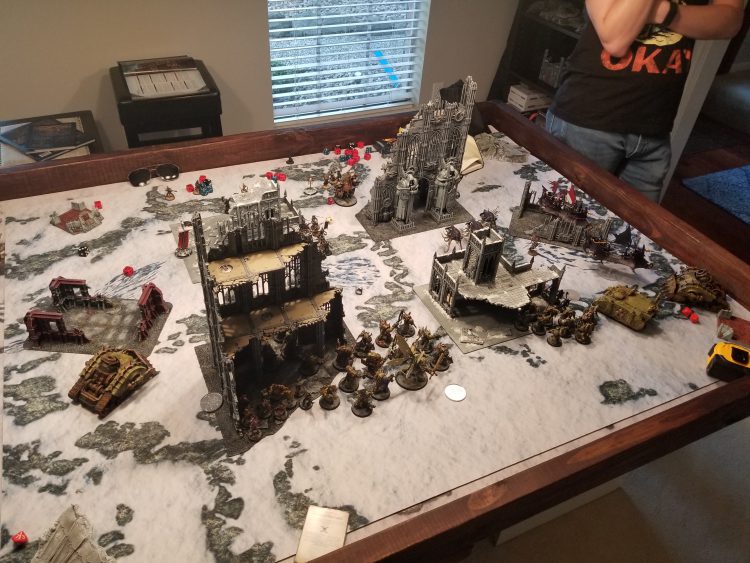
I haven’t actually played against the Adepta Sororitas since their new book dropped, so when Klobasnek asked about playing a tournament practice game, I jumped at the opportunity. One of the big things I wanted to do was play a game or two on terrain approximating what GW was showing off in the WarCom preview article for the upcoming Roadshow tournaments. I don’t have exactly what they put together, but I can get pretty close to that with some ruins I’ve got and some smaller pieces, and so that’s what I did for our game, as shown in the photo below.
Klobasnek's list - Click to expand
Klobasnek: My Sororitas collection leans heavily towards Immolators and Exorcists, neither of which are very appealing at the moment. I don’t own any Zephyrim or Mortifiers, and only four Repentia, so the idea behind this list is to lean in to foot sisters and some of the combos in the Our Martyred Lady supplement to make what I do have into something that could hold its own at Warzone Houston in a month.
To that end, we’ve got a tooled up Our Martyred Lady Canoness ready to dump a silly amount of mortal wounds on anyone she can charge, and a big block of 20 Sisters who can make use of Holy Trinity, Martyr’s Pyre, and/or Defenders of the Faith. The Dominions and Sacresants are intended to start in Rhinos, and if they lose a model when their Rhinos are destroyed, they’ll happily take the +1 to hit for the rest of the game from Our Martyred Lady.
The Mission: Sweep and Clear
My Secondaries: Assassination, Grind Them Down, Direct Assault
Klobasnek isn’t running a full block of Sacresants and I already know that the Gemini are an easy 6 VP for Assassination, plus I can score another 6 for killing Kyganil and Stern, making Assassination a no-brainer for me on this one. I don’t trust my larger units around Sisters shooting when it comes to multi-meltas, so I pick Grind Them Down over To the Last. This particular army does very well with the mission secondary on Sweep and Clear – which scores 3 points per turn for holding the center objective – since it’s not so hard to just walk the Blightlords out there and hold it all game.
Klobasnek’s Secondaries: Engage on All Fronts, Assassination, Raise the Banners High
I’ve got enough characters to max Assassination, and Klobasnek’s army is more than capable of putting up a few banners and moving around the table.
First Turn: I lose the roll-off, so Klobasnek has the first turn.
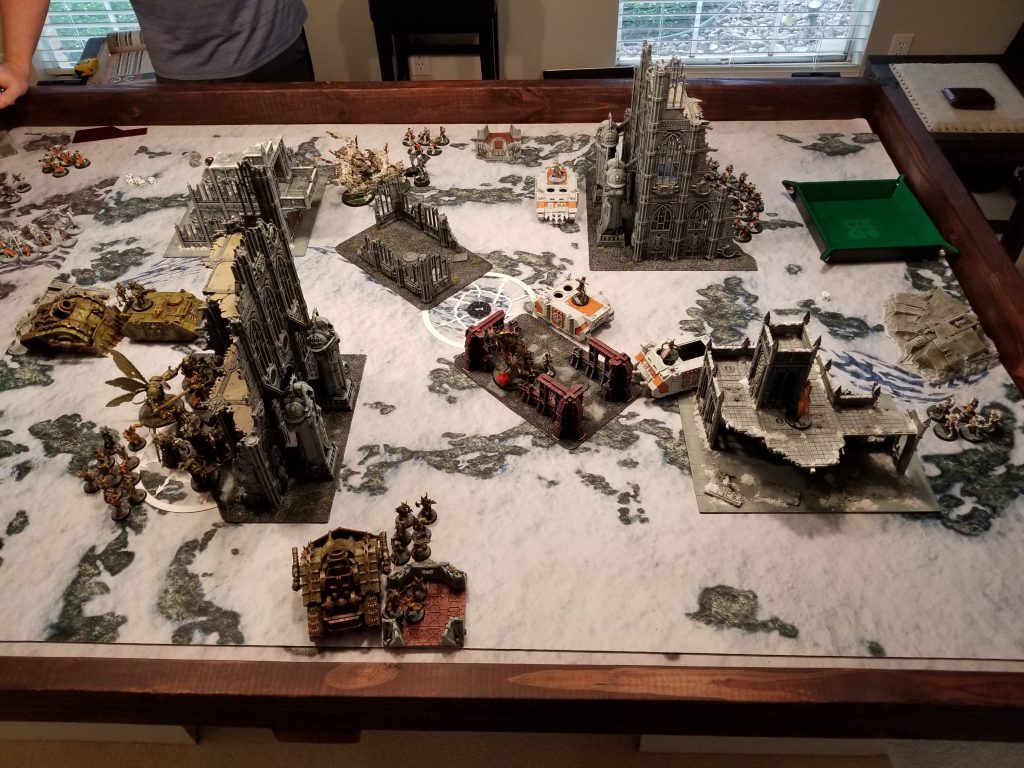
The terrain in the middle of the table makes getting good lines of sight very difficult, even on this mission. Klobasnek powers forward but hedges a bit, trying to stay out of line of sight. He takes a few shots at my Fleshmower Drone, then sends one squad of Repentia at it in a charge that does not go super well, and gives the Drone a free push toward the middle of the table before my first turn. The drone also eats a few of the Sisters to regain wounds. On my turn the priority is “pop open as many Rhinos as possible” and “stay out of Stern’s range.” I don’t have a ton of good targets on turn 1, but I do know I don’t want to deal with those Penitent Engines, so I advance the Blightlords to the center objective and use the mortal wounds output of the Daemon Prince and Plaguecaster along with the mortars from the two Plagueburst Crawlers to remove them from the board. The Plague Marines wheel around the northwestern ruins in their Rhino; they’ll pop out in another turn and wipe out a squad of battle sisters en route to killing Stern.
Key Moment of the Game: Taking Out the Penitents
On turn 1, a mix of smites from the Daemon Prince and Malignant Plaguecaster + mortar and entropy cannon fire from the PBCs completely wipes out the Penitent Engines, ensuring they won’t be a threat I have to worry about. This could have also gone to the Blightlords, who with a mix of shooting and fighting completely tore through a unit of 10 Sacresants using Virulent Rounds to wound them on 2s and re-roll 1s. The weight of firepower was more than enough in this case, and being AP 0 isn’t an issue against good invulnerable saves.
Klobasnek pushes Celestine to mid-table and uses Blessed Bolts on his Dominions to wipe out nearly half the squad of Blightlords (oof!), then charges in with her, but has to deal with getting hit first thanks to the Stench-vats on the Foul Blightspawn. Ultimately the softening from Blessed Bolts still helps him here – I’m able to kill the Geminae but can’t do nearly as much to Celestine. Meanwhile the Daemon Prince and Plague Marine catch Kyganil and Stern from both sides and wipe them out, then the Daemon Prince gets into combat with the Canoness and kills her before being gunned down in a hail of melta fire. Helping Klobasnek’s cause is that he’s able to get three Repentia out of the rhino and into combat with my Plagueburst Crawler on the bottom table edge, which stops it from shooting for three turns while it blasts them away one or two at a time. Still, over the first three turns I’m able to chip down enough of Klobasnek’s army to run away with the contest, though not by as much as I’d like – the Blightspawn whiffs a charge and gets caught out of position, allowing Klobasnek to kill him in melee with Celestine.

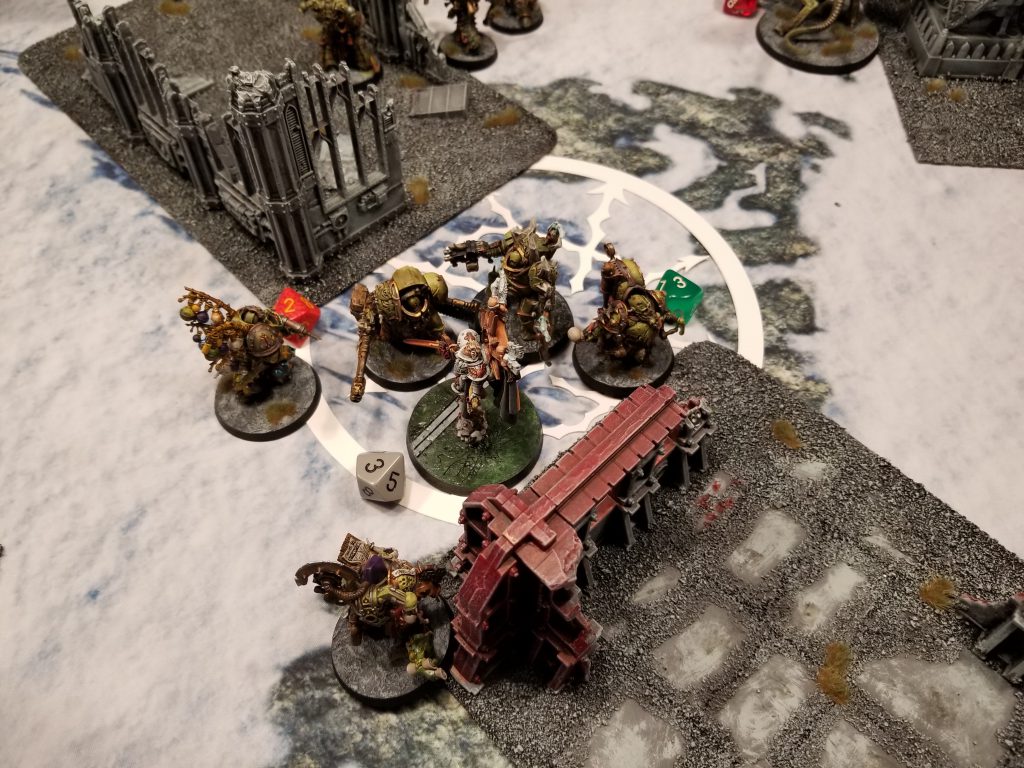
This ends up being a high-scoring game, in part because I can’t do all that much about Klobasnek’s hidden Sister squad on the objective in the Southeast corner and in part because Klobasnek left about a third of his army parked in the Northeast corner of the map in the large ruin, where they’re able to shoot my Daemon Prince to death. That, combined with this being a hold one/two/more mission, means that Klobasnek still ends up scoring 40 points for the mission. I end up scoring 45 on primary and I max Assassination by killing a Canoness on top of Kyganil and Stern plus the Geminae, though Celestine revives to fight again. Klobasnek scores 8 off Engage and 10 off Banners, but I’m able to max out both of Direct Assault and Grind Them Down.
Final Score: 100-73, Victory
Lessons Learned: Blessed Bolts really threw me here, and walking into the Sisters’ 24″ killzone is rough. I think staying out of Stern’s range for as long as possible is a smart play since I’m rocking CHAOS, but I probably got a bit overconfident with the Blightlords early on. I also need to do a better job protecting my flank and screening on these missions – the Poxwalkers weren’t nearly enough screen protection for my Plagueburst Crawler.
Klobasnek: Well, I think this could probably work, but I don’t think I have enough time to both learn how to play it and paint new units for it in time for the tournament. Probably better that I run something familiar and concentrate on the mission. In retrospect, I should have tried using Suffering and Sacrifice on Celestine to try to tank wounds and allow the murder Canoness to get in a second round of combat. Also, I think The Emperor’s Grace on the Canoness is a mistake. She’ll never live long enough to benefit from the healing. She would be much better served with Word of the Emperor to force models to fight last and make sure that her punches land.
Game 2: Swiftblade’s Drukhari
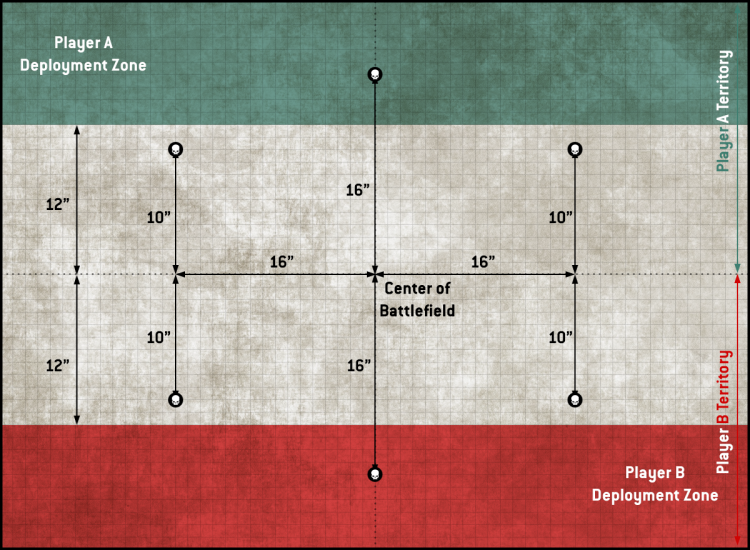
I’ve played Swiftblade many times since moving to Texas during the pandemic, and while he’s slowly improved over that time, he hasn’t beaten me in a game of 40k since mid-2020. We’re planning to travel to and room together in New Orleans and Austin, so he’s just as invested in getting some practice games in as I am. This time we try the alternate setup option for GW terrain.
Swiftblade's list - Click to expand
Swiftblade: This list is something I’ve played a few times now, in fact it’s the exact same list I played in the previous battle report Rob wrote about one of our previous games! As the folks here on Goonhammer would put it, this list is full of the reliable Drukhari Goodstuff, with a lean-in on the Dark Creed Detachment for leadership debuffs and the character sniping stratagem. The Cult of Strife Wyches have been stellar so far at most things they charge with the either Succubus in tow, and the Incubi with Drazhar are nasty in close combat, but my concern playing here into Rob’s list is how many parts of his army will dominate my more fragile close combat pieces if I’m not careful about it. I’ll need to use my mobility to succeed here, and fortunately I have a lot of that with this list, between the reavers and the raiders!
The Mission: Overrun
My Secondaries: Assassination, Grind Them Down, Spread the Sickness
Grind Them Down is my go-to against Drukhari, since they’ll often make the kinds of trades that are favorable for me VP-wise if not points-wise. On a 6-objective map like this I can usually make Spread the Sickness work, getting all three objectives on my side and then putting something across the table to get a fourth if things go well. Worst-case 9 points isn’t too bad; I tend to judge secondaries on whether I’m likely to score more than 7.5 points based on the math I’ve done in prior Meta analysis articles.
Swiftblade’s Secondaries: Herd the Prey, Assassination, Raise the Banners High
Herd is basically an auto-take against Death Guard; I’m typically going to struggle getting across the table so 2 points are a given and 4 are likely most turns. Assassination is maxable against me so if Swiftblade can get a Succubus and/or Drazhar into combat he’ll have an OK chance of killing a character or two. Raise is also eminently scorable as well with things like Wracks to sit back and babysit objectives.
First Turn: I lose the roll-off, so Swiftblade gets the first turn.
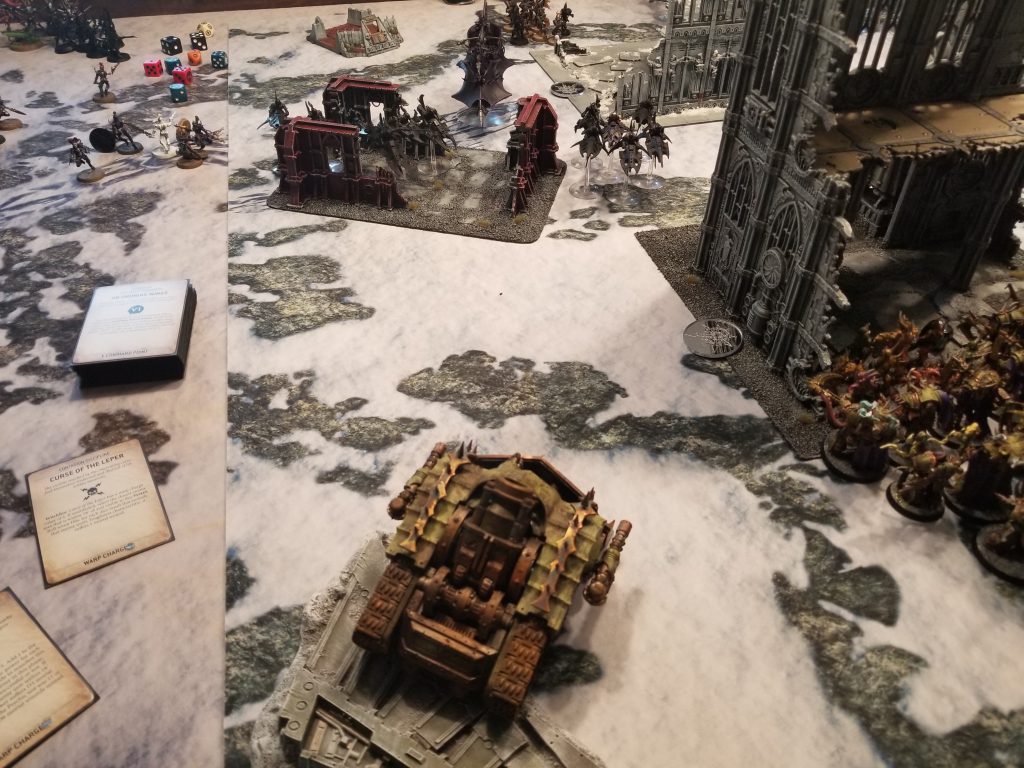
I’ve managed to traumatize Swiftblade a bunch of times with my Plagueburst Crawlers so his turn 1 priority is trying to blow them up with his Reavers’ heat lances and a dark lance. He pushes one heat lance through for a total of 5 damage and the rest either whiff or get saved. It’s the first of several times when he’ll regret no longer having the Kabal of the Obsidian Rose around to re-roll one wound roll per unit. He unloads a couple of units of Wracks, plus the Kabalites and Archon on the rear objectives to hold them and raise 3 banners this turn. The Incubi and Wyches stay in their Raiders and those don’t have much to shoot at. Since Swiftblade’s primary goal right now is keeping the Reavers from getting charged by my Plague Marines, he uses Never Stationary (i.e. Fire and Fade) on the closest squad to drop back 6″ after shooting at my PBC. This isn’t enough to get them completely out of harm’s way, though.
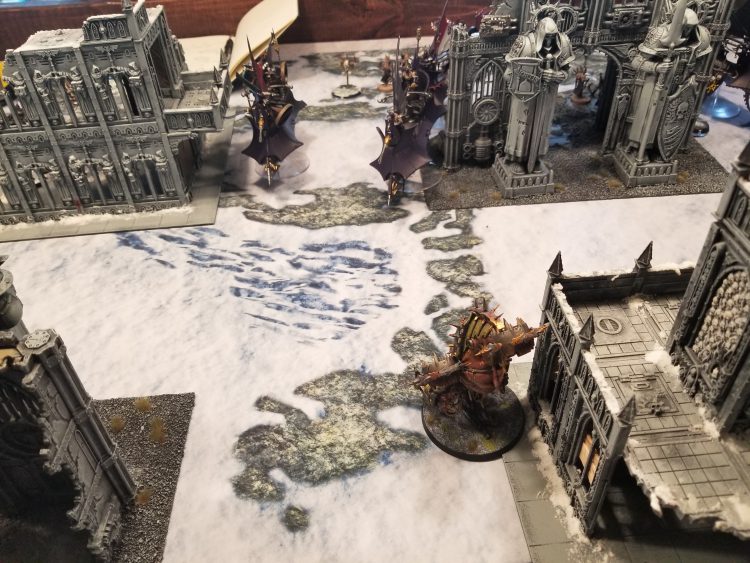
On my turn, there are a few plays I’m looking to do: 1. Charge the Raider at mid-table with a bloat drone – after a 10″ move, I need a 7″ charge to make this work based on his position, which is doable. 2. Take out as many Raiders as possible, which is going to be work, and 3. Find a way to get him off one objective so I can prevent him from getting 15 and work on my own hold more. At this point I decide what I need is a bold strategy. He’s got a unit of Kabalites and an Archon on the Northwest objective, so I decide to use Blight Bombardment to dislodge them. A good roll and I might be able to take them off, and because scoring happens at the end of the Command phase, if I can clear them it might give me Hold More on my turn.
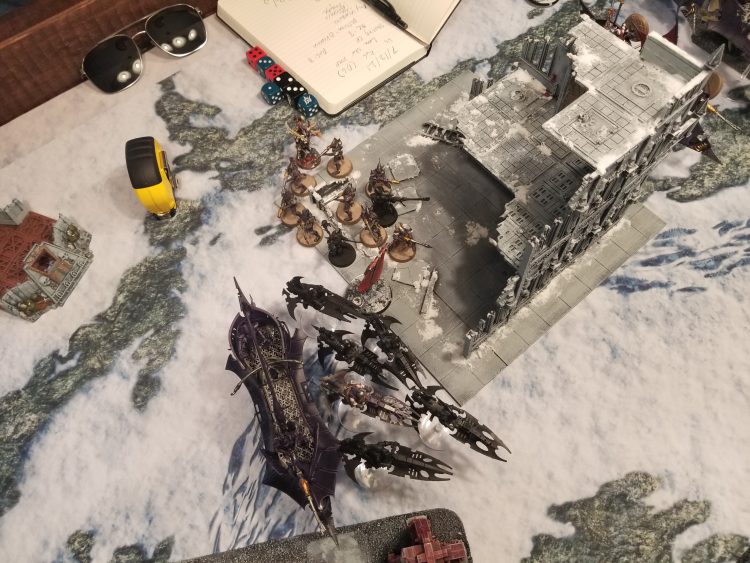
I Spread the Sickness on the southeast objective, then pull my Blightlords, Deathshroud, and characters to the left to meet the Reavers. The Plaguecaster and Daemon Prince take out 4 models from the closest squad with some good smites, and shooting destroys the Raider, which explodes, plus all but one of the Reavers. The PBCs help out on this, and shooting from another takes one of the two Raiders in the middle of the table down to 2 wounds. Meanwhile, the Bloat-drone charges the other, rolls horribly, and only does 8 damage to it, leaving the Raider with 2 wounds remaining.
On Dan’s turn he moves the Archon and Kabalites away from the marker to avoid the bombardment, then charges the last Reaver over there. On the off chance it survives, it’ll be more than enough to hold the objective and if it doesn’t, it’s just one Reaver. On the other side of the table he gets his Wyches and Succubus out and Advance+charges them across the table, wiping out my Poxwalkers and claiming my third objective. This means I’ll only score 5 for primary on my next turn , since I’ll be holding 2 objectives and not more. Well, hopefully I can still deny him hold more. He also tags a PBC at this point, and it spends all game in combat with a Raider. On my turn I head back over to that side of the table and use the Plague Marines to wipe out the Wyches utterly. His Succubus failed both charge attempts reaching the Poxwalkers, needing a 5 both times, and so she’s stuck out in the open, and a mortar from the other PBC kills her. Also the bombardment kills the last Reaver, taking it out of my hair and ensuring Swiftblade will only score 5 primary points next turn as he’s got nothing else on the objective.
Key Moment of the Game: The Bloat Drone and the Archon
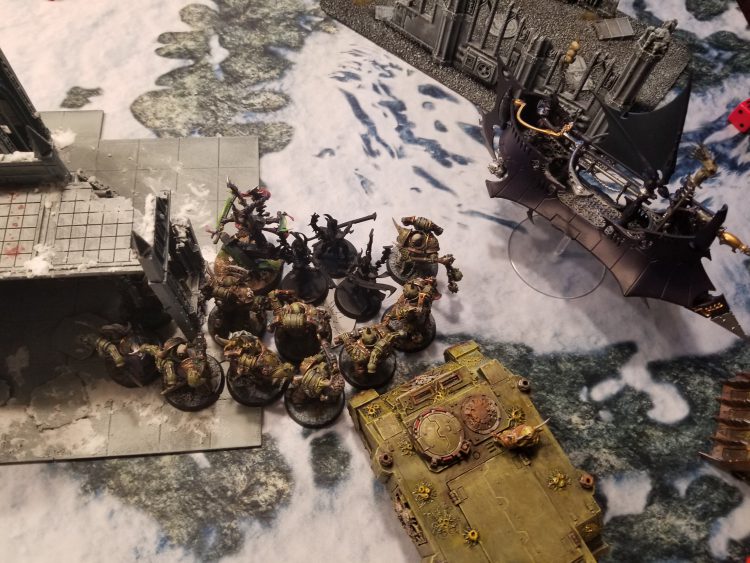
File this one under “shit that only happens to Swiftblade. The bottom of turn 2 and the top of 3 had one continuous sequence that basically wrapped up the game. During Swiftblade’s second turn I use the Dark Cravings Stratagem to intervene into both wounded Raiders (each has 2W remaining). I put 6 attacks on each. The first one dies, and explodes, doing 3 mortal wounds to each of the Blightlord and the other Raider, which then also explodes, doing another 3 mortal wounds to the Bloat-drone, leaving it at one. On the following turn, Swiftblade brings his weapons to bear on it, but isn’t able to hurt it with his shredders. The surviving Wych from the other Raider sticks around along with the Archon to charge the Bloat-drone. At this point the Archon has lost 3 wounds from mortal wounds taken from explosions and Disgusting Force, leaving it with 2 left. He charges in, using the Djinn Blade to destroy the drone. Which then explodes with Putrid Detonation, followed by the Archon rolling a 1 and dying to the Djnn Blade, scoring me 4 points for Assassination. This explosion kills the last Wych, leaving the objective unoccupied.
On his turn, Swiftblade goes for broke. He has one Succubus and one Wych left from his Raider explosion, and he sends the Wych to fight the bloat-drone (see above), while the Succubus rushes off to fight the Malignant Plaguecaster and Foul Blightspawn, who are a bit exposed in their current spots and potentially 6 VP there for the taking. Drazhar and the Incubi charge my Plague Marines while the Cronos charge the Blightlords. The Plague Marines set to defend and overwatch at the Incubi but only get off 3 hits on their 16 shots (hitting on 5s), but they manage to kill 2 incubi this way. The Cronos do predictably little when used as the first attacker, so I go ahead and interrupt, hoping to kill Drazhar. I fire up the Trench Fighters Stratagem and put both flails on the Incubi and the rest of the unit on Drazhar. This ends up being pretty bad as I’m unable to finish off either – both end up having one wound left after I fight. Then the Archon fights (see above), and Drazhar and the Incubi wipe out the Plague Marines. The Blightlords take out the Cronos and the Succubus, forced to fight last, takes 2 wounds from the Plaguecaster and ends up suffering 6 wounds from his staff, dropping dead in the process. This pretty much seals things and we call it a game, talking out the final notes to get a loose score.
Final Score: 92 – 45, Victory
Lessons Learned: I’m still unsure about Blight Bombardment. In the end it worked out alright so I’m not too mad about it but 3 CP was a lot and I felt it later. The change in plague company to Ferrymen did not – the range didn’t matter and I ended up forgetting to use it in my command phase anyways. I think I’m just gonna stick to Mortarion’s Anvil next time. Otherwise, everything worked great. The PBCs didn’t have as much to do with much smaller, tighter lines of fire on the GW terrain, but I do see how I can move them around on T1 to get them into position to shoot some things. The plaguecaster getting caught out of position could have been much worse and I need to work on my positioning, especially when I have poxwalkers around to gum up my movement.
Swiftblade: Well, that was a very one-sided beatdown there! Rob and I were talking it over later, and I think he’s right about my general aggressiveness throughout the game. There were multiple opportunities for me to pressure his forces harder, but I played too defensively and he got up on attrition very quickly. At that point, I started running out of steam to quickly to meaningfully stop him from dominating the game. The Reavers were a letdown this go-around; I wanted them to be able to pop a Plagueburst Crawler quick with heat lances, but I think if that’s how I want to play them then I need to swap their drug for Splintermind, to boost BS and LD. Otherwise, I would have had more success hanging back with them for a big turbo boosted charge to harass targets later on. I also think I’ll swap out the Dark Creed detachment for Dark Technomancers, which with the substantial damage boost that gives to Cronos has a far larger range of applications against even more targets. Also, earlier that day I had made thirteen consecutive Shadow Field saves, so the Archon killing himself with his Djinn Blade is karmic justice for sure.
A great game though – lessons were learned, hams were slammed, and fun was had. Thank you again Rob!
Next Time: The Goonhammer Open
That’s it for this instalment. I may have one more game of practice before the GHO but for now, this is gonna be the last post I make unless something major happens. So look forward to that tournament report. In the meantime, if you have any questions or feedback, drop me a note in the comments below or email us at contact@goonhammer.com.
