The last couple of months has allowed me to really dig into my backlog of Wraithlords, Wraithguard, and some of the other misfit toys of the 40k universe. Unfortunately, not even a pandemic could force me to stay focused on these things and I have been spending my free time working on a labor of love – a new display board. If you have not previously seen our fantastic article on making a display board I highly recommend checking it out. I am going to expand a bit on the work there by walking through step by step how I have chosen to implement fiber optics for an extra bit of aelf bullshit magic. In this article I’ll walk you through my thoughts on planning and considerations and then execution for this board, as well as show you the steps taken along the way.
As I touched upon in the hobbying at competitive events roundtable, a display board is an infuriatingly necessary component to a paint judging competition – and the unfortunate reality is that the more impressive the board the more positive the overall impact to your army due to first impressions. So with that in mind I set about to create a board that was both technically and visually stunning as well as keeping with my army’s general theme of snowy/wintry conditions (as befitting a member of the Frozen North). This created several challenges because Eldar and snow really limits your options or forces absurd amounts of creativity around “how did that Craftworld get so snowy?” Fortunately, GW made some fantastic Eldar terrain pieces that you will never convince me were meant to have an in-game purpose: Waygates.
Project Plan & Building the Framework
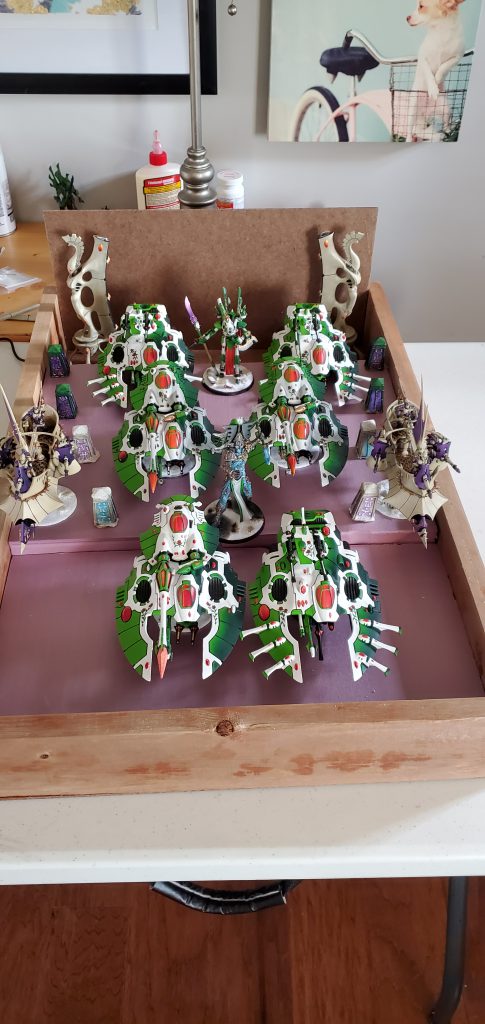
The first and most critical step in build a display board is to understand how much board you really need. The worst possible outcome is to create a fully fleshed-out display with a lot of intricate work and consideration (not to mention money) spent on it only to find that it does not fit your army. As a rule of thumb you’ll want to at least lay out a ‘large’ army – what you think the maximum footprint is going to look like, and take those dimensions down. You can play with sizing a bit to get the same area. A while back I had done a 24×24” board which fit the army just fine. However, it ended up being much more difficult to carry than I wanted and also ended up having a difficult time fitting it onto the sideboard at tournaments due to its width – which made it not ideal.
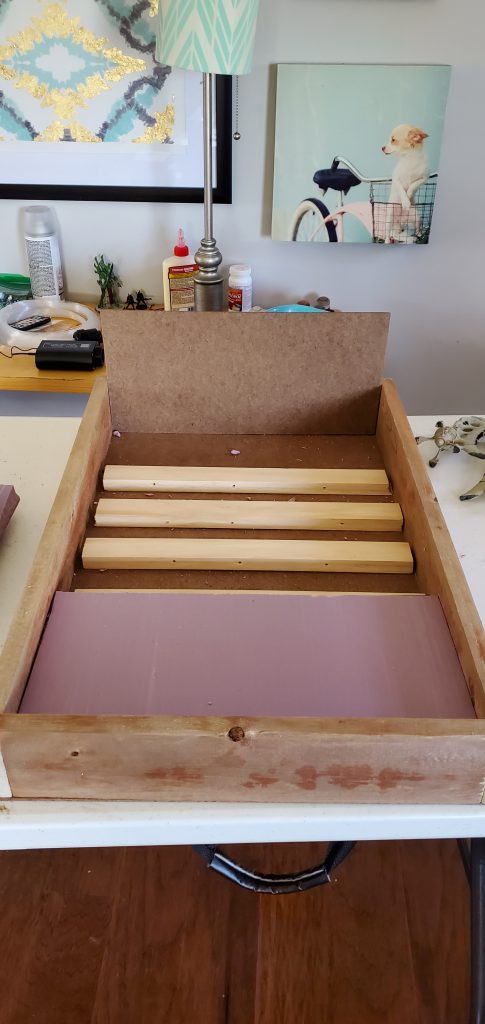
For that reason, I opted for a narrower but deeper board with the interior dimensions 15.5” wide x 27.5” deep (426 in2). It is much easier to carry but does not sacrifice the usable area. I also wanted this to be a board that I could take on a plane – likely as a checked item. While that piece is still being figured out (it is going to require a latched cover), the main takeaway for construction is that the board itself must be durable. I opted for a pine wood frame that is 3.5” wide by 0.75” thick. Pine is light while study enough not to break up with normal handling. Putting together the frame gives me the canvas I need to start planning how I want it to look.
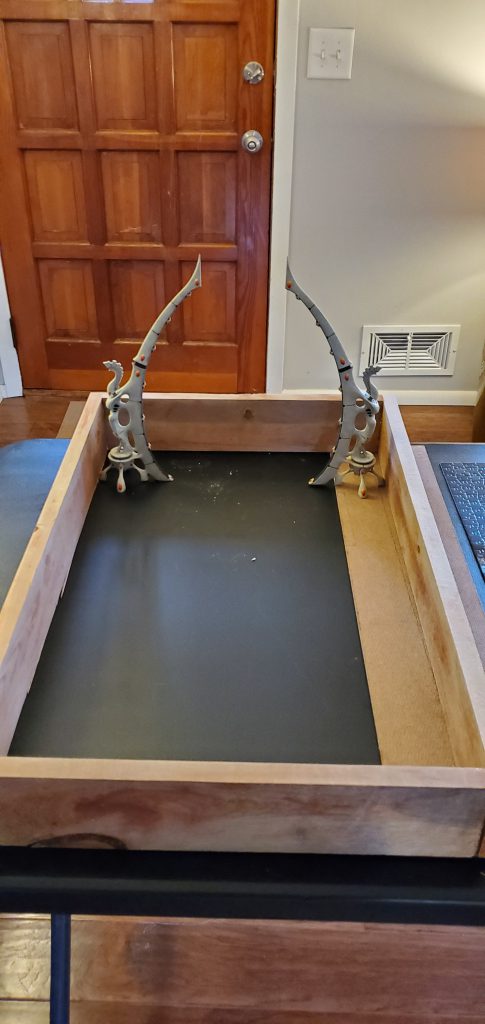
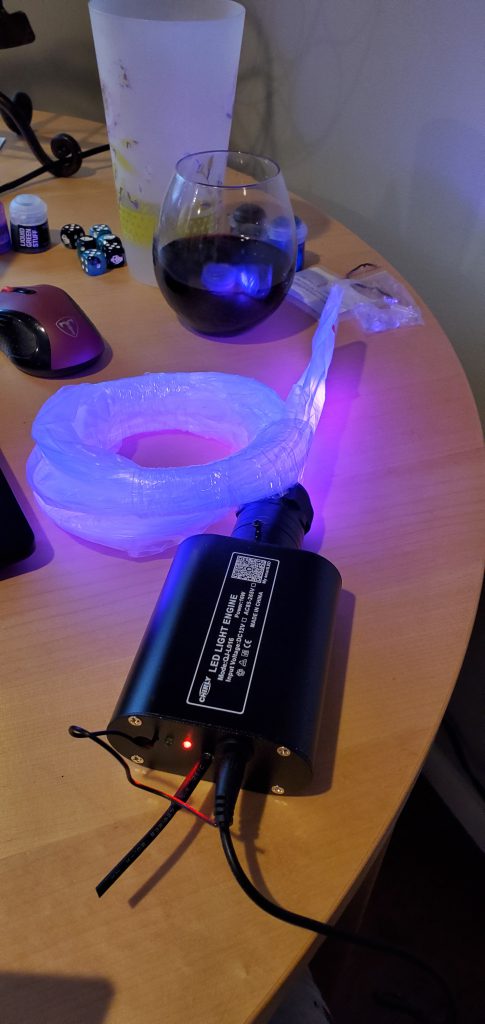
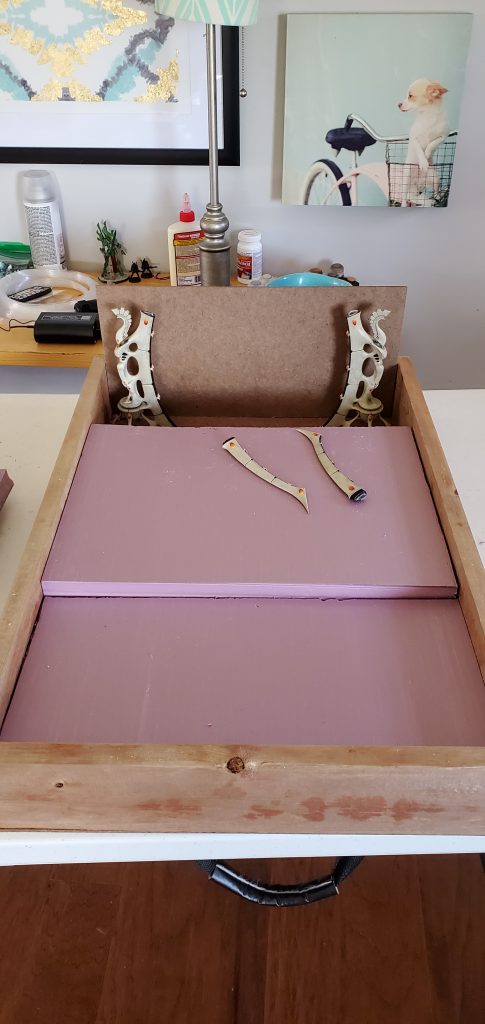
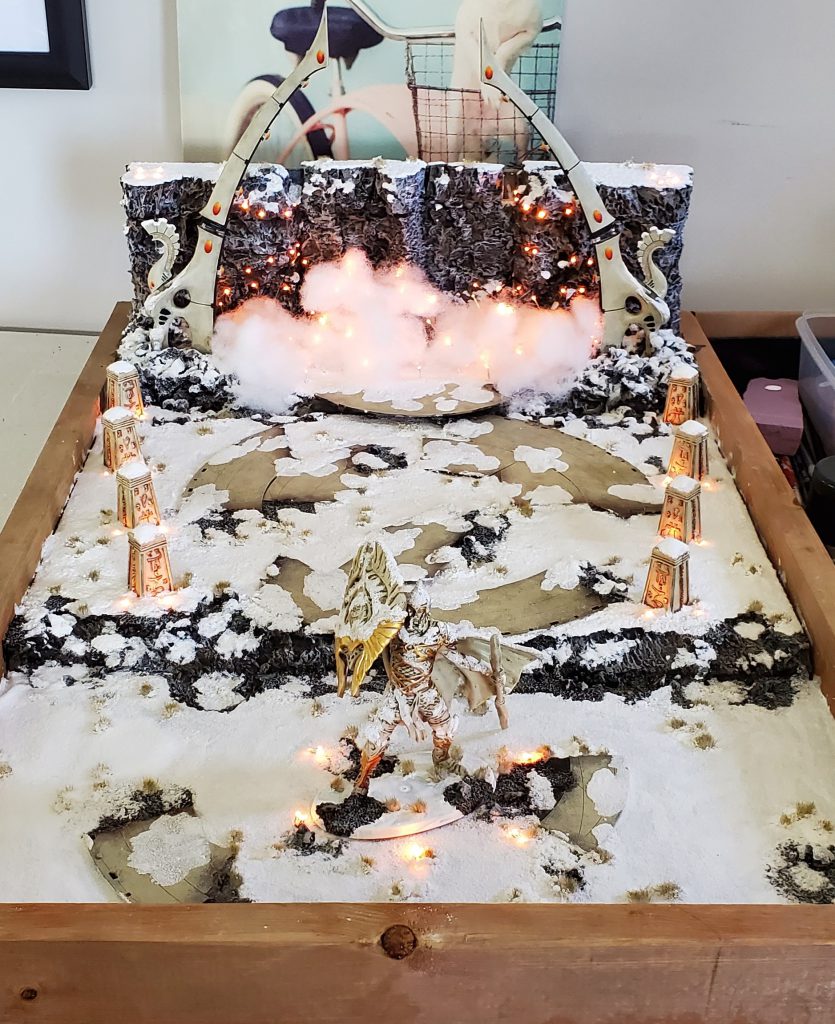
The next thing was designing a concept that maximized the area while also ‘made sense’ in terms of the theme of the board. As I mentioned, a waygate makes a natural tool to divide worlds. Raised platforms also add usable surface area while not adding increased size to the board. I sketched out some concepts of a waygate built into a rock cliff wall where the gate itself opened to a Craftword parade ground. The idea being that I could model in a craftworld interior into the back end of the board and then surround that by cliffs as the waygate breaks to the current world environment. While nice, that seemed overly intensive and fraught with risk. I sketched up another idea where instead of hollowing out the central cliff areas I would use a representation of a webway tunnel including foam and lights. That led me to think about lighting more seriously and what I could really do with it. If the board was going to be durable it would need to avoid requiring bulb replacements or risk knocking around. That meant LEDs, fiber optics, etc. I chose fiber optics because, while a little more intensive and challenging, they don’t require any kind of maintenance – all they need to work is a light source. Further, they can be anchored solidly in place which speaks to the durability component I need from this board. The advanced fiber optic systems are a little pricey, but they offer some nice features (multiple settings, color shifting, phone remote control, etc).
Planning & Placing the Fiber Optics
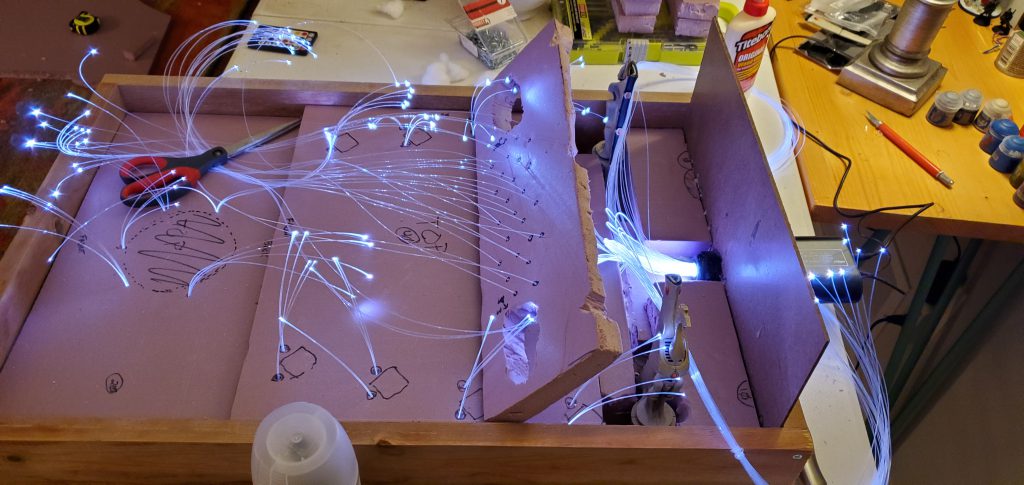
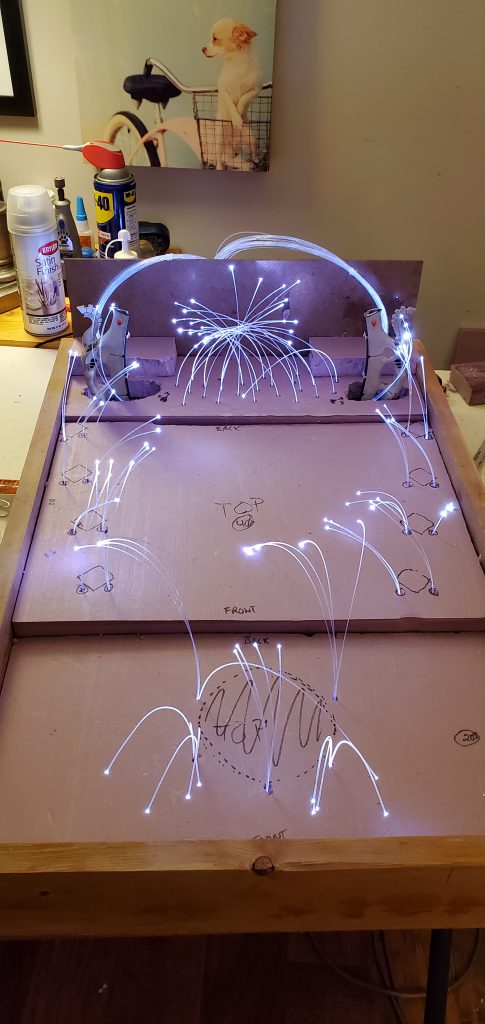
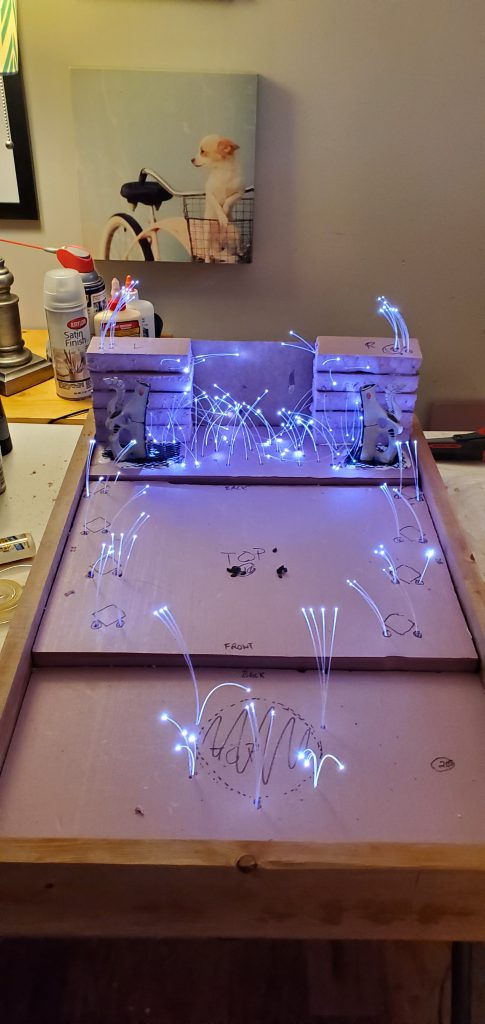
With some sketches in hand and a vision in mind, I began to think about how the fiber optics would be housed. I quickly realized that I wanted the light to be available throughout the display not just at the waygate itself which means running strands through the length of the board. Going back to the sketch pad I laid out how I thought the strands should be divided up and why/where. With Lord of the Rings or the picture of the Avatar and the Court of the Young King on my mind, I figured statues could line the ‘ramp’ to the waygate or be installed in the cliff face itself. Looking at my options I found some old obelisks that I purchased as a ‘what if’ like a decade ago that fit the bill for decoration to ‘line the path’ and a few resin statues that could stand in for aelf warriors of legend. With some general layouts in mind I began to cut the foam base and draw out and lay the fiber accordingly.
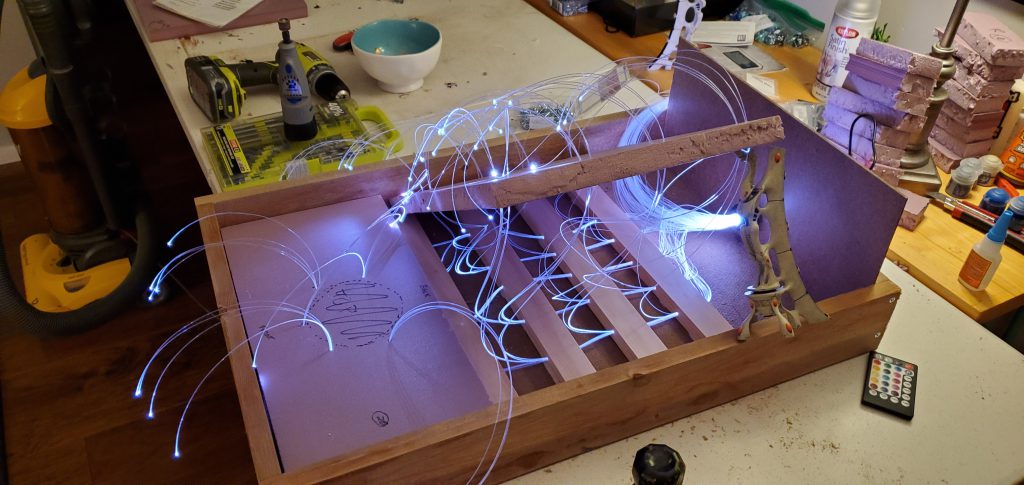
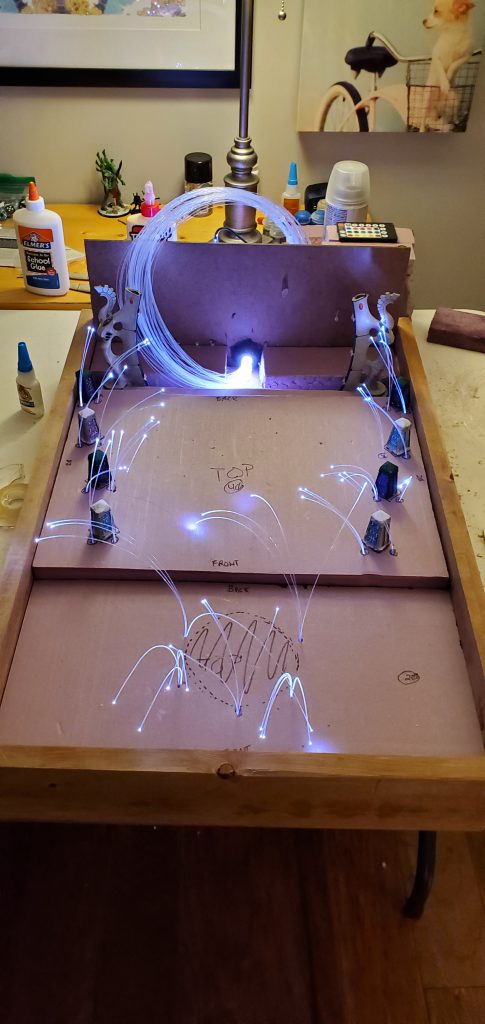
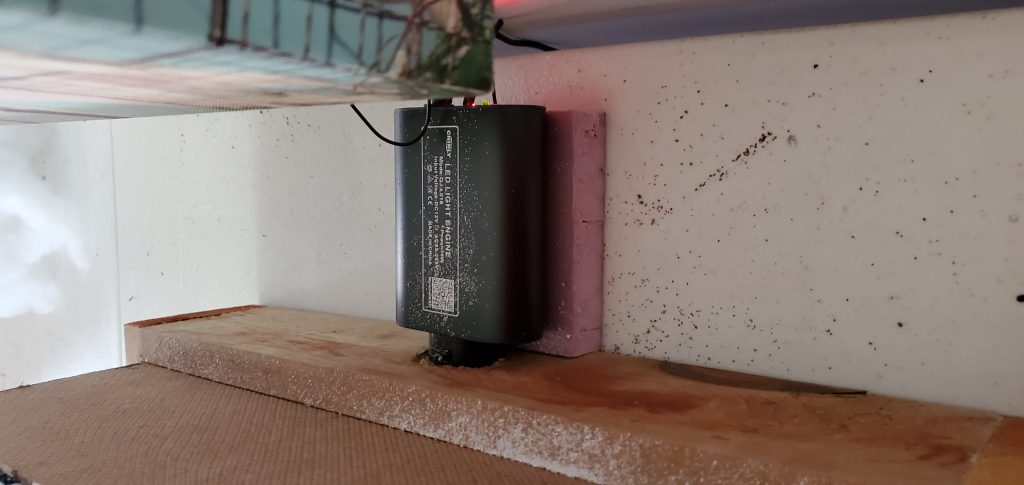
The big decision here was to drill a hole in the frame of the board and place the generator outside rather than mount it internally, either permanently or through some other mechanism. It means that the board requires the generator to be taken with it and set up separately, but it frees up a lot of the space inside for the fibers (which take up a lot of space in the bundle) and also keeps the heat down inside the board. Also, as the fiber bundle is at the end of the board, basically any light source will work here – if I forget the generator or don’t have access to a power outlet/extension cord then I can simply place a flashlight against it to achieve the same effect.

Shaping, Painting, & Flocking the Board
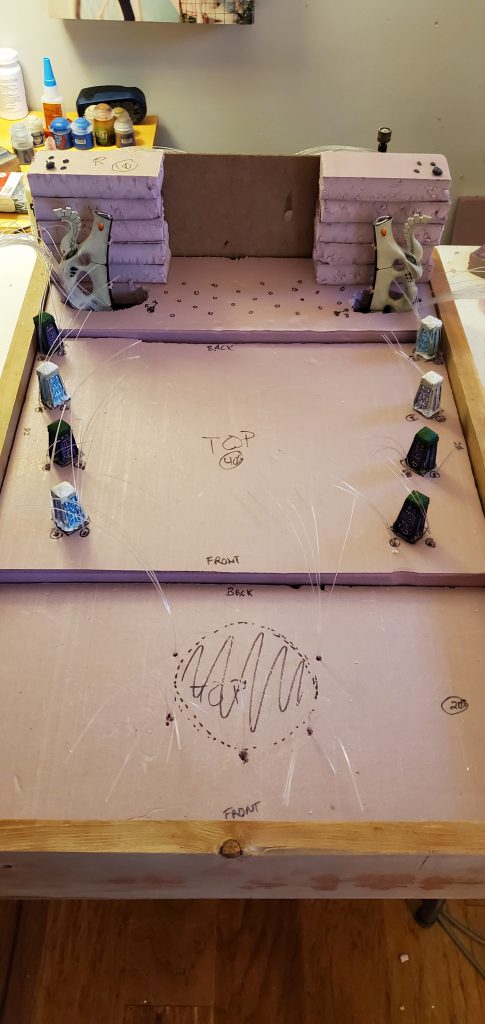
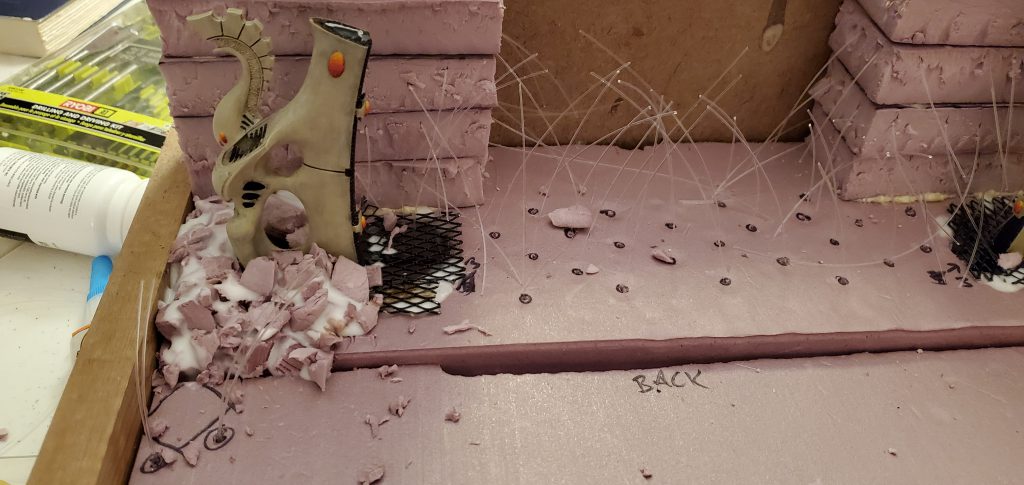
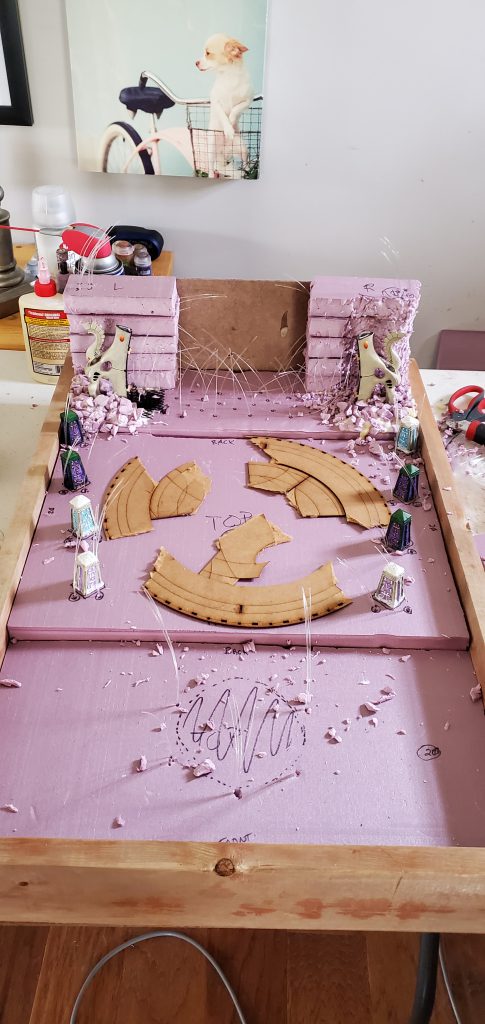
With the fiber optics all placed I felt like I was 50% there. I was also extremely nervous because at this point a lot had been invested into the board in terms of time and material. The waygates were more or less permanently mounted and I was concerned that messing up the fiber by cutting poorly or messing up the facade would ruin the whole thing. Trying to envision how I was going to handle the ‘portal’ it wasn’t clear to me and I quickly realized that I did not leave myself enough room to really carve out a view of a Craftworld or anything else (refer back to my first piece of advice about making sure you have enough surface area). So instead I figured I’d fill in the blank area with additional cliff face and then use cottony clouds backlit by fiber optics to visualize a swirling portal of the webway tunnel.
For shaping the cliffs I like to use a knife. Cliffs tend to have a flow to them rather than a chaotic assortment of rocks so I try to keep the cuts in a similar direction and then use the flat end of the knife to chunk out the foam. The pieces then make good debris and rubble to be placed around the waygates. Once the big boulders are placed I add gravel to give it a more rubble pile vibe. Once it’s all cut up I can start painting the cliffs. i like to use darker tones – black base which then follows with a couple of shades of brown to give them an earthy look and then drybrush over with a grey and then white. It gives them a strong granite appearance while not looking out of place due to the browns.
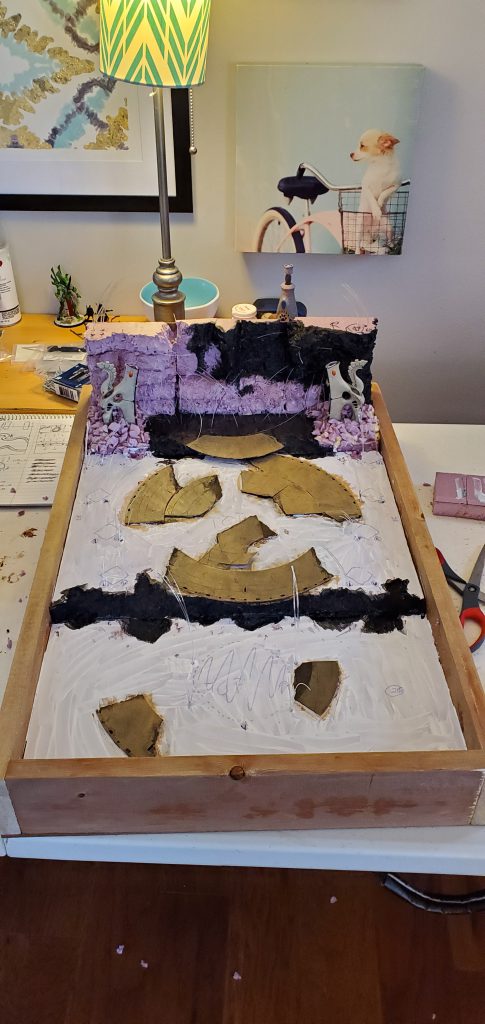
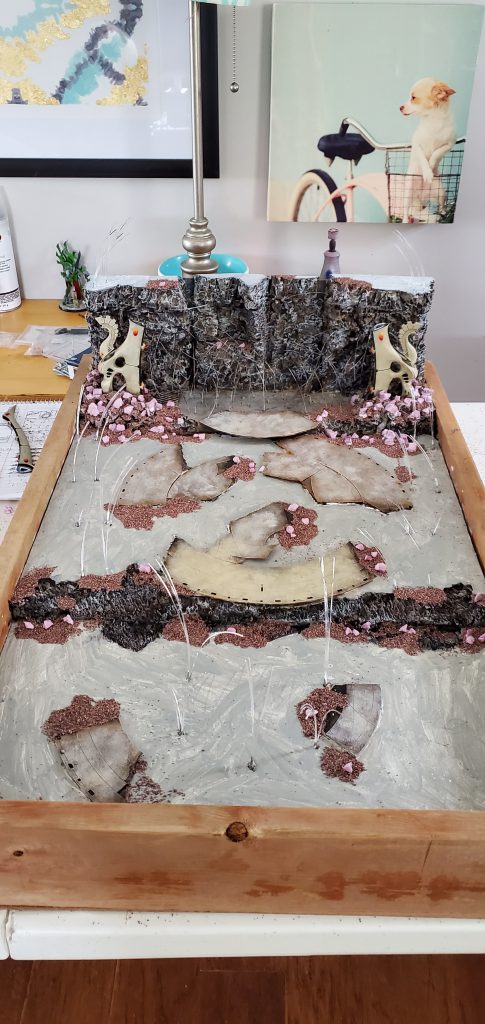
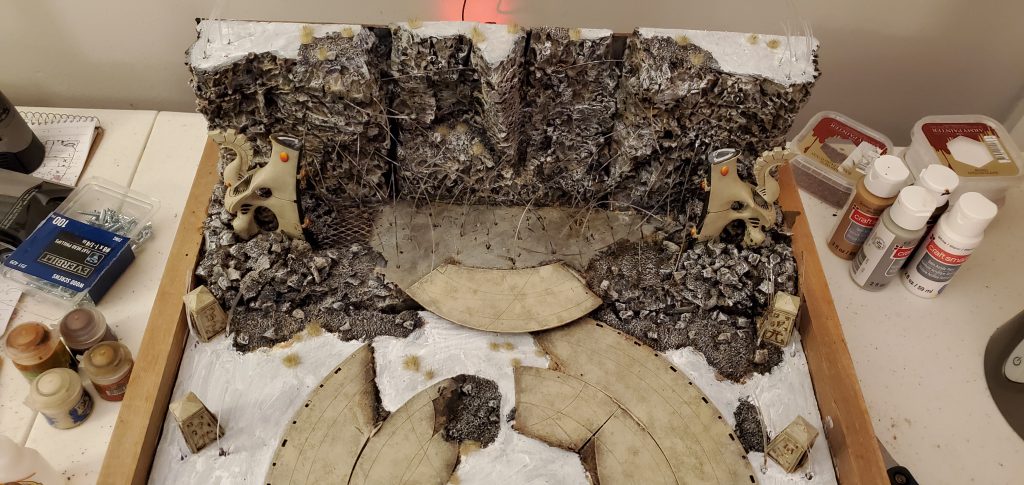
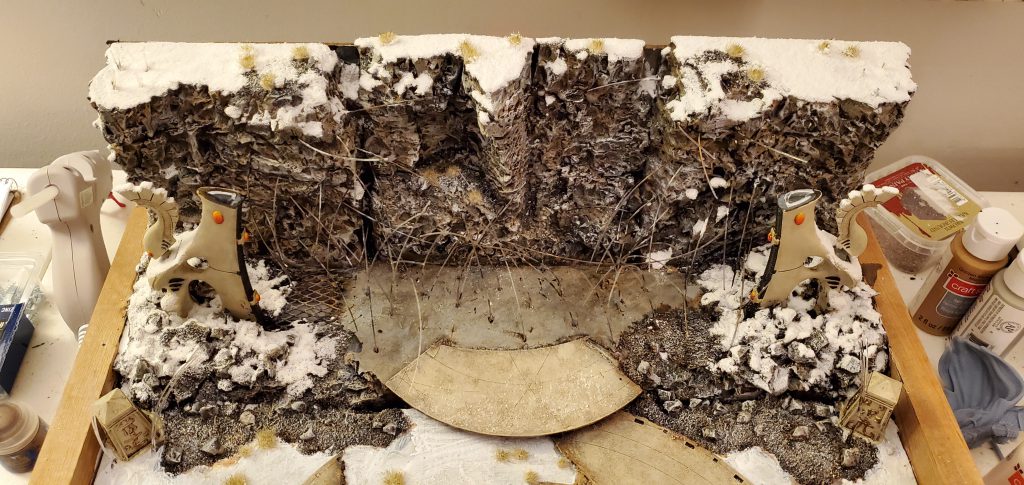
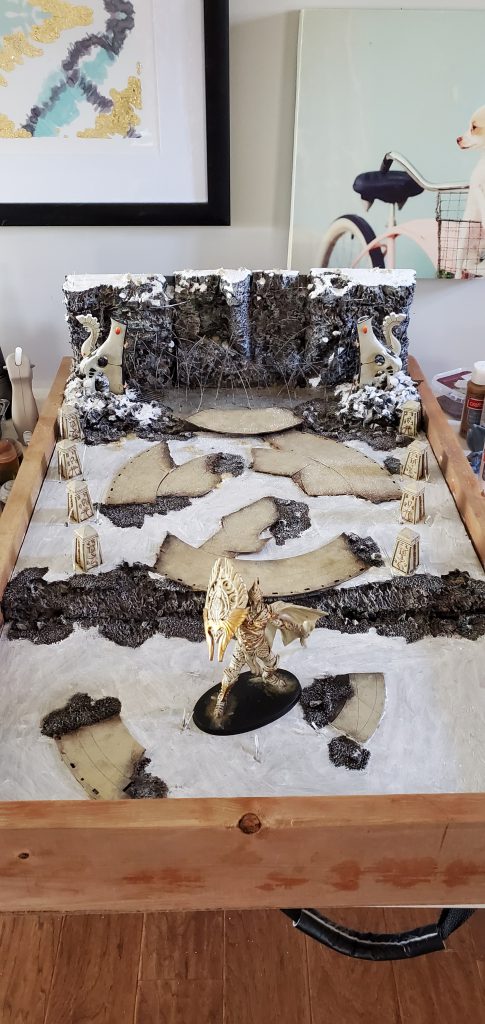
The Finished* Board
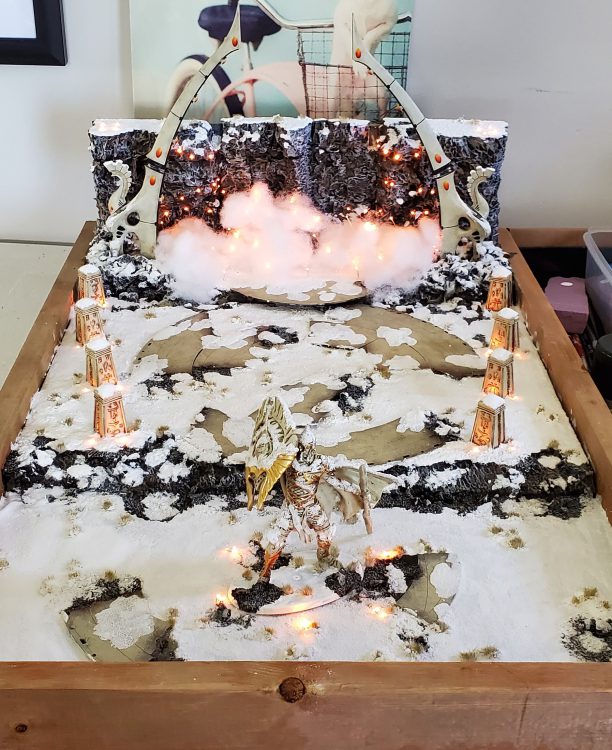
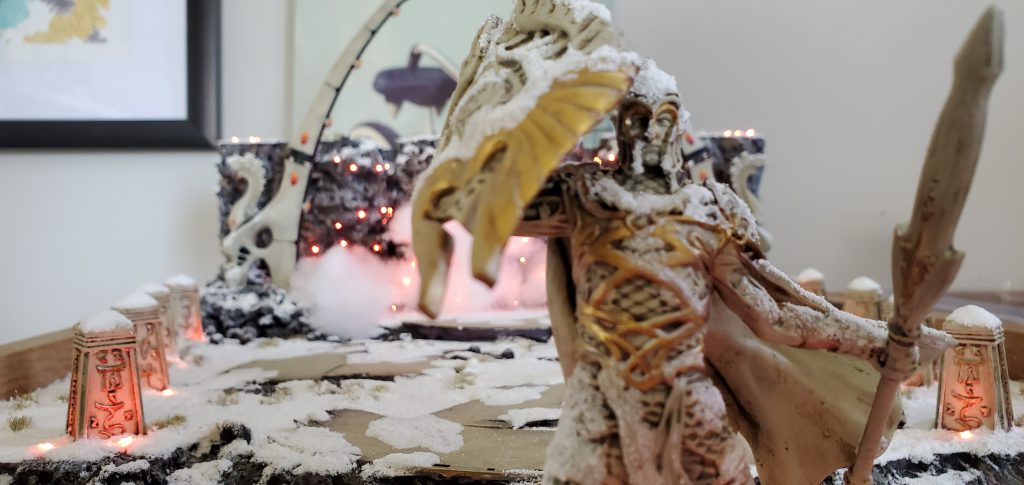
In the end I really liked the look of the cliffs and I didn’t want to obscure them – so instead I opted to place the cottony clouds around the base like a fog and let the lighting speak for itself. I also magnetized the arms of the waygates so I can take them off for travel. Some minor work to be done including touching up the magnets to blend into the gate and some areas that need more flocking (I ran out of snow flock) but otherwise I love how it ended up turning out. It took the better part of a month of on and off work but it was a nice break from backlog painting. My favorite part is that the generator can be controlled from my phone and the colors available are essentially anything on the rainbow and a lot effects can be applied to give it a pulsating or breathing look (can even tie it to music!). The goal was to make the army pop and stand out, and I’m happy with where it landed! The biggest takeaway for me was the amount of advance planning and replanning that was required for the fiber optics at each step. Once the foam was in place any rework was going to need a complete gutting and fortunately I did not have to do that.
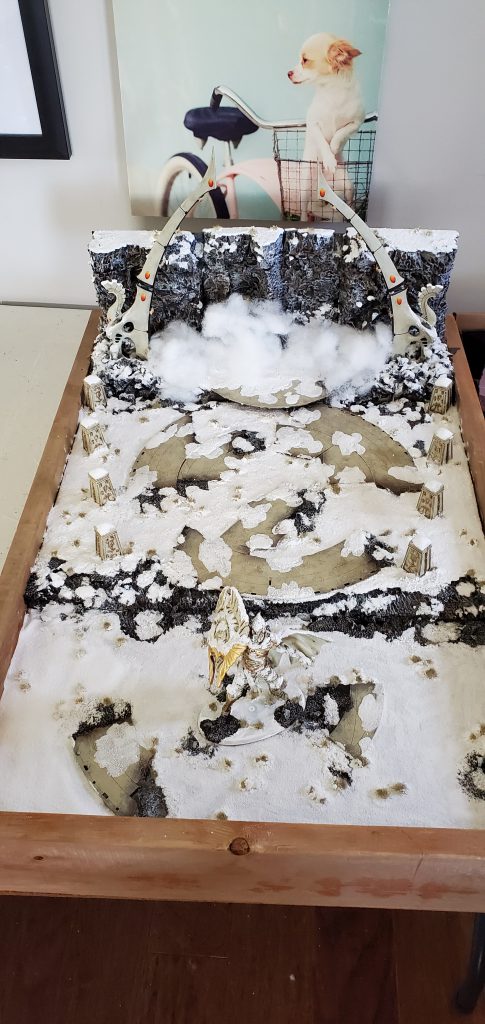
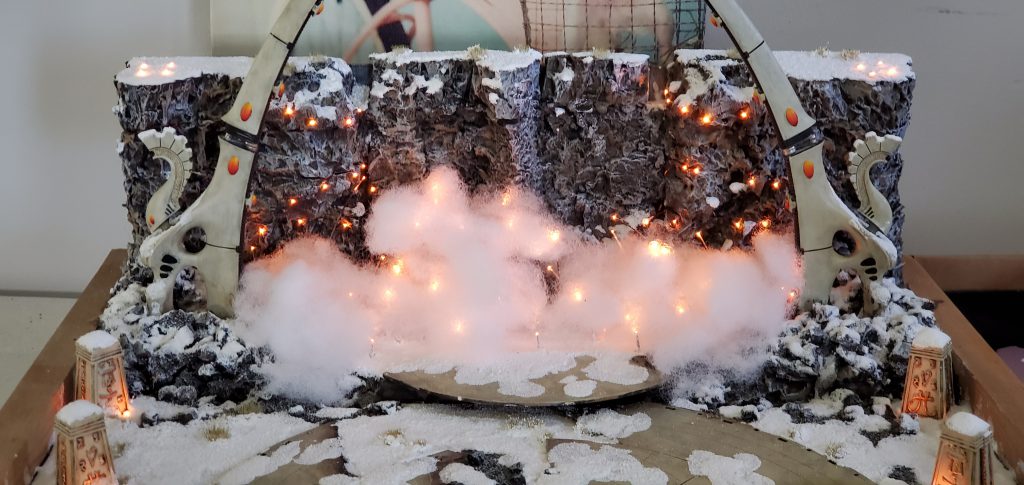
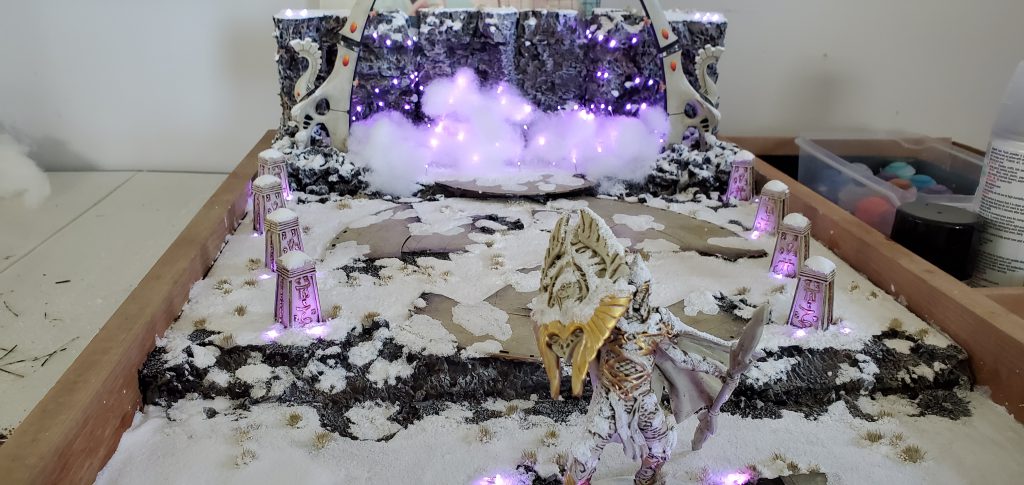
Now Comes The Hard Part
…transporting the thing. Also probably waiting for an event to take this to. In the meantime, if you have any questions or feedback, drop us a note in the comments below or email us at contact@goonhammer.com.
