


The new edition of Age of Sigmar has brought with it a slew of new rules, exciting reactivity, and brand-new takes on beloved factions. The opportunity to truly reinvent for the first time in the game’s lifespan has not been taken for granted, but one of the factions that’s seen minimal overall change in its core mechanics is Beasts of Chaos. Unfortunately, that’s for good reason.
Prior to the launch of this edition, it was revealed that many models from AoS would be moving to Legends, or otherwise discontinued from sale or tournament legality. Of the ranges affected, Beasts of Chaos were slated to be entirely removed from the Mortal Realms by June of 2025 — Being the first faction to get specific Endless Spells, one of the first to get Faction Terrain, and generally being quietly a core part of Age of Sigmar as a whole, this is devastating. Yet, Beast players do have these fourth edition rules for a year, and given we’re not receiving a Battletome, the earlier in the edition you bring these goats to a tournament, the more relative power they’re likely to have (given power tends to trend upwards throughout the course of index editions).
To briefly touch upon it, the lore received in this Digital Battletome is significant only in that it explains why we’re going away, and why we can no longer take marked units for our final year. The Chaos Gods have come to take their tithe, and many Beastmen are keen to finally bend the knee, and follow them. The Beasts you play as in fourth edition are stragglers, survivors, guerilla fighters of a bygone age, doomed to extinction…until whatever eventual reboot occurs, a decade down the line. Naturally, this means we’re playing the underdog-est underdog faction, the rout of a once-great horde.
With that in mind, what do Beasts of Chaos do well in AoS fourth edition? Luckily, if you played Darkwalker board control lists last edition, you’re in good hands — Beasts are one of the premier objective control factions, and while their units are slow once they hit the table, the ability to ambush your entire faction is premium. Furthermore, there’s a range of diverse tools for Beast players to deal with various threats, between hordes, buckets of attacks, or screening MSUs. This edition is going to be the most consistent one yet, when it comes to actually hitting charges from ambush, so long as you’re aware of Redeploy.
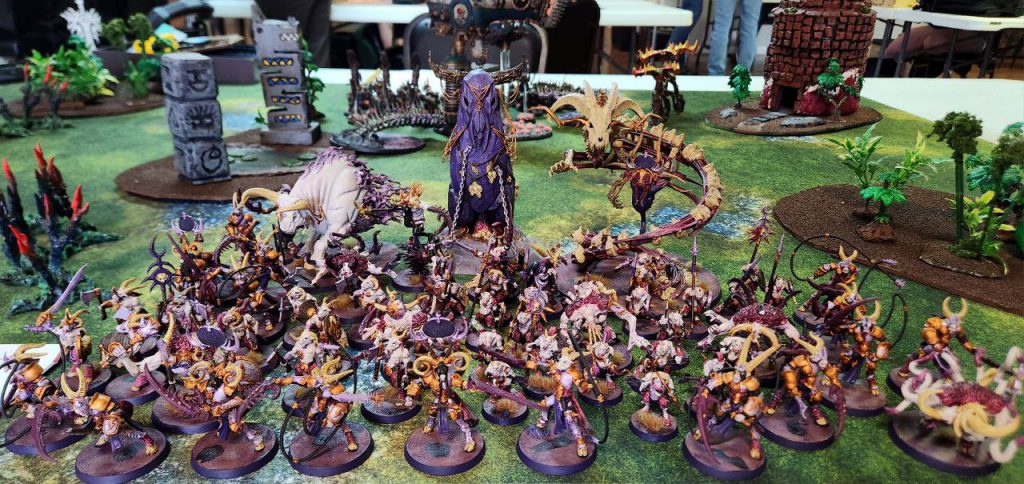
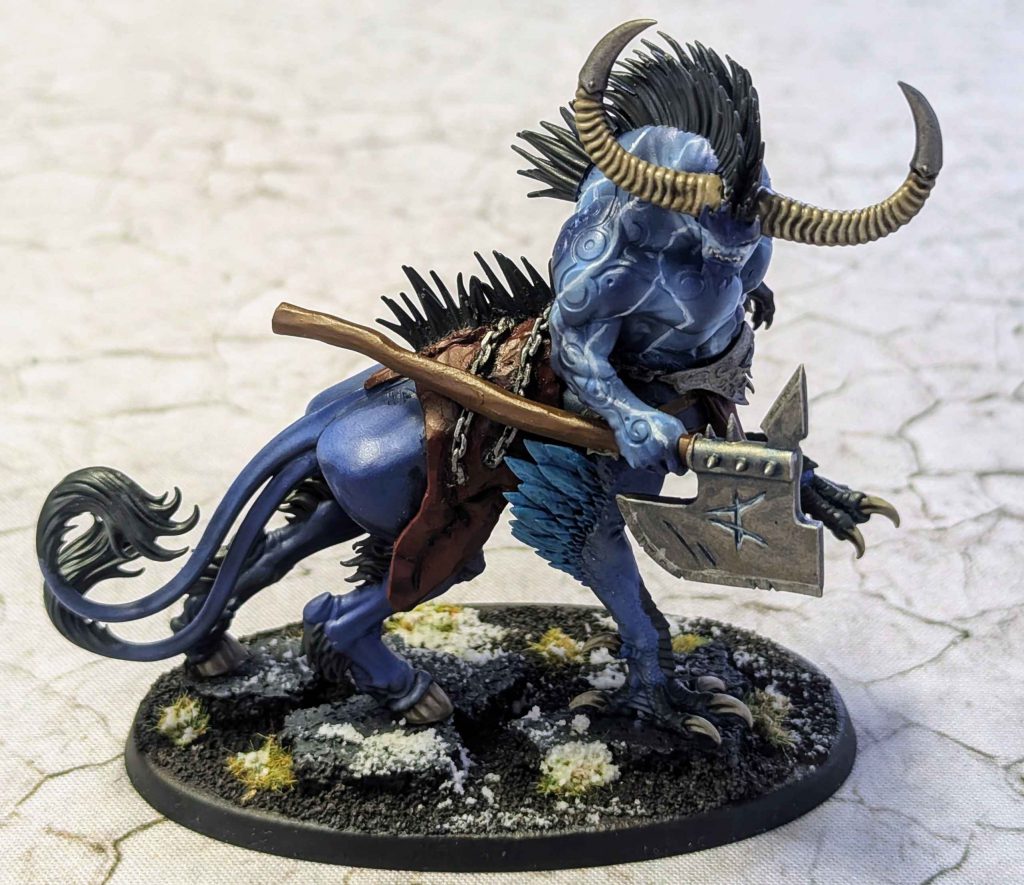
What Beasts suffer at is quite similar to their failings in the third edition tome: Cost. Beasts units are overpriced across the board, with all but a few units given a below-standard priceline compared to parallels in other armies. You pay extra for the luxury of ambushing around the board, and with lethality overall reduced in fourth edition, one decisive alpha strike during your “go turn” won’t suffice. Beasts players are going to need to be a bit more canny in their approach, and deploy in waves across multiple Battle Rounds; keep all of that in mind, as we dive into the rules. All of the photos within this article are provided by members of the Beasts of Chaos community, as part of a group effort to showcase the collective thousands of hours of love & devotion poured into these models. This faction isn’t going away because of us, but in spite of us.
Without further ado, sound the Dirgehorn, one last time.
Faction Rules
Masters of the Wilderness & Beastherd Ambush:
This trait is effectively identical to the trait from Beasts of Chaos’ third edition Battletome, with the exception that models can be kept in reserve past Battle Round 2. That means you’re rewarded more for keeping valuable units offboard until the perfect time to strike, especially Heroes, with the changes to Rituals of Ruin. Even better, unlike previously, you can keep units offboard through the entire battle, meaning it can be nigh impossible for an opponent to slay your general, or force you out of hiding; given the wide range of Once Per Turn (Army) rules in this book, you’ll be deploying units in waves.
Rituals of Ruin:
This trait has seen a few substantial changes from the previous version, but the most apparent one is the removal of the self-damage effect. This means there’s no ‘clock’ to using the listed abilities, and keeping a model like a spare Great Bray-Shaman in Ambush for large portions of the game has no opportunity cost aside from the model itself.
The rituals have also changed: Warping Curse now deals the fourth edition staple of d3 Mortal Wounds on a 2+, rather than D6, and Brand of Wild Fury remains the only means to getting a Ward in the faction. The new Ritual, Bestial Instinct, has quite a bit of value, giving a targeted friendly unit +1 to wound for the turn, which helps to push through damage on units with Crit (2 Hits). Some of our better units already wound on 2+, however, and this buff is able to be provided by the Beastlord as well. All in all, a mixed bag, but you’ll probably be able to get some value from a regularly-applied d3 Mortal Wounds. Our beloved Blood Taunt is nowhere to be found, sadly, and the remaining Beasts players will mourn its quiet passing. May it make a 2d6” move towards a peaceful retirement.
Battle Formations
While there’s technically 4 Battle Formations, there’s really only about 1 ½ worth consideration. First, in a half-measure, the Marauding Brayherd. This allows you to change one of your Charge dice to a 4 once per turn, for Brayherd; the obvious application is with Bestigor, however you already have access to an effective d3+1 extra distance once per game, via Beastherd Ambush and the incredible Heroic Trait Bestial Cunning. The true star of the show is the generic, refreshing Almighty Beastherd, which gives you a flat +1 to hit when attacking a unit on an objective you don’t control. This is going to see wide application, given many of our better hammers hit on 4+, but wound on 2+, so getting that bonus to hit remains a critical factor. Moreover, this synergizes with a certain Regiment of Renown we’ll be talking about later, doubling up on an objective-flipping gameplan.
The other two Battle Formations are Hungering Warherd, which gives Warherd units a Heal (3) each turn they fought, and Thunderscorn Stormherd, which gives Thunderscorn units a version of their classic “heal & deal” ability, with Heal (1) coupled with 2+ d3 Mortal Wounds to enemies in combat with them. The real issue with these subfactions is their specificity, as neither Warherd nor Thunderscorn have a bulk of units that benefit greatly from these abilities, especially not models that are efficiently costed. That doesn’t mean you wouldn’t take Bullgors or Dragon Ogors as a hammer, quite the opposite, but that neither are worth dedicating a Battle Formation to when Almighty Beastherd benefits everyone in a very real sense.
Heroic Traits
In keeping with the theme of having about 1 ½ playable Battle Formations, there’s a similar drought of playable Heroic Traits, and Artefacts of Power, although the good ones are truly great. Bestial Cunning fixes one of the major issues Beasts of Chaos would have in AoS 4.0, being the Redeploy command allowing enemies that aren’t boxed-in to evade your ambush, by allowing key units to shift up d3”. This is also notable for bringing certain models, like the Jabberslythe, within range for its shooting attack at 8” from Beastherd Ambush, potentially changing the damage math on your “Go Turn”.
If Beasts weren’t so crippled by Redeploy, both other Heroic Traits would be quite reasonable. Death-Grip can give you an immense level of shifting for a unit that’s shot at, careening units like Bestigors into priority targets who dare to even attempt Covering Fire. Unfortunately, this is an ability that requires your Hero be well-positioned, and your opponent to forget you have this effect, meaning it’s far less useful in practice. Propagator of Ruin, too, has promise as an option now that your Ritual of Ruin no longer deals damage to its user, although the loss of Blood Taunt means you rarely want a second one.
Artefacts of Power
You’re going to be taking the Brayblast Trumpet, as while it’s rather different from the third edition iteration of this Artefact, it is no less powerful. During each of your Hero Phases, you can bring back a half-size unit of non-unique Infantry with an expanded Ambush range of 9” away, 12” wholly within a board edge. This is what gives Beasts of Chaos any chance at a grind game, and so long as you suicide a unit into the enemy Battle Round 1, you’re likely to bring back a total of 2 half-size units over the course of the game. In terms of raw efficiency, this should be 3-model Bullgors or Dragon ogors, as you round up the number of models brought back, but given you can only bring back a unit once, it’s likely the second target will be a reinforced unit of either Ungor Raiders, or a hammer.
The Slitherwrack Helm is worse than it was in third edition, and in the face of the Brayblast Trumpet it’s a glorified party hat. We do not need to reduce Charge rolls by 1, we’re the ones doing the charging. Similarly, while turning off Ward with the Gnarlstaff of Morghur is enticing, it’s only during our Hero Phase, meaning lengthy combats still bleed damage by way of opposing Wards. There’s not a world where you take anything but the Brayblast Trumpet, so get used to rolling 4+.
Spell & Manifestation Lores
The in-house lore is the Lore of the Twisted Wilds, and unfortunately it pales in comparison to the strength of the faction’s Manifestation Lore, meaning you’re far more likely to see Wizards fishing for Manifestations rather than casting from the other available options. Viletide is our Unlimited spell, casting on a 7 and dealing d3 damage within 12”, also turning off commands. If we had Level 2 Wizards, this would make more sense as an option, but with the available tools it’s blandly competent. Vicious Stranglethorns is next, casting on an 8 and reducing Charge dice by 1, and movement by half, for an enemy unit within 12”. This, again, would be an exceptional pick if we had better Wizards, and I can see a world where this is a brutal counterpunch using Magical Intervention, but we lack the consistency to make such a strategy worth 1 CP. Finally, there’s Devolve, casting on a 7, and making a non-Hero unit within 12” unable to use commands, have OC 1, and only be able to move if their movement ends closer to the caster. This is a slam dunk with the Ravening Direflock Manifestation, but in order to couple those two spells, you’d need 2 Wizards on the board, something Beasts will have issues with. Fundamentally, this faction cannot lean into its magical prowess this edition, so Spells that seem solid become far less impactful in the face of the overwhelmingly useful Manifestations.
Good news for those who own the Endless Spells for Beasts of Chaos — they’re very good. While the loss of our Tzaangor Shaman, and inept warscroll attached to the Shaggoth, means you’ll only be casting these with Great Bray-Shamans, there’s a wealth of power here. These Manifestations are going to push savvy players to field at least one Shaman, and go without the Krondspine Incarnate.
Crucially, your Manifestations have a shocking degree of reach, meaning you can often moveblock Redeploy with them, a critical point of counterplay for a faction dependent on consistent, hard-hitting charges from ambush. While Manifestations don’t have combat ranges in the Movement Phase, they still cannot be landed upon during the end of a unit’s movement, so marking out a distance where they’ll be too far to pass over, but close enough to bar full movement, is essential.
The Doomblast Dirgehorn is our weakest Manifestation, but despite that moniker it’s absolutely still playable. Lethality on the whole has been greatly reduced in fourth edition, and many units wound on 2+ as a generic ‘monstrous’ statline, meaning the Dirgehorn has value in protecting your blobs. It also is our only Manifestation with a casting value of 6, meaning it’s less risky to cast without a CP devoted to a reroll, and still remains consistent when cast on the opponent’s turn. While not nearly as potent as our other Manifestations, it’s a great back-of-pocket means to make kill-based Battle Tactics a mite harder for your opponents.
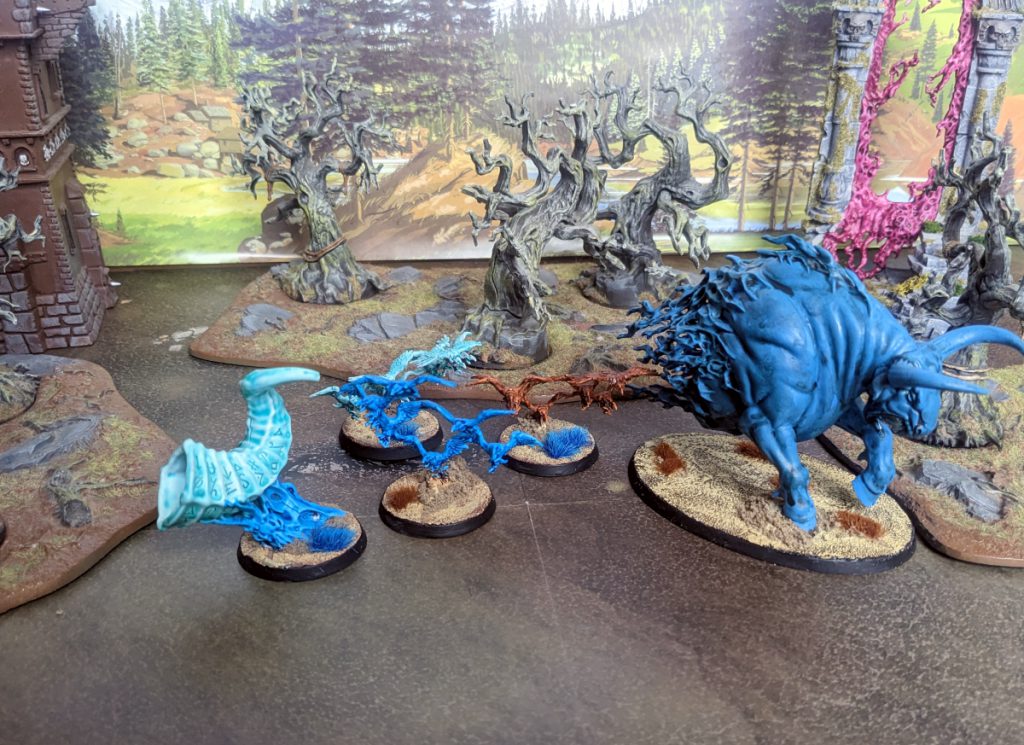
The Endless Spell we used to actively pay points for is back, and this time, it’s free. The Wildfire Taurus has been an on-again-off-again staple of Beasts, and in fourth I’d expect to see it hit the table nearly every game. The Taurus has an absurd deployment range of 18”, so you’re almost always getting into minimum charge range with this model once cast, and once it’s on the board, a 12″ fly certainly doesn’t hurt! Once this steer is aimed at an enemy unit, you’re looking at a more damage on the charge than 10 Bestigor against units with a 4+ armor save (Mortals Included, 9.75 after attacks!). It also, as always, has a high change to hand out a Strike-last effect to a key target, meaning activation priority is under your control. Put simply, this is why 1-2 Wizards are required for Beasts, and why you’ll often want to start one onboard, safely tucked away from opposing damage, casting Taurus again and again. The Krondspine is a lot less appetizing with this on the menu.
It gets even better with the Ravening Direflock, which has the same Casting Value of 7+ as its partner, the Taurus. While the Direflock doesn’t do as much damage as the Taurus, it’s got about the same footprint across 3 bases, and can put out a respectable amount of horde clearing attacks in combat. The real draw, however, is in its ability, Harbingers of Dark Omens. This is a static debuff within a whopping 12”, reducing enemy unit OC by 5. The fact this is per unit, without a cap or specific target, is brutal, and you’re often going to swoop these in and make way for Ungor or units with the Beast keyword to pick up otherwise implacable objectives. The Direflock supplements the objective control playstyle that’s core to the identity of this faction, and is a wonderful inclusion in its spellcasting arsenal.
Warscrolls
One of the first things you’ll notice with Beasts of Chaos in fourth edition is the total removal of marked units, namely the Tzaangor, Tzaangor Enlightened on Foot & on Disk, Tzaangor Shaman, Slaangor Fiendbloods, and Tzaangor Skyfires. Many of these units were vital components to the army’s playstyle for the whole of Age of Sigmar’s lifespan, and going without them cuts a huge chunk out of our playable Brayherd units, including critical trade pieces, and debatably the best caster the faction had access to. For those of us who rightly had 12-18 Tzaangor Enlightened, a moment of silence.
Another point of order is that, when compared to contemporary units with similar profiles and roles, Beasts of Chaos units are largely overcosted. This isn’t always the case, such as with the still-fantastic Ungor Raiders, but there’s a ~12-15% point tax on the majority of our melee-centric units based on their damage & effective wounds. This follows with the trend we saw with our third edition Battletome, and broadly you’ll be seeing fewer units on the tabletop compared to the usual, especially given you’re highly likely to spring for a very specific Regiment of Renown, or Mega-Gargant Mercenary, to offset this tax.
Heroes
As stated in in the review of Beasts’ Manifestations, the Great Bray-Shaman is not a great Wizard, but it is something most armies will have 1-2 of purely for the luxury of casting Ravening Direflock & Wildfire Taurus. Retaining its statline from 3.0, the Great Bray-Shaman has traded its range increase for Rituals of Ruin to regain an ability akin to its second edition iteration: Infuse with Bestial Vigor can grant Run & Charge Once Per Turn (Army), allowing reach with units on the board during deployment, or those that have entered from ambush, and need some speed to travel across the table. This is especially useful in conjunction with the Brayblast Trumpet and a minimum-size unit of your choice, sacrificing it for some damage in Battle Round 1 in order to start fishing for recursion in Battle Round 2. On top of that, the Regiment rules make taking Bullgors with them impossible, so running 2 Shamans & an allied Regiment cuts you out of the faction’s best pure hammer. Overall, this unit is an auto-take, but not one you’re pleased about.
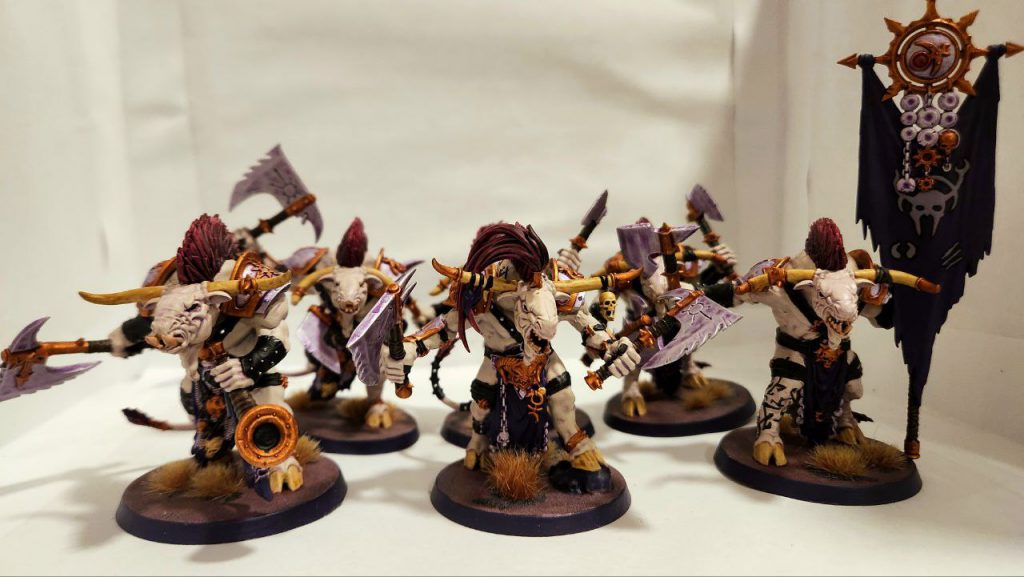
Credit: Josh Maddux
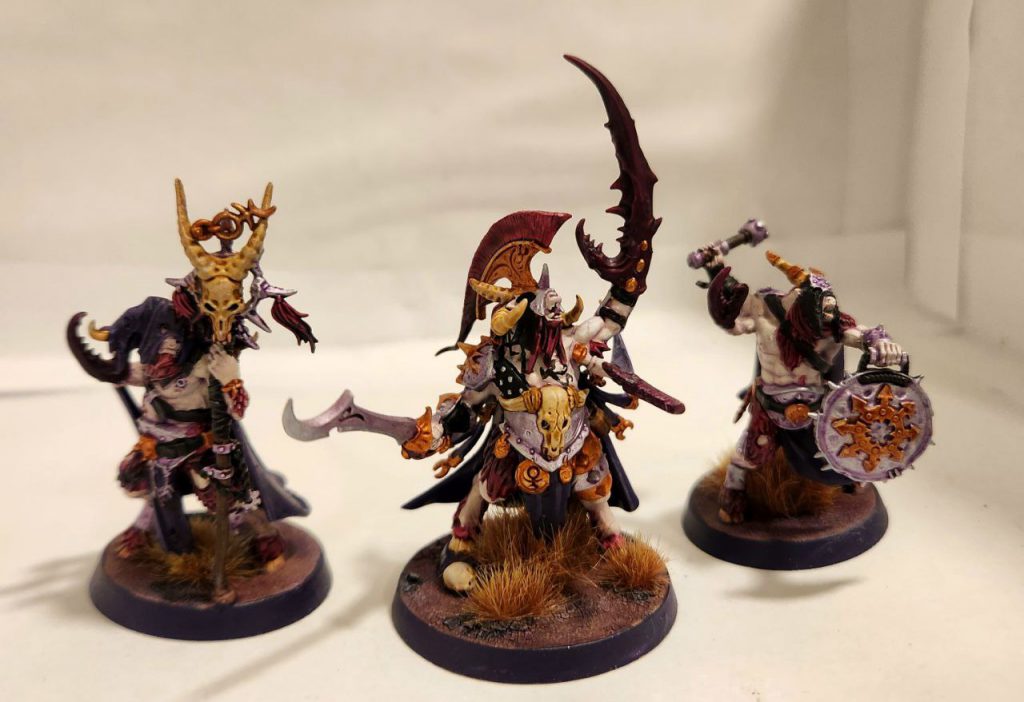
Prepare yourself: 3d6” Counter-Charge Bullgors. Unlike many of the new rules in fourth edition, the Doombull escapes without the stopgap of “Your turn” in Slaughterer’s Call, making Bullgors a truly menacing unit to leave alive. This assists in combating the new Redeploy, which otherwise can leave your charge rolls far less effective. If you’re taking Bullgors, you’re taking a Doombull, but neither are so devastatingly good (as they were in late 3.0) that either are mandatory inclusions. While it’s a minor thing, also bear in mind the Doombull has gone to a 5+ save to match the rest of the Warherd, so shoving this leader into combat can often be riskier than Beasts players remember, even in spite of the overall reduced lethality of fourth edition.
The Beastlord is back again with its Hatred of Heroes, but the buff provided is in a massive 18” bubble, and affects all Beasts of Chaos units. This is fantastic for the units in the army that don’t already wound on 2+ (excluding options like Bullgors), and position the Beastlord to help push through damage against a castled-up opponent with an out-of-position Hero. The issues, however, are manifold: Losing Blood Taunt means getting those Heroes vulnerable is more difficult, the Beastlord is decently squishy, and the amount of Heroes one can run are limited by the Regiments available. If you’re aiming at the target of 3 or fewer Regiments, to potentially fight for turn priority, the Beastlord is going to have trouble fitting in, especially at 170pts.
The Dragon Ogor Shaggoth is the only caster aside from the Shaman, and for 260pts you sure would hope he’s a Level 2 Wizard. No? Well, what you do get is a heal-tanking 3 damage melee grind piece that has the potential to ignore spells, but at only 10 wounds with a 4+ save, any opponent that wants to see this model dead can readily make that a reality using units which cost less. The only lists that would actively be searching for a reason to play the Shaggoth would be all-in on the Thunderscorn Stormherd Battle Formation, but with the pricing of the units that Formation effects, you’d be hard-pressed to find enough points to field such an army. If you’re looking for a unit that makes combat messy and dishes out mortal wounds, the Jabberslythe is worth its 210 points, but more on that later.
Infantry Hammers
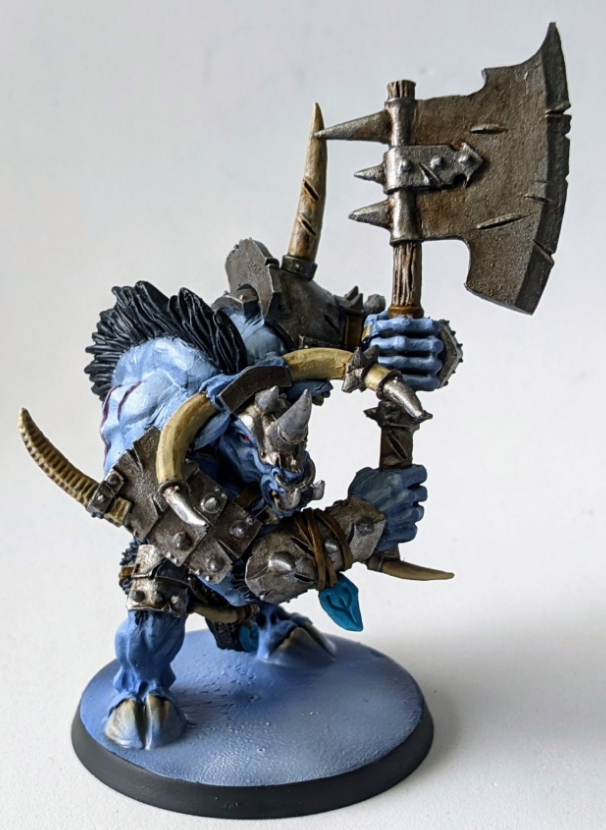
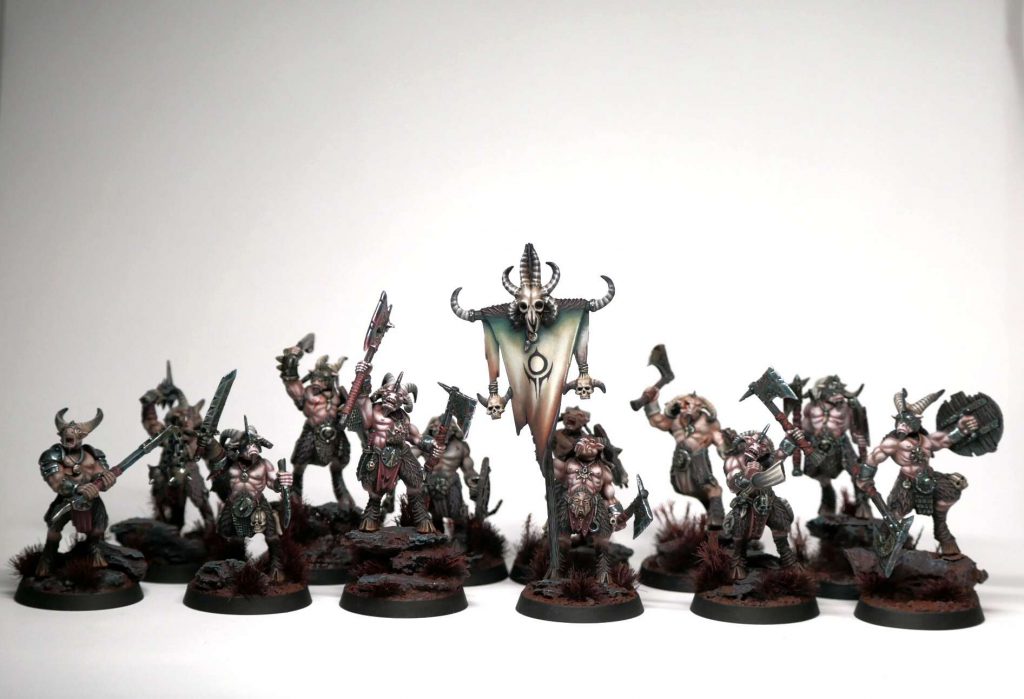
It is with great excitement that I report Bestigors are good again! After being one of the absolute worst units in Beasts following their third edition Battletome, Bestigor are back as the premier anvil of the faction, but that’s a role with some issues. Sporting a now fully passive -1 to be wounded from shooting, you get 20 wounds at 4+ for 200 points, and a decent melee profile to go along with this. Bestigor are middle of the pack in terms of damage, within the BoC Elite trio of themselves, Bullgor, and Drogors, but are substantially stickier. The problem arises that, as we will discuss later on, there’s perhaps a better way to run efficient, sticky midboard units in BoC that might stifle the use of Bestigor. Barring that ominous foreshadowing, though, it’s hard to be disappointed with Bestigor in AoS 4E — merely that you might be more excited about external options.
Bullgors have seen a massive decrease in their lethality, thankfully with a massive decrease in cost to match. Bloodgreed is gone, and Warherd Charge has lost its inexplicable rerolls, but these Bulls still do what you’d expect out of them. Clocking in at the highest damage on average of the Bestigor/Bullgor/Drogor BoC Elite trio, you’re still going to be doing plenty of damage with these in 6-model units, and the ability to bring back a half-size unit as another missile is certainly appealing.
That said, Bullgors are now far worse into high-save units when compared to their previous iteration, as a much lower quantity of their damage is coming in the form of Mortal Wounds, so that will require an adjustment in expectations. Like nearly everything in fourth edition though, the profile is now unified, meaning no matter whether you modeled your Bulls with Great-Ace, Paired, or Shield, they smack just the same.
Once the scourge of early third edition, Dragon Ogors now fill the role of an anti-charge unit. That said, the most practical thing to do with Dragon Ogors is take a single 3 model unit, and suicide charge them turn 1; with the Brayblast Trumpet, the highest value un-reinforced target to return with its ability is 2 Drogors, given you’re rounding up. If you manage to revive 3-model units twice in a game (4+ twice across 4 Battle Rounds is average 4 models returned), you’re netting ~300pts of value. With the Run & Charge from the Great Bray-Shaman, and an At the Double, this is a feasible way to outvalue a glass cannon opponent.
One key aspect of building Beasts of Chaos in fourth is going to be choosing your hammer(s). In the past, this role has fluctuated between several units, however here we see a phenomenally balanced set of units, each bringing something to the table for this role, each with genuine reasons to be in your list. If there’s one faultless aspect to this Index, it’s this trio: Bestigors, Bullgors, and Dragon Ogors.
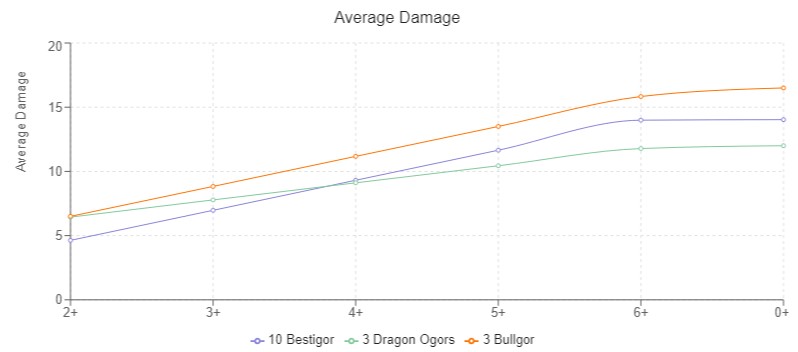
On the charge, these three units deal relatively similar damage, and are costed roughly the same. That said, their relative toughness is essentially inverted, with Bestigor on top, then Dragon Ogors, then Bullgor. If you’re looking for a missile unit, Bullgors still remain the best hammer, although far less concentrated in their damage compared to third edition. If you want a more defensive hammer, Bestigors pull ahead, being a dense pile of 4+ saves that still deals respectable damage. If you’re looking for somewhere in the middle, Dragon Ogors are the premier piece, especially given 3-model Dragon Ogor units are, as stated, the highest single-efficiency resurrection with Brayblast Trumpet in the army.
To summarize — Going hard? Bullgors. Going tough? Bestigors. Going long? Dragon Ogors.
Chaff
At first, Gors seem like a stand-out unit, retaining their Gor Stampede ability to make enemies with fewer models Strike-last, and being a modest 110pts, but closer inspection reveals some cracks in the warscroll. Gors are a victim of the profile unification we’ve seen in AoS 4E, as they’ve been locked to their paired weapon loadout, meaning their save is a meager 5+. Moreover, their ability now fails to affect what used to be its prime targets: Single-model linchpins.
While this effect is thankfully not locked to Once Per Turn (Army), their fragility coupled with a less flexible ability means 10 or fewer in a list is likely these goats’ fate. As one last point against them, the unified combat ranges now thoroughly hamper 20-model units on 32mm bases, as you need to do some ranked staggering in order for everyone to fight, when something like Ungor have a much higher possibility of all fighting. This is better than it was before, with 1” and 2” ranges, but units still won’t be crashing into one another in lines — canny opponents will work to box you in, or use terrain alleys to blunt early ambushes.
Whether you’re paying 160 for 20 Ungor, 220 for 20 Gor, or 400 for 20 Bestigor, a “deathstar” of this manner is likely far worse on the tabletop than on paper. While 3” range means all 20 models can now get into combat, you were never going to be hitting a flat flank into a flat flank against canny opponents. I wouldn’t aim to fit a 20-model unit of any warscroll for Beasts into the role of your army’s hammer, but you can do far worse than 10 Gor.
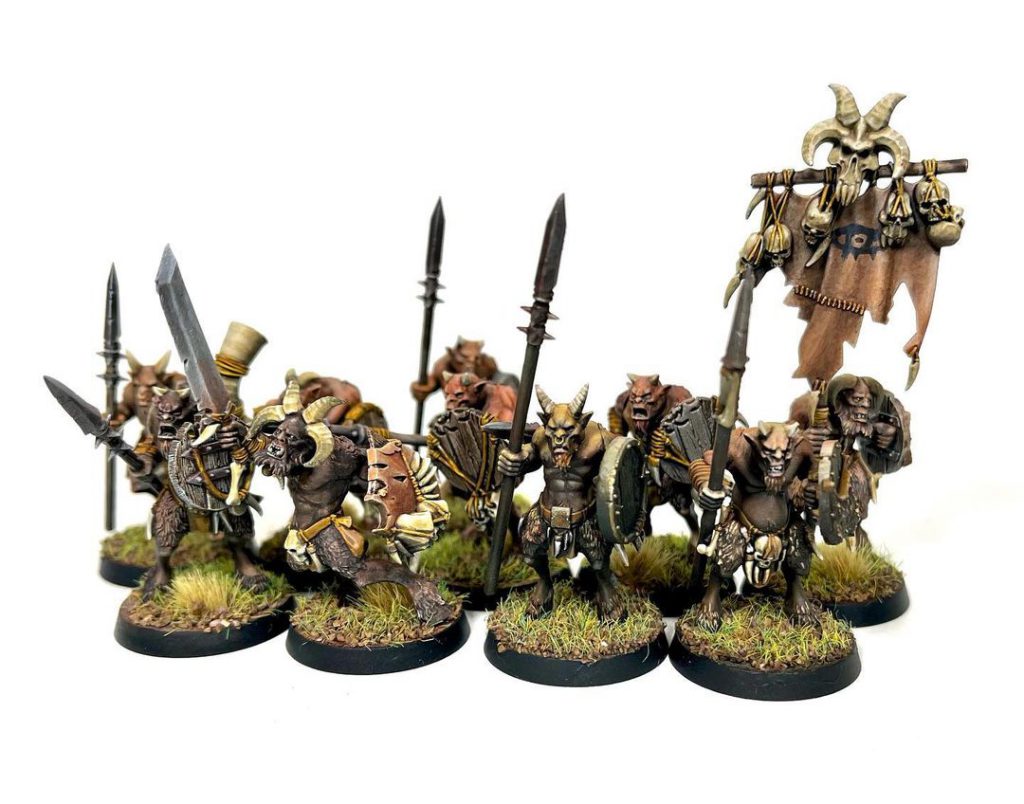
Ungor Raiders have seen a slight but significant change, which helps to reduce the number of dice you’re forced to roll when shooting & deploying them from Ambush. Instead of firing twice, you instead deal ~1.6 Mortal Wounds in the Hero Phase per 10, as a Once Per Turn (Army) rule, then being forced to hit the board during the following Movement Phase. The bad bit here is that you’re only able to “fire” from Ambush once each turn, but the good lies in the fact that it’s in the form of Mortal Wounds, and you’re no longer restricted to the closest unit — just a non-Hero.
This allows you to stack with your Warping Curse, dealing ~3.75 Mortal Wounds with 20 Raiders, before anything else, helping to pick off stragglers or cut down a single 3 Health infantry. On top of now being at 18” range for shooting, and not losing models to Battleshock, this unit remains a staple of the army, and much of our listbuilding is likely to begin with 2×20 Ungor Raiders.
Ungors see a pretty substantial downgrade compared to their previous version, although it doesn’t initially seem as such. They lost their ranged weapon spear attack, which was occasionally good for finishing off stray models you’d plinked away at with Raiders or Mortal Wounds, and their retreat went from an unconditional move away on activation, to a 3+ (that does not require activating). Moreover, this ability is Once Per Turn (Army), meaning that where Ungor would see the greatest value, as several 10-model units able to retreat onto objectives, you need to be especially cagey. They still have a use, as the cheapest model in our roster worth using, but for 10 more points, Raiders are going to do a lot more for you.
Both Chaos Spawn and Chaos Warhounds take potentially interesting, if overcosted, profiles, and ruin them with the Companion keyword. Not benefitting from any of our buffs, especially the Herdstone, ensures no one’s going to bother with either of these. The loss of the Morghurite Chaos Spawn central to Gavespawn in our third edition Battletome is truly felt here, and this marks the first Beasts of Chaos tome without a subfaction dedicated to Spawn of some stripe.
Monsters & Beasts
Long-gone are the days when you could take massed Cockatrice to a tournament and come out on top, and while those hilarious skew lists were about as funny as they were legitimately competitive (take that as you will), the Cockatrice in fourth edition is an absolute staple of a Beasts player’s arsenal at 150pts. Having gone to a 5+ save, this monster is far less apt to be shot off the table by spare ranged firepower, one of its largest issues in late 3.0, but there’s more: The Petrifying Gaze ability has been fully reworked. Now, you’re rolling a dice for each model in the enemy unit, dealing mortal wounds on 6s, and granting Strike-last if any of those wounds go through. This positions the Cockatrice as a fantastic horde-clearing piece, but you can just as easily flex it into a quick means to gain the upper hand in combat activation wars against even elite infantry taken in 6+ model units. Further still, this lacks the Shoot keyword, meaning you can use it while in combat or after the unit Runs.
The Chaos Gargant, meanwhile, puts out reasonable damage for its meager 160pts, so long as it’s buffed by Whipped into a Frenzy, requiring it to be within 6” of any Beasts of Chaos Hero. The real issue comes when you compare this model to 3 Bullgor, also being 12 wounds at a 5+ save, for 20 more points; even when including the buff, and ranged attack, the Chaos Gargant is falling anywhere from 2.33-6.78 damage behind Bulls on the charge, which does not allows its points-per-damage to compete. While a fun model, it’s unlikely you’ll see Gargants on the table in fourth edition when so many similarities can be drawn to a nigh-objectively better unit.Even if the Chaos Gargant were competitive for its points, it’s impossible to skew lists into many of the Beasts arsenal for one key reason: Once Per Turn (Army). Lists will almost always include 1 Cockatrice, but because their key ability is locked behind this limitation, taking the second is largely unappetizing. This means that a canny Beasts player is going to likely rely more on a toolbox of models without repeats, being both more flexible than we were before, but also devastatingly fragile if a key piece is taken out early.
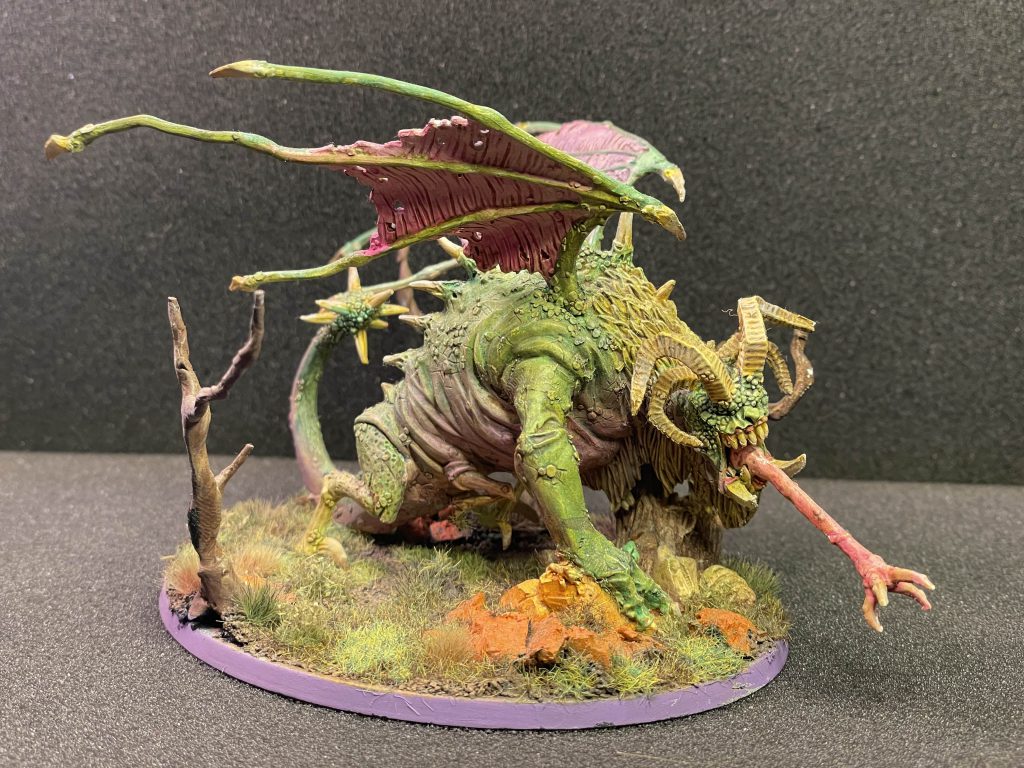
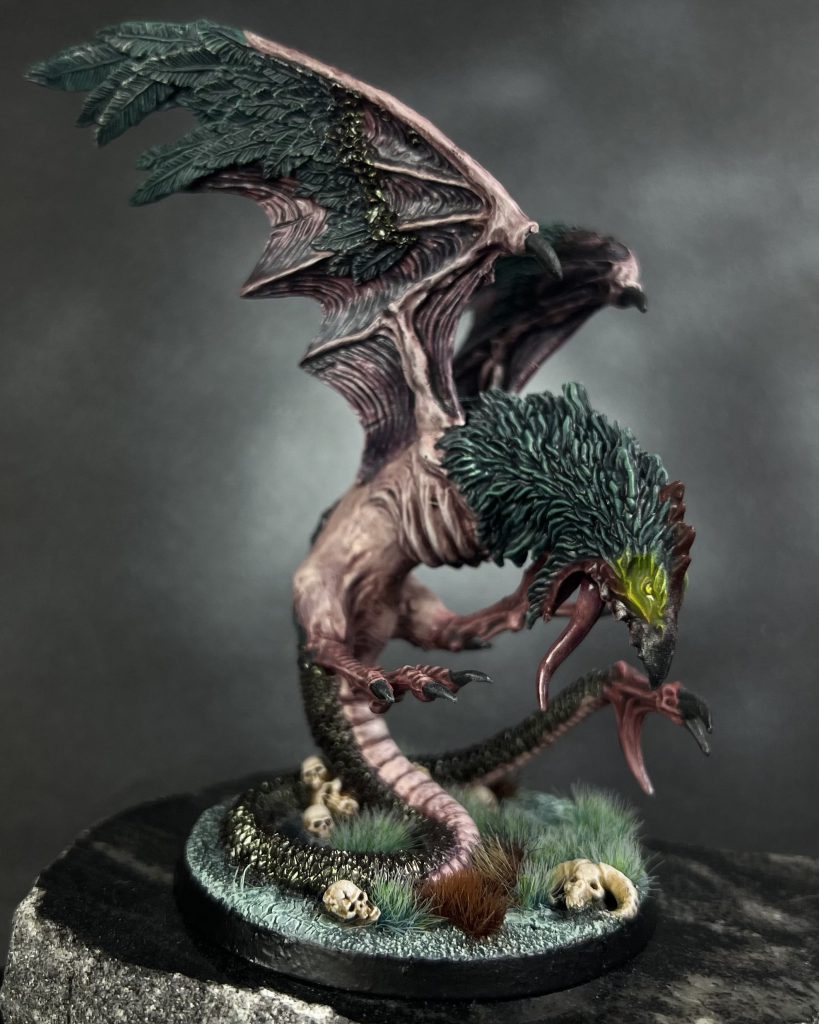
The Jabberslythe has historically been a joke in Beasts of Chaos, an oft-forgotten, ugly resin monster that only sees play when someone was playing a grotesque prank. It should then surprise you that, after testing and hand-wringing, it’s hard to argue the Jabberslythe isn’t one of the best Monsters our army has access to in fourth edition. Its defensive profile isn’t exciting, nor is its damage at face value worth 210pts, but its ability, Aura of Madness, is shockingly good. Each combat phase, you get potentially 2-3 enemy units to deal Mortal Wounds to themselves on 1s to hit — in fourth edition, you’re forced to fight (but not pile-in), and this ability is every single combat, so if a few stray enemies get locked in with an anvil, you quite literally get to say “Stop hitting yourself”. The Jabberslythe is our answer to buckets of dice, and doesn’t even need to be in combat to be useful, making it a premier babysitter for both key units on objectives, and screening chaff ready to force an enemy to clobber themselves to death.
While Quakefray has gone away, the Cygor is perhaps more interesting than one might expect, given every faction now has free access to their Manifestations. Coming in at a reasonable price (for the army) as well, it could certainly see play if Manifestations become the most important factor in the meta, but hitting on 4+ for both its single-attack Desecrated Boulder, and Massive Horns means that, aside from its tech potential, the output here is too unreliable.
The Ghorgon, as it has been for a while, is simply outmatched in damage by Bullgor, and you’re paying a premium for its inefficiency. There’s really not a good reason to take either Warherd monster, especially when the majority of our models are already overcosted.
Razorgors on the other hand are likewise aimed at pure damage, but vastly more useful. They’re best conceptualized as paid-for Manifestations, being a missile that’s going to charge in, deal some damage, and vanish the moment it’s touched. This is seen especially so in how it mimics the profile of the Wildfire Taurus, to some extent, but there’s a world of difference when it comes down to paying 90 points for such a model. They do have a place in certain lists trying to resurrect the alpha strikes from days gone by, as Razorgors have a decent concentration of damage for such a low footprint & overall investment, but you’d still be overpaying when it may just be better to play a Shaman and burn CP on fishing for the Taurus.
The Chimera is functionally inefficient, not unlike the Ghorgon, but is at least a fast unit with Fly. While the damage potential on this unit is high, it’s rather swingy, and having Companion all over its Warscroll prevents it from reaching the heights of damage necessary to justify its 220pt price tag. There are certainly worlds where this is taken in lists that use a Battle Formation other than Almighty Beastherd, as to not care as much about the detriment of Companion, but on the whole it’s likely best to skip this middling glass cannon.
The Rest
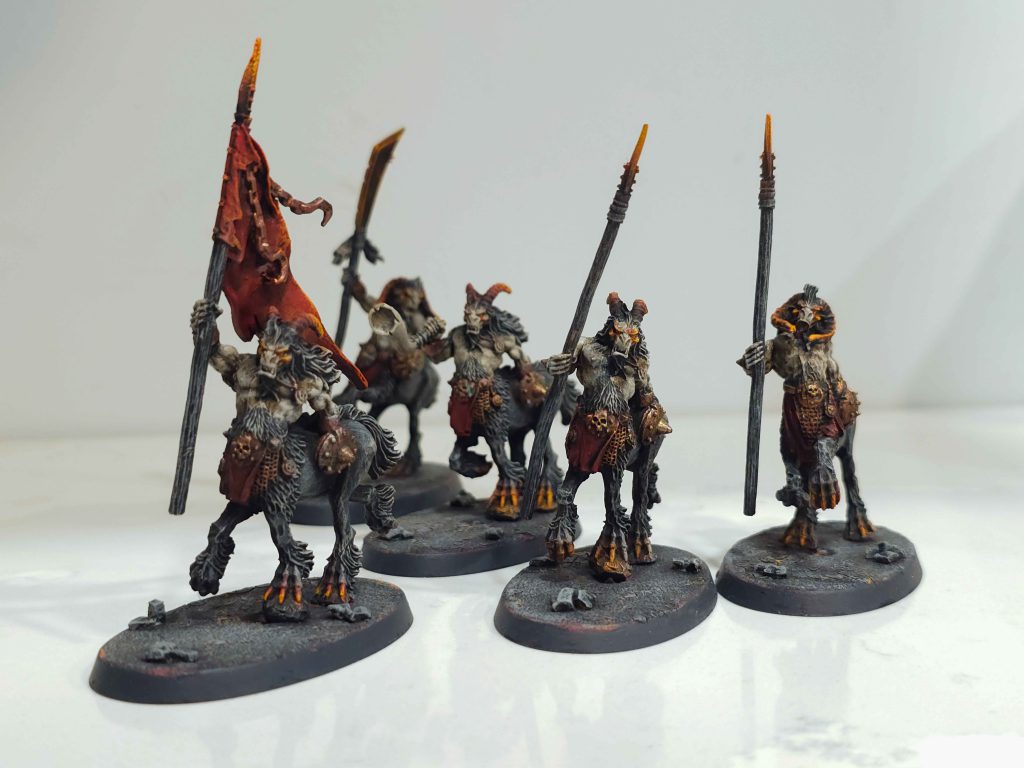
Centigors are an overall oddity within Age of Sigmar, doing a great variety of things over the course of the game’s history, never the same between books. This iteration positions them as a screening ranged piece, able to gain a 4+ ward via Drunken Revelry, but only for your turn; this appears to be a means of offsetting Covering Fire, but frankly if an opponent bothered to waste a CP on out-of-turn shooting for this warscroll we’d be celebrating. This profile just feels unfinished, as though something was forgotten somewhere, and at a agonizing 160 for 5, they’re better left on the shelf this time.
Tuskgor Chariots are largely victims of the changes to how Regiments function, as taking a few of them might be reasonable if not for the need to be 3 drops or below, and that they’re priced far above their weight class. If you’re looking for a fast objective grabber with mortal wound potential, the Cockatrice exists, and functionally does what the chariot aims to do, but far better.
Faction Terrain
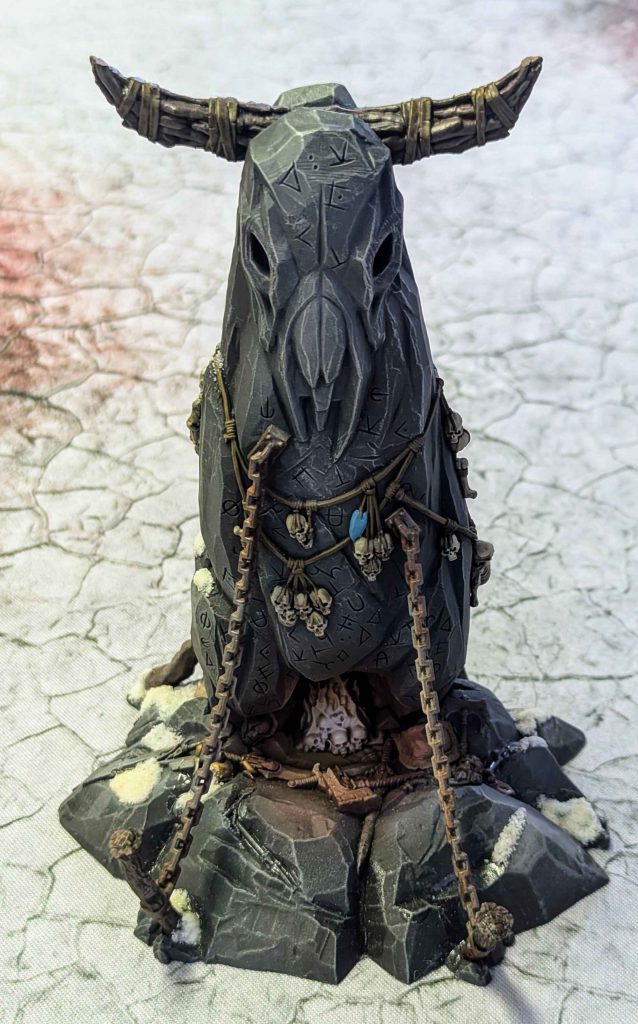
Like nearly all Faction Terrain, the Herdstone got annoyingly worse in Age of Sigmar fourth edition. Not only is it far more killable, at 14 Health, 4+ Save, but its Entropic Lodestone ability now only applies boardwide if it’s wholly within 18” of the center of the battlefield. That means you can’t just stick it in the corner anymore, doubly so with the removal of Protect the Herdstone as free Victory Points.
Moreover, it no longer scales to 2 extra rend from Battle Round 4 onwards, and with the inclusion of Companion attacks across the entire faction, this is the worst the Herdstone has ever been. That said, you’re obviously still taking it, and obviously placing it such that you get the boardwide buff, but you’re not happy about it.
The Five Coolest Units
- Jabberslythe: For the first time in all of Age of Sigmar, you can field this wretched monstrosity and truly make your opponent mad. The Jabberslythe is not as tanky as it ought to be, but serves a key role in making your trade pieces and anvils threats in their own rights; combat (but not pile-in) is forced in fourth edition within 3”, meaning a stray 10-model Ungor unit can cause two, even three units to start stacking mortal wounds, both combat phases. In a protracted battle, keeping this beastie properly screened-for (especially with the Shudderhood’s units) helps win long games Beasts otherwise has issues with. If you’re looking for a skill-expressive tech piece that will win you games, look no further.
- Ungor Raiders (in 20-model units): Unshackled from picking the closest unit, and taking nearly no time to resolve, Raiders represent the perfect complement to the new chip & objective play patterns Beasts now relies on for its gameplan. While you do need to stagger them, this unit is a great way to hamper low-save models and elite units without wards alike, with a surprisingly reasonable melee profile, for 20 25mm bases and Crit (2 Hits). Many lists are starting with 2×20, given their relative efficiency in points, although I wouldn’t be surprised if additional smaller squads saw play as a means to eke out consistent mortal wound damage alongside Warping Curse over ~3 Battle Rounds.
- Great Bray-Shaman: While the regimental restrictions associated with this model are annoying, every list is taking at least one, given how absolutely potent the Manifestations for Beasts of Chaos are. Starting on the board with little else (perhaps a suicide Run & Charge Dragon Ogor unit), if you can spike a turn 1 Wildfire Taurus, you can mimic the alpha strikes of 3.0. This isn’t so much a cool model, but one that provides access to some of our best tools, and does so with an affordable price tag.
- Cockatrice: Where the Jabberslythe deals with high-Attack units, and Gors with low-model units, the Cockatrice is specialized in the slaying of hordes, something you’ll be seeing a lot of in Age of Sigmar fourth edition. As the premier “second hammer” for your go turns, the Cockatrice beautifully supplements a brick of allied damage dealers by providing relatively consistent Strike-last, and the ability to dent hordes in both melee, and at range. The caveat, like so many of our best units, is that its ability is Once Per Turn (Army), meaning you’re best served by just taking one, or spreading them out throughout the game.
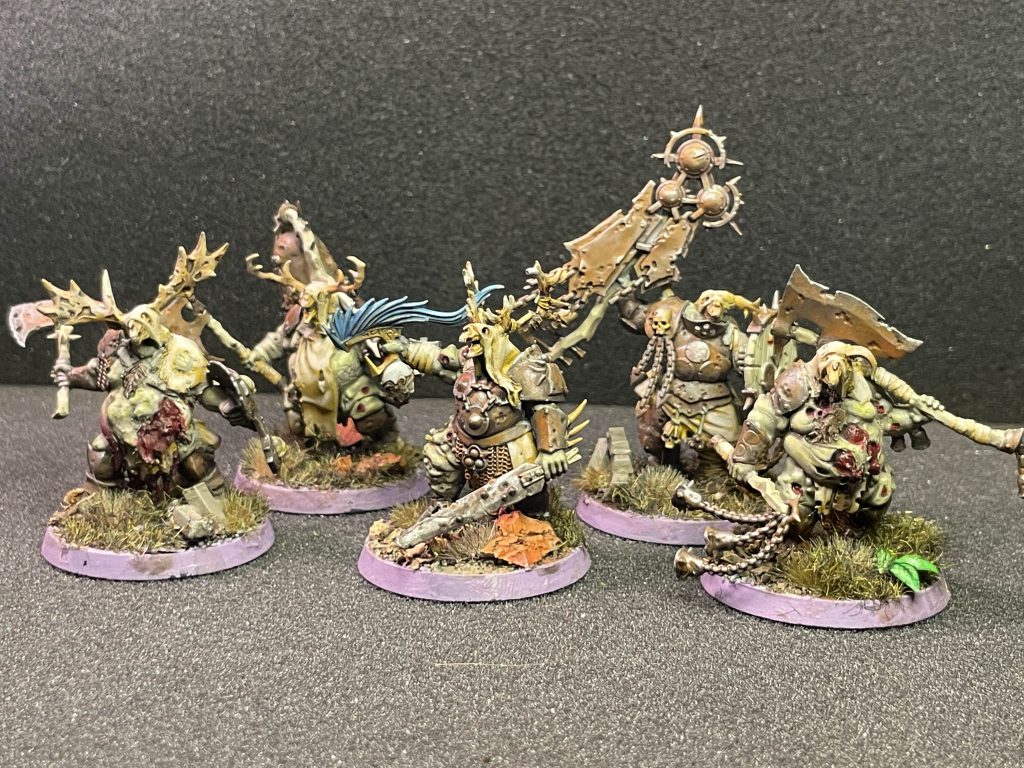
- Phulgoth’s Shudderhood: Wait…what? That’s right, one of the best units for a Beasts of Chaos army in this edition is the Maggotkin of Nurgle Regiment of Renown. This unit of 5 Blightkings, 2 Blightlords, and a Harbinger of Decay comes at a 110 point discount compared to its home faction, but arguably comes out ahead — prorated for the savings, these are some of the most efficient models Chaos has access to, if your goal is sticking on the midboard. Now that Beasts have lost marked units, the faction is fairly barebones, and that lack of options manifests in how it’s now forced to approach the game; we’re an overcosted outflanking force, largely dependent on playing for chip damage and objective control, but without point-efficient anvils in our list. Like a blotfly from the heavens, the Shudderhood complements everything Beasts needs to do to keep up in 4.0, and as you’ll see in our Example Lists section, there’s lots to love. If you aren’t keen to spend upwards of $150 on units that are for an army which has a single year of play time, good news — converted Tzaangor Enlightened on Foot are great Blightkings, converted Shaggoths are Harbingers of Decay, and refitting converted Tzaangor Enlightened on Disk can probably pass as Blightlords. Just be sure to check with your TO, and don’t be afraid to pull the ‘My army is being squatted’ card (for ethical reasons this is a joke).
The 5 Biggest Changes from Third Edition
- The Faction’s Damage Concentration is Way Down, and Mortal Wounds Largely Come from Range: One of the classic aspects of Beasts of Chaos came down to their ability to present a bucket of damage targeting nearly anything on the board, consistently clearing one unit of choice before the opponent had the opportunity to interact. With the toning-down of damage across the board, especially in the case of Bullgors, this means Beasts of Chaos have less opportunities to concentrate their damage on a single target, or single flank. That said, the reactive damage provided by the Jabberslythe & Cockatrice into units they’re meant to be targeting is significant, and over the course of several turns, this damage can ramp up. That said, even this style of damage isn’t freely available, or possible to double-up on, because…
- The Faction’s Strongest Abilities are Once Per Turn (Army), Working as a Toolbox: Mortals from Ungor Raiders, Cockatrice, and the Jabberslythe are competent, but because of the limitations on their abilities, none of this damage can be stacked in a single turn by multiple units. This pushes Beasts to be aimed more at chipping away at opposing units, delivering consistent, annoying damage by properly screening for the units listed above. In the cases where solid abilities aren’t Once Per Turn (Army), like Gors, there’s other limitations on where and when such abilities can be used.
- The Faction is Much Better at the Long Game, but Far Less Explosive: This relates back to points 1 & 2, but Beasts fundamentally are a Round 5 army now, something many players are going to need to adjust for. The explosive scalpel of Beasts isn’t something possible in fourth edition, and by way of the recursion granted via Brayblast Trumpet, and turn-over-turn value of Raiders & the Jabberslythe (as well as Phulgoth’s Shudderhood), oftentimes players will scrape out a win by keeping key pieces safe by way of sticky anvils. The stickiest isn’t even in Beasts of Chaos, but we’re getting ahead of ourselves.
- Redeploy Fundamentally Changes how the Faction Needs to Approach Ambush: Unlike third edition, where Redeploy couldn’t be used in response to arriving from Ambush, now Beasts players have a significant push & pull with players saving CP for Redeploy. The faction does get its +1 to charge in those scenarios, but often losing the +1 to charge from what used to be the Musician rules makes getting in a bit more challenging, on top of the ideal enemy target shifting d6” away. That said, there’s also new tools for approaching the opponent from Ambush which weren’t around last edition: The Doombull gives your Warherd units a 3d6 charge, which is excellent, and the Bestial Cunning trait provides a d3” shift of our own, helping to combat opposing Redeploys. It is also possible to shove a Manifestation upboard as a weird piece of moveblocking, or a spare unit with Run & Charge from the Great Bray-Shaman. To put it simply, CP economy is vital this edition, and while your opponent will often spend on getting away from the frothing Bullgor that await them, you as a player also have some of the best tools Beasts have ever had, in order to combat this.
- Without Marked Units or Typical Ally Choices, Listbuilding for the Faction is Constrained: It went largely unmentioned, but this faction lost a massive chunk of its unit roster, including many of the better units across several editions. Tzaangor Enlightened on Foot were a premier trade piece, Tzaangor Shamans were efficient Wizards who would have loved the new Manifestations, and even Slaangor Fiendbloods could act as melee blenders if given the right setup. Many players purchased or converted these models for this army, so to see it legal for a year without these key pieces is a shame. Beasts are always going to pay a tax for ambush, so it made sense to play these marked gor, or ally in efficient midboard threats. Alongside the loss of classic allies for Beasts like Be’lakor, listbuilding feels deeply constrained. About half of the Warscrolls in this batch of releases are playable, and some like the Great Bray-Shaman are only as such because the other Level 1 Wizard option costs 260pts. Due to this, most Beasts players should be making use of the allies we do have: One-Eyed Grunnock, and Phulgoth’s Shudderhood. When your units pay the ambush tax, those that don’t want to ambush feel even worse to play, meaning as always there’s a lack of efficient midboard pieces — that’s where those two come in.
Example Lists
Pure Beasts of Chaos
Army List - Click to Expand
While I do not endorse Beasts playing without allies, given the general cost structure of our units compared to contemporaries in other armies, it is certainly possible to do well with the right build. This is using every trick available to the army in its index, from a 3-model Dragon Ogor missile, to single copies of each competent tech piece. It’s certainly reasonable to play 2×6 Bullgors in a list like this, but my aim was to see if the Dragon Ogors felt good, which they did (in spite of their cost). I have a hunch that this unit wouldn’t make it into a tournament list, but to be honest, pure Beasts of Chaos likely wouldn’t make it past 4-1 with these rules.
Grunnock Pressure
Army List - Click to Expand
This list aims to keep Grunnock & the Jabberslythe alive as long as possible, in order to reap the benefits of slowly whittling down opposing threats in the midboard. As stated in the review, Bestigors are the best “tough” elite infantry we have access to, and here, 30 of them form the majority of both our damage & bulk. The strength of Grunnock comes from both his massive OC, and ability to hold as much damage he does without crippling falloff, on a single model. Marking wounds on Grunnock means your opponent isn’t killing other threats, just as was the case in late second edition. One feature of the list worth noting is the use of Death-Grip, to doubly punish opponents shooting at our Bestigor, given Bestial Cunning wouldn’t be likely to go off when slotted onto a Great Bray-Shaman.
Phulgoth Counterpunch
Army List - Click to Expand
This is by far my favorite of the lists that aim to make the most of Beast’ standard playbook, and if I was going to take Beasts to an event, which I hope to, my pick lands squarely here. Phulgoth’s Shudderhood is everything Beasts needs — efficient, tough bodies that can excel in midboard objective play. Using these multiple units as screens for the Cockatrice or Jabberslythe feels incredible, and watching the mortal wounds pile up as your opponent crashes against Nurglite heft is a beauty to behold. Everything in this list is designed for you to play from the back turns 1-2, let your opponent stand on objectives, and then stack rend & Almighty Beastherd’s buffs on BoC, and the native abilities on the Shudderhood, to topple opposing forces on objectives. I cannot overstate how good the Shudderhood is with Beasts, and while purchasing units outside of the army feels rough, at least those models will be legal in a year — gallows humor at its finest.
Bonus List: 2-Drop Beasts
Army List - Click to Expand
Okay okay, one more thing — did you know Beasts of Chaos can be a 2-Drop army? Discovered after a long night of hemming and hawing over how to at least roll off for priority against some of the better lists discovered since 4.0 dropped, this concoction gets to play all three of the BoC Elite trio, an absolute massive slab of meat, on top of still finding room for both Phulgoth’s Shudderhood, and a Wizard, in the less-than-ideal (but importantly, expensive) Dragon Ogor Shaggoth. Here, you’re able to fit in nearly everything you’d want in exactly 2000 points, and likely have the luxury of turn priority to boot. While this is a meta call at its most obvious, for when you know the top army is going to sit around 2-3 Regiments, there just might be teeth to playing all three of the Elite hammers, rather than picking just one, in an army more reminiscent of Ogor Mawtribes than sneaky Beasts.
Wrap-Up
You will notice I’ve taken this review rather seriously, and played nearly a dozen games with a faction deliberately meant to be on its last legs — why is that? Well, for starters, this army is shockingly competent, and almost certainly could see tournament success this edition before the power creeps upwards with the release of more actual Battletomes. Beasts have graciously been provided numerous ways to chip away at enemies in manners not even provided to dedicated chip damage factions, like Disciples of Tzeentch. The Jabberslythe punishes buckets of attacks, Cockatrice hordes, and despite losing the sheer dump of damage it was once known for, a brick of Bullgor can still remove many central threat pieces from an enemy force with little resistance. If you want to play Beasts of Chaos in your final year, you have a good shot at appearing in top tables with the right matchup spread.
Once Beasts go away, a lot of people are going to shift to other Chaos factions, especially Tzeentch, and it’s not unlikely the units we’ve spoken about and seen in this review will appear as ‘Jade Gorbelisk’, or ‘Blissbarb Ungor’. Beasts as an army have a limited shelf life, but the dedication players have put into their models is likely to live on, and the fact a Regiment like Phulgoth’s Shudderhood is so deliberately good may very well slide its enjoyers into Maggotkin after our time is up. For now, though, don’t be surprised if you see a horde of screaming goats appear around your deployment zone for the first year of fourth, and for those itching to finally put that Jabberslythe on the table, your time is now.
Have any questions or feedback? Drop us a note in the comments below or email us at contact@goonhammer.com. Want articles like this linked in your inbox every Monday morning? Sign up for our newsletter. And don’t forget that you can support us on Patreon for backer rewards like early video content, Administratum access, an ad-free experience on our website and more.
