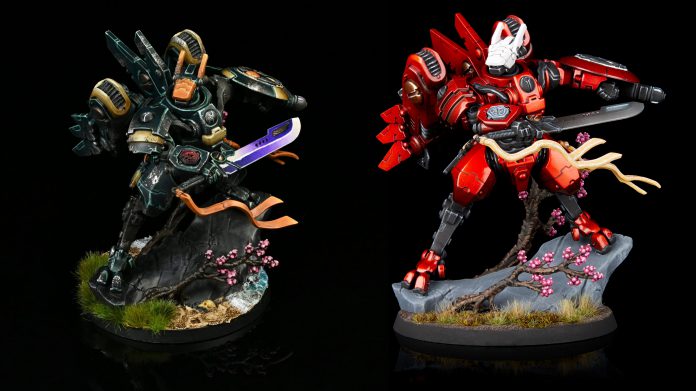
This weekend sees a number of new Boarding Patrol boxes go up for preorders, though two in particular stand out as they have new models for their respective factions. While the Orks Combat Patrol box comes with a new plastic Snikrot kit, the Tau box comes with Commander Farsight.
Before we get into things proper, we’d like to thank Games Workshop for providing us with preview copies of both of these boarding patrols for review purposes.
Assembly

Ok, so I’m going to be honest: As fucking rad as this model is, the build alternates between some great highs and extremely bad lows.
Let’s start with the good parts: While I went with the default build there is a huge potential for customizing this model. Most joints and pieces are fully rendered, with only small pegs to position them in their default positions, I am looking forward to seeing what people manage to get out of this model once they get to changing things up from the default.
Take a look at the instructions:
Each of those red exclamation points represents a opportunity, with others like the knees and feet not being indicated but should be just as easily released from their defaults. This does reveal one notable issue though…
Putting the arms into their default poses is a bit more of a challenge than I’d like; those pegs are absolutely tiny and you have no positive click or feeling so you have no way of really telling if they are where GW is intending you to put them. It’s not the end fo the world but given these are ball sockets, the arms will flop all over the place until they set if they aren’t exactly where they want them. The back engines are far worse for poor indexing though, each mounts with a pyramid and socket connection that is loose as hell and are kinda weirdly positioned when they are in the right spot. I spent like ten minutes baby-sitting the model making sure everything was in the right place while it set, and let me tell you I was nervous when I had to go out before they were 100% there!
Painting
Rockfish
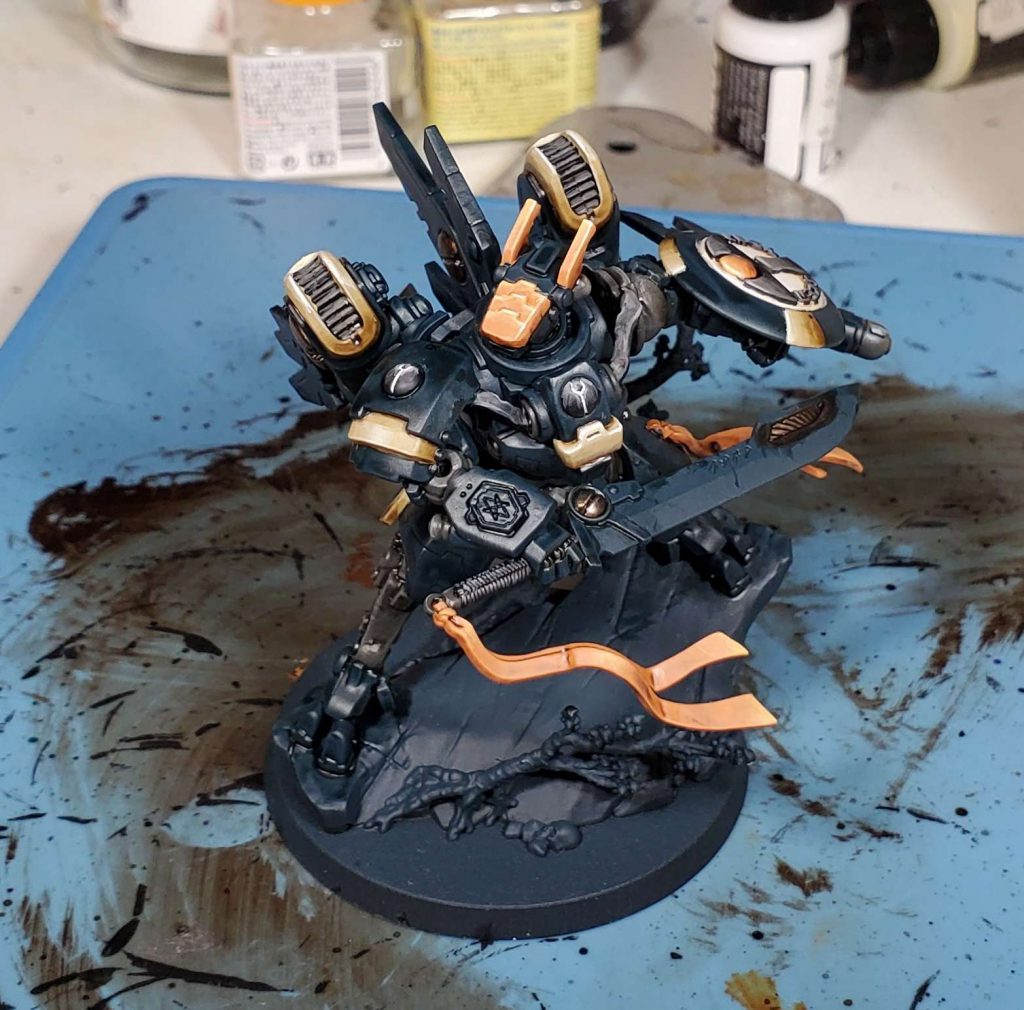
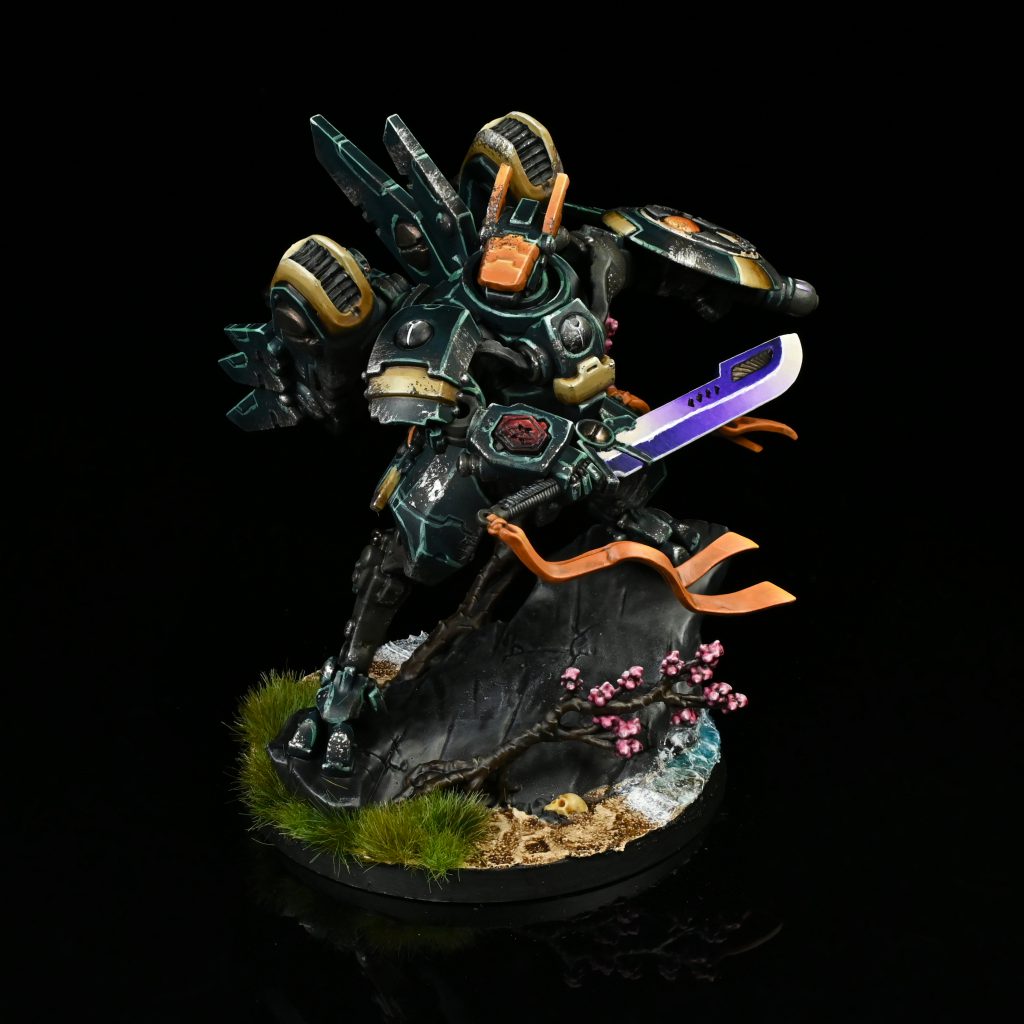
For recipes, I would suggest going back to my old HTPE to find 90% of the schemes colors, there were a few things I changed to jump the contrast up though. The biggest change was moving away from all over washes for the non main green colors and jumping the highlights up, instead I glazed thinned Agrax down to provide controlled dark areas and reduce the time spent cleaning up the brighter areas, I then moved the first highlight up to being a glaze plus edge highlight. For example, the tan is still Zandri dust but now I applied thinned down Agrax to build up shadows then glazed up with Screaming Skull, before edge highlighting with it and white.
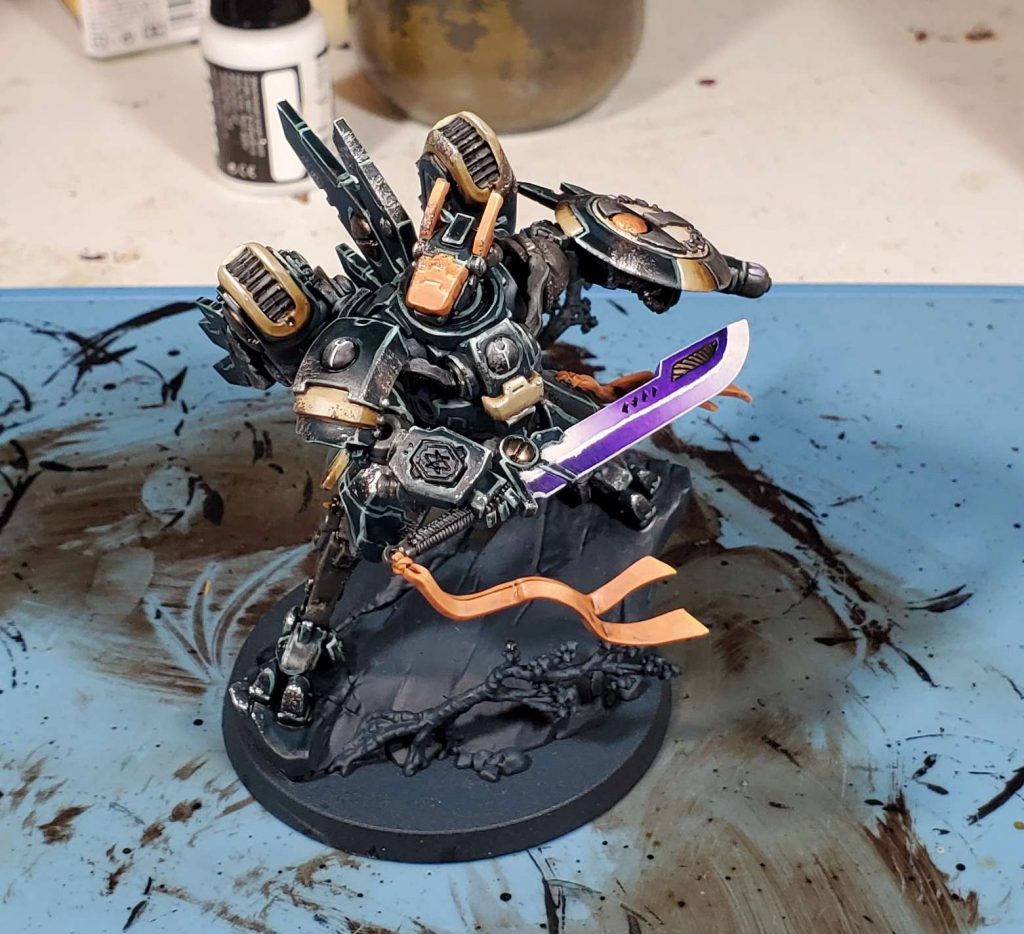
The blade was a bit of a new creation for this scheme, I wanted it to be super distinct from the normal glow I’ve used everywhere else in the scheme. I started by coating the entire blade with Dechala Lilac, a color that would be entirely hidden in the final result, then came the glazing. I started by working out from the middle, moving towards white with Pallid Wych and then white to one end and Luxion Purple to the other. Once I was happy with the brightest and darkest sections, I used a sequence of very thin filters/glazes of Luxion to smooth out the transition at the middle before going around the parameter with white and nearly dying getting the central line down. There is nothing you can really brace a finger against while doing that line, so it’s some sketchy unsupported free handing.
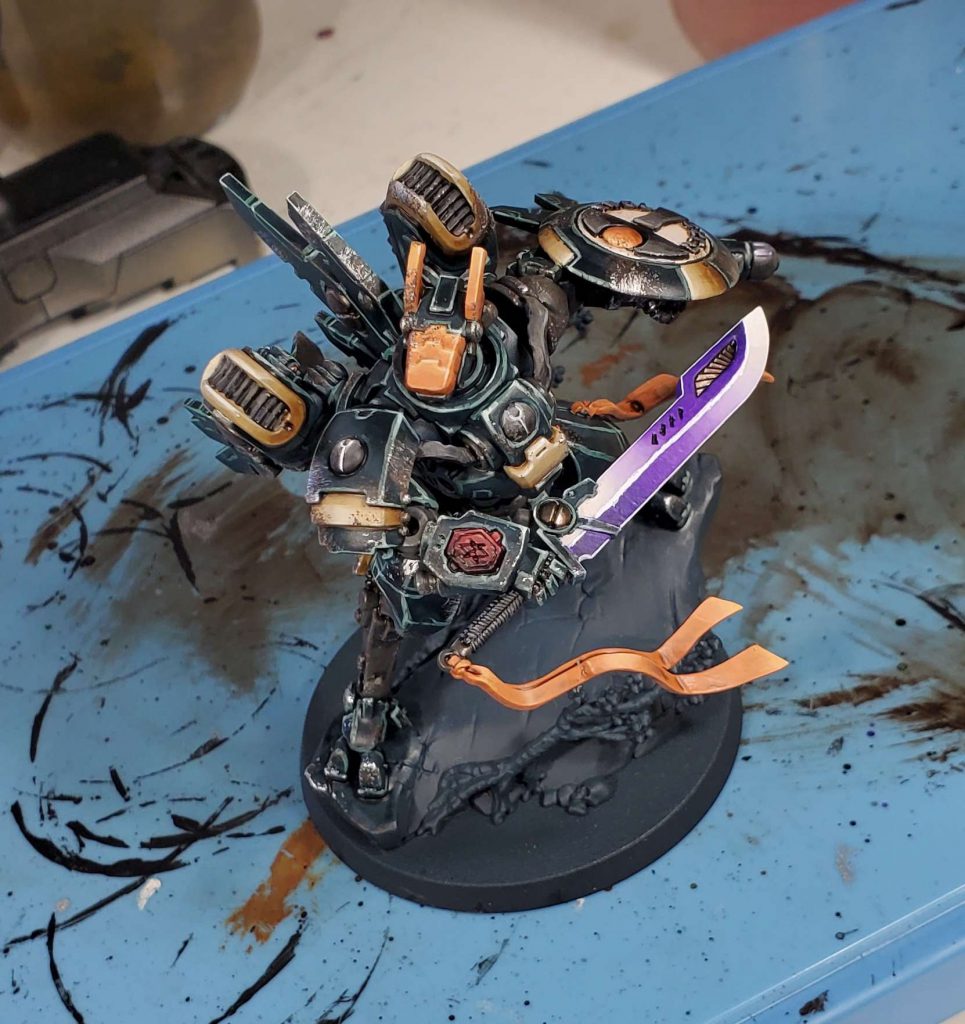
The Amulet is pretty simple, base coat Khorne, wash Druchii then glaze it darker with Shyish in one direction. Then edge highlight with Khorne, Wazdakka, Squig Orange and Cadian.
Once you are on to the base, my old recipe should apply mostly unchanged. I do skip the Vallejo still water as it hasn’t really worked as well the last few times and can age in strange ways. Instead I have just been glazing/wet blending the Sotek and Stegadon right onto the texture paste and using the Vallejo Transparent Water to provide smoothing and gloss. I did also use a collection of different bright greens Gamers Grass tufts instead of barbed bracken as the older bases have been looking a little sparse.
Jack
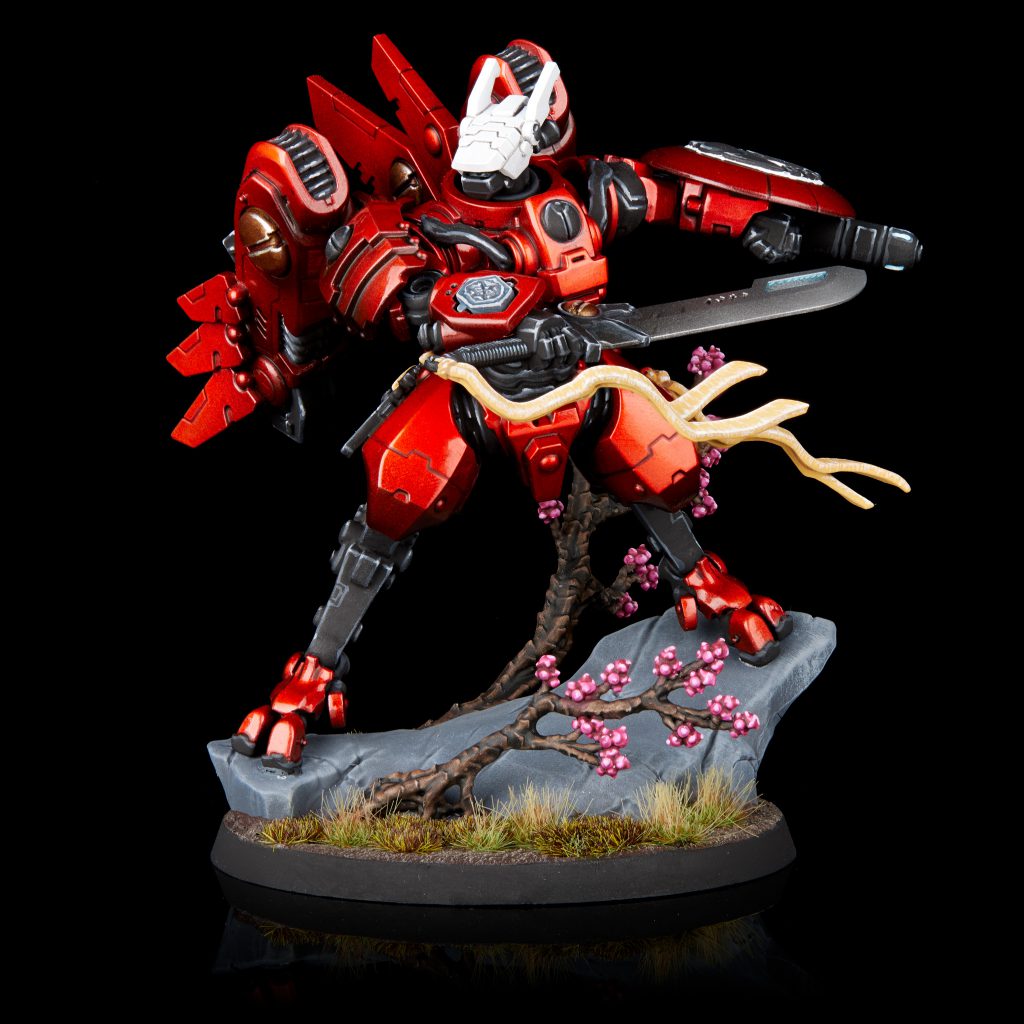
The instant I saw this guy and the more curved lines he has compared to other battlesuits I knew I needed to do something special for him. I wanted to keep the red, but give him a real high-speed feel, and how better to do that than a sports car candy coat. I’ve done this a few times on my knights, and you can jump over to our How To Paint Everything to read through how I pull it off.
I also used this as an opportunity to work heavily with ProAcryl paints. Outside of using contrast in a few places, all the non-metallics were done with their range, and I was very impressed. Especially with the white, which has the best coverage and smoothest application I’ve ever seen.
As usual, I kept Farsight in many subassemblies as I was working. I wanted to keep everything as accessible as possible, as there’s no way to go back in and clean up the red if I screw it up. I fully assembled the legs, though didn’t attach them to the base initially. I kept the torso, arms, jump packs, right shoulder pad, shield generator, sword, plasma rifle, and head separate. With each piece I worked through getting all the basecoats down, then glued it to the full assembly and did all the highlights. While this meant I was going back to the same color over and over, it made it easy for me to be sure highlight direction stayed cohesive throughout.
Our Thoughts
Ok, so there is one elephant in the room which needs to be addressed:
Farsight’s model kinda makes the rest of the range look primitive.
Seriously, this guy is head and shoulders above everything else tau currently has, with a huge jump in both detail and style that really differentiates him from the crowd of boxy crisis suits. Being sleeker, lighter and curvier then the models that proceeded him you will find it tough to believe he is even from the same game. Go looking around and you will find all sorts of design features that could come out of any modern style of mecha from western and Japanese sources, his arms are mounted on ball gimbles that are held up by thin almost organic braces and he even has a choice few triple dot greeble details on the mounts for his jetpacks – which even have their own little wings. Peep the complex multi component feet, or the hollow joints on the limbs for some future tech vibes! They also couldn’t help themselves from dipping into samurai inspirations with the layered shoulder pad and puffed pant like thighs, or going right on the nose with the cherry blossoms on the base!
Is this a problem? Hell no!
Does it make me sad that the rest of the range doesn’t have the same design doctrine, and leave me imagining what they could be? Very much yes!
Seriously, GW give me more models like this. I will struggle through the awkward build just to get another chance to taste that sweet, sweet mecha army of my secret weeb dreams.
Just to circle us back to what is nominally a review rather then the blinded ravings of a fan, would I recommend picking farsight up? Of course! Get you a dash of Gundam in your Tau with a excellent design that won’t leave you wanting as a painting experience either. Although, temper that recommendation with the warning that you should expect frustrations from the build and, unless you want to dive into bashing, you are buying a sub-faction specific model.
Have any questions or feedback? Drop us a note in the comments below or email us at contact@goonhammer.com.
