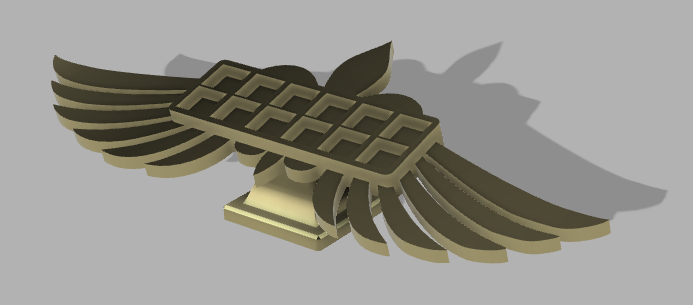
In our Fabricator General series, we cover large projects or those with lots of building and construction and custom work. This week, we are taking a look at 3D printing from the design side with the third and final in a series of special guest posts from fellow SA Goon Dave “TKIY” Gordon. If you’re interested in the designs he’s talking about here but don’t feel up to making your own, you can find them on Dave’s Etsy store by clicking this link and following along with new designs on his Facebook page and Twitter.
Previously we’ve talked about creating a functional design for the Miracle Dice Holder, making a multipart object and working with curves, so today we will look at assembly tools within Fusion 360, and why my first design was never produced.
Dice Holder, Assemble!
The assembly tool in Fusion is a handy way to test fit the alignment and orientation of multiple parts, and can even animate the joints should you need that for whatever reason, or if you just want to mess around with cool animation stuff. In this case, it helps us double check one very important issue – do we have enough height on the plinth to keep the dice holder fully elevated on the tabletop, or will the wings hit the surface?
First, create a new design and save it with whatever name you like. In this case, I’ll call it ‘Assembly’. You must have a saved design in order to import instances of other designs, so this step has to be completed. Next, you can simply drag and drop the two components into the new design.
By default the new objects are both placed flat and dead centre on the origin plane. Despite the fact that we have defined fully watertight 3D shapes, Fusion just overlaps them since it has no idea how we want them oriented.
Each design we imported via drag and drop is a new component in the ‘Assembly’ design so we could just move and rotate the pieces in this space to align them, but that is bound to be frustrating, and with more complex multi-part models, completely unfeasible. Fortunately, Fusion and other 3D modeling systems will allow us to auto-orient everything by defining joints. The joint tool in Fusion is under the ‘assemble’ menu, or you can just hit ‘J’ for the keyboard shortcut.
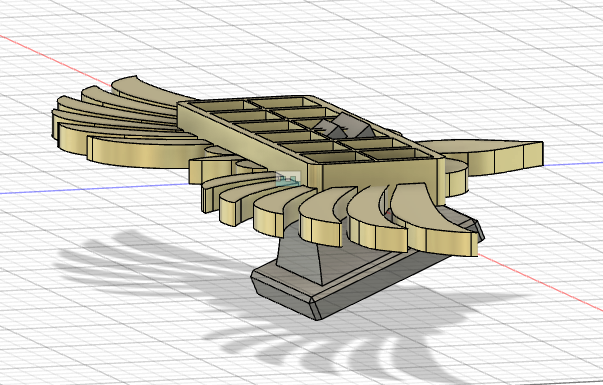
A joint can be defined on any face, edge or vertex of any component. Be careful of the orientation and selection of the joint though, or you might end up with this:
Note the joint icon in the design workspace, it’s there as a reminder of where the joint is in the model, and you can also select the joint icon to directly modify the joint, add or alter the joint animation, set the joint type (not all joints are rigid!), etc.
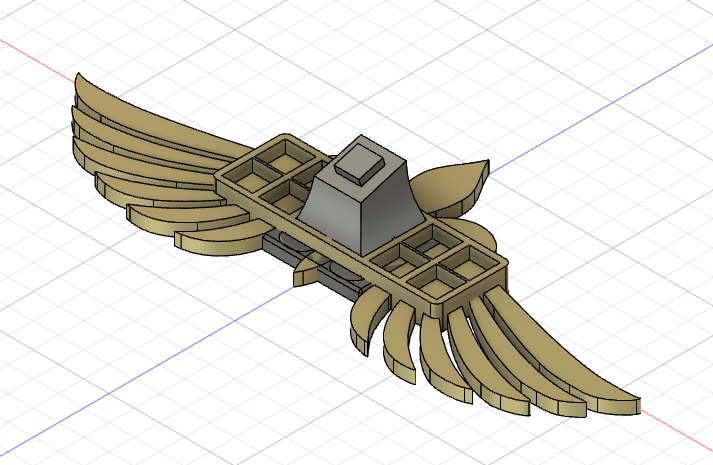
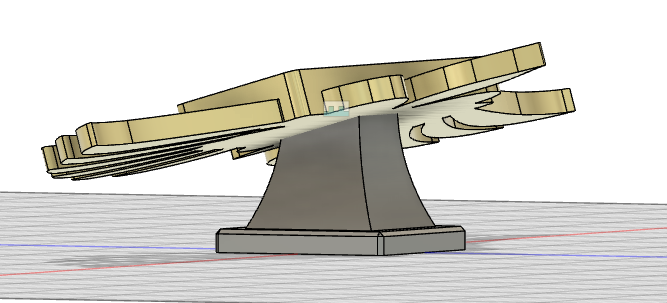
Once you have your joint properly assigned, you should have a proper representation for your model and you can use the origin layer to assess your design. In this case, it’s clear the we have ample height and the wings won’t make contact with the table surface:
While the assembly tool might be a bit unnecessary with this particular design, it’s an incredibly useful tool that you should get to know. For designs like these wound marker dials it is invaluable for test fitting the rotating joints, and the size and shape of the cutouts and the text beneath them.
Render? I Barely Knew ‘er!
Finally, once we have a completed and assembled design we can pop out of design mode and fire up render mode. Render mode allows you do assign materials to the various bodies and/or faces of our models, apply a light source and see what the completed design should look like.
Of course we are going to see very different results on a real world printed object compared to an idealized render with no flaws whatsoever and infinitely fine resolution, but it does give you an idea if the design lives up to your original expectation:
And with that, we can export the two objects to STL, slice them and send them off to the printer.
This Monstrance is Monstrous
So this is the final design that I produced, and it has been very successful. I’ve sold a few dozen which, for a new store on Etsy, is a pretty good result. So as promised, let’s look at the original design and why it was never produced.
The original design was modeled after something that I knew from chidlhood and being raised in a catholic household – a Monstrance.
The goal here was an absolutely over-the-top ornate design with a chalice style which I think was achieved, but there are a few design flaws that kept this from ever being a viable design.
First and foremost this design is extremely top-heavy, and would require the lower component to be heavily infilled to add weight. Infill on decorative objects is usually fine at 5-10%, but in this case I was looking at 20-30% infill for the lower section to help prevent tipping. That’s a lot of relatively expensive gold filament that wouldn’t even be seen. Since this was a design for sale, that also drives up print time and cost to manufacture. This was a very significant flaw and the one that killed this design more so than any other.
The second flaw with this design goes back to the original design ideals that I mentioned back in part one of this series, that the dice should be easily viewable from seated and standing positions, from both sides of the table. The dice are all on one flat layer, and the raised iconography would obscure the dice from the back side.
As much as I like how this design looked, it had functional issues and would be expensive to produce. I tend to price my designs using a combination of print time and material cost since you need to account for printer wear and electrical usage just as much as you do the cost of filament. I originally estimated that for 16mm dice, this holder would be retailing for more than double what my final design would. Some people may be willing to spend $40+ on this but I didn’t imagine that there would be enough to make paying the listing fees worthwhile.
Go Forth and be Fruitful
That, in a nutshell, is how I go about my design work. There are hundreds of designers out there producing similar products, so take a look at what’s available and decide what you like, what you don’t, and what you think might work for you. If there is a product idea you have in mind that doesn’t exist, take a crack at designing it yourself, or reach out to a designer you like and work with them to bring your idea to life.
For myself, getting feedback on a design is fantastic, either positive or negative, because it lets me know whether I’m on the right track or not. If someone comes to me with an idea for something they want created, I’m extremely grateful that they appreciate my work enough to want to see my take on their idea.
Get inspired and try it out for yourself! And if you have any questions or feedback, or there are any topics you’d like to see us cover around 3D printing you’d like to see us write about or accessories you’re interested in seeing designed, feel free to drop a note in the comments below or email us at contact@goonhammer.com.
You can find more of Dave’s designs in his Etsy shop.
