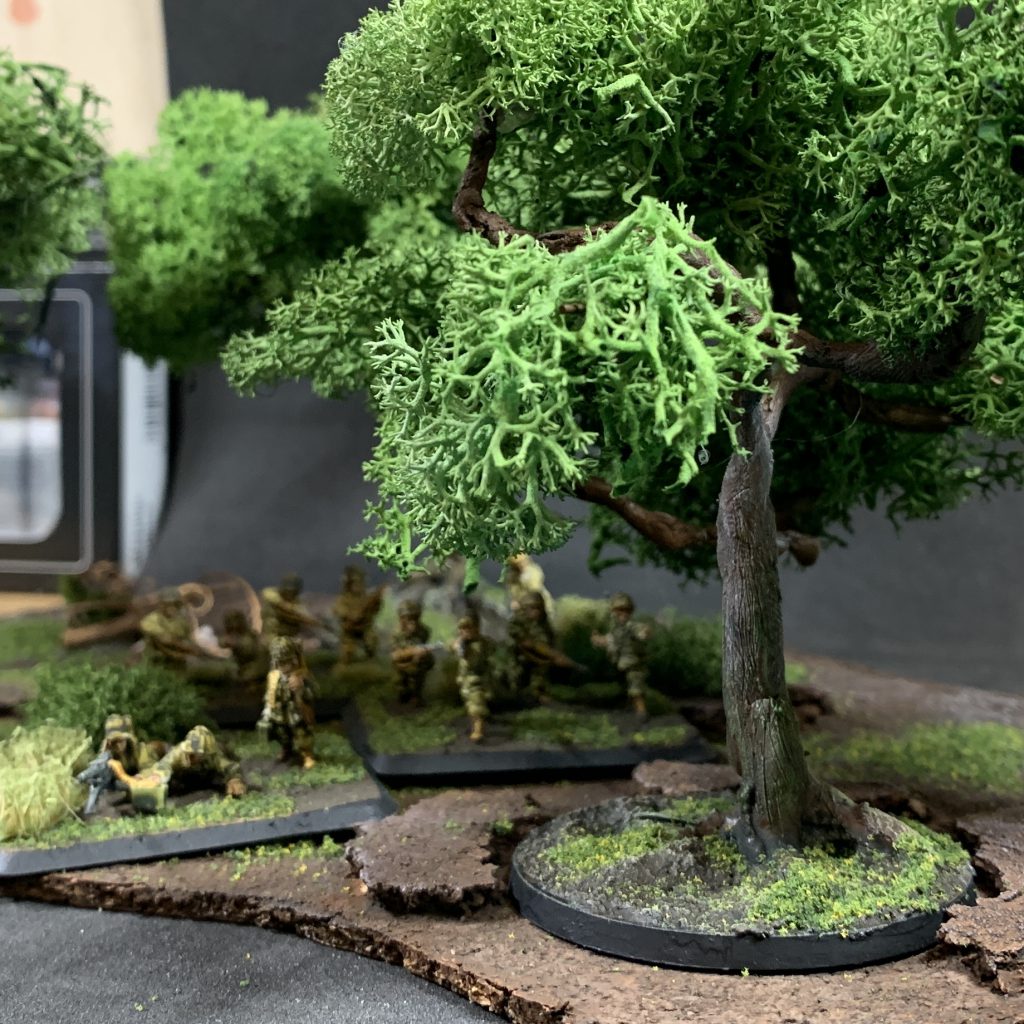
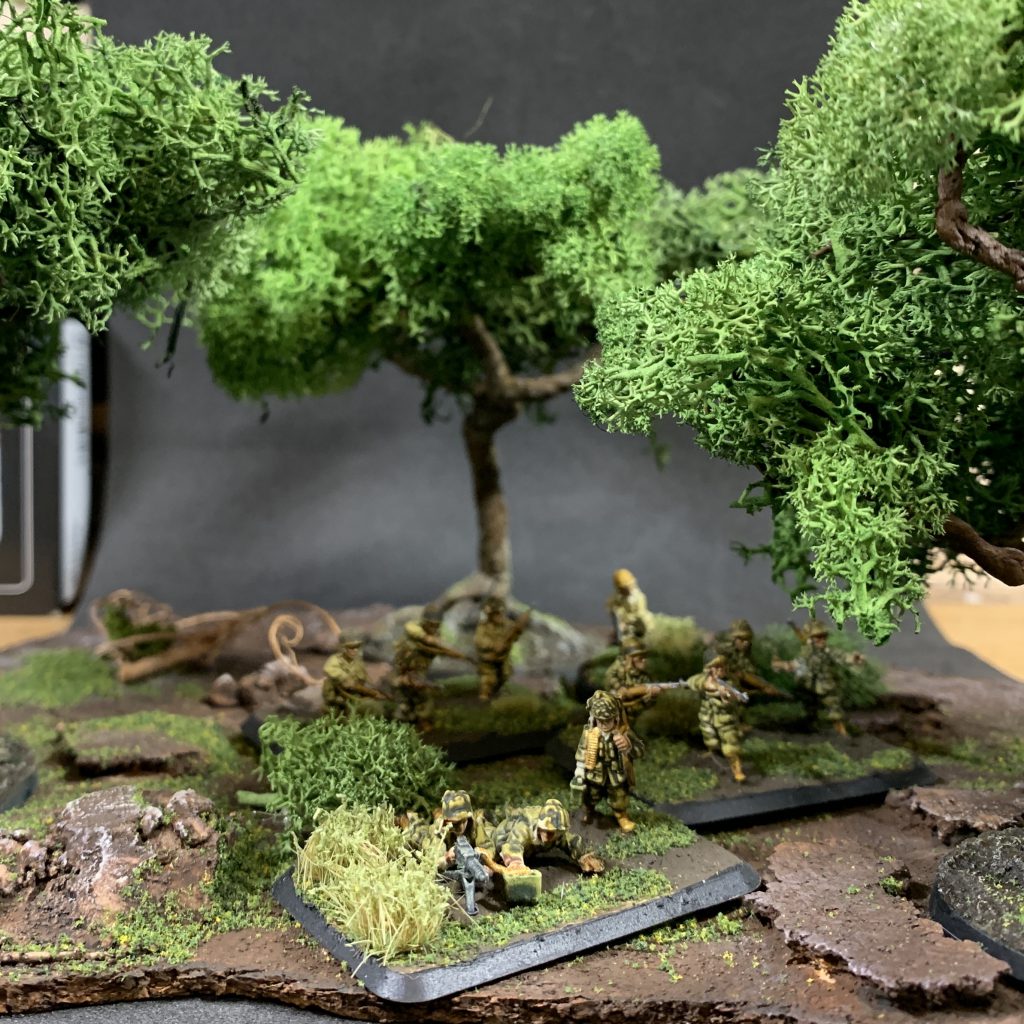
Welcome to the Fabricator General, where we talk about the finer points of construction, conversion, and hobby projects that require a bit more elbow grease and technical know-how. This week, Michael Bettle-Shaffer is talking about how to build trees for your table and terrain.
I’m sure many of your Instagram feeds have been inundated with people trying new things. New sourdough starters abound and friends have found a new lease of life baking cakes and batch cooking. For me, it was building terrain and bringing a little bit of the outside in. It didn’t start this way, one of my hobby goals from the beginning of the year was finishing a table worth of terrain for Chain of Command. I’ve learned a lot about various materials along the way, what works and what doesn’t and what to avoid in the future. I’d like to share a method for creating deciduous trees! I couldn’t of done this without the TerrainTutors great videos and tips on working with Milliput from Marco Frisoni.
Tools you’ll need:
- Needle nose pliers
- Combination pliers
- Wire brush or sculpting tool
- Hot glue gun
- Wire clippers
Supplies you’ll need:
- 20 Gauge florist wire or similar
- Fine or superfine Milliput
- Cork for basing
- Texture paste or similar for basing
- Deer moss
Starting a sapling
The florist wire I happened to be working with was around 35cm long, which somewhat predefined the final height of my trees. Basically, your tree is never going to be taller than half the length of your original wire.
Start by either cutting wire to your desired length, or just pulling some out of your pack! I used around seven pieces of wire for my trees, giving me fourteen strands to work with for creating branch structures (we’ll get to that)
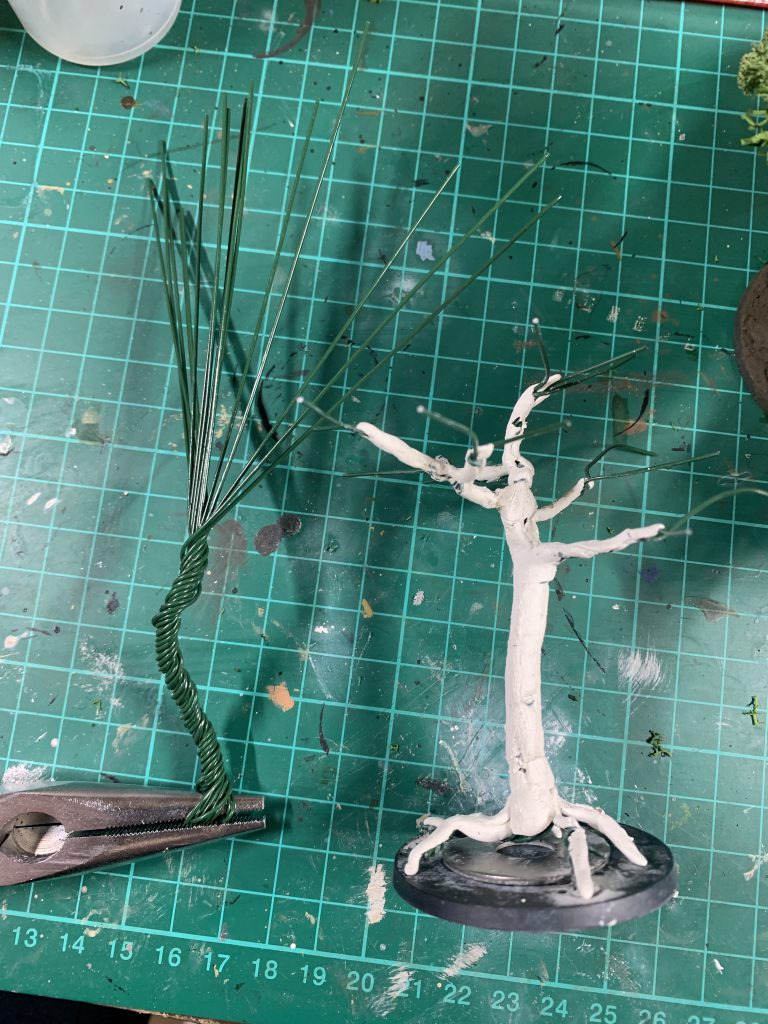
Bend the wire in the middle around your needle nose pliers and begin twisting as close to the pliers as possible, with additional twists being nice and tight. Keep going until your’re around two thirds of the way up.
Fan out your remaining wires and begin dividing them in to your branches. You can always start with say five strands and split them further to create additional branches. Once you have your armature resembling a tree in winter we’ll be doing something similar for the roots.
Slide your needle nose pliers out from the loop and begin using your wire clippers to open out the loop. Be careful at this point as the wires are sharp and stiff, using pliers begin shaping them in to root structures which reflect the upper armature. When you’re done it should be able to stand on it’s own.
The next part is much easier if you mount the tree to a base, so I picked up a 50mm round and started by adding a large washer to it to give it a little more mass. Once the glue for the washer was dry I used some more super glue to attach the roots to the 50mm round.
With the superglue try it’s time to cover up all that wire and add some extra texture to our armature. Mix your Milliput well, taking off small amounts at a time so you’re not left with a lot, and begin by forming roots and the base of the trunk. Don’t worry too much about smoothing it out at this point as we’ll have time for that later. Keep working your way up the trunk, covering the wire as you go. When I reached the branches I chose not to cover individual wires as these would be hidden by the deer moss later on.
As shown in the Marco Frisoni video linked earlier, you can use a 50:50 mix of methylated spirit and distilled water to get a really smooth finish on your Milliput. This isn’t vital but makes blending the various pieces much easier. Wet the surface with either your mix or some plain water and begin smoothing the various pieces of Milliput together with your fingers or a a sculpting tool. It doesn’t have to be perfect and don’t worry about leaving finger prints!
When you have things blended to your liking grab your wire brush or sculpting tool and begin running it vertically up and down the trunk. The idea is to add a bark like texture to your armature while the surface is still pliable. Once you’re happy with where it’s at, take a break while your Milliput cures.
Once your Milliput has cured add some character to your base. This might be in the form of little lumps of cork, rocks or other basing materials to add some texture. Once you have some nice chunky pieces added, work some texture paste on to the base and cover the roots where you feel appropriate. It’s helpful to look at real trees in the area you’re trying to replicate for appropriate amounts of exposure of the roots. A particularly well worn path or area might have numerous, exposed roots, whereas a less travelled area would have fewer showing.
Once your Milliput has cured add some character to your base. This might be in the form of little lumps of cork, rocks or other basing materials to add some texture. Once you have some nice chunky pieces added, work some texture paste on to the base and cover the roots where you feel appropriate. It’s helpful to look at real trees in the area you’re trying to replicate for appropriate amounts of exposure of the roots. A particularly well worn path or area might have numerous, exposed roots, whereas a less travelled area would have fewer showing.
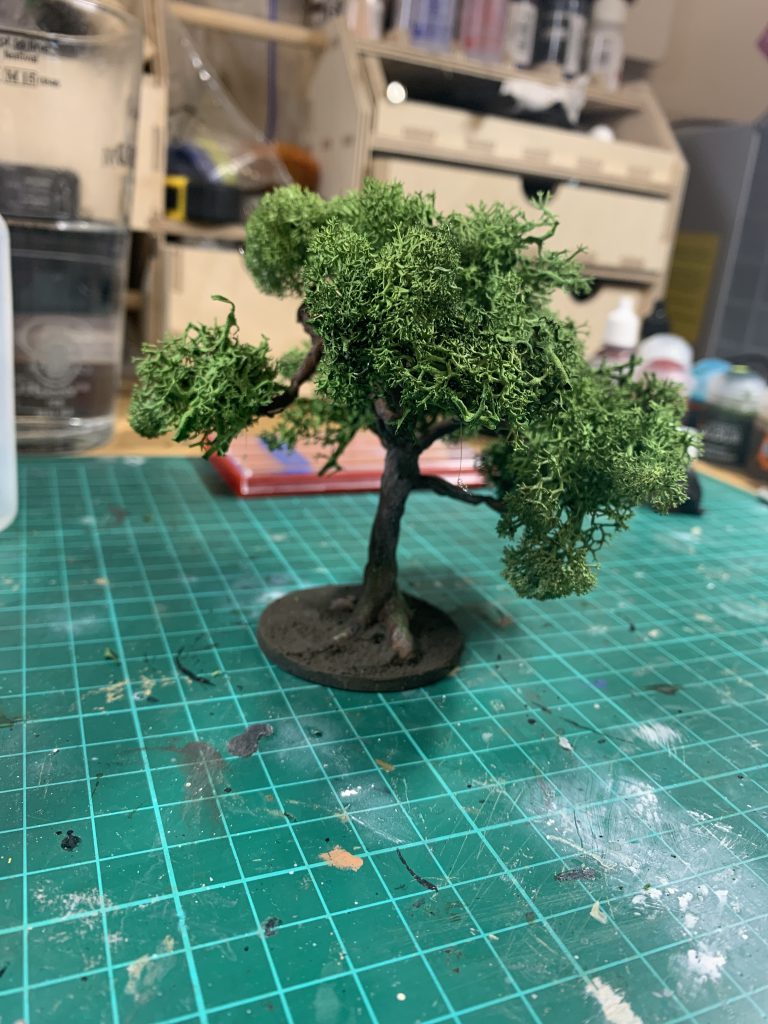
It’s prime time! Now that the base has taken shape throw some primer on using your preferred method. I primed mine using Badger Stylnylrez Olive Green, and then covered that with VMA Light Brown. I followed this by washing everything with Agrax Earthshade. Once this was dried I added some spot washes of Athonian Camoshade to add some variance and imply mossy growths in the recesses. To bring out detail back out I drybrushed with VGC Bone White and then lightly VMC Ivory. To add some depth and character I did some additional drybrushing with VMC German Bright Camo Green to add some pop in places, in particular the tops of roots and branches where you’d naturally see mosses and lichens form. And speaking of mosses and lichens forming, now we’re done detailing the tree it’s time to attach our life sized lichen.
With the hot glue gun up to temperature get a nice sized clump of lichen in one hand and apply some hot glue to a couple of branches. The branches should be close enough together that your clump can cover them. Gently press the moss in place to make sure the glue takes. Continue this process until you’ve built up some beautiful busy foliage. That’s it for our trees and you could stop here if you wanted to. In the next section I’m going to describe how you can make your own woodland bases, and the lessons I learned along the way.
Start by grabbing one of your existing Citadel Woods, if you don’t have one handy they’re around the size of an A4 sheet of paper so with some creative cutting you can get something pretty close. Place the Citadel Woods on some 3mm MDF or Foamcore and draw around it. If you’re having trouble finding these, I ended up using laminated cork sheet which happened to be stiff enough.
Next, arrange you newly created trees (you need three, or at least their bases) on the freshly cut woodland base and draw around them. As we build up the texture on the base, we’re going to want to leave some areas clear for our trees.
Now you’re going to want your off cuts and bitz box! Start gluing off cuts of foamcore, MDF or whatever you used to create your base using some PVA glue. We’re doing this to create some variety in the height profile of the board. If you have it handy, cork is great for this and needs very little additional finishing for some cool textures. If you have it handy, adding some pieces of dried bark, cork and rocks all help add to the final piece.
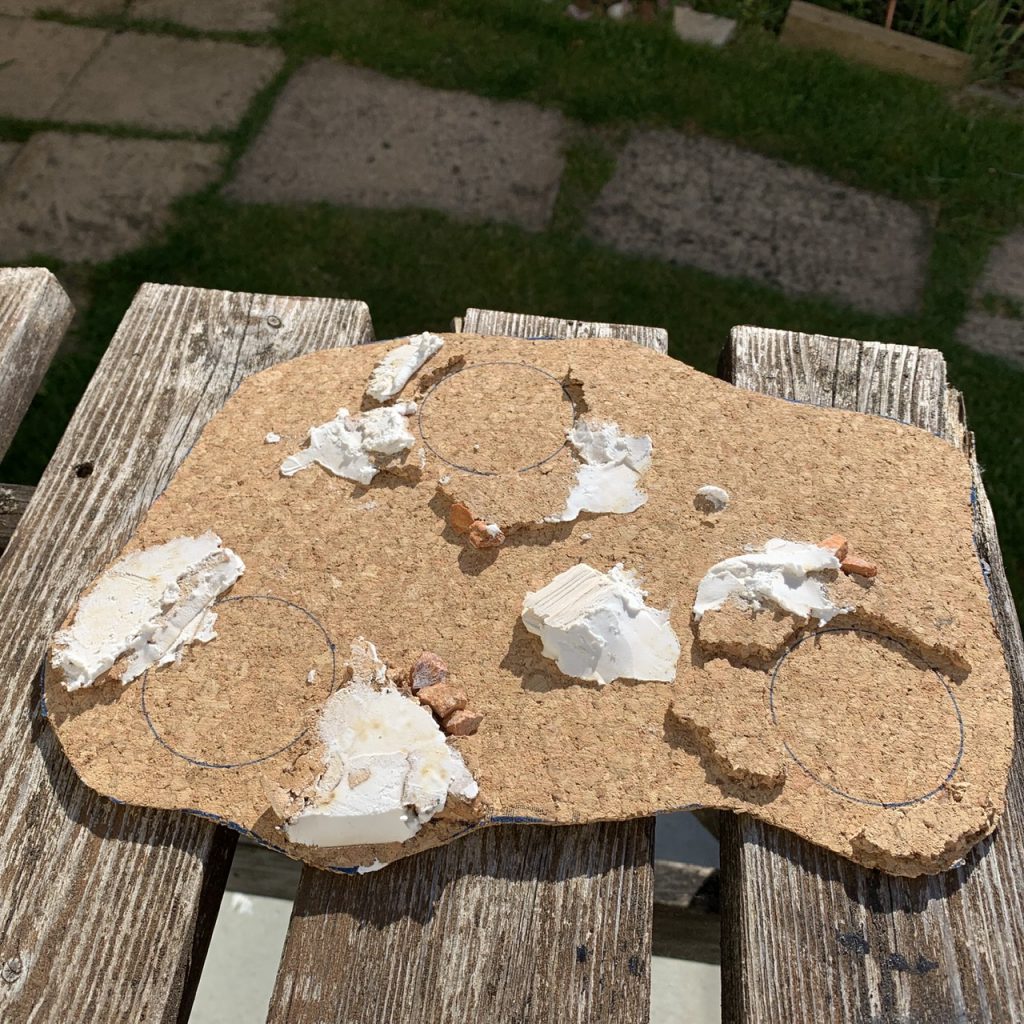
Once you’re doing adding pieces for texture, it’s time to blend some of it in as you can see above. I used Polyfilla for this, but any gap filling paste should work fine. If you’ve used pieces of foamcore and MDF to build height, now is a good time to blend some of the sharper edges away.
With your Polyfilla dry, don’t do what I did. I tried moving straight on to painting with a mix of craft paint, PVA glue and water. It didn’t go how I wanted. So! We’re going to cover the whole thing in a 1:1 mix of PVA and water to help seal it. Just slather it on and then let it dry. MDF in particular needs this additional step as it’s very thirsty. If you’ve used MDF please be mindful of the potential for warping! Using long pieces of packing tape on the back in a cross can help stop it and ultimately you’ll probably want to coat both sides in your PVA and water mix.
Now that our base is sealed, we can prime it. Again, a step I regret skipping now because it didn’t save me any work in the long run. So using your preferred priming method get a layer of something like brown, green or grey down. Once primed, I used a cheap brown craft paint to cover the whole thing. I then went back and picked out different areas with various shades of green to add some detail, before washing the whole thing with a diluted mix of brown and black craft paint (think homemade Agrax Earthshade).
After my wash was dry, I drybrushed the whole thing with a greyish-brown mix of craft paints, followed by a slightly lighted mix. I also took this chance to add some spot colours back to the areas of interest I added earlier.
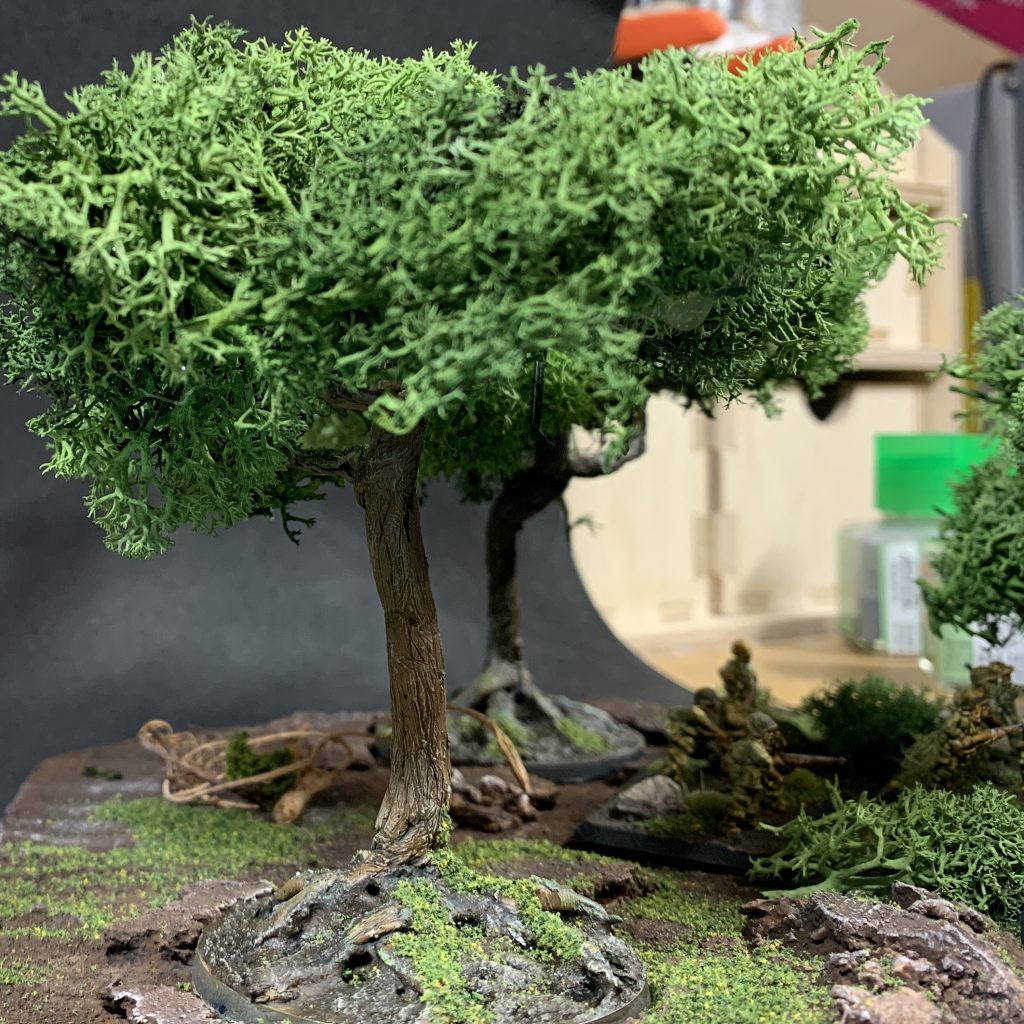
When you’re done washing and drybrushing, give the whole thing a quick coat of matte varnish before moving on. This is terrain after all so it needs to be hard wearing. Revisiting our tree building supplies, I picked a couple of areas to add some bushes, in the form of curly moss and deer moss. Using hot glue, I picked a couple of clumps just to break up the larger areas. At this point, your woodland base is pretty much done! You can keep going, adding little details like flock but you now have a great looking little copse for your gaming table.
Got any questions or feedback? Drop a note for us in the comments below or head on over to r/goonhammer to discuss this article. Or contact us at contact@goonhammer.com.
