In our Fabricator General series, we talk about hobbying techniques and tricks, and ways to build, model, shape, and fix everything, with an eye toward information for both beginners and veterans. This week, That Gobbo and Pvt_Snafu are talking about the equipment, set-up, and basics required to get started airbrushing models. Then in How to Paint Everything we’ll be talking about the basics of airbrush painting and the techniques you can use.
Airbrushing opens up a whole host of new tools and benefits for any miniature painted. My favourite is being able to prime and varnish no matter the weather! It could be pouring with rain or freezing cold, but your airbrushed primer doesn’t care about either of these. As you progress in confidence, laying down large, smooth base layers and creating transitions becomes easier and easier with an airbrush. For newbies, figuring out how to get started airbrushing can be an intimidating process: There are lots of new tools to research and techniques to figure out and it can be daunting to figure out where to go and what to buy first.
This article is intended to help you take your first steps in to the world of airbrushing, providing advice and guidance on what kit you need to get started. In future How to Paint Everything articles we’ll be talking about how to actually start using your airbrush, and more advanced techniques.
The Airbrush and Compressor

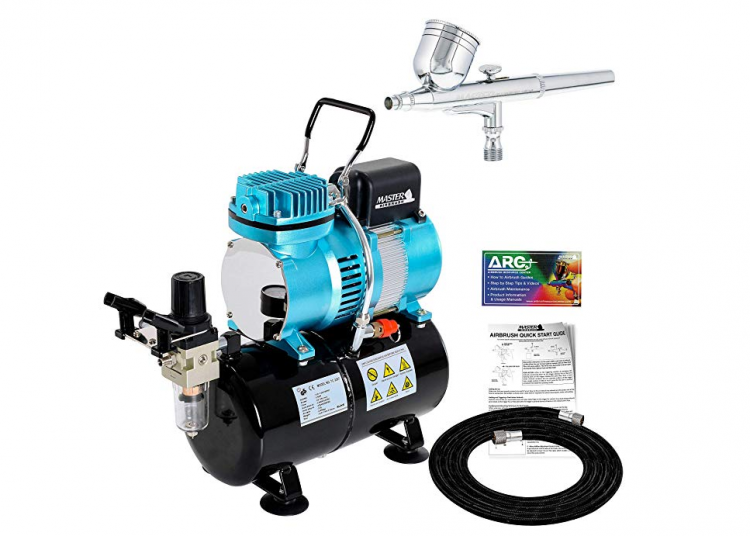
Master Airbrush Compressor w/ Tank + Starter Airbrush Bundle
I recommend this bundle for anyone looking into airbrushing on a budget. The compressor is a great value with a regulator, water trap, and tank. The tank reduces the amount of time the compressor will be running during a session and help provide more consistent pressure while spraying. The bundle also includes a starter airbrush to get you started with learning the use and cleaning of an airbrush. It’ll be good for priming and base coats but don’t expect to be doing any fine detail with it. There are other less expensive variations on this bundle excluding the compressor add-ons if you’re looking to get something very cheap, but I believe the extra investment into the compressor is worth it for when you eventually upgrade to a better airbrush.
Once you’ve gotten a good handle on how to use an airbrush, or want to start with a great all-arounder airbrush, I’d recommend the Badger Patriot 105. It’s quite easy to take apart and clean and sprays nicer than the starter you’d get in the above bundle. When I upgraded it was a noticeable difference in quality. The Patriot is what’s known as a dual action airbrush, where air flow and paint feed can be controlled independently. This gives greater control over how you’re going to get paint on the model. Pushing down on the trigger allows air to spray out while pulling back on the trigger controls how much paint is sprayed.
If you’re looking for an airbrush to really get down close and do detailing the Badger Sotar is a great option. There’s two different models, the 20/20 and the Slim, which differ in the size of the paint cup. The 20/20 comes with a paint cup sized similar to most airbrushes while the Slim has a tiny reservoir intended to unblock your view while you’re painting. I own the Slim and I personally wish I had gone with the 20/20 as I need to do a lot of out-of-cup mixing and refill often while using it.
Master Airbrush and Badger airbrushes may be hard to get outside of the US so something to look for in an inexpensive beginner airbrush and compressor set is a cheap clone airbrush and a compressor with a tank, regulator, and moisture trap. Outside of the US, Iwata airbrushes are a popular brand with the HP-CS being commonly recommended.
NOTE: Badger airbrushes use a different connector from most airbrushes so you will need to purchase an adapter in order to use it with most compressors. This is one I use: https://www.amazon.com/gp/product/B0038NJYHG/
Set-Up
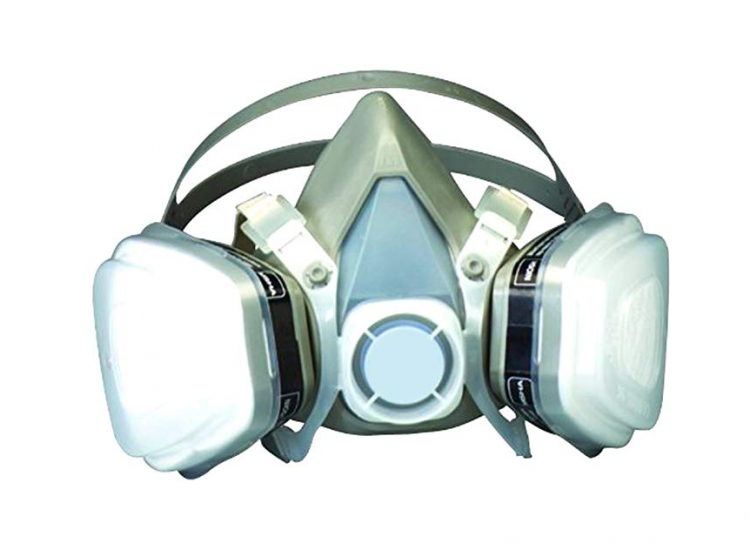
So we’ve got an airbrush and a compressor now, what else do we need for a set-up? Bare minimum you absolutely need at least a respirator mask for safety. A half face mask is more than enough protection but you’ll also want the correct cartridges for it. I use P100 cartridges with mine, which are suitable for gas and vapour, as you’re going to be working with aerosolized paint. The specific mask I use is the 3M Dual Cartridge Respirator.
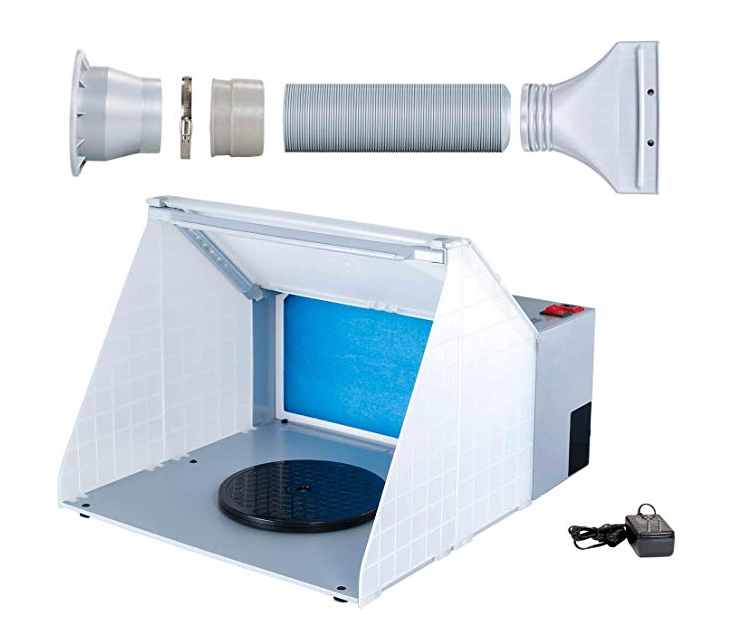
A spray booth is not strictly necessary if you’re airbrushing acrylics but it’s very highly recommended for the extra safety as well as a place for any overspray to go. A popular pick is the Master Airbrush spray booth which folds up to save space when you’re done, includes LEDs for lighting, and has an output hose for venting out of a window which is very useful for winter.
There’s also a few extra odds and ends that can help you with the process:
- An airbrush cleaning pot will give you a good place to rest the airbrush and spray into when cleaning your airbrush. If you don’t pick up an airbrush cleaning station you’re going to at a minimum want an airbrush stand. Either way you need somewhere safe to put your brush when it’s not being used.
- Gloves to avoid spraying paint onto the hand holding your miniatures. Disposable nitrile gloves are decent, but if you’re looking for something that’s less waste you can grab some common kitchen gloves.
- Alligator clips on wooden sticks and foam to hold them can help with painting sub-assemblies without covering areas and keeps from having them rest on a flat surface.
Cleaning
Well now we’ve had our fun priming and painting our miniatures, next we’ve got to do the boring, and arguably most important, part of airbrushing. We gotta clean the dang thing. Proper cleaning of your airbrush will ensure it works well and will save you the awful realization of sitting down to airbrush and finding you’ve left a half cup full of primer sitting overnight.
While airbrushing there’s roughly three cleaning actions I use:
- the rinse
- the end of session cleanup
- the ultrasonic cleaner bath.
During a session if I’m switching colors I’ll give the airbrush a rinse before moving onto another color. I use a squirt bottle filled with water to clean the cup from any remaining paint, then with a bit of water left remaining I’ll hold a paper towel over the needle end to form a seal and backflow by spraying into the paper towel. I find back-flowing to be helpful with making sure the nozzle is clear but this is optional. After that I’ll fill the airbrush half way with a 1:1 mix of water and airbrush cleaner and spray into an airbrush cleaning station. It’s also helpful to do this rinse if you’re spraying a lot of a single color to avoid your paint drying in the airbrush. I usually do this after two or three cups of a color or primer. Alcohol wipes can be a useful extra for cleaning: do a quick flush with water, wipe the cup out, and then flush again with water and cleaner.
At the end of your painting session you’ll want to do a little more involved cleaning. For myself this is mainly doing the rinse process I used above, but also cleaning the needle separately and doing another rinse without the needle in the airbrush. Usually I’ll put a bit of airbrush cleaner onto a paper towel and wipe down the needle until there’s no more paint on it. At this point you can apply a bit of airbrush lubricant to the needle in a similar way with the paper towel and then reassemble.
So let’s say I forgot to clean our airbrush and accidentally left a bunch of paint sitting in the cup overnight (Mike: I once did this with primer, it was not pleasant), it’s going to be a tough job trying to clean it solely by hand. This is where an ultrasonic cleaner comes in handy. I’ll place my disassembled airbrush into it with some water and cleaner and leave it to soak. I like to use Simple Green and Purple Power for my cleaner and for folks in the UK we’d recommend airbrush cleaner cut 1:1 with distilled water, or window cleaner. Every once in a while I turn it on to agitate the cleaner mixture which helps to shake the paint loose. This process can take a few hours depending on how much paint and what kind of paint has ended up clogging the brush. Once I’m satisfied I’ll rinse the parts off with water, dry them, and reassemble.
While cleaning your airbrush is a bit boring or annoying to do it’s important to make it a habit every session. Consistent proper care for your airbrush will keep it in good condition and out of the ultrasonic cleaner.
Closing
Learning how to airbrush opens up a whole new tool set to enhance your hobby productivity. Airbrushing has some large upfront costs, and we understand this, however in the long term it allows you to paint faster and with greater flexibility. We hope this guide has helped you take your first steps towards owning an airbrush, and shooting some paint!
Tomorrow we’ll jump into more detail on the actual painting process and techniques to use with How to Paint Everything: Intro to Airbrushing. In the meantime if you have any questions or feedback, feel free to drop us a note in the comments below or email us at contact@goonhammer.com.


