Do you enjoy plotting the downfall of civilization from your secret lair beneath the city streets? Do you plot to spread propaganda about the sky god to anyone who will listen? Do you have more than two arms? If you answered “yes” to any of these questions, well then the Genestealer Cults may be the Kill Team for you! Recently reintroduced into the 40k universe at the end of 7th edition, Genestealer Cults represent the vanguard forces of the Tyranid Hive Fleets, corrupted cults of humans infected by Genestealers and driven to propagate the cult’s message and spread its influence until they are large enough to cripple the planet’s defenses when the Hive Fleets arrive.
Over its first year Kill Team 2.0 slowly morphed from a game filled with rather generic teams into a truly competitive game with interesting and unique teams and rules. In January 2022 White Dwarf 472 released, giving us rules for the Wyrmblade Kill Team, an updated version of the Genestealer Cults Kill Team, giving them a set of strong competitive options and interesting, character-driven dynamics.
The purpose of this article will be to prepare new and veteran players with all the guidance they will need to play this team, regardless of environment.
Team Overview
Strengths
- Heroes – Wyrmblades have 4 hero options (count as two operatives) and can select two for the team. These bring more durability and damage to the table, as well as higher APL. They give what’s otherwise a horde team an elite edge.
- Flexibilty – Your teams can consist of between 12 and 14 models (though you’ll rarely go to 14), and many of those will have group activations. So you’ve got the bodies to hold objectives and control area, with support from some more elite models, but you can go full horde if you need.
- Cult Ambush – Wyrmblade teams get a bonus for going from Conceal to Engage during their activation, getting a free re-roll on one of their attack dice. This rewards you for something you already wanted to do – start in Conceal mode, and Wyrmblade Teams have the ability to drop back into Conceal at the end of an activation with the Slink Into Darkness Tactical Ploy.
- Buffs – Between ploys, icons, Kelermorphs and the Neophyte Leader there are a series of buffs to give you re-rolls, effectively another rending, free ploys, or allow you to retain a dice as a hit without rolling it. These will need to be tracked, but help a faction where a lot of models hit on 3s or 4s stack up those hits and criticals.
Weaknesses
- Durability – Most of your operatives have a 5+ save and 7 wounds. Your heavier hitters have a 4+ invulnerable and 9 wounds. That’s not a lot, but you do have some good tools for protecting your cult agents, such as the Preternatural Assassin and Unquestioning Loyalty rules.
- Melee – Wyrmblade kill teams had to give up something when they moved from the Compendium, and that appears to be trading off some melee prowess. They still have a powerful option in the Locus – who can reliably incapacitate two operatives in a turn – but they lack the Acolyte Hybrids and Metamorphs as melee horde options.
Team Structure
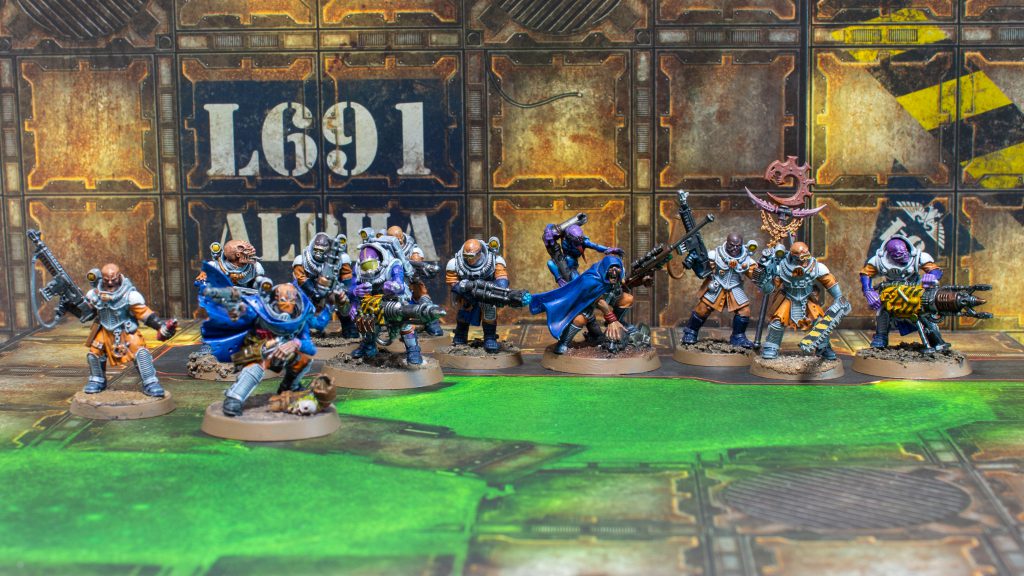
A Wyrmblade Kill Team consists of 1 Neophyte Leader and 13 Wyrmblade operatives chosen from the following list:
- Brood-Adept equipped with Autogun or Shotgun
- Neophyte Gunner equipped with Flamer, Webber, or Grenade Launcher
- Neophyte Heavy Gunner equipped with Mining Laser, Seismic Cannon, or Heavy Stubber
- Neophyte Leader equipped with either an Autogun or Shotgun, or a pistol and melee weapon combination chosen from the following: Power Pick, Chainsword, Power Maul, Bolt Pistol, Autopistol, and Web Pistol
- Neophyte Icon Bearer equipped with Autogun or Shotgun
- Kelermorph (counts as 2 selections)
- Locus (counts as 2 selections)
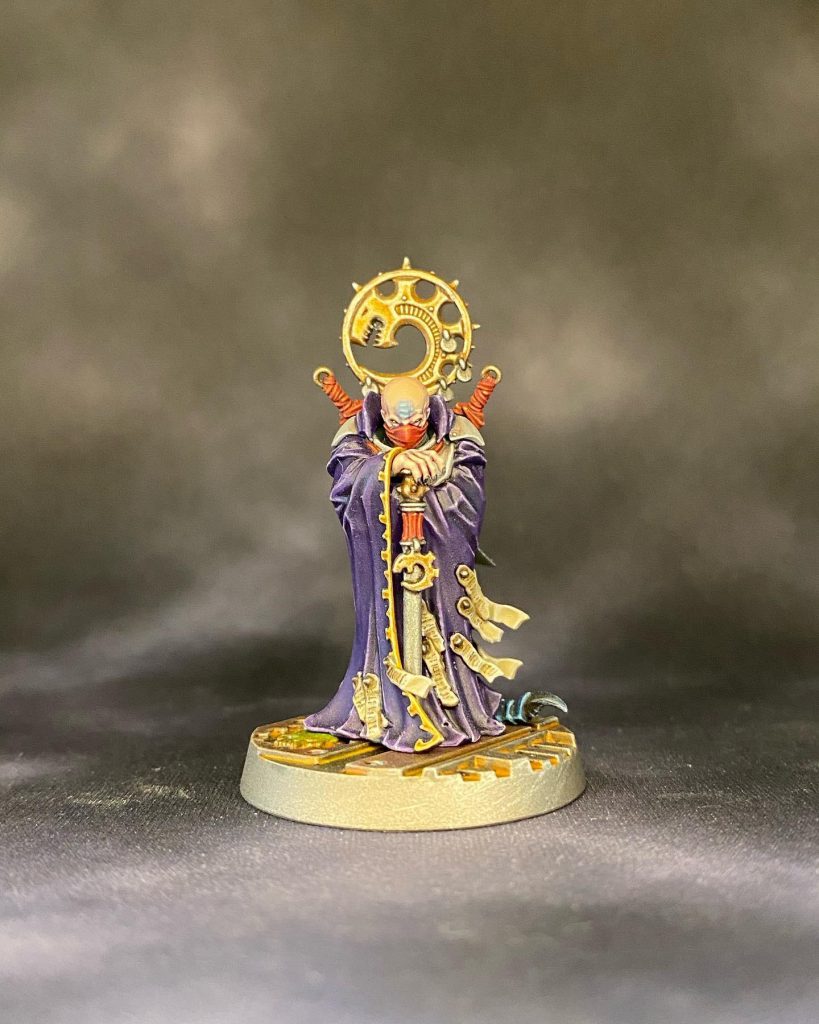
- Sanctus Sniper (counts as 2 selections)
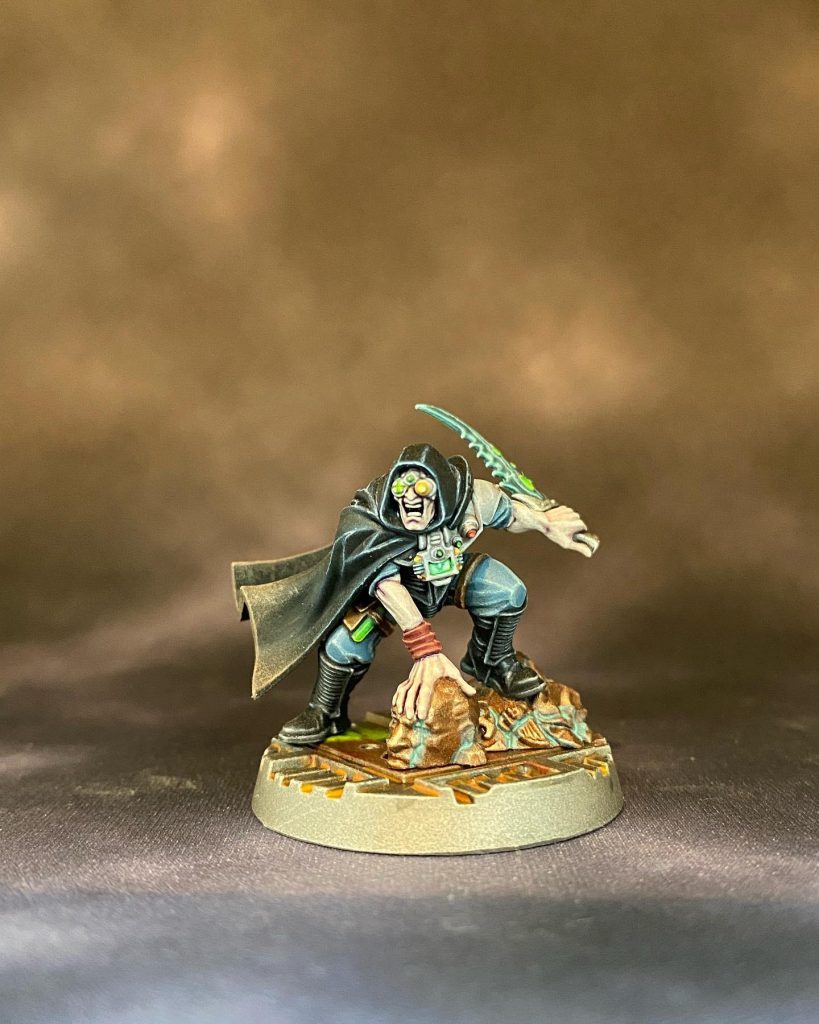
- Sanctus Talon (counts as 2 selections)
In addition to these choices you may only have 2 GUNNERs, 2 HEAVY GUNNERS, and 2 CULT AGENTS (the keyword shared by the Kelermorph, Locus, and both Sanctuses…Sancti?), AND aside from the Brood-Adepts may not have more than one of each operative in your team. Basically, this means at no point can you double up on any special or heavy weapons. In the operatives section of this guide we will cover what weapon choices are still available to us, but the first choice one has to make is between a 12 and 14 operative team. In almost all cases this will involve taking 2 CULT AGENTS for a 12 operative team as only Brood Adepts can be taken in their place.
Abilities
Two abilities define Wyrmblade kill teams: Cult Ambush, which every operative has, and Preternatural Assassin, which you’ll find on the CULT AGENTS.
Cult Ambush
In the first turning point you can change your order. This means you will be starting everything in Conceal because it makes sense with the second part of the rule, which is if, in your activation, you change your order from Conceal to Engage then in your first Shoot or Fight action you can reroll all dice with one result (ie you pick a dice result, say 1, and reroll all the 1s you rolled). It is important to note that you can declare which number you wish to re-roll after seeing the initial results of your roll making this a very powerful ability since most of your operatives hit on 4+.
Preternatural Assassin
This grants a 4+ invulnerable save with the added ability to either retain an additional success or upgrade a normal success to a critical success in cover when rolling saves. This means your CULT AGENTs can be exceptionally resistant to damage if they manage to stay in cover. In addition, it prevents them from taking equipment.
Operatives
Cult Agents
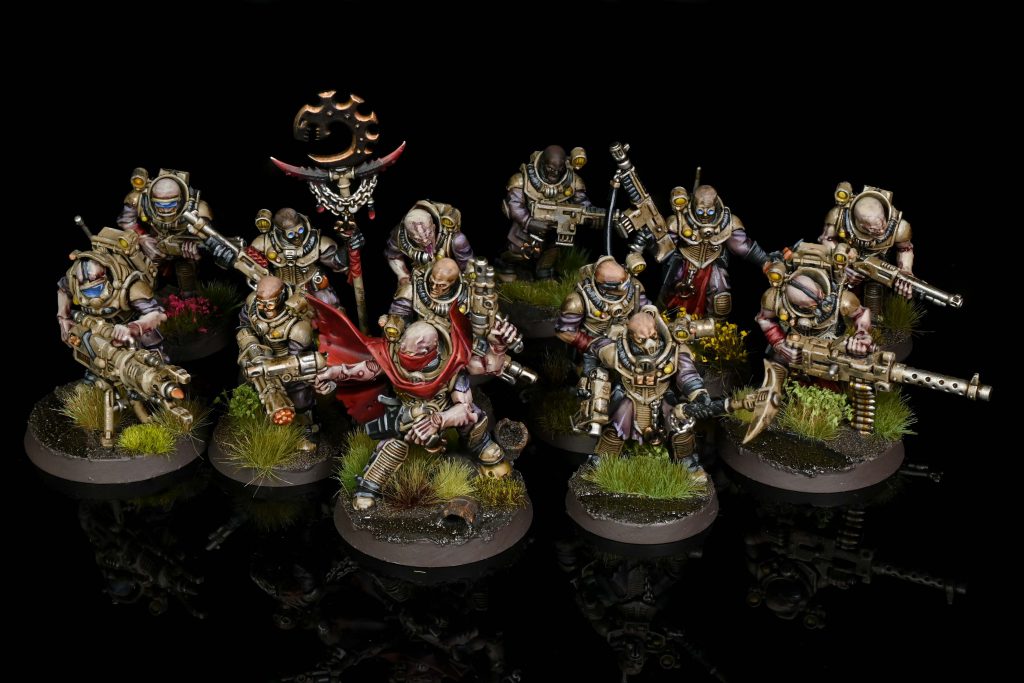
Below I will cover the pros and cons of the various CULT AGENTS, however regardless of what you choose the general guidance is that you are exchanging 2 normal operatives for one. In a purely numerical sense you are losing both APL, Wounds, and Kill Zone coverage when you make this trade, so you need to ensure you are making the optimal choice. In addition to the Preternatural Assassin ability All CULT AGENTS have a similar baseline profile of 3 APL and 9 Wounds making them more versatile and durable than any other operative on your team.
Kelermorph
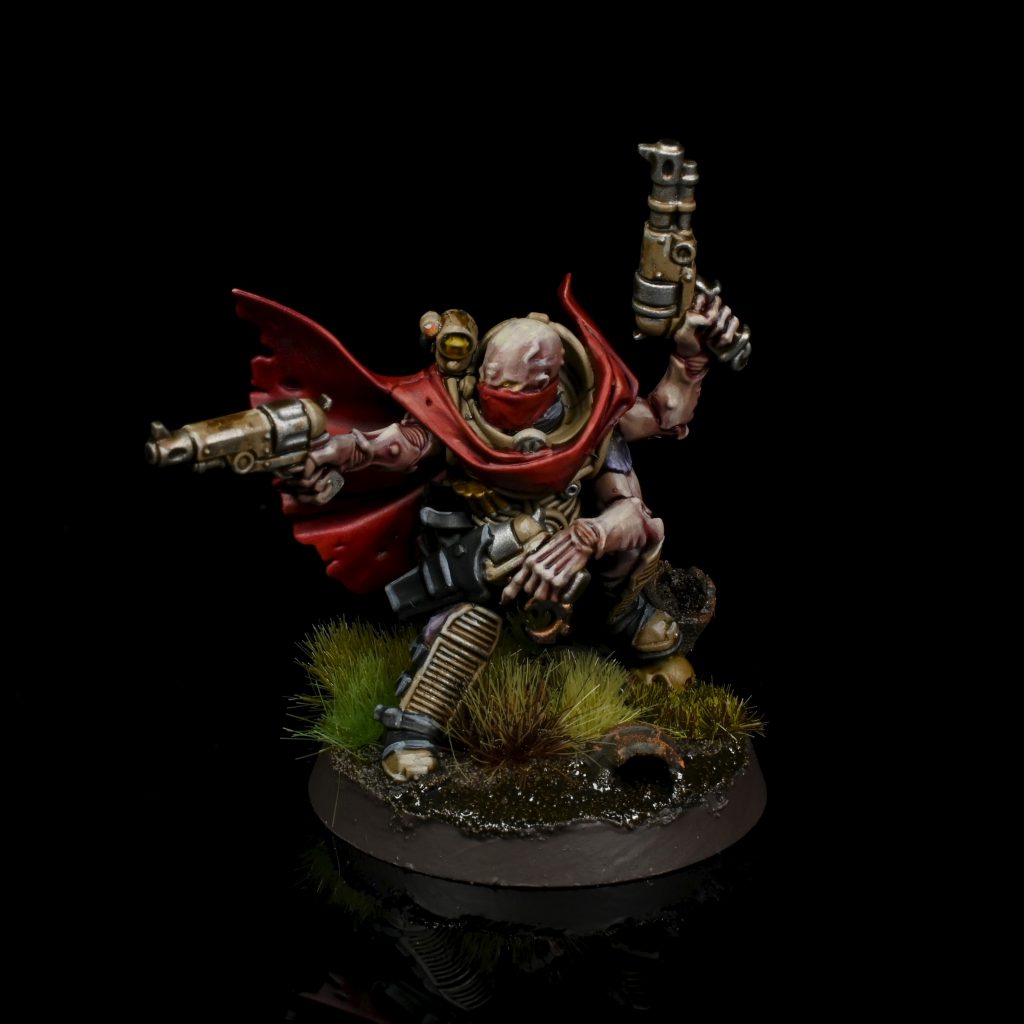
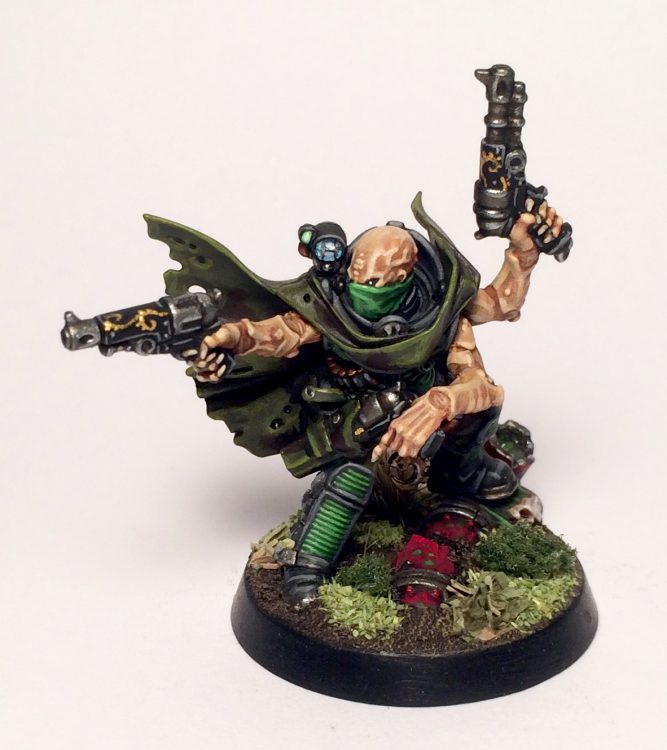
To simplify your choices it’s worth pointing out that this is easily the most powerful choice of the four agents. He’s armed with Liberator Autostubs, which give you an option of two profiles every time they shoot:
- Long range has unlimited range, do 4 shots that hit on a 4+, with 3/4 damage, P1, and Rending.
- Short range has standard pistol range (⬟), but you get 5 attacks that hit on a 2+.
The Expert Gunslinger rule lets them perform two Shoot actions during each activation, so they can put out a pretty heavy amount of firepower per activation, especially at short range. They can also use the Hypersense action (1 AP), which gives your next Shoot action the Indirect and No Cover rules in place of P1 and Rending, letting you trade off a bit of firepower to shoot your enemies through cover. This only works on the Short Range profile, and thus is not as useful as it initially appears simply because if you’re within 6 inches of your opponent, and have the remaining APL to activate Hypersense then it is also possible that a Dash Action may put you in range to shoot them without losing your P1 and Rending.
They also has the Heroic Inspiration rule, which boosts all nearby Wyrmblade Neophyte operatives each time the Kelermorph incapacitates an enemy operative, giving visible operatives within ■ the ability to retain a single hit roll of 5+ as a critical hit whenever they shoot or fight. This pairs well with shotgun Neophytes, but can be very hard to make proper use of since if your kelermorph is close enough to buff them, then he is likely also very vulnerable to being attacked himself.
The main purpose of the Kelermorph is to destroy your opponent’s deadliest operatives, but unfortunately they have to get in close to do so. This means the Kelermorph is best employed as a counter puncher pushing forward to unleash 2 deadly shooting actions on your opponent when they move to counter your neophytes. The Coiled Serpent Tactical Ploy is the ideal method to buff them as ensuring you retain a single critical hit massively increases the efficacy of your attacks.
In short, the Kelermorph is a near auto-pick.
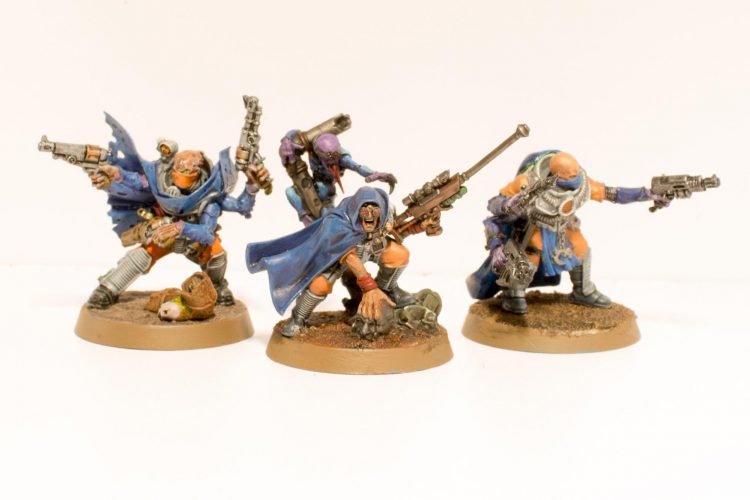
Sanctus Sniper
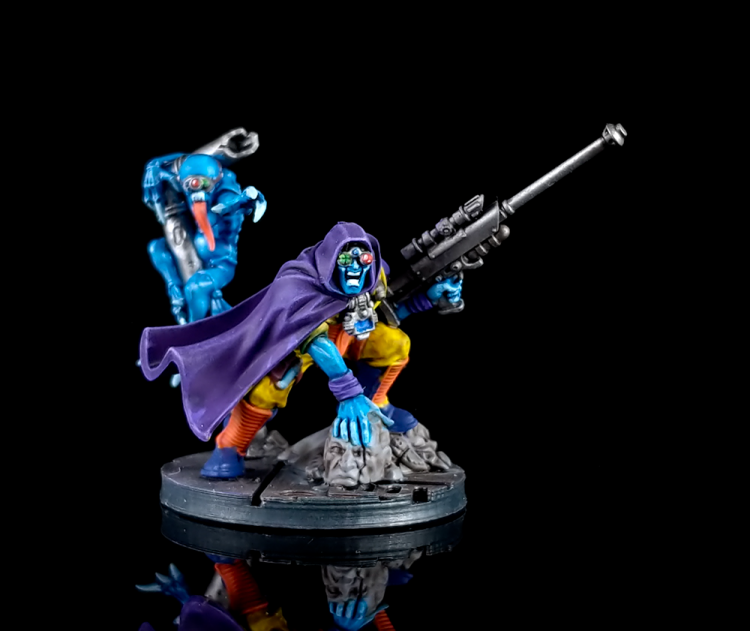
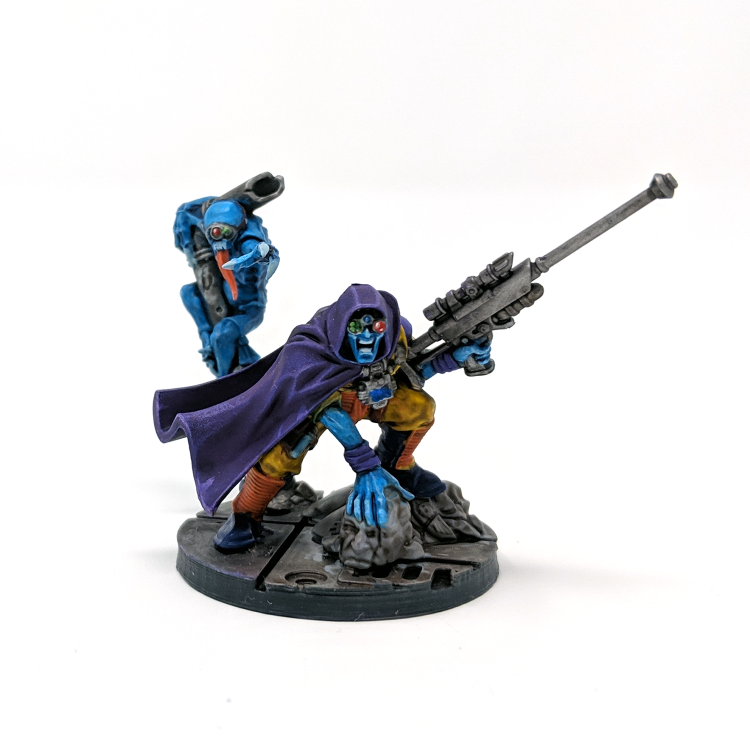
The Sanctus Sniper comes with a sniper rifle that has four attacks, which hit on a 2+ for 3/3 damage with the Silent and Heavy rules, and does 3 mortal wounds on a critical hit. The Sanctus Sniper also has two unique actions:
- Target Vulnerability (1 AP) – gives the sniper rifle the Lethal 5+ special rule until the end of the activation.
- Familiar’s Soulsight (1 AP) – Lets you pick an enemy operative, and until the end of the turn, each time the sniper shoots that enemy operative you get No Cover, ignore obscuring, and areas of smoke can’t prevent that operative from being visible.
The Sanctus Sniper is the first example of a CULT AGENT that is very dependent on the mission being played and the Kill Team you’re playing against. Unlike the Kelermorph they lack the ability to shoot twice meaning their potential lethality is much less. There are a few things that really hinder this operative. First, its weapon has the Heavy Trait, immediately tanking its mobility, once the Sanctus is in position it is unlikely to move. Second, it only has 4 attacks and no AP, meaning its total number of attacks is only one higher than the average defense pool. Lastly, the Silent trait runs directly in conflict with the Cult Ambush ability, meaning if you wish to stay in conceal you’re at risk of rolling 1s with no way to re-roll them.
All of this means the Sanctus Sniper is one of the weaker options as far as Cult Agents go. Your Cult Agents are taking up the space of two lesser operatives, and thus need to do double the work of two operatives. This is something the Kelermorph or the Locus can do when employed properly, simply by either using SHOOT or FIGHT twice, or by using their extra APL to perform mission actions. The Sniper Sanctus is unfortunately encouraged to sit back, and engage your enemy preferably from a vantage point.
Perhaps the best way to illustrate the usefulness of the Sanctus Sniper is to compare him to other sniper equivalents found in other teams, perhaps the most glaring example being the Death Jester who is not hindered by the Heavy Trait (thanks to a 1 EP item), and boasts a greater number of attacks.
All of this isn’t meant to say that the Sniper is useless, far from it, but it requires the correct situation to truly shine. If nothing else it can provide another source of ranged firepower to back up your Heavy Gunners as they support a team outfitted mostly for close ranged combat, OR move onto an objective to perform a mission action thanks to 3 APL.
Sanctus Talon
The melee assassin variant of the Sanctus comes with the Creeping Shadow rule, which allows it to perform a Charge action while it has a Conceal order, plus every time it fights in combat, it can perform a free Dash action after it fights, regardless of any other actions it’s performed and even if you’re still in Engagement range (you can’t use this to end up in Engagement range of another enemy operative). This means it can rush in, fight, and then dash back out of combat and hopefully into cover.
Its bio-dagger gives it 4 attacks that hit on a 2+ for 3/6 damage with the Lethal 4+ and Stun rules. It can also use the Familiar’s Soulsight (1 AP) unique action, which lets you pick an enemy to get the Brutal and Balanced rules against when you fight. This is perfect for fishing for crits and making sure you can just push through 12+ damage per fight.
This might sound impressive at first, but unfortunately the Talon runs into the same issues that the Sniper does. It only has 4 attacks, and its ability to FIGHT while concealed isn’t very useful if you’re looking to either re-roll any unfortunate 1s, or fish for Crits. Additionally, the ability to DASH out of combat is very terrain dependent for its usefulness, but in the right situation prevent your Cult Agent from being immediately killed upon an opponent’s following activation. From a competitive standpoint this is easily the weakest operative, not deadly enough to reliably kill elite enemies, or kill weaker ones in a single blow.
Locus
The final Cult Agent is a close combat monster armed with a Barbed Tail, a 3-inch range and Silent bolt pistol, and locus blades, a 5 dice, 2+ to hit power sword. Additionally, he has the following abilities:
-
- Duellist – when resolving a Fight action, you may resolve one dice before the attacker (note that you can also be the attacker) and you must use this dice to parry. This is great, especially against weaker opponents or bad rolls where the pool of attacks coming your way may be small, and gives you more leeway to just push through damage.
- Expert Swordsman lets the Locus perform two fight actions during each of its activations, and a free 3 inch charge after performing a FIGHT action that doesn’t count against your action limit!
- Quicksilver Strike (1 AP) the least straightforward ability and the most tricky to use. Once per Turning Point after you have activated this ability you may make a free 3 inch Charge Action against an enemy operative that comes within 3 inches of the Locus using either a Dash or Normal Move Action. In essence this turns the Locus into a land mine of sorts, and can be used to discourage opponents from attempting to contest an objective, or in the rarest of cases make him immune to extremely close range weapons like Inferno Pistols.
The Locus is generally the second most useful Cult Agent after the Kelermorph. His first two abilities are what make him truly powerful as he can reliably incapacitate two enemy operatives in an activation, and minimize the damage he receives in return. The Locus’ primary weakness is the same one he shares with the Kelermorph in that he is often left exposed once he does make his move against the enemy, and requires support from neophytes or cover to ensure he survives.
Neophytes
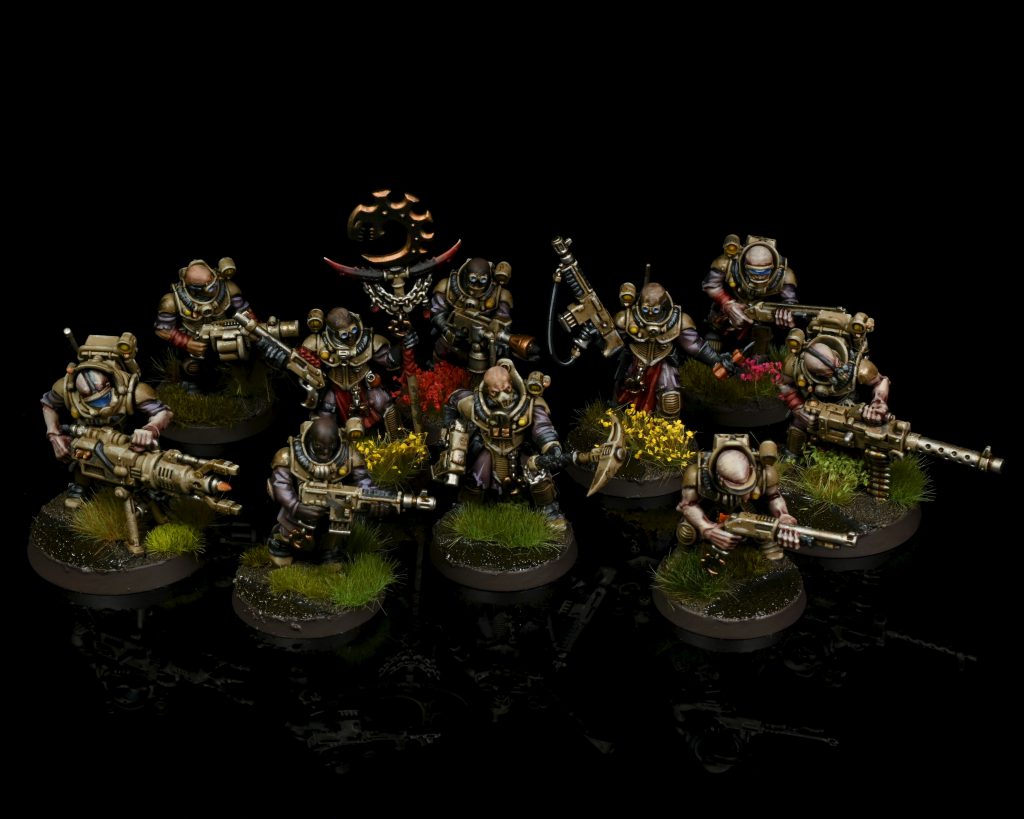
The majority of your team, including your leader, are Genestealer Cult Neophytes meaning they have the standard human profile of 7 wounds, 2 APL, and a 5+ save.
Brood Adepts
These are your standard generic operatives armed with a gun butt and either a shotgun or autogun with no special rules of their own. They perform the role of objective holder and action performer. Usually you will find yourself with four on your team, and in my personal opinion the shotgun is almost always the better pick. These guys need to be in the central area of the board, and any advantage the autogun may provide in terms of versatility is inferior to the added accuracy and damage of the shotgun. Additionally, these guys want to be near your Cult Agents to act as shields via the Unquestioning Loyalty Tactical Ploy, or to gain buffs from other close range specialists like the Kelermorph. They are also the only operatives in your team that have GA 2, meaning that they can really dish out some damage if activated at the proper moment. Lastly, they’re also the obvious choice for equipment such as Frag Grenades since you will want your specialist operatives to employ their equipped weapons.
Neophyte Gunners and Heavy Gunners
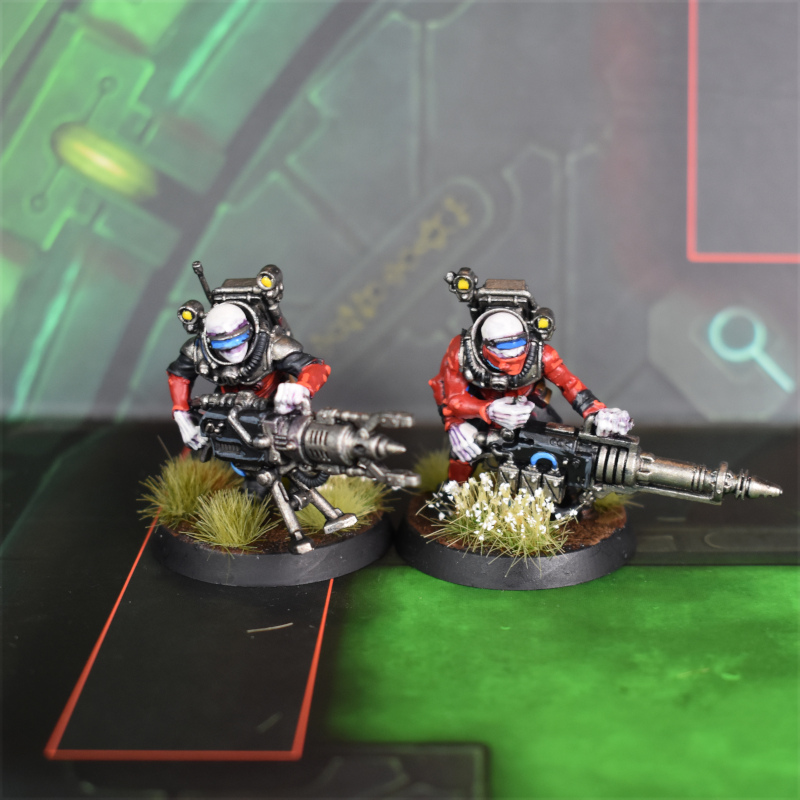
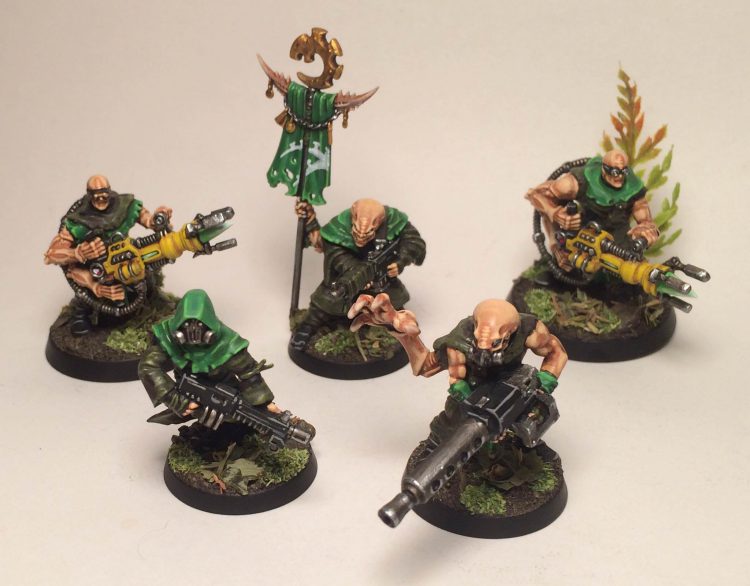
The Wyrmblade have access to three Gunner options and three Heavy Gunner options, but may only take two of each at any one time. To make things even simpler one of each of these categories is basically an auto-pick, with any decision making coming down between the remaining two. Our auto-picks are the Mining Laser and the Grenade Launcher, the latter because it is highly versatile as a source of single target AP via Krak or as crowd control with its Frag, the former because it is the single highest damaging weapon available to the team. The Mining Laser has a staggering 5 atk, 5/6 damage, and AP 1 profile meaning it can easily kill the hardest targets in the game, especially combined with Cult Ambush and certain tactical ploys.
Our remaining options largely come down to what you think will be most effective against your opponent. Between the Flamer and Webber we trade accuracy for the ability to Stun, the Flamer being the most straightforward option, and not requiring the benefits of Cult Ambush to remain effective. The choice between Seismic Cannon and Heavy Stubber can be much more difficult, however the Seismic Cannon is the more versatile of the two as it has both a long range and short range profile that are drastically different from one another. With long providing an impressive 6 attacks, 1 inch blast, 2/2, and Stun vs. short with 4 attacks, +1 hit, 4/4, and P1. This basically means where you position the seismic cannon determines its purpose. The Heavy Stubber on the other hand is basically a 5 atk bolter with the Ceaseless, Heavy, and Fullisade rules. Ceaseless is helpful simply because it means you can save your Cult Ambush to re-roll either 2s or 3s.
In most cases the Seismic Cannon and Flamer are your best secondary choices due increased versatility and accuracy, however a case can be made for the other weapons such as the Heavy Stubber when fighting Harlequins who will not be affected by P1, and are more vulnerable to weapons with a high number of attacks. The Webber unfortunately feels like the weakest choice as its Lethal quality is largely wasted. I also consider the Stun trait to be one of the weaker critical effects in the game that is most useful against AP 2 operatives, who show up most often in horde teams in which the Flamer will be the more logical choice thanks to Torrent. That being said, the Webber can absolutely shutdown AP 2 operatives who lack a ranged weapon such as Genestealers who have a decent number of wounds and are unlikely to be outright killed by the Flamer.
Neophyte Icon-Bearer
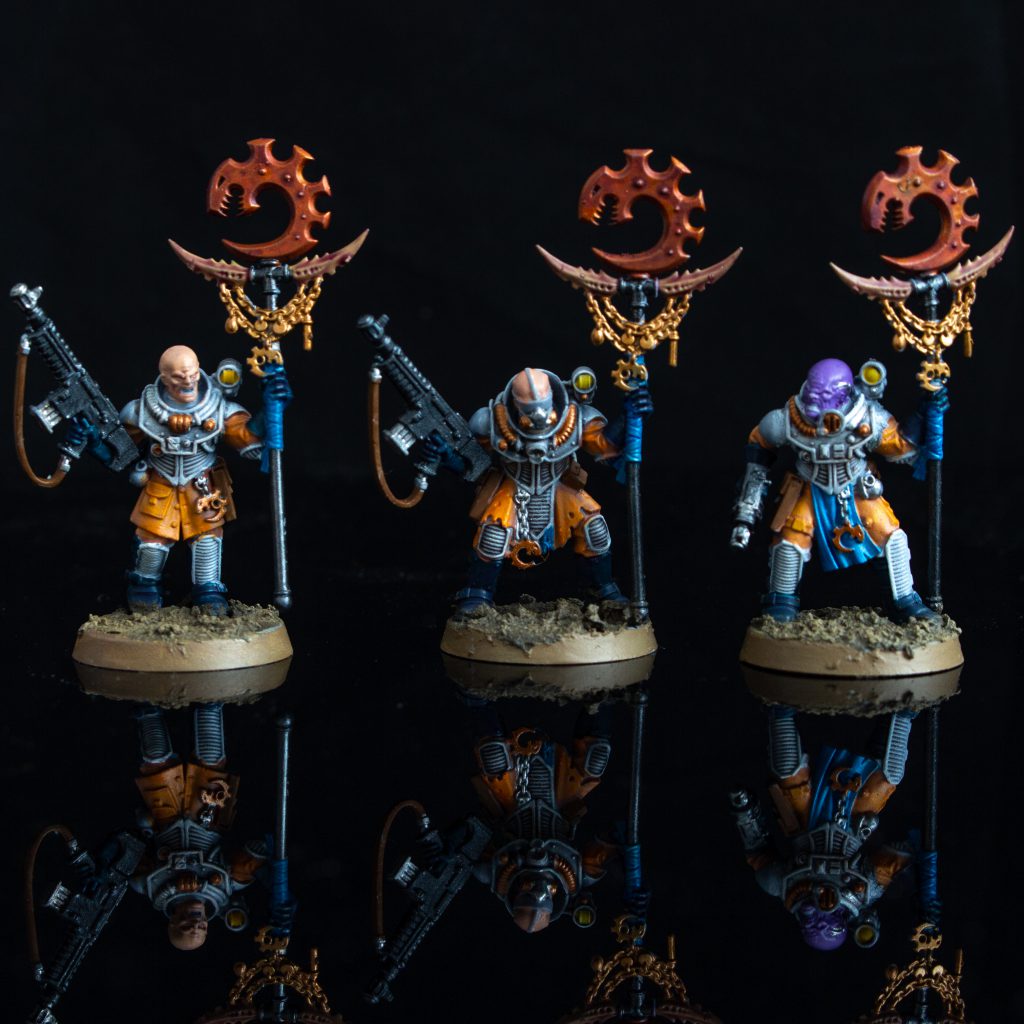
The first of two buffing specialists, and potentially the strongest force multiplier on the team, the Icon-Bearer can use Signal the Strike (1 AP) to allow operatives using the Cult Ambush ability to re-roll ALL their dice during a FIGHT or SHOOT action. This is absolutely bonkers when used in conjunction with other neophytes, especially your Gunners.
However, there are few factors that make this ability harder to use than it appears. First, operatives must be within 3 Inches and visible to the Icon-Bearer, which can make your operatives vulnerable to weapons that have blast or being charged and tied up with melee specialists. The second is perhaps the trickiest issue to deal with. This ability when activated only lasts until the end of the Turning Point, not until the operative’s next activation, meaning to maximize its usefulness you want to activate this operative as early as possible in the turning point. This can really be a hindrance in situations where your opponent has left themselves vulnerable to an attack, and want to capitalize on it before they can do something about it. It also means that by activating the Icon-Bearer you broadcast your intent to your opponent allowing them to counter move against you before you can get all your operatives into position.
Additionally, the Icon-Bearer counts as 3 APL for holding objectives, which can be a nice little surprise for opponents who think they can control an objective only for your Icon-Bearer to run up on the final activation of a Turning Point to either contest or control a marker that the opponent held.
Ultimately, this operative has the potential to be very powerful, however I would not recommend building your strategy around him. It may be tempting to keep all your ranged operatives back, sitting around him, unleashing a hail of deadly firepower, BUT more often than not your opponent will use terrain to minimize this tactic and you will find yourself outnumbered on the objectives.
Neophyte Leader
Our final operative, and the operative chosen to lead your insurgent force. Comes with your standard +1 Wound and +1 WS/BS over the other Neophytes, along with an array of pistol and melee weapon combinations. None of these choices are an automatic pick over the other, although Bolt Pistol and Powerpick have the highest potential damage. I would personally consider the Power Maul to be the weakest pick from amongst the melee options, Stun not being very useful as the Leader is likely to either kill their target during a FIGHT action or be killed in turn.
Your Leader’s main use is as the second of the two buff providing Neophytes as he allows you to use either the Slink Into Darkness or Coiled Serpent tactical ploy for free once per Turning Point provided you use it on a Neophyte (including himself) and that Neophyte is visible to your leader. That there is no range requirement is particularly good with your Mining Laser Heavy Gunner being the obvious choice for this ability. Keep in mind these ploys will still be subject to the once per turning point limit.
Ploys
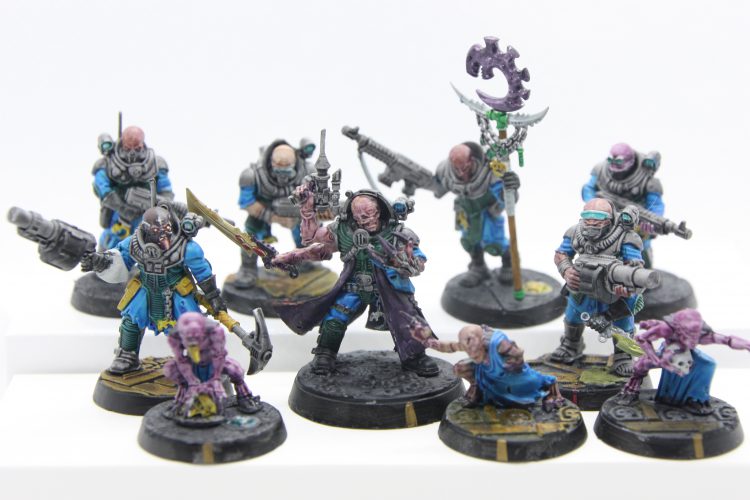
The Wyrmblade are blessed with an array of “good” to “fantastic” ploys, some of which are limited to once per game due to their potential to swing games. They are thematic and all play to the strengths of the team.
Strategic
Meticulous Plan
Gives your NEOPHYTES under the CONCEAL order the ability to perform a MISSION or PICK UP action for 1 less AP to a minimum of 0, once per game. As we will see in the Mission section of the article this Ploy can be incredibly powerful, and is best used early to gain a primary points lead and pressure your opponent into being more aggressive. Unfortunately, in some missions this ploy is nearly useless. B due to situational use and 1 per game limitation
One with the Shadows
Turn all light terrain into Obscuring for your operatives with the Conceal order. This is a tricky ploy to use, and really comes down to how common light terrain is in your Kill Zone. Barricades are by definition light terrain, and the thing you can control most to make use of this ploy. In a situation where deployment prevents you from placing operatives within an inch of cover, this ploy can basically let you place them in the open as long as some amount of intervening terrain is between them and the enemy. In this regard you can choose to place your barricades further forward, and move up to them as opposed to deploying them in your Kill Zone. D
Writhing Ingress
This lets you put an ingress token within 1” of a terrain feature up to 1” thick. Until the end of the battle your friendly operatives can move through said terrain feature if they are within an inch of the ingress token when they do. Much like Meticulous Plan this ploy has the potential to swing an entire game, and can be used in either a defensive or offensive manner. This is done by playing the token as close as possible to a terrain feature that either borders or contains an objective marker (I.E. a ruin), this allows your operatives to pass through and attack enemies on the other side without fear of being attacked in response. A perfect example is putting one of these near an objective marker located near your own deployment zone, preferably on a solid wall that completely blocks line of sight, and then placing one of your Cult Agents such as the Locus on the other side acting as an excellent deterrent to any enemies straying too close. B due to situational use and 1 per game limitation
Crossfire
For the Turning Point, any shooting attacks, after the first, made against an enemy operative may return a single automatic success prior to rolling dice. Unfortunately the weakest of the Strategic Ploys, not because it is bad, but because it is largely redundant. Between Cult Ambush and the Icon-Bearer the Wyrmblade have significant access to ways to improve their shooting, and due to the nature of Kill Team you often find yourself in a situation where only a few operatives are able to target the same enemy. This ploy might be more useful in instances where you have equipped your Brood-Adepts with Autoguns, but more often than not the short range nature of your team is going to make this ploy less than ideal. Best used in situations where you don’t need to spend your CP on better ploys. C
Tactical
Slink into Darkness
Allows operatives to return to CONCEAL at the end of their activation. This is a fantastic ploy for your ranged operatives, and can be very annoying to deal with, which is why you may perform it only once per game per operative. Not much to say here other than that you will probably use at least per game to buy your Mining Laser an extra activation before your opponent focuses everything in his arsenal towards them. Remember you can also do this ploy for free thanks to your Leader. A
Coiled Serpent
Allows an operative to retain a hit as a crit on an activation in which they went from CONCEAL to ENGAGED. This ploy is great because it allows you to see the results of your dice before you decide to use it. It is best used in conjunction with the RENDING weapon trait, because you are then getting two crits for the price of one. The Kelermorph is the operative of choice for this ploy. A
Unquestioning Loyalty
Another fantastic ploy that can be used to grant a Neophyte or Locus a free charge action against an enemy operative that is within 3 inches, if that enemy operative has targeted either a CULT AGENT or LEADER for combat. This one has a lot of uses that should be obvious, and does a lot to encourage you to keep certain operatives near one another. Keep in mind that it is not an additional charge action, so if you already charged with your Locus during the Turning Point he won’t be able to use this ploy. It can be an excellent way to counter an opponent by simply moving your Locus near an on-going combat, or simply a way to sacrifice less important operatives to keep valuable ones alive. A
Hiding
Another once per game ploy, that really makes the strategic/tactical ploy separation seem arbitrary. During operative deployment pick up two of your Neophytes to set up in hiding, and during the first turn they can show up anywhere within 6” of your drop zone and more than 3 inches from enemy operatives and are treated as having just made a Normal move (they lose 1 AP). This is another powerful ploy, however it has a few noticeable limitations. First, operatives that enter the table in this fashion don’t gain the benefits of Cult Ambush. Second, your Heavy Gunners are poor choices for this ploy since they will be unable to SHOOT on the turn in which they arrive. The most obvious choices for this ploy are the Gunners, however the Grenade Launcher really suffers without the benefits of Cult Ambush. Personally I feel the Flamer Gunner and Shotgun Brood-Adept are the best choices for this ploy due to their shooting being fairly reliable without Cult Ambush. Your goal when using this ploy is to basically keep your opponent guessing on where you will decide to bring your operatives in, maybe they will come in and attack an enemy caught out of position, or simply appear on a vulnerable objective marker to perform a mission action? This is the closest thing the Wyrmblade have to an auto-perform when it comes to ploys. A
Equipment
The options available to the Wyrmblade are not nearly as powerful as their ploys, and act more to increase your team’s versatility. None of them are automatic picks, and are all situational.
Frag Grenades (2 EP) and Blasting Charges (3 EP)
Frag, as always, is a very reliable choice when up against fellow horde teams. Put them on your Brood-Adepts to keep your opponent on his toes. Unfortunately, the Blasting Charge occupies some weird position between Krak Grenade and Frag Grenade that when coupled with being more expensive than frags and losing 1 inch off its Blast radius in exchange for only 1 more damage feels too weak against elites and not versatile enough against hordes. Oddly enough harlequins might be a good choice for blasting charges due to them occupying an odd spot between elites and hordes. In both cases Neophytes with this equipment are also a perfect choice for the Hiding Ploy. Frags B, Blasting D
Spotlight [3 EP]
Enemies visible to and within 6 inches of an operative holding a spotlight can not benefit from obscuring. This choice is terrain dependent, however it can be very useful on an operative in Hiding to expose an enemy. The main issue is obscuring is far less of a common way in which operatives hide, and the range requirement on this item means it needs to be in conjunction with another operative to be used, meaning it is very possible for your opponent to kill the Spotlight holder before you have a chance to capitalize on it. Also, as the game progresses and operatives find themselves battling close to one another the utility of this item drops significantly. Perhaps take one and keep it in your back pocket to keep your opponent guessing, especially on tables with large amounts of Heavy Terrain. C
Cult Talisman [2 EP]
Once per game the operative holding this equipment may automatically return a single successful normal save as a critical save. This is the closest thing to a defensive item available to the Wyrmblade. This team survives through CONCEAL and COVER, and once it is out in the open it dies quickly. That being said this item is great to put on your long ranged Gunners to give them just that little extra boost in durability. That being said, don’t expect it to save them against anything more powerful than a boltgun. B
Cult Knife, Climbing Gear, and Flash Visor [1 EP]
The above all cost a single EP, and thus you could conceivably outfit your entire team of Neophytes. The Cult Knife grants +1 attack and is the least useful of these options. An extra attack doesn’t mean much to your neophytes who are very likely to die if caught in combat with anything stronger than a guardsman. Climbing Gear does a number of things and has the potential to be very useful on boards that have vertical distances higher than 2 inches. Worth considering for your Gunner specialists in order to get them into good positions with greatest potential to affect the outcome of a game. Lastly, the visors allow operatives to ignore modifiers to APL. This one rates barely above the Cult Knife in usefulness, and is incredibly situational. It is best used on Brood-Adepts who are often performing mission actions, and thus find themselves close to enemy operatives, and thus the target of things like Stun Grenades. B Climbing Gear, D for both Flash Visors and Cult Knife
Missions
Faction Tac Ops
The Wyrmblade have some excellent faction Tac Ops and can choose from either Seek and Destroy or Infiltration for generic choices. Despite the lore depiction of Genestealer Cults as sneaky infiltrators and guerilla fighters their rules put them firmly in the Seek and Destroy category, they’re a team of assassins first, spies second.
Nowhere Unreachable
On Turning Point 1 your opponent places a token anywhere that is more than 6 inches outside of their own deployment zone. You score one point if you have any operatives within an 1 inch of it at the end of a turning point. This is a very situational Tac Op that can range from nearly impossible to very easy depending entirely on the size of the deployment zones. In some cases your opponent will basically have to place the token along the centerline making this very easy to achieve. Note that you don’t have to control the token, so you merely have to move your last activated operative near it to meet the mission requirements. This leaves your opponent two options, place the token as far from the action as possible to draw your operatives away, or put it central to other objective markers and risk being completely overwhelmed. In the primary mission sections I will point out the deployments that are best suited for this Tac Op. D to B depending on size of deployment zones
Perfect Ambush
Declare this Tac Op at the beginning of any Turning Point prior to the 4th. If your team inflicts more wounds upon the enemy than they do against you for that Turning Point, gain 1 VP. If your CULT AGENTS inflict more wounds against your opponent than they do you, score 2 points. The first part of this Tac Op is very achievable, especially in early Turning Points where you can leverage Cult Ambush to keep most of your operatives hidden while dealing a small amount of damage to your opponent. The second part is much more difficult, especially once the game is in full swing and you’re losing a large number of operatives. With this in mind the best time to declare this Tac Op is almost always in the first Turning Point, especially where you can use your Sanctus Sniper and Hiding Neophytes to basically do damage and not receive any in return. Turning Point 3 is perhaps your second best option if you have managed to keep your Cult Agents alive since you’re likely to have far less Neophytes alive for your opponent to inflict wounds upon. C
Mark for Assassination
You may declare this Tac Op at the beginning of any Turning Point to give your Neophytes access to a Mission Action fittingly called Mark for Assassination (1 AP) that can be performed once per Turning Point if the friendly operative is within 3 inches of an enemy and outside engagement range. This puts a Marked token on that enemy until the end of the game. You gain 1 VP for each Marked enemy that you incapacitate. This Tac Op is relatively easy to perform and works well when combined with the Meticulous Plan and Hiding ploys, and syncs very well with the Seek and Destroy missions. B
Seek and Destroy Tac Ops
Of the two generic Tac Op categories Seek and Destroy plays best to the strengths of the Wyrmblade, and synergizes well with 2 of the 3 faction Tac Ops.
Headhunter – One of the better Tac Ops in general, most enemy leaders need to be in the thick of fighting to be useful, and the Wyrmblade have plenty of ways to capitalize on it. You won’t always get their leader by before TP3, but unless you’re being absolutely pulverized you should be able to score it at some point. B
Challenge – As mentioned in previous guides, a more difficult version of HeadHunter, however if you are going to take this Tac Op the Kelermorph is your go to pick. Against elite enemy teams you can really keep your opponent scared to make use of melee specialists who will absolutely die if they stray too close. C
Rout – One of the lesser choices as Wyrmblade aren’t a speedy team, and the requirement to be within 6 inches of the enemy deployment area makes this largely mission dependent. D
Execution – Trash vs. non-horde, still not advisable against fellow horde teams. D
Deadly Marksman – Easy to fulfill the first objective, the second can be more difficult. Your initial thought may be to use this Tac Op in conjunction with the Sanctus Sniper, however against elite teams the Mining Laser is a better choice. This Tac Op is also very terrain dependent, if there is no safe vantage point for your Marksman you may consider picking something else. C
Rob and Ransack – The more difficult melee version of Deadly Marksman, however it evens out since you don’t have to choose an operative until they actually get the kill. In most cases this will be your Locus, but can just as easily be your Leader during a late game counter charge. Easier to achieve against elite teams who might have operatives separated from their fellows. C
Infiltration Tac Ops
While I personally prefer the Seek and Destroy Tac Ops that isn’t to say the Infiltration category doesn’t have useful options.
Capture Hostage and Infiltrate – Lets see…requires your operative to be within 2 inches of an enemy they incapacitate, 6 inches away from other enemies, you LOSE your operative, AND it has to be TP 3 or 4 to get the 2nd VP?!? Trash, only take if you’re trying to challenge your tactical acumen. This Tac Op sucks for any team. F
Behind Enemy Lines – Wyrmblade have no abilities that increase their movement speed, and in all the missions the distance between deployment zones is 12 inches minimum meaning there is no way to score this Tac Op on TP1. However, against elite teams you can definitely use your numbers to push operatives into your enemies side of the board if you clear a lane. You score this Tac Op immediately, so it isn’t like your operatives have to enter enemy territory and survive until the end of the TP, which is a big plus. C
Upload Viral Code – This one would be great if the mission action was 1 AP, especially combined with Meticulous Plan, however at 2 AP there are usually better options, and in many cases your operatives will want to be performing mission actions associated with the Primary. Even with Meticulous Plan you won’t be getting this until TP2 or later. D
Implant – Probably the easiest of the Infiltration Tac Ops, especially for horde teams. You can go about this in two methods, when Neophytes are charged by enemy melee specialists they’re often likely to die in two hits, and the 2 wounds they would deal in a futile strike back aren’t critical to victory, so just give up the damage and gain a victory point. The other method is using a melee specialist such as the Locus to essentially parry all your opponents attacks, and having enough successful hits left to both perform the implant, and kill the enemy operative. There is no Turning Point limit on this either, making it possible to get both VPs in a single TP. Just remember each implantation has to be on a different enemy. B
Sabotage – Another mission action dependent Tac Op making Meticulous Plan an obvious choice for it. This Tac Op is HIGHLY dependent on terrain setup, and can be rather easily achieved, or near impossible depending on the dimensions and traits of terrain features. Containers with the HEAVY trait, and their considerable length make obvious choices as they may very easily extend to within 6 inches of the enemy deployment zone. As with Implant there is no Turning Point limitation here, so if you see the terrain allows for you to quickly achieve this, activate your ploy and go for the points. C
Interlope – One of the riskier Tac Ops. You secretly choose an operative to be your Interloper, and then want to get that operative within 1 inch of the enemy Kill Zone Edge to perform the Interlope (1 AP) action. This will instantly grant you 2 VP, but should this operative be killed then you’re shit out of luck. This can be effective against elite teams that don’t have the manpower to chase after an individual operative, and also comes down to having the proper cover for that operative to make it to his destination without being picked off. The size of your deployment zone is also key as on more narrow ones your Interloper will likely not be able to reach the enemy edge until Turning Point 3. D

Critical Operations Missions
Here we will look at the 9 Critical Ops Missions with a focus on Deployment Layout, Mission Rules, and Tac Op support. It is important to remember that UNLIKE standard 40K the amount of space between deployment zones varies from 12 inches to 18 inches depending on the mission. As a general rule a smaller distance between deployment zones is more favorable for Infiltration Tac Ops since they often require you to be close to the enemy deployment zone. Something to keep in your head when analyzing these missions is that 9 inches is the maximum distance operatives can move in a Turning Point if they perform a Normal Move and Dash as Wyrmblade have no method of increasing their Movement characteristic. Even operatives entering the board using the Hiding ploy can only do so within 6 inches of your deployment zone, and can only perform a Dash Action once they have arrived.
1.1 Loot and Salvage
A 6 objective mission with very thin deployment zones separated by 16 inches. Each objective marker can have the Loot and Salvage (1 AP) mission action performed on it for 1 VP per Turning Point (Max 4 per TP). For this mission I’d recommend Seek and Destroy Tac Ops swapping out the weaker ones for Faction Tac Ops 2 and 3. A tricky maneuver you pull at the beginning of this mission is to select Recon during the Scouting Phase, allowing one of your Neophytes to move up 3 inches. Then you activate Meticulous Plan on TP 1 to move Neophytes on to 4 Objectives, including one on your opponent’s half the board, to gain an early 4-2 lead on primary. This forces your opponent to attempt to take your objectives in order to offset the early deficit, making them vulnerable.
1.2 Consecrate Ground
5 objectives with an odd split drop zone deployment with 12 inches between the zones. Additionally the mission action, Consecrate Ground (1 AP), is very similar to Loot and Salvage in that performing it on an objective you control will gain you a VP (max 4 per TP), however there is the added twist that the operative performing the action gains +1 to their APL, Attacks, and Defense characteristics. The strategy here is very similar to the previous mission, while the distance between the zones is shorter the gap between them really forces you to concentrate your operatives and puts them directly in the path of your opponent. This means Seek and Destroy still seems your best option, and you really want to get your neophytes on the objectives immediately simply because elite teams with the boosted stats will be very difficult to shift.
1.3 Awaken the Data-Spirits
A very fun 6 objective mission with corner deployments and a staggering 18 inches between the zones. Each side of the board has 2 Firewall Objective Markers and 1 Uplink Objective Markers that correspond to one another. Using the Disconnect Firewall (1 AP) mission action within 1 inch of a Firewall Objective will score you 1 VP and remove the marker, additionally at the end of each Turning Point you will score 1 VP for each Firewall Objective Marker you removed if you control its corresponding Uplink Marker. Based on the objective layout you can essentially deny your opponent points by choosing not to deactivate Firewalls that correspond to Uplinks they control. As with the last two missions the huge gap separating each zone discourages Infiltration as a Tac Ops category as well as making NoWhere Unreachable utterly useless. If the terrain allows a clear path you can use a similar strategy of Mission 1.1 using your free Recon Dash and Meticulous Plan on a Neophyte to attempt to deactivate both Firewalls on an Uplink Marker that you control. If this is possible it is in your best interest to focus on controlling one of the Uplink Markers, while simply interfering with your opponent’s ability to get 2 points on whichever one they focus on. If you are really looking to push your luck you can even use Writhing Ingress to open up a lane for your Neophyte.
2.1 Escalating Hostilities
6 Objective Markers with 18 inches of separation between deployments with the added bonus of all of them being located outside of either player’s zone. There are no mission actions to perform, and at the end of Initiative Phase 2 and 3 each player removes an objective marker located closest to their deployment zone. Yet another example of a mission that favors Seek and Destroy, a huge gap between you and your opponent’s zone, and all the objectives clustered in No Man’s Land. This is really going to favor elite teams who don’t have to keep any operatives back. This means you will likely want to be aggressive with your own ranged specialists. Many Kill-Team games can come down to having 1 or 2 operatives left on the table, and having a Mining Laser sitting in your deployment zone all game is a potential loss of VP. Meticulous Plan can now be used to make Marked for Assassination easier to achieve.
2.2 Seize Ground
Nearly identical to 2.1 in that we have max objectives spread throughout No Man’s Land, and the same distance between each deployment zone, but now spread over a long front. I still view Seek and Destroy as the more obvious choice for this mission, but at the very least length-wise deployments like this can make Infiltration a more tempting option against elite enemies, because they will have a more difficult time screening your operatives out. This also happens to be a very favorable mission for elite teams as the mission parameters allow them to move off objectives if they Secure them by remaining on them until the end of a Turning Point. In my estimation this is one of least favorable missions for the Wyrmblade, Meticulous Plan has no use here outside of its interaction with any Tac Ops you may choose, No Where Unreachable will require you to cross into your opponents territory, and the nature of Securing the objectives at the end of a Turning Point only rewards more conservative play.
2.3 Domination
A major shift in setup from previous deployments. 5 Objectives with only the center located outside of deployment zones with a mere 12 inches separating the sides. If there was ever a mission to take Infiltration Tac Ops this would be it. There is a single mission action called Claim Ground (1 AP), however Meticulous Plan is not really crucial to gaining an early objective lead, and is for once best saved for a potential push into enemy territory or claiming the central objective after initial skirmishes over it have died down. All Tac Ops that depend on being within 6 inches of the enemy deployment zone are suddenly very tempting (Rout, Sabotage, etc), especially No Where Unreachable which your opponent will be forced to place near the centerline. Odds are against a competent opponent you aren’t going to gain any sort of major lead in primary points, and so you will be doubly relying on Tac Ops to shift the stalemate.
3.1 Secure Archeotech
Initially this seems like a difficult setup, 6 Objective Markers, 16 inch offset between deployments, all markers located outside of the deployment zone. However, once you inspect the mission rules it becomes apparent that Meticulous Plan is at its most broken. Remember that this ploy reduces BOTH Mission Actions AND the Pick Action by 1 AP. You score in this mission by performing the Disengage Tech (1 AP) mission action for 1 VP, after which your operatives may perform the Pick Up Action on disengaged objectives. You then score 2 VP for each objective you control at the end of Turning Point 4. Basically, this means you’re encouraged to quickly gain control of objectives, and move them towards your own deployment area. Using the ploy you can not only move your operatives onto each of the centerline objectives and perform the mission action to gain an early primary lead, but you can also pick them up! No matter what your opponent does you should very easily be able to grab 4 to 5 of the markers immediately, especially if you use your Brood Adepts with their GA 2. At this point you retreat into your side of the board using your Cult Agents as deterrents against your opponent following aggressively. With this in mind Seek and Destroy is the safe Tac Op option as the opponents deployment is simply too far away, and moving towards their side of the board runs directly counter to the Primary mission. It is also important to note that you will want to make the operatives who move to control/pick-up the objectives to be amongst the last ones activated to reduce the amount of Overwatch and Shooting they will suffer.
3.2 Duel of Wits
5 Objective Markers all located outside of corner deployment zones. Corner deployments are never good for No Where Unreachable but Meticulous Plan through GA 2 Brood Adepts can provide an early game lead as usual. Each player must select a priority objective at the Target Reveal step of each Turning Point. Operatives may perform a Gambit (1 AP) mission action in order to gain 1 VP and 1 Command Point, which will exhaust the objective for the remainder of the TP. Aside from performing this action the only way to score VP is by controlling a majority of the objectives at the end of the Turning Point. This mission has the potential to quickly stalemate due to the majority requirement to score, meaning performing the mission action and scoring your Tac Ops is very important. Seek and Destroy is the obvious choice since your opponent will be required to move aggressively to contest objectives.
3.3 Master the Terminals
4 objectives arrayed within 6 inches of the center of the battlefield with, ONCE AGAIN, corner deployment. This is in strong contention with 2.1 as one of the more difficult missions as there is only one way to score the primary objective, and it’s through the Divert Power (1 AP) mission action that is worth 1 VP when performed on an objective and can only be done once per TP. In addition, 1 of the 4 objective markers will not be accessible in each Turning Point with both players taking turns, prior the first TP, deciding the order in which they will deactivate. This means that the potential for scoring primary is a total of 12 VP if every available objective has a mission action performed on it every TP, which is very low compared to other missions. If your opponent gets the initiative on you they are very likely to choose the objective closest to your deployment zone to put you at an early deficit. As per usual Meticulous Plan can help you overcome this, but due to the concentration of the objectives you’re likely going directly head to head with your opponent from the start. This means Tac Ops will be especially important and, yet again, this makes Seek and Destroy your go-to choice. Place your Writhing Ingress token in a location that allows your team to countermove and more effectively reach the objectives.
Painting and Modeling Genestealer Cults
We’ve covered painting Genestealer Cults pretty extensively, including multiple unit types and vehicles. Check out How to Paint Everything: Genestealer Cults for more info there.
Final Thoughts
The Wyrmblade have a significant amount of competitive options making them a solid choice for any player. They’re basically the epitome of glass cannons, who want to avoid a fight until they can set their opponent up for a killing blow. They are equipped with a number of ploys that meant to give them an early advantage in the hopes of luring their opponent into a poor position. You then capitalize on this by using your deadliest operatives to give your opponent multiple difficult choices by Turning Point 2. While you’re given the choice between Seek and Destroy and Infiltration it is important to remember that the Wyrmblade are assassins first, spies second.
As always, if you have any questions or feedback, drop us a note in the comments below or email us at contact@goonhammer.com.
