
One of the excellent game mechanics of Conquest is the Command Stack, the pile of cards that determines the order in which you activate your units that turn. The core concept is deceptively simple, but there’s a lot more nuance and interesting interactions that stem from this mechanic. We’ll start by explaining the Command Stack and some basic principles and then take a look at some common situations you’ll find yourself in during the game. This leads on into exploring the psychological games between you and your opponent, and finally we’ll have a look at how each faction can manipulate the Command Stack mechanic to best effect.
What Is the Command Stack?
For those not familiar with the system, Conquest is an alternate activation game where each player takes it in turn to use one of their units. It’s a system more common to skirmish games like Kill Team, Marvel Crisis Protocol and Malifaux than mass battle games. The trick is that, unlike those systems, you pre-determine the order your Regiments will activate in at the start of the Round.
Each Character and Regiment in your army has a Command Card associated to it. At the start of the Round, you and your opponent secretly arrange these in the order which you would like to activate in. After determining who has Supremacy, you alternate flipping these Command Cards and activating the corresponding Regiment.
This mechanic is excellent from a player experience for two reasons. Firstly, it means that both players are constantly interacting and making decisions rather than waiting half an hour for your opponent to play their entire army. Secondly, because you have already determined the order of activation it reduces the mental load mid turn of trying to decide which unit you should activate next. The decision is already made by you at the start of the round, so you simply flip your card, activate that Regiment and hand back play.
Finally, its worth noting that players determine this order before the roll for Supremacy and who goes first. This creates an element of risk/reward which we’ll get more into later.
Stacking the Odds in Your Favour
Now we have the basics down, lets look at what considerations will give you an advantage with your Command Stack:
Bigger is better – The more cards you have in your Command Stack, the better control you can have of the game. This is because you gain something known as ‘Activation Control’ within the community; ie the ability to wait out your opponent’s activations and then react at the end. Its often good to check with your opponent at the start of the Round how many cards are in their stack, noting this will change as Reinforcements arrive and units are destroyed.
With the changes to the Core Rules in 2024, there is no longer a Supremacy roll advantage to having less Command Cards than your opponent. A 2000 point list will often take 10-12 Command Cards in total between Characters and Regiments. Even if you aren’t taking significantly more cards than this, you may want to carefully consider taking less than 10 cards in your whole list without giving too much control to your opponent.
Stalling out – Linked to the above point, some units get better the later into the Round they activate. If a unit is able to project threat and isn’t in immediate danger, consider delaying them to the end of your Stack to see if your opponent moves into their threat range.
The best units for this are ranged units who may find themselves able to Aim, or fast units like Cavalry that threaten a big area of the board. You should also consider leaving your units arriving from Reinforcement until later in your Command Stack. As they are generally unable to do damage when they arrive, you’re often better waiting to see how the Round plays out and then bringing them on from a flank where they’re needed.
Double Trouble – If you take more than one of the same Regiment or Character, you will have duplicate Command Cards in your Stack. The advantage here is that when drawn, you may choose any one of those Regiments or Characters to activate rather than being committed to a single unit. This flexibility can be massive, giving you more options mid turn than you would normally expect. Its not uncommon to see lists featuring almost exclusively duplicated entries for this reason.
To maximise the opportunity, try spreading out duplicate units both on the table and within the Command Stack order too. Having the same Regiments next to each other on the board, or one after the other in the Stack, reduces how much flexibility duplicates can bring. Try and keep units of different flanks, and ideally one unit earlier and one later in your Command Stack order. Just remember that if one of your duplicates is destroyed before activating, you must activate another available duplicate when drawn rather than go to the next card, so make sure to factor that into your planning.
Multiple Engagements
Usually around Turn 4 or 5, where the battle lines are closing and both you and your opponent want to make some big hits in. Both you and your opponent having multiple engagements where whoever activates first will strike a devastating blow. How do you decide which order to activate in? Lets look at the simplest example and the possible outcomes.
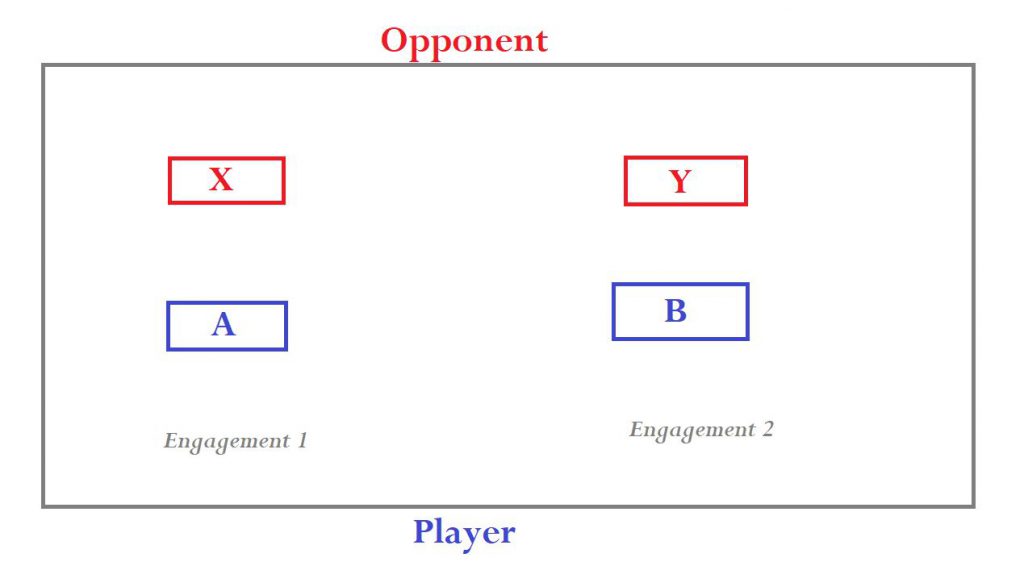
In the above example, you and your opponent own two Regiments (A and B vs X and Y respectively) each who are matched off against each other. You both want to activate each Regiment one after the other and need to decide the best order. There are four possible outcomes shown in the table below, before factoring in the Supremacy Roll.

In the simplest terms, there is a 50% chance of an even trade where each player gets to strike first in an engagement. Alternatively, there is a 50% chance that whoever wins the Supremacy roll will get to strike first in both engagements, a potentially game changing advantage to the winner. In theory, this means you should only have a bad outcome one in four times where your opponent activates first in both engagements.
The other factor to consider is that apart from Round 1, one player will have ‘advantage’ on the Supremacy roll, able to modify their result by one. This roughly equates to the player with advantage deciding who goes first 66% of the time. So if you have advantage, you’ll actually get an even result 50% of the time, an ideal result 33% of the time and a bad result only 17% of the time.
The base probabilities are important to understand, as this is the foundation for the more interesting psychological game layered over these decisions.

The Chicken Supreme (or Supremacy Chicken)
The maths example above doesn’t take into account the deep and varied factors layers over the decision of where to activate first. Aside from the specifics of each individual Regiment involved, you’ll also be considering board position, supporting units, objective zones and more. It would be impossible to give an exhaustive list of factors, so instead I’d like to offer four questions to ask yourself when facing Supremacy Chicken:
Do I actually win this engagement? – Take a moment and do the maths on each engagement to work out how much damage you’re actually doing. Its easy to get caught up in the moment and charge in without checking whether you’re going to actually do enough damage to cripple the opponent’s unit. This is especially the case with Monsters who if you don’t kill outright will just punch back with the same output as normal.
Where possible, try and make sure your first activation does enough damage to kill or hinder the counter punch to get the most value from winning the Supremacy Chicken. Otherwise you could be giving up the advantage gained if you go first.
Play to win, or play to not lose? – There’s always a risk that something goes wrong, it’s the nature of a dice game. Rerollable 2+ charges fail, you can miss 10/11 attacks on Clash 4, your opponent can spike their saves. Or that 1/3 chance comes up and you lose Supremacy despite your advantage. You need to take reasonable risks in a game with randomness, but its worth considering what happens if your bad luck kicks in.
For Supremacy Chicken, think through the implications if your opponent goes first instead of you and what happens. You may want to take a ‘safer’ first activation that you know will do good damage rather than risking it all on that sweeping cavalry charge you know your opponent is going to try and negate. Sometimes its better to get your anvil unit over an Objective Zone to lock it down rather than go for a kill elsewhere.
That being said if you are sure that your opponent will destroy your Regiment when they go first it can sometimes be fine to gamble with that Regiment going first. If you win, you get your desired activation and damage output. If you lose, your opponent destroys your Regiment and you’ll get to draw into your next card anyway so you don’t take the ‘penalty’.
Does it all come down to this? – Sometimes things don’t go as planned. A key unit lets you down with some bad luck or a poor decision earlier comes back to bite you. You’re on the backfoot and it doesn’t look good. In these situations, it might be that you need to take a risk to get back into the game.
These are the situations where Supremacy Chicken can be a great rubber band mechanic. If you recognise that you’re on a losing trajectory in the game, you should consider making more ambitious and risky plays such as gambling hard on going first with a specific Regiment. Sure it might not happen, but if it does it could swing the tides. Just think carefully before making an ‘all or nothing’ play as you’re relying on pure luck to reward you.
What are they thinking? – Finally, remember that your opponent has these same considerations themselves and trying to make difficult choices. Some of this will come from the environment you are in, with players more likely to make risky decisions on a casual game night compared to a tournament setting. Others will be the individual themselves, who you may know as being particularly cautious or especially bold with their chances.
If you think you know which card your opponent will play first, you can make much better decisions in Supremacy Chicken by reacting to that accordingly. This loops back into the previous three questions and can help you try and get more wins out of the situation you’re both in.
Faction Comments
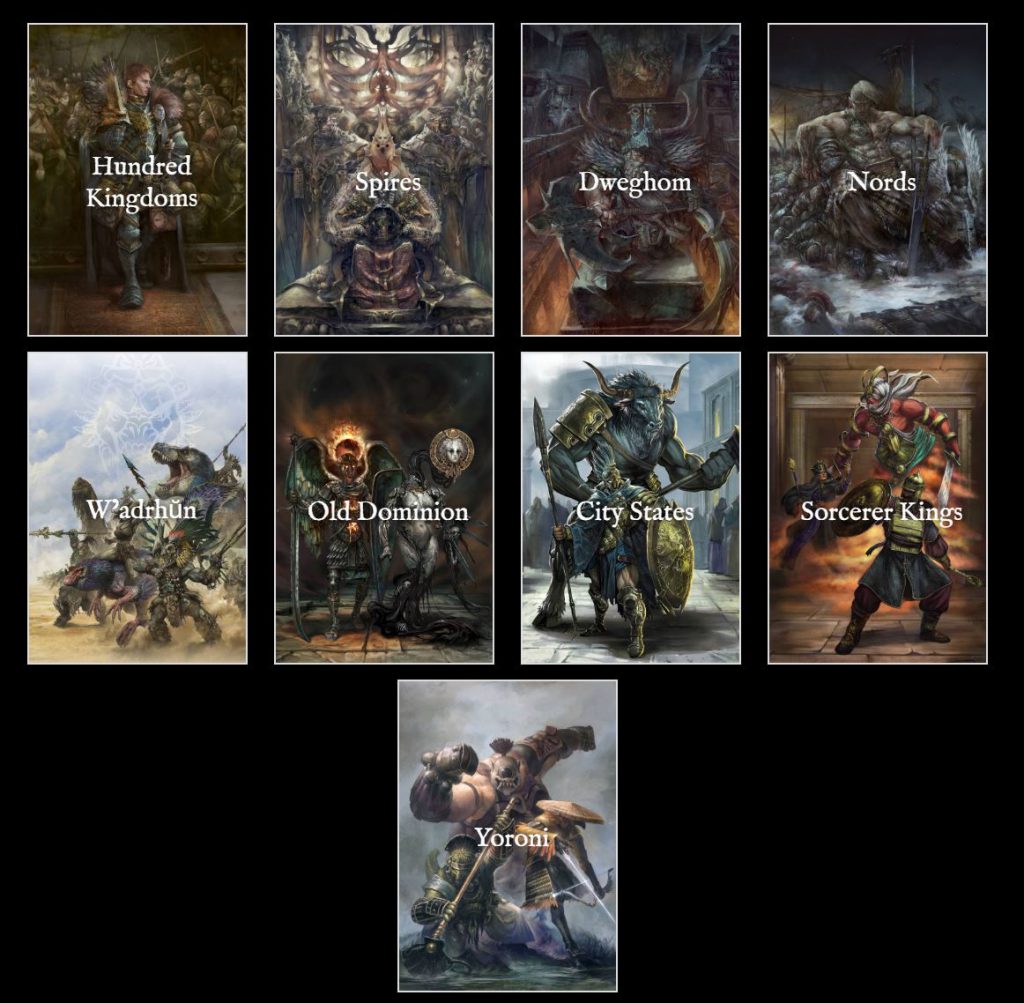
Almost every faction in Conquest has ways of interacting with the Command Stack, varying from almost negligible to a core fundamental. Whilst the Faction Focus articles cover this in more detail, here is a quick run through of how each Faction interacts:
100 Kingdoms – 100 Kingdoms doesn’t heavily utilise the Command Stack but will often take duplicate Regiments because of the Dynastic Alliance interactions. Its possible to lean into an Activation Control deck, and the Art of War master giving a free ‘pass’ a turn can greatly enhance this strategy.
Spires – The Command Stack is vital to the Spires with both the Biomancer and Pheromancer’s abilities being dictated by the card following theirs. This can lead to some incredible ‘burst’ activations seeing multiple Regiments act sequentially through Biomancies and the Entourage rule. Spires can struggle to play Activation Control because of this even with larger decks, and they can get punished badly by a unit being destroyed as it throws off their sequencing for buffs.
This is particularly the case with the Pheromancer, whose abilities send cards to the bottom of the deck. If he dies due to going second, you may end up starting your turn by being forced to activate the unit you literally wanted to leave until last.
Dweghom – Dweghom don’t do much with their Command Stack directly, and thanks to being relatively elite they can struggle to do Activation Control. That being said, they have some of the best ranged output in the game and can capitalise on this by pushing their Command Stack number as high as they can.
Nords – As with Dweghm, Nords don’t have many specific interactions with the Command Stack. They tend away from Activation Control decks thanks to their more elite units like Jotnar. Good thing is they don’t really need it!
Old Dominion – Old Dominion love taking multiples of units such as Legionnaires, Kanaphors/Karyatids and Varangians which plays nicely into Command Stack principles. They tend to prefer a more defensive playstyle, happy to lose initial engagements by mitigating damage with their Resolve immunity and storing up Dark Power for their heavy hitters later.
W’adrhun – W’adrhun adds an extra complexity with their Chant mechanic, meaning that your activations need to set up your Battlecry with the correct tokens. Whilst this doesn’t factor in as much in the latest iteration of the rule, you need to keep count of your tokens and plan ahead for when you want to sing.
Its also worth mentioning the Scion of Conquest, who’s Supremacy ability allows you to activate your Regiments in any order for one round. This can be immensely powerful in a larger Command Stack army, giving you total flexibility on how to play your turn.
City States – City States are the masters of the Command Stack and knowing how to use it well is key to their success. The Strategic Stack works as a once-per-Round ‘Pass’ that you can cash in on like an Entourage later, often with extra benefits like Inspired or +1 Movement. The Aristarch even allows you to put a second card in the stack once per game, giving exceptional reactive ability. This is further enhanced by units like the Chariots who bring multiple duplicate command cards for relatively cheaply.
You can either lean into this with a big Command Stack and force your opponent to play out their whole turn first. Alternatively you can play a more elite list and use the Strategic Stack to negate the downside by slowing down your rate of draw. Either option is valid and both can be highly effective.
Sorcerer Kings – Sorcerer Kings are excellent at Activation Control, both by generally wanting to bring more Characters and by the Ritual mechanic adding cards into their Command Stack. With excellent ranged units and the ability to triple-activate their Elemental units, the Sorcerer Kings can lean heavily into big Command Stacks and punish the opponent for entering their threat ranges.
Yoroni – Yoroni are built different from any other faction. Instead of contributing a Command Card, Yoroni Command Stacks are built of ‘Ideal Cards’ based off the unit’s Chi. You may activate any Regiment with the corresponding Ideal when drawn. This extends the benefits of duplicating Regiments to big swathes of the army giving incredible flexibility when activating.
The tradeoff to this flexibility is that Yoroni are one of the most elite armies in game, and will often be conceding Activation Control to the opponent. Not an easy challenge to overcome, but certainly possible.

Final Thoughts
Overall, the Command Stack mechanic is a fantastic compromise between strategizing your army’s actions for the turn and keeping both players constantly engaged in a round. For many players its part of what keeps them engaged with the game. With a full game containing 10 Rounds, you’ll likely be stacking your Command Stack 10 times in each game so its worth putting some time into it.
Thanks for reading, please let us know what your experiences with the Command Stack are and any other hints and tricks!
As always if you want to get 10% off and support Goonhammer you can make your Conquest purchase by clicking here for US/Canada or here for EU/rest of world. You’ll also need to enter code “goonhammer” at checkout.
Have any questions or feedback? Drop us a note in the comments below or email us at contact@goonhammer.com. Want articles like this linked in your inbox every Monday morning? Sign up for our newsletter. And don’t forget that you can support us on Patreon for backer rewards like early video content, Administratum access, an ad-free experience on our website and more.
