Welcome back, Dear Reader, to the third part of my ongoing progress blog/tournament series for 2021. Last week I talked about some final prep and practice for the Lone Star Open. This week we’ll talk about whether any of that work paid off. If you missed parts one and two, you can find them here:
- TheChirurgeon’s Road to… Well, Lots of Places
- TheChirurgeon’s Road to… 2021, Part 2: Final Prep for the Lone Star Open
Going to a large tournament is always a daunting proposition. I certainly haven’t gone to enough of them to be comfortable with them generally – most of my big tournament experience is from NOVA 2018 and 2019 (well, for 40k anyways – Magic is another story). 40k Tournaments are kind of hard to describe as an experience. They’re fun, in as much as playing 40k is fun. But they’re also exhausting, particularly when they run multiple days. You’re on your feet almost the entire time, you’re constantly thinking, you’re yelling over the room noise, you don’t drink enough water. And after the day’s games are done, if you know people at the event (and trust me, it’s much better if you do – I wouldn’t go to one where I didn’t know anyone there), you’re going to spend a number of hours drinking, laughing, yelling, and generally avoiding sleep. Then you wake up four hours later and do it all over again. What I’m getting at is that it’s a much more physically and psychologically taxing experience than you might expect if you haven’t been to one before, and that was before I lost my cellphone midway through day 2.
But let’s back up and start at the beginning.
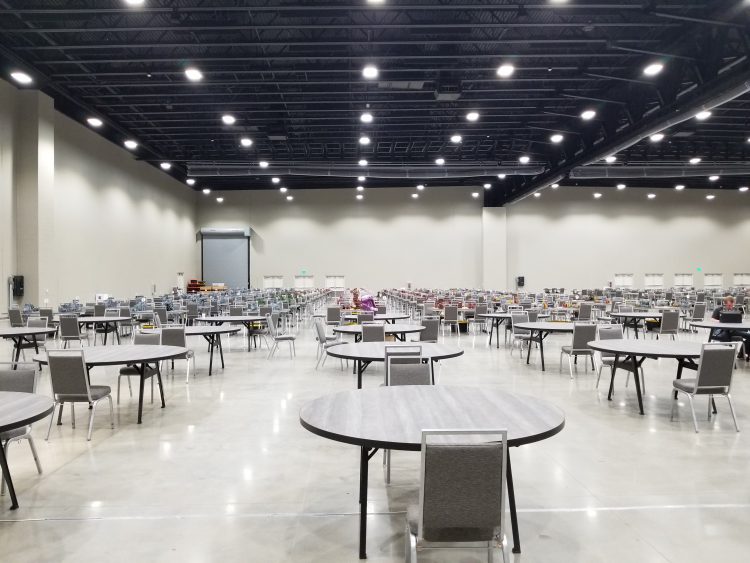
I showed up the night before – almost always a necessity, since round 1 typically starts pretty early and even making a flight from Houston to Dallas for a 9am registration time would mean being up at 4am to catch a flight which, fuck that. I spend night 1 watching the Red Sox dismantle the Yankees after Garrit Cole gives up 3 runs in the 5th. I don’t care for either team but a Yankees loss is always fun to watch. The hotel bar burger at the Marriott is pretty solid. It comes with tater tots instead of fries and the bun is pleasantly soft. It’s a good cap to the evening but I made the mistake of eating much too late. I’ll be up again with heartburn in a few hours, ruining any chance for a good night’s sleep before day 1. Cool.
Day One
Round 1 of the Lone Star Open doesn’t kick off until 10am; that’s incredibly late for an event where checking in as is as simple as dropping into Best Coast Pairings and hitting a “sign in” button. I set myself up and grab breakfast at the hotel buffet, which is… mostly serviceable. They have scramble egg and some fruit salad, so I go with that. It’s important to try and not eat like total shit at these things – make sure you get some fruits and vegetables in you. You don’t have to eat a salad, but it’s not gonna kill you to have a few pieces of cantaloupe in the morning. Next up I meet up with Don “The Mastodon” Hooson, who’s essentially the reason I’m at the event – he hit me up on the Goonhammer Discord a while back to ask if I was going and after finagling some things, I agreed. He’s playing his vehicle-heavy Death Guard and there with his teammate Mark “of Khorne” Whittaker, who’s notable for playing a World Eaters army. We’ll all finish the event within a few spots of each other in the standings.
We talk for a bit while I assemble the army transport tray I just bought from FLG. The paint judges come by and I submit my army. From the others I’ve seen I think I’m in the top five easily, but I don’t have a display board and so that means that I’ve got absolutely no chance of actually cracking the top 5. But that’s not what I’m here for anyways.
I’m here to kick ass and go 3-3. And I’m all out of ass. As a refresher, here’s my army:
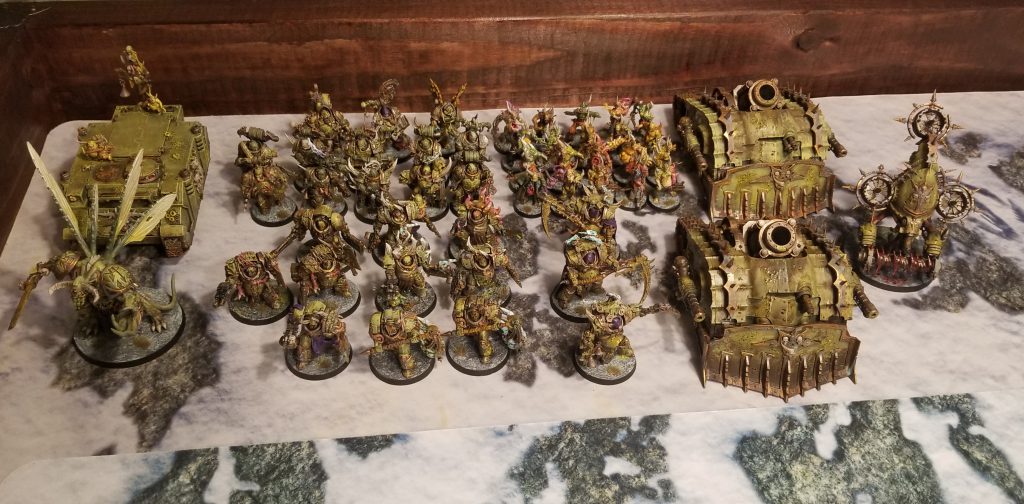
My Death Guard - click to expand
I’m pretty comfortable with the list at this point; the changes only make it more like the lists I’ve gotten used to using. The fleshmower is probably the biggest wild card here, and I wish I’d had more experience picking secondary objectives with it, but overall I’m comfortable with it. The secondary piece will eventually come back to haunt me, but for the most part I can play games with this list without ever having to look things up.
A Note on the Terrain
It’s worth noting something about the terrain before we dive in here, since the event’s terrain, while not bad, had a major impact on the way games were played and some things you’ll see in photos below don’t make a ton of sense if you aren’t aware of how the terrain rules work. There are two things you need to know about terrain for this event:
- Terrain was player-placed, with each player placing the terrain on their half of the board
- Almost all of the terrain had the Obscuring keyword, and was considered to be infinitely tall, even if it had nothing on it. This led to several boards where empty flat area bases were actually LOS blockers.
What this meant was there was a lot of LOS blocking terrain, and on top of that, lots of Hard Cover to make life difficult for melee armies. Of the tables they had, variation 1 was my favorite to play on, and only 2 had meaningful dense terrain, though those forests were also obscuring.
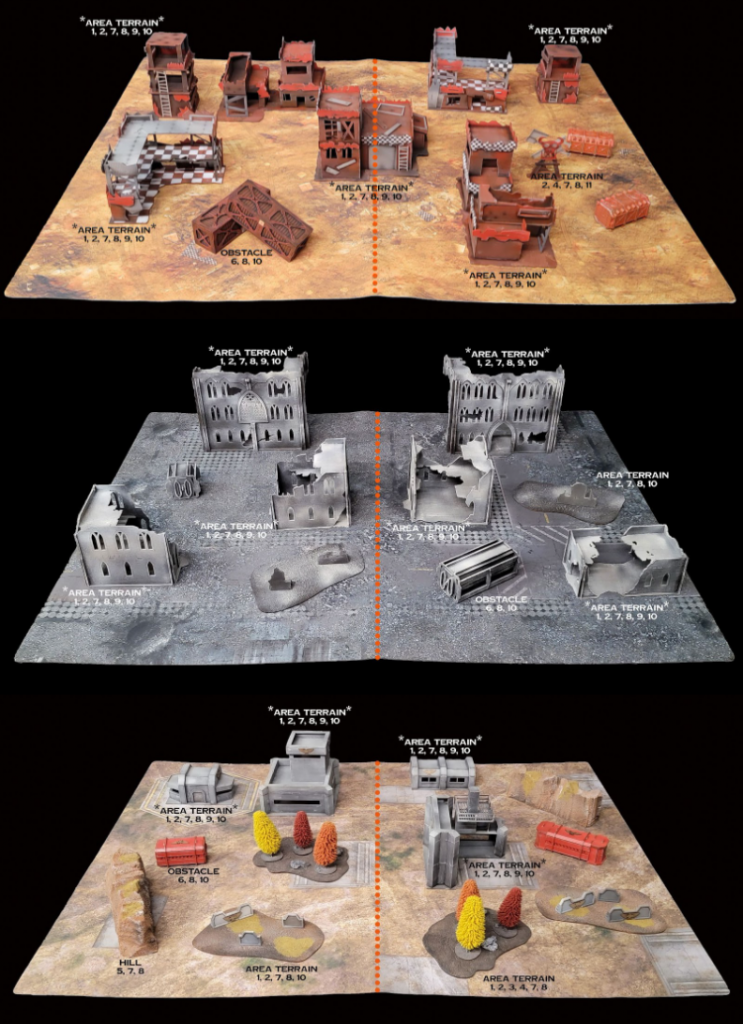
This helped mitigate some potentially disastrous table setups for some armies, though it could cause real problems for others. There are also some weird quirks, like the one ork sign on table 1 there being the only dense terrain on that board. If you got that half of the terrain, you could make a nice little back-toe-in dense cover for your plagueburst crawlers, which is what I did in game 4. I didn’t love the terrain at the event but overall it was fine. I’ve played on worse and there was enough of it to make the tables feel solid.
Round 1: Rick Calnon’s Grey Knights
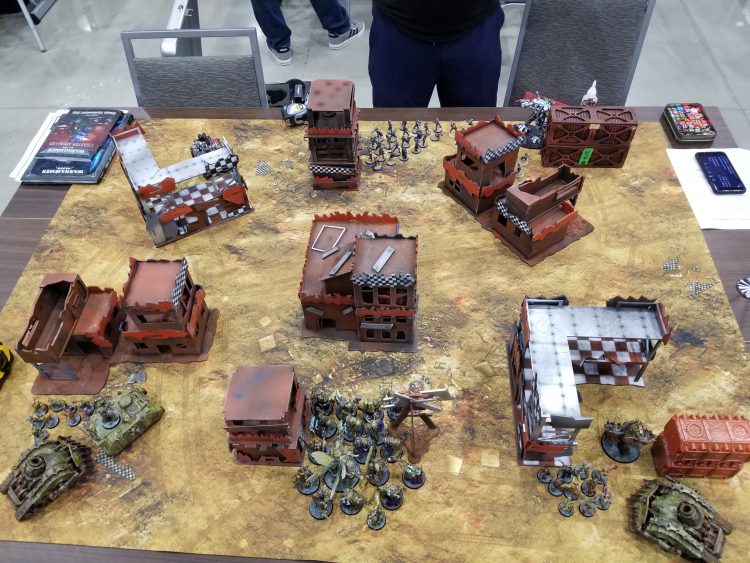
Rick's Grey Knights - click to expand
The Mission: Overrun
My Secondaries
- Spread the Sickness
- To the Last (Blightlords, Plague Marines, Daemon Prince)
- Assassination
Rick’s Secondaries
- To the Last (Draigo, Terminators, Grandmaster Dreadknight)
- Assassination
- Behind Enemy Lines
Relatively new to competitive play and 9th edition, Rick is one of the most pleasant people I’ve ever played against. He’s a bit unsure of his rules, and a slow player – that’ll come back later, but still an absolute joy to play and someone I was legitimately rooting for during the event. Rick’s running a Grey Knights list which, while not entirely kitted out to ruin my day (I only have four Daemons in the army), can still absolutely cause me trouble with its ability to dish out mortal wounds. He’s got a Vindicare and a Callidus assassin in tow, which can cause me troubles, though the former can’t ignore the Deathshrouds. I’ll need to make sure I keep out of his line of sight all day. I don’t have great answers for his Dreadknight and Razorbacks, but I’m hopeful I can keep the PBCs alive and shooting and set myself up in good position to remove most of his threats before the reinforcements arrive. That said, the Mission – Overrun – isn’t doing me any favors, since there’s no center point for me to push to and hold and reaching the three objectives on his side of the table isn’t super likely. That means I need to keep my blightlords in the middle of my deployment zone and then be ready to jump on whatever comes in.
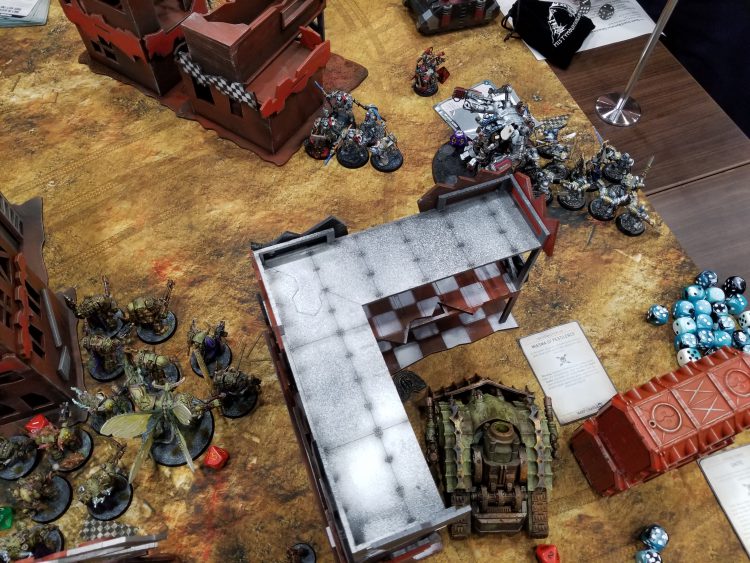
I was able to make a good start of it early by pressing up the table on the left side, wiping out a squad of paladins and holding one of the objectives in his deployment zone with the plague marines essentially all game. That’s good because it means I score a 15-point 2nd turn and am able to keep them over there out of sight all game, taking enough shots at his Razorback to kill it. On the other side of the table however, things don’t go so well – the Grandmaster Dreadknight spent all game getting great saves, and managed to survive three turns of being knocked down to only 1 wound (and then healing back 2D3 with the techmarine). Rick’s attempt to drop a Callidus and his Terminators deep in my lines doesn’t go as well as he’d like, and I’m able to wipe those out without dealing with their charges thanks to the Deathshrouds. His big teleporting blob gives my Blightlords fits however, and he’s able to kill the Daemon Prince to score 4 points on Assassination. Ultimately however Rick’s slow play (and admittedly I could have gone a bit faster) catches up to us and we’re only able to finish three turns, though I intentionally refrain from rushing to start my fourth before time expires – that shit’s just bad form in my opinion. At the end I have 3 points for Assassination, 6 for spread the sickness, plus another 10 for To the Last and 25 on Primary to Rick’s 10, plus 7 for Assassination and 15 for To the Last – he ended up with nothing in my deployment zone. Another round or two and I think Rick might have pulled this one out, though I’d have likely been able to keep scoring 10 and max out primary, plus put another spread the sickness marker down with the plague marines and kill his dreadknight, so he’d have to beat 76-81 points, depending on whether he could kill my Blightlords.
Still, Rick was fun to play and I’d definitely play him again. We caught up again several times during the event and I was happy to find out he ended up finishing 3-3, with a 100-point win against Dark Angels right after our game.
Result: 54-46, Win
Round 2: Clay Mullins’ Space Wolves
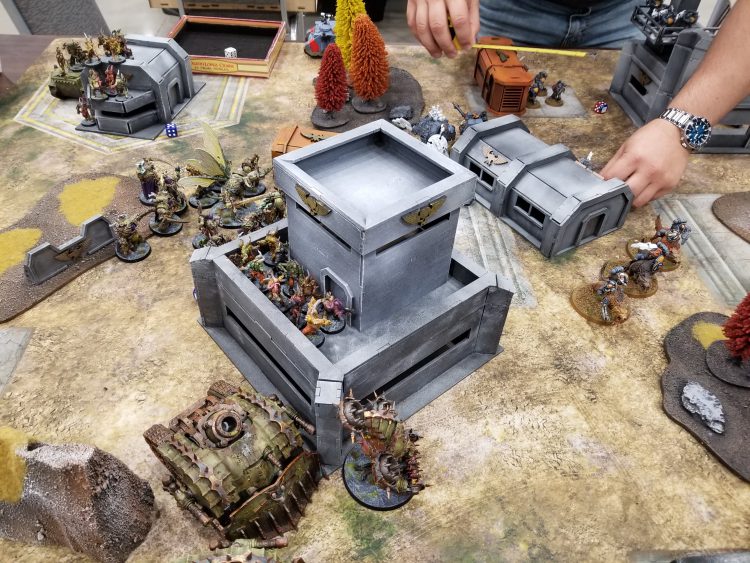
Clay's Space Wolves - click to expand
The Mission: Priority Targets
My Secondaries
- Despoiled Ground
- To the Last (Blightlords, Plague Marines, Daemon Prince)
- Priority Targets
Clay’s Secondaries
- Engage on All Fronts
- Warrior Pride
- Priority Targets
Another super swell guy, Clay’s brought a Space Wolves list that looks like something out of 5th edition, but it’s got surprising chops in 9th as well, where the Thunderwolves and Wulfen Dreadnoughts can give it some real punch and the Long Fangs can get the drop on unsuspecting opponents. That said, I’m not too worried about it – Death Guard are very good at killing space marines and the plasma guns are all but worthless in this matchup. If I can get first turn I can try and take out the rhinos and force him to split up his army crossing the table, and if he tries to engage my Blightlords at mid-table it’s not going to end well for his Thunderwolf Cavalry. The mission is Priority Targets, so that’s a free 15 points to score for that secondary, but with only five objectives I’m not wild about Spread the Sickness here so I take Despoiled Ground as my third secondary. It works out, but I definitely should have found a better alternative.
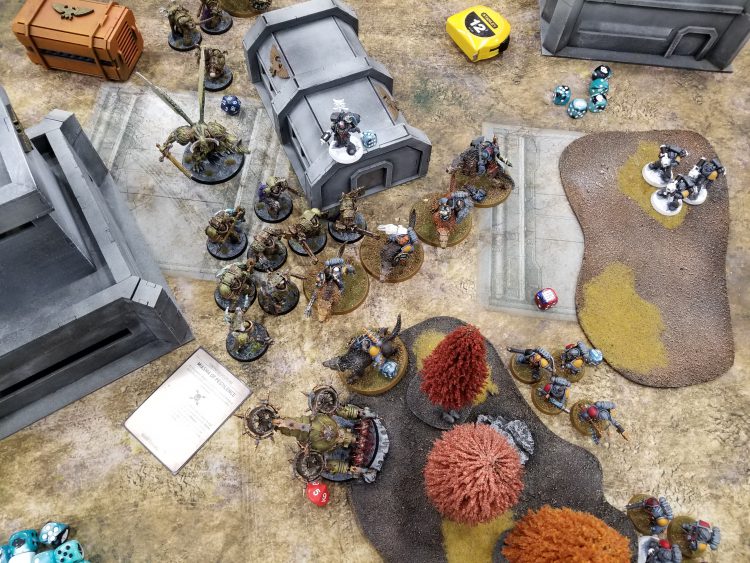
And that’s pretty much exactly what happened. I got first turn and proceeded to blow up one rhino full of meltagun-toting grey hunters, and used the PBCs to decimate his Long Fangs. The Plague marines get an early charge off on the other Rhino, essentially trapping it in place and wrapping it for a turn until they could destroy it and force the passengers to lose 2 models making an Emergency Disembarkation. Meanwhile at midtable the Thunderwolves took out my Fleshmower bloat-drone but were wiped out by the Daemon Prince and Blightlords while the PBCs and Deathshrouds took care of the Wulfen Dreadnoughts. This one was over by turn 3 and with free reign of the board and two turns to move, maxing out Despoiled Ground was easy.
After the game we talked a bit about what Clay could have done differently. His options in the matchup aren’t great but I suggest Outflanking some of the Long Fangs so they can drop in and surprise an opponent, while taking advantage of his speed to play keep away from my deadliest units. and avoid getting tangled up in a blob at the middle of the table. Hopefully it helped out – Clay ended up going 4-2 and beating Death Guard in game 6.
Result: 100-26, Win
Round 3: Peyton Preece’s Drukhari
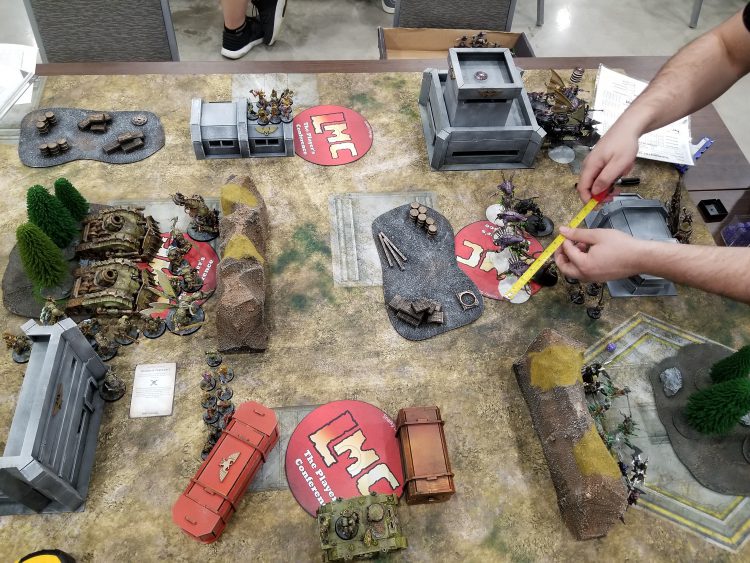
Peyton's List - Click to Expand
The Mission: Battle Lines
My Secondaries
- Despoiled Ground
- Grind Them Down
- Assassination
Peyton’s Secondaries
- Herd the Prey
- Retrieve Octarius Data
- Assassination
This is probably my biggest regret of the event – it was a winnable game for me that came down to the wire and was closer than the final score indicated, but I made some major mistakes that really cost me the game. The first of them was taking the Despoiled Ground secondary. I overestimated my ability to keep specific units on the table late-game and was riding high on it from the prior game and as a result, didn’t put enough thought into how I’d score it beyond just focusing on the smaller number of objective markers to get into Contagion range. I ended up blanking on it when with some better play I could have ended up with 4 points on it or just have taken Raise the Banners High and done more there. My other picks were fine; Grind Them Down tends to be a much better pick against Drukhari than To the Last because they’re often able to kill anything they set their minds to but the army’s low toughness means I can usually get good trades in terms of raw unit counts, even if the points are uneven. Assassination was also a fine pick as even though Peyton only had 4 characters, 13 possible points with a Warlord kill is a good total to strive for and once I get in with the characters I can usually finish them off. Plus there wasn’t much else good to pick from.
Otherwise, this mission is a nightmare for Death Guard taking on Drukhari. Because there are only four objectives it’s trivially easy to blank a player on primary with good mobility, or hold them to 5 points and because it’s hammer and anvil deployment with only one “home” objective marker I have a loooong way to go to even get my hands on the ones at mid table. I end up going second against Peyton and while his first turn doesn’t see him doing a ton of damage, it does put me behind. The biggest issue is that, through some good hiding on Peyton’s part and some bad rolls on my part, I can’t get a single unit kill on T1, ensuring I won’t be able to max out Grind Them Down. That’s not great!
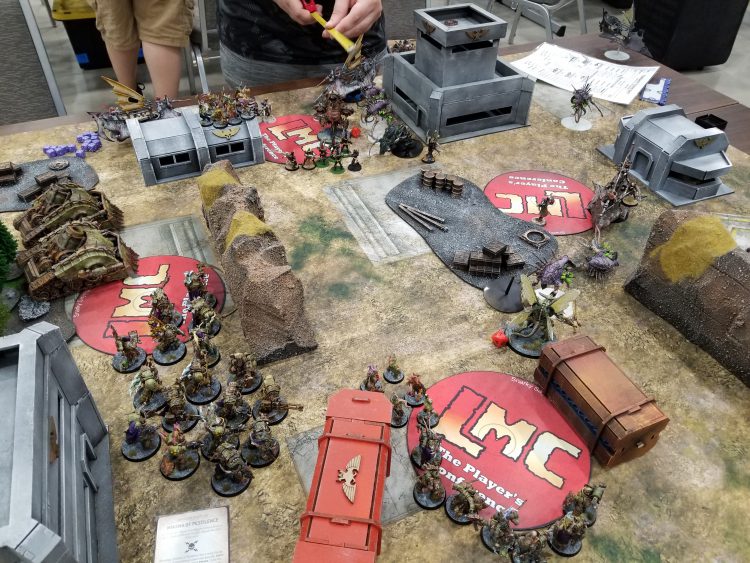
Even with the mis-pick on the secondary, I’m comfortable playing against Drukhari and I make a good game of it. There’s a lot of back and forth until the late game, when I’m finally able to push forward to the middle of the table and get stuck in with Peyton’s Incubi, Cronos, and Archon. The Daemon Prince unfortunately eats it on turn 5, but not before I’m able to take out most of his threats in the middle of the table. Unfortunately a well-timed charge of Wyches blanks me for one turn on primary (I ended up scoring 35 total), and I’m not able to recover well, though I do manage to clear them off. The game comes down to a couple of decisive turn 4 charges that I fail repeatedly to ensure Peyton scores 15 on primary on turn 5 and leaves me with 0 points for Despoiled Ground. The final score has Peyton winning 83-64 but with a successful charge and a bit smarter play on my part and that could have been an 80-77 win, as I’d have netted out +8 points from Despoiled Ground, +3 from Grind them Down, and denied Peyton 5 points on Primary. That said, Peyton also played a smart game and made the most of a list that only started with 5 VP. This was a game I feel like I could have won, but Peyton absolutely took advantage of my errors to get the win. He ended up going 5-1 and making the top 8, and it was well deserved.
Result: 64-83, Loss
And that put Day One in the rearview. I’d have been happy with 3-3 at the event, so going 2-1 on day one had me over the moon. Did I want to start 3-0? Sure. Was I also glad that losing had taken all the pressure off me to win games 4-6? Also yes. At this point I was a bit ripe from the day’s games, so I hit the room and took a quick shower. Note: I cannot stress how important it is that, as a dude, you occasionally smell-check yourself during the event and, if necessary, take a trip back to the room to re-apply deodorant. Don’t be the dude where people remember how you fuckin smelled.
After the event I met up again with Don and Mark and Alfredo “Bonds0097” Ramirez, who was there for the Star Wars Legion tournament starting the next day. Don’s in the mood for bar-be-que and while Dallas doesn’t have an amazing bbq scene – particularly up in Allen where the event is being held – there are a couple places close by. Unfortunately we didn’t pay any attention to what time it was so we went to the closest place we could find afterward, an Italian place that was on the way back to the hotel. Reader, I’ve lived in Italy and New York and New Jersey and trust me when I tell you: There is no good Italian food in Texas. There’s a ton of great cuisine from everywhere else – I know some great ramen joints and some good places to get pho – but when it comes to Italian food, the best you can do is maybe some OK pizza. The place we ended up at wasn’t bad, necessarily, just real mediocre. To give you an idea of the kind of Italian place this was, please note that they did not have a Caesar salad on the menu. Just no option for it. Fuckin amazing.
We stay up a while longer but I end up crashing around 11, giving me the rare night of decent sleep at one of these events.
Day Two
I may have won games on day two but trust me when I tell you it was not nearly as much fun as day one. This is because I spent most of the day looking for my cellphone and thinking about how it was likely stolen.
Round 4: Nathan Hayot’s Death Guard
Nathan's Death Guard - click to expand
The Mission: The Scouring
My Secondaries
- Raise the Banners High
- To the Last (Daemon Prince, Blightlords, Plague Marines)
- Assassination
Nathan’s Secondaries
- Assassination
- Engage on All Fronts
- To the Last (Plague Marines, Plague Marines, one PBC)
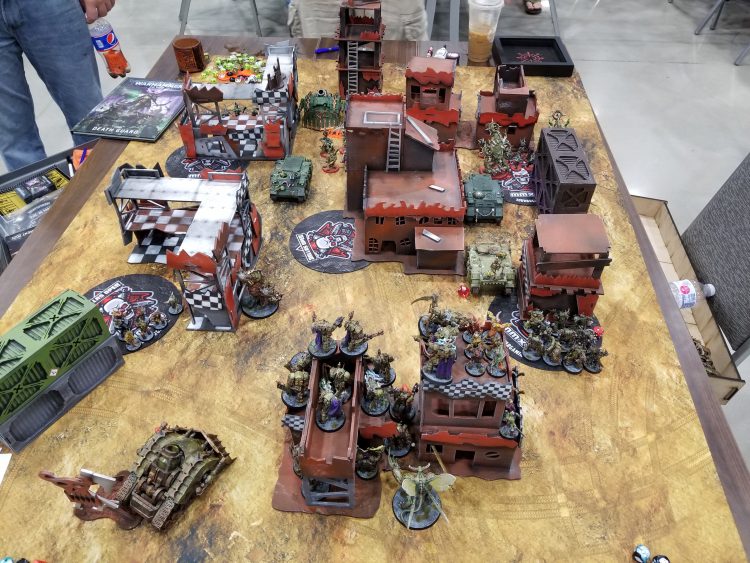
This game, against a Death Guard player Don had beaten in the final round of day 1, looked a lot like a mirror match. The good news is that going in I knew a few things to expect about that – Plagueburst crawlers trade terribly with each other, so my plan was to ignore his PBCs completely and focus on taking out the two squads of plague marines he’d nominated for To The Last and hope they lasted long enough to make him regret spending all game shooting mine. I had some help here in that I had both parked on a piece of dense terrain, which should have helped deflect a few shots and prevent them from getting blown off the table immediately. I say “should have” here because pretty much from the jump everything went badly for me in this game. I went second and lost a PBC on the first turn to his PBCs, which never missed a single shot all game. The PBC then exploded and took a chunk out of everything around it. Still, I was in a decent position as I pushed forward and put up banners and blocked his Rhino full of Plague Marines from moving forward. Half the table was in melee turn 2 and the other half got there on turn 3. It was a slow game, not helped by my opponent. I don’t think I was intentionally slow played by anyone during the event, but where the first game’s slow play didn’t work out for my opponent, this game it did and I ended up losing when I only got three scoring turns to his four. The clincher on that was just some abysmal luck trying to push wounds through on his daemon prince and biologus putrifier, who kept making 5+ and 6+ saves against all odds. This is the game that convinced me to finally become a Chess Clock Guy.
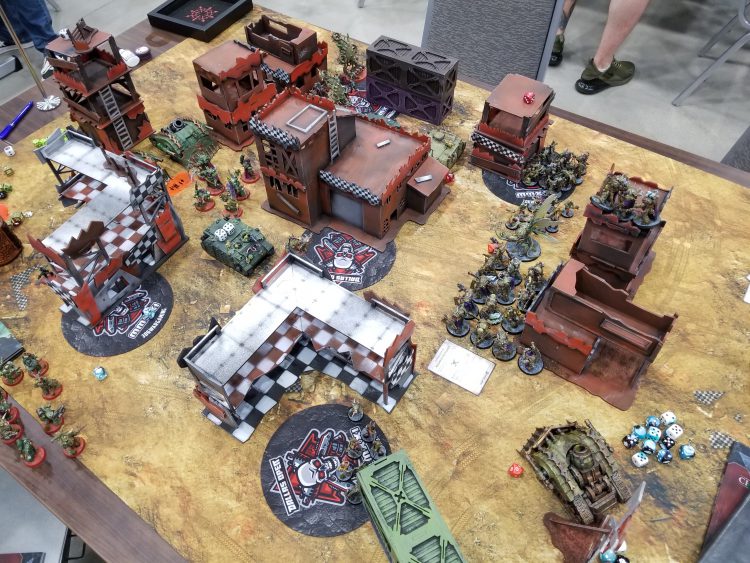
A no-good, very bad game and it wasn’t helped by the Scouring, one of my least favorite missions – it has no home objectives and only five to work with (making a few secondaries worthless), plus the control 2/3/more on a 5-objective map means lots of low scoring games for primary. We end the game 46-38 in the middle of his fourth turn, denying me the ability to score another 10 primary points and kill off a number of characters sitting on one wound. Oh well, 2-2 isn’t the end of the world.
Result: 48-56, Loss
Round 5: Justin Randolph’s Harlequins
Justin's Harlequins - Click to expand
The Mission: Retrieval Mission
My Secondaries
- Minimise Losses
- To the Last (Daemon Prince, Plague Marines, Blightlords)
- Assassination
Justin’s Secondaries
- Engage on All Fronts
- Raise the Banners High
- Grind Them Down <— this was a huge mistake
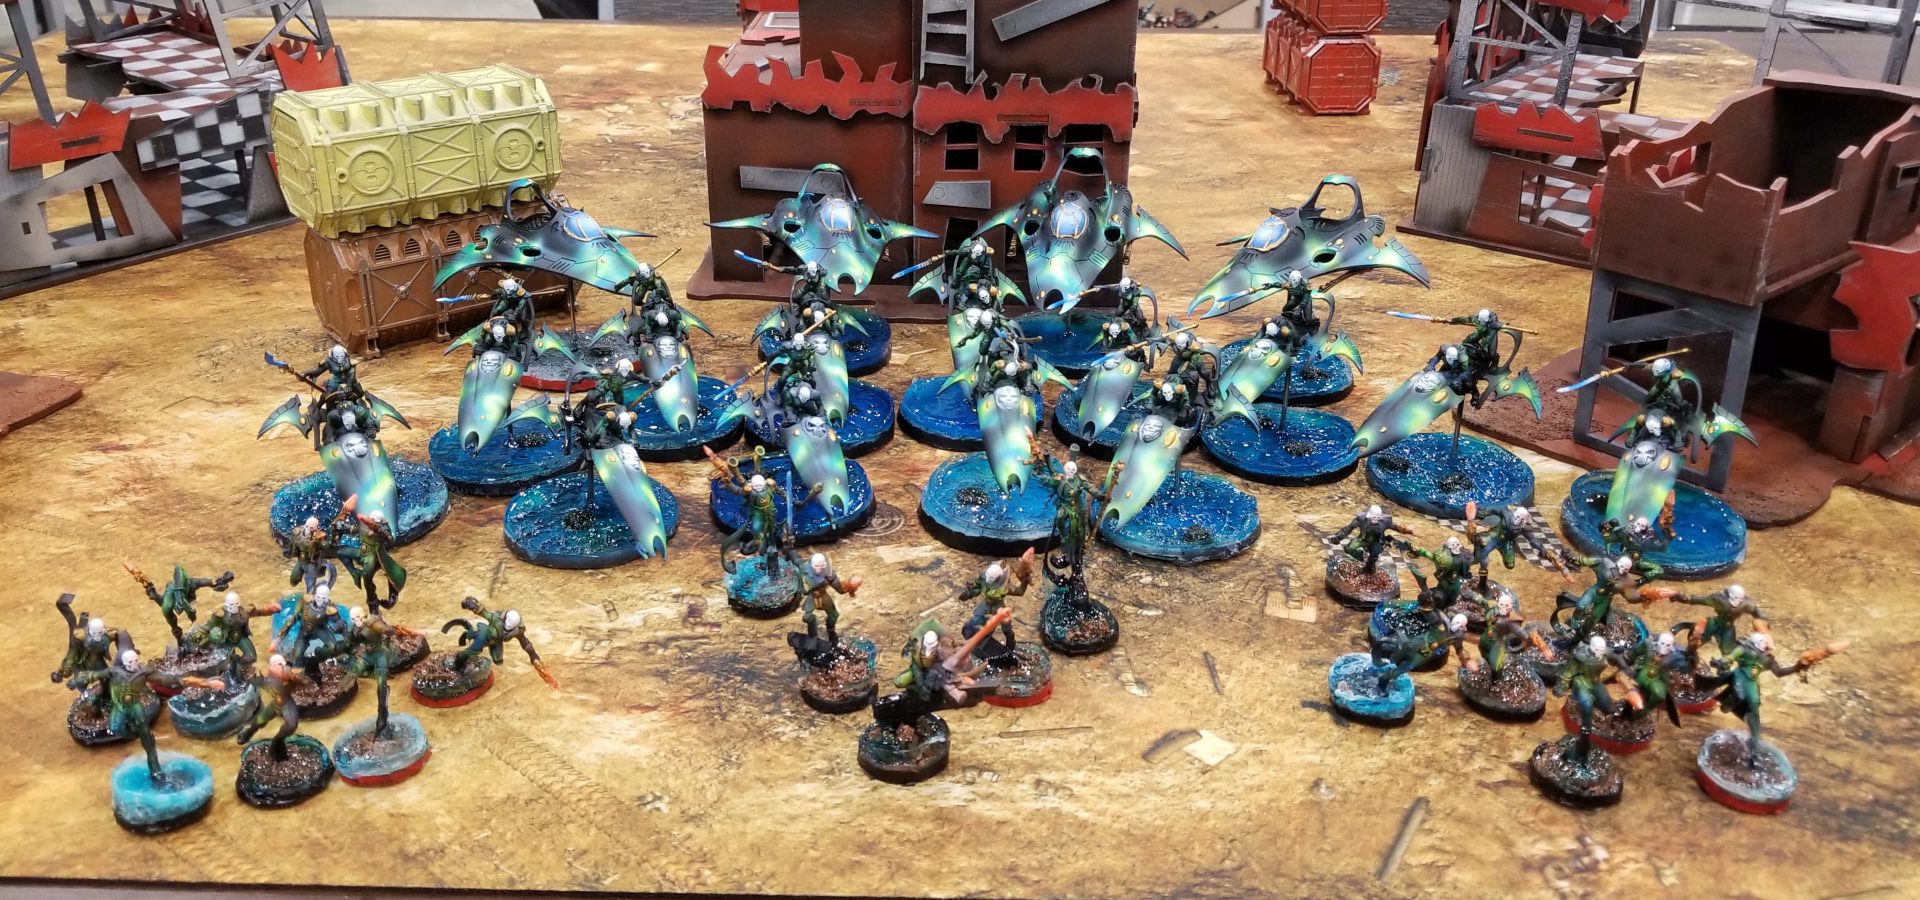
OK at this point I’ve only got army photos to show off because right after deployment in this game I went to the restroom and my phone just completely disappeared. I notified the venue but I still needed to finish my game and, after doing as thorough a search as I could afford with the time I had, just gave up and went back to the game. Also, lest you think I’m a slow player after seeing two of my games go to time note that I took a bathroom break after deployment in this game, then spent 15 minutes looking for my phone, and we still finished the game with an hour to spare. But I digress – phone or no, this game was a bloodbath. There just wasn’t much the Harlequins had, outside of haywire, that could really threaten me, and even then the haywire was only really a threat to the fleshmower and PBCs, the latter of which weren’t likely to be visible targets on turn 1 (and weren’t). I went second and even going second all Justin could manage was to blow up my Fleshmower. The problem that Harlequins have is that getting close enough to blow up Death Guard also means getting close enough for Death Guard to charge you, at which point they’ll just cut through your army with ease. I wiped out most of Justin’s jetbikes and two Starweavers on the first turn, then took care of the rest on the second turn. I wasn’t really able to table him though, owing to the Death Jester and a Shadowseer being able to hide way back on the far end of the table, but I came pretty close. Minimise Losses was a big score here since I think I only lost the Fleshmower and a few infantry models all game.
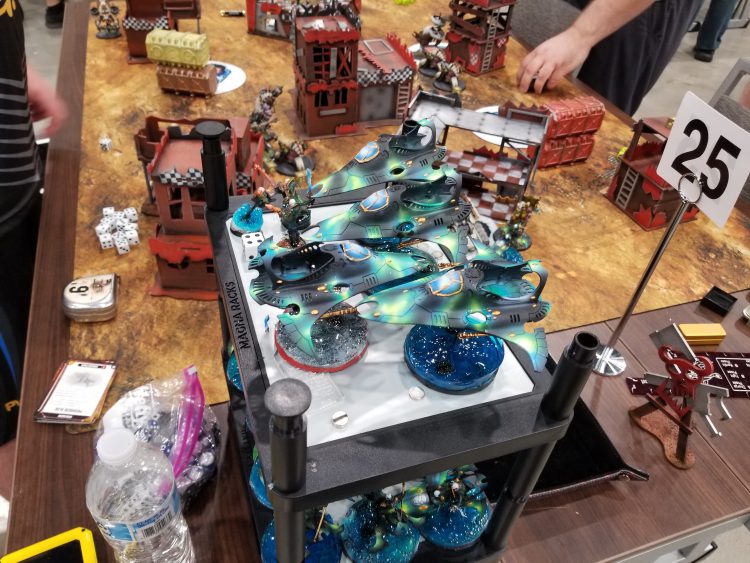
Justin was a great opponent and helped me look for my phone. He also had a very pretty Harlequins army that he’d come down to the wire painting, only finishing right before the event. The water bases on them came out great and I was glad Justin was able to make it to 3-3 by the end of the event.
Result: 90-47, Win
At this point I was 3-3, which was great, but had no cellphone, which was bad. In part because I had no way of seeing what table my next game was at. In between games I went back to my hotel room to hop on my laptop and let the missus know the phone was missing and that she’d need to have it deactivated. It was also at this point that I realized that all of my photos of the event so far, plus the photos I’d taken of our son this year, were on that phone and not backed up. Which sucked ass. Also, I have no way of calling an Uber tomorrow to get to the airport. Fortunately, Alfredo was more than happy to volunteer on that front, cause he’s just Good People. I check another dozen times for my phone, including with the event staff, but nothing turns up. Calling it goes straight to voicemail, which is a bad sign. I resign myself to having to buy a new phone.
Round 6: William Ivey’s Astra Militarum
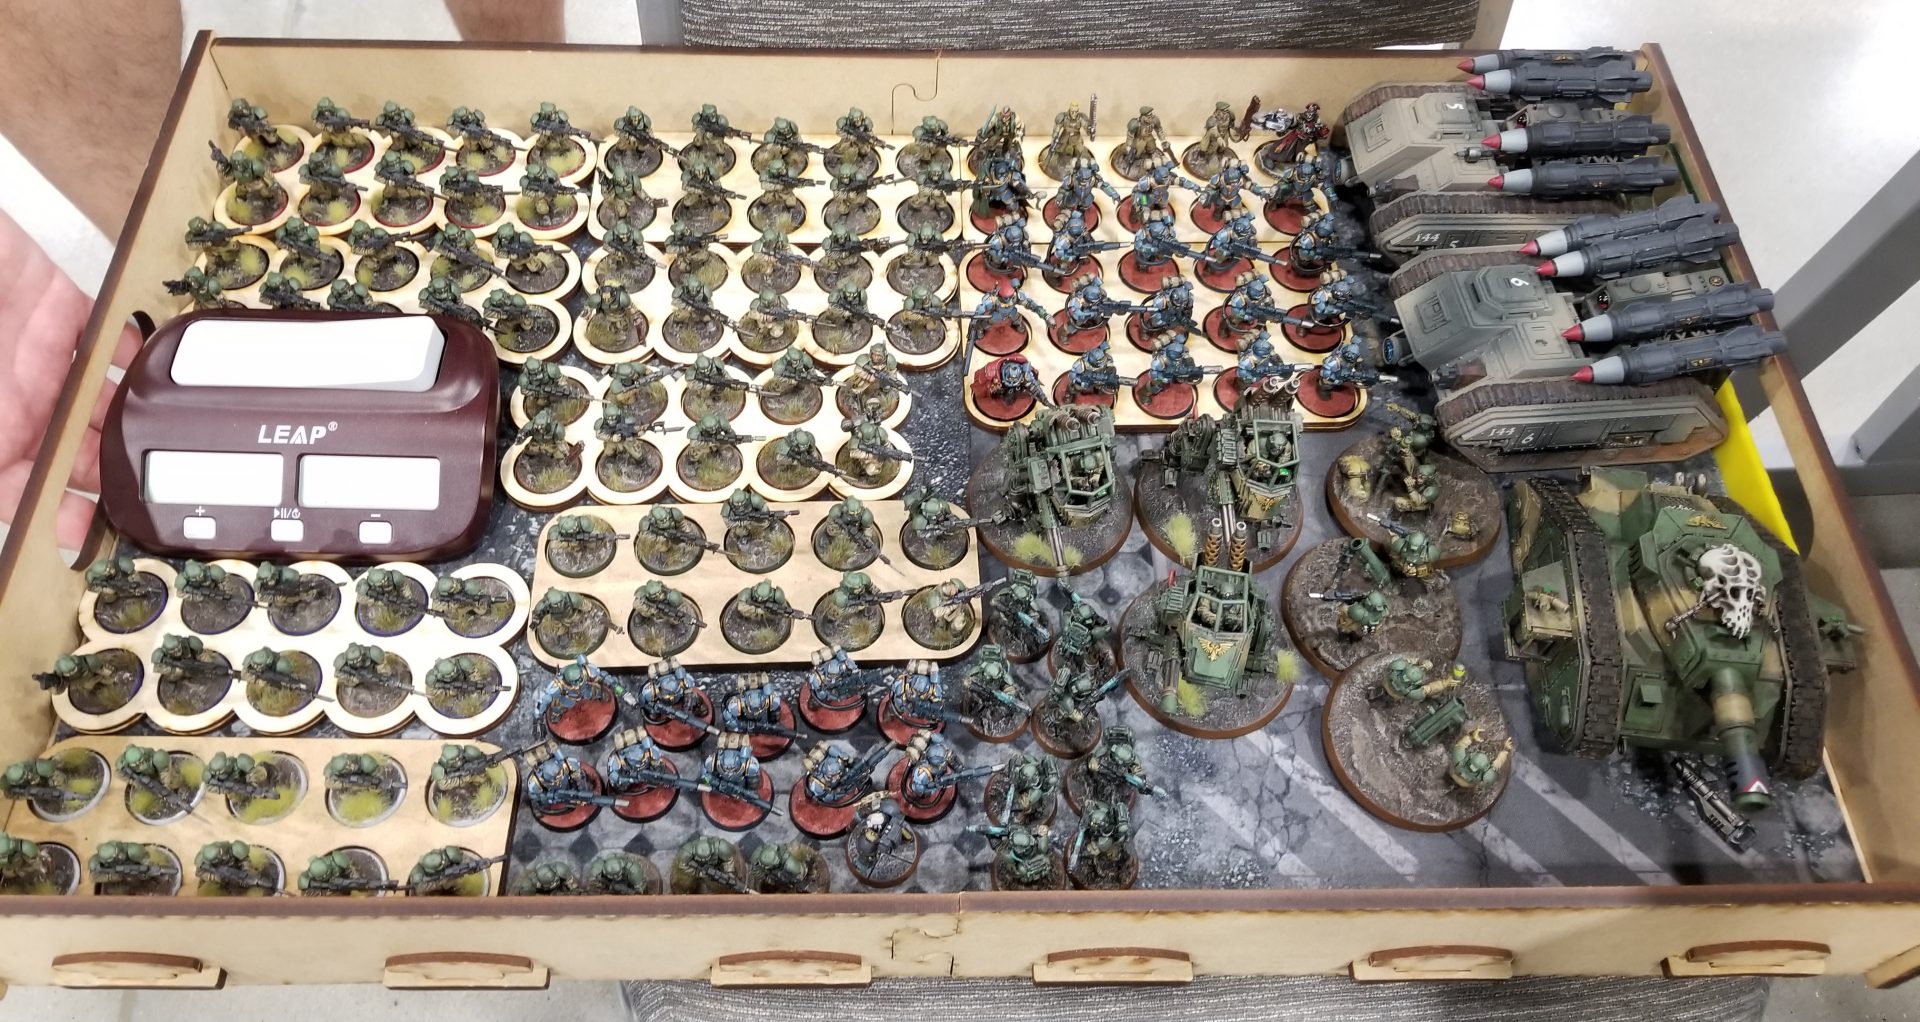
Will's Astra Militarum - click to expand
The Mission: Retrieval Mission
My Secondaries
- No Prisoners
- Assassination
- Spread the Sickness
Will’s Secondaries
- Engage on All Fronts
- Raise the Banners High
- To The Last (all three tanks)
Alright, the final game. This one determines who goes home triumphantly 4-2 or merely feeling adequate at 3-3. I’d have been happy with either, but I can already tell looking at Will’s list that I’m gonna win this game – he’s running a very similar list to what I’ve seen Scott Horras “Heresy” bring in our games several times now and I haven’t lost one of those, either. There’s some real threats here, sure – the Full Payload Manticores can be pretty nasty and they’ll use Vengeance for Cadia to drop some real nastiness on you – but they basically have to spend time taking out the Poxwalkers and the Plagueburst Crawlers, which means the rest of the army gets time to do its thing and get dug in. This is also one of the rare times you’re rewarded for just blowing through chaff, since every model you kill is 1/10 of a victory point. Guard aren’t quite as bad off as they were now that they don’t give up “Thin Their Ranks” and Bring it Down every game, but I can still max No Prisoners here and I’m aiming to do it, plus Assassination will do fine as a substitute since he’s got so many very squishy characters.
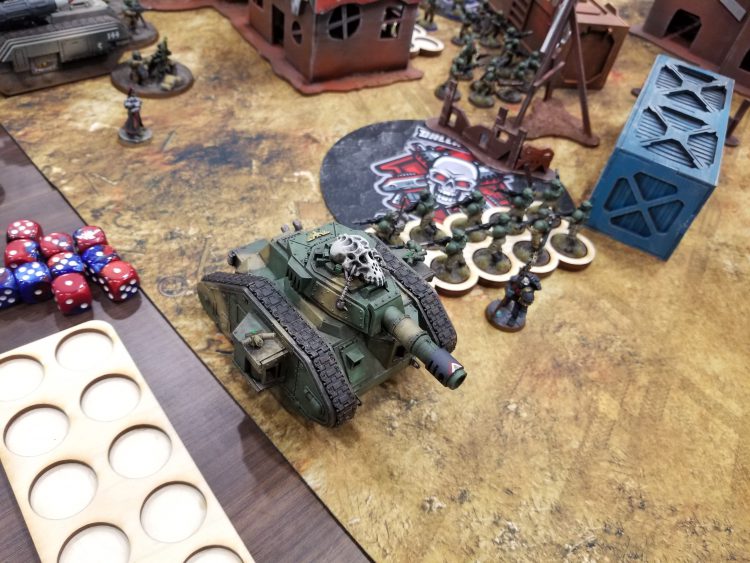
This time I get first turn again and I’m happy to take a few shots before things kick off. I get really lucky with a t1 shot on his Leman Russ with the Plagueburst Crawler’s Entropy Cannons that takes it out, but I think I make up for some of that with some abysmal shooting on the Manticores all game, who’ll survive to the end. The good news is they aren’t able to wipe my poxwalkers out entirely and I’m able to spread the sickness to all three objectives on my side of the table before he starts threatening those objectives with guardsmen and Tempestus Scions. Meanwhile I get the Fleshmower into his deployment zone on Turn 2 (it missed its T1 charge) and start shredding things up, plowing through guardsmen and eating them to regain wounds lost from shooting. This makes it a bit of a nightmare for Will and it scores me 6 points for Assassination killing his Astropath and Priest. Meanwhile the Blightlords walk across the table with the Daemon Prince and wipe out his Warlord and the Tallyman spreads the Sickness to another objective. It’s not without cost, though – Will collapses my right flank and takes out the PBC there and I’m never able to kill his Manticores, I just end up chasing him around the table clockwise. The Manticores can only shoot four times though so it’s not *that* critical, even if it means he keeps 10 points for To The Last. Scorched Earth is like the opposite of The Scouring in that it has 6 objective markers but scores primary for hold one/two/more, so it’s nearly impossible to score fewer than 40 points for primary on the mission. Still, I score 13 for No Prisoners, 13 for Assassination, and 12 for Spread the Sickness and that puts me at a comfortable 88 points.
That win puts me up 4-2 and while I make a mental reminder to thank Scott for inadvertently teaching me how to play against Guard, I’d also like to note that Will was a great opponent and was a big part of what made that last game my favorite game of the six.
Result: 88-77, Win
After the game, I grab sushi with Alfredo for dinner and lament the loss of my phone. If you’re wondering how I got these photos, well, I went down to check with the TOs again the next morning and someone had (thankfully) turned it in. To whoever found it: Thanks. That made my whole weekend. Seriously the difference between a great weekend of fun games and a miserable one where going 4-2 couldn’t make up for losing my phone. I skipped the RTT the next day but it looked like a lot of fun – though I did stop by to watch Justin get horribly beat by Don’s Epidemius-and-vehicles Death Guard list. RIP, Justin. Alfredo won his first game of Legion at the event in game 1 of the day two Losers/Redemption bracket, then dropped and we grabbed lunch before heading back.
All in all, it was a fun time. Not the full on “nerd summer camp” of NOVA 2019, but still an enjoyable time and unlike NOVA I felt much more on top of my shit game-wise this time. I still made some bone-headed mistakes during my games and forgot some things that would have helped, but I was a contender in every game I played and had a few moments I’m reasonably proud of. I think I also scored well enough to boost the Team Goonhammer ITC score, which is something to feel good about.
Alright one event down, five more to go.
The Aftermath: Lessons Learned
OK so with all that behind me, what did I learn? Well, I got a great deal more experience playing the army, and against some opponents I’d never played with Death Guard before – the mirror match was all new, and I’d never played Harlequins or Grey Knights with Death Guard. Generally speaking, here are some of my notes:
- The Reaper Autocannons were a real value-add. I mostly put them in the army because I didn’t have enough combi-bolters but overall I’m really happy with the Reapers’ performance. At 4 shots apiece and AP-2, they’re perfect for taking out a lot of targets and for only 5 points they’re well worth the cost, plus they worked in the mirror very well. I’m going to keep them in the list, and I think they’re a big reason to look at blightlords over Deathshrouds. The Deathshrouds were fine, but at no point did I feel like I really wanted a second unit of them. On that note…
- The Plague Marines were also a solid include. The Plague Marines did very well and survived every game in which they were a key unit for the To The Last secondary objective. That’s key because I feel like they’re both more resilient and more versatile than a unit of Deathshrouds at this point, and that’s good because my Deathshrouds still haven’t arrived. Even when they do I think I may stick with the Plague Marines. I’m 50/50 on whether I want to take out the Sigil of Corruption and the Power Fist, though. It’s 20 points I can spend on some extra Poxwalkers, though putting them at 11+ models for blast isn’t ideal, or to swap out the Putrifier for something bigger. The Sigil is interesting for taking on vehicles, where auto-wounding on 6s to hit can help push through extra wounds, and the power fist likewise is there as a back-up, but I find I end up using the champion’s knife more often than not.
- Despoiled Ground just sucks. I already knew this but I managed to re-confirm it for myself during the event. I’m not taking that secondary again. It’s just too “win more” for Death Guard. What I should have done instead on missions where Spread the Sickness wasn’t viable as gone hard on Banners and used the Tallyman and Biologus Putrifier as my banner units, since their abilities can still be used while raising banners and they don’t have much else to do otherwise. Going banners probably wouldn’t have saved me in game 3, and there I might have been better off with something like Psychic Interrogation, since there were plenty of characters to throw it on and the Plaguecaster never really got into range to go off with mortal wounds. Generally speaking I could have put more time and thought into my secondaries overall. Most of my picks were good but there were a few times I just felt lost picking a third secondary when Spread the Sickness wasn’t a good option and it’s on me to iron that out before I get to the event.
- Be more aggressive about taking an opponent’s objectives. While I certainly need to avoid outkicking my coverage with the Daemon Prince – something that got me into trouble a couple of times – I also needed to try and play more aggressively with the Rhino full of Plague Marines. Some of my stronger games were when I was able to push them across the table early, though admittedly that was only something I was able to do on missions with Dawn of War Deployment. Still, something to watch out for, and it should also help inform when I use To the Last vs. Grind Them Down as my secondary pick.
- Be more proactive about using the Foetid Virion for doing actions. Something I wasn’t really mindful of early was that the Putrifier, the Tallyman, and the Blightspawn are all more than capable of raising banners in the Poxwalkers’ stead, and likewise good vectors for Spread the Sickness late in the game. They’re often not doing much except walking forward with the CORE units early on and being able to use them for Banners (and then use the poxwalkers for holding) on missions where I’m not taking Spread opens up a lot of flexibility for me.
- In the mirror match, ignore the PBCs. I mean, not entirely, but generally speaking I think this was the right call. The PBCs can’t do splash damage to NURGLE units with the Disgusting Force Stratagem, and otherwise they’re bad at trading with PBCs. There will be other, more important targets to take out.
- Maybe the Daemon Prince can come out. I like the Daemon Prince and I like my conversion for him but he’s always underwhelming. As a source of re-roll 1s for CORE units he’s fine, but he’s expensive for that and locking him into a Warlord Trait and a Relic means I’m giving up a lot to take a model that all too often rolls a bunch of 1s on his 2+ to hit rolls. Additionally he’s more of a front-line fighter and while that’s helpful, making him my Warlord means he’s worth 4 points on Assassinate and because he’s 185 with wings, he’s the third unit I have to pick for To the Last. This is a problem when I want to run him out and get him stuck in – depending on the mission killing him can be worth as much as 9 Victory Points, which isn’t ideal on an 8-wound model with only a 5+ invulnerable save. Yes, the psychic power helps and yes, Rotten Constitution is a bonus, but there’s just too much AP-3 coming his way for the combo of Rotten Constitution + Supparating Plate most of the time. I’m thinking that I can instead drop him in favor of a Lord of Virulence, who can then be given the Arch-Contaminator Warlord trait and the Virulent Fever Deadly Pathogen to pack a nasty punch while being able to give my guys all the re-rolls they need. Doing this also opens me up to put Gloaming Bloat on the Foul Blightspawn and gives me another 40-60 points I can play with. That can be a squad of Cultists for doing more actions, I can add a Plague Surgeon, or I can swap out the Fleshmower for a third PBC. Not entirely sure yet.
- Get in some more practice games against Admech and Sisters. I didn’t run into either during the event, but I don’t have a great mental plan for how to deal with either faction at the moment. Enriched Rounds would still absolutely shred my shit, and I don’t have a great notion of how I’d play against the new Sisters book as I haven’t had any games against them yet. While neither faction is still super popular I’m bound to run into them in a competitive environment eventually, particularly if I start 2-0 or 3-0 at an event.
- Get a chess clock. That’s happening now. I’ll get used to playing with one and make sure it comes with me to the GHO. If someone wants to spend their clock looking up the rule for Objective Secured to discover they’re wrong about how it works when two Obsec units are on the same objective, they can do that on their time.
What’s Next?
That’s a good question! After this weekend’s games I’m not sure I actually want to adjust the list much. I really liked how the army played and what the big squad of plague marines brought to the table. Plus I’m not sure I need a second unit of Deathshrouds. So while those are (theoretically) on their way, they may not be what the army needs. That said, the Thousand Sons are also just around the corner and if it looks like there might be some play there I’ll give them a look. I have some painting to do before I can field them, however – I currently have Magnus, a Helbrute, a Rhino, and two squads of old metal-and-plastic Rubric marines painted for the army, so setting them up to actually play when their codex releases will mean doing some real work. I don’t have any other painting going on at the moment, so that’s probably where I’m going next, given I have all those models in my backlog. So next time I’ll be painting those and getting in more practice games with my Death Guard.
Have any questions or feedback? Drop us a note in the comments below or email us at contact@goonhammer.com.

