
As has become semi-traditional, today we’ve got a guest tournament report from a Goonhammer Patron who brought his T’au Empire army to the latest Goonhammer Open UK. Let’s find out how things went for Oliver at the event.
I’ve been playing T’au competitively for about 18 months since my first GT at the tail-end of 9th. I’ve established myself as a solid lower-mid-table player with a succession of 2-3s, a 2-2-1 and a 3-3 at the previous GHO UK in March.
I had been playing Mont’ka to some success after the codex dropped – I managed a 3-0 run at an RTT and won a series of friendly games – but I never felt comfortable with it. I took a Kauyon net list with no reps into an August GT, and returned my usual 2-3 but felt even less good about it. Without the giant, now Legends-ed, crisis CIB brick, and with a new mission pack, I was all at sea.
Rather than throw it all up in the air for GHO, I decided to tinker with it. The net list was a variant on the Farsight in Plasma City lists that have been popping up recently and these lists tend to be very lean. 2 Crisis units with Commanders, 3 Riptides, 2 tanks, 2 Breacherfish, Pathfinders, Darkstrider and 3 units of Stealths. OK, lean for 10e T’au at least. If your screening isn’t tip top, it’s very unforgiving – and as my record suggests, probably I’ve not quite mastered that yet.
So I needed a bit more mission play redundancy. Out went a Riptide and in came Shadowsun and 10 Kroot Carnivores. My other choice was the tanks. I went railgun on the Hammerhead rather than ion because the mid-tables will always contain someone running more hulls/monsters than you can shake a stick at; but kept a Sky Ray because I only had 140 points left to play with. I got a single practice game against full Accursed Cultists Chaos Cults, speed-painted up my minor Shadowsun conversion and I was ready to go to Leicester!
A quick shout-out here to my military adviser, Jamie Wates, who is both an excellent person and 40K player, for jumping on WhatsApp to give me tips and tricks ahead of every one of my games.
Army List - Click to Expand
The plan: use the Kroot, Pathfinders, Devilfish and Breachers to secure one flank and stall out the other until turn 3. The Fireknife units will start in reserve and ideally rapid ingress in to create overwatch opportunities (no one wants crisis will full rerolls to hit and sustained 1 overwatching them as they try to charge kroot) and then we simply blast away until nothing moves on the other side.
The goal: I’m a realist. I know I don’t have the reps in to push into the top tables, there are some very very good players at every event in the UK. So a repeat of my March 3-3 result would be great but I’d take a 2-4 as long as I felt like I’d given at least some opponents a proper challenge.
Round 1: Luke Townsend’s Adepta Sororitas
![]()
![]()
Matchup
Mission J – Linchpin/Raise Banners/Search & Destroy
List
Army List - Click to Expand
The Game
Oh jeez. I walked into this knowing that Bringers of Flame Sororitas was the current meta monster but with zero actual experience playing into them. I knew they were fast, shooty and could ignore randomness whenever it really suited them. Then I had a chat with Luke at the start where he casually dropped that he typically hits 4-1 at GTs and I knew it was going to be a tough start to the day.
Linchpin is basically Take and Hold with built in Defend Stronghold; and search and destroy at least let me keep a fair way away from the hyper-violent nuns to start with. I set up using my infiltrators to turn this into a bit of a Hammer and Anvil deployment. The Hammerhead joined the Crisis in reserves. Luke popped all his Seraphim, Arco-flagellants and Vahl-gons in reserves, everything else in his castle except for two Immolators he put on the line full of Dominion mini-squads. Scary. I don’t know what I wanted here but probably to go second so I could hide my scouts and force him to make the first play. Instead, I go first.
The Kroot scout forward to sticky the centre objective, Darkstrider’s fish scooted behind the central ruin and the Pathfinders pushed forward into the same ruin. One of Luke’s Immolators was able to tuck into his central ruin safely but the other was left a little out in the open, only partly able to get behind the home ruin.
Turn 1, I draw Assassination and Recover Assets. I make what quickly turn out to be some bad choices. That lone Immolator was tempting so I leaned one Devilfish out from the home ruin and the other right up in its face. They sling their Seeker Missiles at the Immolator and of course 1) fail to kill it and 2) let him play the strat to jump out his Dominions and strafe the close Devilfish with meltas. Whoops. Luke sends out his first wave of Immolators and nuns with guns and picks up both Devilfish, the Kroot, most of the Pathfinders and tags the rest up with Dominions.
I’m on the back foot so I have to push back but it’s only Turn 2. I stick out the Sky Ray and one Riptide, bring on the Hammerhead down the bottom in my castle but just poking out, and drop the Coldstar Crisis team in on my north NML objective. What do I not do? Think about his Rapid Ingress. Vahl and her posse swan in safely just out of sight of my Crisis but very much in danger close range. I clear out a unit of Dominions and kill the already wounded Immolator but am not able to do much else. Turns out Bringers of Flame Sisters only need half an excuse to hit the big red button and Luke slams it bottom of 2. The Vahl-gons waded through a fairly half-hearted overwatch from the Crisis to completely murder them; the two remaining Immolators both drove onto the central objective and dumped out Dominion mini-squads. I rapid ingress Farsight and squad to position to kill the Vahl-gons next turn; but the big event was midboard where the melta–toting sisters blew up the Riptide with the explosion picking up both mini-units of Dominions and scattered mortals all around the rest of the blob. The Sky Ray also went down and I was pretty much cooked.
The rest of the game was a formality – Farsight and Breachers took revenge on Vahl and crew and I killed a random Castigator but I could only score 14 points from T3 onwards. Luke is an excellent player and made zero mistakes in the simple task of mopping up and scoring points.
What should I have done? Well for starters, played way more cagily. But also I’m willing to give myself one ‘out’ per event and here, playing into a very strong army piloted by a very good and experienced player, I decided to cash that chip right away. C’est la vie and all that. Luke was a great opponent (I’m gonna be saying that a lot but it’s true) and he ended up with a 4-2 record, with losses to the eventual 1st and 3rd place finishers, and Best in Faction Imperium.
Result: 38-89 loss
![]()
![]()
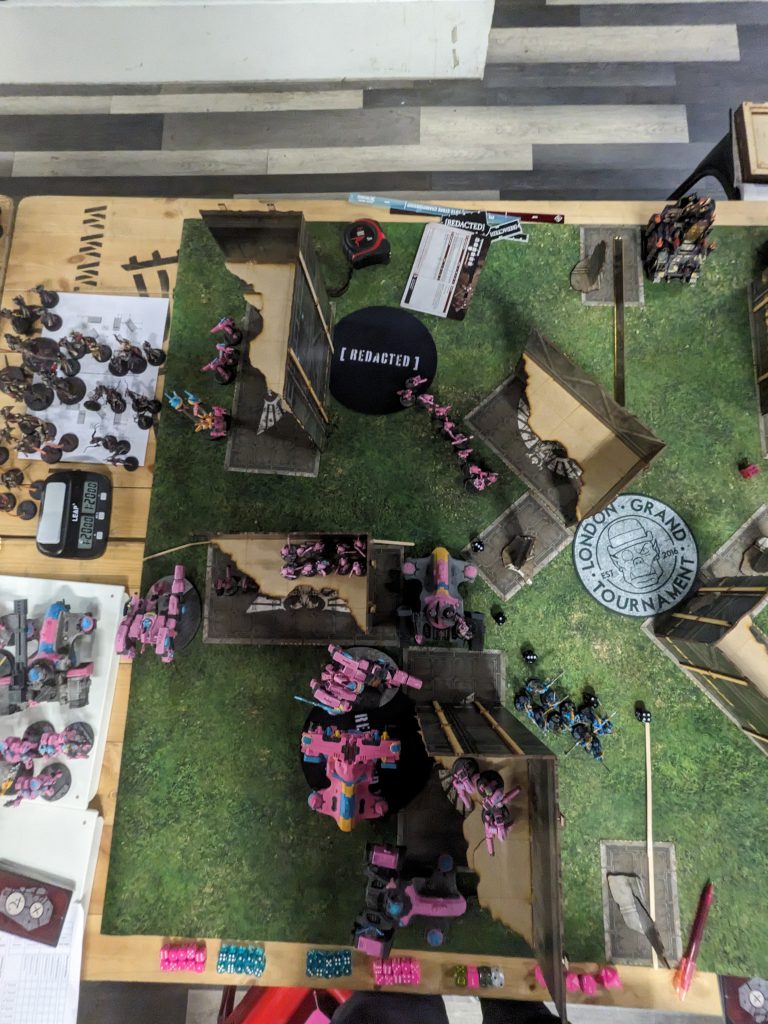
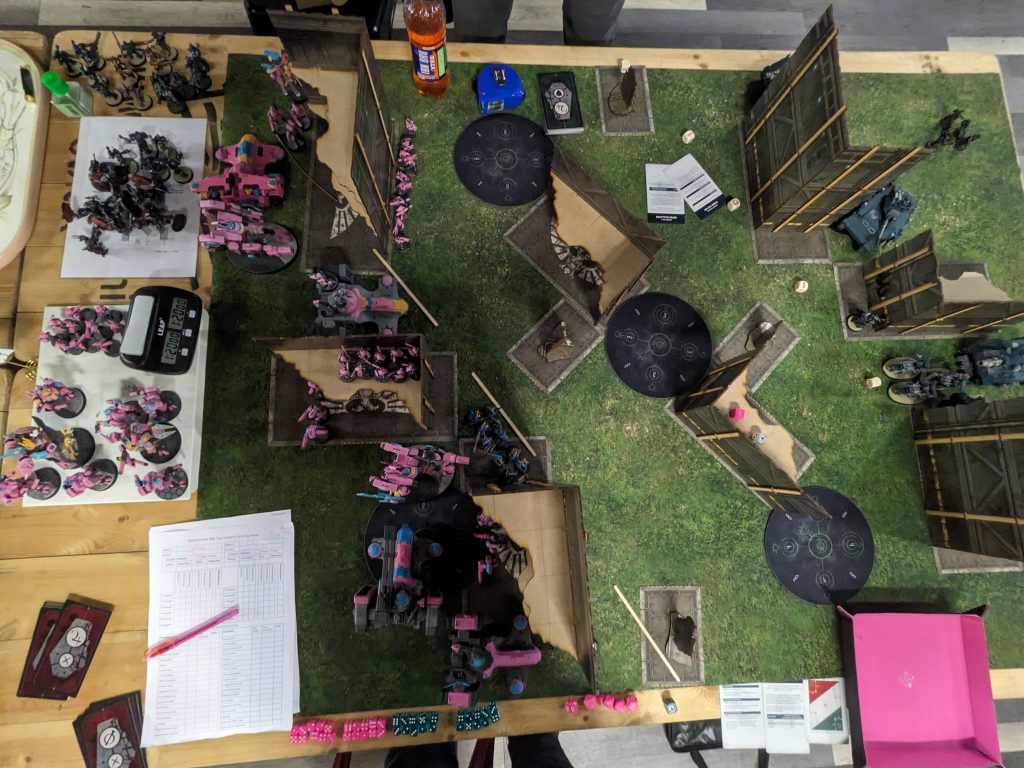
Round 2: Craig Spier’s Chaos Space Marines
![]()
![]()
Matchup
Mission M – Purge the Foe/Rapid Escalation/Crucible of Battle
List
Note – this would normally be in an expand tag, but something in this list is somehow breaking our CMS in a new and exciting way.
+++++++++++++++++++++++++++++++++++++++++++++++
+ FACTION KEYWORD: Chaos – Chaos Space Marines
+ DETACHMENT: Renegade Raiders
+ TOTAL ARMY POINTS: 1995pts
+ ALLIED UNITS: Legiones Daemonica
+
+ WARLORD: Char4: Cypher
+ ENHANCEMENT: Dread Reaver (on Char1: Chaos Lord)
and Despots Claim (on Char2: Chaos Lord)
+ NUMBER OF UNITS: 18
+ SECONDARY: – Bring It Down: (5×2) – Assassination: 4 Characters
+++++++++++++++++++++++++++++++++++++++++++++++
CHARACTER
1x Chaos Lord (105 pts)
• 1x Daemon hammer
• 1x Plasma pistol
• Dread Reaver (+15 pts)
1x Chaos Lord (105 pts)
• 1x Daemon hammer
• 1x Plasma pistol
• Despot’s Claim (+15 pts)
1x Chaos Lord (90 pts)
• 1x Daemon hammer
• 1x Plasma pistol
1x Cypher (90 pts)
• 1x Cypher’s bolt pistol
• 1x Cypher’s plasma pistol
• Warlord
BATTLELINE
10x Cultist Mob (50 pts)
• 1x Cultist Champion
• 1x Brutal assault weapon
• 1x Autopistol
• 9x Cultist
• 9x Autopistol
• 9x Brutal assault weapon
5x Legionaries (90 pts)
• 1x Aspiring Champion
• 1x Close combat weapon
• 1x Heavy melee weapon
• 1x Plasma pistol
• 4x Legionary
• 2x Astartes chainsword
• 6x Bolt pistol
• 6x Close combat weapon
• 1x Heavy melee weapon
• 1x Reaper chaincannon
• Chaos icon
5x Legionaries (90 pts)
• 1x Aspiring Champion
• 1x Close combat weapon
• 1x Heavy melee weapon
• 1x Plasma pistol
• 4x Legionary
• 2x Astartes chainsword
• 6x Bolt pistol
• 6x Close combat weapon
• 1x Heavy melee weapon
• 1x Reaper chaincannon
• Chaos icon
5x Rubric Marines (105 pts)
• 1x Aspiring Sorcerer
• 1x Force weapon
• 1x Warpsmite
• 1x Warpflame pistol
• 4x Rubric Marine
• 2x Close combat weapon
• 1x Soulreaper cannon
• 3x Warpflamer
• Icon of Flame
5x Rubric Marines (105 pts)
• 1x Aspiring Sorcerer
• 1x Force weapon
• 1x Warpsmite
• 1x Warpflame pistol
• 4x Rubric Marine
• 4x Close combat weapon
• 4x Warpflamer
• Icon of Flame
OTHER DATASHEETS
5x Chosen (125 pts)
• 5x Chosen
• 2x Accursed weapon
• 2x Bolt pistol
• 2x Boltgun
• 2x Combi-weapon
• 1x Paired accursed weapons
• 2x Plasma pistol
• 1x Power fist
10x Warp Talons (270 pts)
• 10x Warp Talon
• 10x Warp claws
3x Chaos Bikers (70 pts)
• 1x Biker Champion
• 1x Close combat weapon
• 1x Combi-bolter
• 1x Power fist
• 2x Biker
• 2x Close combat weapon
• 2x Combi-bolter
• 2x Meltagun
• 2x Astartes chainsword
• Chaos icon
1x Chaos Predator Destructor (140 pts)
• 1x Armoured tracks
• 1x Havoc launcher
• 1x Predator autocannon
• 1x Combi-weapon
• 2x Lascannon
1x Chaos Vindicator (185 pts)
• 1x Armoured tracks
• 1x Demolisher cannon
• 1x Havoc launcher
• 1x Combi-weapon
1x Chaos Vindicator (185 pts)
• 1x Armoured tracks
• 1x Demolisher cannon
• 1x Havoc launcher
• 1x Combi-weapon
1x Chaos Rhino (75 pts)
• 1x Armoured tracks
• 1x Combi-bolter
• 1x Havoc launcher
• 1x Combi-weapon
1x Chaos Rhino (75 pts)
• 1x Armoured tracks
• 1x Combi-bolter
• 1x Havoc launcher
• 1x Combi-weapon
ALLIED UNITS
3x Nurglings (40 pts)
• 3x Nurgling Swarm
• 3x Diseased claws and teeth
The Game
Renegade Raiders is another detachment that is having a moment – fast shooting, loads of small units that can punch up and plenty of redundancy. Craig is packing 10 Warp Talons despite their recent nerfs and if they get to do their ‘downy, murder, uppy’ cycle, I will find myself without screens in very short order.
Purge is fine though – CSM have a lot of small units and attached characters so I should be able to rack up quite a few kills per turn and it lets me play very cautiously – I only need to either be able to hold one NML objective, or push him off the NML objectives to keep us both on ‘hold one’ only.
Deployment is therefore careful: Sky Ray, Riptide, Pathfinders and Darkstrider Devilfish up north, Hammerhead and Riptide south in home castle with Breacher Devilfish. Craig puts everything on the board, well hidden and behind cover. I’d love to go second on Purge always, but I actually don’t really mind too much which is good because I’m going first.
Containment and Extend Battlelines pop out of the deck which is a little tricky. Normally these are slam dunks but Extend basically hands Craig a kill one (thankfully not kill more) and Crucible deployment means the same on my south board edge for Containment. So Shadowsun gets me a 3 on the north board edge and the Kroot sacrifice themselves to touch the south-east NML objective for a 5 on Extend. Everyone else stays nicely hidden. Craig pulls Behind Enemy Lines and Containment. He gets himself a 3 on Containment and murders the Kroot with Bikes and Vindicator shooting to take 4 on kill one. So far, so cagey.
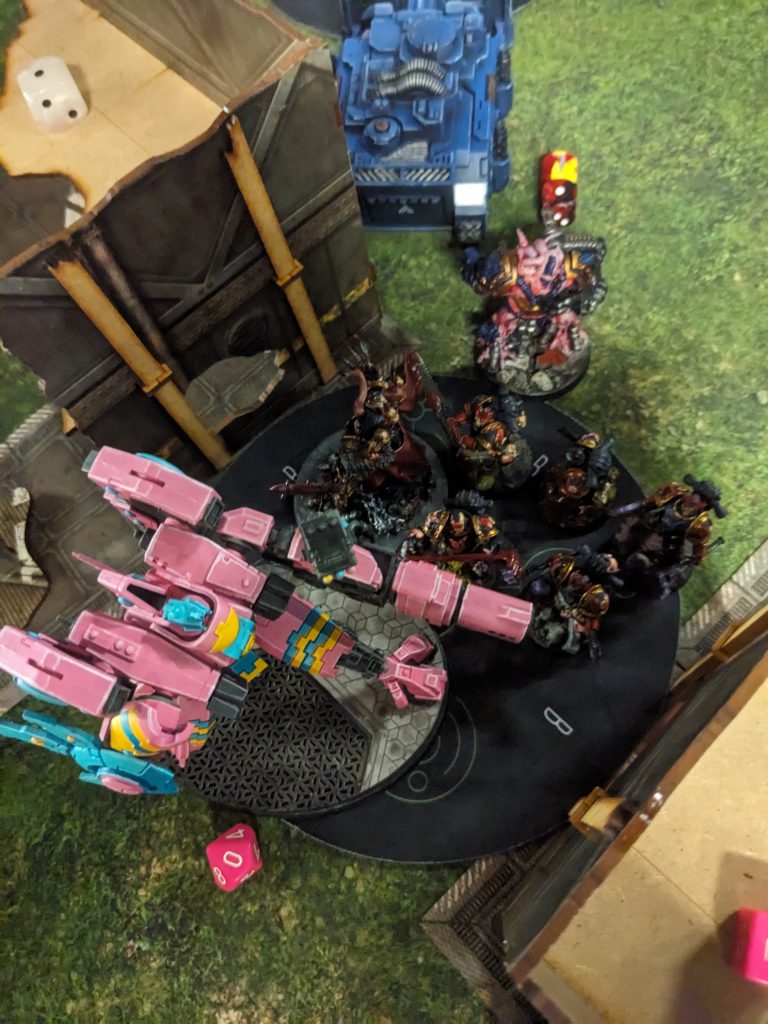
I draw Cleanse and Sabotage turn 2, which I can do very safely. Craig gets Area Denial and Storm Hostile and decides to get aggressive. Cypher wanders onto the central objective to get Area Denial, a Lord and Legionary unit sprint out from his home to threaten the Devilfish full of Pathfinders sitting on the north-west objective. One Vindicator noses out of his home ruins to shoot that Devilfish and the ten Warp Talons jump forwards into the open, but out of sight of my units, to stage for a charge into my Stealth Suits in my home ruin. This is exactly what I wanted. Coldstar and Crisis team Rapid Ingress in 12.1” away from the Talons and with full line of sight. The moment he declares the charge, I Overwatch and seven of the squad are immediately vaporised. The survivors reach the Stealth unit but can’t kill them. The Lord and Legionnaires kill the Devilfish but from there, can only consolidate onto the objective.
That’s a huge swing for me. He’s put 795 points out (inc. Cypher and Bikes) and managed to kill a single Devilfish. In my turn, I pick up all of it. Craig is in a rough spot – he now can’t really threaten my expansion objective in the north west and he’s running out of resources to score with. He manages to clear the central breachers but can’t kill the second Devilfish. In response, I move the whole line up. Riptides and Coldstar team get lines to some small squads of marines and clear them, the Sky Ray and Hammerhead win the tank duel by removing the Predator and other Vindicator. By the end of my Turn 4, it was pretty much done and I was able to score my cards and lock in Primary and Secondary leads. Craig was a delightful opponent, friendly, relaxed and in good spirits the whole way through; and I think our game probably convinced him to drop the Talons and the Predator for good!
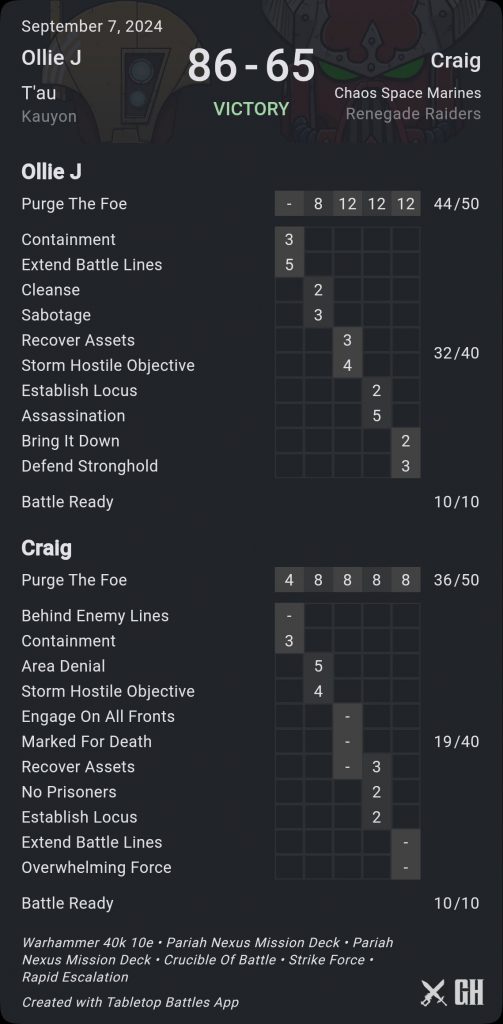
Result: 86-65 victory
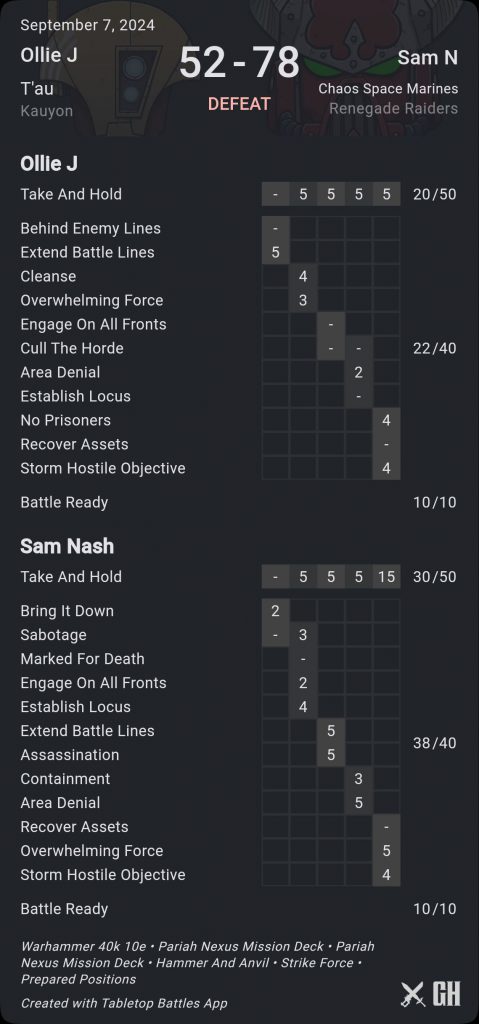
Round 3: Sam Nash’s Chaos Space Marines
![]()
![]()
Matchup
Mission E – Take and Hold/Prepared Positions/Hammer & Anvil
List
Army List - Click to Expand
The Game
Renegade Raiders again but with three key differences. First, Take and Hold does not let me play as cagey as Purge does. Second, the Hammer & Anvil layout on GW map 1 leaves all three midboard objectives completely exposed. Third, this is quite a different list to Craig’s. Abaddon and six Obliterators is a terrifying shooting brick and each unit has one turn of indirect whenever it wants. To top it off, Sam Nash is a Team Ireland stalwart which means he will not give me a single free opening.
I deploy very similarly to the previous game but swapping the Pathfinders and Shadowsun to my south flank. Sam likewise drops everything well in cover. For the first time in this tournament, I know for sure I want to go second. Hard luck, first yet again.
I put a single devilfish out on the south NML objective with Pathfinders in it, such that if (when) it blows, I can choose to either put the Pathfinders behind my home ruin, or on the objective. Sam pushes his Oblit-blob with Abaddon into his central midboard ruin, runs Raptors onto the southern NML objective and blows the fish with a Vindicator.
Turn 2 I make a line of bodies across the whole board with Kroot, one unit of Breachers and the Pathfinders. The goal is to make Sam expose enough assets to kill them that I can then start a winning tempo of trades in Turn 3 with Kauyon fully active. Unfortunately, I do not really succeed at this. The infantry get melted and the only things exposed are one Vindicator and three Bikes.
Here is where I chicken out slightly. I almost certainly should push out the Hammerhead to try to kill that Vindicator and start to deplete his castle. But the threat of Vindicator overwatch with full Abaddon rerolls is in my head rent free. So I push up more sacrificial lambs in the form of a Devilfish, Breachers and a Stealth team. I do kill the Bikes, but that’s about it. Sam, of course, completely wipes those units as well, and decides to go-go-go with the Possessed brick, which charges and murders Shadowsun and tags the Hammerhead.
I’m pretty stuffed now – I’m not scoring my secondaries well because I’ve lost a lot of my chaff but I haven’t inflicted significant damage on his pieces either. I push forward once more into the killing fields and take out two units of Obliterators and the Vindicator on the southern objective. But I cannot bring assets to bear on the Possessed who are behind my home ruin and the Sky Ray is not capable of killing his northern Vindicator. Sam has one last haymaker to swing – Abaddon and his five Chosen, the Vindicator and the two remaining Obliterators. Along with the Possessed, this is more than enough to pick up the rest of my stuff and with bottom of 5 scoring, Sam seals the deal comfortably.
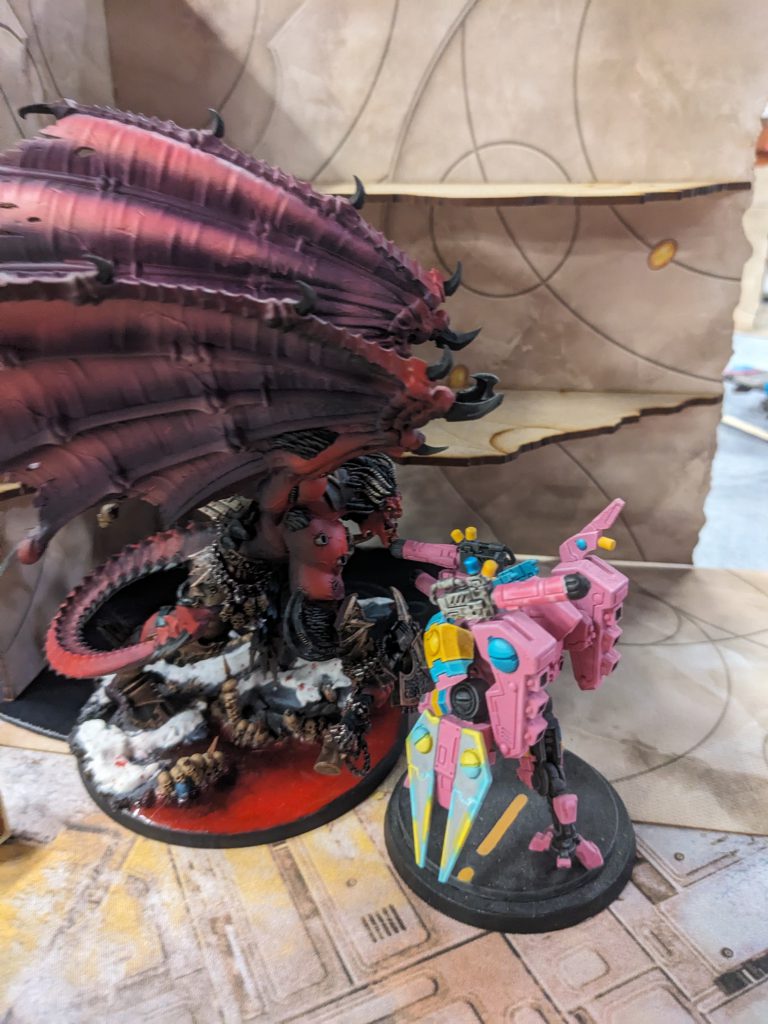
Who would win – the Warmaster of Chaos and his gods-blessed warriors, or one big pink boi? Obviously the Warmaster.
I had a good chat with him afterwards and he made the point that my turn 2 play was the right concept – I needed to force the tempo to make up for the fact that I had first turn – but if anything I didn’t go hard enough. I should have used Devilfish with mounted infantry and probably Riptides behind them to force Sam to fully commit or let me have 10s or even 15s. Then I could go for the counter-punch into meatier things and had the trade war tilting my direction. Shout out to Sam who was yet another great opponent and came 5th with a 5-1 record and took home Best in Faction Chaos.
Result: 52-78
End of Day 1 and I was 1-2 which had been my baseline goal; and I knew my two losses had been great learning exercises against very high quality players. So I wandered back to my hotel for a solid night’s sleep, content with a good day and feeling like I was starting to get to grips with the list. Matchups went up just before bedtime and I was staring down the barrel of the Emperor’s golden boys. What do Custodes do now? I had no idea but I was going to have to figure it out quickly.
Round 4: Kylo Turley’s Adeptus Custodes
![]()
![]()
Matchup
Mission D – Scorched Earth/Swift Action/Tipping Point
List
Army List - Click to Expand
The Game
The one thing I did make sure I understood before we started was that Venetari are no joke. Rapid Ingress for free and all at once is a terrifying drop for a non-combat army like mine. Thankfully the mission would let me once again be fairly slow and build up to a big turn 3 onwards push.
We’re on GW Layout 6 today which is not one I am familiar with but it has a fairly open midboard with limited firing lanes across it. My north flank is where I want to expand and fortify, my south flank where I want to screen and delay. I was once again fairly chill about first v second.

I’m going first. Four in a row!
Turn one is slow, I get a small secondary and as we both push up quite cautiously. Turn 2 I began the plan “clog their blades with your bodies”. The Kroot contested the south-east objective off Wardens, the Pathfinders created a line in front of the north-west objective. I inexplicably poked my Sky Ray and one Riptide out without checking sight lines, giving the northern Calladius an angle. Put it down to unfamiliarity with the map layout and general sloppiness. Kylo Rapid Ingresses one squad of Venetari.
I’ve successfully put Kylo on a 5 so he needs to push back. He pushes the Ventari centrally to score a secondary so I Rapid Ingress the Coldstar Crisis to stare them down. The Wardens in the south jump out and murder Kroot. The north Wardens clear the Pathfinders but my Breachers still hold the north-west. The Caladius lines up the Sky Ray and does… 4 damage. Phew.
I score 10 again on Primary and keep up the pressure. My Devilfish dumps 20 OC of Breachers onto the south-east objective. Farsight and his squad dropped down to support my north flank. Kylo Rapid Ingressed his remaining two Venetari squads but they could only really drop at the edge of his deployment which was fine by me.
I needed this phase to go fairly well and it did. Farsight’s squad, a Riptide and the Hammerhead killed all the northern Wardens through the Feel No Pain. The Coldstar picked up the Venetari. After that, the variance swung back the other way – Breachers and a Riptide fired into the southern Wardens doing one (1) damage. Ah 4+ FNPs. Then the Sky Ray attempted to revenge itself for the paint chipping it took from the Caladius and did absolutely nothing.
The Breachers meant Kylo was yet again on a 5 for primary and he was starting to struggle on secondary resources. The central Venetari flew forward and were promptly dispatched by the Coldstar unit’s Overwatch (full rerolls and sustained 1 is a hell of a drug). He flips the north-west objective but fails to kill any of my serious stuff. The southern Wardens charged the Breachers who emergency embarked into the Devilfish and sat there happily listening to the clanging sound of Wardens failing to kill the fish.
I go for clean up on turn 4 – the Sky Ray and Hammerhead combine to blow up the Caladius on the north flank and Farsight’s team kill the last Venetari. The Coldstar and Crisis unload into the Wardens, killing just two despite the lack of FNP. The surviving Wardens finish off the southern Breachers and tag the Crisis, but Kylo’s best play was the Callidus who uppy-downied into the rear corner of my deployment and made the 9” charge into Shadowsun to contest my home. She couldn’t kill Shadowsun but that was enough to both put me on a 5 and deny my Defend Stronghold.
I bin off Defend Stronghold and get Recover Assets and Establish Locus. The central Riptide can drive forward and get 4 on Locus; I burn the central objective with Farsight’s crew; and run Darkstrider forward into NML to start Recovering Assets. Shadowsun killed the Callidus and the Coldstar team finally put the troublesome Wardens into the grave. Draxus and co managed to murder Darkstrider with shooting while the Calladius burnt the south-east objective. We both completed our burn actions and although he was able to score 20 points bottom of 5, I had built enough of a lead to hold on.
Result: 73-64 victory.
![]()
![]()
Round 5: Ryan McMullan’s World Eaters
![]()
![]()
Matchup
Mission O – Terraform/Stalwarts/Crucible of Battle
The List
Army List - Click to Expand
The Game
World Eaters and T’au is an odd one. Stat Check tells me Khorne’s chosen are favoured into T’au but only just, my phone-a-friend was telling me this was very bad for me based on his team matrices, and then Ryan (who was yet another lovely opponent) told me this was not good for him. Who to believe? Turns out Ryan had run face first into Kyle Grundy running a more optimised version of my list not that long ago. Now, this may shock you, but I am not as good at Warhammer 40,000 as current ITC number 1 ranked player Kyle Grundy, so I reassured Ryan that he would not have quite as lopsided a game this time.
Deployment was fairly similar to the previous game but with slightly more caution to account for the ludicrous threat ranges World Eaters can get. For the first time this weekend, I’m going second.
Ryan moved Spawn onto the south-east objective. The other Spawn came north but not quite to the north-west objective while everyone else mostly pushed up to stage. I drew Area Denial and Engage on All Fronts which, in case it wasn’t obvious, I did not want to do! But points is points so the Kroot bravely ran into the centre for Area and some body blocking. I killed the north Spawn but couldn’t reach the others.
Turn 2 and Ryan’s deck hands him Bring it Down and No Prisoners. So he decides to go for the Angron play and hurls the big lad down the northern board edge. Invocatus and the Spawn go for the Kroot. The Jakhals emerge from the ruin in the north to stage for the Pathfinders but I Rapid Ingress the Coldstar team into line of sight of them to threaten Overwatch so they stand still. The Pathfinders jump into the Devilfish to avoid Angron and then immediately out again as the Devilfish is torn in half.
My deck is not that accommodating and gives me Behind Enemy Lines and Cleanse. I create the old reliable wall of bodies across almost the whole board and go for Angron with the Coldstar team, Sky Ray and Riptide. Shooting starts well with Invocatus disappearing but then the Breachers can’t kill even one Spawn. So onto Angron where, after throwing the kitchen sink at him, he lives on 1 wound. I decide that I have to take every gamble and charge with the Coldstar to tank shock (only five dice I know but I had to down him). Not a single mortal. Oh no. The Crisis suits all die though the Coldstar survives this round of combat.
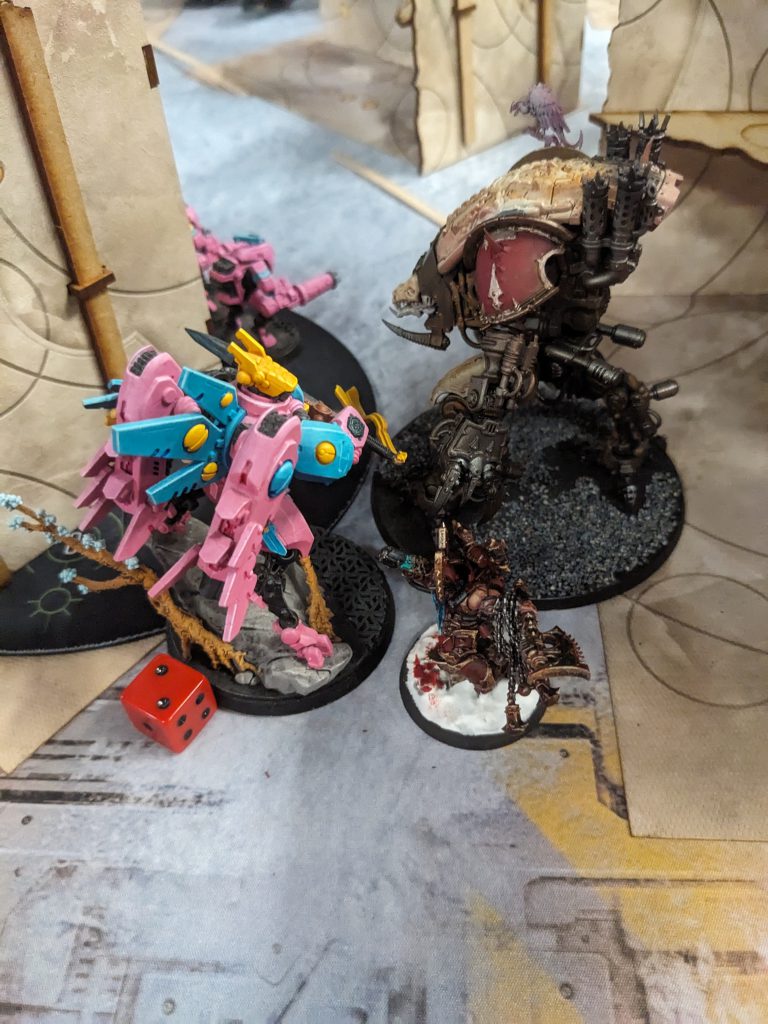
I genuinely think I’ve lost at this point. Ryan gets a big 14 primary having Terraformed south-east and he goes for the kill. Everything surges forward. The Jakhals kill most of the Pathfinders, the Spawn tag up the southern Riptide, Angron finishes off the Coldstar, Eightbound clear the central Breachers. Kharn and the Karnivore combine to kill Devilfish and Breachers in the south. There are multiple units of Eightbound in the centre, Kharn’s Bezerkers are closing in on my home and Angron still isn’t dead.
Turn 3 I score 4 primary and draw Defend Stronghold and Establish Locus. Bad. I mill Defend into Recover Assets which I can do ok. The northern Riptide jumps onto the objective to take it back from Jakhals, the southern Riptide falls back from the Spawn onto the middle objective. I need a big shooting phase. The Sky Ray immediately banishes Angron back to hell. The Riptides pick up a unit of Eightbound each, Shadowsun melts the two Spawn and Farsight’s team shoots Bezerkers, killing nine. One mistake I make: forgot about blood surge. Kharn and his mate hit Farsight’s squad and kill the three Crisis but Farsight swings back and kills the last Bezerker and puts some damage on Kharn. I start Recover Assets, and keep Locus.
That cleared the board quite a bit! Suddenly I’m the one sitting on objectives. Ryan still gets 10 this turn on primary and draws Assassination and Behind Enemy Lines. The Karnivore runs around the wall and charges Shadowsun, the Jakhals stand still and the Forgefiend tries shooting the central Riptide doing very little. The Karnivore cuts Shadowsun down to score Assassinate but then I get to attack with Farsight, who not only kills Kharn but then survives the fight on death with 2 wounds. He’s still in combat with the Karnivore but it denies him 2 on Behind Enemy Lines and it’s my turn now (just after I Wall of Mirrors a Stealth Suit unit into reserves).
At the start of my turn the scores read 32-65. I start eating into that by scoring 12 on Primary thanks to Riptides, and draw No Prisoners. I drop the Stealth Suits into Ryan’s empty backfield and Establish Locus for 4. I need to both deny Ryan points while scoring as much as I can. So the Sky Ray and Riptide centrally both Terraform just to make sure I can max Primary while my south Riptide flies over to stand on the south-east objective to take it from the Rhino. The Hammerhead lines up the Karnivore menacing Farsight and cores it out with railgun and seekers for a single No Prisoners kill.
Ryan’s final turn nets him 6 Primary and he banks two more points on Engage. He’s all scored out on 73 points so passes to me on 50 points at the start of my turn 5. I max Primary for 15 easily so it’s Heart of the Cards time: Marked for Death and Extend Battle Lines. Ryan only has three units so they are all marked and Extend is automatic. The game comes down to: can a Riptide, a Sky Ray, three Stealth Suits and a Hammerhead kill two Jakhals? Obviously yes.
Result: 75-73 victory
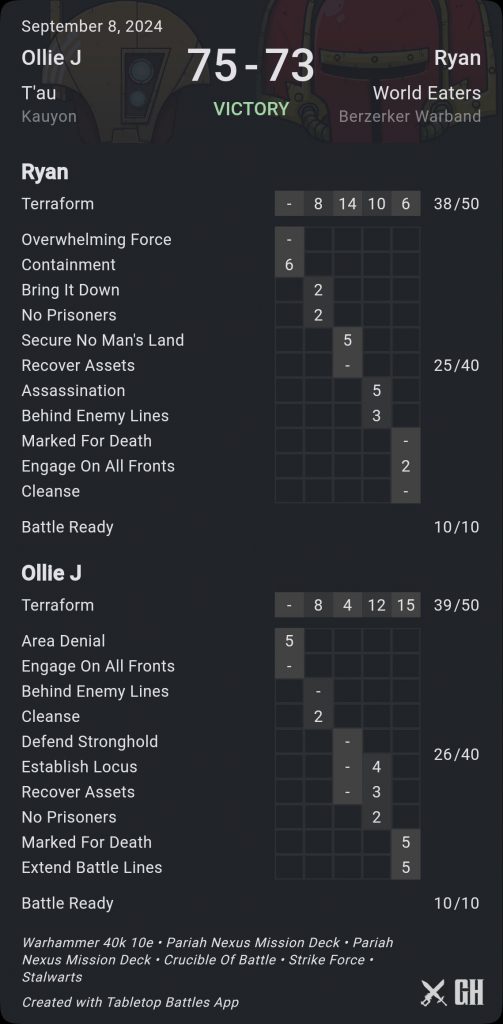
(Minor note, in the heat of the game, neither of us realised there is a per turn cap on Terraform primary so we recorded this as a 80-73 win to me – it was only when I was entering scores in my app on the train home that I realised there was a cap and had a minor heart attack. Thankfully for what was an excellent game, it turns out it didn’t affect the result, but always check your cards carefully!)
Round 6: Alex Berresford’s Chaos Space Marines
![]()
![]()
Matchup
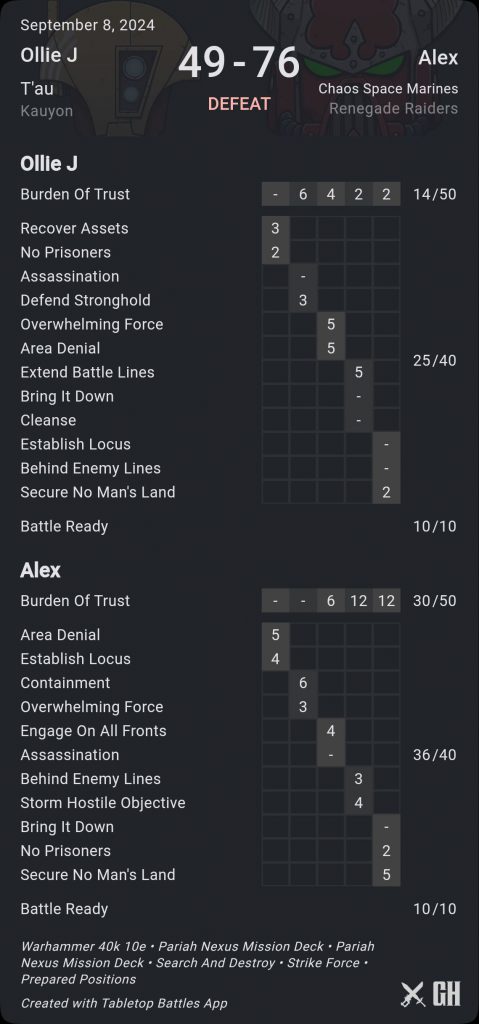
Mission I – Burden of Trust/Prepared Positions/Search & Destroy
The List
Army List - Click to Expand
The Game
I hadn’t even noticed Alex’s list name. Or list intro? Glorious stuff. I’ve managed to once again get myself to a 3-2 position going into game 6 at a GHO but the fatigue is really biting. I have a quick chat with Alex to establish that we’re both pretty happy with being here at the 3-2 bracket and we’re also both struggling to hold it all together mentally. This is a prelude to yet another lovely game – I cannot stress enough how wonderful all of my opponents were and I hope it was mutual!
Burden of Trust is a weird mission and neither of us fully understand it going in, but I decide to treat it like any Take and Hold variant and go for my now tried and trusted “bully one flank and deny the other”.
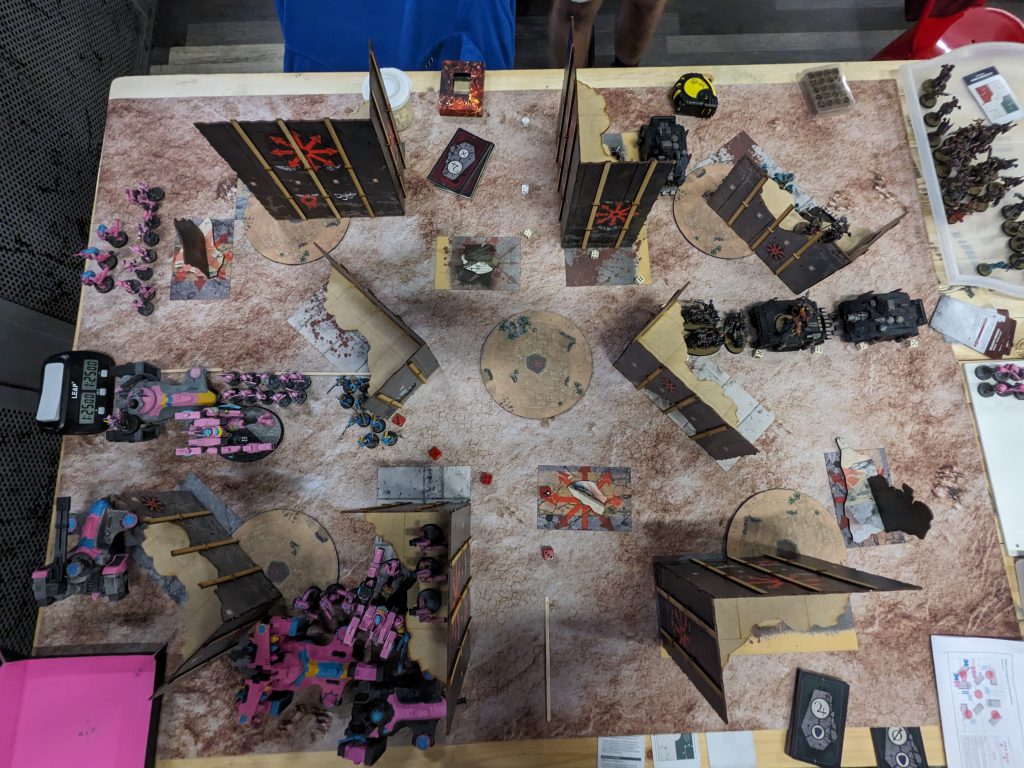
I’m going first for the fifth time at this event.
Recover Assets and No Prisoners are a fine start. The Pathfinders murder the Nurglings, Stealths and Shadowsun Recover Assets and I’m up and running. I’ve made one mistake – there is a spot on the centre of the north board edge where he can get something to stage for my north-west objective that I can’t draw a bead on with anything easily. So he puts three Bikes there and three more in the centre for Area Denial and Establish Locus.
I pick up a few primary points and decide the northern Devilfish has a shot at taking down the Bikes that are hiding in that little nook so I push some Stealths slightly out to spot for it. This was silly. Down south I pop the Devilfish onto the south-east objective to contest it from the Rhino. The Kroot push out into the middle to create a screen. The Riptides pick up the central Bikers easily enough but the Devilfish only kills two Bikers even with tank shock and Alex falls back the survivor.
Alex is setting a fierce secondary scoring pace and keeps up board pressure as well. A Legionary squad comes out to threaten the Kroot so I Rapid Ingress the Coldstar to see them but foolishly don’t position so the lascannon cannot see me – too used to doing this to squads with no real shooting threat. He kills a couple of Kroot, the Lascannon pops off and kills a Crisis suit, the south Vindicator kills the Devilfish and the Lord+Legionnaires kill the Breachers. Up north, the Vindicator blows up the Stealths (should not have stuck them out) and the lone Biker charges and kills a few Pathfinders, while a 5 man Legionary unit charges around the Devilfish to tag my north-west objective. Thankfully, the Overwatch from the Coldstar team picks up the central Legionnaires and leaves 6 Kroot sitting happily in the middle.
I draw Area Denial and Overwhelming Force and here my so far slightly sloppy but overall sensible play devolves into downright nonsense. Instead of making a Breacher + Kroot line across the north half of the board and shutting down that flank with Farsight deep strike; I decide that I really just want to try to wrap the Rhino sitting behind the central midboard ruin. Why? Don’t ask. I do that, then push my Riptides centrally without screens to get Area Denial. Like I said, no thoughts, just vibes. The Coldstar crew pick up the Lord and Legionnaires down south and the surviving Devilfish tags a Vindicator because why not at this point.
I’ve given Alex the opening he needs and he seizes it with both hands. Out come the two Chosen+Lord units and the Rubric squads. I Rapid Ingress Farsight and his team with line of sight on the Chosen; thinking I can stop him picking up both Riptides. But as is often the case when you find yourself on the back foot, the dice don’t bail me out. I get a single 6 on 8 fully rerolling plasma shots and kill one Chosen. Both Riptides decide they don’t feel like making invulnerable saves today and bite the dust, and up north, the Legionnaires and Vindicator kill the Devilfish and Rubrics wipe the Breachers.
I’m out of juice now and despite Farsight and the Coldstar picking up a bunch of marine bodies, I can’t score. Alex does a little mopping up and takes bottom of turn scoring to win comfortably.
If I didn’t do a very silly push in turn 3, I would have been in it. I think I was still behind and would have been pushing uphill into a good list piloted by a very competent opponent but I would have had some options and could have rebooted my primary scoring. As it was, I made the wrong decisions with a tired brain and completely beefed it.
Result: 49-74 loss
Wrap-up and Reflections
So yet again I land firmly mid-tables. I feel really good! I think I set reasonable expectations coming in and I hit my upper end target of 3-3, and I got in a position to play for a 4-2. My three losses were all to very good players who knew what they were doing while my wins were into players who all finished at least 2-4 or better.
I’ve broadly accepted that, given I struggle to get many games outside of events, there is a very hard cap on how well I can compete with players who are playing once a week or more. But I also know that there are areas of my play I can improve even without that. Namely: sloppiness in terms of positioning models around firing lanes and behind cover; developing a 2-3 turn plan for roughly how I want the game to play out and identifying what actions I need to take to force that to happen; and placing my screens correctly to both perform the screen and to not give my opponent too many resources at once.
The list is great. Kauyon has great tools into a lot of armies with charge denial, buffs to wounding and AP and the huge turn 3 damage spike. Fireknives are money at the moment – full rerolls and Kauyon overcome the low shot number and high AP and Damage are great. Two units is very takeable but one would be fine. The Riptides are Riptides – swingy as hell but great all-rounders. I think I would prefer to take two Sky Rays over one Rail Hammerhead – when the Hammerhead is good, it is very very good (loves to kill Vindicators) but sometimes it is useless; Sky Rays are just a bit more flexible. The screens are where I am going to experiment next: the Kroot were good but I felt like I could mostly achieve what I needed to with Breachers and Pathfinders. What I lack is speed. So I have two Piranhas on my building desk and I intend to replace the Kroot and one Devilfish with three solo Piranhas. I don’t yet know what my next event is but suspect I’ll be hitting some London based RTTs til the end of the year.
Finally, GHO was an awesome weekend. I fully plan to attend the next 40K one in the UK and encourage any readers considering it to do so as well. The vibes were immaculate, the opponents all fantastic and the company between rounds delightful. Shoutout to the various Goonhammer patrons I met or re-met this weekend and hope to see more of you there next time; and if you spot a man in a pink shirt, with pink T’au and pink dice out at an event in future, come say hi!
Thanks for the report Oliver, and we look forward to having you back next time!
Have any questions or feedback? Drop us a note in the comments below or email us at contact@goonhammer.com. Want articles like this linked in your inbox every Monday morning? Sign up for our newsletter. And don’t forget that you can support us on Patreon for backer rewards like early video content, Administratum access, an ad-free experience on our website and more.
