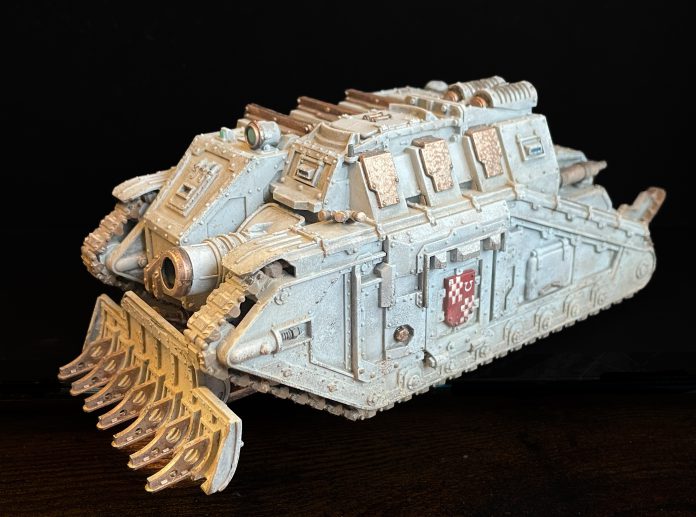
So you’re looking at your Solar Auxilia and you’re thinking “yes, these are cool, but wouldn’t they be better mechanised?”. I know you are. Mechanised infantry, however they actually play on the tabletop and regardless of whether they’re a good points investment in your army list are just functionally much cooler than footslogging infantry and we all know it.
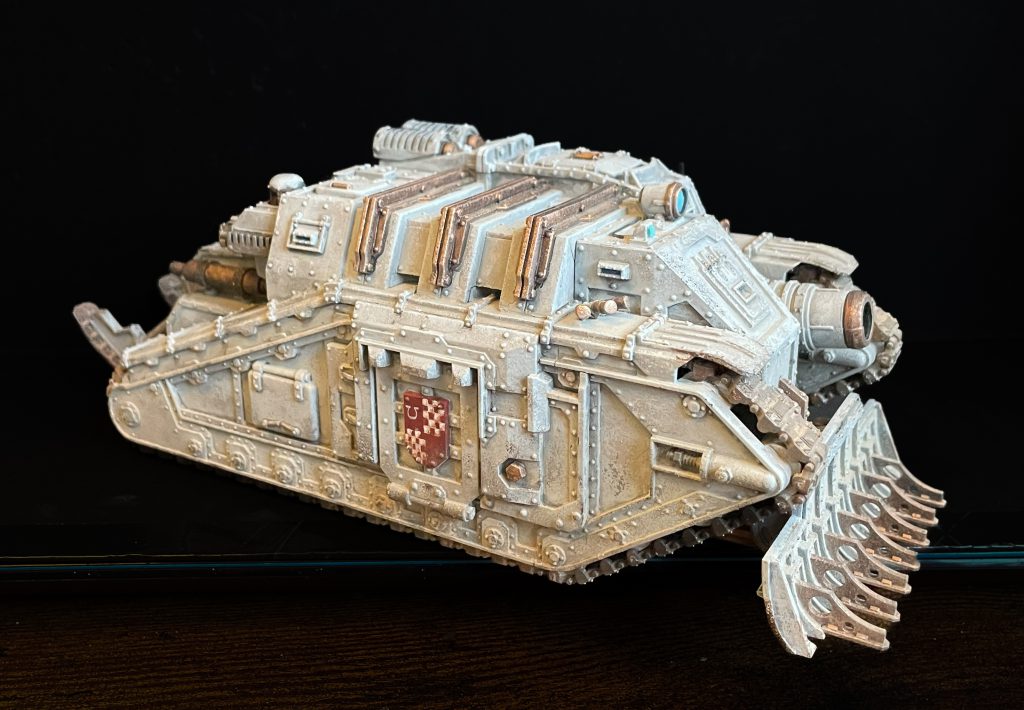
The Solar Auxilia have a few options for their transports – the cheap and cheerful Aurox, the much-beloved Arvus and the giant brick shithouse of the Dracosan. Until now, the Dracosan has been an enormous, weighty, and tricky resin build, but now with the Solar Auxilia getting a full plastic range, it has arrived in brand-new modern plastic, and it’s about damn time.
Before diving in, thanks to GW for sending this kit over for review.
Design
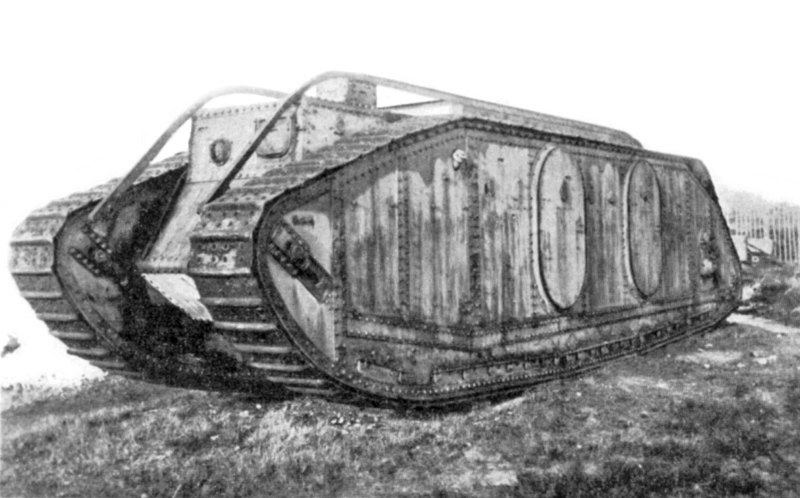
I’d not even seen a Dracosan before in the flesh before this arrived on my doorstep, so please bear with me if I’m telling you things you already know here. Many GW tanks draw inspiration from British Heavy Tanks of WW1 – the rhomboidal tracks, casement and sponson weapons and rivets marking out most of the guard and many marine tanks in the range. The Dracosan is no exception, looking like it’s dragged its way straight out of the mud and blood of the Western front. The same design cues are there, but taken further and with slightly different inspiration – unlike the more Mark I-V look of the Leman Russ, the Dracosan is much more elongated, the rear of the tracks in particular drawn out and narrowed down, making it much more akin to the lengthened Mark V** or Mark VII tanks, while the idea of a massive, heavy, lengthened Armoured Personnel Carrier comes straight from the Mark IX tank.
As a plastic kit, from what I can see comparing to pictures out there on the internet, a lot of effort has been put in to making the new kit as close to the resin one as possible. This extends to the inclusion of a fair few very small detail pieces separately on sprue, making up for the restrictions in plastic casting with additional components. It’s also very close to the LI one, and, I suppose, was probably redesigned at the same time, so the similarity makes a lot of sense! It is also, obviously, modular with the eventual Malcador release, with the sprue layout suggesting that the Malcador is the “base kit” with the Dracosan building from that. The tracks, base and rear of the Dracosan are on one sprue that will work with any Malcador chassis tank, while the bits that make this the transport variant are all on separate sprues. We know that the Malcador is coming, but the sprue layout – as with the Leman Russ – is going to make plastic versions of some of the weirder Malcador variants like the Infernus possible.
Inspiration and resin-inspired design aside, the Dracosan is a big giant bastard of a tank. It is long – very long – when compared to the already chunky Auxilia Leman Russ, and compares well to a Land Raider. It breaks with GW guard design law by being much narrower than you’d expect as well, giving it a substantially different and very retro silhouette when up against more familiar hulls.
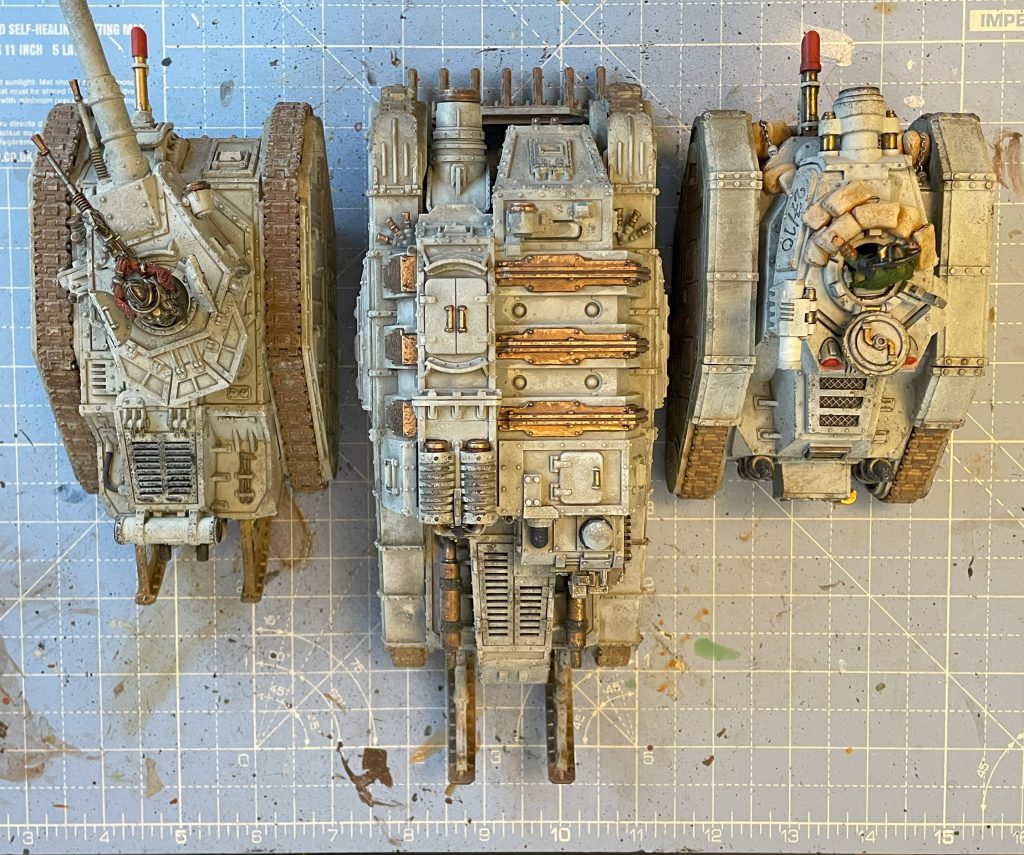
In the same way as the Auxilia Russ, it’s clearly a 30k tank and clearly a Solar Auxilia tank. The now characteristic Auxilia trim is everywhere, it marries high and low tech elements well together in a cohesive dieselpunk whole, and, along with those changes to the classic square box ratio of the GW tank, these make it very obviously 30k and far different to the resin malcador chassis which is closer to a semi-historical 40k tank. A brick shithouse of a tank, solid and robust but still with clear flair and ornate detail is really aesthetically pleasing to me so at least personally the design is a massive win.
Building
With something possessing this many edges, precise trim, large flat components and perennial tank issues like “gaps look awful”, I would advise really taking your time with this build. Use clamps, elastic bands, gridded paper, anything you can because even though this is a modern GW kit with all the indents, keys and instructions that entails, this was a nightmare to get lined up.
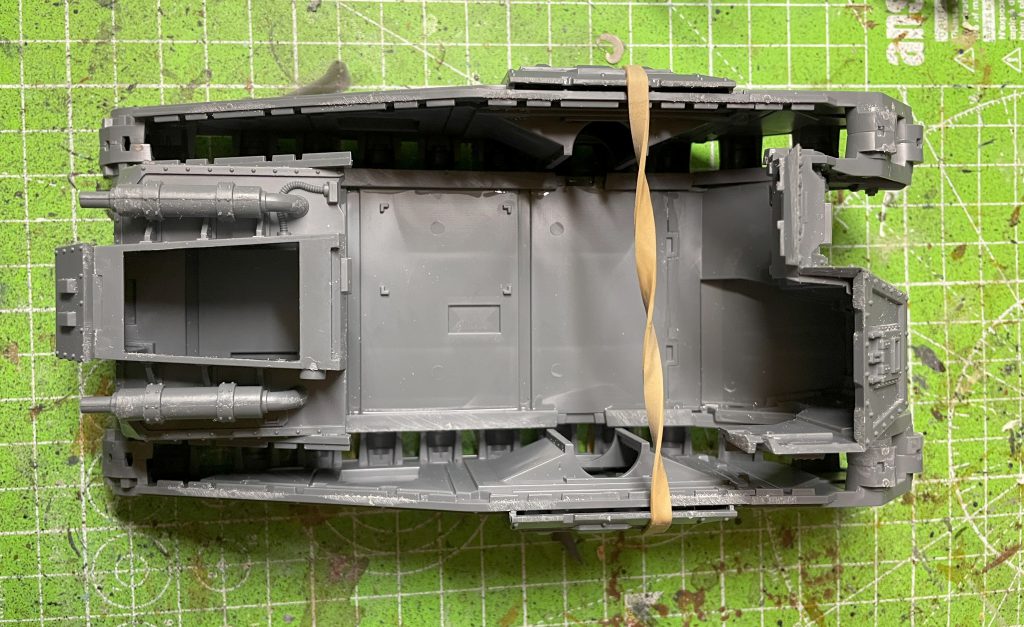
The components fit so snugly – particularly around the top plate – that adding new pieces tends to push old ones out of alignment, and the slightest warp out of true from some of the smaller plastic pieces will create yawning gaps. Most of these I managed to sort out with dryfitting, filing, sprue goo etc, but others opened up once the final steps of the hull were completed. While the build isn’t difficult – you can throw this together in half an hour if you want – it is difficult to get exactly right. Even with all the care I put into the build here, I wish I’d taken even more time on the top plate and front, and it’s worth letting each stage dry completely before starting the next – otherwise the top plate will slightly lift off, and that leaves an ugly gap you’ll need to fill.
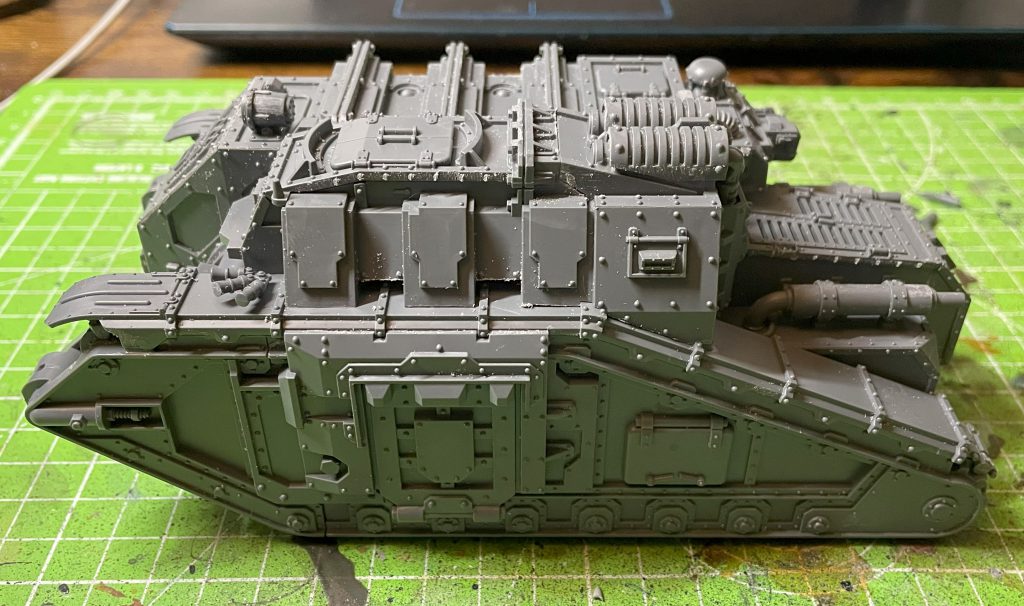
It’s not all stressful by any means. I was really pleased to see how easily the hull in particular went together with the tracks, leaving a nice clean join between the two. The additional guide pegs and indents meant this was effortless – a rubber band is helpful, but lining the pieces up at 90 degrees is child’s play and that was really nice to see. The tracks are much better than on the Leman Russ and go together nicely.
There aren’t a huge amount of options for variant builds beyond the weapons, but the accessory sprue provides a lot of additional gubbins and kit to add onto the basic hull. The main option will, at least, change the look of the tank from the front fairly significantly – the Gravis lascannon (definitely the right weapons choice) and the Demolisher cannon (definitely the cooler weapons choice). Both are built on the same basic weapon mount, which is designed to move and does so very easily. Aside from this mount, though, there’s no shared components and a gun shield hides a magnet very well, so both options are very possible. I’d love to see some additional stowage and kit thrown onto these sprues, but they’re so packed I can see why there isn’t.
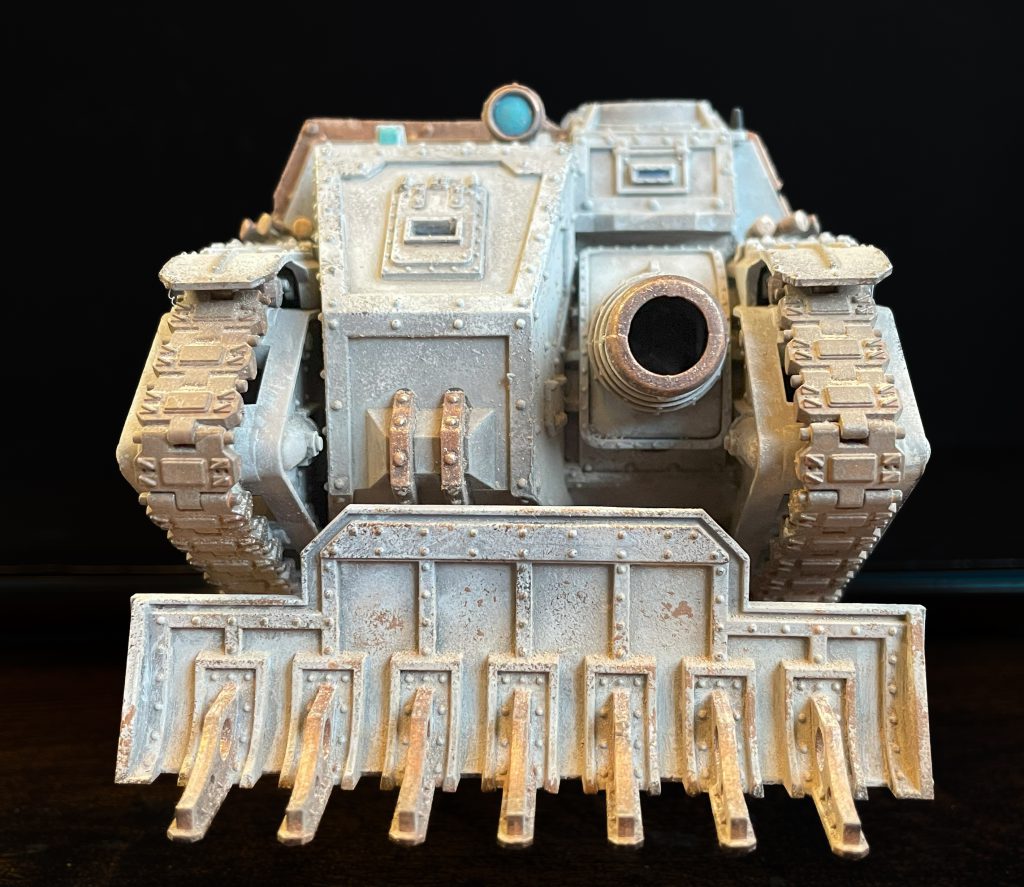
I really liked the sponson-filling components that transform the Malcador tracks into the Dracosan. It would have been very simple to add in a flat plug plate that just covered the hole for the sponsons – instead, it’s a chunky, fully modelled brick of plastic that fits seamlessly into the trim and detail of the sides of the tank. It’s really nicely done, and sits perfectly into the tank with no prospect of misaligning it. It’s a great bit of attention to detail and speaks to the skill – and love of tanks – of the Heresy armour designers.
Painting
The Dracosan followed the same painting scheme as my Auxilia Leman Russ, with the WW1 inspired sky-blue paint scheme. Again, I didn’t paint the trim a separate colour, using a light Nuln Oil and Army Painter Dark Tone wash to pick out the under and overhangs to delineate the raised strips.
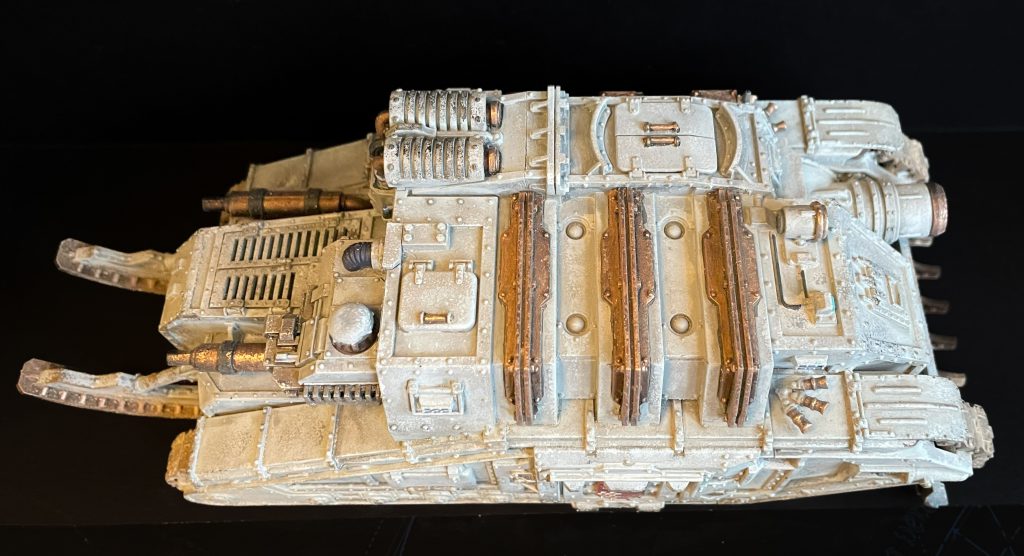
It’s all done with a sponge bar the finest details as I think this gives a realistic textured look to large panels and tank equipment without painting on endless multi-highlight scratches and dings. As the Dracosan has a lot of deeply recessed panels, I had to break out ever smaller sponges to do so, but I think I made it work. Working up and down through the Citadel range of grey-blues, with darker tones focused on the lower areas has come out really well. There’s some places where it doesn’t look too great, and I’d advise painting the entire rear block in subassemblies around the engine/radio areas. Again, while the transfer sheet is nice, I don’t tend to use transfers, so freehand it was – “Déshabillé” is ready to go.
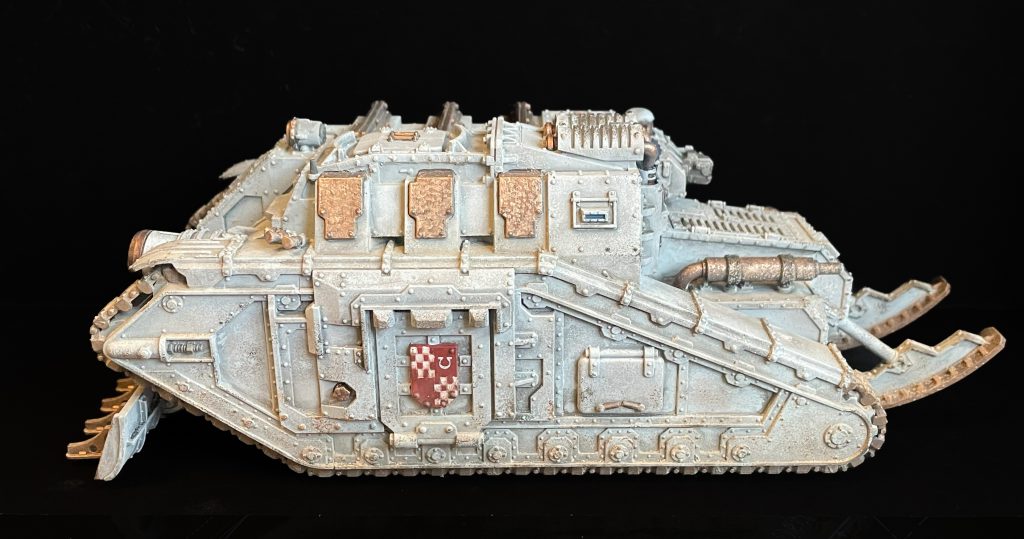
I paint tracks separately with a black undercoat and a brown base. A rust wash and then sponged metal gives a nice effect that’s quick to apply. In this case I added on the tracks that peek out from underneath the track guards before painting the main body in order to cut down on the faff of painting track guards separately.
Conclusions
I don’t know if I’ll really use the Dracosan all that much – I built this one with the Demolisher cannon, making it a pricey 235 point transport (or 260 with a flare shield!) that can only transport ten Auxilia. But I’m sure I’ll find a niche for it as I tend to only play with what I’ve got painted. Regardless of whether it hits the table, I really enjoyed building and painting it and I’d be keen to pick up another. A wall of armour might not be the most threatening prospect without the big guns and high BS of the Space Marines to back it up, but it certainly looks amazing. With the Malcador round the corner and the Dracosan a very fun build, I can see my painting table becoming a long, narrow, fiercely armoured tank factory and that’s no bad thing at all.
Questions, Comments, Suggestions? contact@goonhammer.com or leave a comment below
