


G’day Goonhammer readers! It’s that time of year when ConVic, the two day Kings of War tournament, brings all sorts of Victorian cheer! For your humble writer, Cytoplasm, this is the only two day event I typically get to attend in the calendar year. It is a chance to really prove my mettle, and show off my latest hobby project.
Two years ago I brought my Goblin army; a mix of Mantic and Games Workshop miniatures with some pretty epic multibasing. Last year I took the Undead, an army that was completely refurbished in a classic graveyard style. This year I finally get a chance to put on the table a hobby project that has been two years in the making.
Army Inception
The Riftforged Orcs were released at the end of 2021, and I jumped right in buying all kinds of boxes. Over the next two years, they were intermittently worked on hero by hero, legionary by legionary. All the while I was pondering what multibasing theme I would go for. Barren wastes like the Barrens of Azeroth? A sacked medieval village? So many choices.
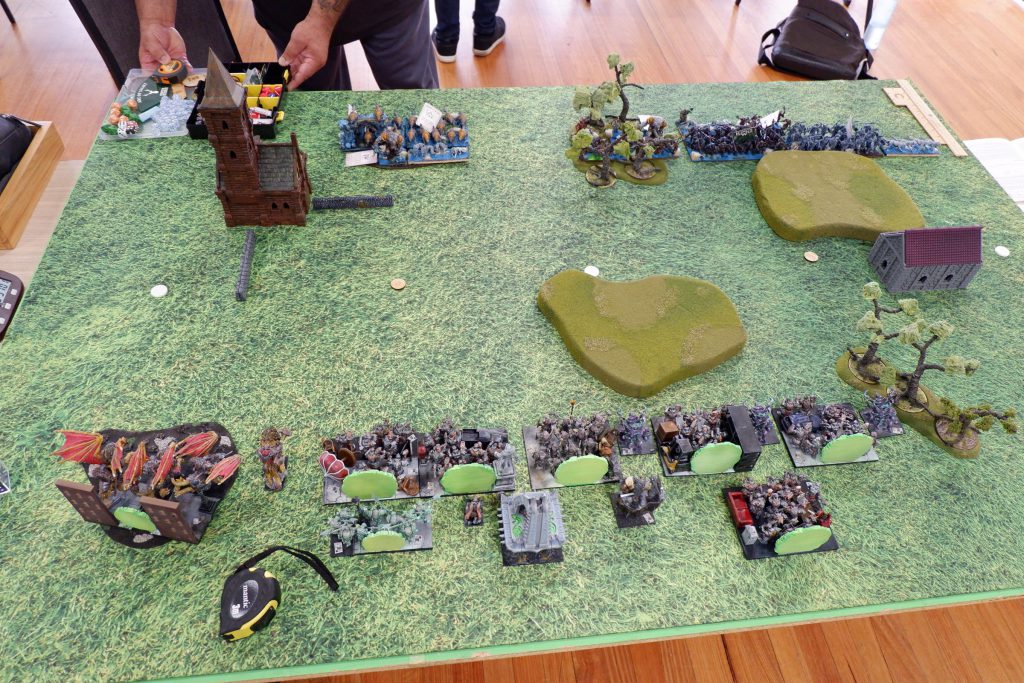
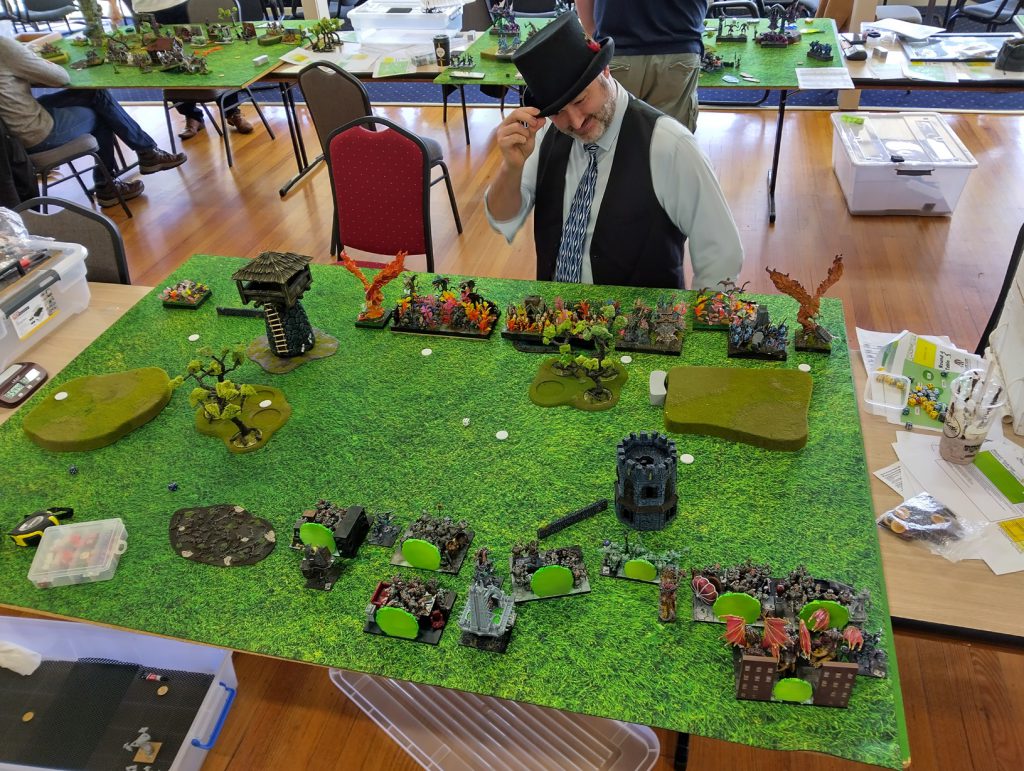
The choice, in the end, was made for me upon purchase of one of the Mantic Crazy Boxes; a Terrain Crate Crazy Box. It came filled with modern and post-apocalyptic terrain, something that was at face value entirely incongruous with all that I collected and played. That was, until, I decided to bring the Riftforged Orcs to the modern(-ish) world!
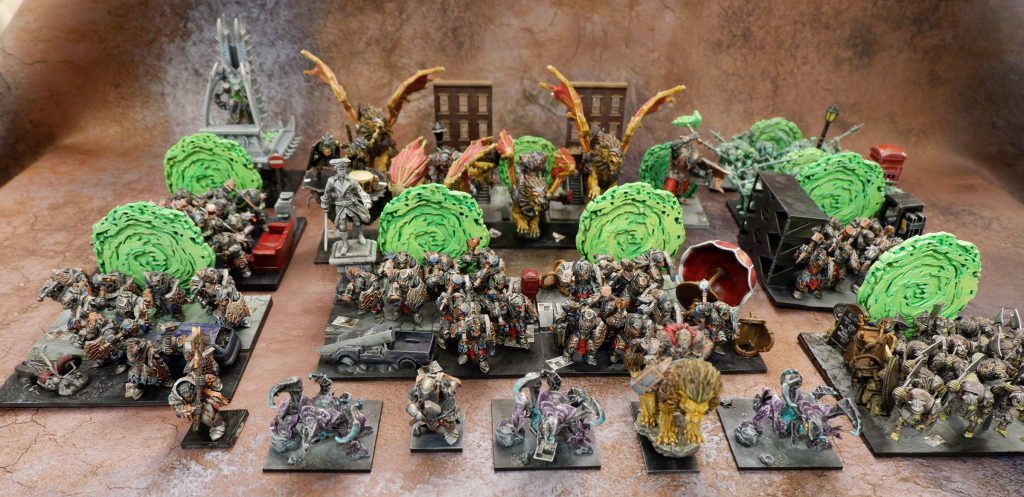
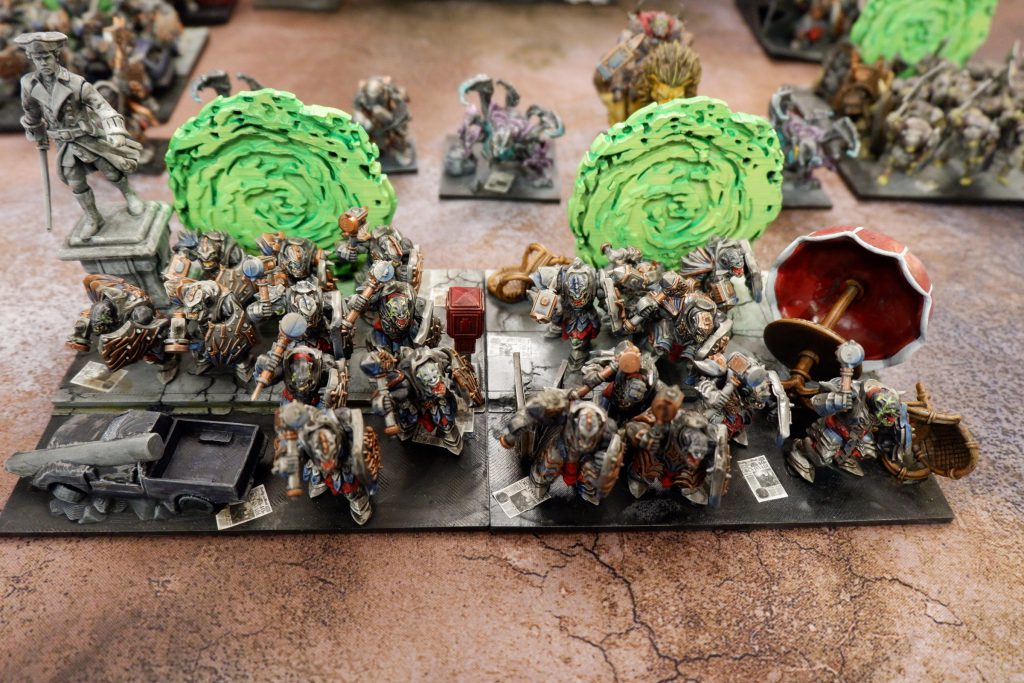
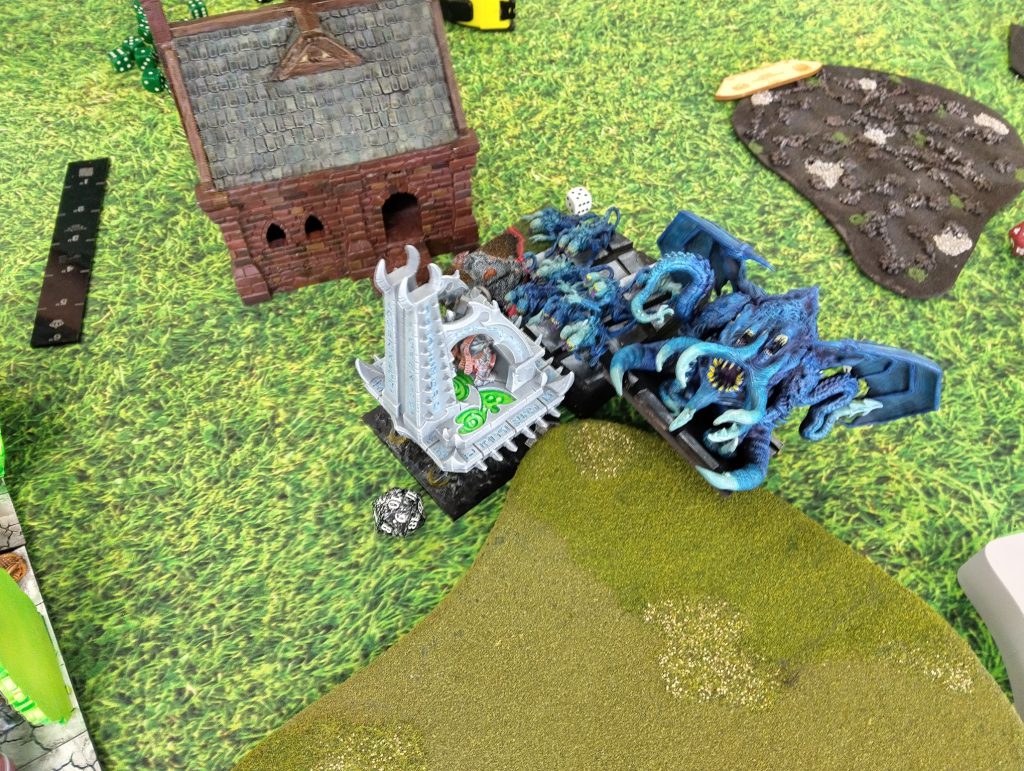
Combining the scatter terrain of the Crazy Box with completely 3D printed unit bases, the army came together at last. The giant “Rick and Morty” portals at the back of most of the bases not only explains how the Orcs got to the modern world, but acts as a nifty handle by which I can pick up my units. They also had a big splash of colour in an army that is mostly just metal, thanks to the ridiculous amounts of armour the Orcs are clad in.
Making a Balanced Riftforged Orc Army
The army I ended up taking to ConVic was not the one I initially had in mind. The original iteration consisted solely of heavy infantry and the flying cavalry that are the Helstrikers. It was slow, unwieldy, and worst of all – boring. The first few turns were spent moving and doing little else. There was little pressure on the opponent to do anything except wait for me to come, and shoot me or set up a trap. It was getting dull pretty quickly, and at this point I hadn’t even finished painting!

Two things made the army more exciting, and I owe these ideas to two individuals:
- Steve Hildrew of Death By Dragons fame (excellent Kings of War Youtube channel) ran Riftforged Orcs for a number of battle reports and demonstrated just how fantastic the little Riftforger heroes are when powered up with Host Shadowbeast.
- Mike Crossman of the Kings of War Rules Committee got into my head that three Ambaroxes would be a formidable source of firepower and utlity. He was right.
Getting the Riftforger and Ambaroxes into my army took some reorganising of the forces, but once it was done, the army became a lot more dynamic and engaging. I had enough firepower in the early turns to force my opponent to meet me, and the Riftforger helped my army crack units when they would otherwise just fall short.
So here it is, the army, all 2100 points:
Unforged Orcs (Heavy Infantry) Regiment [115]
Riftforged Legionaries (Heavy Infantry) Horde [250]
Riftwalkers* (Heavy Infantry) Troop [120]
Helstrikers (Large Cavalry) Horde [265]
Ambarox (Monster) 1 [115]
Ambarox (Monster) 1 [115]
Ambarox (Monster) 1 [115]
War Drum (Monster) 1 [80]
Stormforged Shrine [1] (Titan) 1 [190]
Riftforger (Hero (Heavy Infantry)) 1 [50]
Thonaar [1] (Hero (Cavalry)) 1 [170]
**Formation: The Iron Boots**
[F] Riftforged Legionaries (The Iron Boots) [1] (Heavy Infantry) Regiment [155]
[F] Riftforged Legionaries (The Iron Boots) [1] (Heavy Infantry) Regiment [155]
[F] Reborn Legionaries (The Iron Boots)* [1] (Heavy Infantry) Regiment [205]
Now that you know the method of my madness, let me tell you the tale of their battles at ConVic 2024; six games, two days, 2100 points of Kings of War!
Round 1: The Unlikely Encounter with Ratkin Slaves
The first game of the day was against Huw and his Ratkin Slaves; a mix of Ratkin and Abyssal Dwarf units. The Ratkin Slaves are the butt of every joke, but once I saw how it worked, I started to see the appeal.
Here’s Huw’s 2100 points of Ratkin Slaves:
Slave Warriors (Infantry) Horde [155]
   - The Last Breath [15]
Slave Warriors (Infantry) Horde [155]
   - The Last Breath [15]
Decimators* (Infantry) Horde [260]
Abyssal Halfbreeds (Cavalry) Regiment [190]
Slave Tunnel Runners (Chariot) Regiment [245]
   - Brew of Sharpness [35]
Iron-caster (Hero (Infantry)) 1 [85]
   - Fireball (12) [35]
Cryza's Gore-Impaler [1] (Hero (Monster) (Chariot)) 1 [210]
Overmaster on Ancient Winged Halfbreed (Hero (Titan)) 1 [300]
**Formation: Lowest of the Low**
[F] Slave Warriors (Lowest of the Low) [1] (Infantry) Horde [155]
[F] Slave Warriors (Lowest of the Low) [1] (Infantry) Regiment [100]
[F] Slave Warriors (Lowest of the Low) [1] (Infantry) Regiment [100]
[F] Taskmaster on Chariot (Lowest of the Low) [1] (Hero (Chariot)) 1 [145]
The army is almost completely made up of rubbish units (Slave Warriors) but The Last Breath means that they deal a considerable amount of damage on their demise: 2D3 Piercing (2) hits to each unit in contact! The elite units, such as the Tunnel Runners and Ancient Winged Halfbreed, then come in afterwards to clean up the weakened enemy. At least that’s the theory!
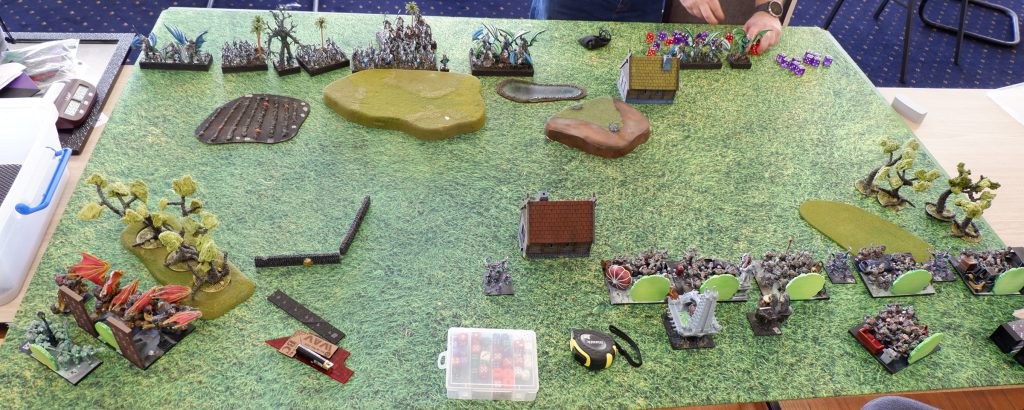
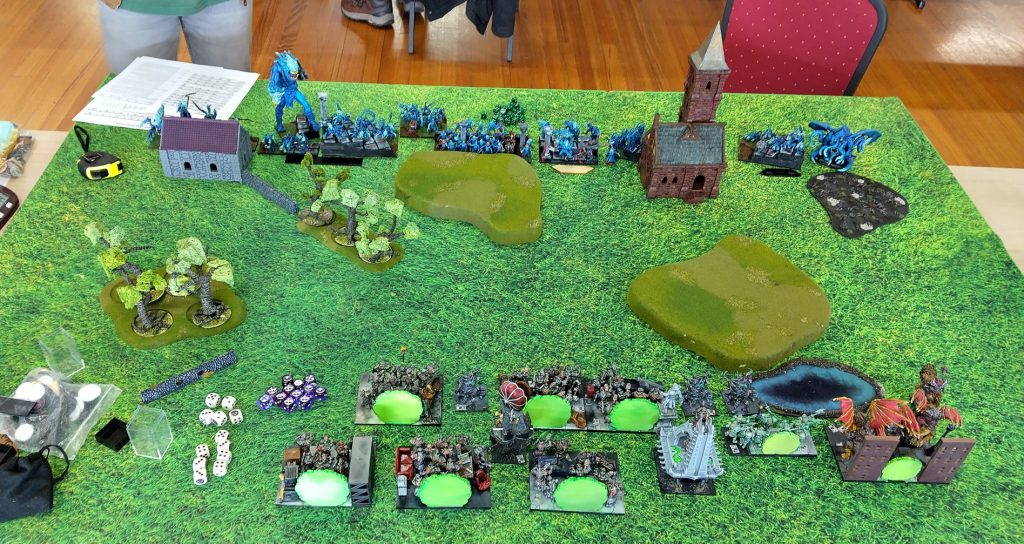
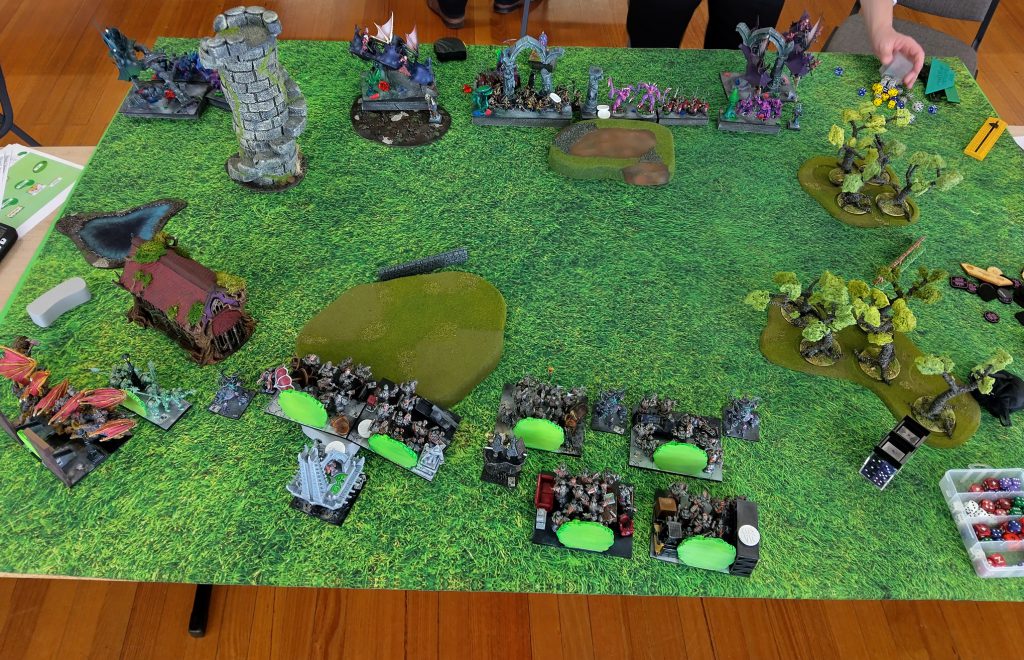
Deployment
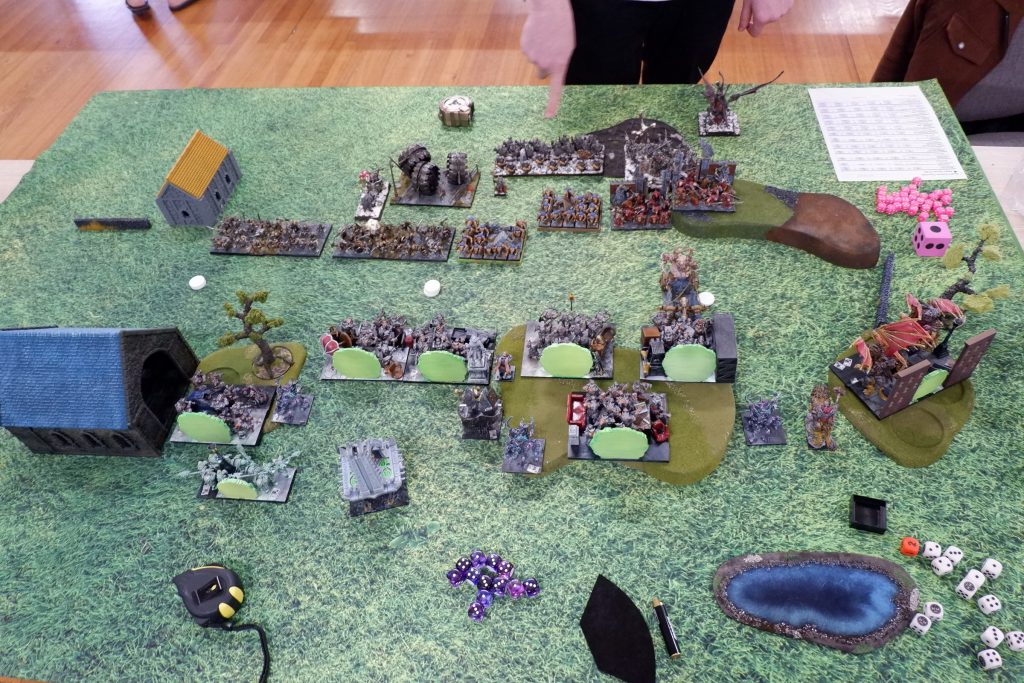
The scenario was Stockpile, which involves three piles of tokens; a pile of three loot tokens in the center, and two piles of two tokens each along the midline. I deployed my army wholly to the right of the large building, keeping all my heavy infantry units together in the middle and placing the flying Helstrikers on the right with Thonaar. The support units (War Drum and Stormforged Shrine) sat behind the front line, along with the Reborn Legionaries.
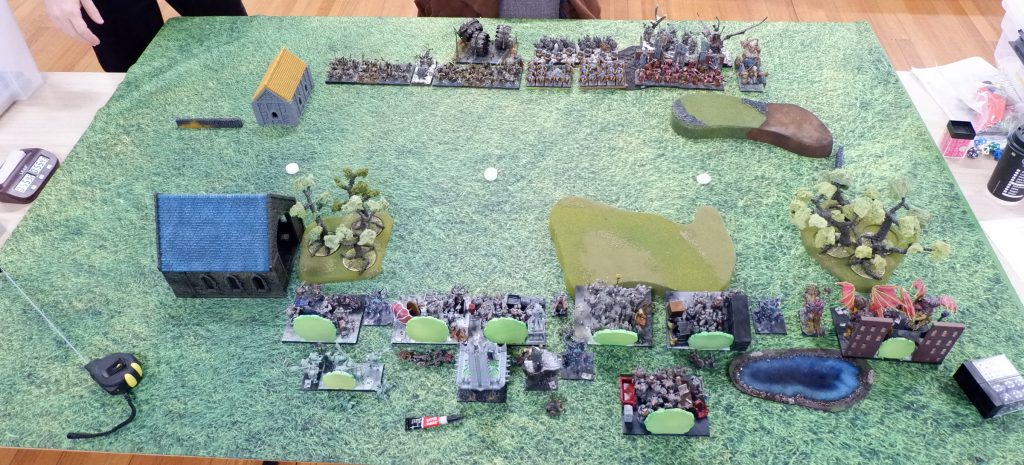
Huw deployed his army immediately opposite mine, with a complete line of Slave Warriors. Amidst them were the two chariot units – Cryza’s Gore-Impaler and the Taskmaster on Chariot. Behind this wall of chittering flesh were the real threats – the Decimators, Tunnel Runners and Halfbreeds.
A Quick Advance
Getting the first turn was crucial for me, as I moved everything up as fast as I could to lay claim to all tokens as soon as possible. Orcs are slow, and Ratkin are slightly faster. I didn’t mind getting charged by them, but I wanted to be closer to the loot tokens when this would start happening. My entire infantry line moved up in a solid wall of armour while the Helstrikers moved into a forest on the right flank to lurk.
Huw moved his own army just as boldly, throwing the Slave Warriors almost as far as they could go. Cryza’s Gore-Impaler could not handle the affront of Orcs getting the first blood and charged off into a regiment of Riftforged Legionaries. Unfortunately for the Gore-Impaler, it merely Wavered my Orcs.
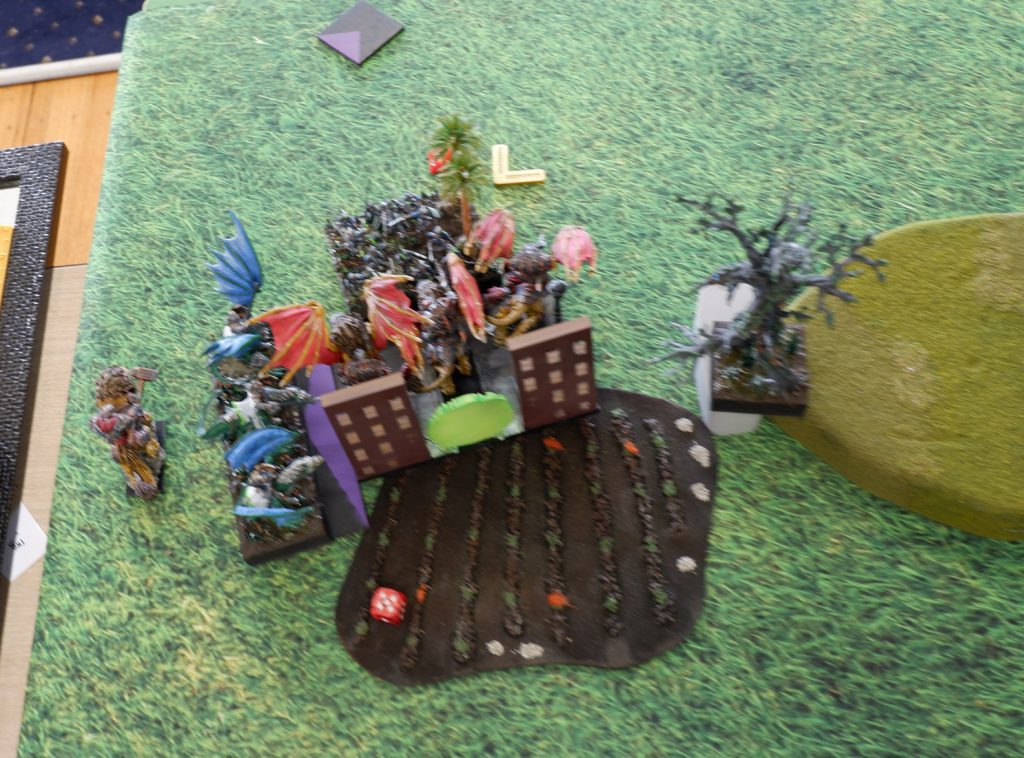
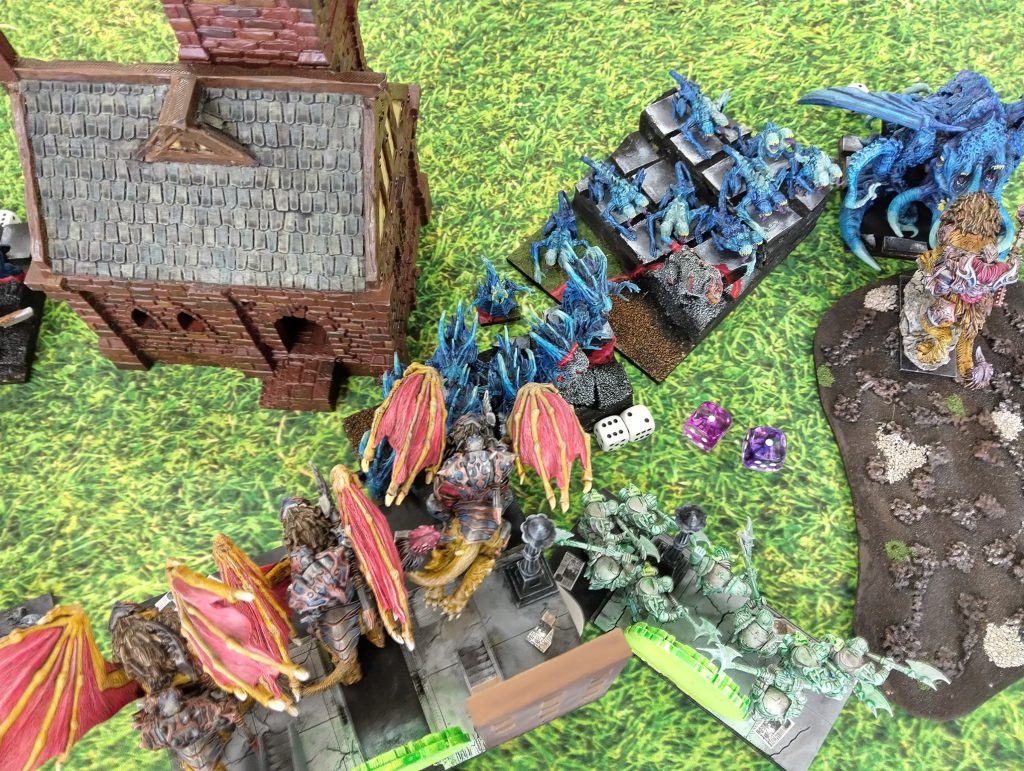
Hammer and Claw
At this point the Riftforged Orcs get stuck in. Legionaries of the Dark Smith obliterate a horde of Slave Warriors, while Cryza’s Gore-Impaler meets a quick end with a flank bashing by a regiment of Unforged Orcs. The Ambaroxes have been harassing the Taskmaster on Chariot for two turns, who now becomes Wavered.
The violence escalates with the introduction of the elite units of Huw’s army. The Tunnel Runners plowed into the horde of Legionaries, doing decent damage but ultimately getting bits of Orc stuck in the wheel mechanism. A horde of Slave Warriors ripped apart the Riftwalkers that were protecting my flank, and both the Abyssal Halfbreeds and the Ancient Winged Halfbreed obliterated the regiment of Unforged Orcs responsible for the Gore-Impaler’s demise.
To cover the flank of the Halfbreeds, a horde of Slave Warriors charged into Thonaar, getting into the perfect position to block the Helstrikers from hitting the Overmaster.
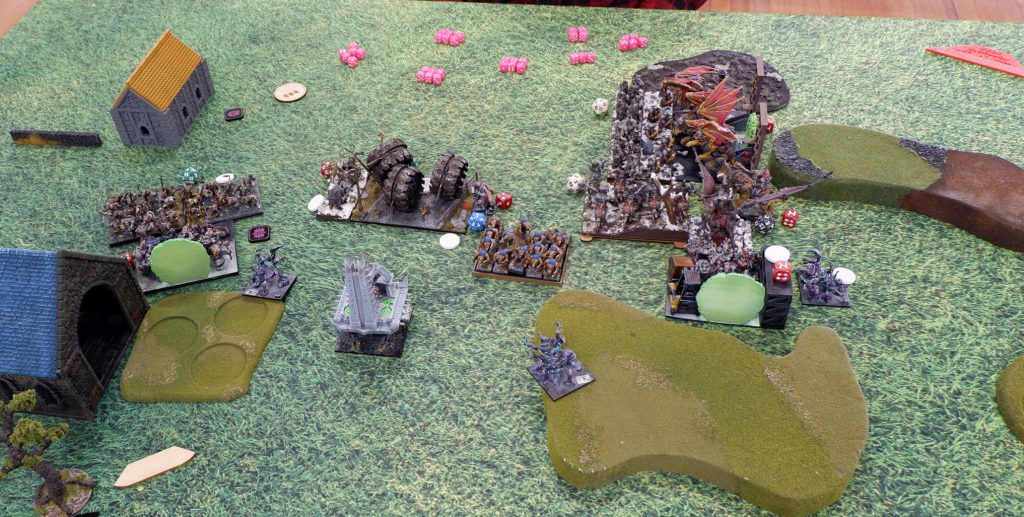
Look to the Skies
Unfortunately for Huw, he was concentrating so much on protecting his Overmaster from retribution, he neglected his Decimators, who had advanced just a bit too far, leaving their flank open to the Helstrikers. The flying Helstriker manticores launched out of the forest and crashed amidst the lines of beleaguered Abyssal Dwarfs, yet the difficult terrain Hindered the charge so that, surprisingly, the horde of Decimators survived. The Helstrikers, however, were now deep in the backlines of Huw’s army, a place they loved to be.

The rest of the Riftforged Orcs rushed into every visible Ratkin. Slave Warriors everywhere were feeling the hammers of the Riftforged, none more than the right-most Slave Warrior horde. This mob failed to tickle Thonaar and as a consequence are flanked by some angry Orcs and promptly ended. Unfortunately the Great Orc Offensive fails to rout anything else of the Ratkin, but there were plenty of bloodied noses at least.
At this point, Huw has one loot token on the left-most horde of Slave Warriors, while I have two on the horde of Riftforged Legionaries, and one on a regiment. This all changes when the Tunnel Runners shift into high gear, turning the Legionaries into a fine metallic paste. Their victory is short lived as the Super Saiyan 3 Host Shadowbeast-boosted Riftforged shattered the wheely rats soon after, leaving the two loot tokens on the battlefield.
Meanwhile the Halfbreeds and Overmaster make short work of some more Orcs, yet Thonaar comes in like a sniper round to remove the Halfbreeds who had already been tenderized by the aforementioned Orcs. The Overmaster survives with a loot token in hand, but this is not the model that wants to be burdened by loot tokens and quickly finds itself prey to the Helstrikers who had finished their lunch of Decimator delights.
The Loot Orc (as opposed to Goblin)
The state of the battlefield by the final turn saw loot tokens being held by the Helstrikers, Stormforged Shrine and one on each Ambaroxes. The whole game the Ambaroxes had continued wavering the Taskmaster on Chariot, which was rude of me but helped blunt the response of the Ratkin Slaves after routing their front line. Huw tried his best to get tokens off the Ambaroxes, but unfortunately the forces that were remaining to the Ratkin Slaves were tired. The Riftforged Orcs emerged victorious with five loot tokens to two.
Round 2: The Unbridled Hate of the Varangur
The second opponent of the day was Oz with a different kind of Varangur army. The Varangur aren’t particularly often seen in the Australian scene, but thanks to many games against my co-author Urr’s Varangur, I had extensive knowledge of their capabilities.
This is Oz’s 2100 points of Varangur:
Night Raiders (Infantry) Troop [110]
   - Fire-Oil [5]
Night Raiders (Infantry) Troop [105]
Night Raiders (Infantry) Troop [105]
Human Tribesmen (Infantry) Horde [255]
   - Two-handed Weapons [0]
   - Blade of Slashing [5]
Human Tribesmen (Infantry) Horde [260]
   - Two-handed Weapons [0]
   - Pipes of Terror [10]
Tundra Wolves (Cavalry) Regiment [210]
   - Brew of Strength [30]
Tundra Wolves (Cavalry) Regiment [200]
   - Blessing of the Gods [20]
Snow Foxes* (Swarm) Regiment [80]
Snow Foxes* (Swarm) Regiment [80]
Snow Foxes* (Swarm) Regiment [80]
Magus Conclave (War Engine) 1 [100]
Magus Conclave (War Engine) 1 [100]
Lord (Hero (Heavy Infantry)) 1 [145]
   - Devoted Icon [20]
   - Sacred Horn [15]
Snow Troll Prime (Hero (Monster)) 1 [135]
   - Trickster's Wand [15] Hex (2)
Snow Troll Prime (Hero (Monster)) 1 [135]
   - Talisman of Silence [15] Mind Fog (2)
Typically a Varangur army, who are the barbaric cousins of the Northern Alliance, are all about striking first and striking hard. Like all skewed army lists, this can result in hard counters. Oz’s army has brought together multiple aspects of the Varangur, including the less seen ranged units and the light cavalry that are the Tundra Wolves.
It has some speed, some firepower, and, most disconcertingly, some Hex. My Stormforged Shrine absolutely cannot handle being Hexed. The whole point of the Shrine is to pump out multiple castings of Bane Chant a turn, and getting slapped for 2 damage with each successful roll of 4+ will ruin the Shrine in a single turn. Hex was not a popular spell in the Australian Kings of War meta, yet it seems this is starting to change.
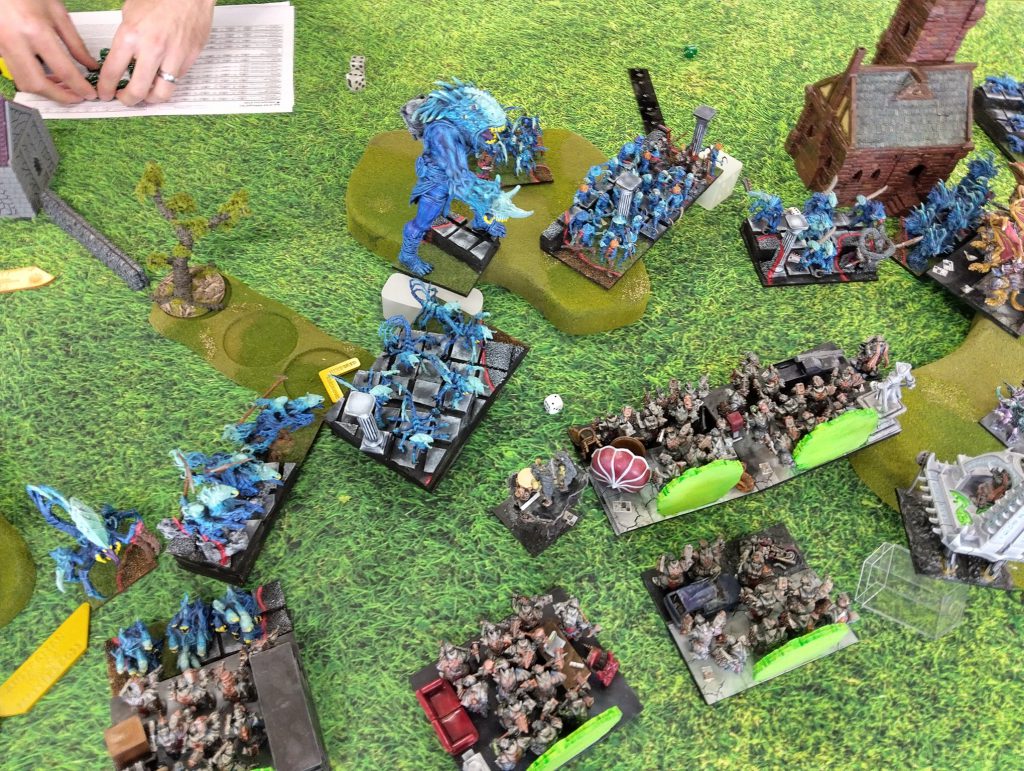
Deployment
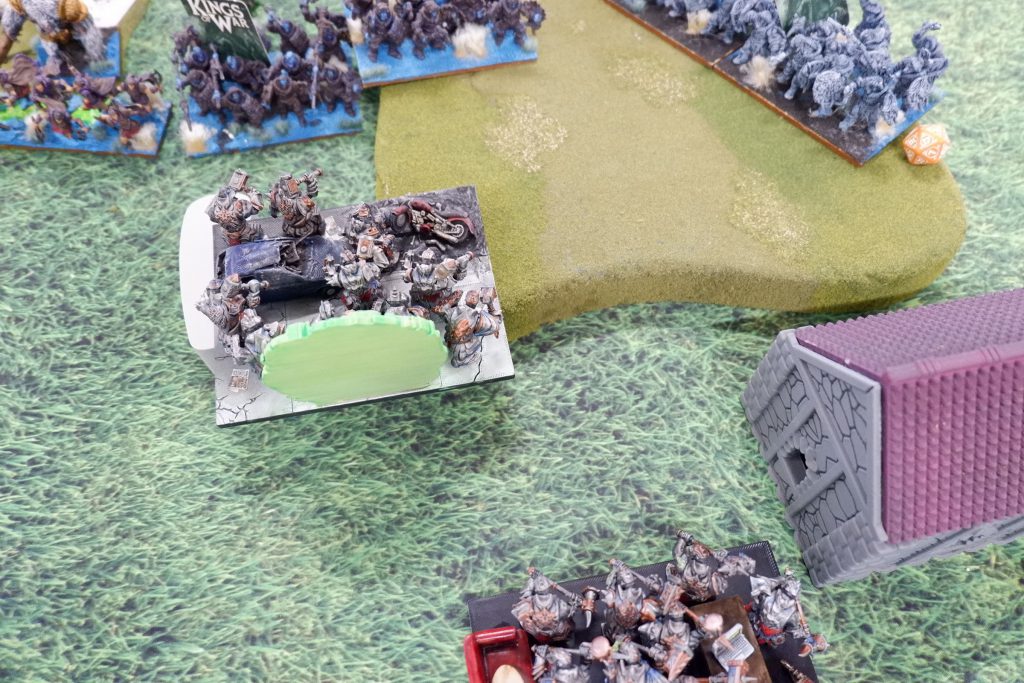
The scenario was Plunder – five Loot tokens across the center line, with two being chosen as worth 2 Victory Points. Did this change how I would deploy my army? Not in the slightest. I put my entire army across the middle. A wall of Orcs interspersed with Ambarox, backed up by the supporting units such as the War Drum, the Stormforged Shrine and the Reborn Legionaries (they’re kind of support, right?). The Helstrikers sat on the left flank of the army, ready to pounce with Thonaar.
Oz divided his Varangur into two battlegroups: the fast Tundra Wolves on the left, and the slow humans on the right. In the forest were all the shooting components, the Magus Conclaves and Night Raiders, likely hiding from my own shooting. Snow Foxes stand at the ready to pounce on the Loot tokens and the scene is set.
Best (Iron) Foot Forward
First turn went to the Orcs and we wasted no time moving right up as fast as we could. The entire army rarely manages to deploy on open terrain, but in this instance the ground was flat and the Orcs did fly!
Despite my army moving up within striking distance of the Loot tokens, Oz sent one of his Snow Foxes to grab a 2 Victory Point token on the middle right. A sound tactic; send a fast unit to pick up a token and sprint away as fast as possible. The problem is, when carrying a token the unit’s Speed is reduced to 5, and so the next turn the Foxes were obliterated by my Reborn Legionaries thanks to the extra Wild Charge (D3) they possessed.
At the same time, the other Riftforged Legionaries regiment charged some Night Raiders to block things up. These poor Orcs were surrounded by TWO hordes of Tribesmen, but over the next 5 turns my Reborn Legionaries managed to escape with the 2 Victory Point token. They ended up behind a building, and even managed to flank charge the Tribesmen when they got stuck after a fight.
A Snow Foxes regiment managed to make it with a 1 Victory Point loot token on the far right, so Oz’s tactic was working to some degree.
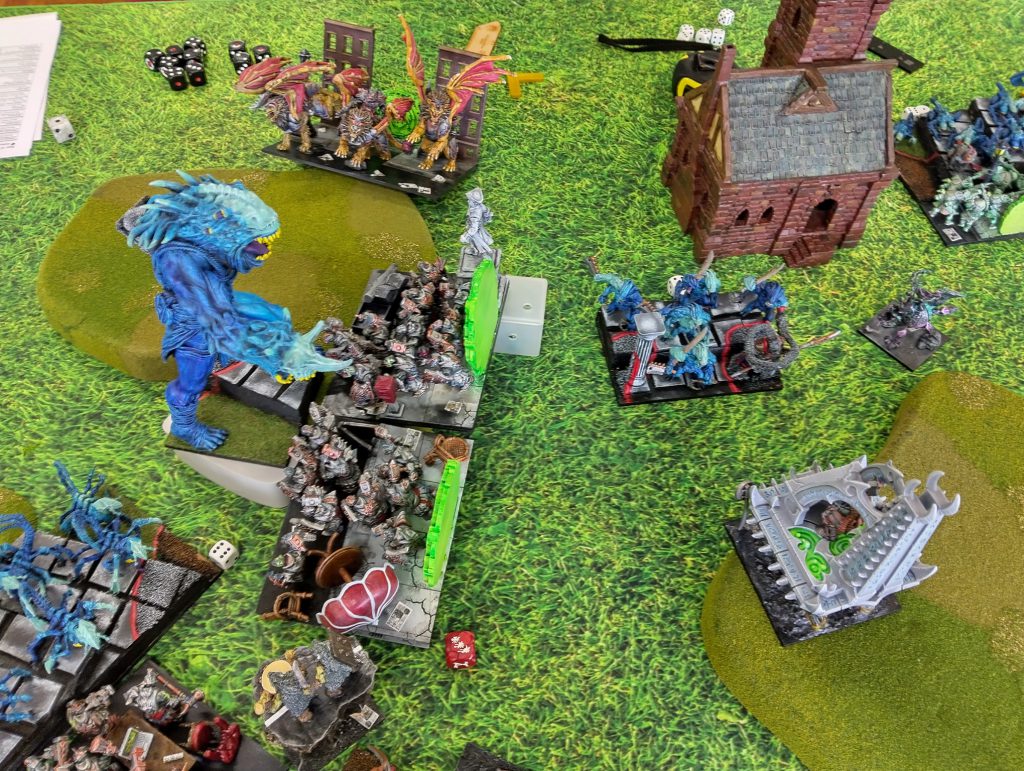
Of Wolves and Manticores
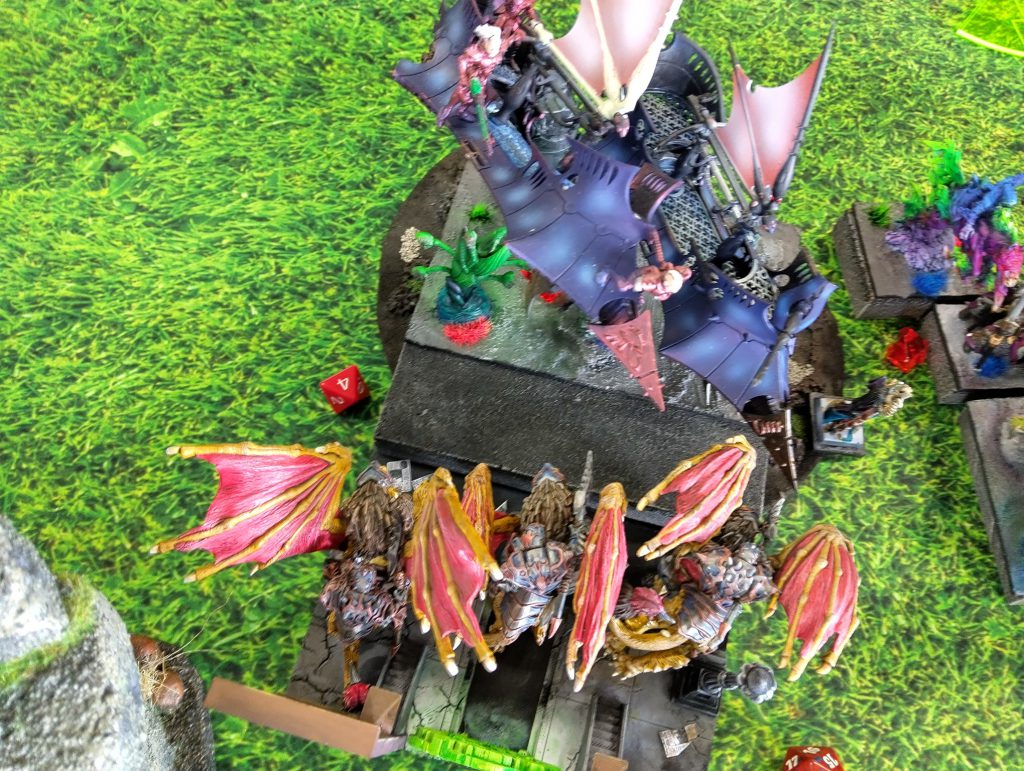
The left side of the battlefield was carnage from Turn 1. The Helstrikers and the long line of Riftforged Orcs had moved up into charge range of the faster units of the Varangur, and Oz sent the Tundra Wolves and Snow Foxes in for the kill. Most critically the Helstrikers sat atop an obstacle, forcing the Tundra Wolves into a Hindered charge which dramatically reduced their effectiveness. With the aid of Thonaar, the Helstrikers made short work of the Tundra Wolves and were soon flying through the back lines of the Varangur, starting with a Night Raider troop in the middle of the army.
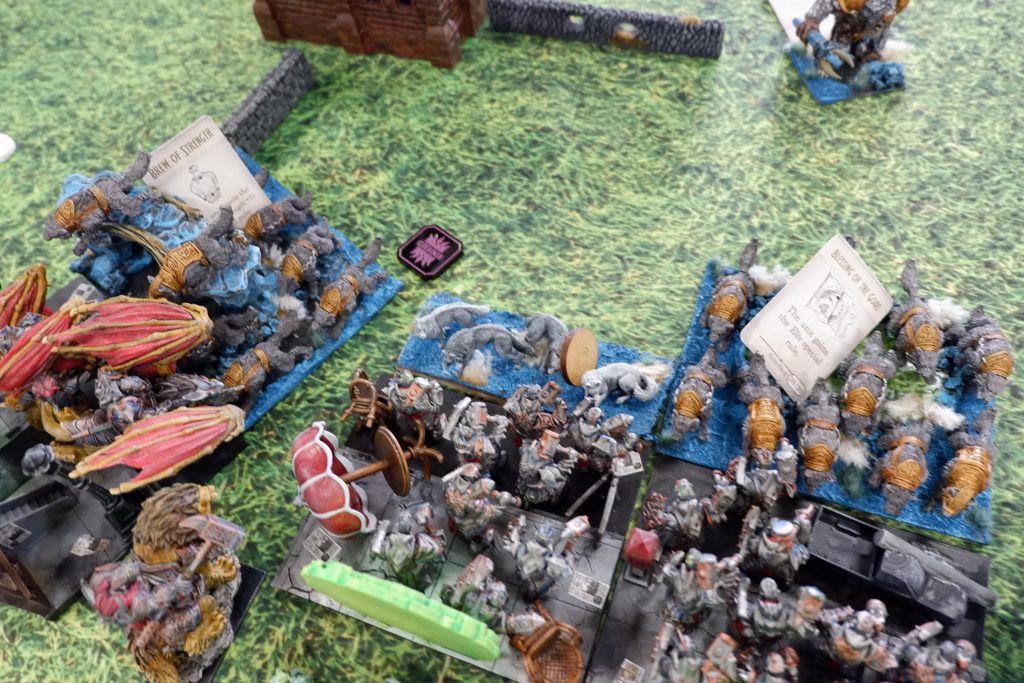
By the end of the game, the Helstrikers had feasted on all of the Tribesmen hordes, leaving none alive. Critically, the Varangur’s Lord on foot had tried to pin the Helstrikers down, but failed to damage them. This moment allowed them to continue their carnage.
The tally of Victory Points at the end was 5 to 1. The horde of Legionaries managed to grab the other 2 Victory Point token, while the humble Stormforged Shrine picked up the middle token. The Snow Foxes that grabbed theirs managed to keep it, staving off greater defeat.
Round 3: Tricksy Elves
With two victories to the Riftforged Orcs I was flying close to the sun, which is exactly how I was spotted by the keen archers of the Elves – literally. My third opponent of the tournament was Tucky and his admirably all-Mantic Elves.
Tucky’s 2100 points of Elves:
Kindred Gladestalkers (Infantry) Regiment [185]
Kindred Gladestalkers (Infantry) Regiment [185]
Therennian Sea Guard (Infantry) Horde [260]
Stormwind Cavalry (Cavalry) Regiment [225]
   - Sir Jesse's Boots of Striding [15]
Drakon Riders (Large Cavalry) Horde [295]
   - Helm of the Drunken Ram [20]
Nimue Waydancer [1] (Hero (Infantry)) 1 [150]
   - Fireball (10) [0]
   - Heal (4) [0]
   - Surge (4) [0]
   - Wind Blast (5) [0]
Tree Herder (Hero (Monster)) 1 [260]
   - Surge (8) [0]
**Formation: Kal'ar's Hunters**
[F] The Swirling Tempests, Drakon Riders (Kal'ar's Hunters) [1] (Large Cavalry) Regiment [180]
[F] The Swirling Tempests, Drakon Riders (Kal'ar's Hunters) [1] (Large Cavalry) Regiment [180]
[F] Kal'ar Drakonkin, Lord on Drakon (Kal'ar's Hunters) [1] (Hero (Large Cavalry)) 1 [180]
   - Pipes of Terror [10]
The Elves in general are considered a pretty good army list, but one that lacks defense. A mistake can be costly as the units are elite (in both senses of the word), but unfortunately for me Stephen Tuck doesn’t often make mistakes, or at least not at the same rate that I do. This particular Elves army list boasts 49 ranged attacks not including what Nimue was capable of. In addition, the army has considerable speed, far beyond my own single unit of Helstrikers. I was going to be fighting in the shade of both arrows and wings.
Deployment
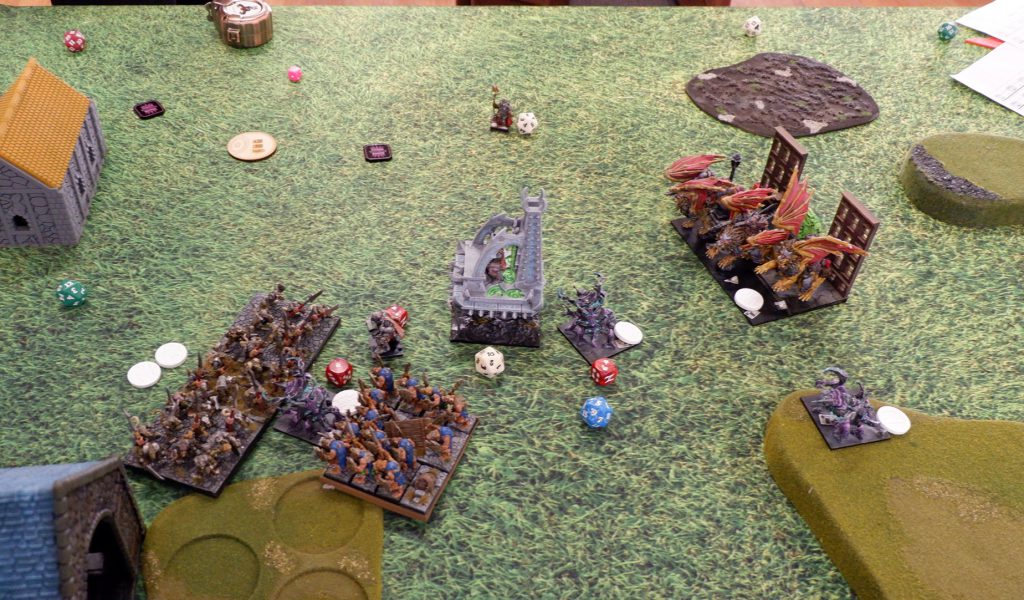
The scenario was Control – six regions to score in, requiring my army to spread out, which it definitely does not like to do. Worse yet, I got stuck with a deployment zone with a house in the middle of it. As I deployed my standard deployment barely fit between the house and the edge of the battlefield, leaving my Helstrikers out of the equation. I ended up doing the absolute worst thing – I put them out on the far left flank with Thonaar and the Riftwalkers.
Why was this the worst thing? It dropped the threat range of my entire army from 20” to 10”, but at the time I was thinking those tempting thoughts of “What if my Helstrikers flank his whole army?”. Do not give into these thoughts, they rarely lead to any good outcomes.
Facing off against these lonely Helstrikers was almost the entirety of the Elven host – Gladestalkers, Tree Herder and one of the regiments of Drakons were on the far left. The center was occupied by the Sea Guard and Drakon hordes. On the far right, on the other side of a building, was the other Drakon regiment with the Lord on Drakon.
Already I could see that my army would struggle to bring itself to bear on the Elves, simply from my deployment. Unfortunately, I only realized this after the fact!
Doomed to Die
To my credit, I did have the Helstrikers behind a forest to prevent that first turn shooting. The moment they peeked through the trees, however, they were met with a fearsome hail of shots: one unit of Gladestalkers managed to inflict 6 damage on my precious manticores despite the cover. Suddenly, I remembered all the times my Helstrikers perished due to my hesitation, so the next turn I sent them into the Gladestalkers, but alas they failed to break them and were flanked by the Drakon regiment. It was a sad ending, but it boded even less well for the right flank (ie. the rest of my army).
Elite Cunning
The mass of infantry that were the rest of my Riftforged Orc forces advanced, the units on the right coming in towards the Elves. The first few turns the Drakons, and indeed the entire army, edged back gradually. Shots were exchanged all the while; arrows dealing damage to the Riftforged Legionary horde, and Ambarox attempting to blast off some Drakons (the regiment).
The Lord on Drakon spied an opening, an Ambarox that if charged and killed, would result in it being hidden from view but deep in my ranks. Tucky took the chance and the Lord slew the Ambarox. I had a Lord on Drakon looking at multiple flanks and could do little about it.
It was at this moment that everything pounced. The Elves advanced while the Lord and the regiment of Drakons started causing havoc. My horde of Legionaries, peppered with arrows, was crushed under the might of the Drakon horde and Stormwind Cavalry. With everything beset on all sides, it all ended rather promptly by Turn 5. Tucky had his forces all over the table, winning the scenario completely. I had managed to kill a Drakon regiment and the Lord on Drakon, but that was all.
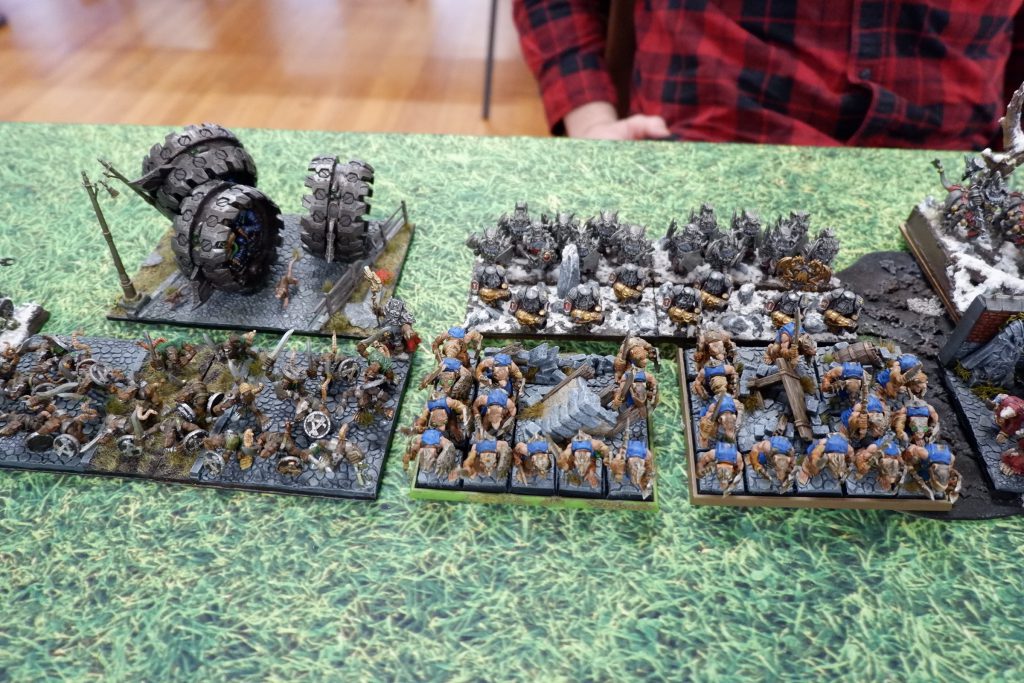
Round 4: Phalanxes of the Salamanders
After a good nights’ sleep and a strong coffee, I was ready for the second day of ConVic against my 4th Round opponent – Josh and his ultra vibrant Salamanders! He, too, was quite resplendent in pressed shirt, waistcoat and top hat. Overall it was a visual spectacle that was only matched by Josh’s vivaciousness.
Josh’s 2100 points of Salamanders:
Ghekkotah Warriors (Infantry) Regiment [95]
Salamander Unblooded (Heavy Infantry) Regiment [125]
   - Mead of Madness [10]
Salamander Ceremonial Guard (Heavy Infantry) Horde [270]
   - Effigy of Fire [5]
   - Hann's Sanguinary Scripture [10]
Salamander Ceremonial Guard (Heavy Infantry) Horde [260]
   - Effigy of Fire [5]
Scorchwings* (Large Cavalry) Horde [220]
   - Fire-Oil [5]
Rhinosaur Cavalry (Large Cavalry) Horde [265]
   - Sir Jesse's Boots of Striding [15]
Komodon (Monster) 1 [115]
Komodon (Monster) 1 [115]
Komodon (Monster) 1 [115]
Phoenix (Titan) 1 [145]
   - Heal (5) [0]
Phoenix (Titan) 1 [145]
   - Heal (5) [0]
Herald (Hero (Heavy Infantry)) 1 [75]
   - Trickster's Wand [15]
   - Hex (2)
Herald (Hero (Heavy Infantry)) 1 [85]
   - Lute of Insatiable Darkness [25]
   - Bane Chant (2)
Battle Captain (Hero (Heavy Infantry)) 1 [70]
   - Path of Fire [15]
This army of Salamanders is not here to play nice. The Ceremonial Guard hordes will be kept healthy by the Phoenixes, and the faster elements such as Rhinosaurs and Scorchwings will keep my forces at bay. The Komodons are particularly concerning as they have a fearsome reputation for obliterating units. They are similar to my Ambarox, but for the same price boast considerably greater firepower, while being less mobile (no Steady Aim).
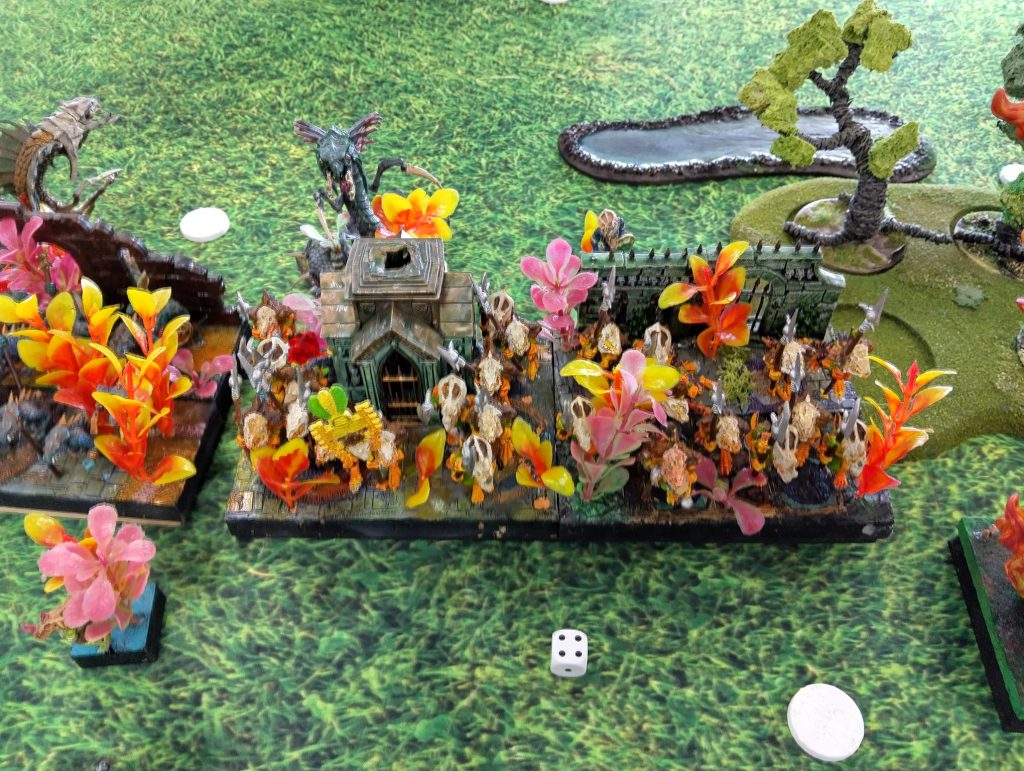
Deployment
The scenario was Fool’s Gold – a tricksy scenario whereby one places counters of different values on the opponent’s side facedown. Turn them up on Turn 3 to find out if you remembered where the valuable tokens are! I placed all the valuable tokens on the right, making sure to keep them within 14” of each other. This was just in case my massive large infantry horde of Riftforged Legionaries got over there and could possibly hold two tokens at once!
I learnt a lesson from my game against the Elves – do NOT split up the army. The entire army deployed on the right side of the board. Wedged in between a building and the board edge was the horde of Legionaries and the Helstrikers behind, the idea was that the Helstrikers could project threat and help the Legionaries march forth. The rest of the army, all the various regiments, were on the other side of the building.
Josh’s Salamanders were spread across his entire deployment zone. On the right flank, facing off against my Helstrikers, was one Phoenix, the Unblooded and the Scorchwings. Next to these were the Rhinosaur Cavalry. In the middle of the battlefield were the pair of implacable Ceremonial Guard hordes flanked by the other Phoenix on the left. The Ghekkotah Warriors were on the far left flank. No guesses needed for the hidden objective on that side!
My three hidden objectives were on the right side; the rightmost and the one at the back being 1 Victory Point, and one more middle-right was the valuable 2 Victory Point objective.
Delay Tactics
The Ceremonial Guard were completely capable of grinding through my entire army if I got into combat with them too early, so it was my intention to put that off as long as possible. This was at least until the right flank was resolved. How I planned to do that was to feed them just one unit at a time.
The Salamanders went first, and while they moved up tentatively, they made sure to blast me from afar with Phoenixes and Komodons. This was the first game in which the Stormforged Shrine was an active target from the very beginning. Josh knew exactly how integral it was to my army. Komodons and Hex battered against its arcane stonework, and quickly racked up 5 damage and was no longer capable of casting spells and moving. Another turn like this and it would be rubble.
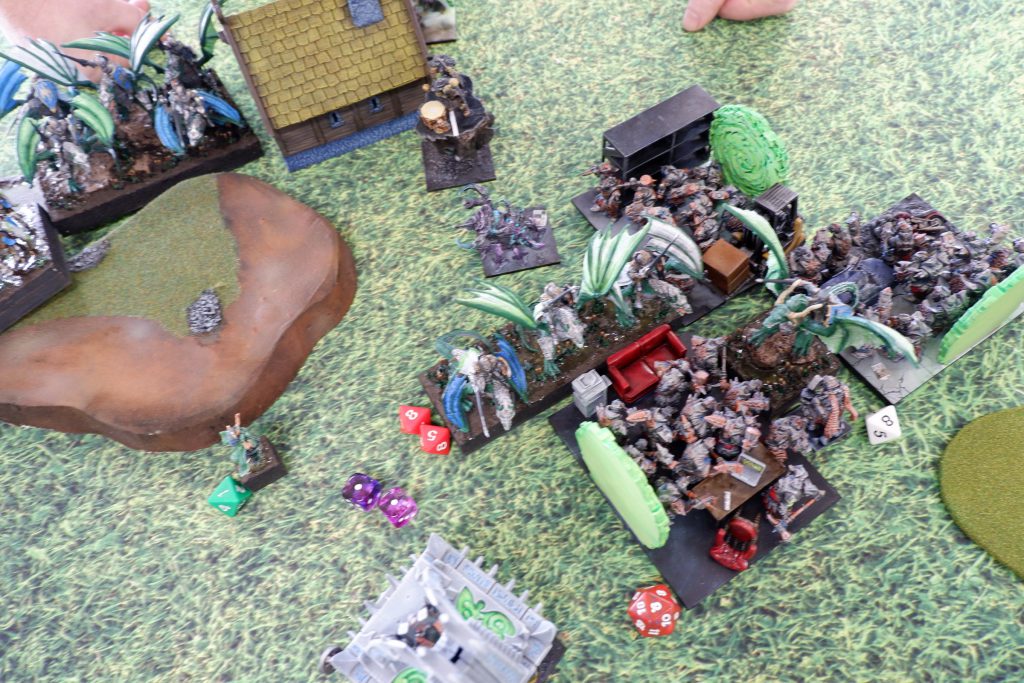
I was moving up as fast as possible with Speed 5, but by Turn 3 I resolved to deploy my cunning plan to spoil his neat battle lines. I sent out bait in all directions, my damaged units as well as the chaff (Unforged Orcs and Riftwalkers) to tempt the Salamanders into all kinds of charges. One Ceremonial Guard horde flank charged the Unforged, the other went into the front of the leftmost Riftforged regiment (damaged already by Phoenix fire). The Unblooded flank charged the Riftwalkers, and the Rhinosaur front charged the Shrine. It was Turn 3, and the Salamanders were all out of position.
Bloody Work
The Rhinosaur Cavalry and Unblooded were promptly obliterated by a tide of Riftforged Orcs. The Ceremonial Guard horde took two turns to eventually destroy the Riftforged regiment. The other Ceremonial Guard horde finished the Unforged no problem, but then along came the Riftforger! He single-handedly withstood the Ceremonial Guard horde for two turns, which it must be said is an incredibly unlikely thing, but dice were with me and Josh’s were not in that combat.
On the right flank, the death of the Unblooded and Rhinosaur meant that only the Scorchwings and a Phoenix stood before my horde of Legionaries, which marched forwards boldly. The Scorchwings had also been reasonably damaged by my Ambarox and so they valiantly charged Thonaar, hoping to rout the Individual and overrun into the horde. Unfortunately, they only tickled Thonaar and were put down by the horde of Orcs. Thonaar went on to slay Phoenix.
The Helstrikers first and only charge was into the Ceremonial Guard along with the Reborn Legionaries. Unfortunately Phalanx stymied their impetus, but managed to do a little damage. This was a terrible charge to do, but at this point it was known that the 2 Victory Point token was up for grabs right underneath them so I needed to at least start hurting them.
Play the Scenario
Near the end of the battle, Josh had 6 Victory Points secured with the Ghekkotah on the left and a Komodon in the middle holding one each. Each Ceremonial Guard horde sat atop a 2 Victory Point objective.
Meanwhile, my rightmost Ambarox and the Riftorged horde sat safely on a 1 Victory Point objective each. The score was 6 points to Josh, 2 to me. Not great, but I came up with a longshot plan to secure victory, and went for it!
In (potentially) the last turn, my horde of Riftforged Legionaries wiggled to cover both their own objective, but also to contest that held by one of the Ceremonial Guard hordes. Suddenly the score was 4 to 2; progress.
Next was the true longshot, Thonaar and the remaining Riftforged regiment went into the Ceremonial Guard horde. Despite the Phalanx a considerable amount of damage was done and it came down to the Nerve test.

Two dice.
Double one was rolled. The Ceremonial Guard horde was not going to die that day… except that I had the Blessing of Lady Burden of the Burden Bowls Club (our venue). This was a one use token that when invoked would grant a reroll on a Nerve test.
I proclaimed “LADY BURDEN GRANT ME YOUR BLESSING!”, and proceeded to roll enough to wipe out the Ceremonial Guard, secure the 2 Victory Point objective, and the game ended there with a win to the Riftforged.
Also, the Ambarox and Phoenix fought each other for four whole turns but that’s hardly worth mentioning. An ultimate pillow fight.
Round 5: The Nightstalker Menace
Having reached three wins, I was riding on a high. My fifth opponent was a familiar face, indeed the army was entirely familiar; Andy’s and his incredible Nightstalkers complete with display board. I had previously fought an almost identical version of his army with an almost identical version of my own army, so this was a rematch! I had narrowly lost that last game against Andy, so I was ready to try again!
Andy’s 2100 points of Nightstalkers:
Scarecrows (Infantry) Horde [125]
Reapers (Infantry) Regiment [190]
Phantoms* (Heavy Infantry) Troop [105]
Butchers (Large Infantry) Horde [205]
Shadowhounds* (Cavalry) Regiment [205]
   - Helm of the Drunken Ram [15]
Soulflayers* (Large Cavalry) Regiment [165]
   - Wind Blast (5) [0]
Fiends (Large Cavalry) Horde [230]
   - Sir Jesse's Boots of Striding [15]
Needle-fangs* (Swarm) Regiment [80]
Shadow Hulk (Titan) 1 [225]
Esenyshra, the Wailing Shadow [1] (Hero (Infantry)) 1 [160]
   - Enthral (7) [0]
Dread-fiend (Hero (Large Cavalry)) 1 [135]
Void Lurker (Hero (Titan)) 1 [275]
   - Blade of Slashing [5]
An army that dabbles in a bit of everything, Andy’s Nightstalkers have all kinds of speeds and profiles to keep in mind. What it lacks in literal redundancy, it makes up for in flexibility. Most notable among these are Esenyshra, the Void Lurker and Shadowhounds. Andy likes to run these as a fast flank, so they need to be either protected against or dealt with. The rest of the army typically moves up together, sending out chaff first and then the hard hitters. If Andy times it right, this army can mince most opponents.
Deployment
The scenario was Dominate – get as many units in the middle by the end of the game! Easy to understand, hard to execute. At this point we know my deployment strategy, but this time I went for even more unit layering. The horde of Riftforged and the Unforged were at the front, while the regiments from the Iron Boots formation were all behind, along with the typical support units. This was to protect against Soulflayers, which were deployed on the far left and were no doubt looking to find a tasty flank attack. On the right were deployed the faster units – Helstrikers, Thonaar and Riftwalkers, to counter Andy’s fast units mentioned above.
Andy’s deployment was tricky, wedged between two buildings. The horde of Scarecrows were right in the middle, aiming for that Dominate zone to score. To their right were the Butchers and to the left were the Fiends. Behind them were the Reapers, being kept hidden from my pesky shooting.
Calm Before the Storm(forger)
Gaining the first turn, I pushed up hard, staking my claim in the middle thanks to a paucity of terrain around my army. Only my Helstrikers sat back, taking care to be out of charge range of the Void Lurker and friends. The Riftwalkers and Thonaar went far forward as bait, but Andy wasn’t going to fall for that old trick.
Andy’s advance was similarly tentative. The presence of my Helstrikers kept his fast flank in check, with only the Phantoms daring to jump out in front. Andy’s wider frontage of battleline saw his leftmost forces wrapping around, and I was in danger of getting attacked from all angles.
The first blood to be drawn was when the Helstrikers charged the Phantoms, with Riftwalkers protecting their flank from the Void Lurker, who was hit by a Thonaar in the face. At the same time my army moved up boldly, and a single Ambarox sprinted forward to impede any chance of multiple charges on my Riftforged Legionaries horde. This forced Andy to double charge the Unforged with Fiends and Soulflayers, lest he get blocked up. The Reapers came onto the hill to pounce on what remained, while the Scarecrows moved to block my horde from reaching them.
The Helstrikers failed to rout the Phantoms, but then the Phantoms failed to damage the Helstrikers. And that’s when things went crazy.
High O(r)ctane Violence
The failure of the Phantoms meant the undamaged Helstrikers retained their ability to fly, and unfortunately for Andy, he had just positioned his Reapers on the hill and moved the Scarecrows more than half off the hill. The Helstrikers went straight into the flank of those Reapers which resulted in their catastrophic demise.
Simultaneously the Scarecrows were removed by the Riftforged horde, and the Fiends were hit by one of the regiments of Legionaries. Andy did his best, sending the Shadow Hulk into the horde of Orcs and trying to save the Fiends with the help of the Dread-fiend, but poor rolling saw them both do middling damage and as a result the Fiends and Hulk were charged in the flank by Legionaries and Helstrikers respectively.
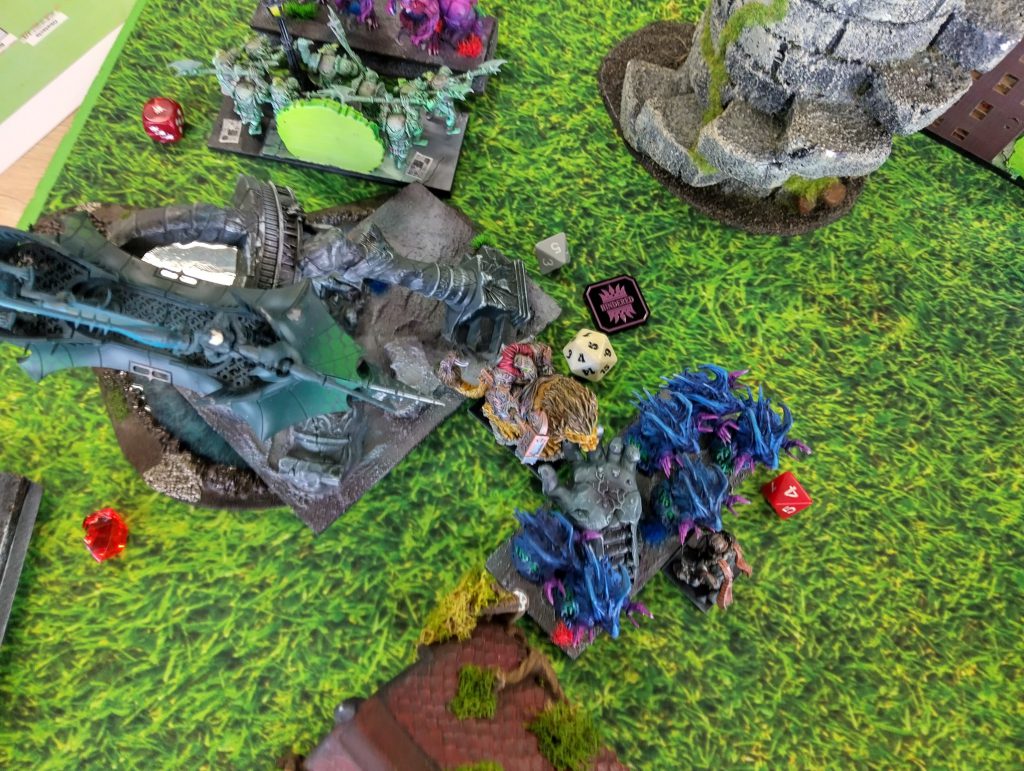
The Soulflayers had managed to jump over and fight the other regiment of Orcs, and in two turns managed to rout them and turn around. The Butchers had killed an Ambarox and a Riftforger (all sent to slow them down) and were currently attempting to dismantle the Shrine. The Shrine, however, is no mere pushover, and with its 8 attacks it somehow squashed the Butchers and was able to face the fast flank on the right.
By the time the Void Lurker had finished with Thonaar, who had been beating it silly for two turns, there was only the Shrine to charge. The Fiends and Soulflayers were doing their best amidst a clamour of Riftforged Orcs and Helstrikers. By the end, the Stormforged Shrine managed to hold its own against the Shadowhounds and Void Lurker, acting as a bulwark and protecting my key units now set into the Dominate zone of the very middle.
The Fiends almost lasted until the end accumulating 22 damage as I rolled a double one on the Nerve test. Eventually even these mighty heroes fell to hammer and claw. The Shrine fell by Turn 7, but alas the Nightstalkers were cleared, and the Void Lurker could only look on from afar. Victory to the Riftforged Orcs, but really it was thanks to, again, a lucky flank charge by the Helstrikers.
Round 6: The Dreaded Twilight Kin
It had to happen eventually. There were two Twilight Kin army lists floating around the event, both of which were played by persons named Matt. Thankfully I managed to dodge Urr’s Twilight Kin army list, as I know exactly how hard it is to play against and would prefer not to have that headache this late in the tournament. Instead I got the other Matt’s Twilight Kin, which had so many options going for it that it was likely to cause a similar level of cerebral strain.
Matt’s 2100 points of Twilight Kin:
Corsair Voidwalkers (Infantry) Horde [240]
   - Snare Nets [20]
   - Hammer of Measured Force [20]
Bound Phantoms* (Heavy Infantry) Troop [115]
   - Helm of the Drunken Ram [15]
Bound Butchers* (Large Infantry) Regiment [120]
Bound Butchers* (Large Infantry) Regiment [120]
Corsair Void-Skiffs (Chariot) Regiment [165]
   - Bloodhex [5]
   - Corsair Deck Harpoons [10]
Corsair Void-Skiffs (Chariot) Regiment [165]
   - Bloodhex [5]
   - Corsair Deck Harpoons [10]
Corsair Void-Skiffs (Chariot) Regiment [165]
   - Bloodhex [5]
   - Corsair Deck Harpoons [10]
Bound Mind Screech (Monster) 1 [150]
   - Planar Apparition [0]
   - Heal (7)
   - Mind Fog (2)
Summoner Crone (Hero (Heavy Infantry)) 1 [90]
   - Weakness (4) [35]
Summoner Crone (Hero (Heavy Infantry)) 1 [90]
   - Weakness (4) [35]
La'theal Bleakheart [1] (Hero (Heavy Infantry)) 1 [150]
   - Bane Chant (3) [0]
   - Enthral (7) [0]
   - Wind Blast (7) [0]
Soulbane on Nightmare (Hero (Large Cavalry)) 1 [155]
**Formation: Crew of the Heart Seeker**
[F] Corsair Fleetwardens (Infantry) Troop [115]
   - Bloodhex [5]
   - Veterans of the Celestial War [5]
[F] Corsair Fleetwardens (Infantry) Troop [115]
   - Bloodhex [5]
   - Veterans of the Celestial War [5]
[F] Impalers (Monstrous Infantry) Regiment [145]
The real power in this list are the Crones with their Piercing (1) on Weakness, the Corsair Void-Skiffs with their fantastic value, and La’theal with her Stealthy aura that will make my Ambarox a little less effective. The rest of the list is no slouch either, and nearly everything has Bloodhex which means Defense 5+ for a turn when I really don’t want to be fighting Defense 5+.
Deployment
The scenario was Push – three loot tokens that can be placed anywhere, including on your units, but with the new caveat that a unit can only score at the end of the game with just one of the tokens they carry. My entire army deployed across the left half of the battlefield, with the infantry across the middle left and the Helstrikers with Thonaar and Riftwalkers on the far left behind a building. I didn’t really have a plan at this point, I needed to get tokens across, but I felt that figuring out how to deal with the evil elves was more pressing.
The Twilight Kin spread out a bit more evenly – the Voidwalker horde was right in the middle, with Void-Skiffs to the left and right, with the formation spread out either side. On the left flank was another unit of Void-Skiffs accompanied by Phantoms and Butchers, ready to cause some trouble. The Crones and La’theal are around there somewhere, just ready to ruin my day with Weakness and Stealthy.
I put one loot token each on the Stormforged Shrine, Legionaries horde and a regiment of Legionaries. Matt placed one on the Voidwalkers and two on the Impaler regiment, simply because there was nothing he wanted to slow down in his army.
Mistakes Were Made
The army moved in an angled kind of way, sweeping in from the left mainly because I felt the terrain was forcing me to do so. My first mistake was jumping the Helstrikers over the building, with the actual error being that I only measured distance the Void-skiff, not the Phantoms behind them.
Who cares about Phantoms, right?
I should have, because they took that flank charge and suddenly I am in panic mode with my Helstrikers. Do I countercharge the Phantoms and then get charged by the Void-Skiffs? No, I decided to take the fight to the Twilight Kin and the Helstrikers bounded off into the Void-Skiffs. Unfortunately for the Helstrikers, they failed to break through and were put down by the Skiffs and flanking troop of Fleetwardens.
The infantry side of the Riftforged Orcs was pushing up as well, albeit in an uncoordinated fashion. The Unforged Orcs had a charge on the Voidwalkers thanks to the Wild Charge (D3) from the Reborn Legionaries, and they took it. What I was thinking, I shall not know. It’s one thing to send them in to set up a trap, it’s another to fling them so far across the battlefield the rest of the army cannot keep up. I had no second wave to capitalize on this move, and so ultimately their death soon after fed no purpose. What I should have done was place them close but in front, and tempt Matt to charge. Alas, I was not thinking such thoughts.
The regiment of Impalers managed to charge forward into one of my regiments of Riftforged Orcs, and this effectively blocked up my entire army. I would get multicharges on them, but their Big Shield prevent me from taking them down until the very end of the game.

Heroic Deeds
At the same time, I attempted to exert damage control on the left flank with my heroes Thonaar and the Riftforger. Thonaar, typically a destroyer of empires, and the Riftforger, leveler of cities, bounced off the Phantoms like rubber bricks. This left the Riftwalkers to solely deal with the Void-Skiffs and Butchers which was a tenuous situation. Despite this setback, once Thonaar and the Riftforger actually did their job, they managed to hold back the Void-Skiffs and Butchers next to those pieces of impassable terrain for the entire game!
Grim Work
For turns 3 to 5, it was a bloody battle in the middle with no real tactics on my part. The Twilight Kin were simply forcing their way across the battlefield while my own forces were struggling to mount an effective response. Riftforged Orcs countercharged and attempted to break units, but eventually were overwhelmed as the Twilight Kin gained the upper hand. I did manage to take off some Void-Skiffs, but in the end Matt had so many tokens over on my side and won the day. It was a great game in terms of fun to be had, but I really didn’t do it justice.
Wrapping Up: The Riftforged Orcs Are no Slouch
The final tally was four wins and two losses, leaving me in sixth place at a 23 person event. This is the best I have performed thus far, and I was mightily chuffed. There were games where I had plans, and I executed them to almost perfection; but then there were games where I had no answers to the questions my opponents were posing.
I know how my army works, purely thanks to the repetition of using the same list so many times, yet sometimes I would put it into situations that I know don’t work. Such as putting Helstrikers far away from the army. To get better, I need to keep in mind how the army works first and foremost, then apply that to the scenario, not the other way around (such as in Round 4).
Riftforged Orcs (at least the style I have) needs to stick together. The heavy infantry need the Stormforged Shrine for support, and they need the Helstrikers for the threat range, otherwise the overall army is always on the receiving end of charges.
The feel at this tournament was probably the most relaxed yet jovial thus far. I will continue attending as long as it continues running! I was lucky enough to win best painted Mantic army, which came with one of the coveted bottles of Goblin Blaster Rum direct from Mantic themselves (thanks to Sellick for bringing it in his luggage!). I also received one of the Army Painter Speedpaint 2.0 “Most Wanted” sets, which I will be using to great effect on all future armies.
Finally, I would like to thank all the readers of the Kings of War articles that have come out on Goonhammer.com. Through writing these articles over the last 2 years, I have managed to learn so much about this wargame to reach a tactical level I never had while playing previous games. I know some of the early content was a bit rudimentary, but Urr and I were fresh into the game and full of excitement. Thanks for enjoying it and here’s to many more articles from the expanding team at Goonhammer!
Have any questions or feedback? Drop us a note in the comments below or email us at contact@goonhammer.com. Want articles like this linked in your inbox every Monday morning? Sign up for our newsletter. And don’t forget that you can support us on Patreon for backer rewards like early video content, Administratum access, an ad-free experience on our website and more.
