Goonhammer was provided with a review copy of this product by the manufacturer. Bandua is also supporting the upcoming Goonhammer Open UK with terrain kits.
Boarding Actions have generated a lot of excitement since they arrived with the first Arks book, and rightly so. The simplified faction rules and small boarding patrols make them a great game mode for players taking their first steps into 40k, but there’s also plenty for more experienced players to enjoy. The core rules changes and terrain modifications provide new strategic challenges, and also allow some units that are underwhelming in larger games to really shine. Quicker, smaller games that are still satisfying are fantastic for players and the overall health of the game as an entry point, and we’re pretty much all converts here at the Goonhammer offices – but there’s one major barrier to getting involved.
By its nature, Boarding Actions requires a unique and very specific set of terrain, a modular assembly of walls and doors that creates the maze-like battlefields of the mode. You can, of course, purchase a set of these from Games Workshop, which comes with the standard upsides and downsides of GW terrain – it’s very good looking and very durable, but it isn’t cheap and it can take a long time to get assembled and painted to even a basic standard. I’ve painted quite a bit of GW stuff in my time, and I love it, but between attending events, writing for this website and attempts to paint enough units to at least lightly pursue the metagame, I have simply not been able to justify the time investment to get a set of boarding actions terrain together.
Instead, I’ve been biding my time and keeping a vague eye on the various alternative options produced by third party manufacturers, hoping that one would appear that was well-suited to my particular attributes as a customer – very time-conscious, and ideally wanting something that looks good enough that photos taken using it are suitable for use on this website.
With that in mind, when Bandua Wargaming offered us a review copy of their Alpha Boarding Area terrain set, I jumped at the opportunity to try it out. Thanks to the demands of the Goonhammer Open, I’m now a distressingly experienced MDF terrain builder, and the Bandua USP of requiring no painting after assembly seemed to perfectly address my concerns about time-to-tabletop. With perfect timing, the kits arrived just before the Easter holiday weekend in the UK, along with some suspiciously nice weather, and a plan was hatched – on the Friday, I’d build as much of the kit as possible (along with some tournament terrain from Bandua we’ll be looking at in a separate review), then on Saturday Soggy and Corrode would join me to either play some games on the fancy new terrain, or help me complete it if the promise of speedy assembly hadn’t held up.
The headline summary up front – this went perfectly to plan, and this product rules (with a few small caveats). Let’s dig into why.
What You Get
The Alpha Boarding Zone comes as a big box of MDF and a rolled up vinyl mat, which assembles into everything you need to create the Boarding Actions terrain maps. We’ll get the mat out of the way first – it’s fine. It’s a bit lighter-weight than a “mousepad” style mat, but still feels sturdy, and has a very good quality print on the front of it (which is important for Boarding Actions, as you need the “grid” on it to show you where to place the terrain). You may want to bring something to hold down the corners for your first game after unrolling it (you’ll see some crates in the pictures from our games), but I suspect if you spent a few minutes flattening it down you’d be fine without that.
Moving on to the MDF, this is where Bandua’s kits are really set apart from a lot of manufacturers – they do very detailed prints on one side of the MDF, and design the assemblies such that all outward-facing parts of the finished product are the painted side. That means that once complete, no further painting is needed to get them ready to use. Bandua’s other special move is creating kits that require less use of glue than most to put together – don’t get me wrong, you’ll need PVA to put this together, but there were some joins I didn’t bother glueing, and still felt very solid once complete, speeding the process up. The experience of designing kits in this way also feeds into how they’ve implemented hatches, which is delightful.
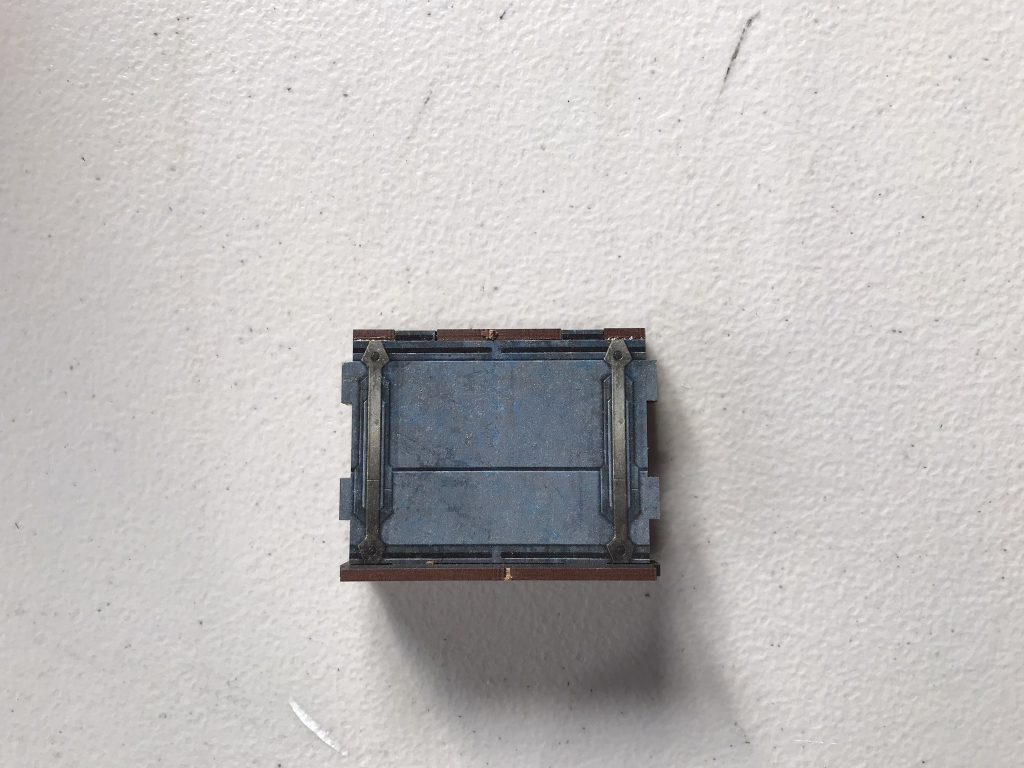
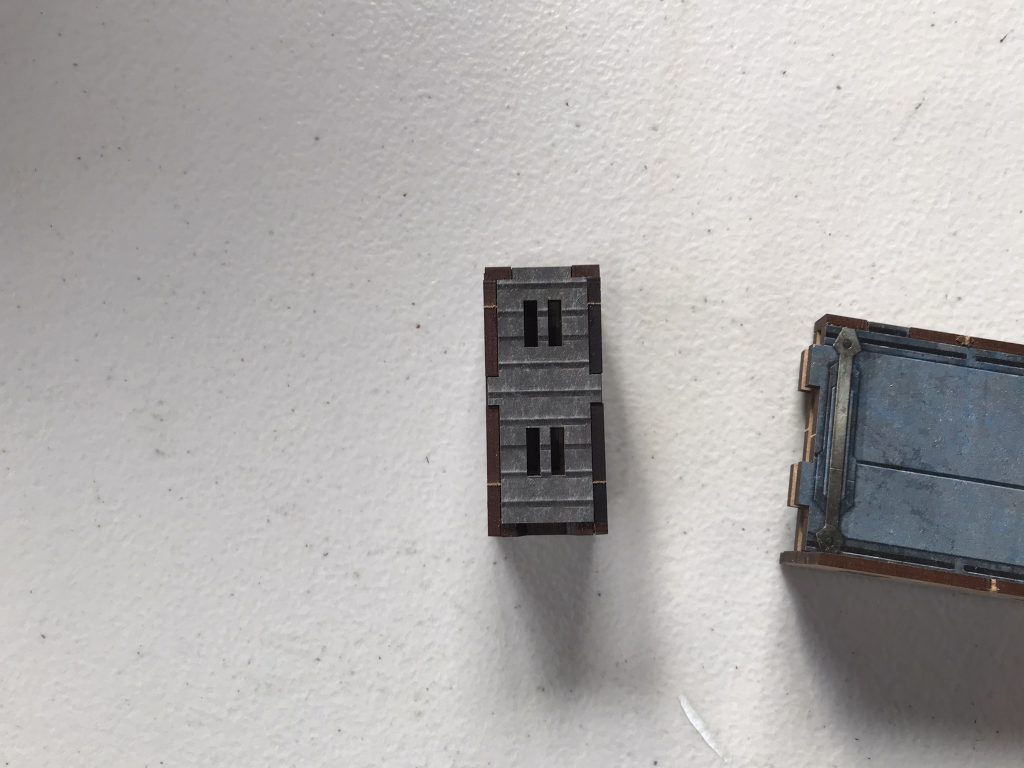
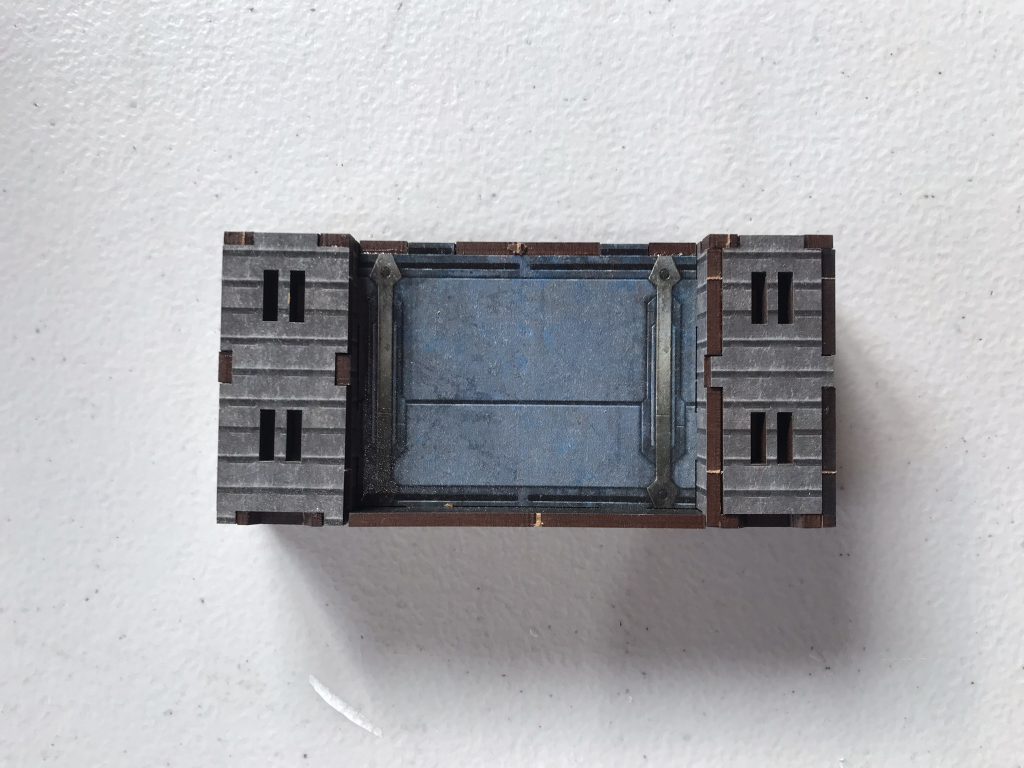
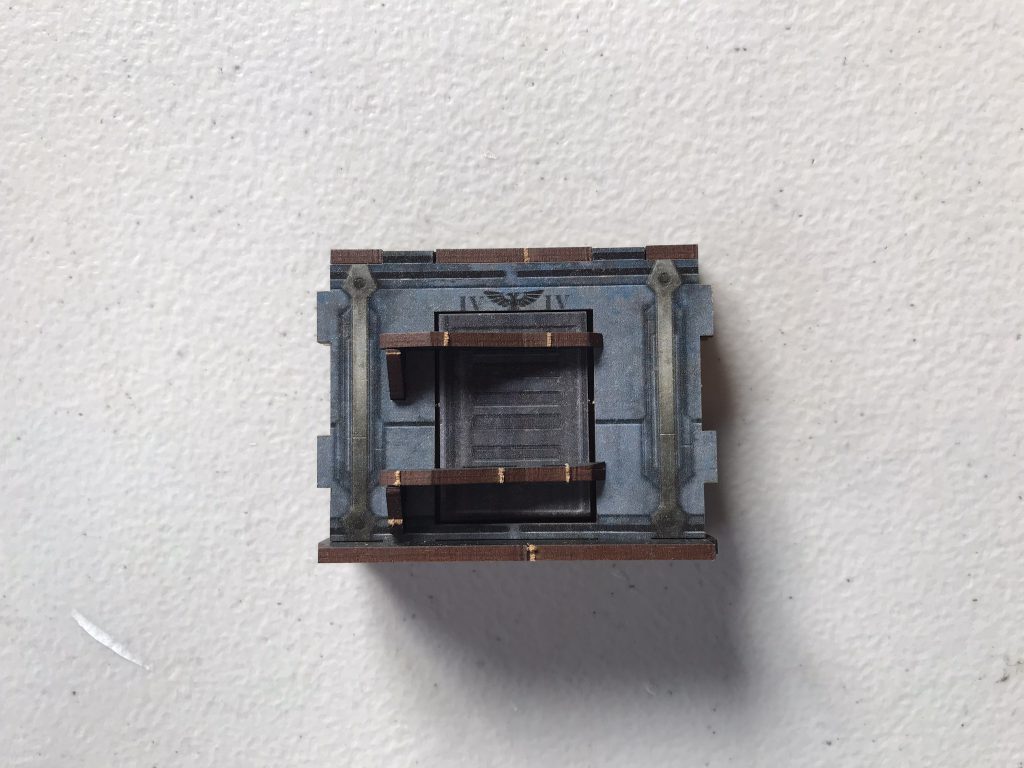
Because boarding actions terrain is modular, what you’re building from this set is three different types of terrain piece that can then be fitted together to create the maps. You can see finished examples of each of these (some in various configurations) below:
How was the assembly process though?
Building The Terrain
Putting together the full set of terrain took me between 6-7 hours. As mentioned above, I’m very experienced at assembling MDF kits, so if this is your first time with this kind of product you probably need to allow a bit more, but probably not much more because of how simple it is – you’re essentially repeating three different processes many times, and you’ll quickly get into the swing of it. It also makes this very easy to either do collaboratively or spread over a few evenings – If I was doing it again I probably wouldn’t go for a seven hour marathon, but if you can wrangle up a couple of friends you’ll comfortably smash it out in the time it takes to play a game of 40K.
The standard wall pieces are the easiest to put together, each comprising four parts:
- A floor
- Two painted wall pieces
- A sort of “plug” that goes in between the pieces at the top
For these, I only glued on the joins with the plug at the top – just push-fitting into the floor was adequate. These are super quick and easy to do, but feel satisfyingly solid once done.
The columns were next, each coming as a sheet of pieces that you put together. These are a little more fiddly to put together as they require glue on every join, and you kind of need at least three pieces assembled before it starts being “solid”. It took me a few tries to nail a technique that got these out quickly and efficiently, but once I did I churned through them. This is the bit where you’ll be very bored by the end of it because you’re doing the same thing 61 times, but there’s basically no way around that, and again the finished product feels sturdy.
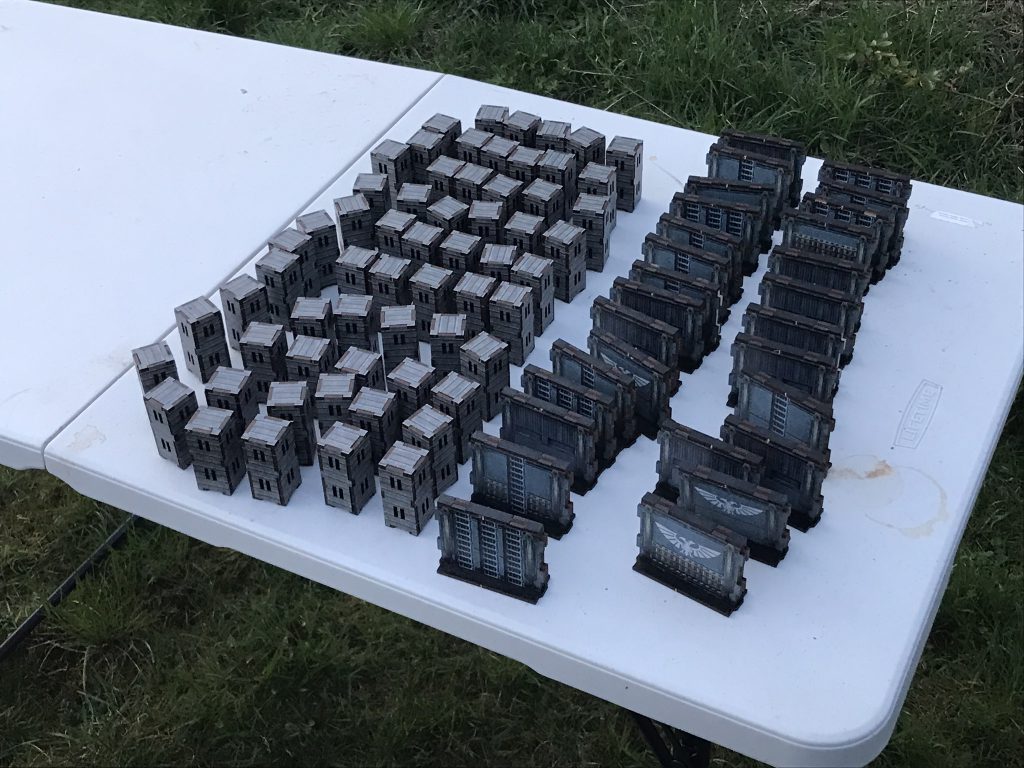
Finally, the doors, which follow the same process as the wall sections, but with extra steps to handle the doors. These pop out from the centre of the section, on both sides, and you get a separate frame of parts to create the attachment mechanism.
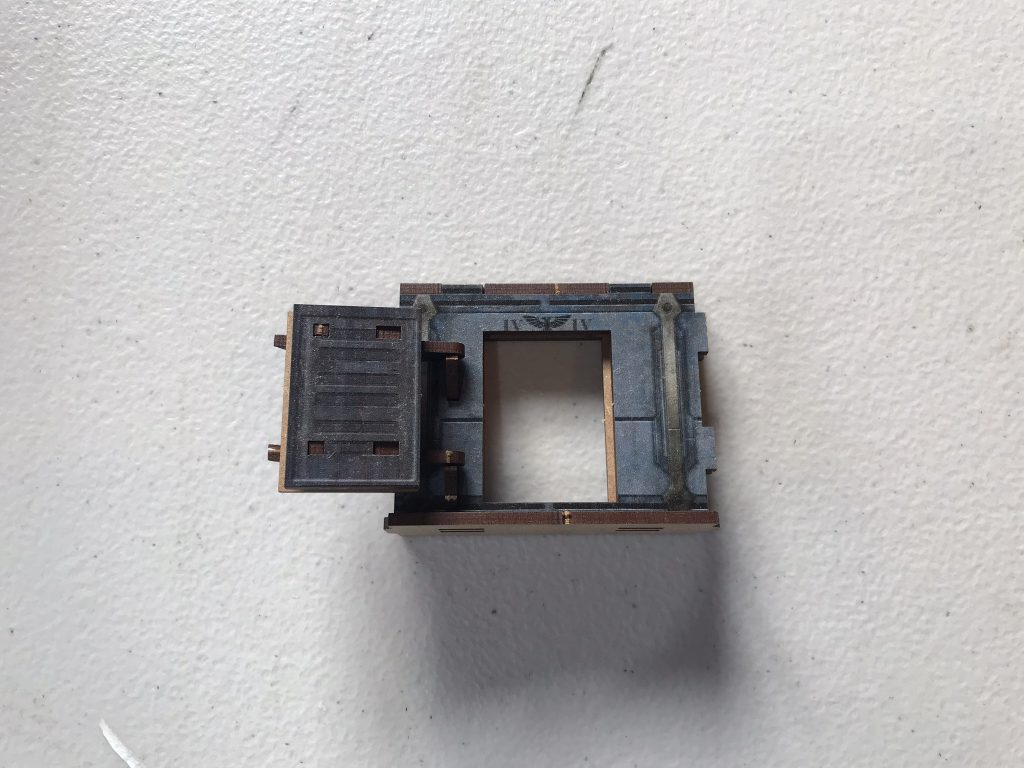
This is very clever, and I find the level of thought that’s gone into the construction very impressive. When i first saw the pieces, I was worried that the doors wouldn’t close nicely, as I thought plugging them back in to the slots they came out of would be a pain, especially on the far side, which I assumed would line up awkwardly. Both of these problems have been thought of and addressed in the design – when you pop the doors out of the wall, you’ll find that there’s a very thin frame around them that you remove, creating enough clearance that the doors don’t catch, and the door slot in the “front” and “back” wall parts are slightly offset from one another, as you can see below:
This means that the doors open and close very smoothly, which is very cool. All that said, this was the only part of the assembly where I had a couple of criticisms. For whatever reason, the frame of hinges and plugs you need for attaching the door was very stiff, making getting the parts off a struggle, and weirdly time consuming. This is a particular problem, because the hooks that the doors hang on are quite fragile, and I broke one trying to get it off the frame. I was able to easily repair it with some green stuff, but this was definitely the part of the build I didn’t enjoy. It’s also the place where having the fully painted parts can create challenges, as the space tolerances are pretty low, so even a slight difference in thickness from the paint can create inconsistencies, and I found it a bit of a coin flip whether the plugs would push fit snuggly, or need a dollop of glue to adhere. No dealbreakers, but I did these last and was expecting a smooth home stretch, where the challenges actually made it the longest of the three sections to complete.
That was not enough to prevent me from achieving objective 1 – build these on the Friday, ready for gaming on Saturday. The finished product is very satisfying, with the design ensuring that each part feels solid with a decent weight to it. Next up – creating a table.
Assembling a Map
My one remaining concern, after the build, was how easy slotting the parts together to create a mission map would be. The pillars have slots in the sides, with corresponding tabs on the wall and door sections, plus a clever indentation on the base of the pillar to help stabilise the joined pieces. It all looked good on paper, but some of the slot/tab joins during assembly had been very snug, and I was unsure how easy push-fitting the parts together would be.
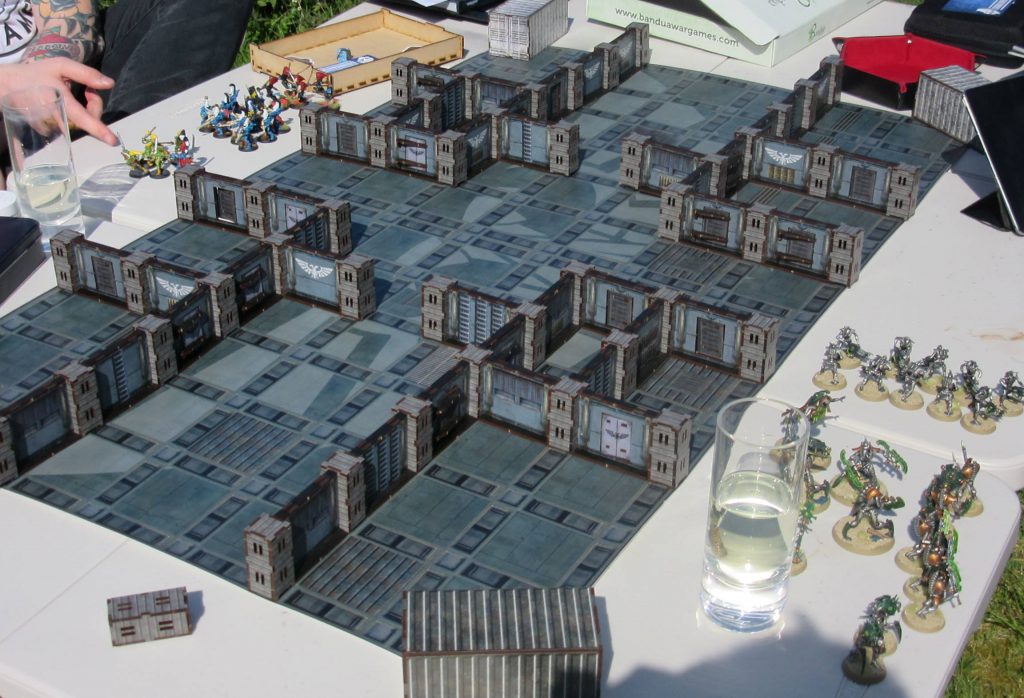
The good news is that, once again, this seems to have been accounted for. It feels like the pillar slots have been made ever-so-slightly larger than the ones that are intended as permanent joins during assembly, so the parts mostly slot in very easily. There were a few pieces where the slightly thicker paint bit again, and needed either a bit of wiggling or a quick shave down of the tab with a file or moldline remover, but this was a minority, and likely only an issue the first time you use the set. Even with that, Liam and I got a map together in about ten minutes, and the finished product looks good.
Thanks to the pillar-base indentation, once you’ve put it together it’s also pretty stable, and combining that with the satisfying weight that the walls have means that, while the layout will obviously be slightly more vulnerable to drifting a bit than with solid plastic, it’s barely a concern. The fact that the kit is fully modular rather than coming with some double-wall pieces or specificly directed columns also makes it super easy to put together as a team – no worry about grabbing specific parts, just add walls and pillars to follow the guidelines.
Gaming
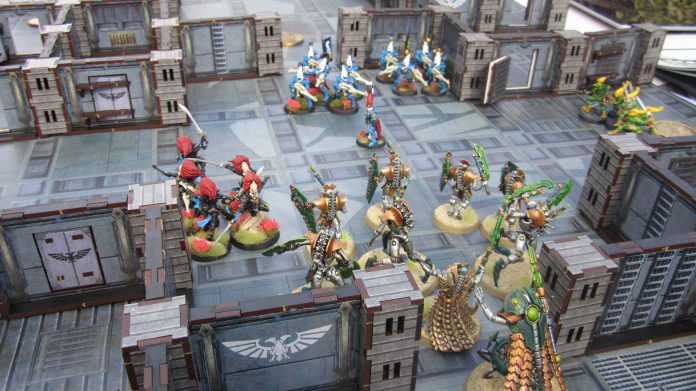
Then we played some games – Liam proceeding to comprehensively own both me and Scott across a couple of rounds, with my poor Necrons getting shot to death by Dire Avengers and the White Scars outwitted on objectives. This section is mostly just an excuse to dump action shots below:
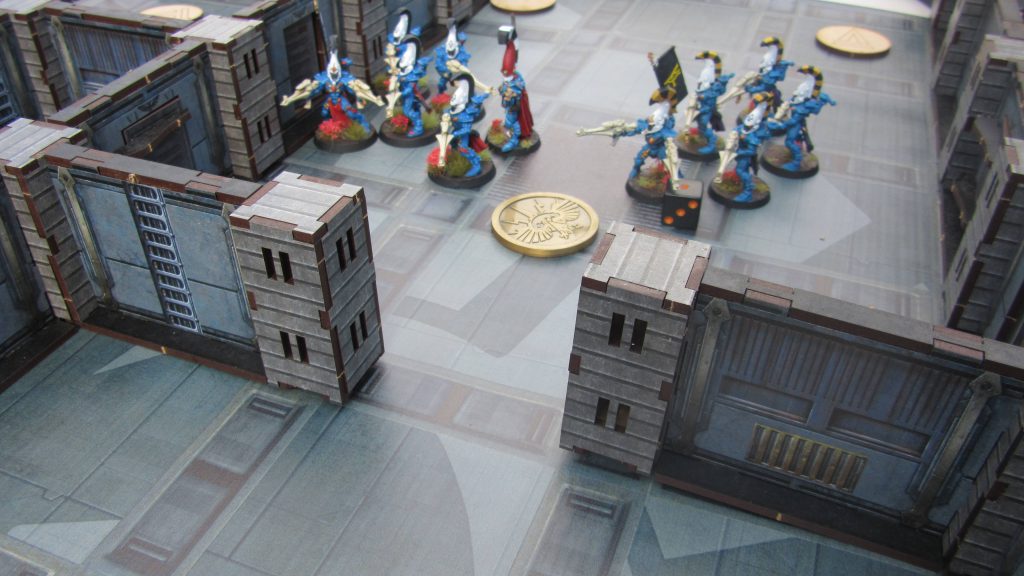
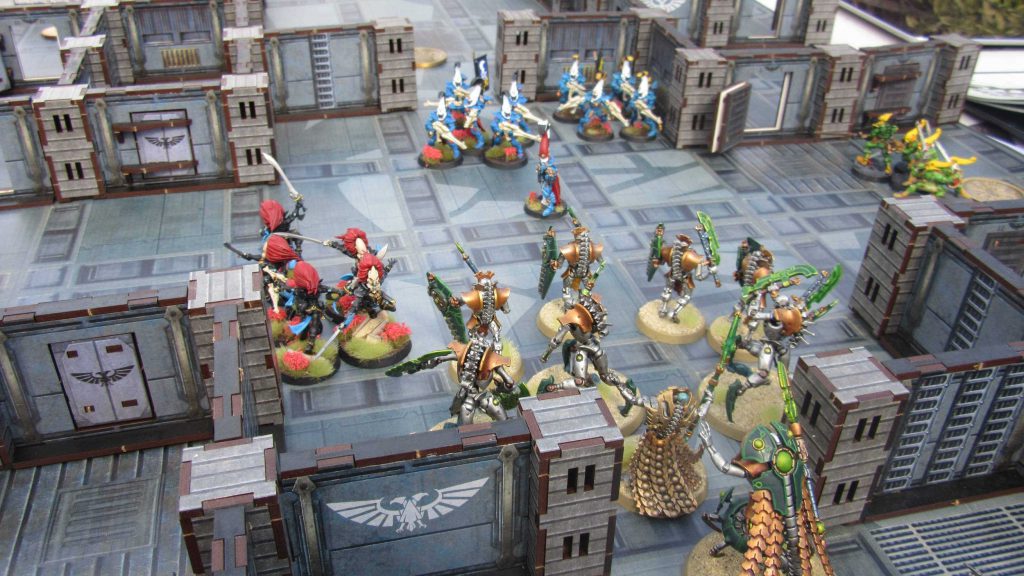
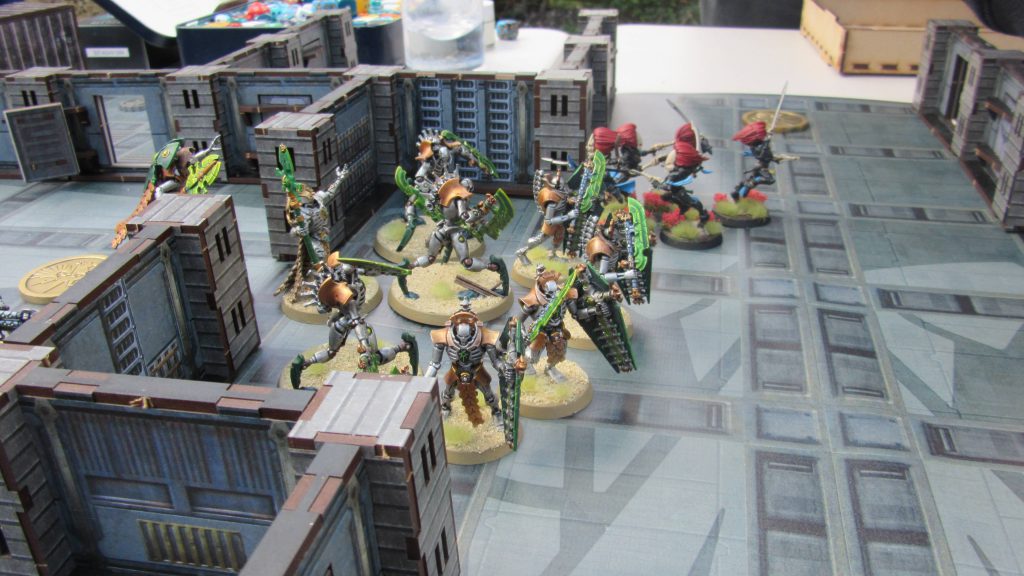
Taking apart the terrain at the end was also very quick, and it packed back down into a pretty manageable size. A few weeks later, I got another game in with Rob when he came over for Warhammer Fest, and it was once again very quick to get set up and going:
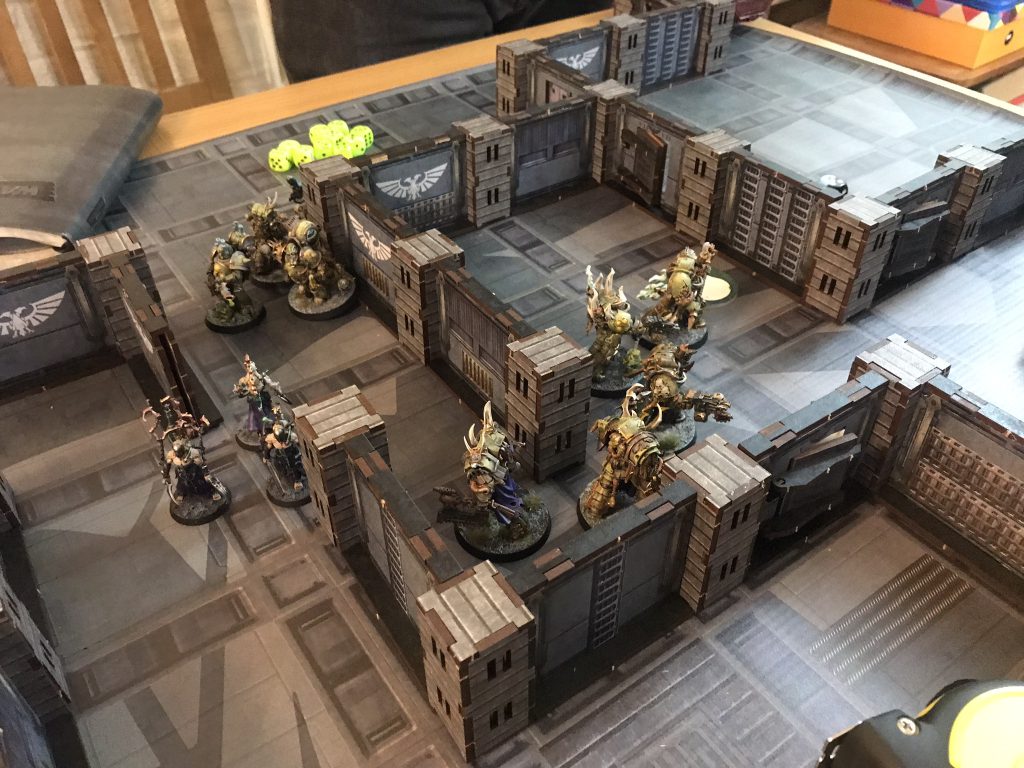
The Price
Last but not least for any product review, particularly one where there are other official and unofficial alternatives, we need to take a look at how the price tag stacks up. The Bandua kit is very much not a budget option – it comes in at €129.95, which is broadly equivalent to the official set (assuming you can get that at the 15% third-party discount), and higher than some of the other third party offerings that provide either unpainted MDF or printed card. That does mean that if price is your key decision factor, and you’re after a cheap alternative to the official product, you need to look elsewhere.
The Verdict
For me, the premium price tag is worth it because of the balance the product strikes between speed of assembly and quality on the tabletop – the Bandua printed MDF means that you get the solidity of that material and the visual quality you might expect from a card-based option, without needing to do any painting yourself. This is pretty much laser-focused to my niche as a consumer, as discussed at the start. If you’re in the same boat where it’s the time investment that’s kept you away from playing boarding actions, I think this is the best option on the market, and if I needed to put together a second terrain kit for a friend or a club, this is definitely the one I’d buy. I also really like how clever the design is – it’s very clear that Bandua have some very, very skilled designers on staff, and I’m excited to see how they approach any future expansions that get added to the boarding zones setup.
Thanks again to Bandua for providing the review copy of this kit, and once again if this review has made you want to purchase it, you can do so here.
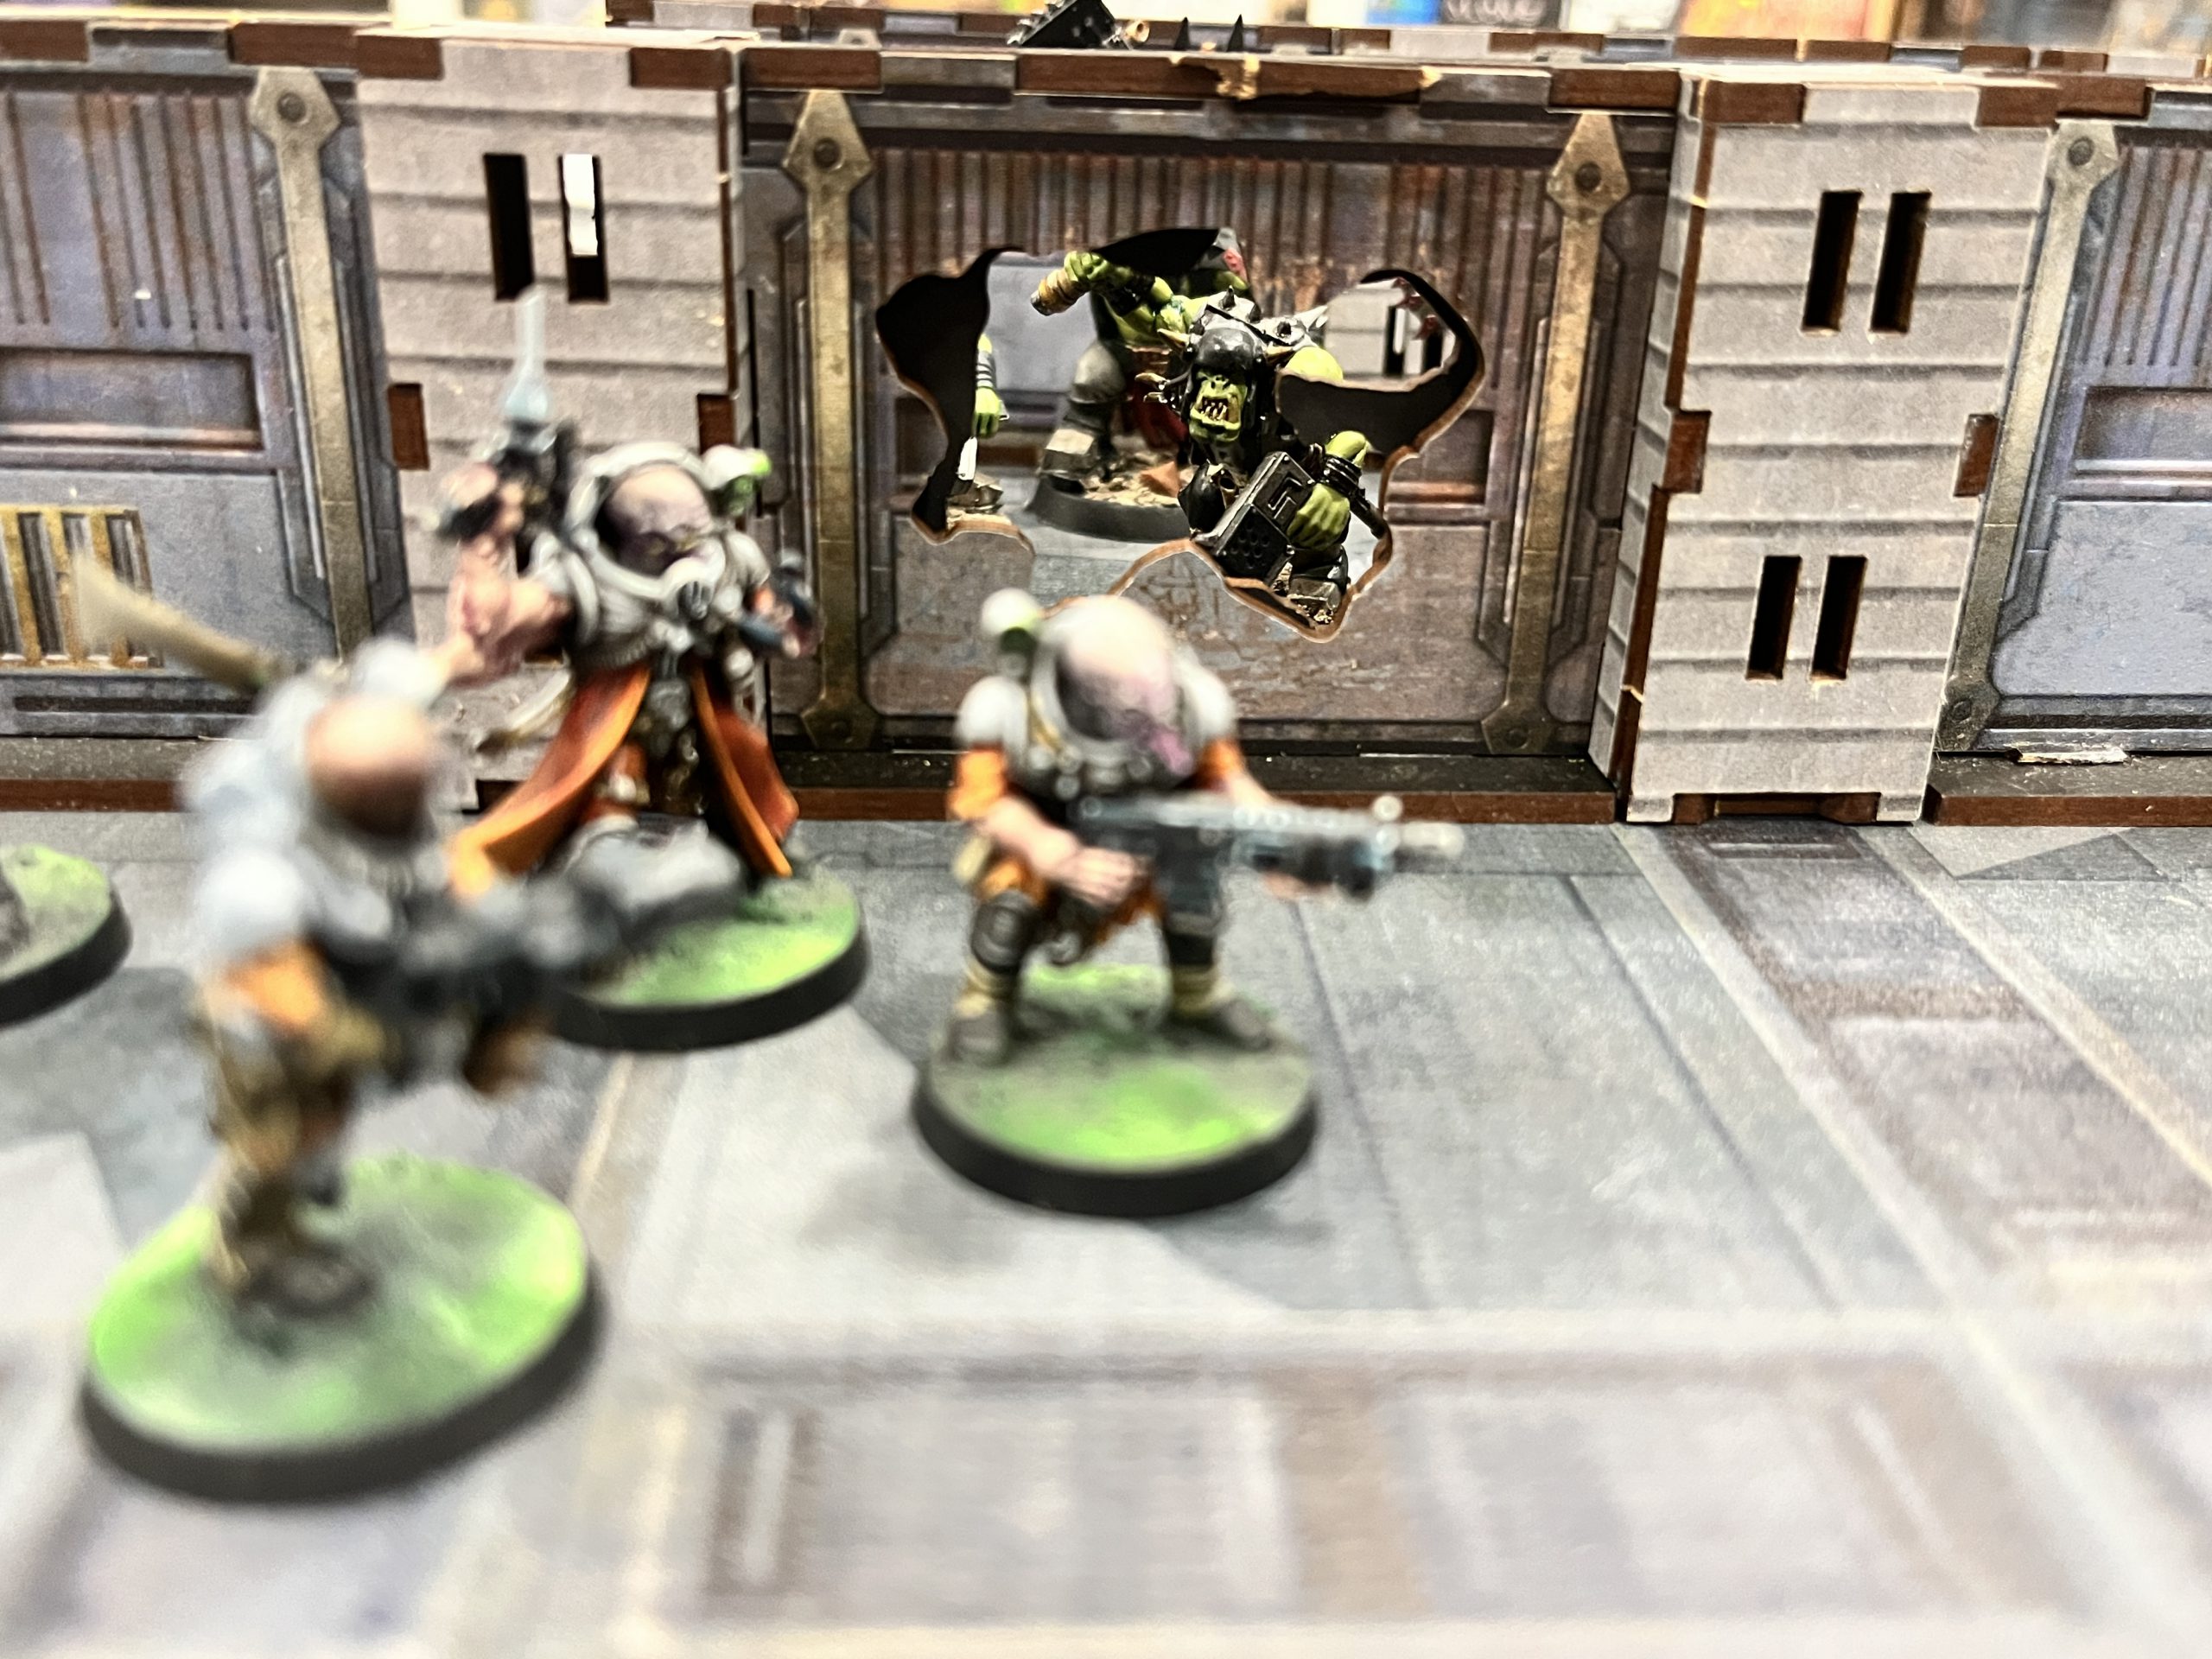
Editor’s note from the future: Bandua have since release an add-on pack of breachable walls to keep up with the release of Soulshackle. We’re glad to see that it’s a simple add-on rather than having to buy a whole other set if you were using a different solution.
