
In almost the same week that 10th edition launched, my wife and I celebrated the birth of our son and my life’s priorities rapidly changed to support our new family life. As a result, I have barely kept up with the edition and played very few games. After falling just short of winning at the Icebreaker Open in April, and again at the Motor City Mayhem in May, I was fiending for some games and hungry to get back at the competitive scene. After just four local league games my wife gave me a couple of days to get away and I travelled down to a perennial favorite, the Iowaaagh Open in mid August. There I would manage a 5-1 record but it was ultimately marred by a reserves calculation mistake that resulted in me forfeiting a game I’d otherwise have won. It was an error caused by trying to make some nuanced adjustments in a list I wasn’t all that familiar with, in a game I wasn’t practiced with.
Mistakes happen. Ultimately, you take responsibility for them, accept the consequences, learn from it, and then move on. Still, these things tend to stick with me and it shook me a bit. I had but one game since that event but the bug was biting again. Then Jonk reminded me that the GHO Canada was coming up and I checked the calender, good to go! So while I was excited at the opportunity to attend my second event of the edition, the Goonhammer Open: Canada, I was also a bit apprehensive. My excitement was mitigated by the knowledge that I would once again walk into an event with a list I’ve never put on a table, and even worse, had little in the way of repetitions in terms of the game. Recalling my prior experience with Iowaaagh! helped to inform my list building – I simplified the list considerably, trying to minimize the number of decisions I’d need to make at the table and the number of options that would be available at any given moment. I didn’t want to find myself in the situation where my lack of practice resulted in a misplay with a complicated list. So I chose to go with double-Avatar – iconic, strong, simple.
The List
My list can be seen (clickable) below:
James' Aeldari - click to expand
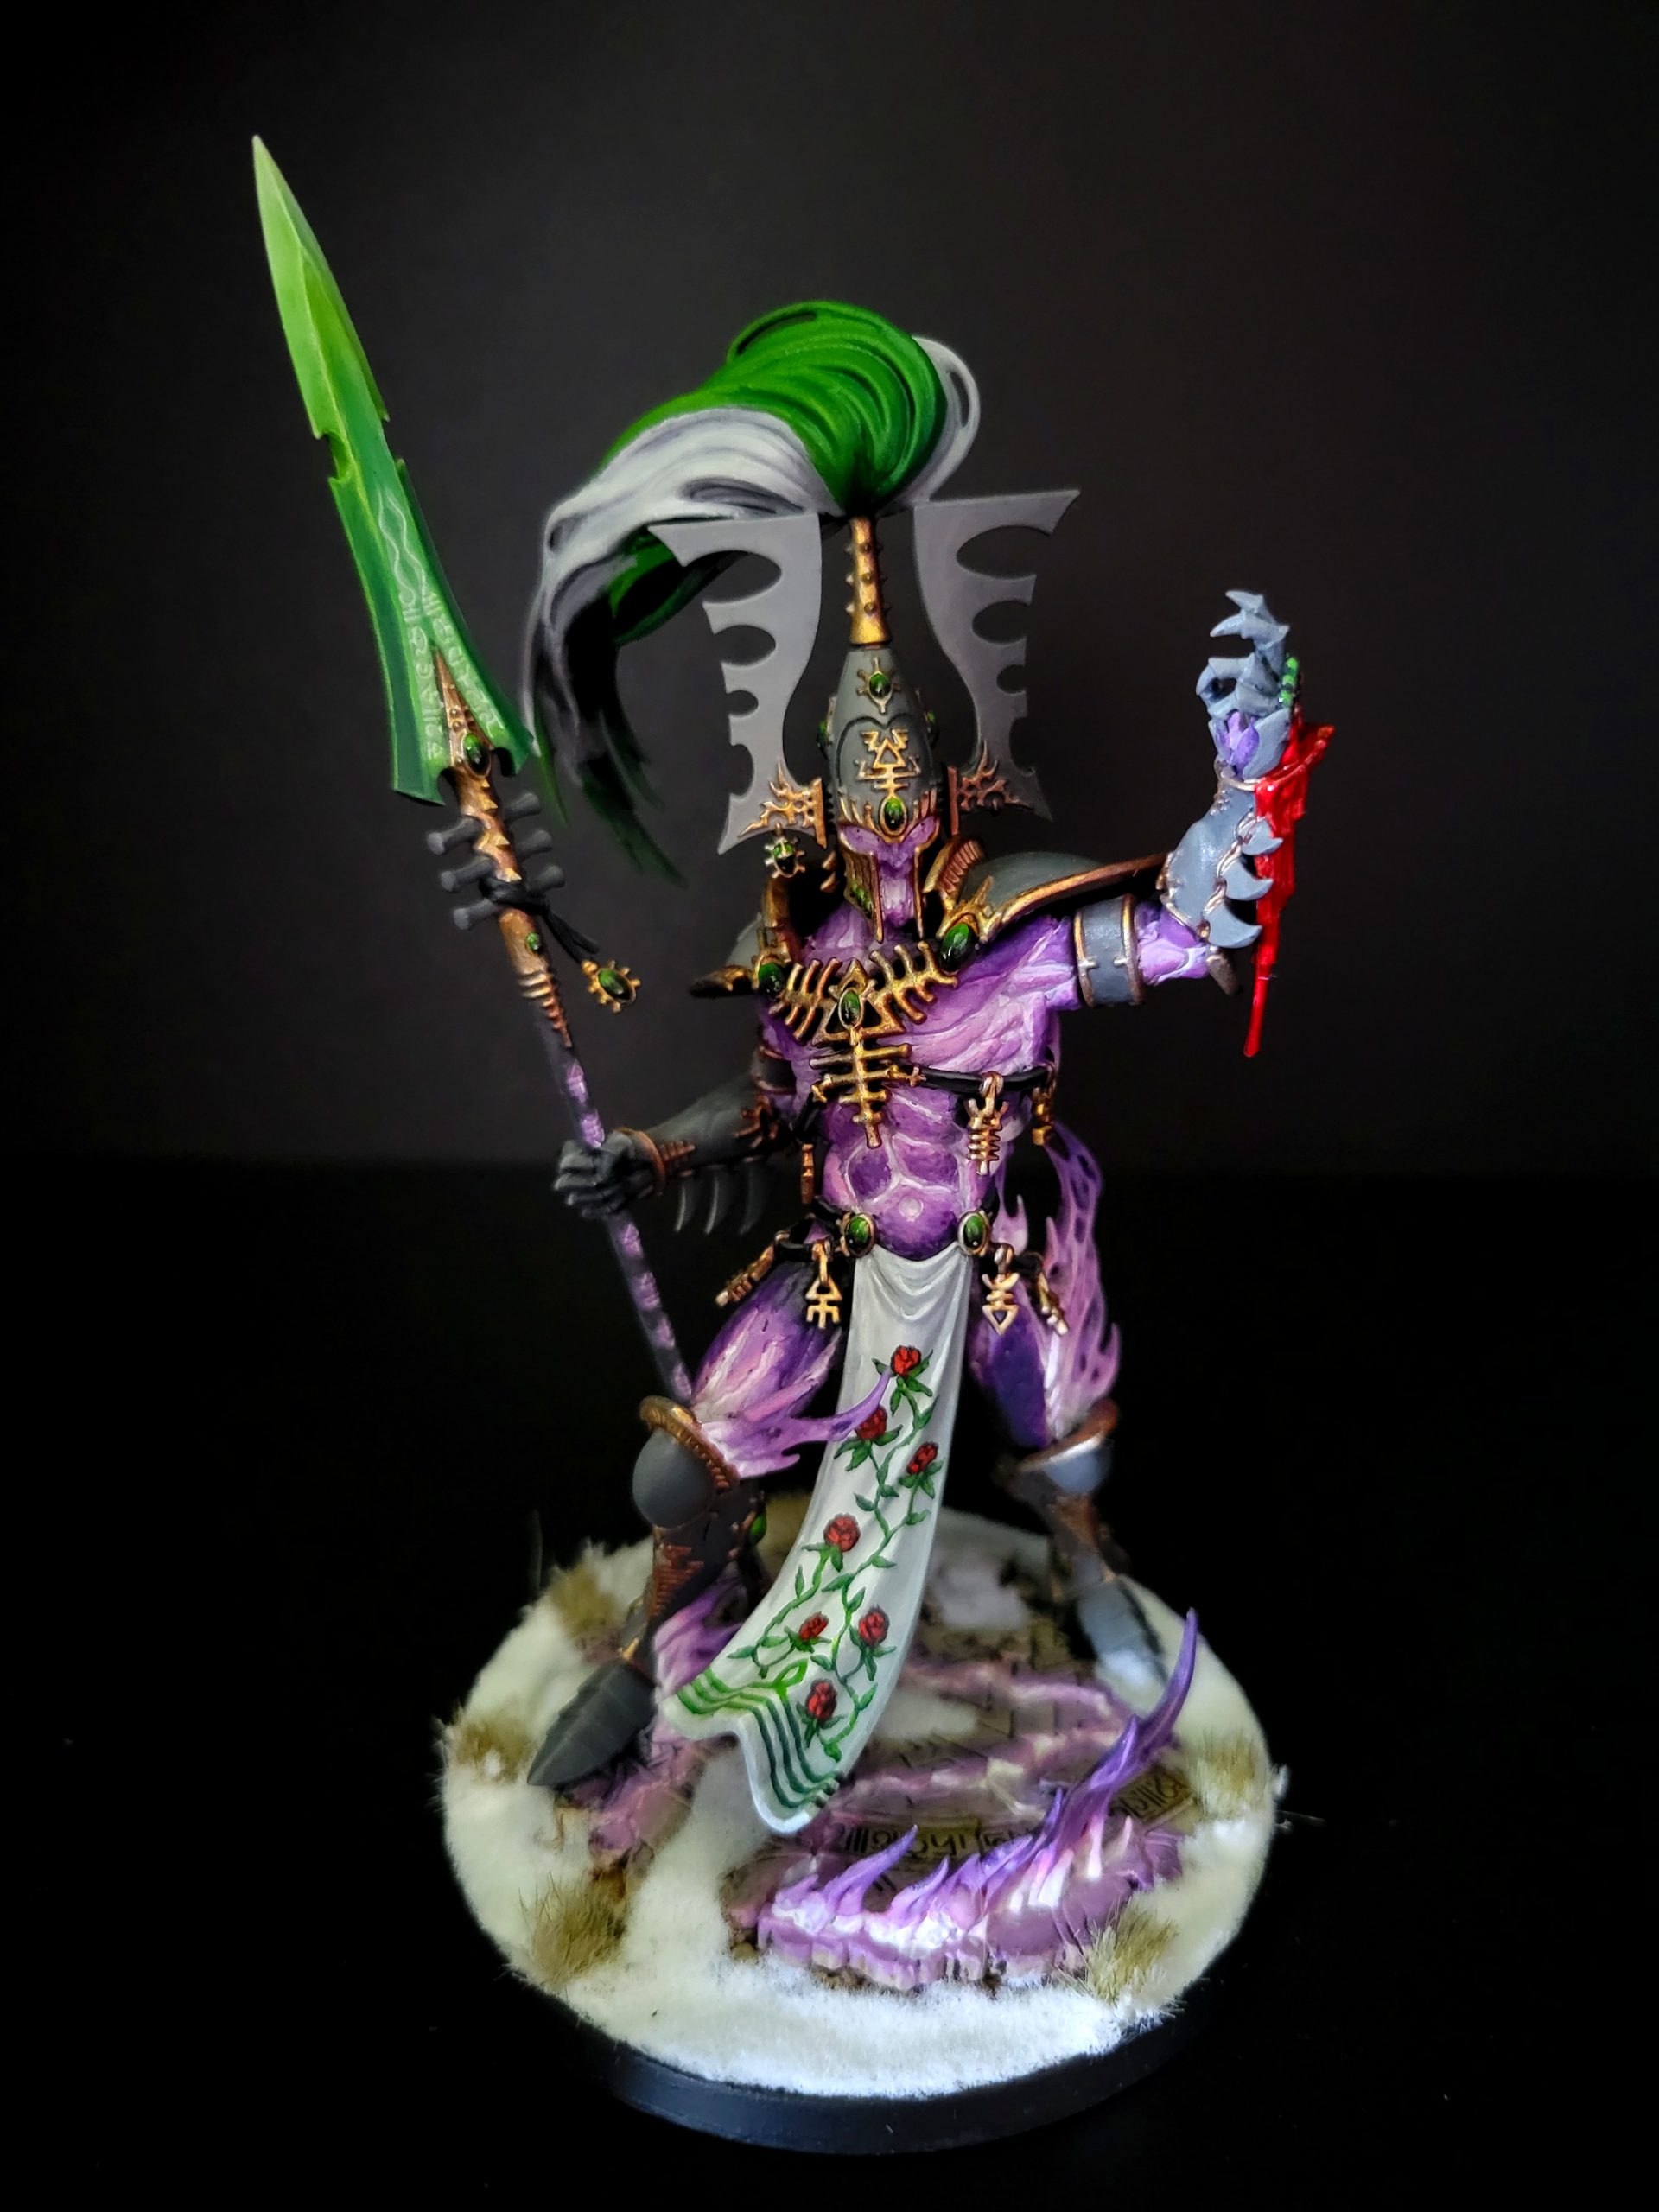
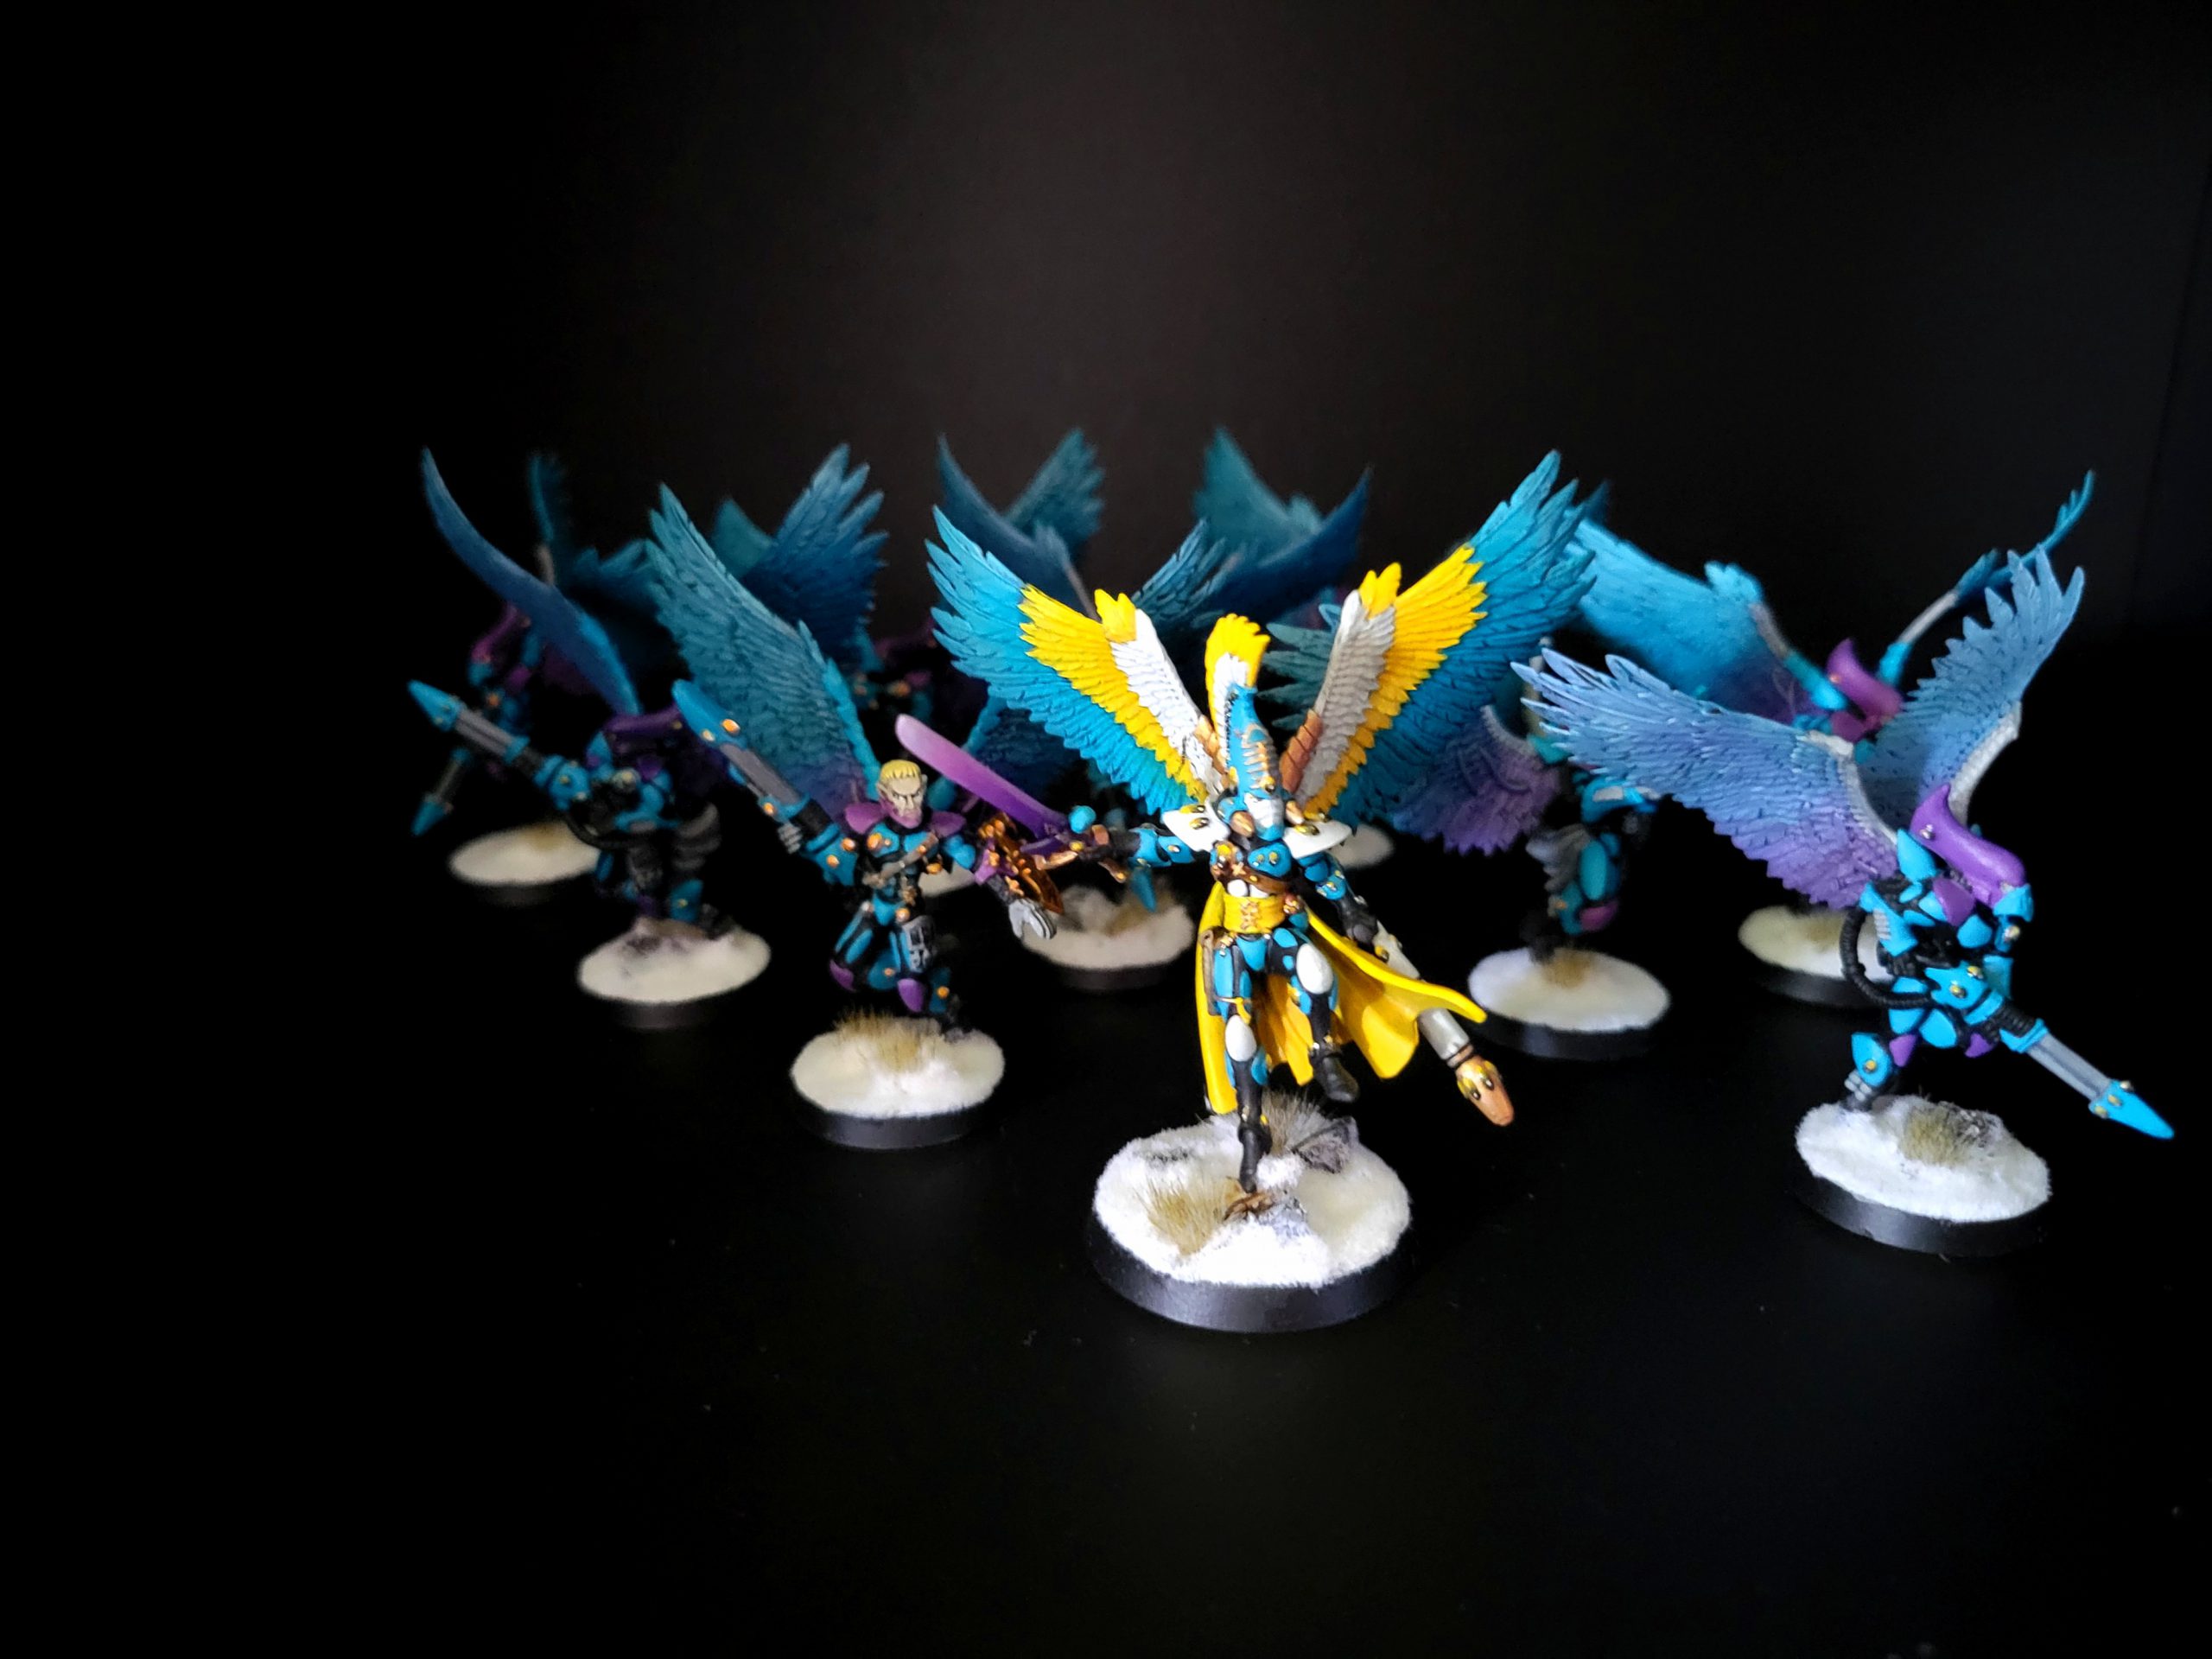
I was very excited to put this onto the table, two Avatars! They greatly reduced the number of moving parts while representing significant and credible threats. The Yncarne is the singular embodiment of what I love in my lists – utility. It’s an avatar of utility. It can solve problems and plug a lot of holes, and when backed by a more robust and deadly Avatar of Khaine, they represent a fearsome duo. However, they’re also incredibly expensive and the rest of my heroes weren’t going to help with the cost problem. At the heart of every one of my lists are two staples: the Autarch Wayleaper and the Fate’s Messenger Death Jester. Neither need much of an introduction, the former provides a reliable, critical CP boost, the latter a boatload of damage utility, and both are lone operative infantry that can safely facilitate backfield objective holding. To that I added what has since become another staple, Feugan, and then speculatively, a Solitaire. The former is not a Lone Operative but may as well be. His 2+ armor save, 4+ invulnerable save, and 5+ Feel No Pain gives him a durability that belies his T3 frame – and he gets back up full-health after dying on a 2+ (and Yncarne can still teleport in if choosing). His shooting profile is certainly interesting but invulnerable saves commonly exist. So it wasn’t until he waded into combat for the first time that he became a staple for me – swinging his fiery axe around for 6 attacks at S5, AP -3 flat 3 damage gave him a lot of utility. The Solitaire is more of a flavor choice. I like his ability to get anywhere with a combination of Lone Operative and Blitz, fight first, hit hard, then fade away with a Phantasm. While not particularly durable at T3 with 3 wounds, played properly he’s difficult to reach on an opponent’s terms and if he does die an Yncarne is always waiting to jump in and support.
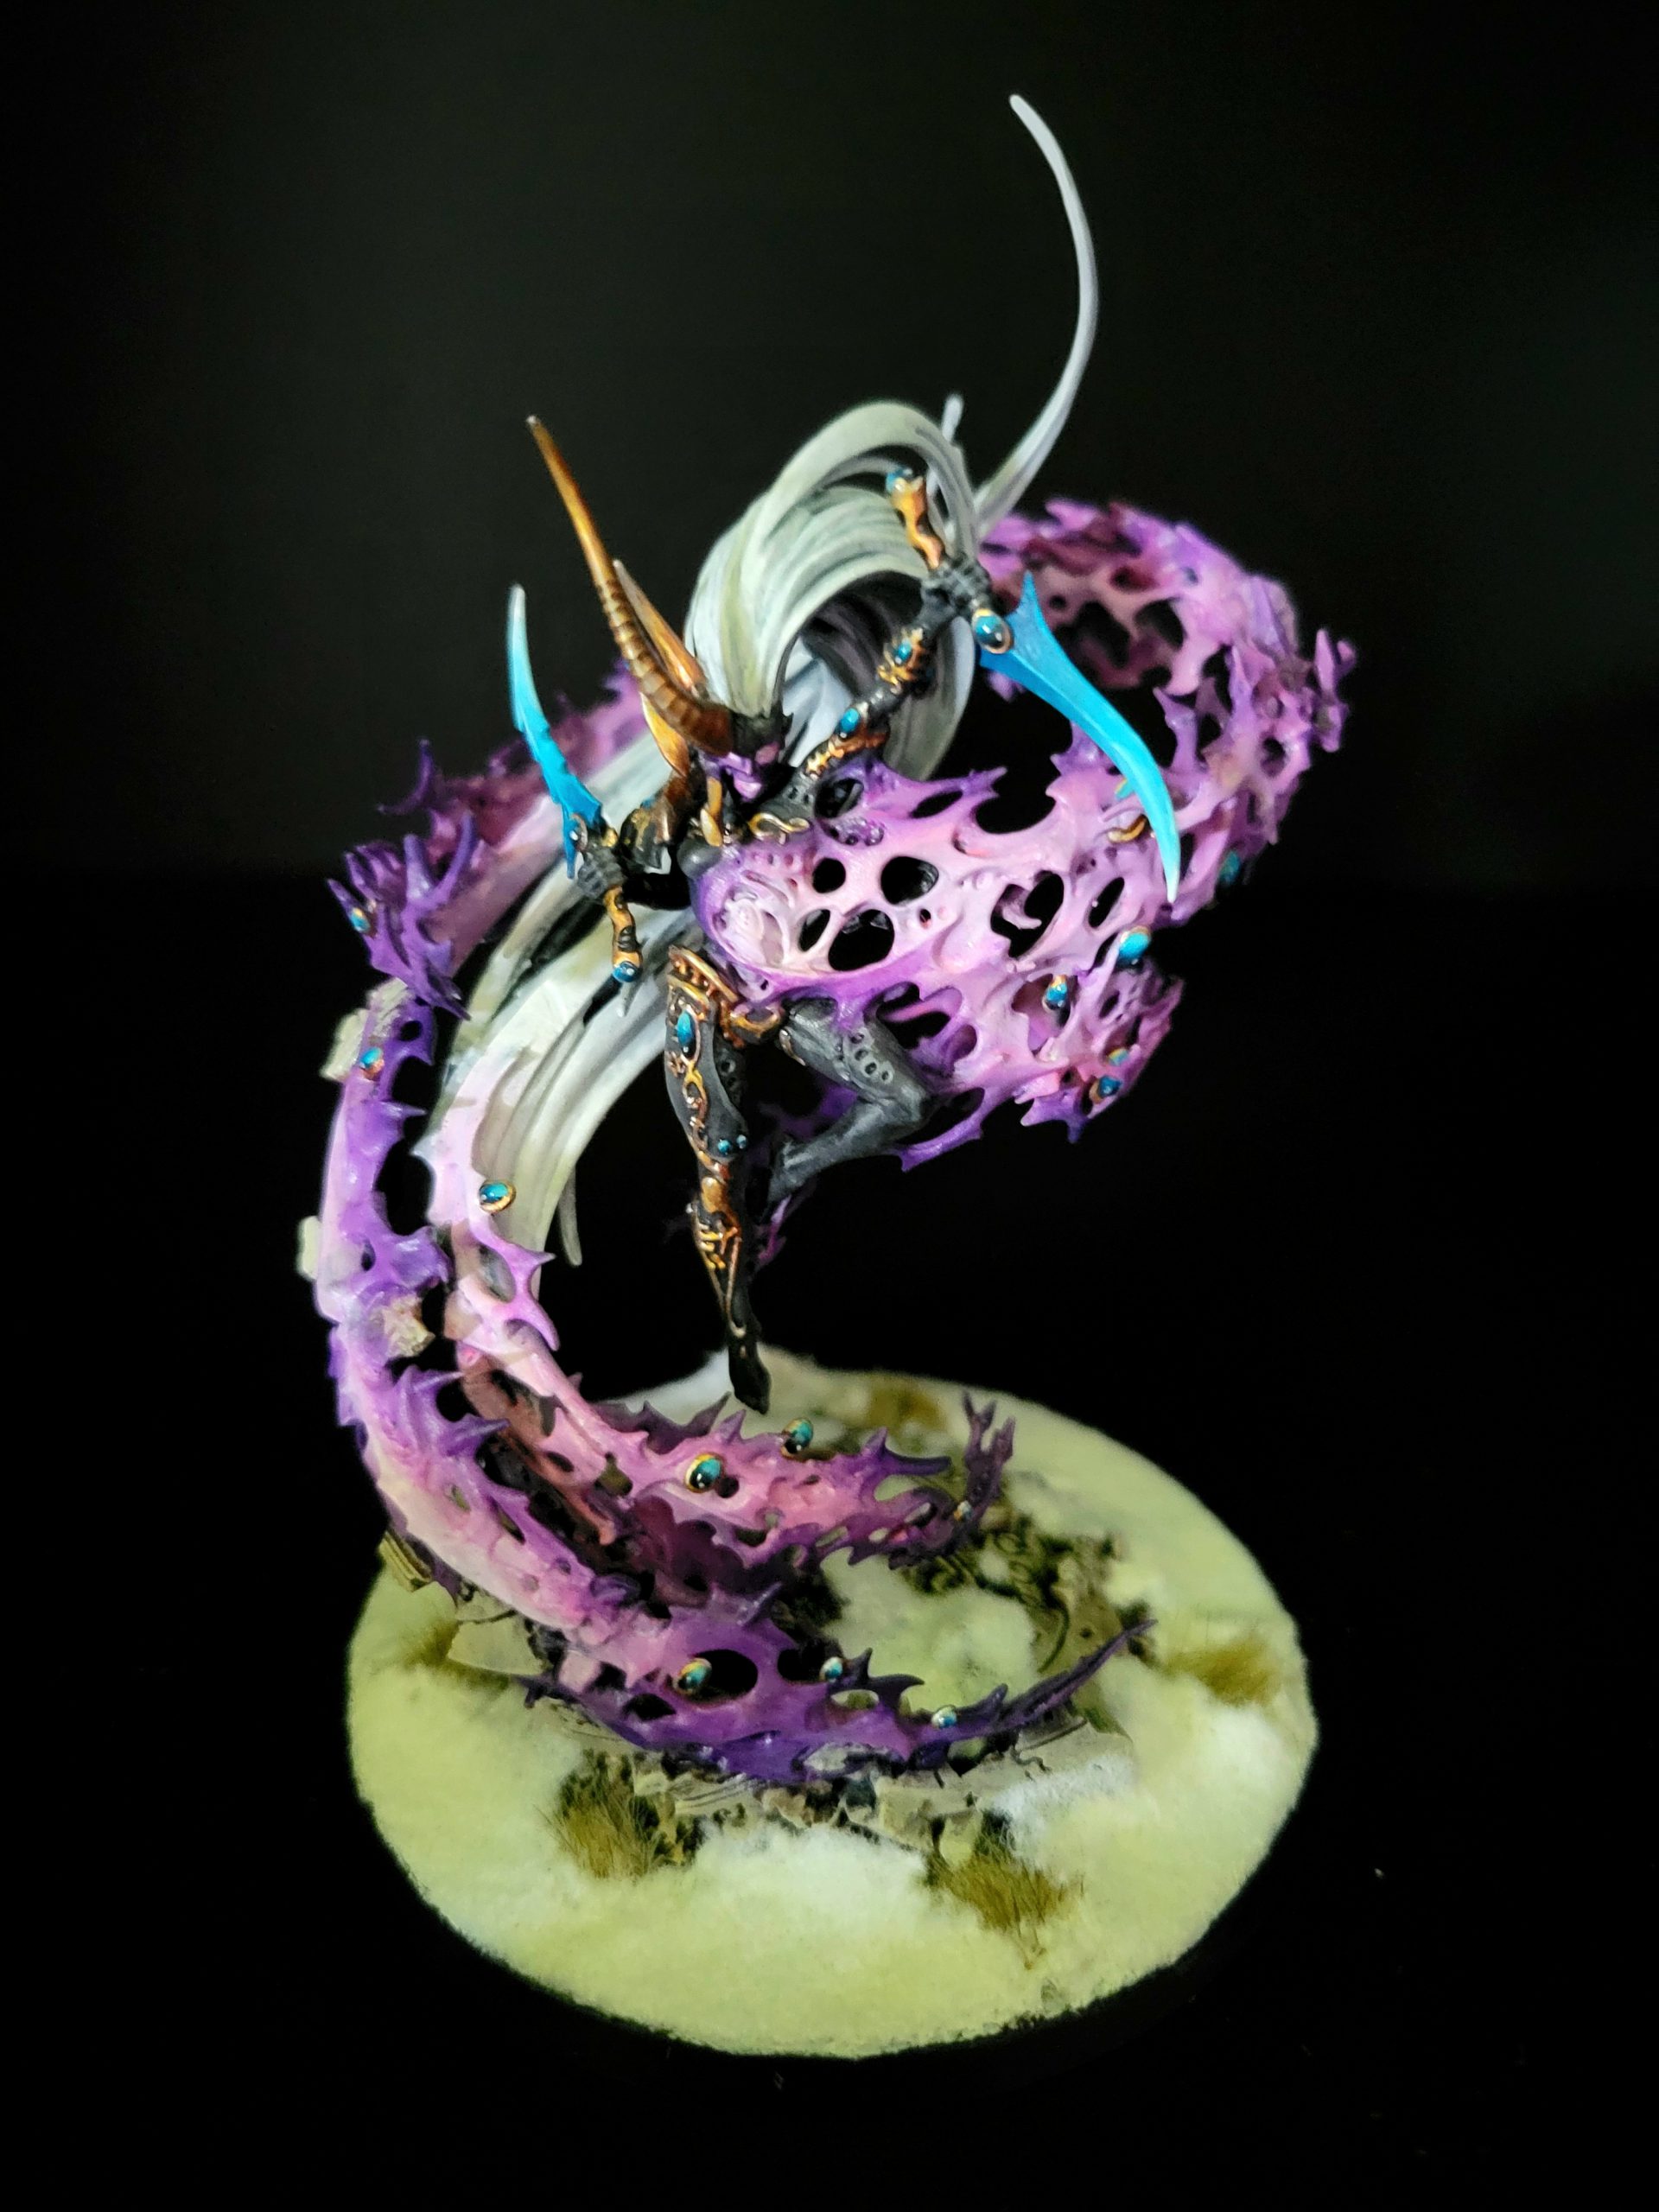
With over 1,100 points in just 6 characters, I needed to think about mission play. The Nightspinner is still an auto-include because the Transcendent C’Tan or Necrons in general still exist in the game. As a result I’m realistically working with just under 700 points to give me options in game play. Right away Swoopings Hawks and Shadow Spectres make the cut, two squads of each. Both are utility units that can leverage their unique abilities to score secondaries or keep themselves safe and the former can even do it relatively cheaply. The latter also bring a fantastic anti-elite profile while also bringing excellent horde control, something otherwise lacking in the list. A unit of Warp Spiders and the all-purpose capabilities they bring for turn one and overwatch was an easy choice, but the final selections were more difficult. Outside of the characters, the list didn’t have anything that could really take a hit or deal much damage at range. The list wasn’t built with Wraith units in mind, I didn’t have the points for multiple Fire Prisms, and I frankly think Wave Serpents are awful (did you know a Devilfish is 75 points? 75 points…) so I cast my gaze at the venerable Falcon. Brings decent punch on a T9 hull and had the added benefit of being able to deep strike with a squad if I wanted. It gives Feugan an opportunity to use his Melta profile, and with the remaining points I could add some Fire Dragons to carve power/terminator armor or equivalent elite profiles.
Voila! I had a list that was in some part surprisingly elusive, durable, deadly, and capable of dynamic adjustments. Sounds like my kind of Eldar list.
Game One – Curtis Strong (Death Guard)
Mission O – Crucible of Battle – Chilling Rain – Vital Ground
Curtis’ Death Guard - click to expand
Secondaries:
- I selected Tactical missions
- Curtis selected Fixed missions (Cleanse / Assassination)
Like in the the UK, first round pairings went up a couple days prior to the start of the event and I had the opportunity to review my opponents list and really overthink the matchup. I personally dislike early pairings. While it’s nice to be able to fully investigate the opponent’s army ahead of time I only ever end up seeing all the ways that I would play it into me were I to command my opponent’s army. Then I stress myself out over it.
In any case, I waffled between selecting Fixed (Assassination/Bring It Down) and just going with Tactical which is the army default. I took the safe, known option of Tactical and the randomness it brings over giving my opponent agency. It was a mistake and it wouldn’t be the first time this event.
Curtis Goes First
The Death Guard list can be scary, Mortarian has a unique aura ability to get around the Avatar’s half-damage and the Nightspinner’s movement penalty. An all out rush could threaten to put me on the back foot, overwhelming my ability to kill Plagueburts equipped to rush forward (Plaguespitters). Just a few lucky 4+ or 5+’s with Mortarian in charge range and a fast group of Characters and Plague Marines mounted in their Rhinos to follow and I’d struggle to push to counter his Primary scoring.
However, Curtis also feared the damage my list could do and opted to play a slower game, preferring to keep me at range and use the Rhino mounted Plague Marines to contest the midfield. As a result I was able to avoid the majority of his lists damage and focus on the Rhinos and Characters/Marines. Mortarian and the PBCs hung back which ended up being a fatal mistake as it fully ceded board control. In the end Curtis was nearly tabled with only Morty, who I never needed to contend with, remaining alive.
After the game we talked through a bit of the strategy and what could have gone differently. I think we both saw the worst in the matchup and it impacted how we approached the game. Sometimes your first instinct is the correct one – trust your gut. Curtis would end up with a strong 4-2 finish.
Final Score: Win 90-38

Game Two – Sean Clancy (Thousand Sons)
Mission M – Crucible of Battle – Chilling Rain – Purge the Foe
Sean's Thousand Sons - click to expand
Secondaries
- I selected Tactical missions
- Sean selected Tactical missions
Thousand Sons present an interesting challenge for my list, they notionally have the tools to pour mortal wounds in on my Avatars but are equally capable of sniping out my Lone Operatives with Doombolt. However, with just 7 units and no ability to redeploy mid-game Sean’s list would struggle to corral my much faster, more dynamic force. For him to effectively pressure me he’d be forced to move straight in and present an overwhelming front while forgoing the protection of his backfield. That’s not an easy or comfortable decision to make – it’s an all-in play.
I go First
Going first and trying to further eliminate his options I made sure to remove the independent Sorcerer on disk with my Nightspinner, using a Fate ‘6’ to ensure he went down. That left just two Terminator bricks and three Rubric squads in support of Magnus. Given the nature of his army and primary scoring, it also meant that Sean was far more likely to score on the kill primary, so my job was to limit his ability to hold the center objective to prevent a run away on primary scoring.
However, Sean took the cautious approach preferring to send a single Terminator brick forward to contest control of the center and kept the remainder of his forces back to screen his backfield. While the Terminator brick proved far more difficult to remove than anticipated, the cautious approach nonetheless resulted in me being able to focus down his units one at a time and on my terms. The second brick would stream out in the next two turns, but my focus shifted to whittling his Rubrics which forced decisions on which objectives he could and could not hold as Feugan single-handedly held up the Terminator brick.
The game ended relatively close, but Sean was unable to effectively limit my primary scoring while I racked up on secondary. For Sean’s part he effectively near-maxed primary, but just couldn’t keep up on the secondaries after being whittled down. While I did pull out the win, I did not escape unscathed. Sean’s Tzeentch would leave me with a gift that defied logic and seemed to multiply after every round.
Final Score: Win 89-77

Game Three – Cyle Thompson (Deathwatch)
Mission A – Search & Destroy – Chilling Rain – Take and Hold
Cyle's Deathwatch - click to expand
Secondaries
- I selected Tactical missions
- Cyle selected Tactical missions
Quick note to the reader: Cyle is pronounced “Syle” like style without the ‘t’. He is very particular about this.
The road trip rumble. The loser of this early final table matchup faced the prospect of not only losing a shot at the belt but also an insufferable car ride home.
Cyle’s non-standard approach to Deathwatch is an interesting one, the Terminator bricks toting 6 missile shots each backed by a duo of Inceptors, Eradicators, a Hellblaster brick (with a Librarian’s 4+ invulnerable), a couple of Whirlwinds, and then there was a triplet of Las-fusil toting Eliminators. And let me tell you, I’m glad Oath of Moment’s reroll wounds are going away because those things are gross. It had the power and mobility to effectively counter me, particularly with the Deathwatch ability to pick up a unit and redeploy in the ensuing turn (real nice on Hellblasters).
Cyle goes First
A quick note about this match, it has been a while, but Cyle and I played multiple games prior to the pandemic and he had a habit of either seizing the initiative on me (67% success rate) or just going first. So imagine my surprise when he went first again. I deployed terrain and units conservatively with my infantry all in deep strike (except the Dragons mounted in the Falcon) but the map didn’t give me many options against Cyle going first and redploying his Las-Fusil’s onto my flank. With an Oath of Moment on the Falcon, pinning Feugan and my Fire Dragons back, the Falcon ignited in spectacular fashion dealing several mortal wounds to my Avatar and nearby Death Jester, then obliterating 3 Fire Dragons on their way out of the escape hatch. Some Whirlwind shots and unlucky rolls later and the remaining Fire Dragons and then Feugan all went down. Fortunately, Feugan stood back up and dusted himself off, vowing vengeance. Horrible start.
In response I cleared all 3 Eliminator Squads but some very poor rolling forced my hand and I needed to risk my Yncarne to finish them, which was now stranded in the neutral corner of the board and about to face down Cyle’s full army. Compounding the bad luck I’d completely forgotten that secondaries exist and scored nothing. But that’s when Cyle blundered. His full reserves arrived, Eradicators and Inceptors while everything else lined up on the Yncarne. Coming in a little too close, the Yncarne overwatched the Eradicators killing two and wounding a third. Slightly mad at the mistake Cyle shot his lone Eradicator and a couple of Terminator squads, wounding but not killing the Yncarne. Momentarily switching gears he used his Inceptors to eliminate my Autarch… and the Yncarne vanished. And just like that it was a new game. And I immediately seized on the opportunity by clearing 2 Terminator squads, both Inceptor squads, the remaining Eradicator, and his Eversor.
Over the next few turns we’d batter each other until almost nothing remained alive. The Hellblasters remained problematic, shooting whatever they could see and then shooting again on death, every time. They also cleared both Shadow Spectre squads by punching them to death. However, with most if his mobile units cleared on turn two Cyle just didn’t have the ability to hold primary and ultimately lost a tight one. I was lucky to escape.
Cyle would go on to finish 5-1 and take 4th place.
Final Score: Win 81 – 73
Game Four – Brody Rushton (Black Templars)
Mission B – Search & Destroy – Hidden Supplies – Priority Targets
Brody’s Black Templars - click to expand
Secondaries
- I selected Tactical missions
- Brody selected Fixed missions (Cleanse / Deploy Teleport Homers)
Just like in round one, round four offered an opportunity to review lists the night prior as the pairings went up after round three concluded on day one. This time I didn’t look too deep, but in reviewing Brody’s list I just didn’t see what it wanted to do, it didn’t feel particularly challenging for my list to handle. And that’s where my inexperience with 10th came into play.
After seeing the list in action I really like what it wants to do and Brody had some clever picks. I was curious what would go in the Drop Pod, turns out nothing! It’s just a 70 point way to get a turn one Deploy Teleport Homers on an unsuspecting opponent. Followed up by a near unscreenable T2 and T3 Inceptor units and Brody guaranteed himself a minimum of 12 secondary points on Deploy Teleport Homers. Which is where his big immovable blocks of 20 Crusaders with a 5+ Feel No Pain (each with a single shotgun to advance and action) and suddenly Brody’s list is wracking up secondary points AND primary points. The Callidus is the final piece, something that can easily snag a T4 or T5 Deploy Teleport Homers. Just a very clever list.
Brody goes First
However, the list is slow. And while Brody did move into the mid-field, splitting his Crusaders and Sword Brethren into two pincers, and while he did spike some saves and Feel No Pains early, I was able to overwhelm his left flank and swept his backfield with the help of an Yncarne teleport. Because he scores so easily it was still a tight game, but he was now largely trapped in the center with the exception of the aforementioned T1-3 scoring units. Those were destroyed not long after coming in and the Nightspinner ensured he’d not make my backfield with anything that remained. The Avatar, previously protecting my flank, had charged out and challenged the remaining Crusader squad. Eventually his remaining Sword Brethren charged in to cut down the Avatar but that only allowed my Yncarne to move across the board, which then move and assaulted his Callidus on T4, stripping him of the tools he’d need to hold primary and score his secondary.
For what I initially thought, unfairly, was going to be a blow out turned out to be a really fun, white knuckled game. A credit to Brody who would finish out the event at 3-3.
Final Score: Win 81 – 73
Game Five – Eric Singer (Blood Angels)
Mission E – Sweeping Engagement – Chosen Battlefield – Take & Hold
Eric’s Blood Angels - click to expand
Secondaries
- I selected Tactical missions
- Eric selected Tactical missions
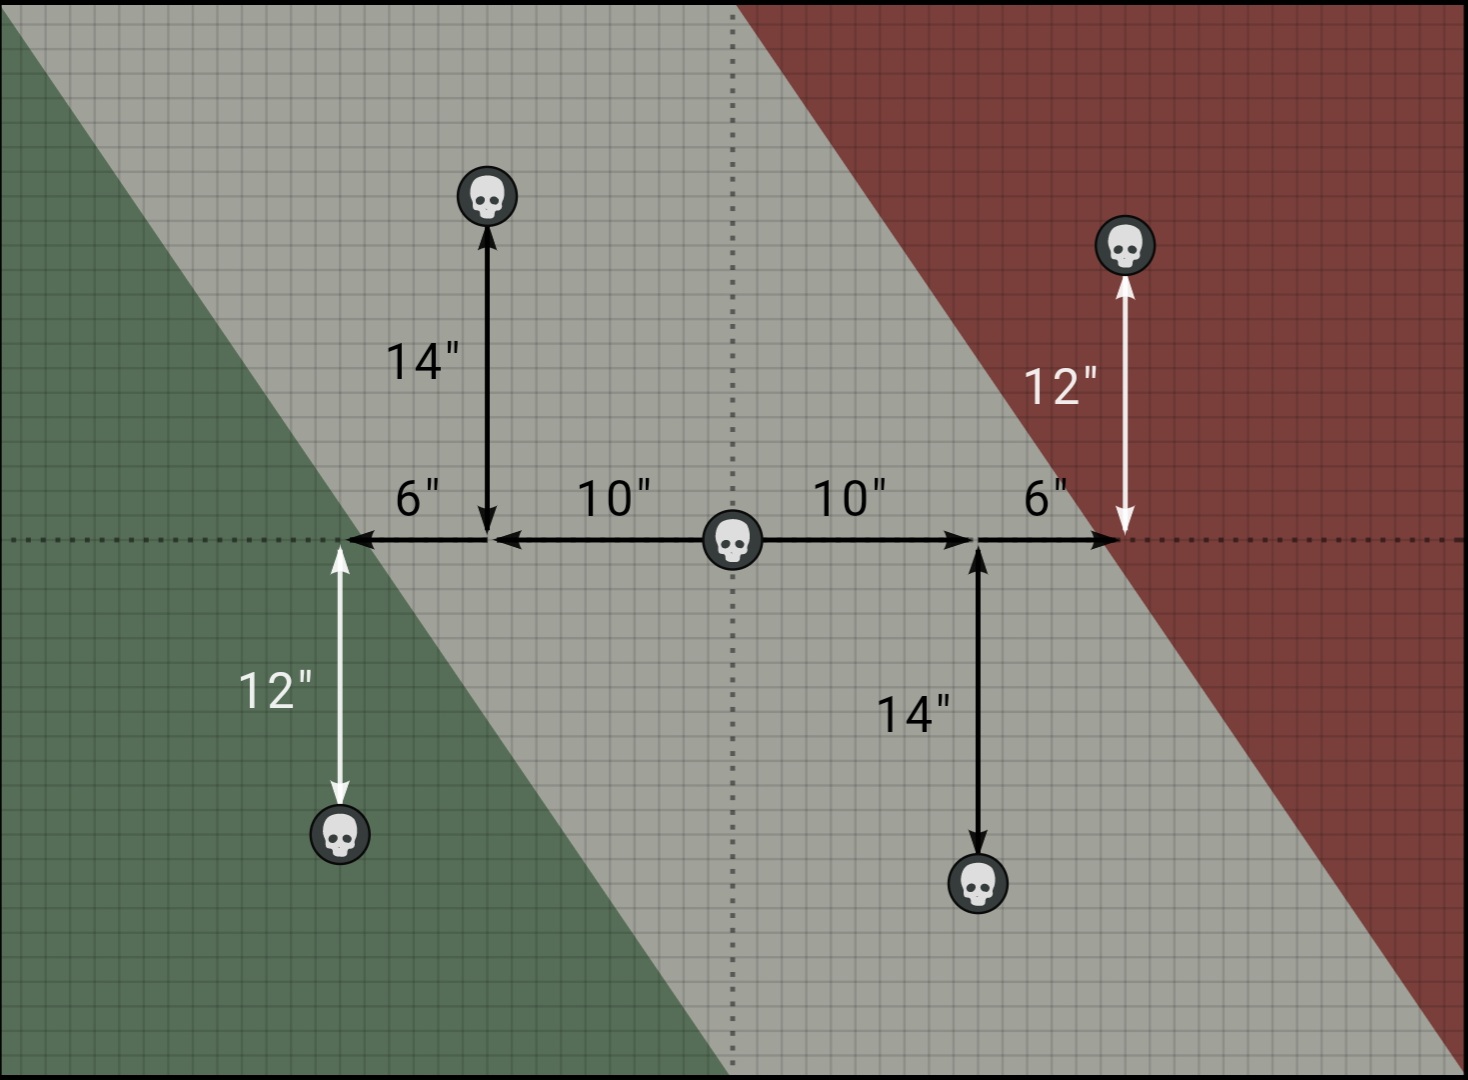
An army that I had absolutely no idea what it did. But hey, Marines are Marines right? I assumed the Aggressors would shoot real good, and the Death Company would smash real good and just kinda went from there. The mission required objectives to be player-placed and having lost the roll, Eric placed favorably. This… is a bold strategy. Like FLG, Goonhammer ruled that the roll off for sides is after the objectives are placed, a deviation from the Levi pack. As a result there was a 50/50 chance that Eric would lose the roll and leave himself at a disadvantage… but he did not. The Objectives were placed so that one sat solidly in each deployment corner, easily defended, one in Eric’s midboard on the edge of his zone, and one at the far corner on the edge of his zone. The final objective sat in my midboard on the edge of my zone. Being Take and Hold, the objective placement was a real advantage for him.
Most of his units placed conservatively in his back corner with the Redeemer carrying Aggressors sitting in his mid-zone near the objective. A squad of Infiltrators sat his far zone objective. I knew I couldn’t hope to fight him off the midboard objective so instead I deployed to defend myself from jump pack Troops on my midboard objective with the Fight First Solitaire milling about, then placed my Falcon to try and reach out and put the Fire Dragons and Feugan in range of the Infiltrators T1. All of my infantry otherwise went into deep strike due to the high amount of indirect.
Eric goes First
Eric first moved his Death Company into his mid-zone to go with his Redeemer. After taking some indirect shots on the Oath’d Falcon he then turned over an uneventful turn happy to position for turn two. As planned I moved my Falcon out and deployed the Dragons/Feugan… Which is exactly how I learned that Marines can move if you get too close. Saving them for one more turn and preventing a deep strike in that corner. Without a lot of ranged threats, my Avatar moved out towards the same corner while the Solitaire, moved out into the wide open center to claim an Area Denial and hopefully bait out a Death Company, or even better, the Redeemer from which I could Phantasm away. To soften them a bit the Nightspinner focused on thinning the smaller Death Company squad.
Eric opted to hold his large squad of Death Company while moving the Redeemer down his line to support the beleaguered Infiltrators. A bit out of range but in position to fortify the corner on the following turn. A squad of Inceptors came in to support Secondary scoring then the small squad of Death Company, now down to 3, moved to take on the Solitaire who did Phantasm out of Pistol range but still within charge distance. After taking down the Falcon and a few Fire Dragons the Solitaire took the inevitable charge, killed a couple of guys then went down to a couple failed saves.
On my turn the Avatar moved in to bolster Feugan and his remaining Dragons. Lining up a shot, Feugan super-melta’d the Land Raider which was then finished by the Avatar. The Aggressors tucked back behind a nearby wall to avoid further damage. Then Feugan finished the Infiltrators in combat. On the other side I had brought in some reserves to clear the one Inceptor squad and the Lone Death Company.
In what proved to be the decisive turn, Eric moved his Aggressors out which my Avatar promptly overwatched using a Fate ‘6’ and popping 3 extra hits which then killed 4 Aggressors. Due to their position, the wounds taken in cover, a massive gap opened between the character Apothecary and the two remaining Aggressors. Hoping to close it with a charge, Eric rolled, then rerolled, but ultimately failed and the remaining two Aggressors were removed. One hell of a Fate die. The remaining Death Company did murder the Avatar but that just resulted in the Yncarne coming in to clear them on the next turn with Feugan’s aid. Just an indirect firebase and an Apothecary remained and it was mostly clean up from there.
The Aggressors were a gut punch, up to that point it was a hotly contested game but the loss with almost zero return was just too much to come back from. Eric would go on to finish 4-2.
Final Score: Win 90 – 73
Game Six – Logan Antonation (Tau)
Mission N – Dawn of War – Chosen Battlefield – Priority Targets
Logan’s Tau - click to expand
Secondaries
- I selected Tactical missions
- Logan selected Tactical missions
The top table game had arrived. Logan and I had circled each other all day and it finally came to a head with the belt (and a trip to Atlanta) on the line. As with Blood Angels I had no idea what Tau did or had any inclination on what the list wanted to do. My opponent on the other hand knew my list and was prepared to go right away. My lack of experience with 10th edition would come to haunt me.
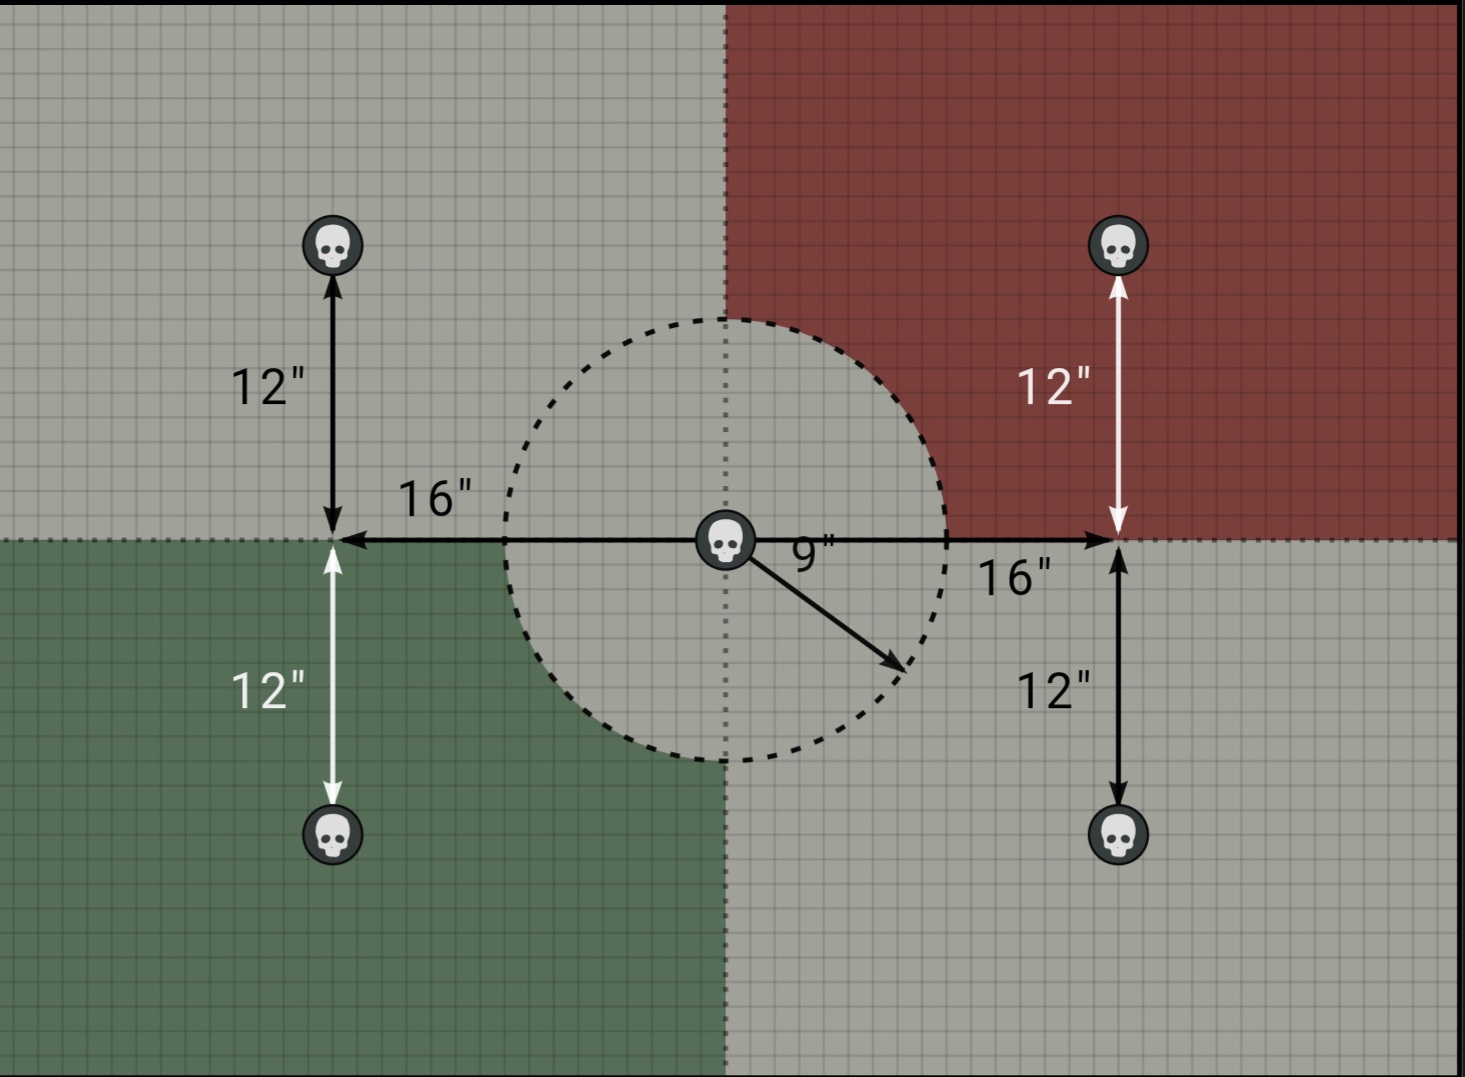
Just as with round five, objectives were player placed. And just as round five, my opponent won the roll and placed the markers to advantage him. This time however I won the roll and chose the advantageous side. I had an objective in my left-most corner, and then just outside of my deployment zone such that two objectives sat solidly protected in my left-most board corner. Another objective sat about center shaded slightly towards my deployment zone, while Logan’s objectives sat in his corner opposite of mine, and then a second mid-board, not far from the center objective. He deployed along his back line, protecting his Hammerheads, Devilfish and Riptides as best he could with intervening terrain, while some of the cheaper more disposable units (Tetras/Piranhas) or Lone Operatives (Ghostkeel/Shadowsun) sat in the spaces between. The Vespid remained off the table. For my part, I deployed conservatively into my corner, the Shadow Spectres and Warp Spiders remaining on the table, the Hawks and the Falcon/Feugan/Dragons in deep strike reserve. The terrain heavily favored my corner while leaving the other half of my table edge mostly exposed as open, worthless ground.
Logan goes First
With most of my units hidden Logan simply positioned a few units, then used the bevy of Smart Missile System shots to completely wipe my Warp Spiders from the board. I didn’t expect it but it proved to be fairly reliable all game long for killing infantry. In response my Shadow Spectres hopped out and got to blasting at a visible Hammerhead before ducking back again. The combination of Spectre shots and the Nightspinner left the Hammerhead alive by the slimmest of threads – enough to send another volley of SMS in the next turn. Oh and I forgot to play my secondaries again. A good start.
Logan grabbed some good secondary draws and brought his Vespid in to help secure both a Deploy Teleport Homers and Investigate Signals which was a banger of a secondary turn, scoring 21 points in Turn 2 total between primary and secondary. A couple of Shadow Spectres were nibbled away, but to this point I still wasn’t giving him much to shoot at. No matter, he was up early and in a solid position. Unfortunately for me, I also drew Investigate Signals and Deploy Teleport Homer on turn two, and while my Hawks were prepared to drop in, his Vespid and Piranha’s already occupied three corners and the rest of his zone were covered in vehicles – nothing I could do about it but accept the 5 total points and move along – it quickly became an uphill fight. Feeling the pressure, I knew I had to make some plays. I brought my Falcon with Fire Dragons and Feugan in, getting Feugan out close enough to shoot at half range (Melta 6) and expected to clear out a fair chunk of the Hammerhead/Longstrike/Piranhas. I knew I’d be bringing the Yncarne in back there this turn with an opportunity for her to hit Shadowsun and/or the Ghostkeel. I had a lot of options and the potential for a big turn.
The expectation was that the Dragons and Feugan would handle Longstrike, the other Hammerhead by the Spectres/Spinner, and then the Yncarne could shoot Shadowsun and charge the Ghostkeel or both to finish them.
Disappointment. Longstrike saved against Feugan’s lance shot on a natural 6, then the Fire Dragons all whiffed the hit rolls. The Spectres did finish the damaged Hammerhead which allowed my Yncarne to drop back there and the Yncarne combined with the Falcon to take Longstrike down enough for the Nightspinner to finish it, but the Yncarne now was forced to choose between Shadowsun and the Ghostkeel in combat. I took Shadowsun. I needed a big turn, but it fell just shy and now I was both exposed and behind on points. On the other end of the board my Solitaire was beginning to make a nuisance of himself, picking up Stealth Suits before playing around the walls and using Lone Operative to avoid the return fire. Meanwhile my Hawks came in to clear Logan’s Vespid – if I was going to win I needed to keep his options limited and his units in front of me.
Logan then proceeded to line up his full army to handle the Yncarne that was now in his backfield – circling his forward most objective, one of the Devilfish planted itself on the near-center objective and disgorged it’s infantry ready to make the Yncarne a memory. Didn’t need it. Instead a Riptide just one-shot the Yncarne. No big deal. The Solitaire happily skipped away from any threats, and the Fire Dragons ate a whole bunch of shots and went down, but Logan’s shooting phase was largely wasted which was a small blessing. Nevertheless he continued to score.
Needing to force his hand a bit, I couldn’t reach his backfield at this point with anything that could deal with a Riptide. My Avatar lurched out to the midfield to clean up the Devilfish and Breachers while using the terrain to minimize the shots he’d have back on his turn. The Solitaire continued to clean up any peripheral units that would force Logan to keep one of his Riptides back on his home corner and out of sight of the center objective. Feugan began to move towards Logan’s forces using cover to avoid the clapback and carving a melta path through a Piranha. The Avatar attempted a Fate ‘6’ shot on the nearest Riptide but only managed one extra shot and both were saved. After softening up the Devilfish, the Death Jester destroyed it ensuring the Breachers couldn’t escape the looming Avatar’s Wrath.
On turn four Logan still had 2 Riptides remaining, a Hammerhead, Ghostkeel, Tetra, Devilfish with Breachers, and a single Stealth suit. In contrast I had my Avatar, a squad of four Shadow Spectres, and a squad of one, a Nightspinner, Falcon, Solitaire, Death Jester, five Hawks, the Autarch, and Feugan. It wasn’t exactly foregone but I was outgunned by a mile. He positioned his remaining units to draw sight on the Avatar, bringing the second Devilfish and Breachers out, the near Riptide, and the Ghostkeel. The remainder couldn’t draw sight to their position and the Hammerhead settled for SMS blasting the lone Shadow Spectre. The Breachers shot first dealing a number of wounds to the Avatar, one guy being able to see the Solitaire and promptly throwing grenades to put him down. The Ghostkeel then shot ineffectually. The Riptide, already having one-shot the Yncarne prepared to finish the Avatar with 8 wounds remaining but instead left him teetering on 2 wounds. This was problematic. Logan was now exposed and an Avatar wasn’t a guaranteed kill by overwatch, and I certainly wasn’t going to move him in my movement phase. So he hoped for a long ~9″ charge, rolled an 11, popped Tank Shock and took him down that way. Easy.
I was reeling now, but still managing to keep the game within reach. The Riptide and Breachers needed to go or it was over. The Falcon raced over to contest his second objective from the Hammerhead sitting there and put some shots into the Riptide, punching through some significant damage which would then be finished off by the Death Jester. Meanwhile the Spectres mostly cleared the Breachers but failed to finish the hero leading them before popping back behind a wall. Feugan, moving closer to the Hammerhead downed the final Tetra. Dumbly, again not focused on secondaries, the Falcon charged the Hammerhead which took me out of my Engage on All Fronts secondary.
Contesting Logan’s objective meant that at the top of turn five the score sat at 81 – 63 after he scored his primary. He drew secondaries, A Tempting Target and Overwhelming Force. I made sure he could not get Tempting Target, but Overwhelming Force he could kill my Falcon for 3. Which is what he did as he consolidated the Ghostkeel onto his objective along with the Hammerhead and remaining Stealth Suit to ensure I couldn’t take it.
Turning it back to me the score sat at 84 – 73. I had ~3 minutes remaining to figure out the score, what could be done, what needed to be done, and then execute. He’d score 10 points at the end of game on primary if I didn’t take him off an objective, and going second I knew I’d also score 10 making it 94 – 83. Drawing secondaries I got Defend Stronghold for an easy 3 and Behind Enemy Lines. Having forgotten to pick my Hawks up at the end of Logan’s turn I didn’t have any way to get 2 units in his deployment zone, but Feugan could make it while still contesting that midboard objective. So he did. That’d make it 94 – 89 which meant I needed to take the objective from Logan. The Death Jester could make it, that’d be 2 OC, and my Shadow Spectres could also get there and make it 6 OC I’d need to kill the Hammerhead and oh god time is running out roll the shot!
Hit, fail to wound, reroll, fail, game over.
Final Score: Loss 94 – 89
It was a hell of a way to finish, and while I wasn’t happy to lose I was happy for the game and that Logan got his invite ticket. It wasn’t until later, when I had the time to think about the game that I realized how many mistakes I’d made in the course of it. As a quick note to the reader, it is good to reflect deeply on your losses, without thinking about the dice, if you hope to improve and avoid those mistakes again in the future.
The first error was just simply, once again, completely forgetting my secondary scoring on turn one and turn four. This ultimately would not have changed much about the game except to narrow the score differential but it’s just a mistake that cannot happen if I hope to win an event. More than anything, this is where my lack of practice in 10th has shown through most clearly.
The second error that stood out to me, almost immediately after the game, was that I completely missed on the objective layout. I had an advantage, the mission could only score 10 on Primary until the end game and most of the objectives were in my table half and reachable through ruin-walls. I did not need to play Tactical missions. I could have simply taken Fixed (Bring It Down and Cleanse) and forced Logan to play my game on my terms rather than his. This was a significant error and had the potential to completely upend the game had I seen it.
The third error was making the wrong moves on turn five. Upon reflection I had a clear path to a tie and forcing a tiebreak (which I held on opponent-win-percentage). Instead of fixating on the Hammerhead to take the objective, I only needed to shoot the lone Stealth suit which would have reduced his OC to 6. My Death Jester was in range of the objective to bring the OC to 2, and the 4 remaining Shadow Spectres, moving last to hold his Overwatch threat and remaining on the other side of the terrain from the threat, before shooting the nearby Devilfish and using their 6″ move ability to hop onto the objective for a 6 to 6 contest. Importantly, the shooting phase move is not an Overwatchable move. I never needed to hold the objective as I’d already maxed primary, I only needed to ensure Logan didn’t hold it. I think given a couple of extra minutes I’d have puzzled this one out, however, with the clock situation as it was there just simply wasn’t enough time to assess the situation, the score, the potential options, plan and verify the plan, and then execute on it.
Final Thoughts
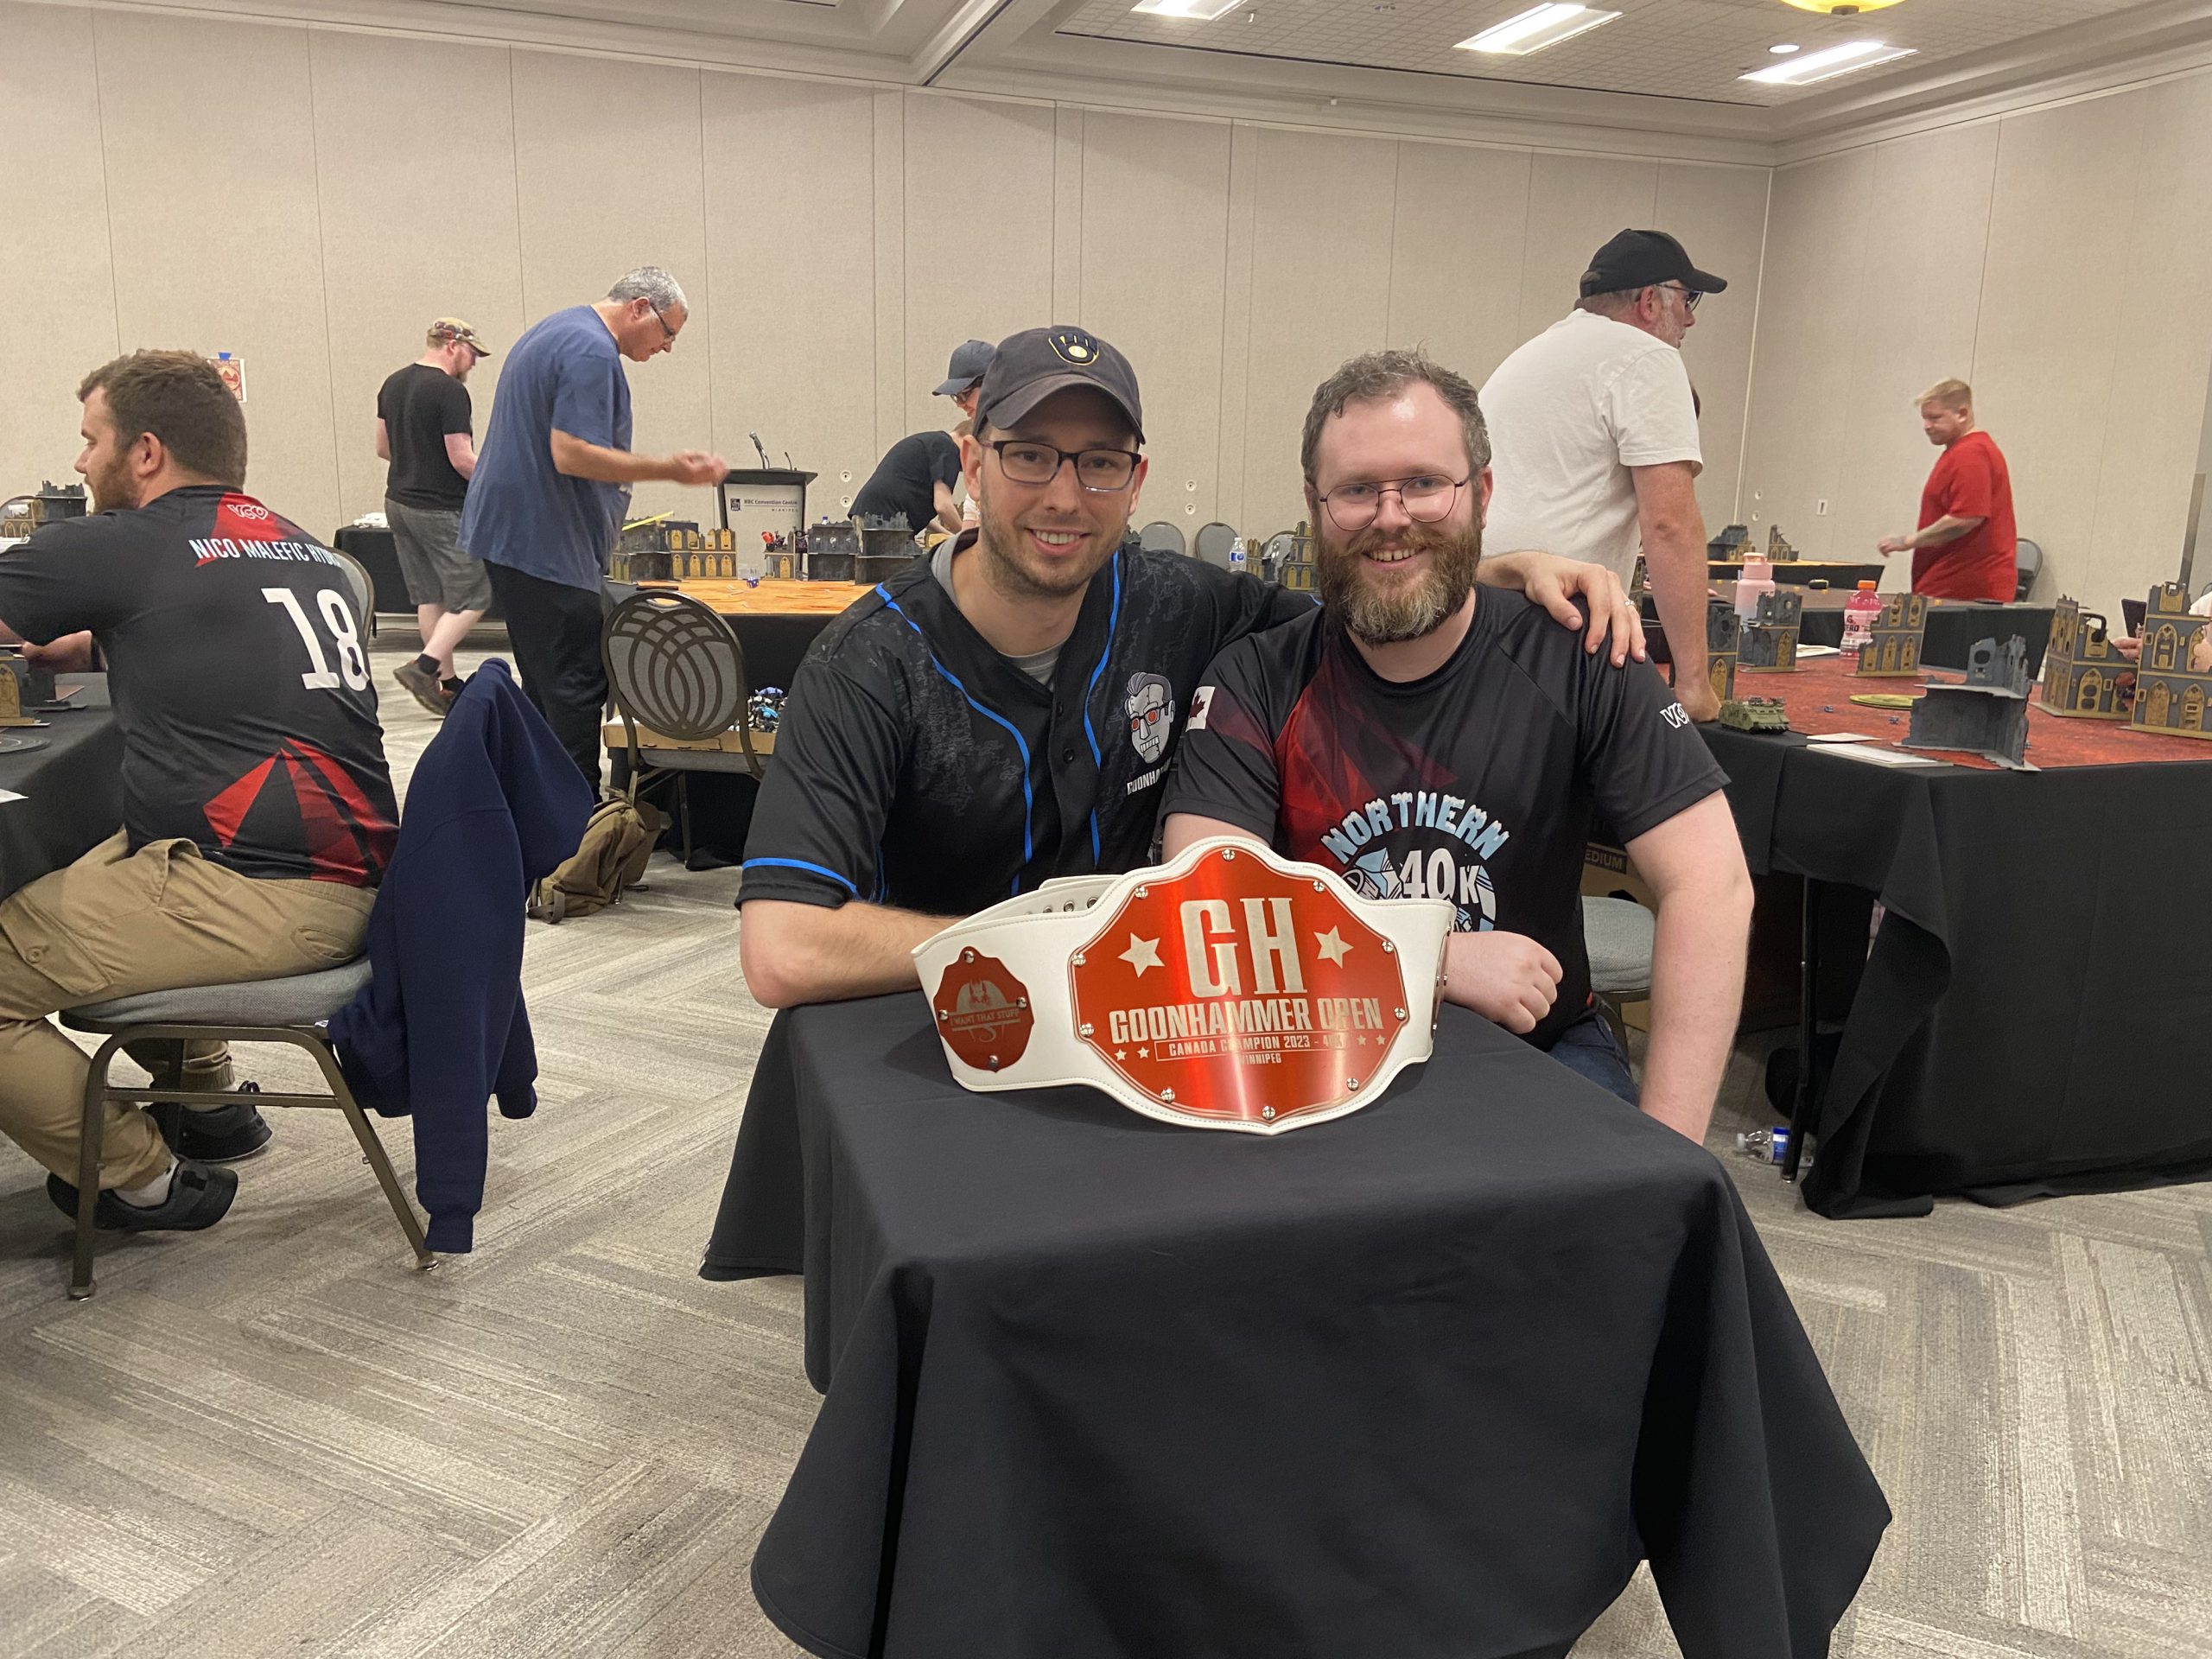
While I wasn’t too saddened by the loss and I was ultimately happy for Logan’s win, I did want to claim that belt for my own. It is by far the coolest trophy I’ve seen in 40k (particularly the red/white Canadian one). It would have been nice to head to Atlanta with the golden ticket but coming off last year’s finale win and with a 3-month-old at home I wasn’t too concerned about that. However, on the drive home I had time to reflect a bit on the year and I realized that I had gone 0-for-3 in top-table finishes in the four events I participated in going back to a post-LVO 9th edition. Certainly not bad by any means, but the feeling of having nothing to show for the effort brings a certain melancholy of its own. I can chalk that up to a lack of practice and general unfamiliarity prior to events, but with a baby at home it just isn’t something that will change any time soon. I’m not sure I’ve quite come to terms with that new reality yet and the desire to play and win is there, but the time required is not. But then I see my son giggle and laugh and know that ultimately it just doesn’t matter.
Have any questions or feedback? Drop us a note in the comments below or email us at contact@goonhammer.com.
