
Good morning and welcome back, fellow Underhive denizens! The Goonhammer Overlords have once again lashed the poor Necromunday crew to our arcane lexicography devices and demanded content! This week we’re going back to Tactics Cards and giving one of our older articles a fresh coat of paint, because Games Workshop just keeps releasing more of these things!
In this article we’re going to explain how Tactics Cards are used, how we think they should be used, break down the newest cards available, give some suggestions on what cards to choose for each gang, and then finally list and rank every single card.
We’ve seen some folks passing around this particular article as a resource, so in the interests of the community we’ll do our best to keep this thing a bit more regularly updated going forward!
That said, we are mostly current up to the Hive Secundus Card Pack (2024). There are a few gaps, and we will be filling them in over the next couple of months!
What are Tactics Cards?
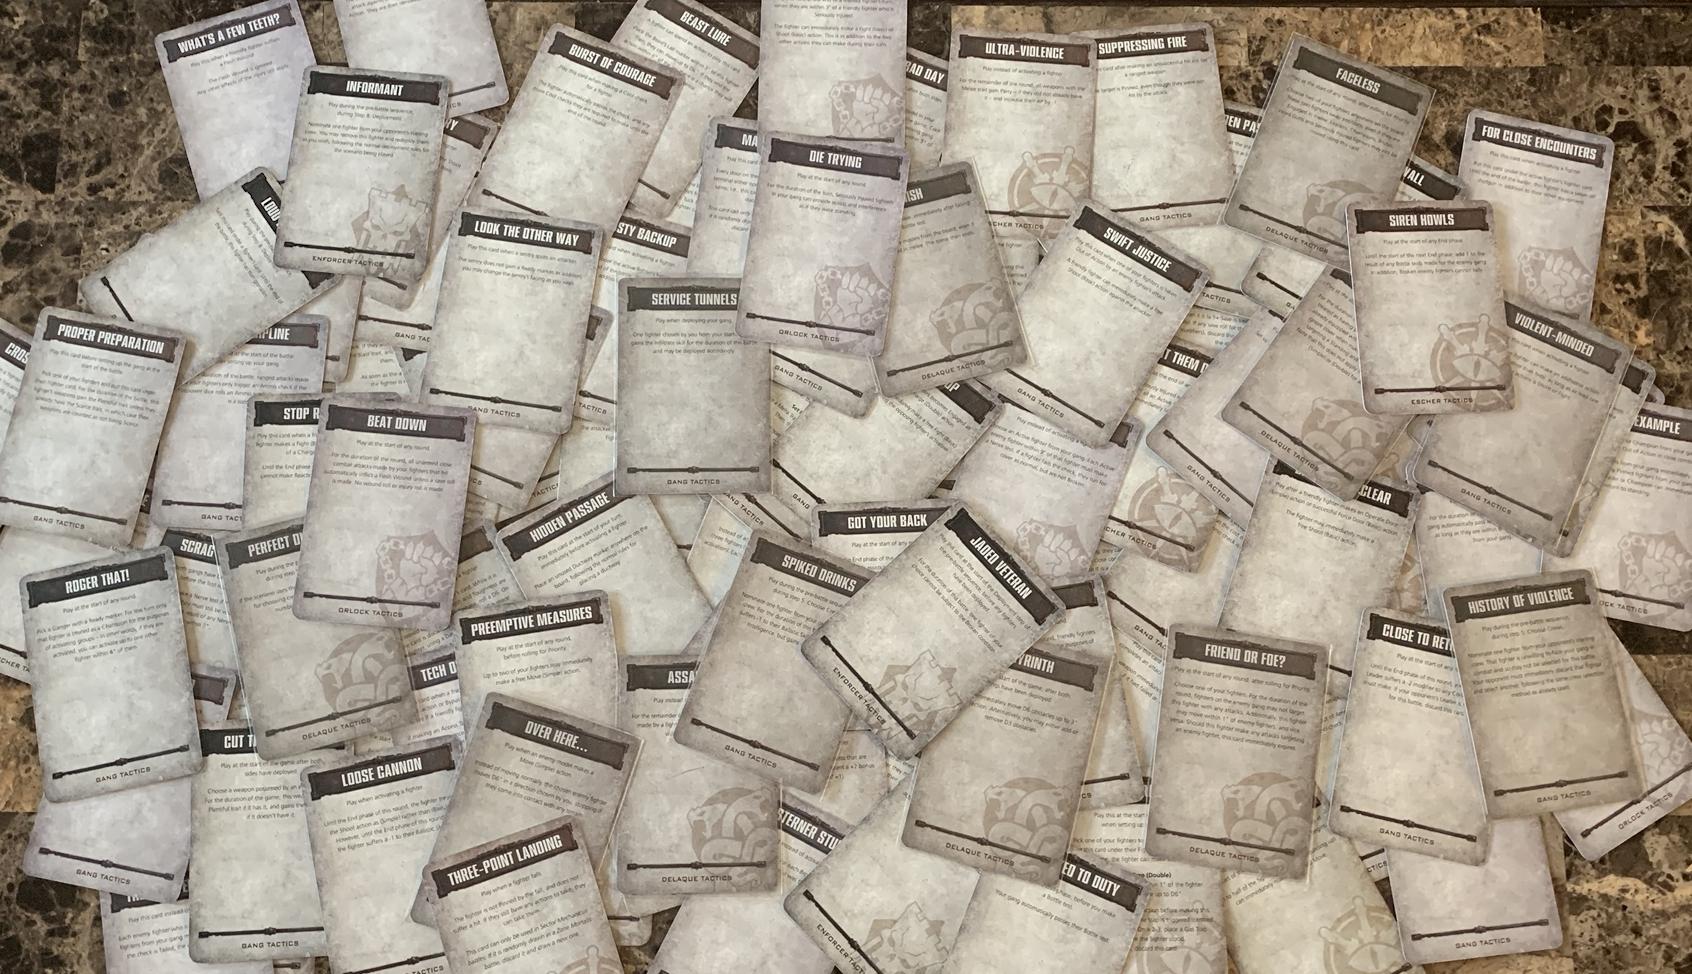
First off, Tactics Cards are awesome. They’re generally single-use effects that you can play to cause some manner of insane payoff that’s often capable of swinging a dicey game back into your favor. Tactics Cards can give your crew that special bit of Oomph they need at just the right moment, allowing gangs to auto-pass a crucial Bottle Test, make additional actions, or even drug an enemy to ensure that he shows up to the fight absolutely plastered and unable to shoot straight.
Each gang has around a dozen cards exclusive to their usage (or closer to thirty, if they’ve had their House book), and these tend to lean heavily into their particular play-styles. Delaque get sneakier, Goliaths get smashier, Cawdor gets even more flame-happy than usual. In new Necromunda, by mid-campaign once everyone’s had enough credits to have their fill of the trading post, sometimes the distinct lines between gangs blur as folks wind up buying their way into the same The Best Stuff. The gang-exclusive Tactics Cards do wonders to bring back home the fact that each of these Houses and Cults are separate entities with their own play-styles and unique strategies. Beyond those gang-exclusive cards, there are a slew of regular Gang Tactics cards, usable by anyone regardless of faction.
So, grab some cards, build a deck, have a blast? Yes, but in true Necromunda fashion, it ends up being just a bit trickier than it needs to be.
Obtaining Your Cards
If you’re a purist who insists on using the actual official Tactics Cards, we wish you the best of luck on your odyssey. There are currently (extremely high number) unique Tactics Cards, and acquiring them is no small task. In order to have legitimate physical copies of all the cards you would have had to have:
- Purchased both boxed sets for Necromunda; Underhive and Dark Uprising (and pre-ordered the Underhive box directly from GW for the bonus Hive Tremors card!)
- Acquired all of the gang and gang vehicle-related card packs, which each included both gang-exclusive Tactics Cards as well as universal cards usable by any house/cult, as well as the Underdog Card Pack (which also included a dozen universal cards).
- Also purchased your secondary gang card packs, released alongside each gang’s House book, and grabbed the 26 cards from the briefly-available Zone Mortalis pack.
- Downloaded the PDF from Warhammer Community which included 17 more cards in digital form.
- Picked up a copy of the December 2019 White Dwarf for the Gang Raids supplement and the exclusive A Present For You! card.
- And otherwise manifested the other cards that have trickled out of other sources.
If that seems like a lot, it is. It’s also an unfortunate note that none of these cards have seen a reprint since their initial release. At this point anyone who missed out on paying $15 last year for, say, the Delaque card pack, would be stuck either getting fantastically lucky and finding it buried on a shelf at a friendly local store, or shelling out up to $60 on eBay!
The Current System
So if you’re not the Monopoly Guy and don’t have access to a print shop or a time machine, getting your hands on all of the cards in present day is likely a bridge too far. Even if you do manage to score your particular House’s pack, you’ll only have a small fraction of the universal cards theoretically at your disposal. One of our own illustrious “experts” here at Necromunday, Dan “The Sex Cannon” Boyd, didn’t even know this was a thing at his first Necromunda event. He just brought the Orlock card pack to use as his entire deck and suffered some serious envy when confronted with actually good tactics.
Ultimately, if there was a possibility for new players to grab the original Tactics Cards for themselves, we would wholeheartedly recommend that route. As it stands, it’s far more rational to suggest that players build a proxied deck with standard card sleeves, or to list out their deck on paper and roll a die (or use a random number generator) to see which tactic they ‘draw’. If you’re part of a playgroup that for whatever reason won’t allow this totally reasonable compromise, let us know and we will shake our heads disapprovingly at them.
The point is that not everyone has every card, unless they’re psychopaths like us. Even if you do have all of the cards, the only guideline for using them is to use whatever cards the player has. And while that can be fine for games where the players can choose their cards, in random draw missions, a bad draw can potentially crater a gang’s chances at winning. Imagine drawing Frag Trap or Sump Slump. Terrifying.
What’s even more terrifying is the massive spread in usefulness among the cards. Some are good enough to warrant Auto-Include status, and some don’t actually, factually, do anything. This is, obviously, a big problem when considering missions where cards are randomly selected. There are about 325 cards, and only about 45 or so of them are useful all the time. That means roughly 14% of the cards are desirable in random draw missions. This is horrible. A 14% hit rate is garbage. It’s table games at a casino levels of bad. Come on.
In summation, the current rules for Tactics Cards and decks in Necromunda are broken. It’s a disappointment, because Tactics Cards can be a really fun and flavorful way to spice up games. However, while the official rules are atrocious, we’ve come up with what we think is a very good way to balance the cards enough that they could work for any gang in any campaign.

The solution, we think, is simple:
Tactics Cards: The Goonhammer Way
Have your players build a deck (or list) of 12 cards of their choice. For games with random card selection, just draw (or roll for) X cards and have at it. For games where the players choose their cards, have them generate X+1 cards and discard one of their choice.
This way, each player can inject some of their desired play-style into every game, while at the same time keeping the games fun and fresh because they can’t adhere to just one strategy. Players won’t get hosed by drawing bad cards, and everyone can feel like their agency is intact for each and every game.
For an even more flavorful variant, increase the deck size to 14, but include a pair of Sector Mechanicus and/or Zone Mortalis-specific cards, swapping them in based on whichever terrain style you’re playing on for that match. There are some great cards based around manipulating and exploiting the battlefield, and we’d feel terrible if folks followed every one of our deck suggestions to the letter and never got a chance to experience the wonders of Hive Tremors and Rigged Door.
As an example of our system; when Dan plays his Orlocks, the generalist gang, he generally chooses these twelve Tactics Cards to put in his deck for a campaign:
- Lucky Find: Dan uses a lot of Plasma and Bolters in his gangs, and when they run out of ammo, it can be devastating.
- Bond of Brotherhood: Extra shooting or fighting on a turn is always a good thing. This one’s use condition means it can be very versatile, too. It’s also just about the only Orlock card worth taking!
- …Click!: Plasma weapons beware!
- Adrenaline Surge: Extra actions are never bad.
- Bait and Switch: Get a crucial double turn for a leader or champ at the expense of a ganger or juve. Cannot be underestimated.
- Desperate Effort: Another double turn card.
- Duck and Cover: A ridiculously useful card. Consider using it on a guy with a template weapon to maximize friendship destruction.
- Hard Stop: Orlocks kinda suck in combat, so stopping a charging Goliath before they can even get in is hugely useful.
- Lucky Shot: Re-roll that failed to-hit roll. Obviously useful.
- Reaction Fire: Out-of-turn shooting is incredibly powerful.
- Violent Minded: See #4.
- Wrong Again: Another great card for destroying friendships. Take the shot on a juve instead of your valuable fighters and laugh your way home, alone, because everyone hates you.
Notice the proliferation of extra actions and out-of-turn shooting or fighting. Those are some of the strongest possible uses of Tactics Cards in the game, and every card has a guaranteed use condition: no tests to see if it happens. You’ll also notice that all, save one, are in our Tier 1 list of cards. It’s important to mention the tiered ranking system, because we’re about to rank some cards!
The Goonhammer Tiered Ranking System
There are four Tiers in our system:
- Tier 1 cards are always good. Using them in a game is a guaranteed bonus.
- Tier 2 cards are usually good, but may depend on special equipment or conditions to be truly useful. Don’t count these out, though. With the right preparation, there are some seriously powerful cards in Tier 2.
- Tier 3 cards are hyper-situational or downright bad. Try not to use them if you aren’t forced to do so.
- Tier 4 cards aren’t strictly worse than anything in Tier 3, despite being even more situational and specific. Think of this as the Comedy Tier – you’re never going to win a game because you dropped a Beast Lure, but it’s gonna be one hell of a story.
The Newest Cards
If you’re just swinging by to check out the new stuff, that’s fine! Our gigantic table of every card ever can be a bit ponderous to navigate, to put it politely. Here’s what’s recently been added:
Ash Waste Nomads Pack (2022)
Along with the weighty Ash Wastes boxed set, GW released three new Tactics Cards decks, and right now we’re looking at the one that pertains to the brand new gang, the Ash Waste Nomads. The best Nomad tactics involve trickery and obfuscation, giving the Nomads nearly unparalleled run of the battlefield. There are a few stinkers in this pack, but 2/3rds of the cards are, at the very least, usable, and some are really quite good. With the Nomads’ heavy long-ranged firepower and hit and run attacks, this pack will definitely help you eke a few victories out of any Ash Waste games you play!
Tier 1
| Name | Restricted to… | Condition | Description | Notes |
| Ambush Masters | Ash Waste Nomads | Play this gang tactic at the start of the battle, after both sides have deployed, but before the first round. | Your gang may immediately recruit and palce in your deployment zone d3 Ash Waste Nomads Dust Runners. These fighters are recruited for free but will leave your gang at the end of the battle. Each Dust Runner has up to 20 credits worh of equipment. If you do not ahve the models available to represent these fighters, you may discard this gang tactic and select another. | Free fighters are always good, especially when they ride on gigantic, mutated sand fleas! |
| Bait and Switch | Ash Waste Nomads | Play this gang tactic at the beginning of any round, before rolling for initiative. | Select two friendly fighters on the battlefield, neither of which is Engaged. Swap the position of the two fighters. | Great card to get a venom caster or web gun into range or get your good combat fighters into position while at the same time protecting them. Excellent choice. |
| Blessed by the Storm | Ash Waste Nomads | Play this gang tactic at the start of the battle, after both sides have deployed, but before the first round. | For the duration of this round, if the Visibility (X”) rule is not active for this battle, apply the Visibility (24″) rule. Otherwise, either increase or decrease the value of X” by 6″ to a minimum of 6″. | Having the option to mess with the Visibility is an extremely useful thing to have in your tool box. |
| Now You See Me… | Ash Waste Nomads | Play this gang tactic at the start of a friendly fighter’s activation. | Remove the fighter from the battlefield and set it up again within 9″ of its initial position and more than 1″ away from any enemy model. | Hugely useful: guaranteed charge, getting in template range, or setting up a fire and hide situation. Excellent tactic. |
| Numbers Without End | Ash Waste Nomads | Play this gang tactic during any End phase, before your opponent maes any Recovery tests. | You may return to play d3 friendly Gangers/Juves that have been taken Out of Action but did not suffer a Memorable Death result on the Lasting Injury table by placing them in your gang’s deployment zone. These fighters retain any injuries suffered for going Out of Action but discard any Flesh Wounds. | They’re baaaaaack! Excellent way to give some serious longevity to your gang. Note: Dust Runners, as prospects, count as Juves can be brought back with this card, so go crazy! Best to wait until you have 3 gangers/juves out of action to potentially get the most from this card. |
Tier 2
| Name | Restricted to… | Condition | Description | Notes |
| Ash Quake | Ash Waste Nomads | Play this gang tactic at the start of any round before rolling for initiative. | All fighters on the Battlefield Surface must pass an Initiative test or become Prone and Pinned Any Ash Waste Nomads fighter gets +2 to this test. | Helpful, especially against melee-focused gangs. Probably not a good one vs. an Escher gang. |
| Fade to Ash | Ash Waste Nomads | Play this gang tactic during any End phase, before your opponent maes any Recovery tests. | The battle ends as if youir gang had retreated from the battlefield. Friendly fighters who are Seriously Injured automatically recover and there is no chance for any fighters to be Captured. | Really useful if you’re getting hosed in a game and you need to pull the ripcord. |
| Ghosts in the Ash | Ash Waste Nomads | Play this gang tactic at the beginning of any round, before rolling for initiative. | For the duration of this round, friendly Ash Waste Nomads fighters treat the Battlefield Surface as Open Terrain. | Useful, but not amazing. |
| Overcharge! | Ash Waste Nomads | Play this gang tactic when a friendly fighter makes a ranged attack, before rolling the dice. | For the duration of the attack, the Shock trait activates on a Hit roll of 5+ instead of 6+. | Shock is a pretty good trait, especially since it bypasses Toughness, so use this with a Rapid Fire weapon for maximum effectiveness. |
| Raiders Without Equal | Ash Waste Nomads | Play this gang tactic during the Wrap-Up phase of the post-battle sequence. | Add d3x10 credits to your gang’s Stash for each enemy vehicle that was Wrecked during the battle. | Extra credits never hurt! But tactics cards that actually impact the outcome of the battle help more. |
| Secret Paths | Ash Waste Nomads | Play this gang tactic during any Rolling Roads phase of a Rolling Roads battle before checking to see if models rejoin the battle. | For the duration of this round, friendlt fighters can attempt to rejoin the battle regardless of their Movement characteristic. If the scenario being played does not use the Rolling Roads rules you may discard this gang tactic and select another. | Very useful for a Rolling Roads game. Nice that you can re-draw if it’s useless. Will really help a foot-heavy Nomads gang keep up with any vehicles. |
| Spineroach Venom | Ash Waste Nomads | Play this gang tactic when a friendly fighter makes a close combat attack before rolling dice. | For the duration of this attack, one of the fighter’s weapons with the Melee trait gains teh Toxin trait. | Pretty good for sidestepping an enemy’s Wounds. Nomads don’t sparkle in combat, though, so you’re not gonna get a ton of use out of this one. |
Tier 3
| Name | Restricted to… | Condition | Description | Notes |
| Beseech the Great Spirits | Ash Waste Nomads | Play this gang tactic during any End phase, before making Recovery tests. | You may re-roll any Recovery tests you make this round, but must keep the second result even if it is worse. | Probably only worthwhile if you have a ton of fighters Seriously Injured, and if that’s the case, you’re gonna need more than rerolls to Recovery rolls to pull you out of it. |
| Master Sniper | Ash Waste Nomads | Play this gang tactic when activating a friendly fighter. | For the duration of this activation, increase the Long range of the fighter’s weapon without either the Melee or Grenade trait by 6″. | Pretty weak for a tactics card. |
| Mined! | Ash Waste Nomads | Play this gang tactic after an enemy vehicle has completed its activation. | The enemy vehicle must immediately take a Loss of Control test. | Would be great if it triggered an automatic fail on a Loss of Control test, but it doesn’t, and those are generally pretty easy to pass. Not worth it. |
| Survival Suits | Ash Waste Nomads | Play this gang tactic at the start of the battle, after both sides have deployed, but before the first round. | For the duration of this battle, d3 friendly fighters fo your choice in your starting crew are immune to the effects of the Rad-phage trait. | Garbage. Rad-phage is one of the worst weapon traits in the game and will only come up if you happen to roll the right weather effect or paly a very poorly equipped Van Saar gang. Avoid. |
| War of Attrition | Ash Waste Nomads | Play this gang tactic during the Wrap-up phase of the post-battle sequence. | If your gang has fewer fighters taken Out of Action than the opposing gang, your gang gains d3 Reputation. | If this just gave d3 Reputation without a conditional trigger, it’d still be Tier 3. |
| Will-O’-The-Wastes | Ash Waste Nomads | Play this gang tactic at the start of the battle, after both sides have deployed, but before the first round. | For the duration of this battle, d3 friendly fighters of your choice in your starting cres gain teh Dodge skill. | 1-3 of your fighters gain a 6+ invulnerable save for the battle. Astonishing. |
Gangs and Tactics Cards: Which To Choose?
Let’s run through a quick break-down of which Tactics Cards each gang should be thinking about. Generally, any card that allows for out-of-sequence attacks, extra actions, or bonus activations are good across the board. Some gangs can get a lot more specialized than that, but any cards that fulfill those three roles will be good in any gang.
Cawdor: The trash bois excel in close-range firefights and outnumbering their opponents. Call the Faithful, Effigy of the Damned, and Let it Burn! are so good, they should make it into every Cawdor deck. Let it Burn! can be extremely deadly if you have the giant exploding crossbow bolt of doom combined with a whole bunch of blunderbusses. Think about Tactics Cards that will get you closer to the enemy or allow you to employ more templates per turn. Cawdor also have a solid four Tier 1 gang-specific cards, so they’re somewhat spoiled for choice.
Chaos Helots: A medium-range shooting and combat gang, Chaos cultists will benefit greatly from general Tier 1 cards. They can be a bit choppier than others, but their strength relies on numbers and close-range work. Their singular gang-specific card, Dark Blessings, can replace their leader with a Chaos Spawn, which is a ton of fun, but a successful Willpower check is required for it to go off. If either of us had a Chaos gang, we’d take it, but there are certainly better cards.
Corpse Grinder Cult: Corpse Grinders want one thing, and one thing only: to rip and tear their enemies to pieces and feast upon their flesh. A Corpse Grinder player needs to get them into combat as soon as possible. Extra actions, movement, and Blood Surge. Take Blood Surge as much as you can, it’s just about the best card a Corpse Grinder has ever seen. A quick note, there are two cards named Blood Surge! The Corpse Grinder-specific card is the one we’re talking about, but the other one’s pretty good, too!
Delaque: Delaque have the equipment to access to some of the coolest Tier 2 cards in the game. They also have a slate of really good gang-specific cards. Full Blackout is always tempting, but you really can’t go wrong with their five Tier 1 cards and a smattering of general Tier 1’s. Over Here in particular will never lead you astray (though its target may feel differently!)
Enforcers: Informant is really good because it will get the enemy out of position before the game even starts. Enforcers are a close to mid-range shooting gang at heart, so any cards that would buff an Orlock gang would do just as well for an Enforcer gang.
Escher: While the original pack was lousy with stinkers outside of maybe Stealthy Advance (worth it for re-positioning), the new House of Blades additions catapult the gals into Tactics Cards Heaven. From free Chem Alchemy Stimms and Toxins with Chemical Reign and Gifts of the Matron to a free Wyld Runner with attendant Phelynx from Wyld Hunt, don’t sleep on House Escher!
Genestealer Cult: The Cult’s strengths lie in cheapo neophytes to screen and protect their nasty close combat fighters to allow them to get in and do work. Their gang-specific card is garbo, so just focus on extra actions and activations.
Goliath: The muscle bunch has an astonishing fourteen of their gang-specific cards in Tier 1 and they’re all completely bonkers. Extra actions per turn and Thundering Charge (in Tier 2) round out the rest of their selections, which makes this a great pack. Goliaths are slow, so anything that gets them closer to the enemy or increases their charge range is excellent. Their House of Chains pack adds in a ton of great options as well, and cards like Get ‘Em! only serve to increase their melee threat range. The Tier 1 Goliath cards really are ridiculous, though. Read them and stare in goggle-eyed wonder if you’re not familiar.
Orlock: The generalist gang does well with generally good cards, if you can believe it. Most of their gang-specific cards are only so-so, so just focus on shooting, shooting, and then more shooting. However, Showboating is a ridiculously powerful card, and if you have any melee-focused fighters in your gang, it is a must-have!
Van Saar: We think it’s pretty straightforward as to what the shooting gang should focus on, but if you still need help, it’s shoehorning (shoot-horning?) more shooting in to every game. Their Tier 1 cards are spectacular, so grab some of the other good Tier 1’s and you’ll be good to go.
Venators: The super-friends are a hard bunch to pin down as they’re so customizable, but their gang-specific card sucks, so avoid that at the very least. Otherwise, just focus on the good stuff, and you’ll be fine!
Slave Ogryns: Ogryns bust out of the gate with an unexpected pile of phenomenal Tactics Cards. Offload an elsewise-pinning shot on your leader to some chump Lobo-Slave with No, I’m Smarticus!, charge twice as far with Quicker Than They Look, or even turn the tables and enslave some Goliath patsies with Slave Becomes Master. Ogryns were already nasty, and their excellent Tactics selection means they’ll always be a threat.
Ash Waste Nomads (full gang write-up pending): Nomads excel at Long-range shooting with a sprinkle of very punchy strikers. Use their tactics cards like Bait and Switch, Blessed by the Storm, and Now You See Me…to shift the battlefield in your favor. Otherwise, they’ll benefit greatly from the general tier 1 cards, so feel free to go hog wild!
An Arbitrator’s Plea: Consider a Ban List
Whether you’re in a moderated campaign or just running some casual skirmishes with a buddy, keep in mind that (currently) two of these Tactics Cards are just downright nasty. We’re not talking about nasty-powerful, like Click or its eternal bestie Lucky Find, but nasty-nasty, the kind of cards with little to no counter-play with an out-sized and often game-warping effect. Familiarize yourself with these offenders, and perhaps consider whether or not you want to be That Guy.
- History of Violence: An enemy of your choosing, probably a leader or champion, cannot be fielded against your crew this game.
- Dangerous Footing: If a targeted enemy fails an initiative check, they are immediately removed from the game as Out of Action.
In campaigns that both of us run, we generally ban these two cards because we think they’re extremely un-fun. Especially History of Violence. Having your players draw cards semi-randomly instead of just picking them will cut down on Tactics Card abuses, but no one enjoys being the target of either of these two cards.
Tactics Cards, Ranked
For the last part of this article, we’re going to rank every single Tactics Card into tiers. We’ll be updating this list as more and more content comes out, but for right now, this is a comprehensive rundown of each and every card. It’s searchable now too, if you’re looking for anything specific. (Use quotes around your search term or string!)

Conclusion
We’re hard on Tactics Cards because we love them. Last time we tackled this subject, we wound up at over 15k words by the end, and we’re afraid to see what that’s ballooned into after this update! We think we’ve covered pretty much everything you’d need to know about Necromunda’s Tactics Cards, but if there’s something we missed, or ideas that you have about cards and strategies, we’d love to hear your feedback.
The entire system is a bit intimidating, but hopefully we’ve done our part to encourage you and your group to give the cards another shot if you’re not using ‘em yet, and a better grasp on what to include in your decks if you are!
If you have something you want to share with us, feel free to drop a comment for us below or email us at contact@goonhammer.com. In any case we’ll be back next week with more spicy Necromunda content, but until then, be safe out there, scummers!
