Games Workshop kindly provided these models to Goonhammer for review purposes.
Many moons have passed since these were previewed, with the collective impatience of the unwashed masses of Necromunda enthusiasts left to fester, but the day has come for these rocket sleds to be unleashed upon the Ash Wastes.
Let’s go over the basics of the rules for this jet engine with a seat strapped on – before we go over the trial of the mind that is assembling and painting them.
RULES
DYLON: The cutter is wargear that ignores terrain and prevents the rider from falling. Oh, and it ups the gangers movement to nine inches. And then you get to put a twin-linked something or other on it…. Get a champion on there with BS3 and it’s good y’all. I’ll pass it off to Kevin to talk more about the rules.
KEVIN: For 35 credits relative to a regular dirt bike you get an extra inch of movement, the ability to ignore terrain in the same way as a Van Saar Neotek (and I can tell you that ability is awesome), unlimited gas traps, and access to weapons with the Twin-Linked trait, which allows you to re-roll any Ammo dice (meaning you can re-roll a jam and never make an Ammo check). That’s incredibly good on a plasma gun. The downside to the Mounted condition is that if you fail an Initiative test when being hit by a ranged weapon you will likely take damage from the fall, and you have to pass another Initiative check to stand up. Since Escher leaders and champions have a 2+ Initiative (and Prospects, the other Escher unit that can take this, has a 3+ Initiative) they are ideally suited for using these vehicles.
For me the Death-Maiden is the real beneficiary, as not only does she gain access to a massive list of benefits that help her considerably in terms of getting close and murdering people, she also gets access to weapons she would otherwise not be able to touch. Death-Maidens are normally limited to Pistols and Close Combat Weapons, but for 110 credits she can put a plasma gun on her bike that will only overheat 1 in 36 times.
The Sprue
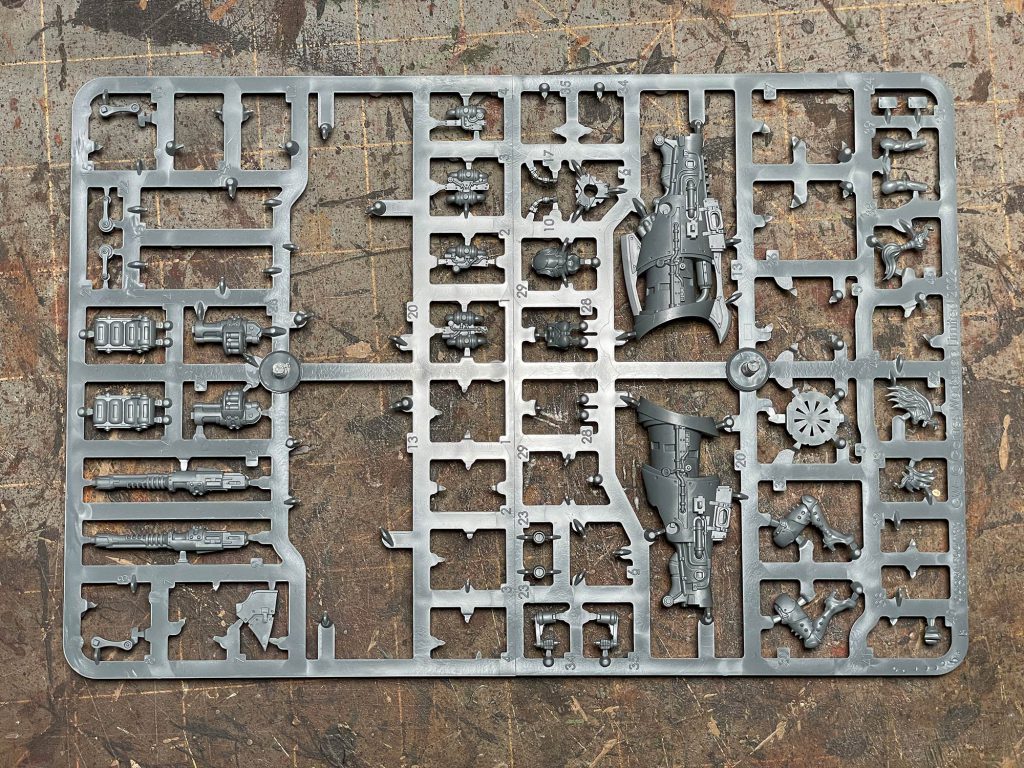
DYLON: I forgot to take a picture of the sprue before I assembled my Cutter, but they come two on one sprue, and like all modern kits, it’s very efficiently laid out. You only get one of each weapon option per sprue, two choices for face and four hair options. As the Cutter is limited to Leaders, Champions, and Prospects we found the rider to be rather plain. Maybe they intend it to be a Prospect and you can optionally upgrade the rider as you want for a Champion of Leader – is exactly what Kevin did.
KEVIN: My biggest gripe about this sprue is that it’s fairly difficult to tweak the model without getting into some serious customization territory. In particular if you want to add a champion like a Death-Maiden you’ll need to do a head swap (and the Death Maiden head does not play nice with this kit), and if you want your biker to be doing anything other than riding you’ll need to replace the handlebar (EDIT: Turns out that pieces 21 and 22 are open handlebars… oops!). The Wyld Runner box includes a spikey ropey bit that’s perfect to serve as a handlebar once you cut it up; it’s part 29 on the sprue.
Assembly
DYLON: Let’s talk about this kit in two parts: the jetbike and the rider. The jetbike goes together like a dream, the halves fit together and the detail on the cowl is made up of little bits that fit in. Like the Goliath Mauler, the bike has a complete seat with the rider totally separate. It’s a kit that you could park outside a settlement or building as terrain, and I really appreciate the thinking behind it. The rider also goes together just fine but it’s when you go to combine the two that the real consternation begins.
To start, the rider’s hands – and just her hands – are attached to the control sticks. I’d planned to attach the arms to the torso and after painting attach to the wrists. After dry fitting multiple times, and realizing that the rear fin of the bike attaches to the armor plate on the butt of the rider, I realized that subassemblies would be nigh impossible. With a heavy sigh, I glued it together completely. Even then, had issues lining everything up. I had to add a little putty to the shoulder joints, but I think I’ll have a better time with future builds. One thing that could be left as a subassembly is the bike-mounted weapons. I glued them on, but realized that I could have left them off for painting.
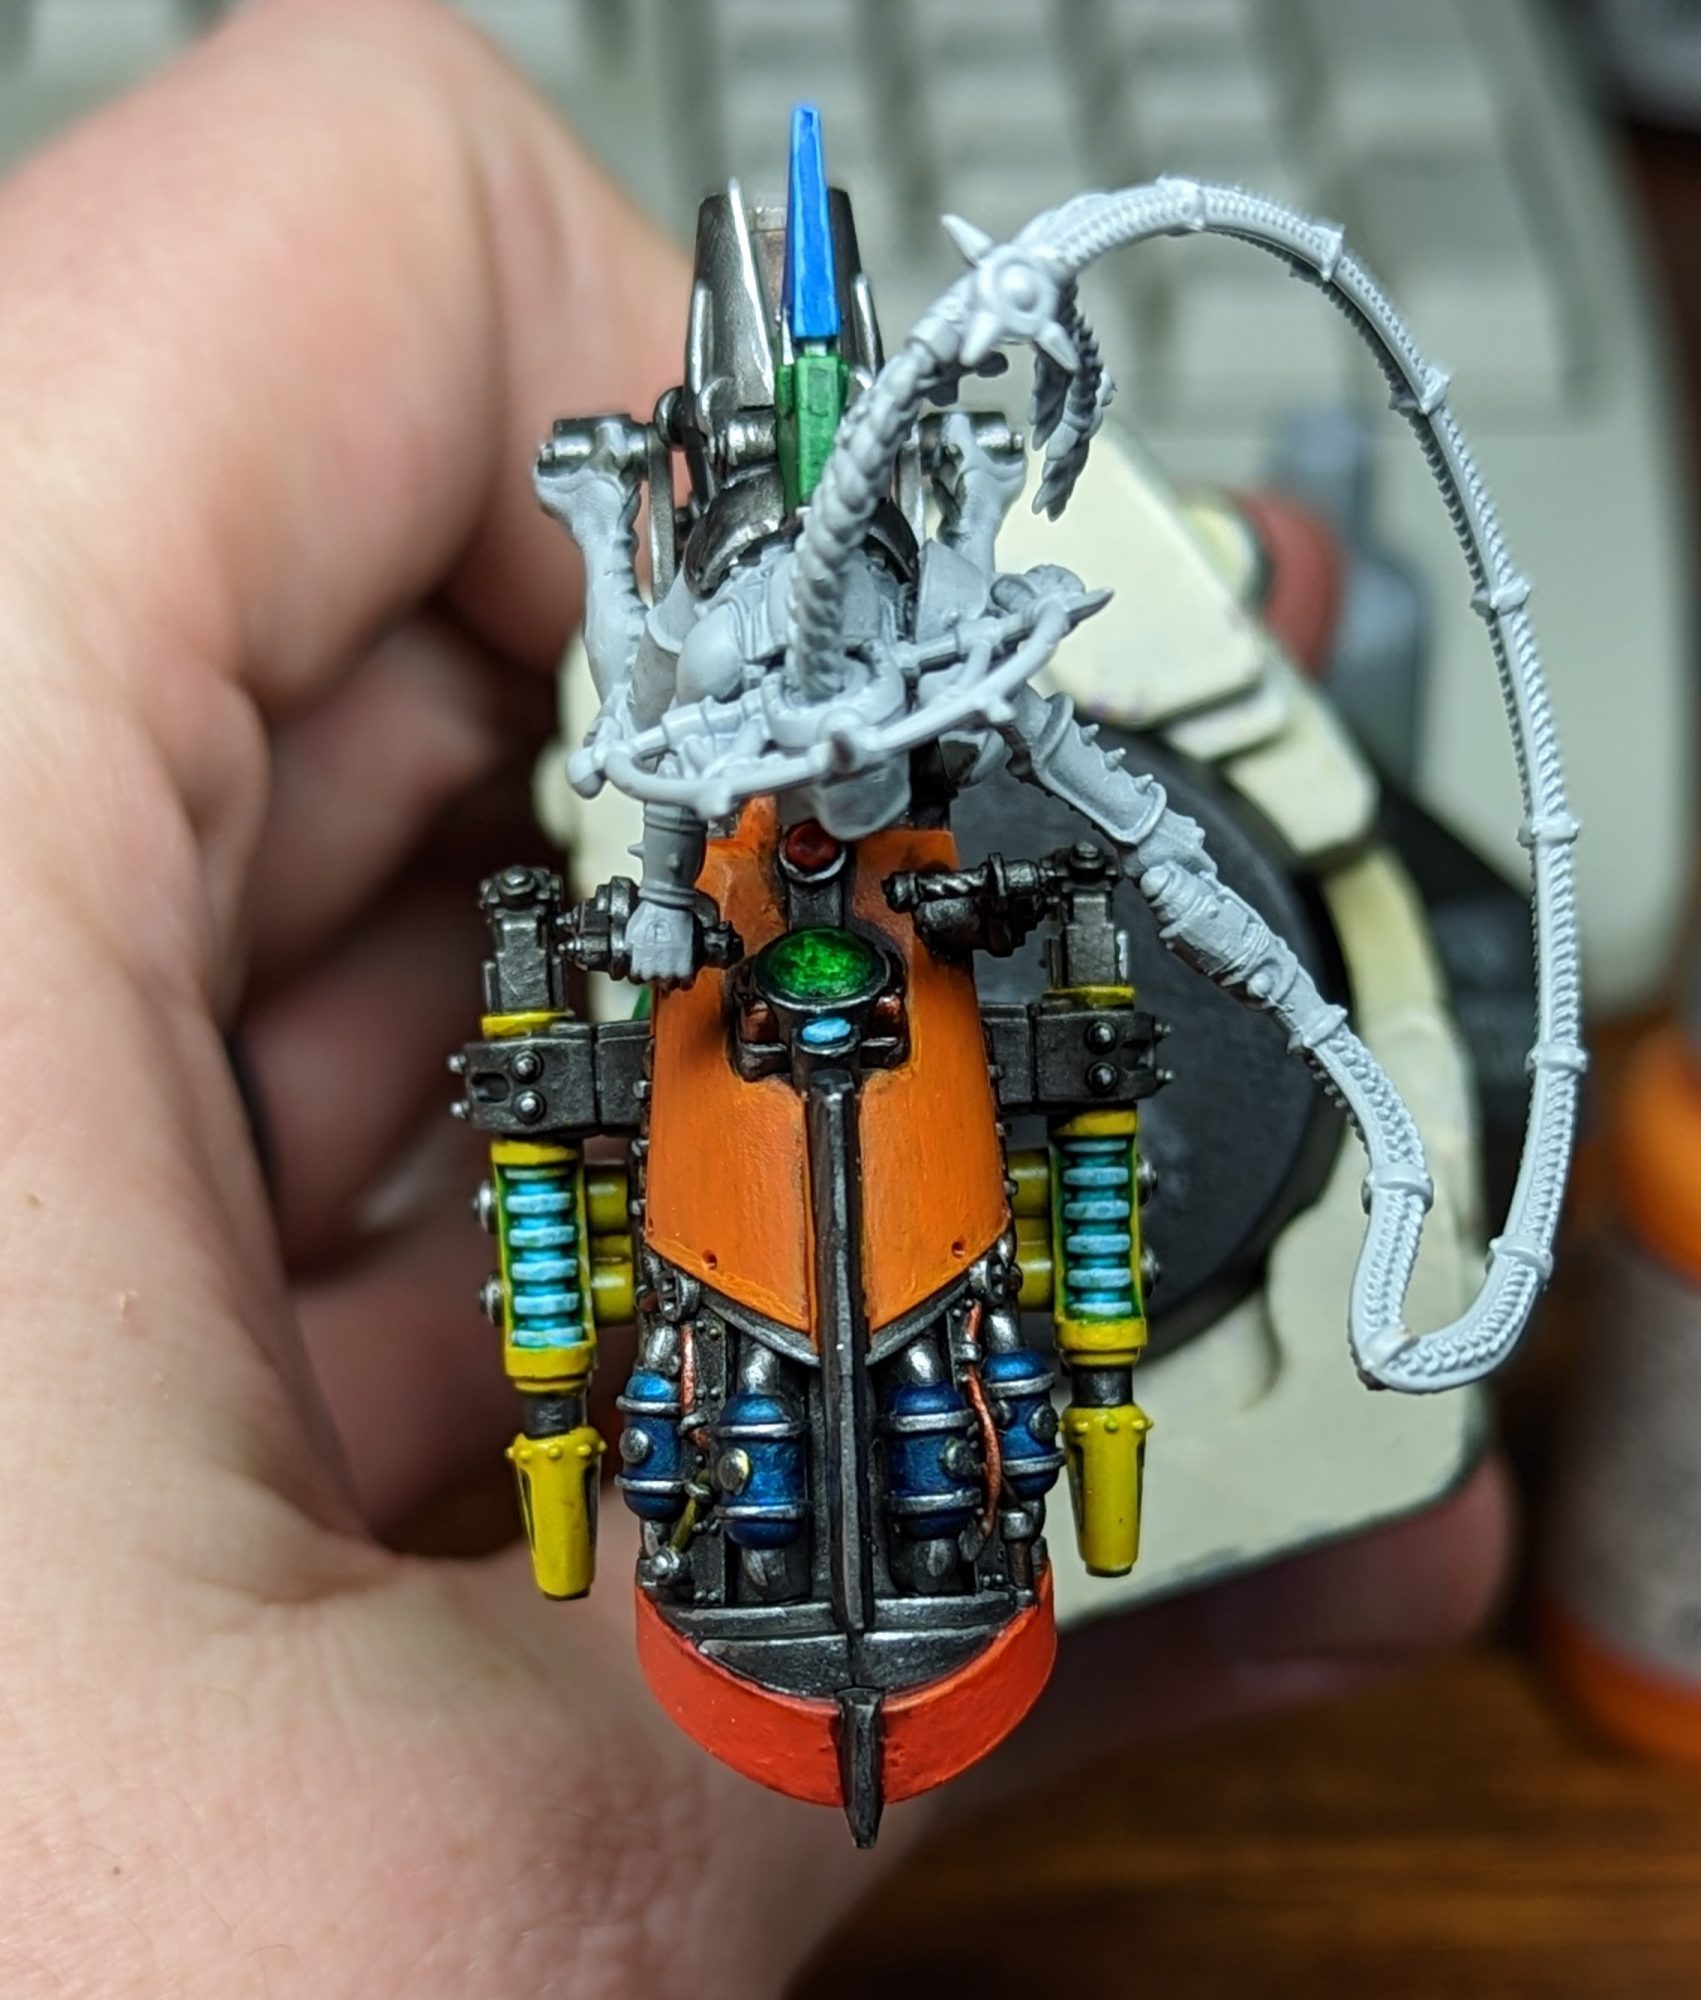
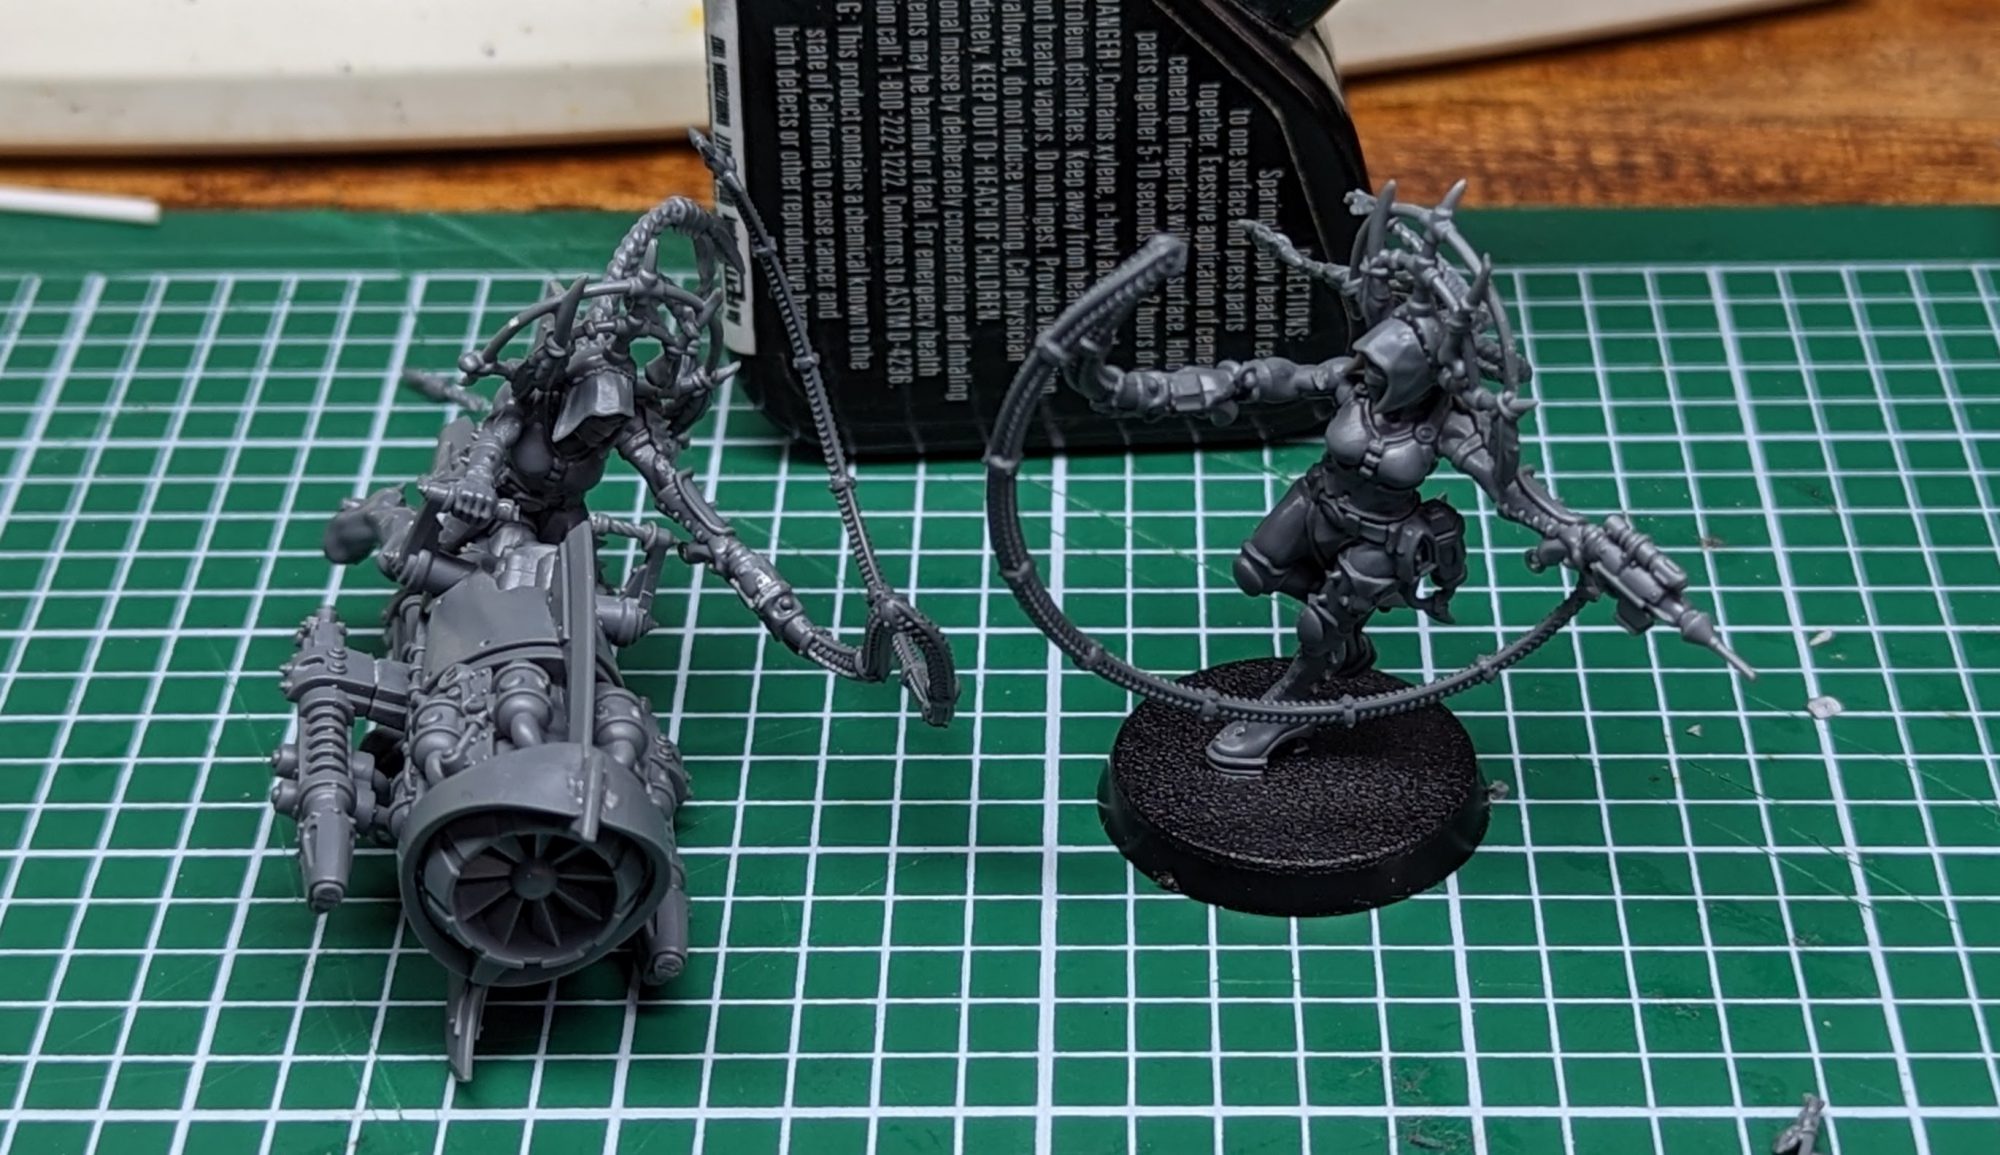
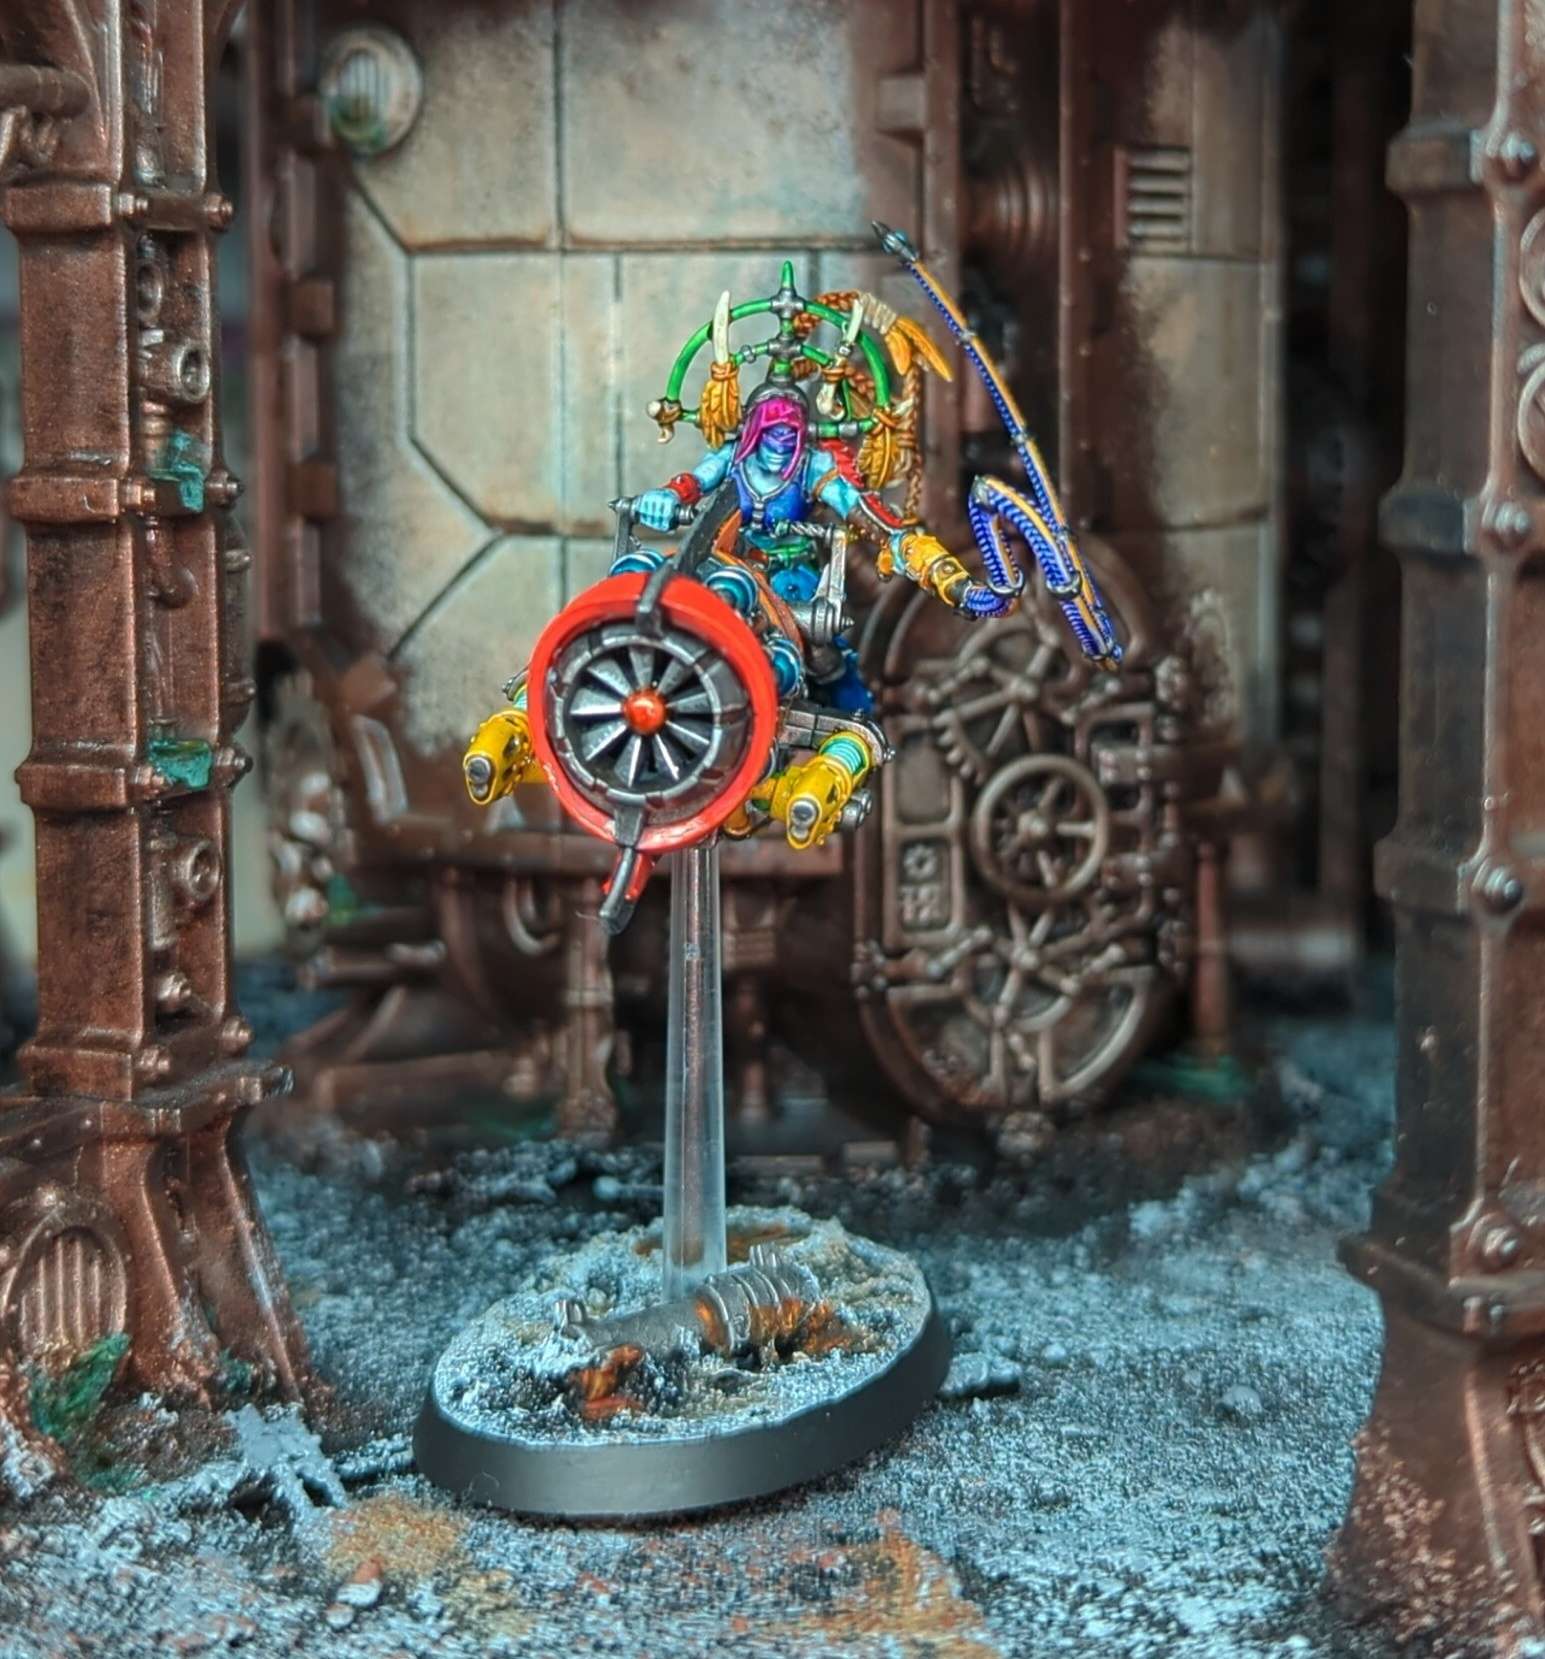
KEVIN: If you’re going to do be doing any kind of custom weapon work, like the shock whip shown below, then do yourself a favor and make as many subassemblies as possible. If anything swapping out a single arm for a weapon (the easiest conversion is probably the left handed power sword from the core gang box) will make painting everything a bit easier. Where Dylon had a challenge with green stuffing the shoulder joints, I ended up adding a bit of green stuff to the seat that’s molded into the butt of the rider because there was an annoying gap where it met the bike. For the Death-Maiden I decided to make my life particularly obnoxious and incorporate a shock whip. The only shock whip is attached in a particularly unpleasant fashion, so what I did was cut off the front of a laspistol and glue the shock whip onto that. The end result is that it looks like the fighter is pulling a trigger to activate the shocking bit, and the whip pose is much more dynamic.
Painting
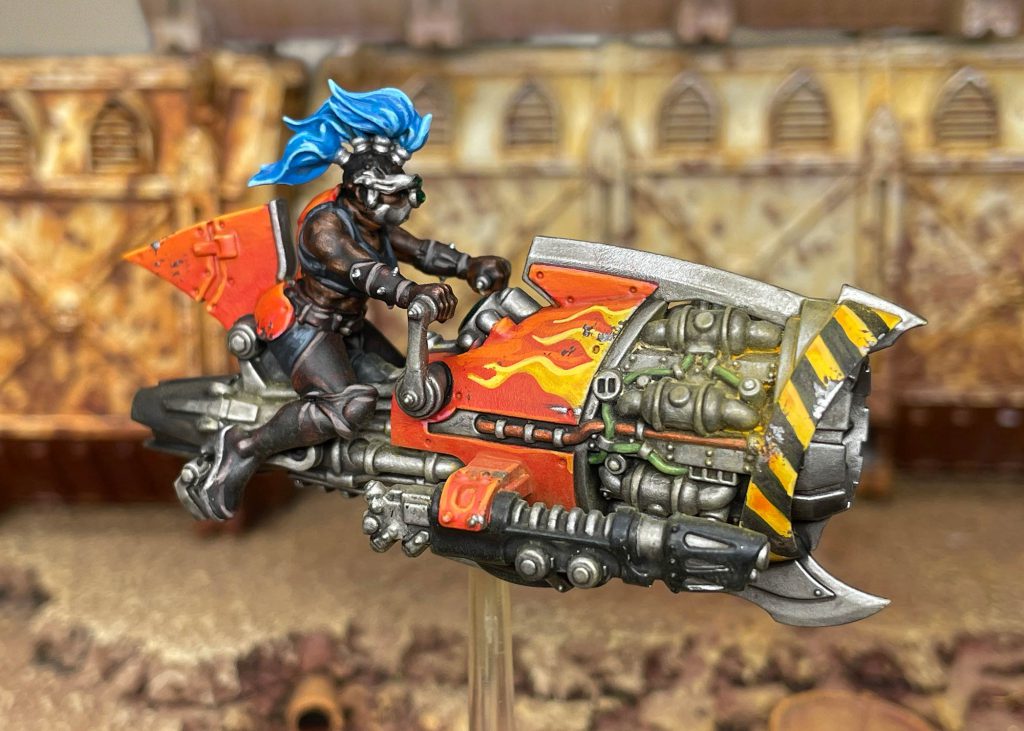
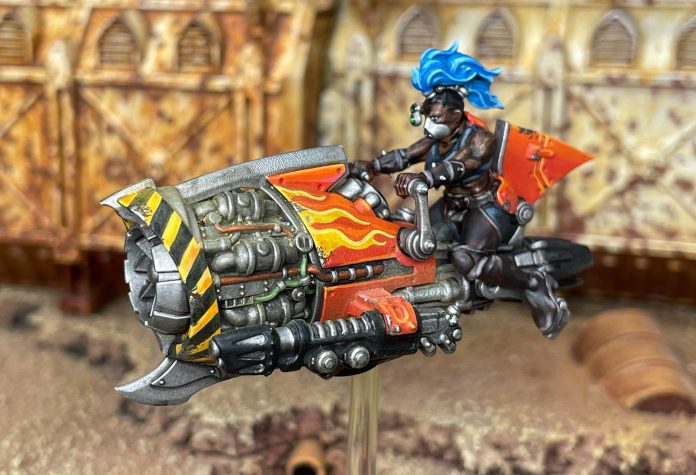
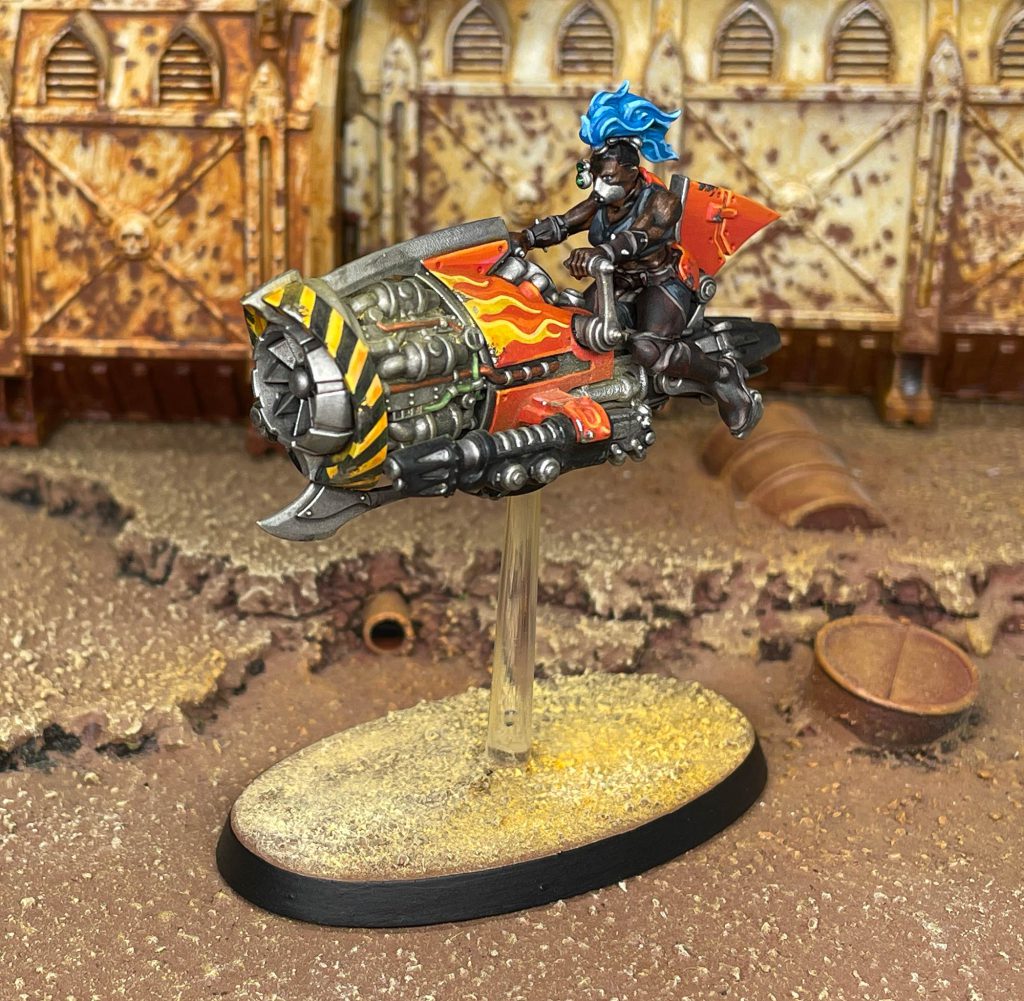
DYLON: I started with my usual coats of primer, a base of Army Painter Leather Brown with a zenithal spray of Skeleton Bone. I follow that up with a drybrush of white. As this is the first Escher that I’ve painted, the rest are still on sprue as a future project, It took a bit to decide how I wanted to paint her. And by a bit, I mean a month. This sat on my desk and I kept looking at her without a clear plan. When I finally sat down, I decided to start vibing with the classic grimdark tropes of flames and checks.
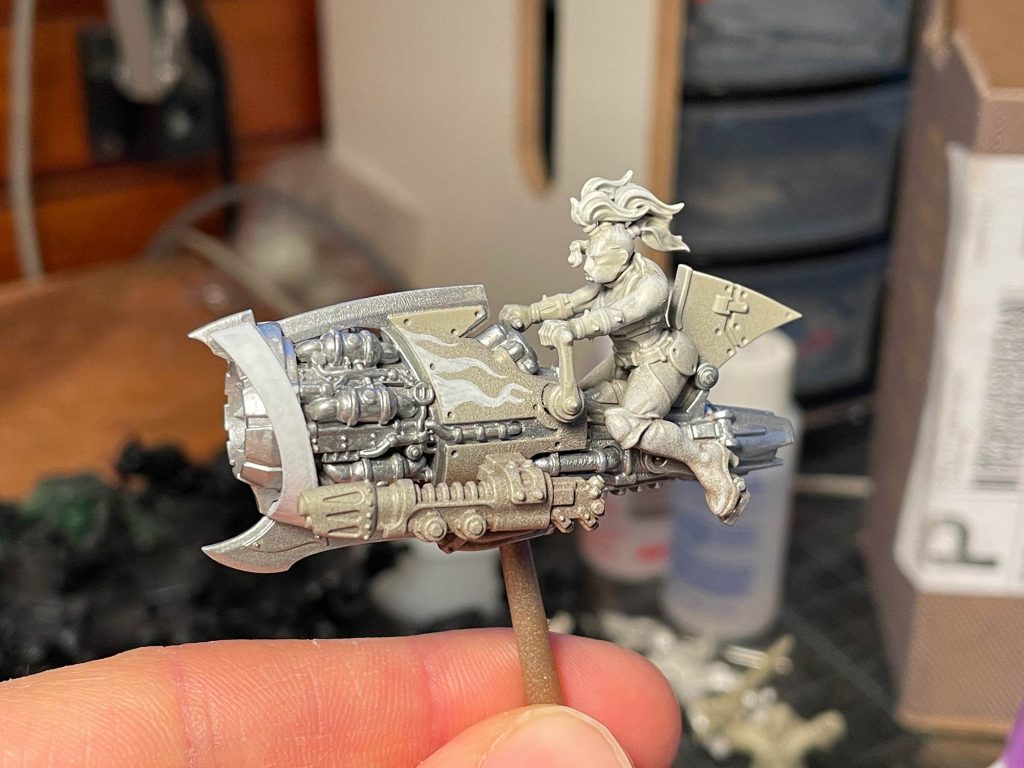
Painting started with blocking in all the metals with silver. After that I painted in the base for the flames, with white over the bone basecoat. Next I painted the cowl red, with Evil Suns Scarlet, adding white to highlight the red up the nearly white.
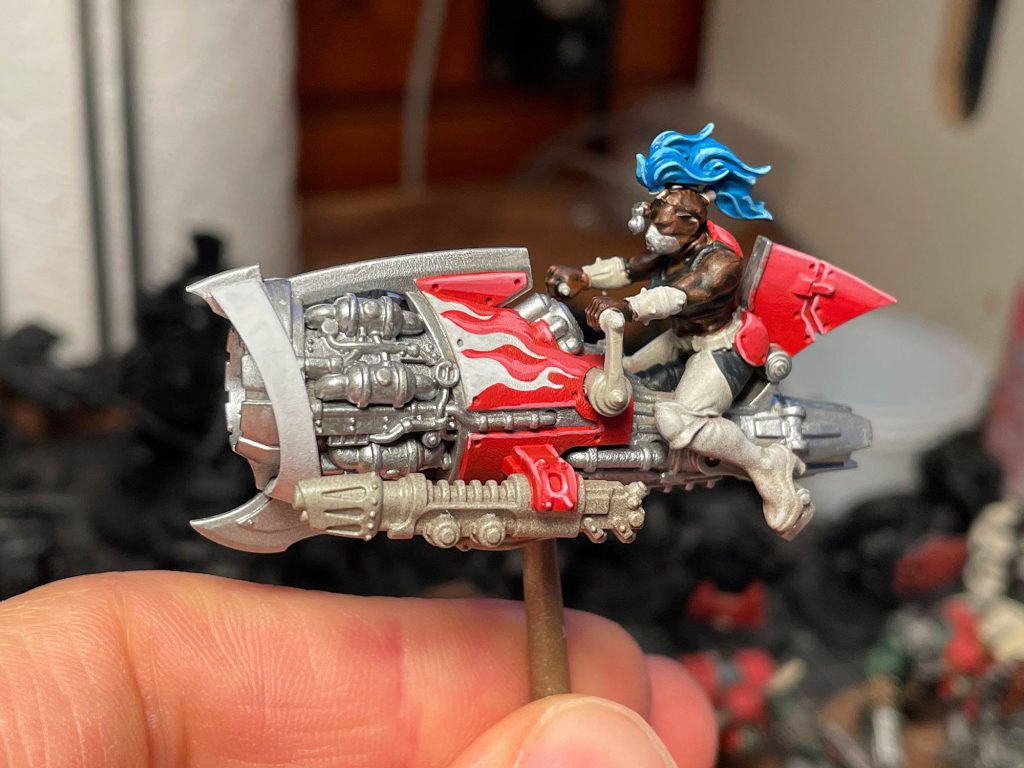
The next step was to glaze all the red areas and flames with Iyanden Yellow, turning the red closer to orange.
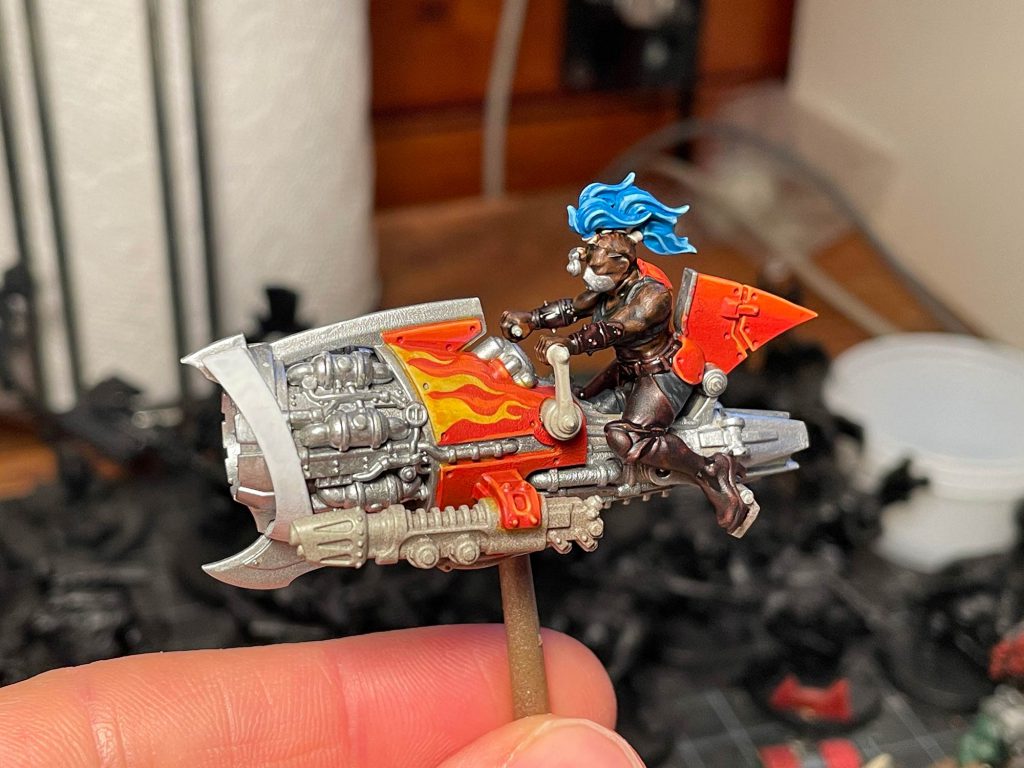
I’d planned to paint the front fairing with checks, but realized that the width of it wasn’t consistent, so checks would be super hard to make look good. So… I fell back to a Necromunda classic, hazard stripes. I painted the black stripes first, touching up any mistakes with white and adding a highlight to the yellow areas with white. Once dry I glazed the fairing with Iyanden yellow.
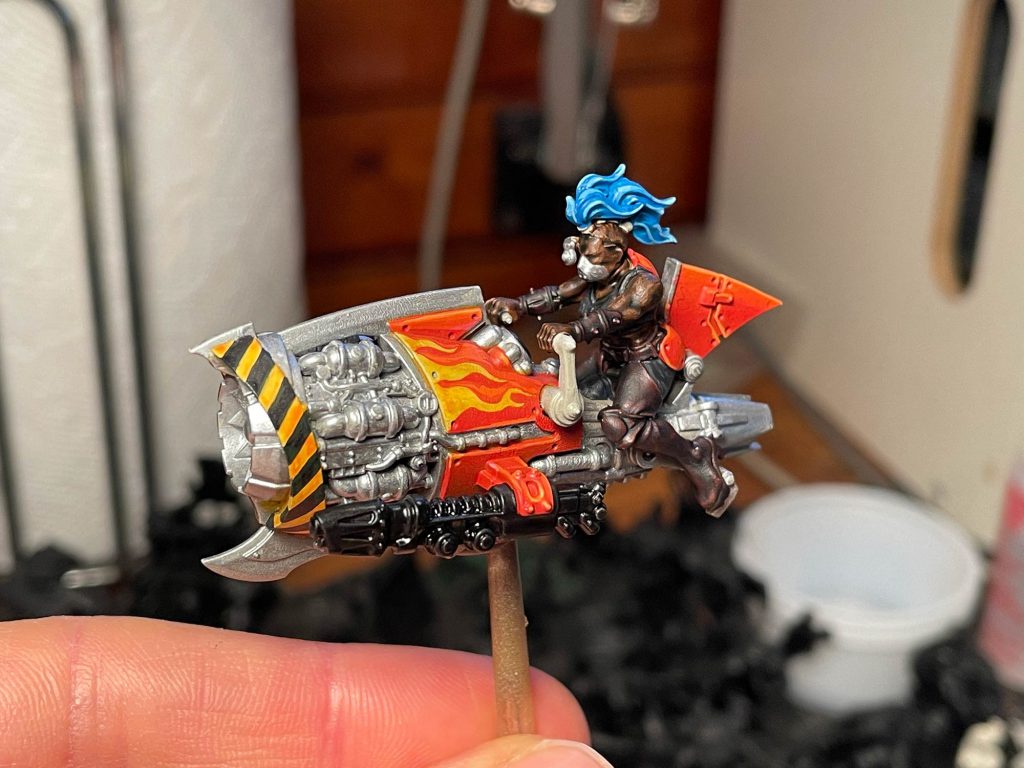
Once all the armor panels were painted, I went back and added some detail to the pipes and cables on the bike itself. I used Screaming Bell for some piping and Goblin Green for the wires. I added a highlight to the wires and then all the metals got a coat of Nuln Oil.
I based the weapons black, painting the metal bits silver after which they got a coat of Nuln Oil.
With the bike painted I added some sponge weathering with Dryad Bark. I followed up the chipped areas with silver stippled on with a brush.
I worked on the rider while painting the cutter itself, but I started painting the rider with the skin. I based it with Mournfang Brown adding white to highlight it up to white. I glazed all the skin with Wildwood Contrast. Her pants and top were based with Corvus Black again highlighted with white. Her boots received a layer of Cygor Brown with a highlight of Cygor Brown and white. Her hair was painted with Coat d’Arms Wizard Blue highlighted with white. I glazed her scalp with black.
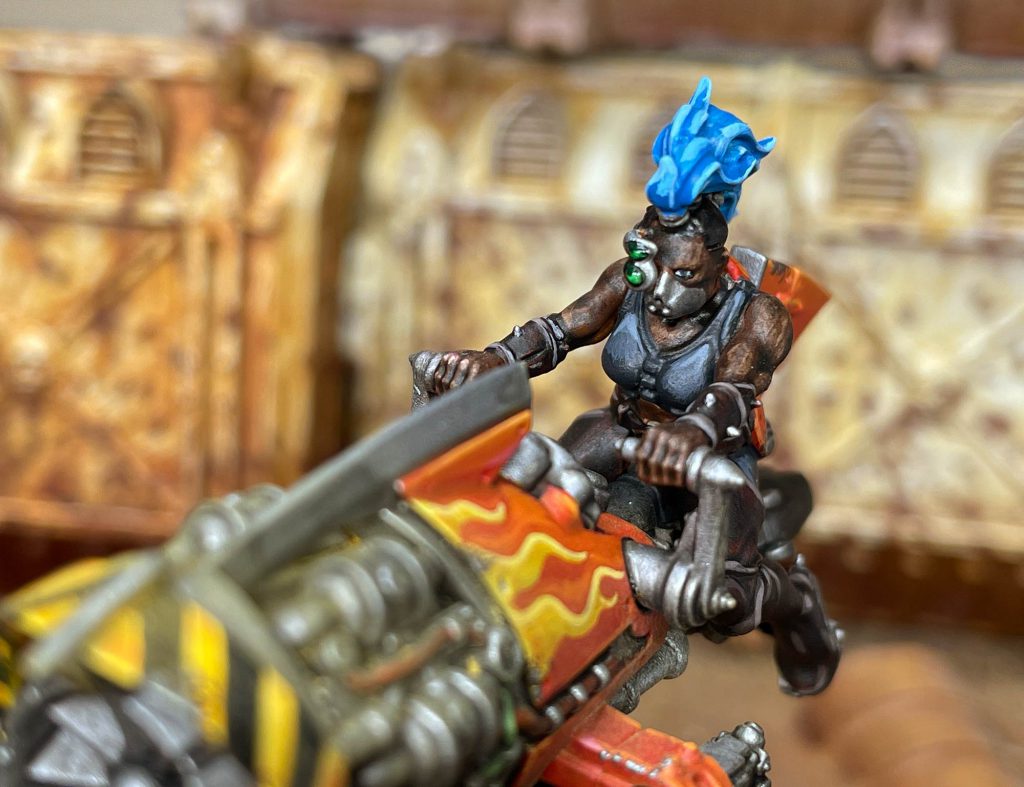
Her targeting array and the screen on the jetbike were basecoated black and highlighted like gems up to white and then glazed with Warp Lightning Contrast. Once dry they got a coat of ‘Ard Coat.
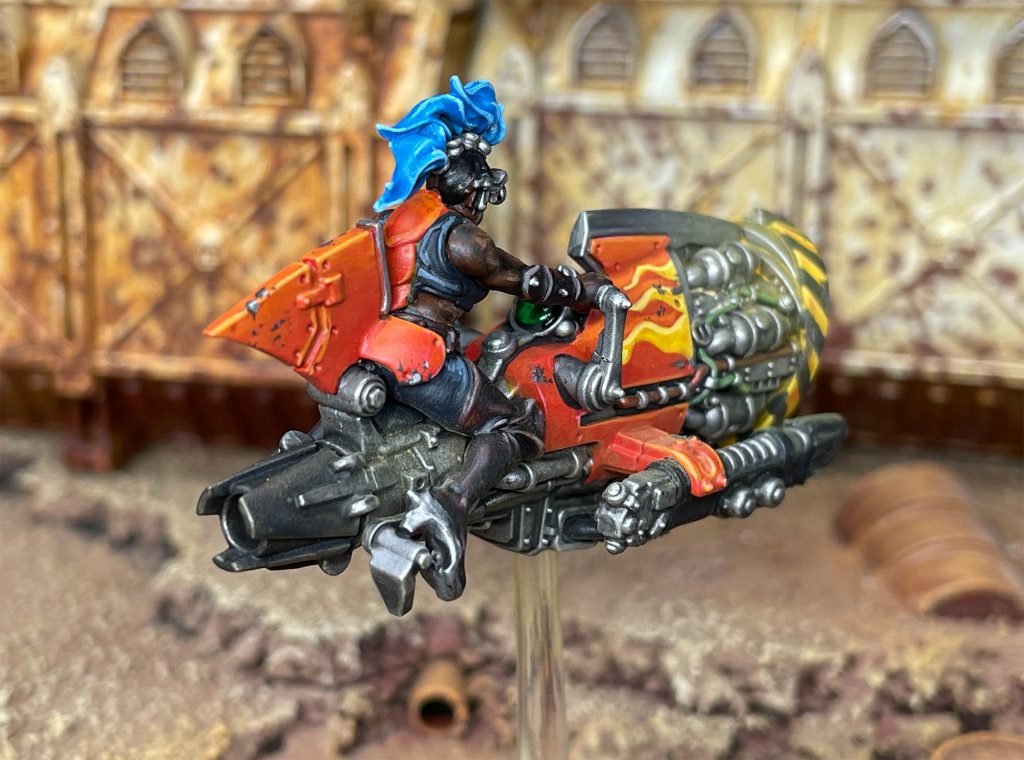
The last step was the base. I glued the clear flying standing into hole I drilled in the base and then masked it off to spray the base with primer. I painted the top with Mournfang Brown and drybrushed white. Like the Goliath Mauler, I used some powders made from Artists Pastels to make the bae all dusty/ashy. I also added some powders to the Cutter itself to add a nice level of crust to make it fit in the setting.
KEVIN: I’m in the middle of a project where I paint Escher gangers for my daughter. Basically she decides how each model is colored courtesy of a detailed and easily interpreted drawing, and I put said instructions to work using the best of my meager abilities. Occasionally her guidelines require either some negotiation or clarification, so often we’ll sit down together and figure out things like what color boots the model should have (blue) and what color her hair is (brown, not black).
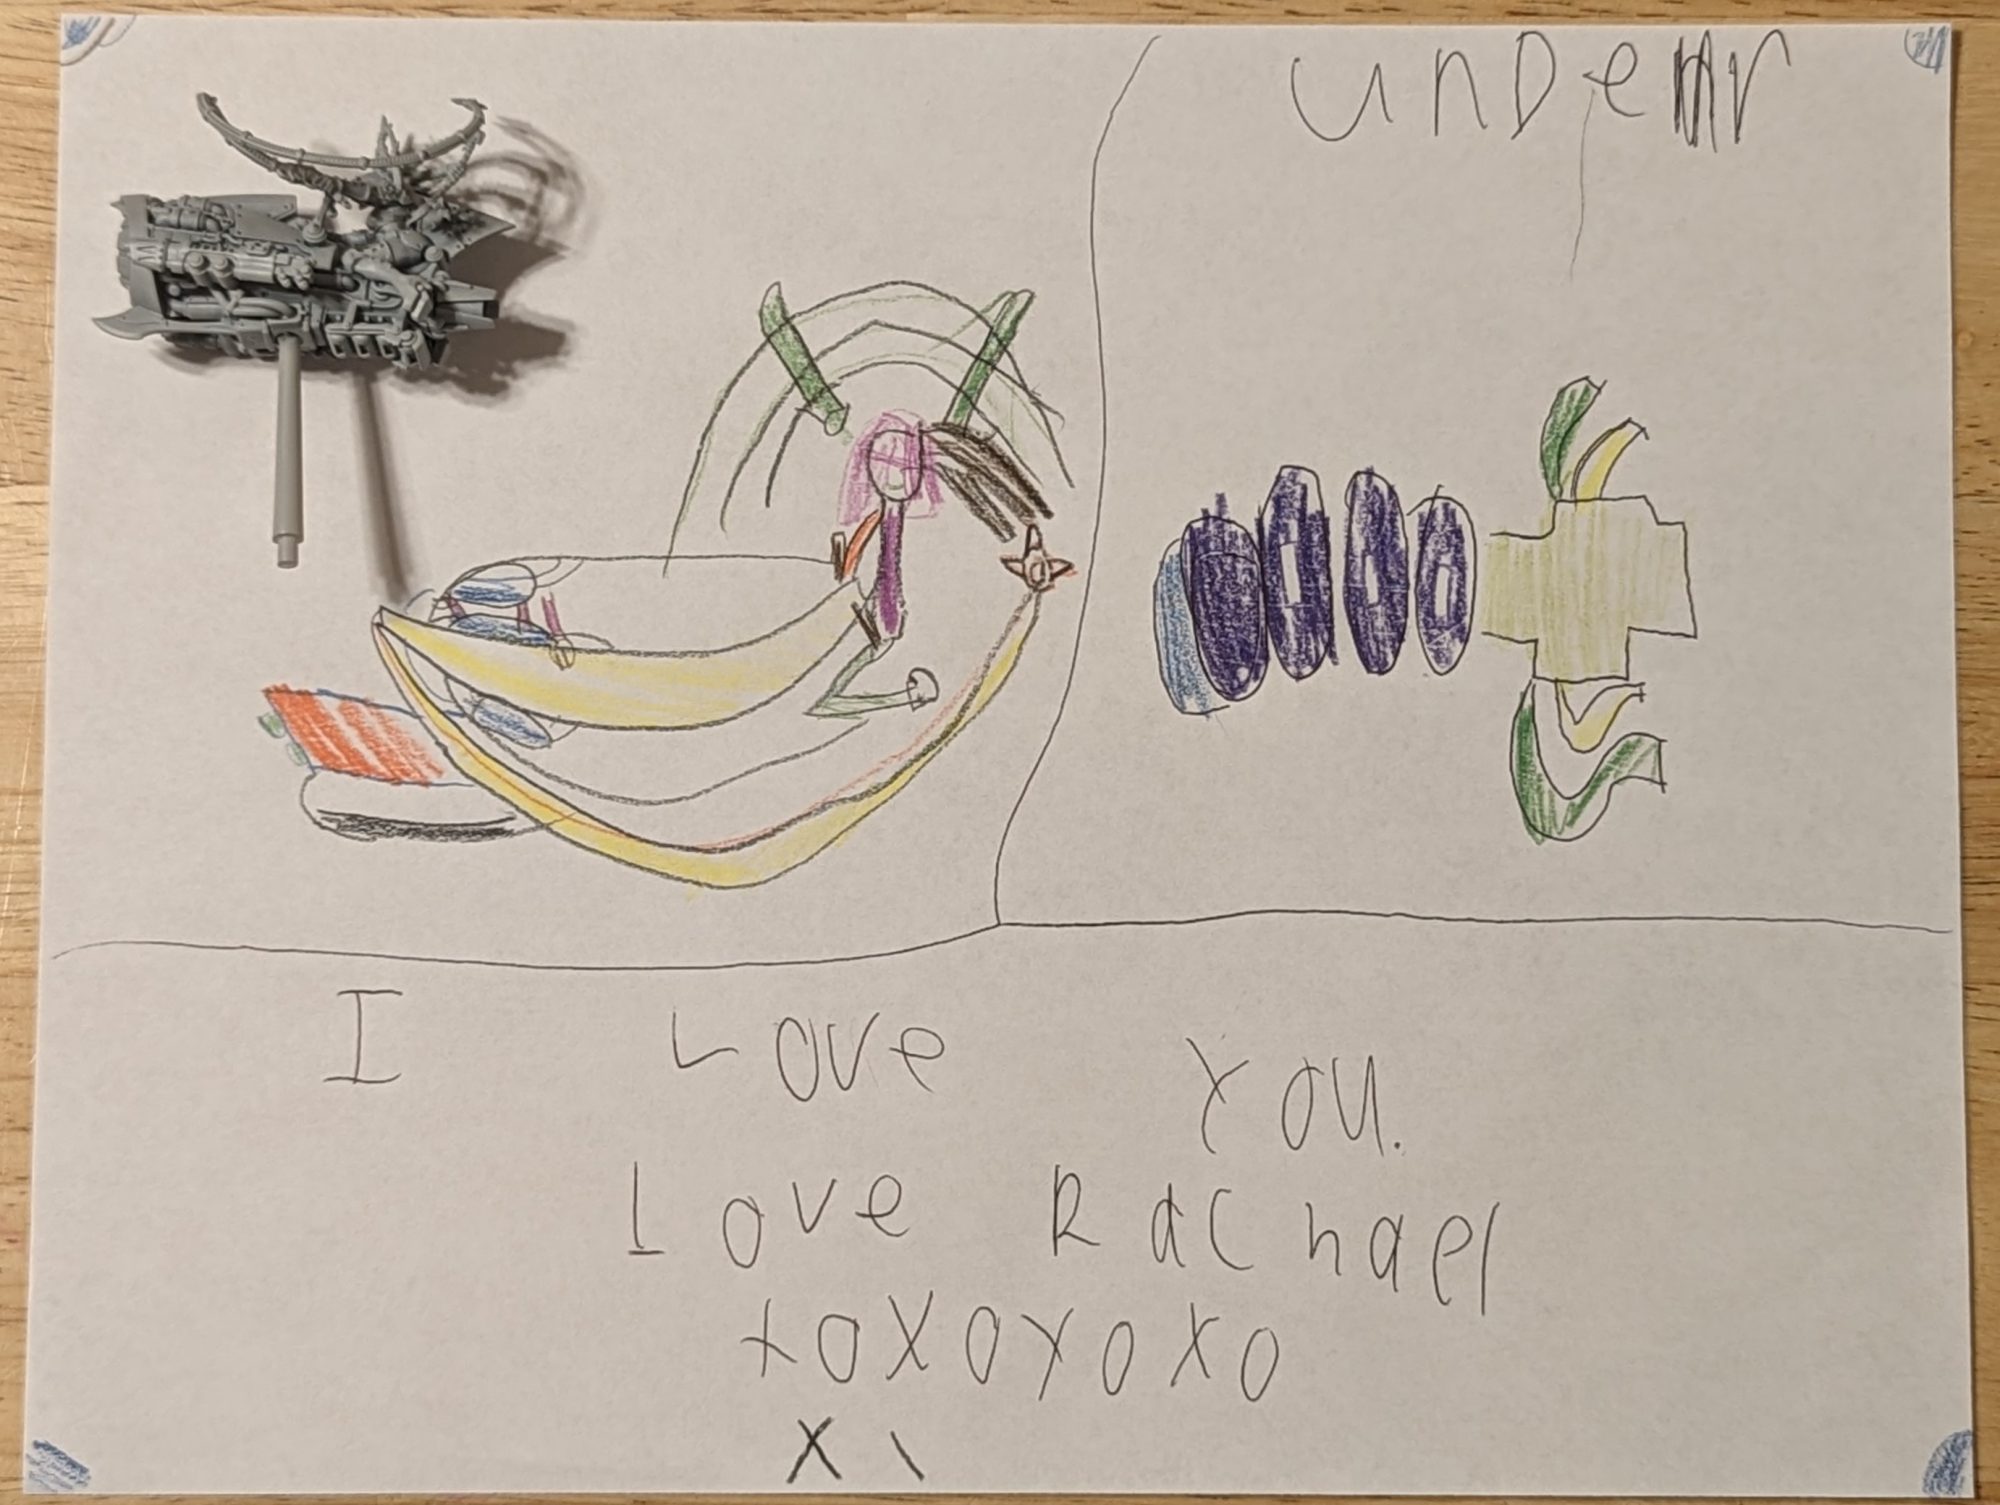
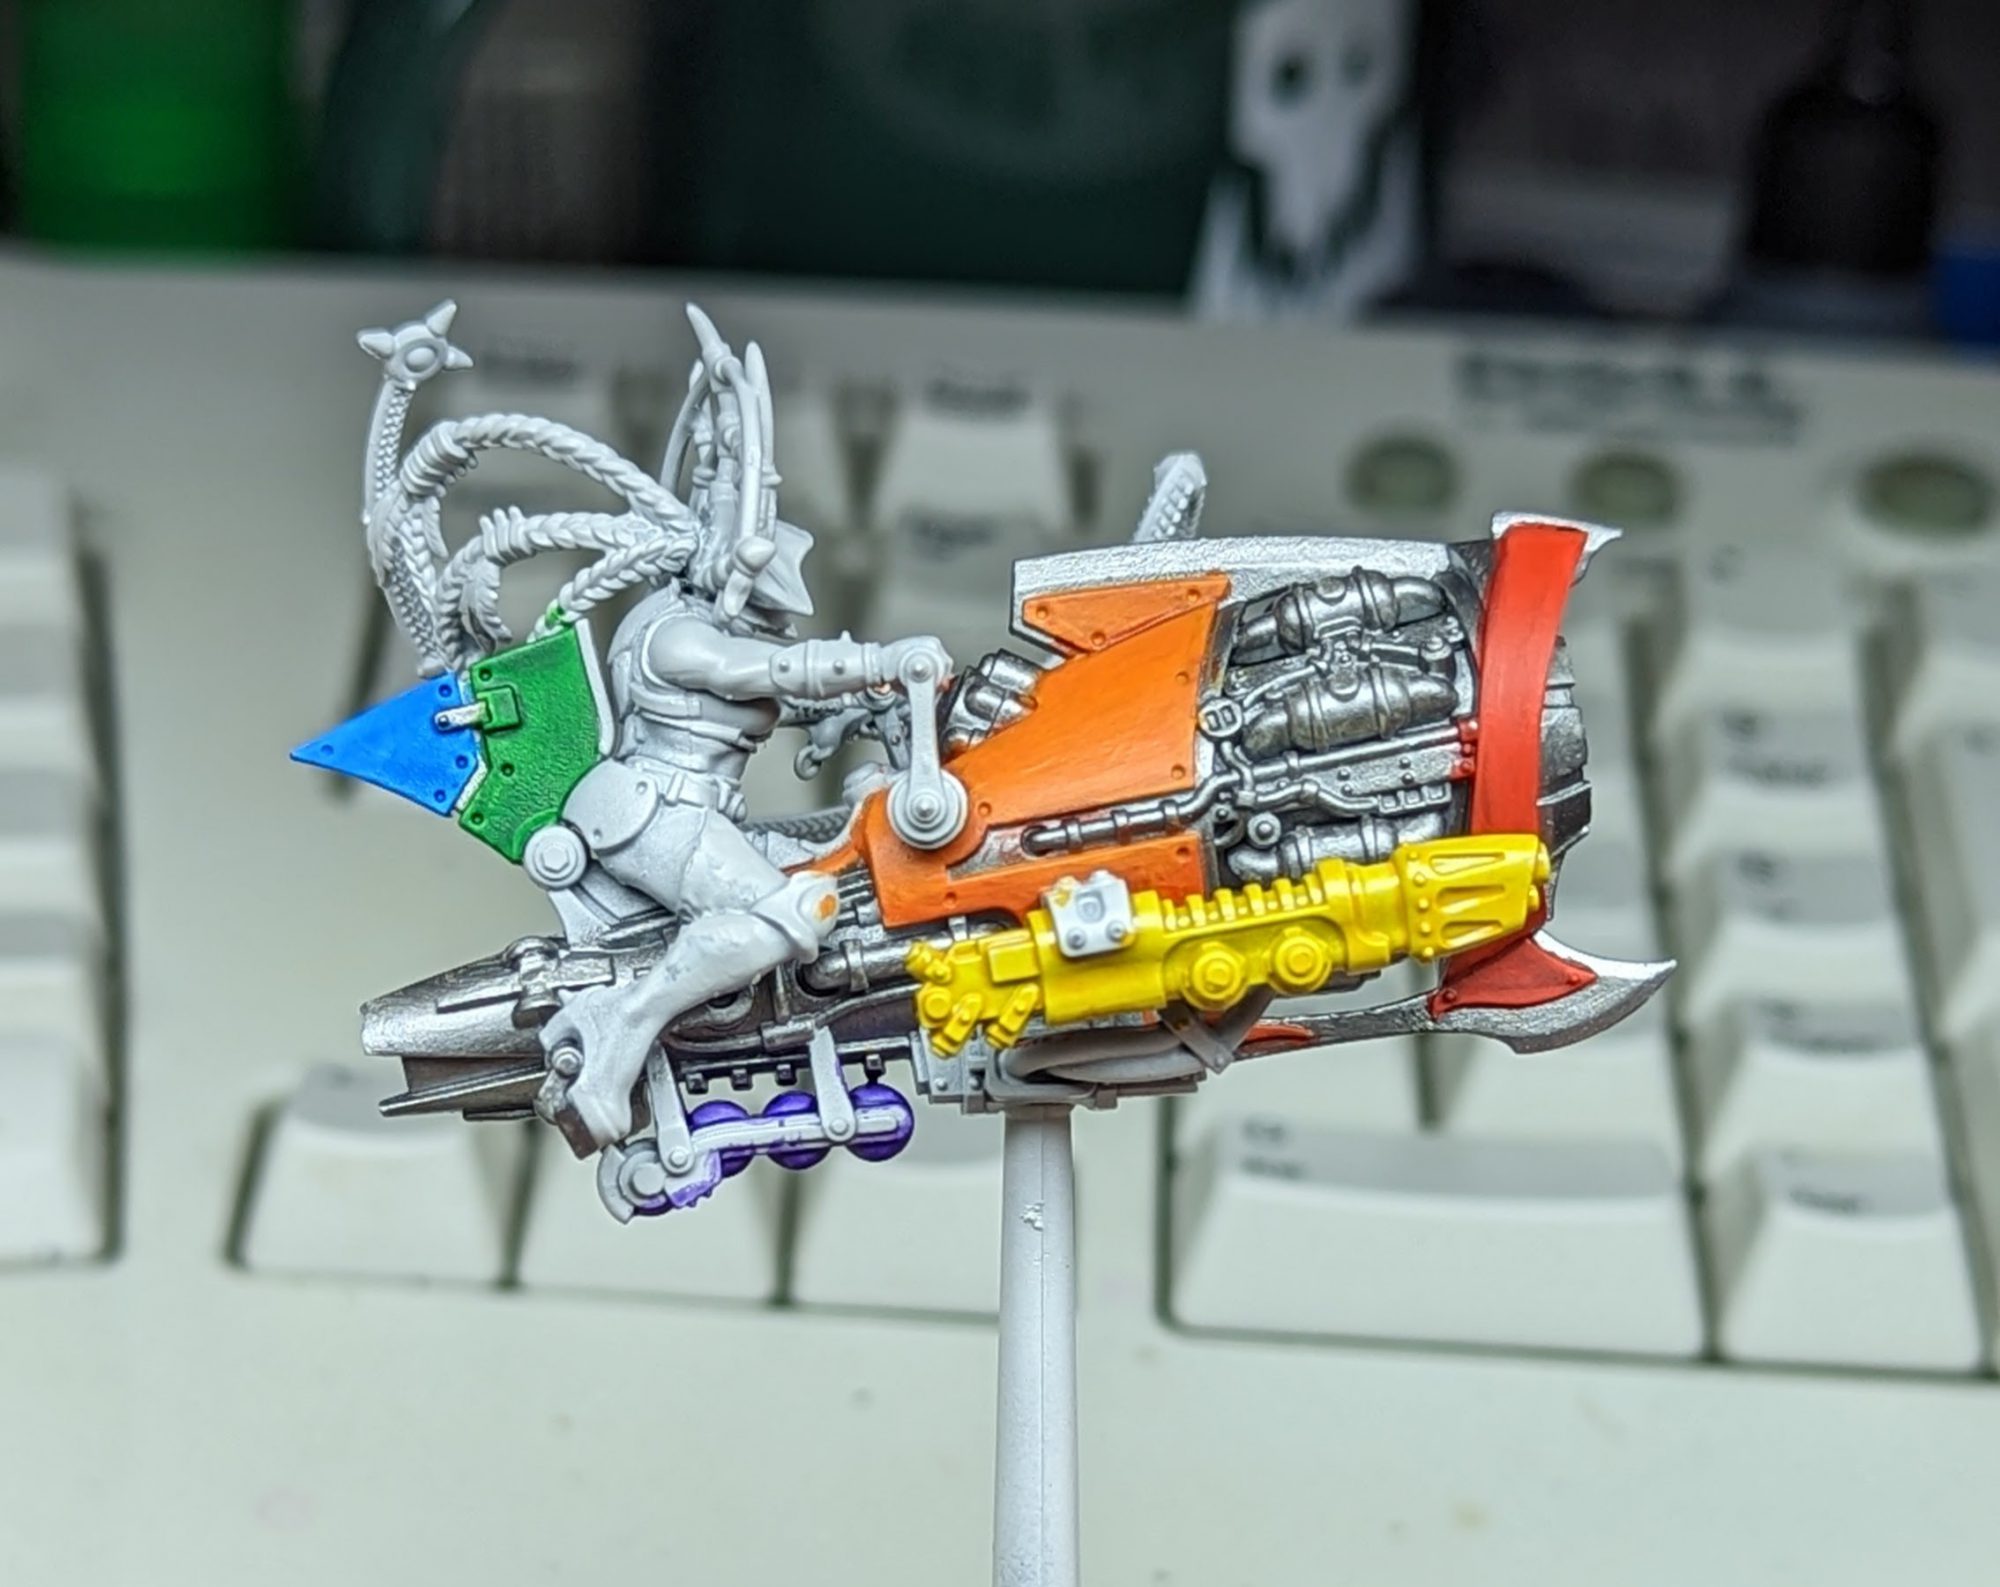
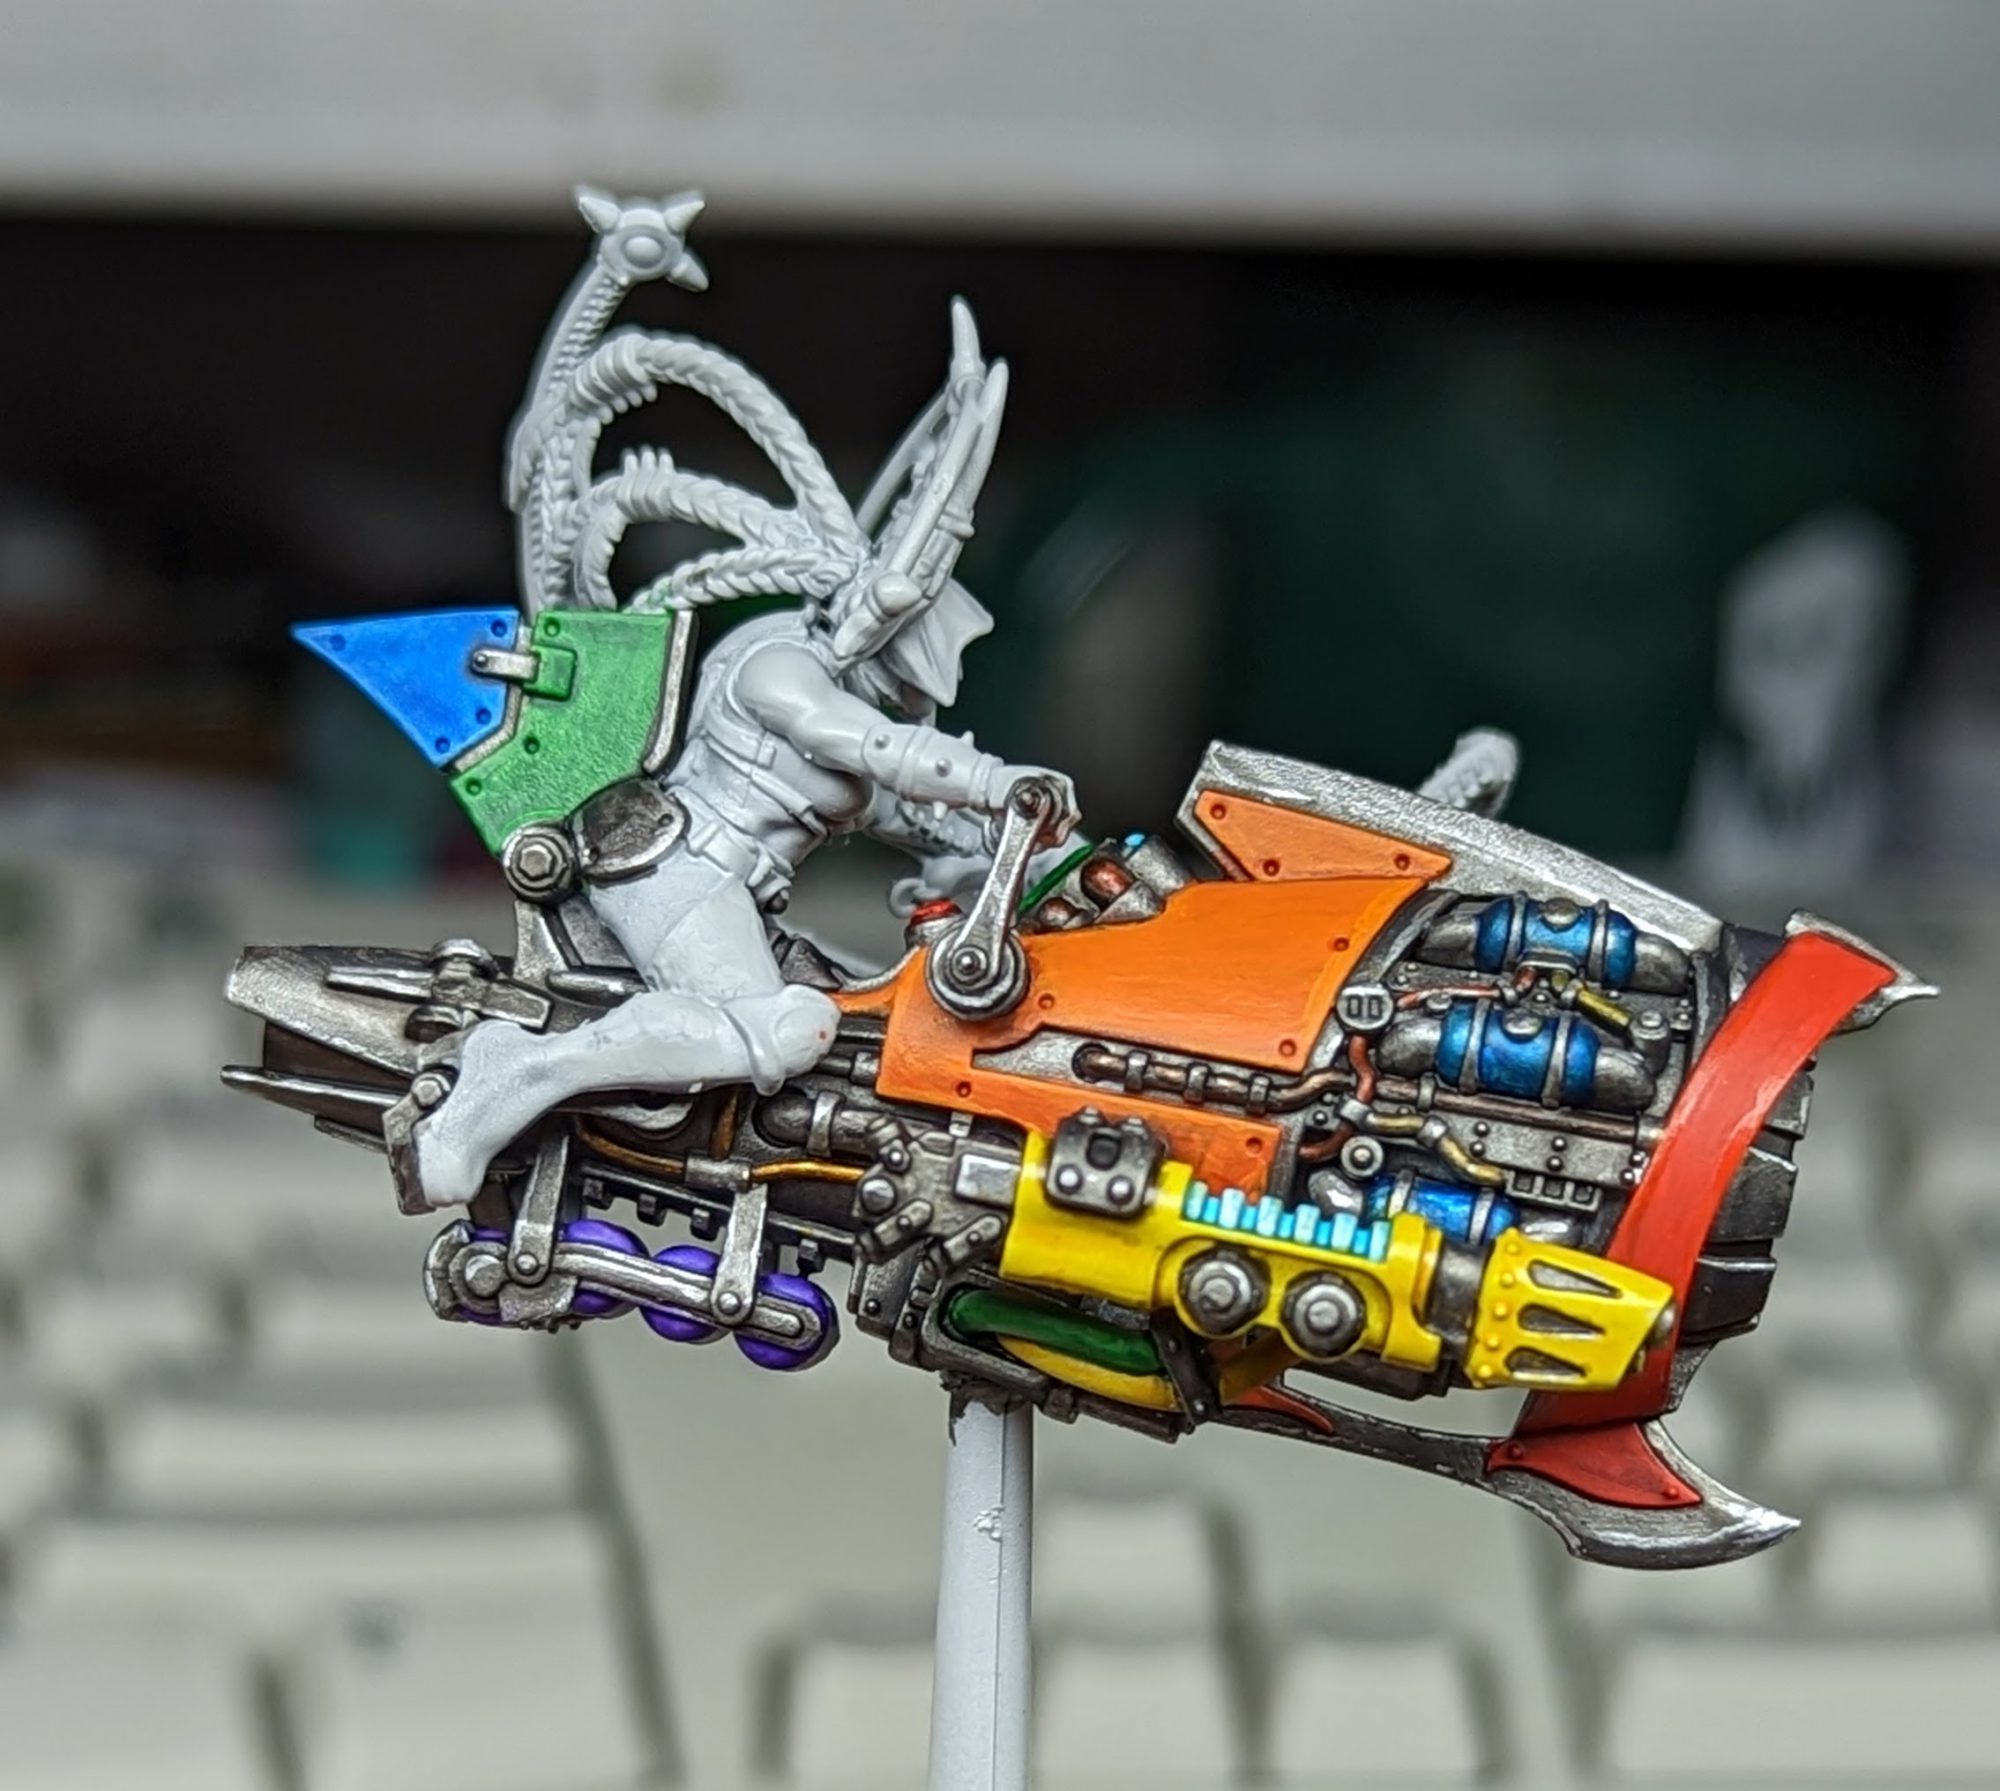
There is nothing quite like the challenge of having to work on a model and color palette that is completely outside of your comfort zone. Before I started the project I hadn’t painted flesh in over a decade, and my daughter’s color choices make me extremely glad that I impulse purchased the entire GW Contrast line. To start I primed the model with Games Workshop Grey Seer, which I find to be an extremely pleasant color to work with and a good quality primer, and then blocked out the colors. The metal is Vallejo Model Air Gunmetal, which is a fantastic base and is great for brushing on since it’s effectively pre-thinned. The colors were mostly GW Contrast (Blood Angels Red, Warp Lightning, Talassar Blue, Luxion Purple) with two exceptions. The yellow was Liquitex Ink! Orange Azo but to be honest GW Contrast Iyanden Yellow is just as good. The orange was originally GW Ryza Rust but eventually I settled on Vallejo Game Color Orange Fire with some GW Contrast Gryph-Hound Orange used in shadows.
I decided to finish the Cutter before I worked on the model, so after blocking out the colors I added some edge highlights (mostly just playing with Vallejo Game Color options I had available) and then washed the metals in Army Painter Dark Tone. I have yet to find a better acrylic combination for metals that VMA Gunmetal and AP Dark Tone, and I use it for nearly everything. I then used Vallejo Model Air Silver to highlight the metal before applying various GW Contrast colors to add some variation. The “gold” is Iyanden Yellow, the dull brown color that looks like weathered copper is Wyldwood, the intense orange copper color is Gryph-Hound Orange, and I also experimented with Aggaros Dunes, Snakebite Leather, and Ratling Grime. They all produce some really fun results so go wild. The blue tanks were Tallasar Blue. For the plasma coils I simply painted the glowing region white and then applied a single layer of GW Contrast Aethermatic Blue, which along with Warp Lighting are my go-to colors for glowy bits. The glowing console items and buttons were painted by starting with white and then adding Aethermatic Blue, Warp Lightning, and Blood Angels Red to the respective button. The seat is actually a few layers of Basilicanum Gray but you can’t really tell so I recommend using a different color.
The last bit of detailing was three purple stripes on the orange cowling. The big cowling bit really needs an accent in order to not look flat, and my daughter’s suggestion of three purple lines was perfect. Finally I moved on to the Death-Maiden, and unfortunately I wasn’t able to spend as much time on this part as I would have liked to. The colors are generally the same as those used on the bike, with some exceptions for the organic components. The hair is two passes of GW Contrast; first Aggaros Dunes and then Guilliman Flesh. The bone pieces in the hair are Vallejo Game Air Bonewhite washed with Army Painter Soft Tone and then lightly overbrushed with more Bonewhite. The leather wrappings are Snakebite Leather.
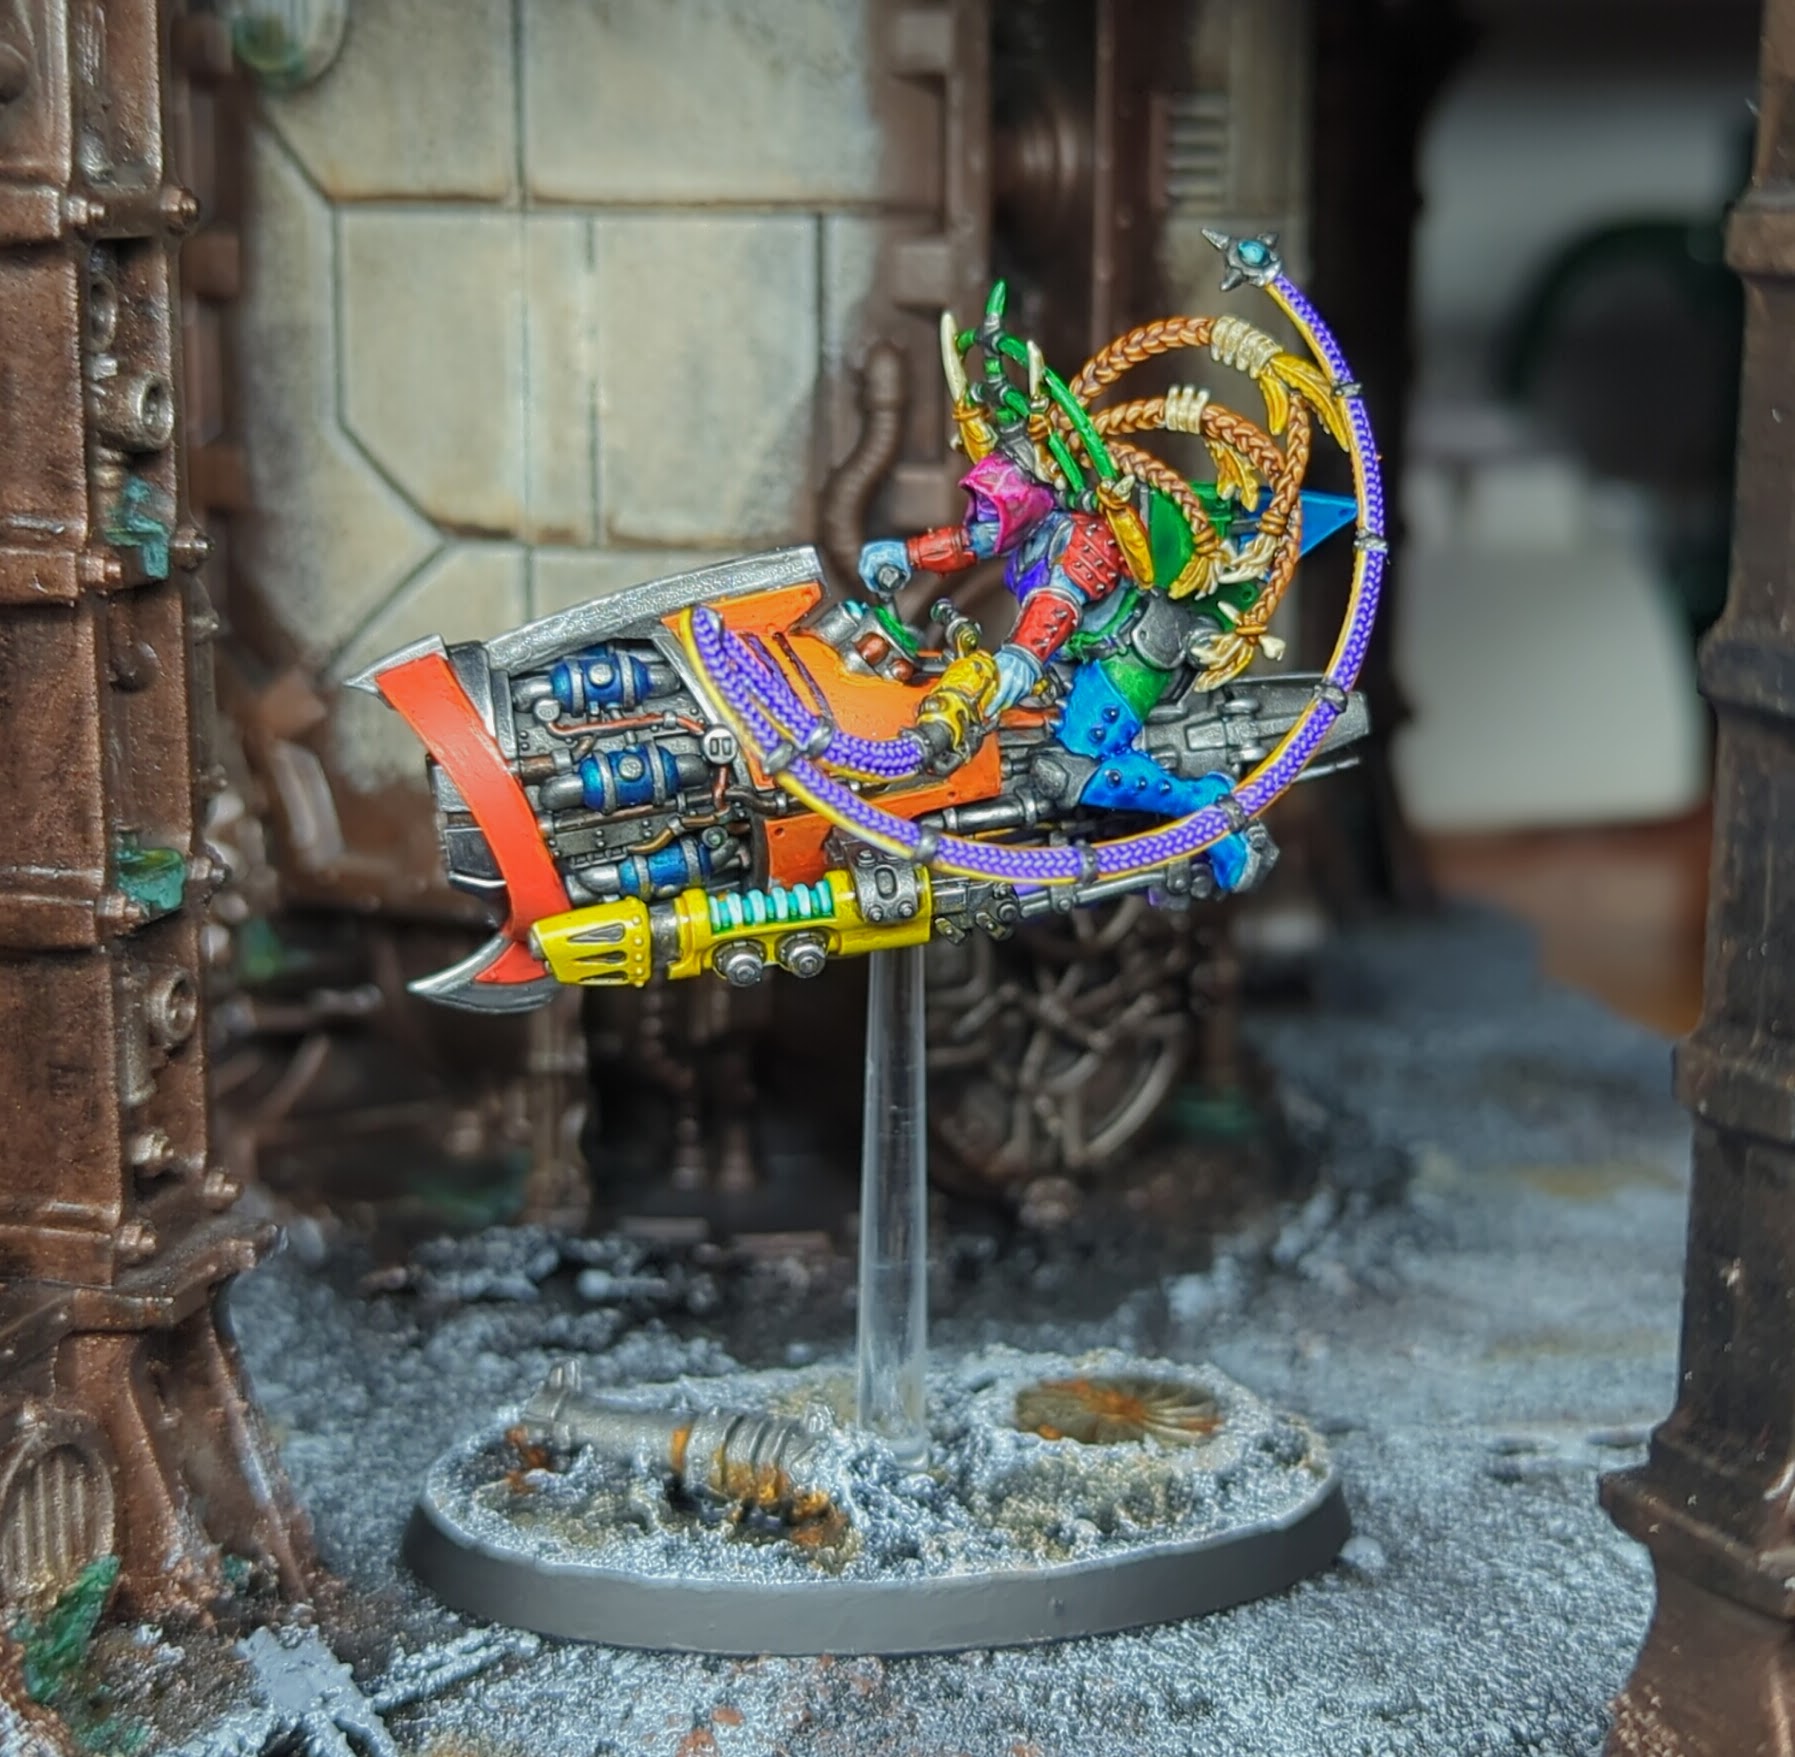
I wanted the skin to look like a blood-drained corpse, without any hints of reds and a very cold and dead pallor. I started with the Grey Seer base, and experimented with adding thinned glazes of white to provide an initial highlight. I then washed the skin in Apothecary White but the effect was minimal. I decided to go bold and wash the entire skin in a heavily thinned glaze of Army Painter Blue Tone; it was thinned with 3 parts Vallejo Airbrush Flow Improver to 1 part Blue Tone. The result was extremely stark, and left the model looking more like an alien from Star Trek than a corpse. I added a few passes of thinned Grey Seer to see if I could make the tone a bit less blue, but I was running on a deadline and decided her particular batch of undeath chemicals had been mixed by an intern.
The base is a layer of Vallejo Earth Texture Black Lava-Asphalt with some random bits meshed in. I drilled a hold in the base and used green stuff to provide a strong connection point for the riser that I could later adhere with super glue after I had finished painting. The base is sponge painted using the same technique as I used for my Sector Mechanicus Terrain, consisting of a mix of grey, black, and white craft paint along with some sepia tone and born sponged paint. I also played around with some Dirty Down Rust which is really striking and effective even if it does smell like chemical death.
Thanks for reading, scummers! If you have any questions for us, want to suggest a future article, or just want to show us pictures of your kickass gangs, drop us a line over at Necromunday@Goonhammer.com.
