Howdy scummers! We hope you have been enjoying Necromunda games in the Ash Wastes. The vehicle rules are a blast, and it’s a fascinating twist on the game we love. However… if you want to get down with some vehicle combat, you need some vehicles! While GW offers a multitude of rides – and scale model conversions are a great option – how about a potential Ridgehauler proxy that costs less than a six pack?
Enter: The Buzz Lightyear Hyperspeed Series Truck. Credit to Crablezworth on Dakka for hipping us to the idea. As a toy, it’s surprisingly high quality. It has nice details, the wheels roll smoothly, the back door opens, and the cab tilts forward to put the mini action figures in side. The scale of these is the key, as they’re 1.25” tall. You know what else is about that tall? Necromunda minis! It’s as if someone at Mattel is trying to make stuff specifically for Necromunda perverts to kitbash.
So what could you run it as? It’s close enough in size to the Ridgehauler that we would allow it in our campaigns. Conversely, it could make sense as a medium or large vehicle if that is more to your liking. If you are looking for some proxy haulers for a downtime Fast And The Furious style heist race, this is the ticket.
We rallied the troops to grab a truck (or two) and see what we could come up with!
Fowler
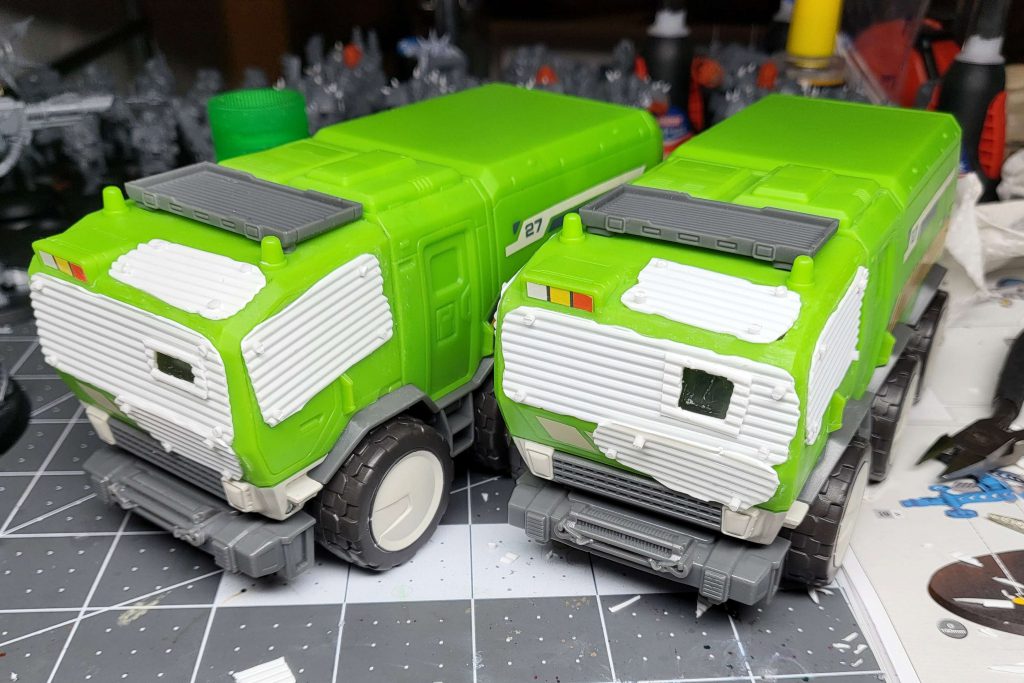
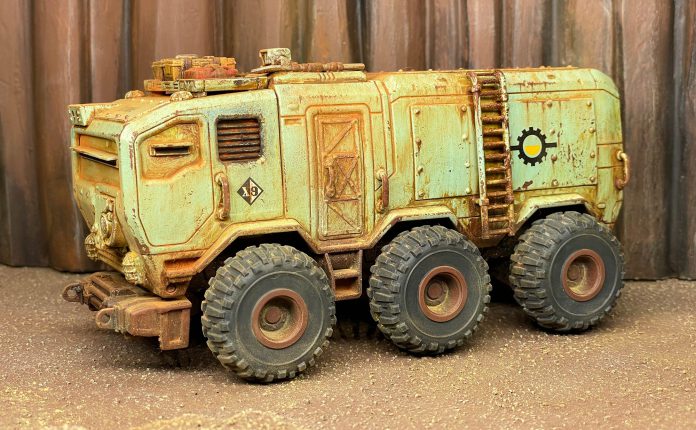
Dear reader, you will enjoy some tutorials for extensive kitbashing and 3D printing below. For my contribution, I will be keeping it simple in the modeling department. I glued the wheels in place (yes, I know I am a monster) and secured the roll-forward cab. Then I cut some rough plates of corrugated plasticard and added some short clipped sections of styrene rod to stand in as rivets. In the intervening time between when we started this adventure and preparing to post this article, Crablezworth showed that a Sentinel driver fits almost perfectly in the vehicle seats – so you could leave this step out if you want to add riders (or paint the windows). You could just prime it and go!
I stayed super simple for the paintjob on this one. It’s just a bone color basecoat (close to Wraithbone), some details in Mephiston Red, metallics basecoated with Vallejo Metal Color Burnt Iron, and wheels painted with Black Legion contrast. Drybrush silver on metallics and then sponge it messily all over the truck, focusing on edges. Go over that with a sponged pass of Dryad Bark. Even there, it would be more than respectable for the tabletop. I airbrushed Streaking Grime and added some weathering powders to give it a bit more variation.
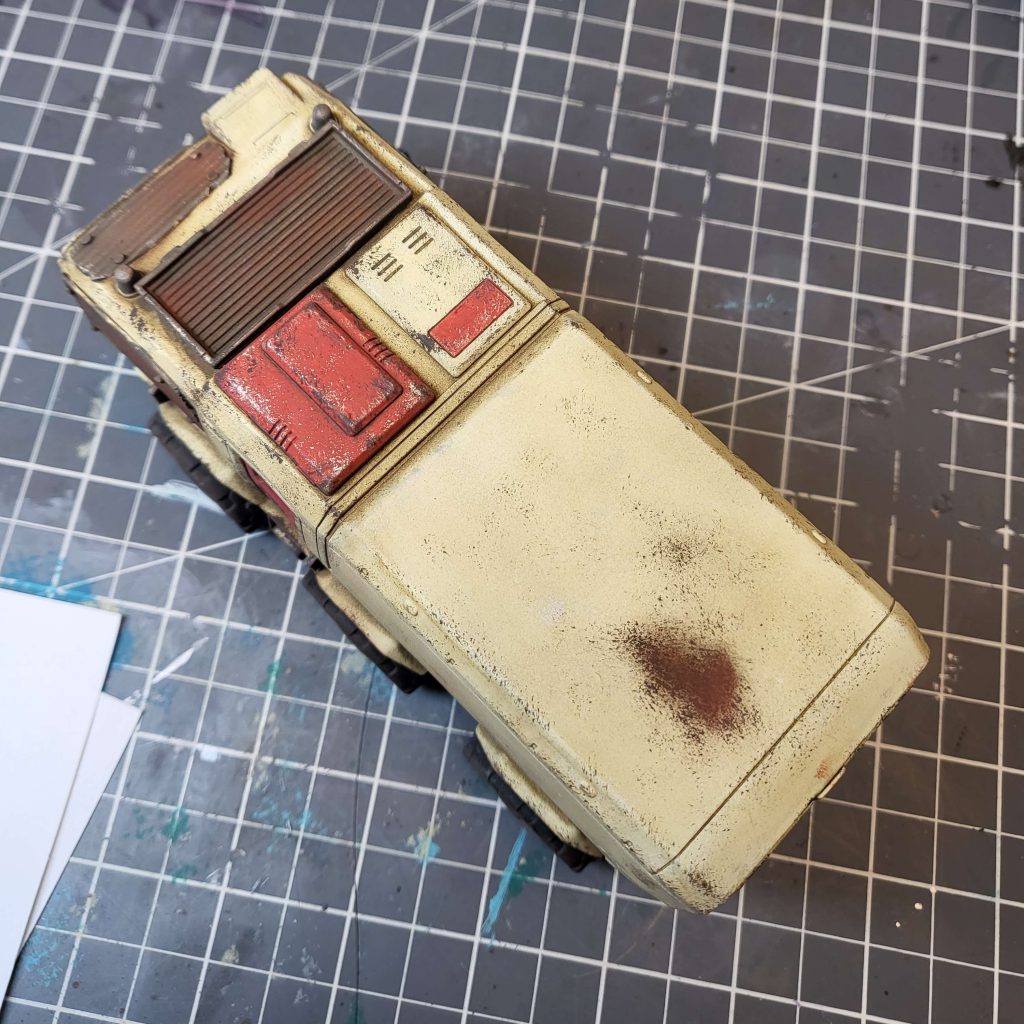
This is a super achievable paintjob. These are individually easy steps, you just need to plan ahead and make sure you do everything you are supposed to!
The Manwolfs wizard van was a labor of love. I am not really a freehand expert by trade, and this was quite an adventure. I used the cover of the Uriah Heep album Demons and Wizards as a loose reference… obviously subbing in the ubiquitous Wizard with submachine gun in. This was also a great excuse to use some of the amazing decals that came with the Cargo-8 Ridgehauler.
DYLON
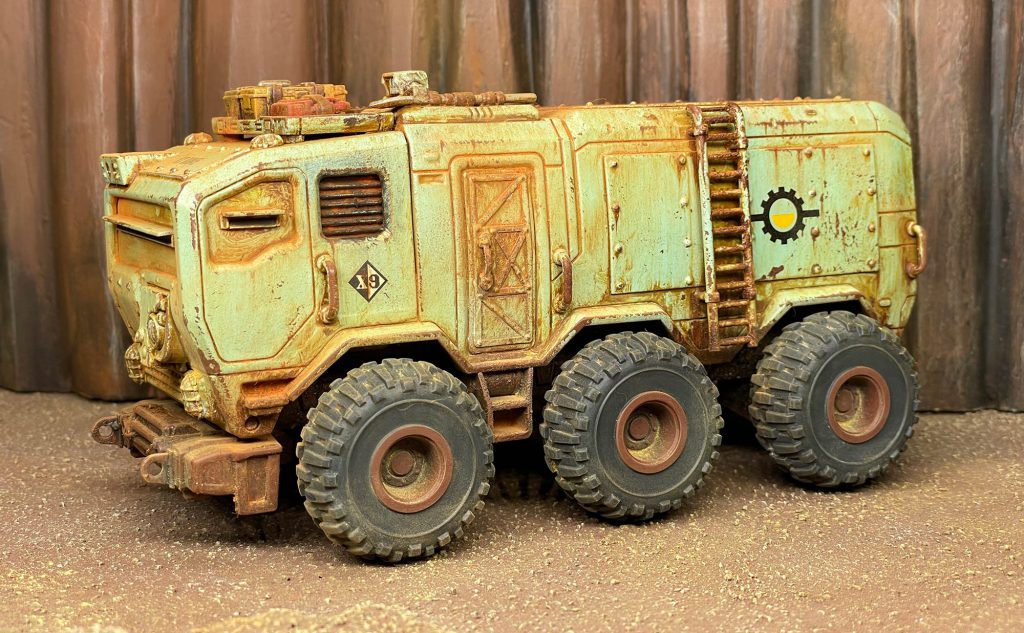
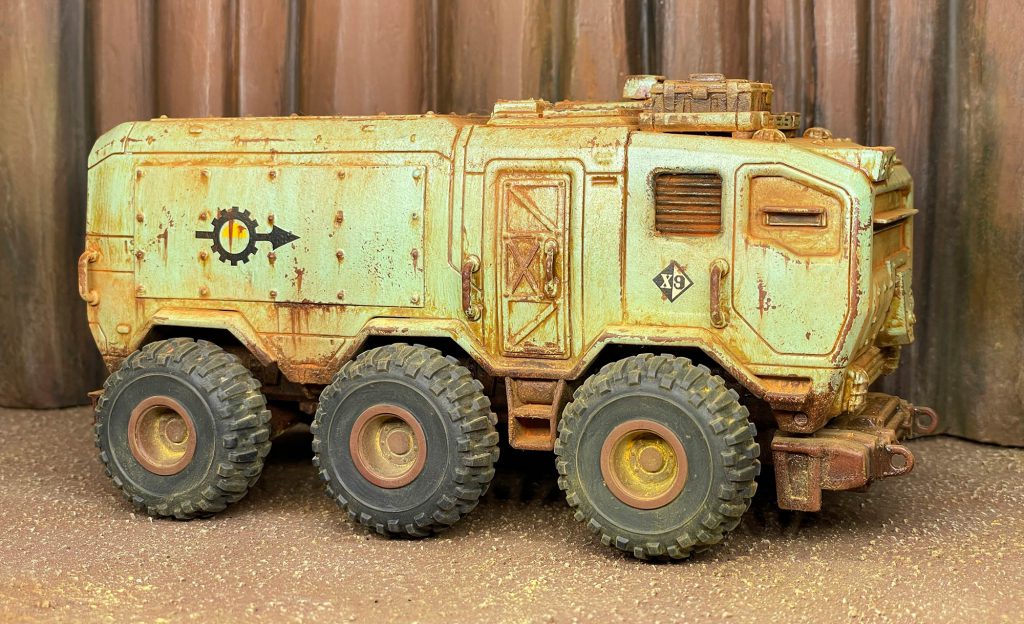
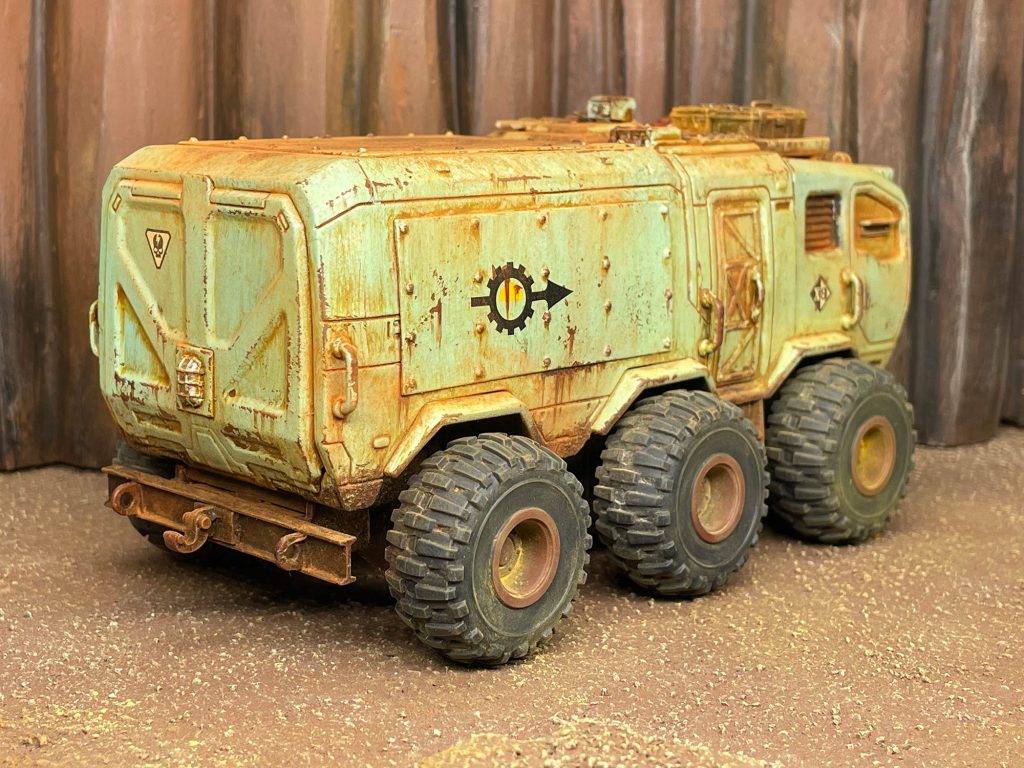
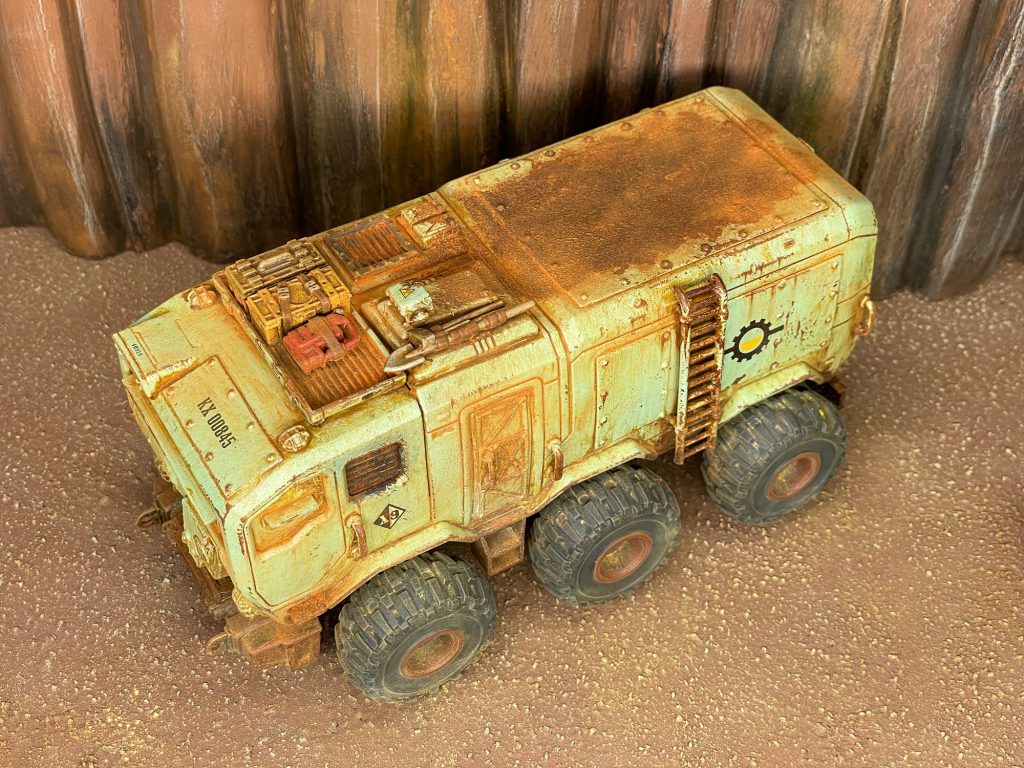
I fully place the blame for this distraction squarely on the shoulders of Fowler. A casual post in Discord of “Buzz Lightyear Star Command truck looks pretty rad for Ash Wastes”, thirteen freedom bucks, and one Amazon delivery cycle later… I had one of these in-hand.
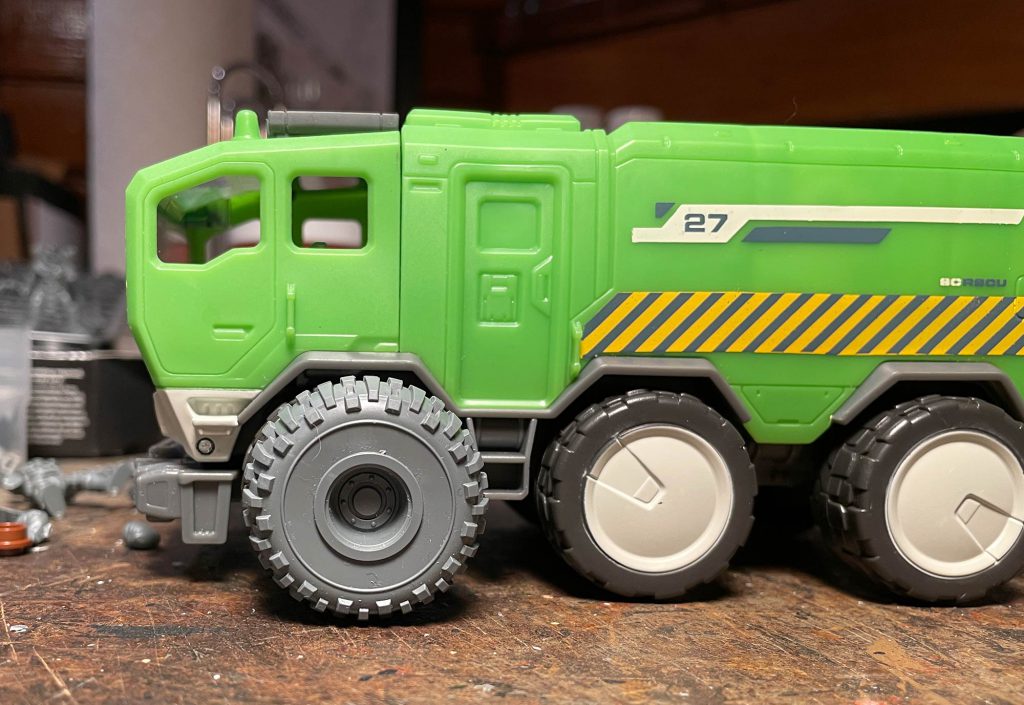
After the mandatory zoom-zoom across my desk, I started brainstorming what I wanted to do. I pulled out a Cargo-8 wheel from my bits box and put it in front of one of the wheels. And guess what, it’s basically the same size. And my path became clear. After struggling to pry the wheels off, I got out the razors and cut the (metal!) axles which allowed me to remove the wheels. The holes cast into the kit required only a little clearancing to accept a length of styrene tube. After some thought I decided to use my spare suspension bits from my Cargo-8s and cut them down to fit. I drilled holes in them to slot over the styrene tube to make it sturdy.
This way the Cargo-8 wheels fit on perfectly and widen the wheelbase nicely.
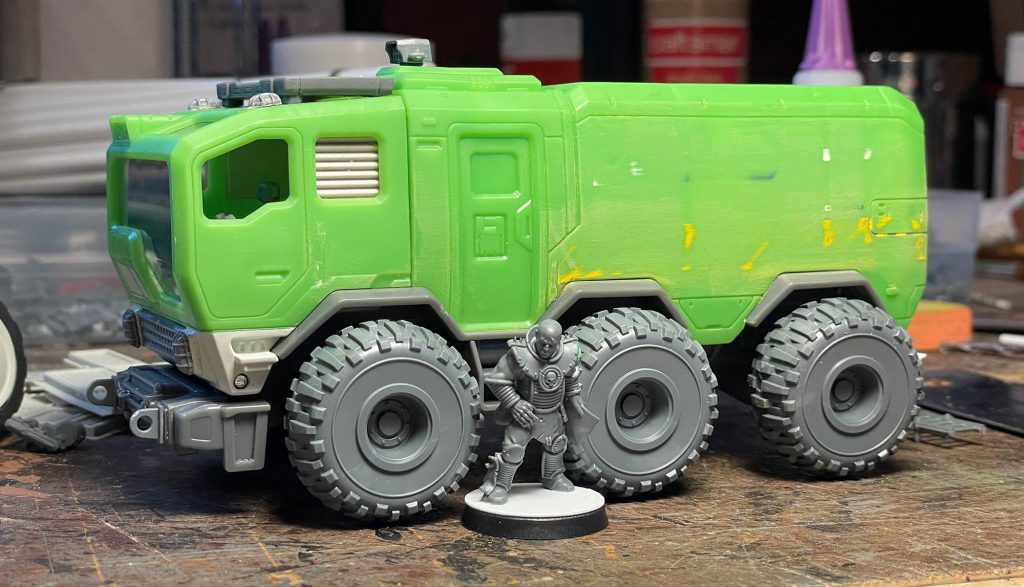
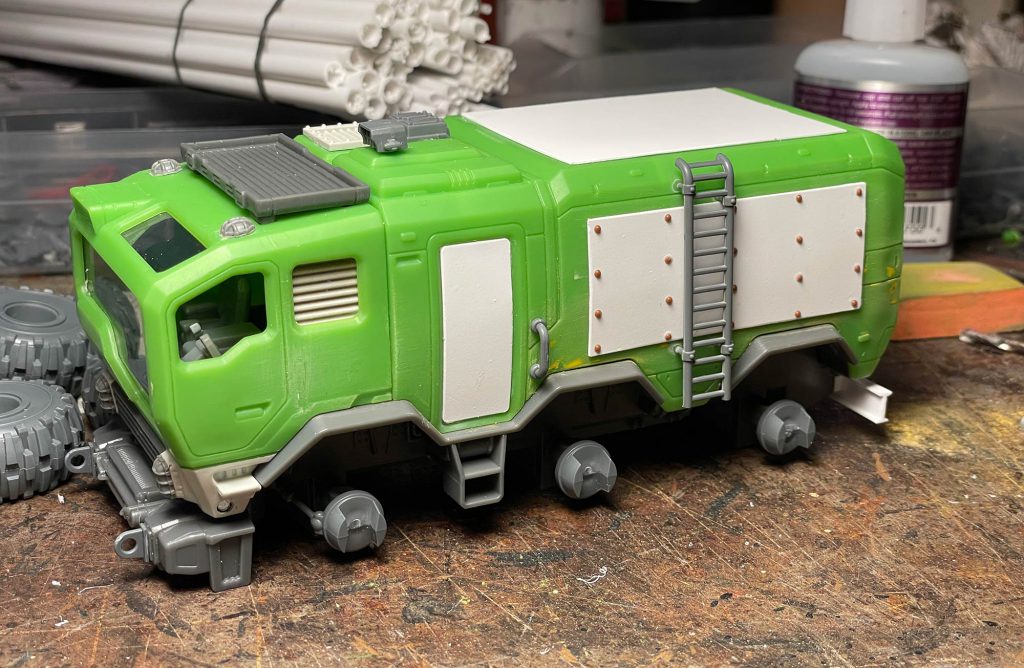
On to the body! First up was taking a sanding block and knocking down the printing. I wanted to make sure none of it would come through when painted and it allowed me to see the shape of it better. After that, I jumped onto my computer and fired up Adobe Illustrator. I took measurements and drew up a set of plates to apply to the body and to replace the doors. These files (and more) are available on my Patreon. So, if you have a Cricut, you could cut your own. The hardest thing about kit bashing toys is the scale difference of small details. The hand grabs and door handles are just too small and don’t look quite right. I used a chisel blade to trim most of these off and to flatten out the side doors to accept my styrene replacements.
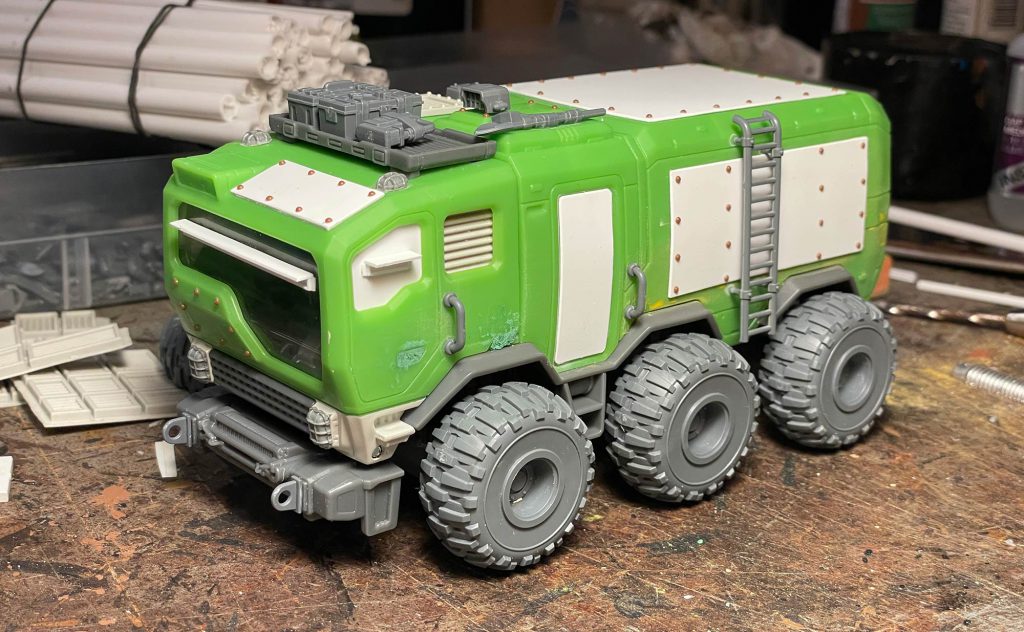
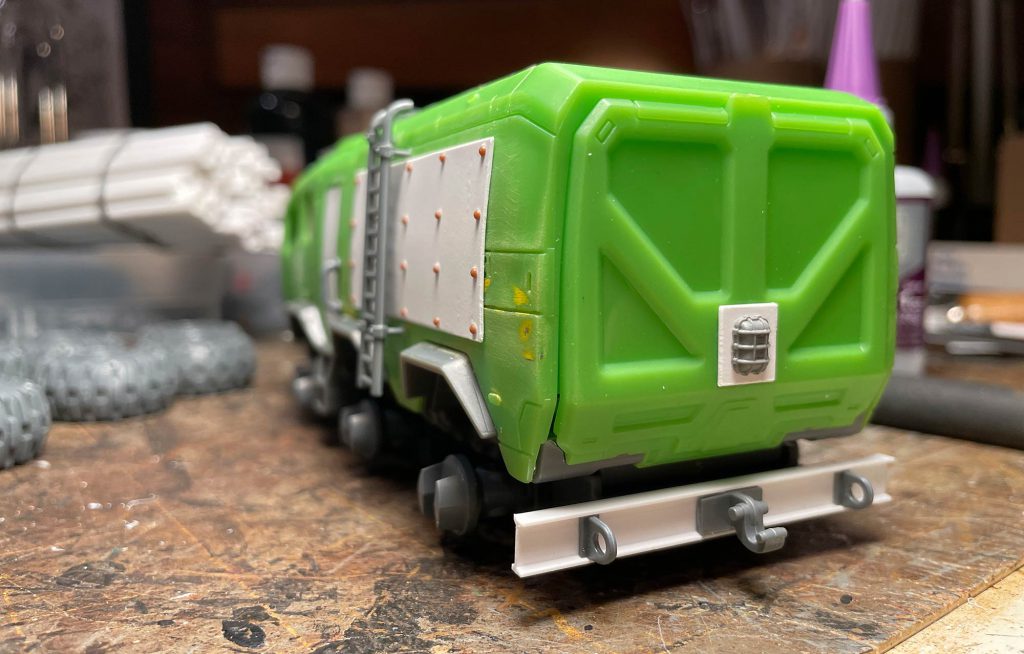
I glued on the plates, added my usual rivets and started detailing. I used hand grabs from the Cargo-8 kit on the body and a ladder from the Baneblade that’s sat in my bits box from 10+ years. I removed the rubber rear bumper and used a length of styrene I-beam to replace it with bits from a Leman Russ to jazz it up. The only downside is that it prevented the rear door from opening fully, so I glued it shut. Be warned! The lights on all sides were replaced with bits from Blood and Skulls Industries. I sanded down a vent from Dragonforge for the roof and added vents inside the cab in the rear windows. I added plates inside the cab for the front side windows and one on the roof window as well. For the front windows I created view ports out of .080” styrene channel and some styrene strip. I grabbed some stowage from the Cargo-8 kit and added it to the roof rack. I used Squadron green putty to fill in the front door handles and the cab lift points.
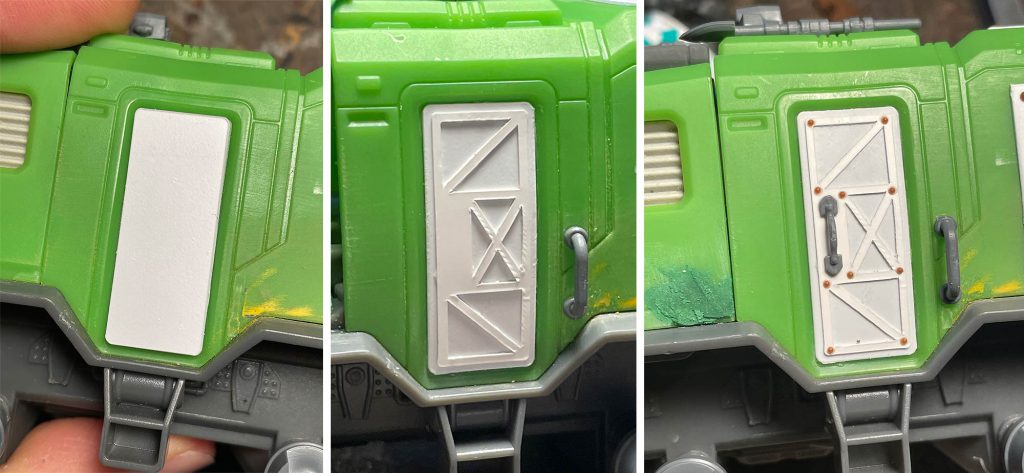
After sitting with the side doors for a few days know that I wanted to do something with them, but not sure what, I drew up outer bracing and added that with some .030” rivets and hand grabs from a Leman Russ.
I was feeling close to done, but the front of this thing had such a unique design that I wanted to obscure. Sifting through my many bits boxes I found a bit that I’d never found a home for and tried it. It’s the sensor array from a Astra Militarum Hydra, flipped upside-down and with a little trimming done, fit almost perfectly. More green putty and a little styrene and I was finally happy with it.
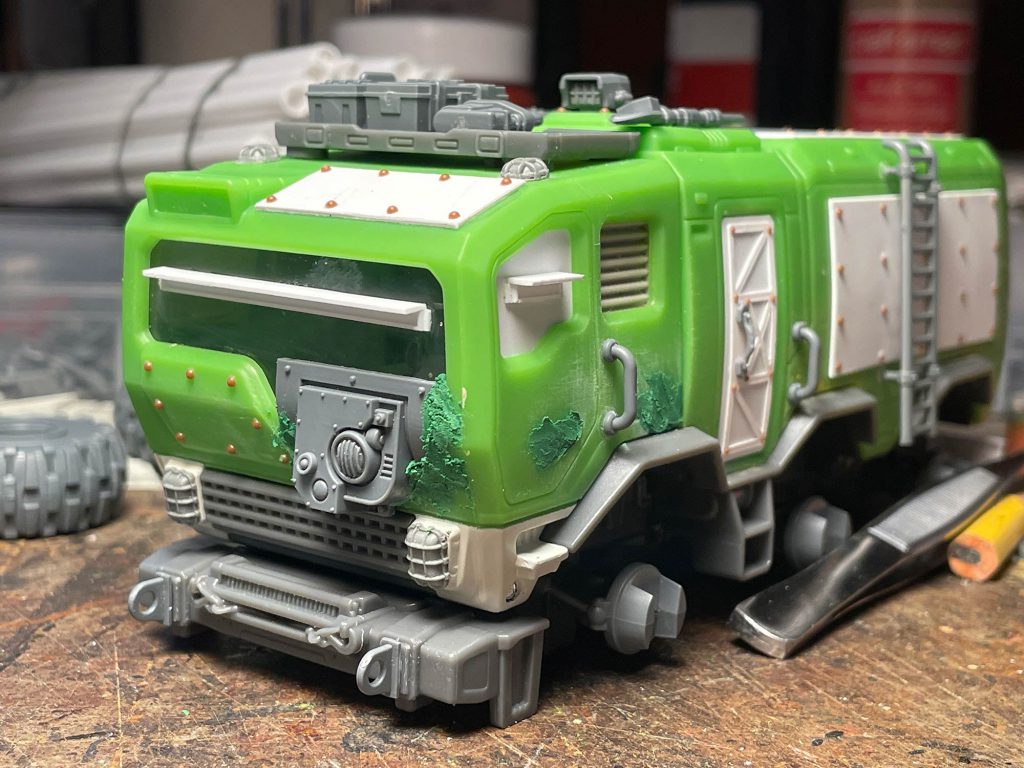
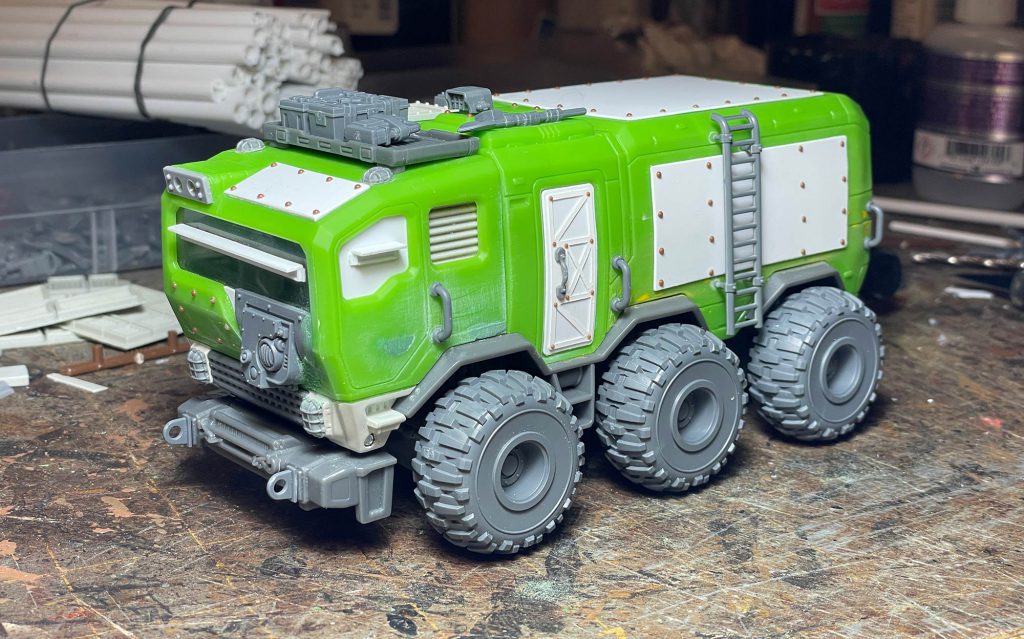
While it’s still a paint-in-progress on my desk, I treated it much like the Cargo-8 trailer in this article. I sprayed with Rustoleum Ruddy Primer, sprayed with too-much Aquanet hairspray and then sprayed with Montana Gold Malachite Light.
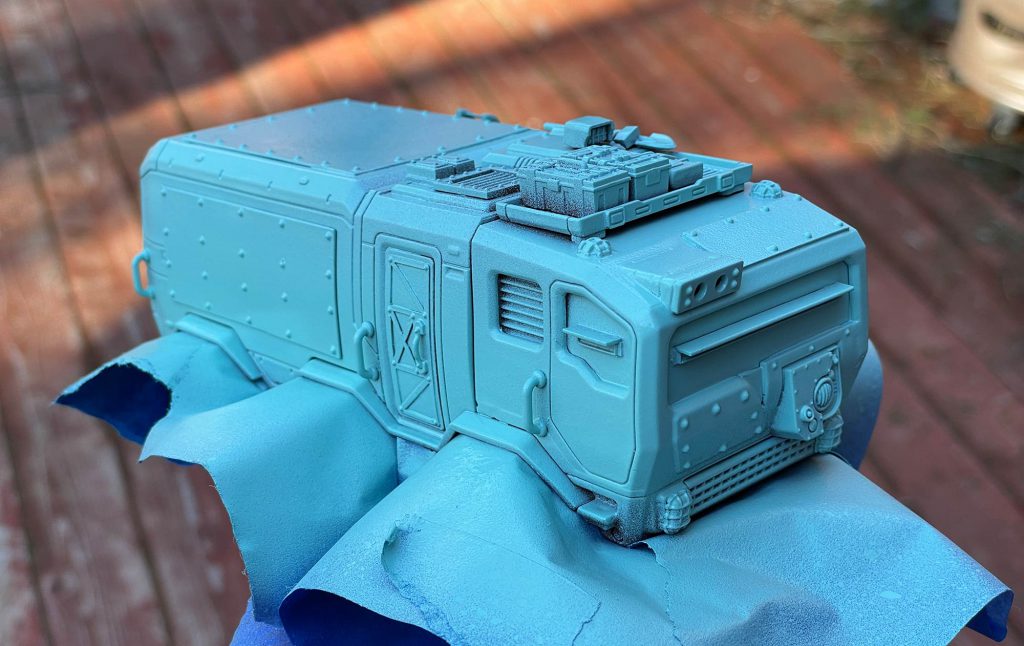
Once it had dried I ran it under hot water and scrubbed it with a toothbrush (an old one!) to get all my chipping. Once it was dry, I painted a few details and added a bunch of decals.
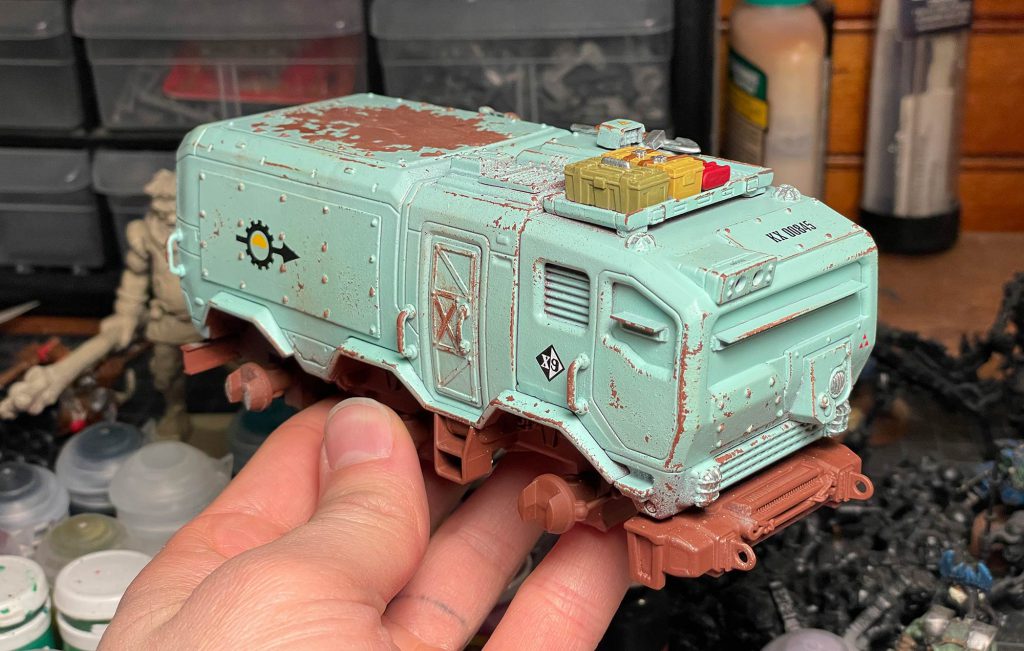
And then it was time for oils. I used Burnt Sienna over the body and Raw Umber on the undercarriage and wheel centers. After a week, the oil paints were dry. I painted the tires with Corvus Black and then I could glue the wheels on and apply powders. I used 5 colors of powders I shaved from Artists Pastels. Once they were on, it was done. Into the light booth!
Primaris Kevin
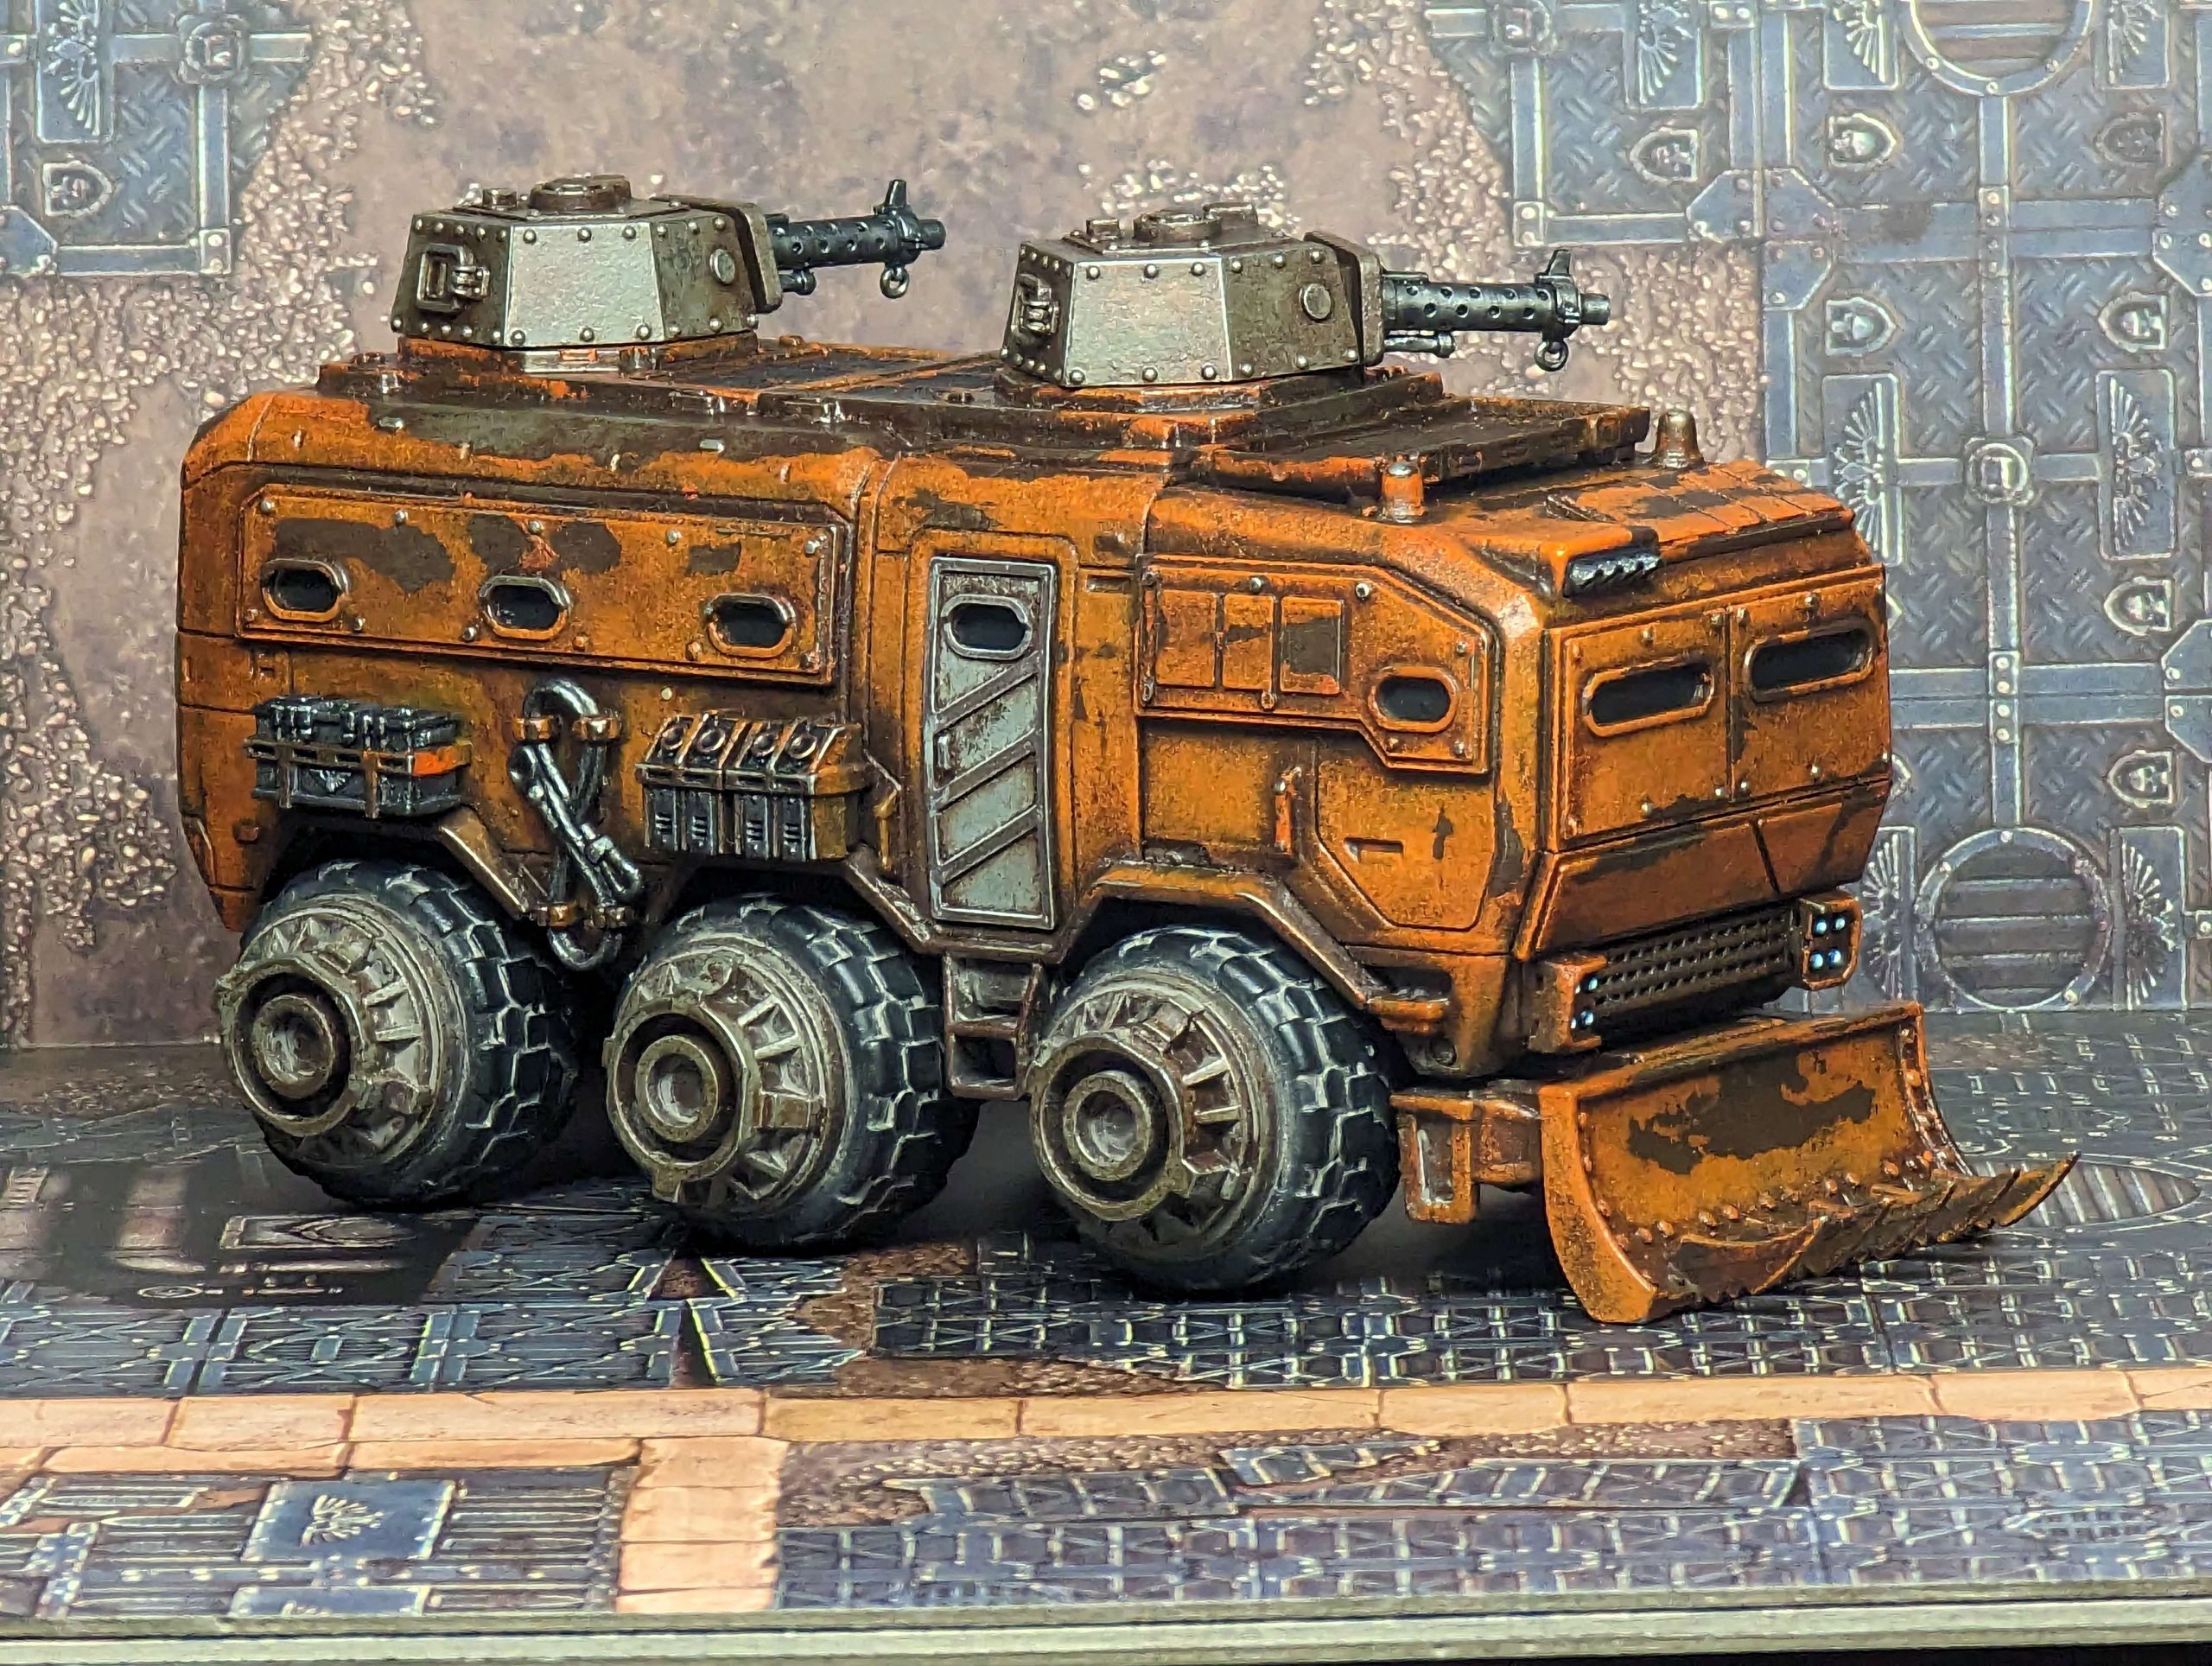
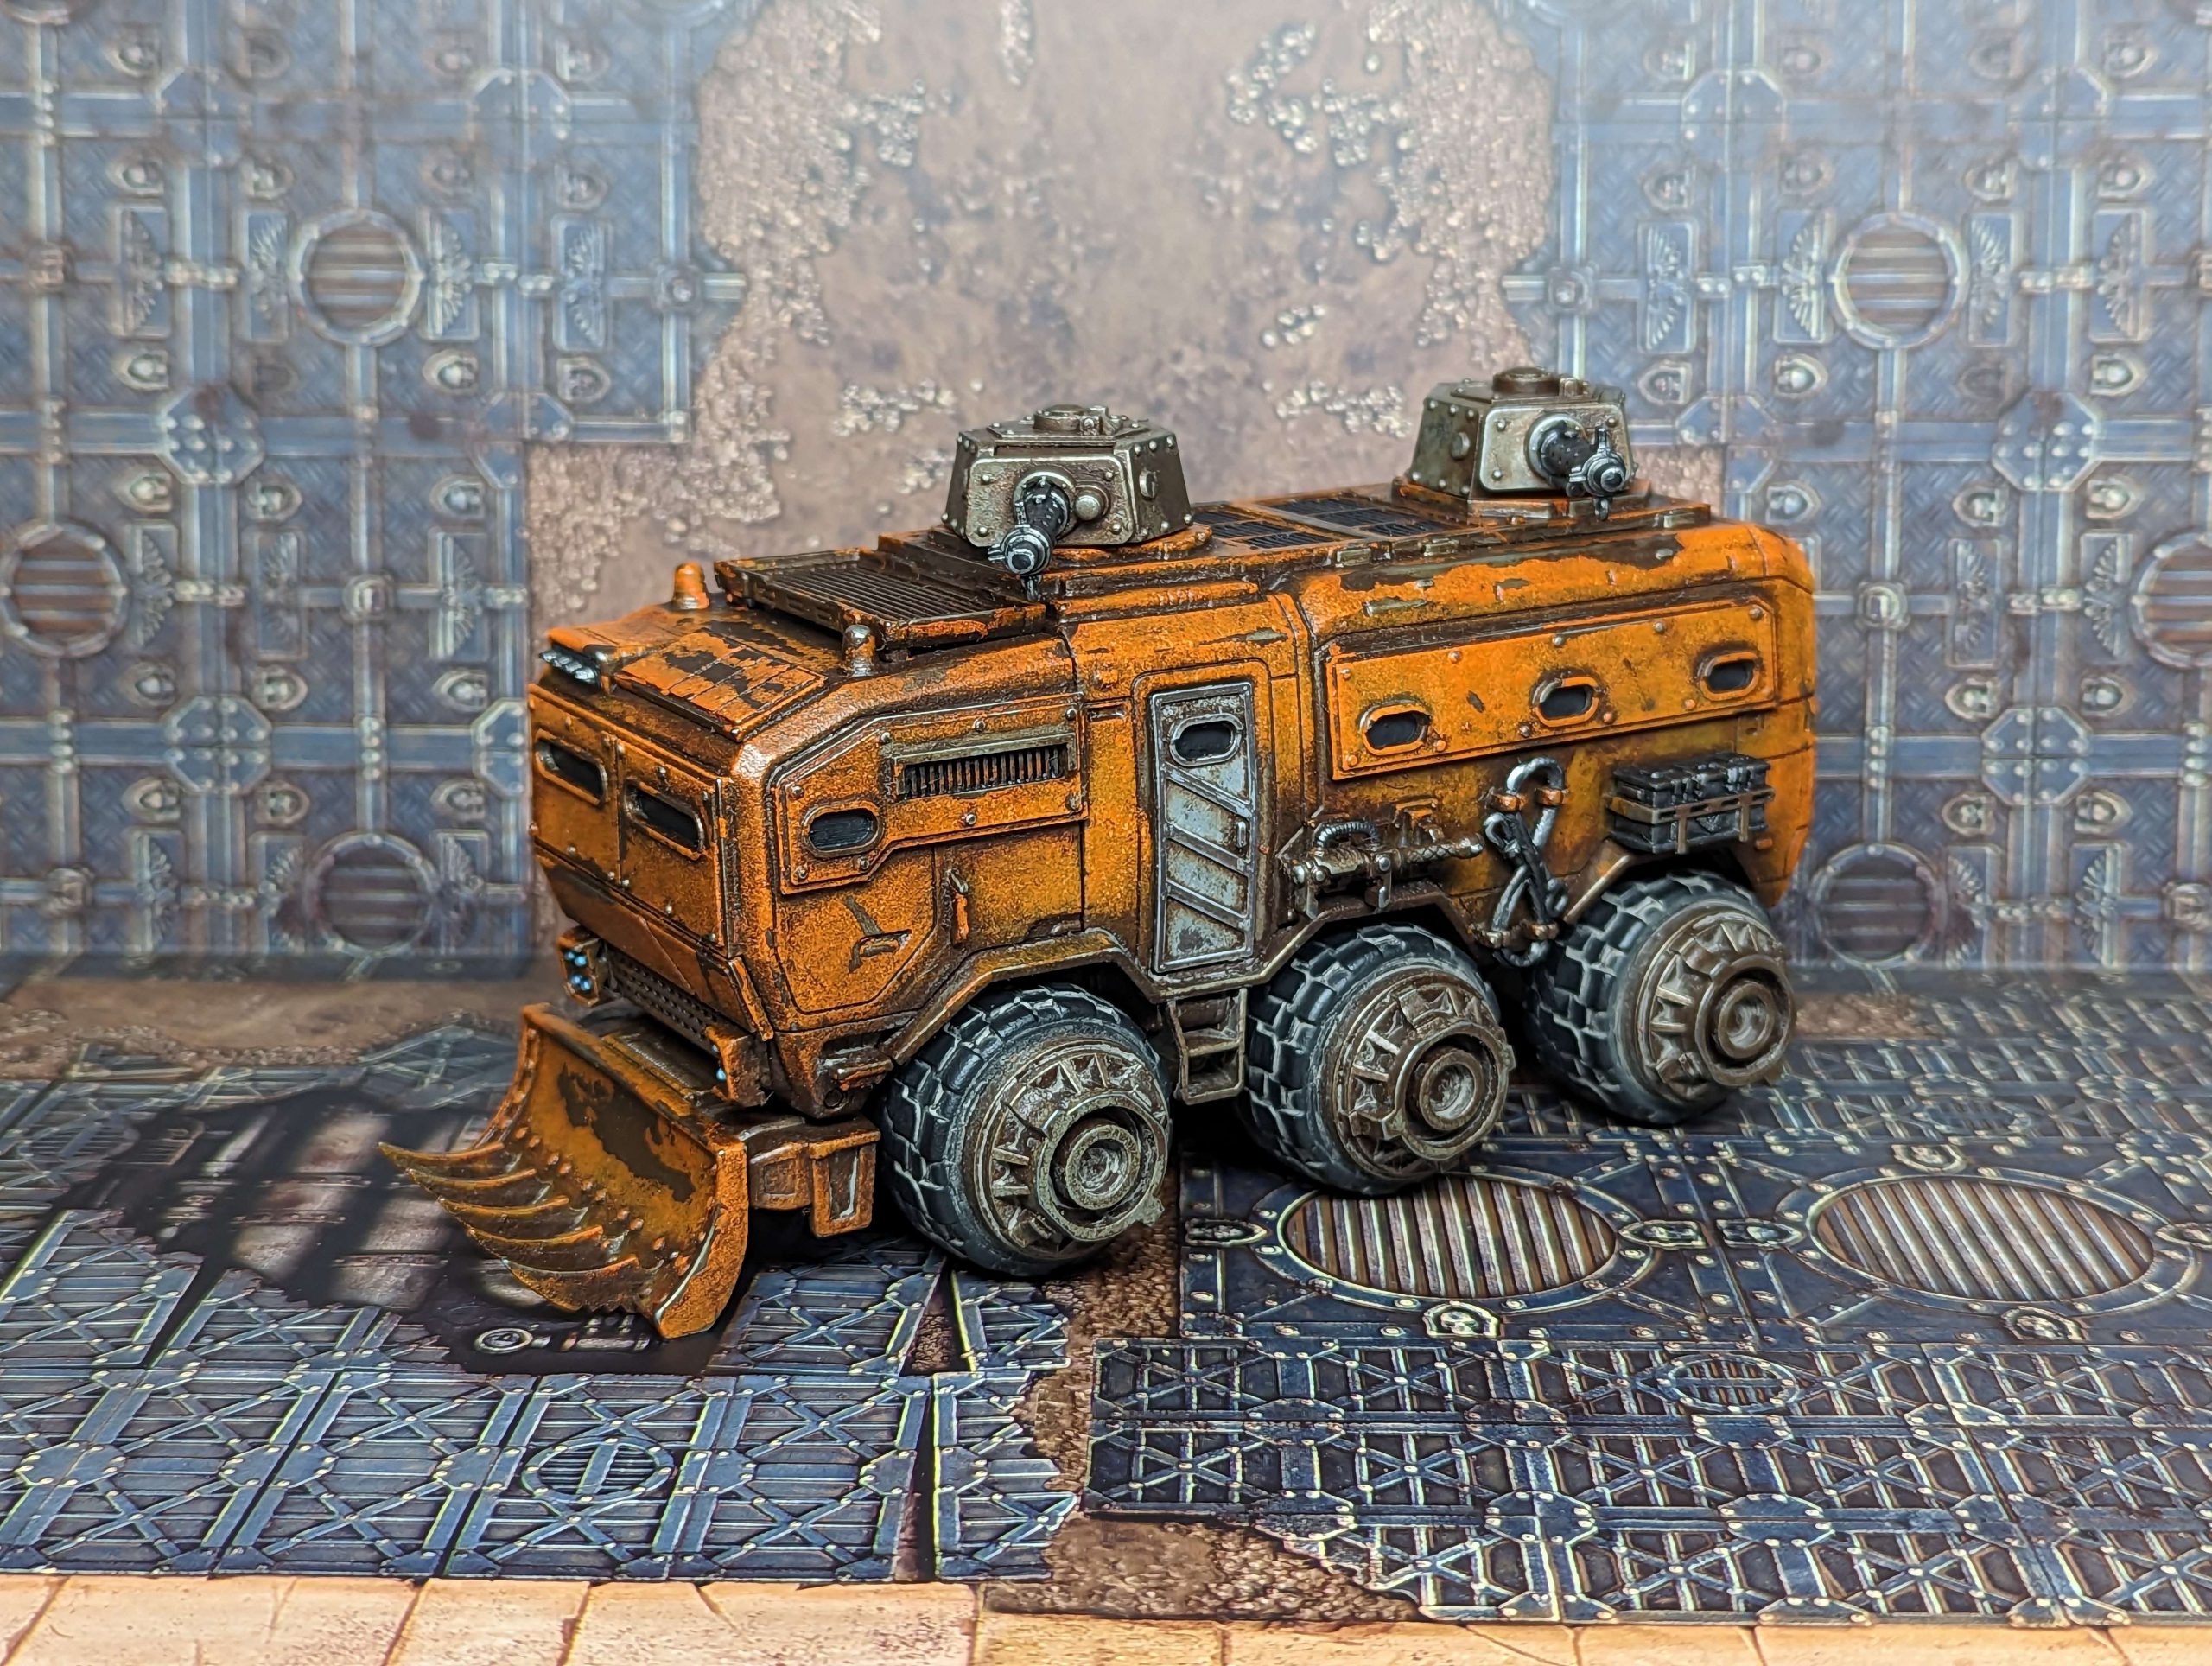
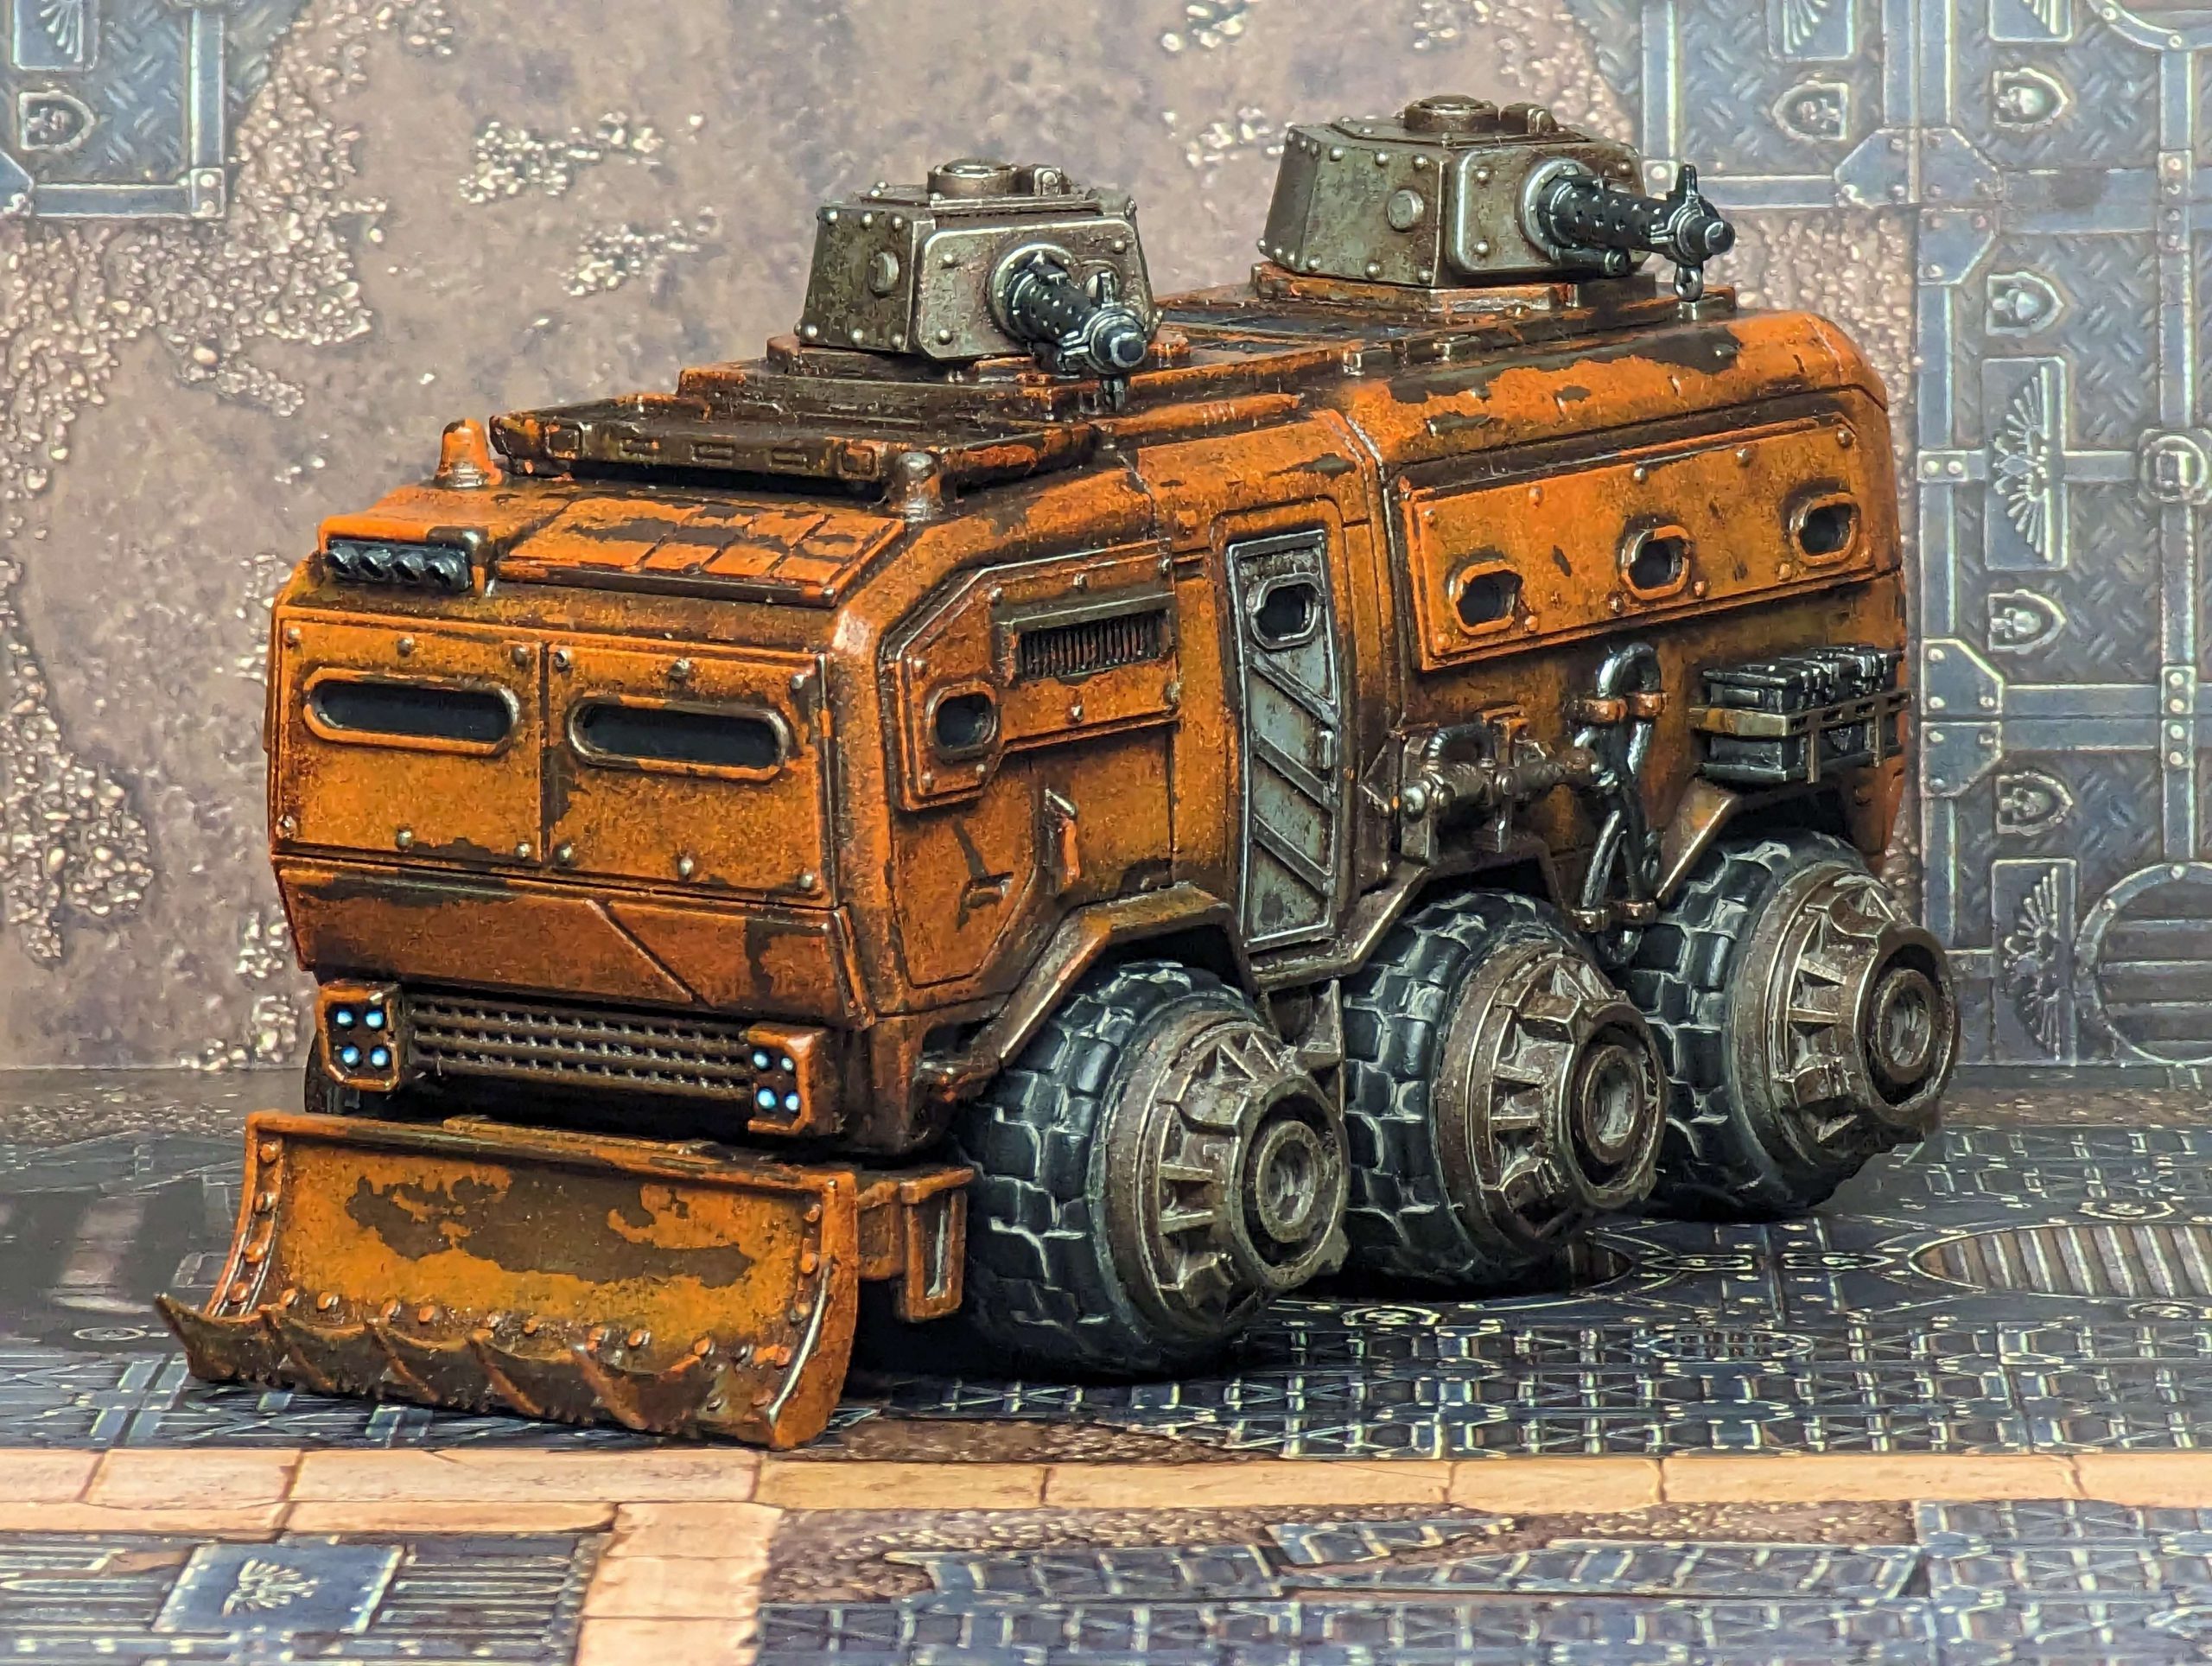
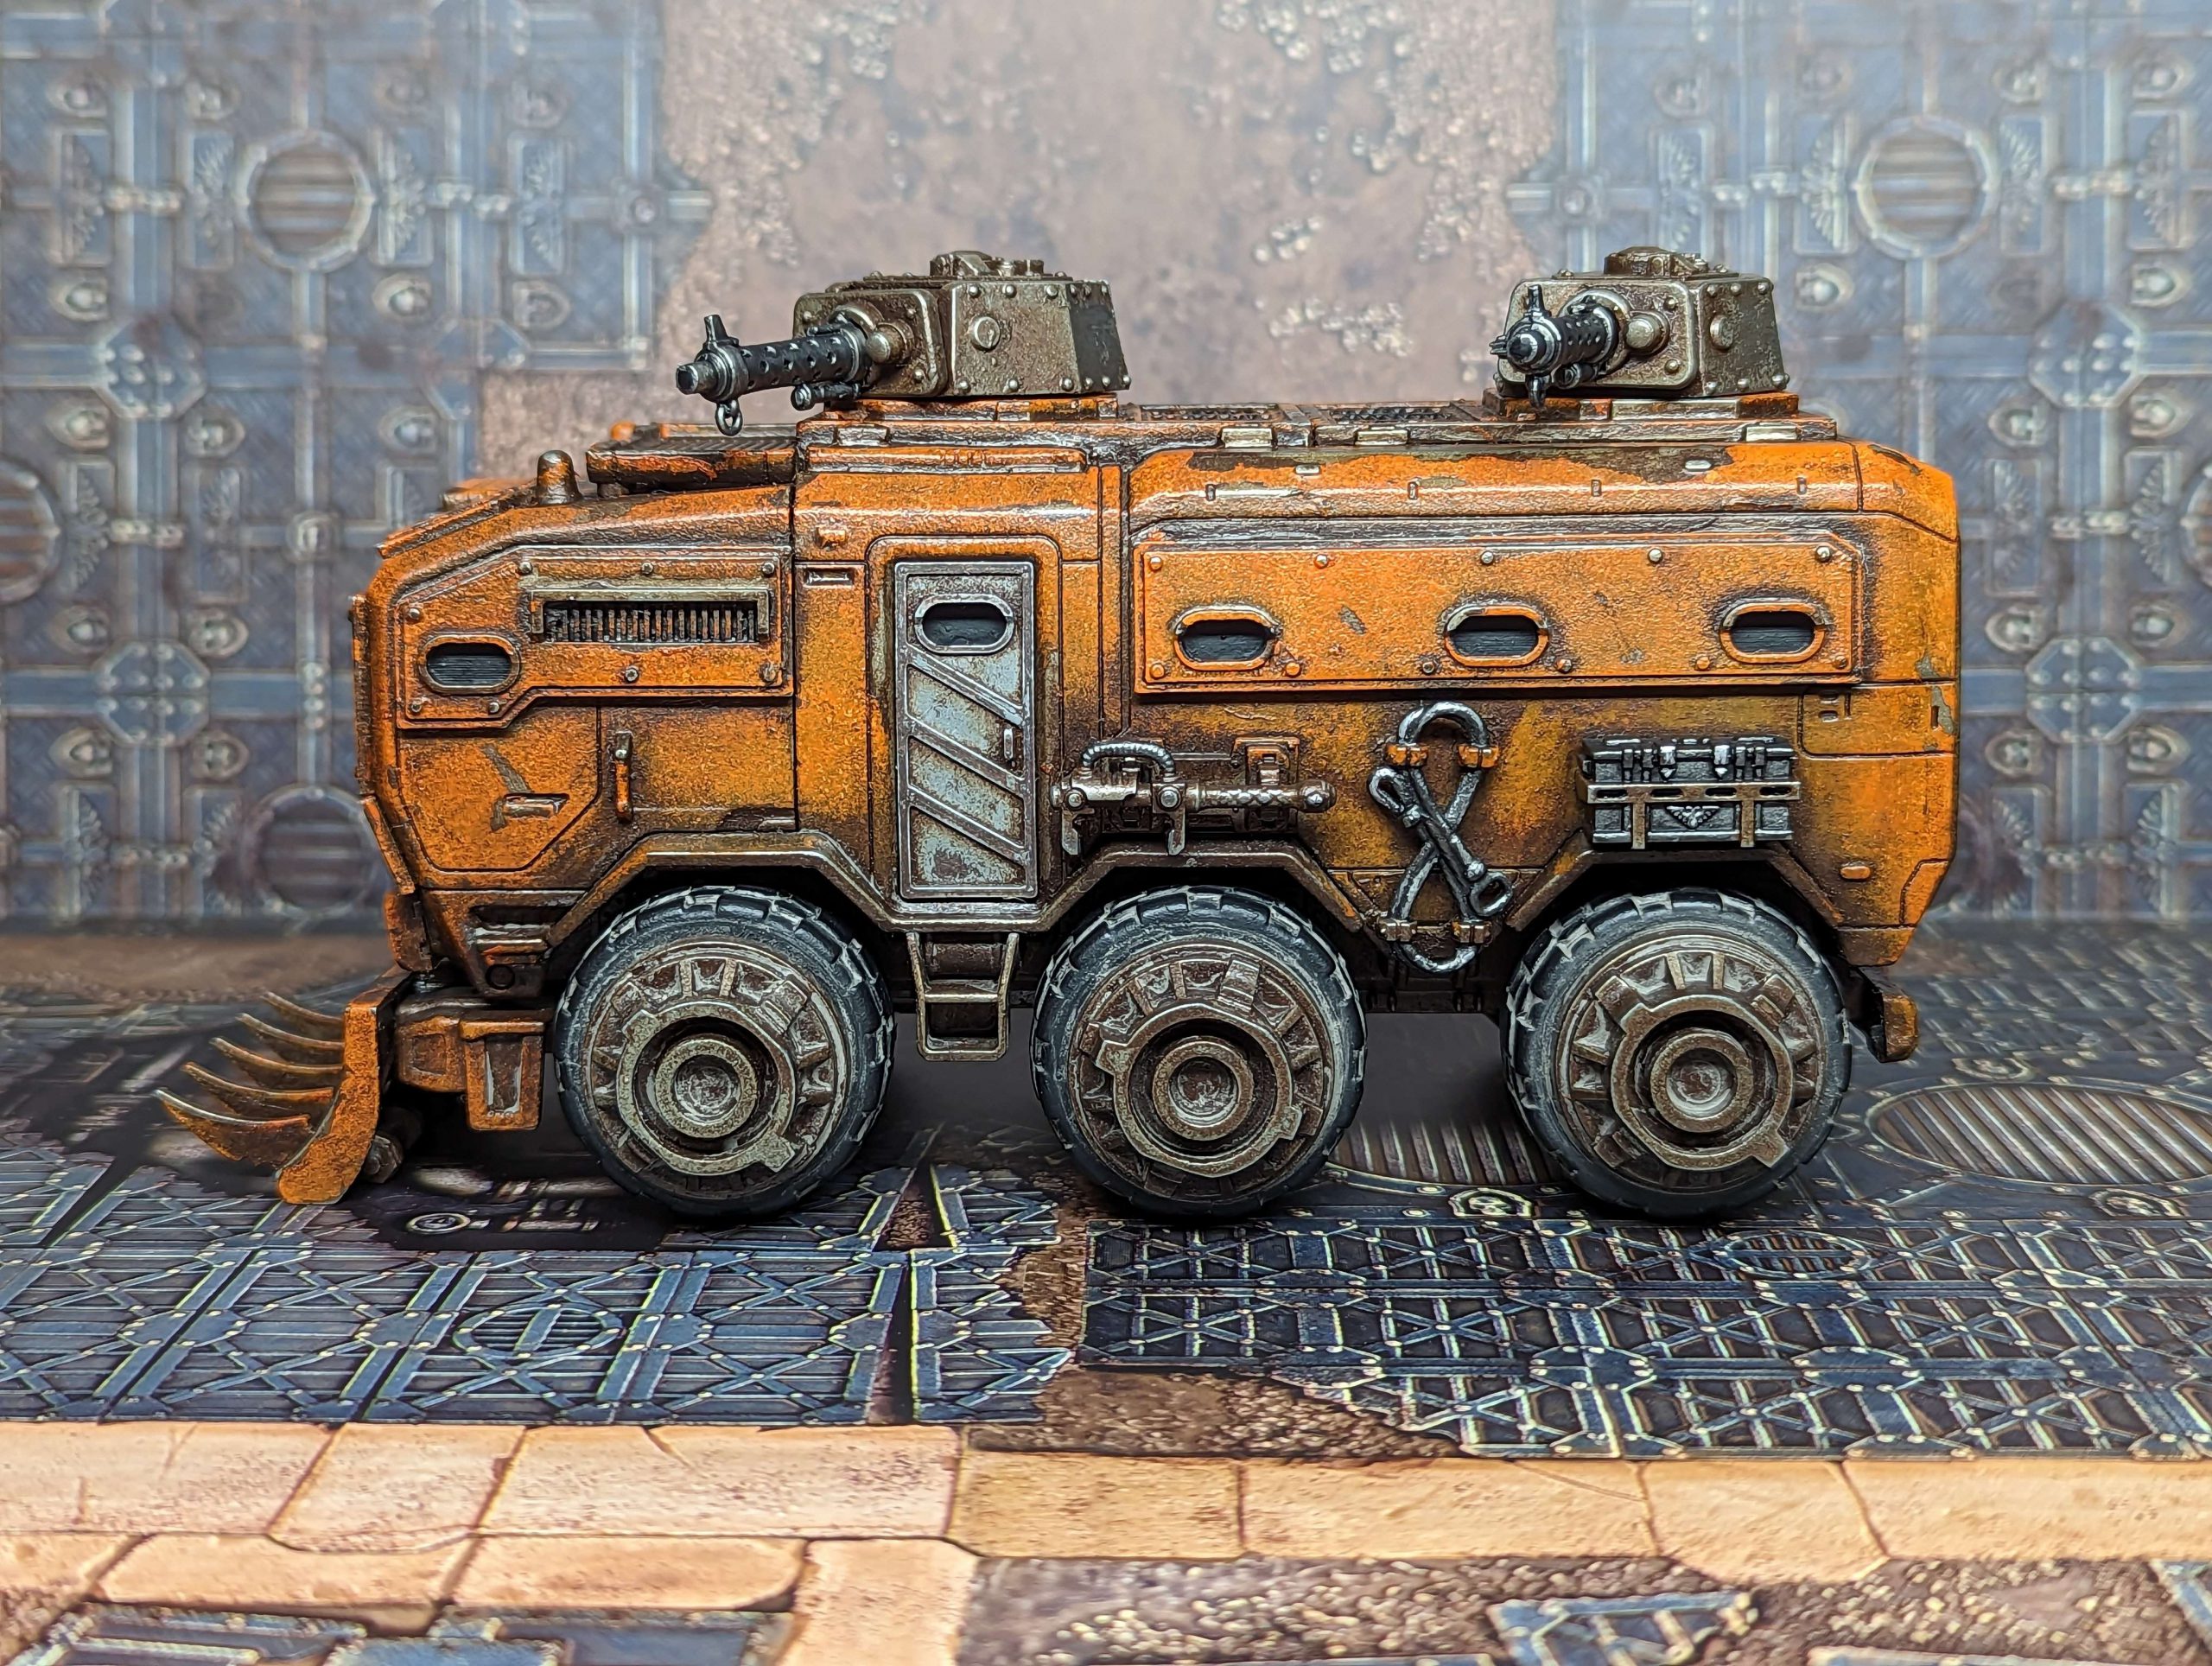
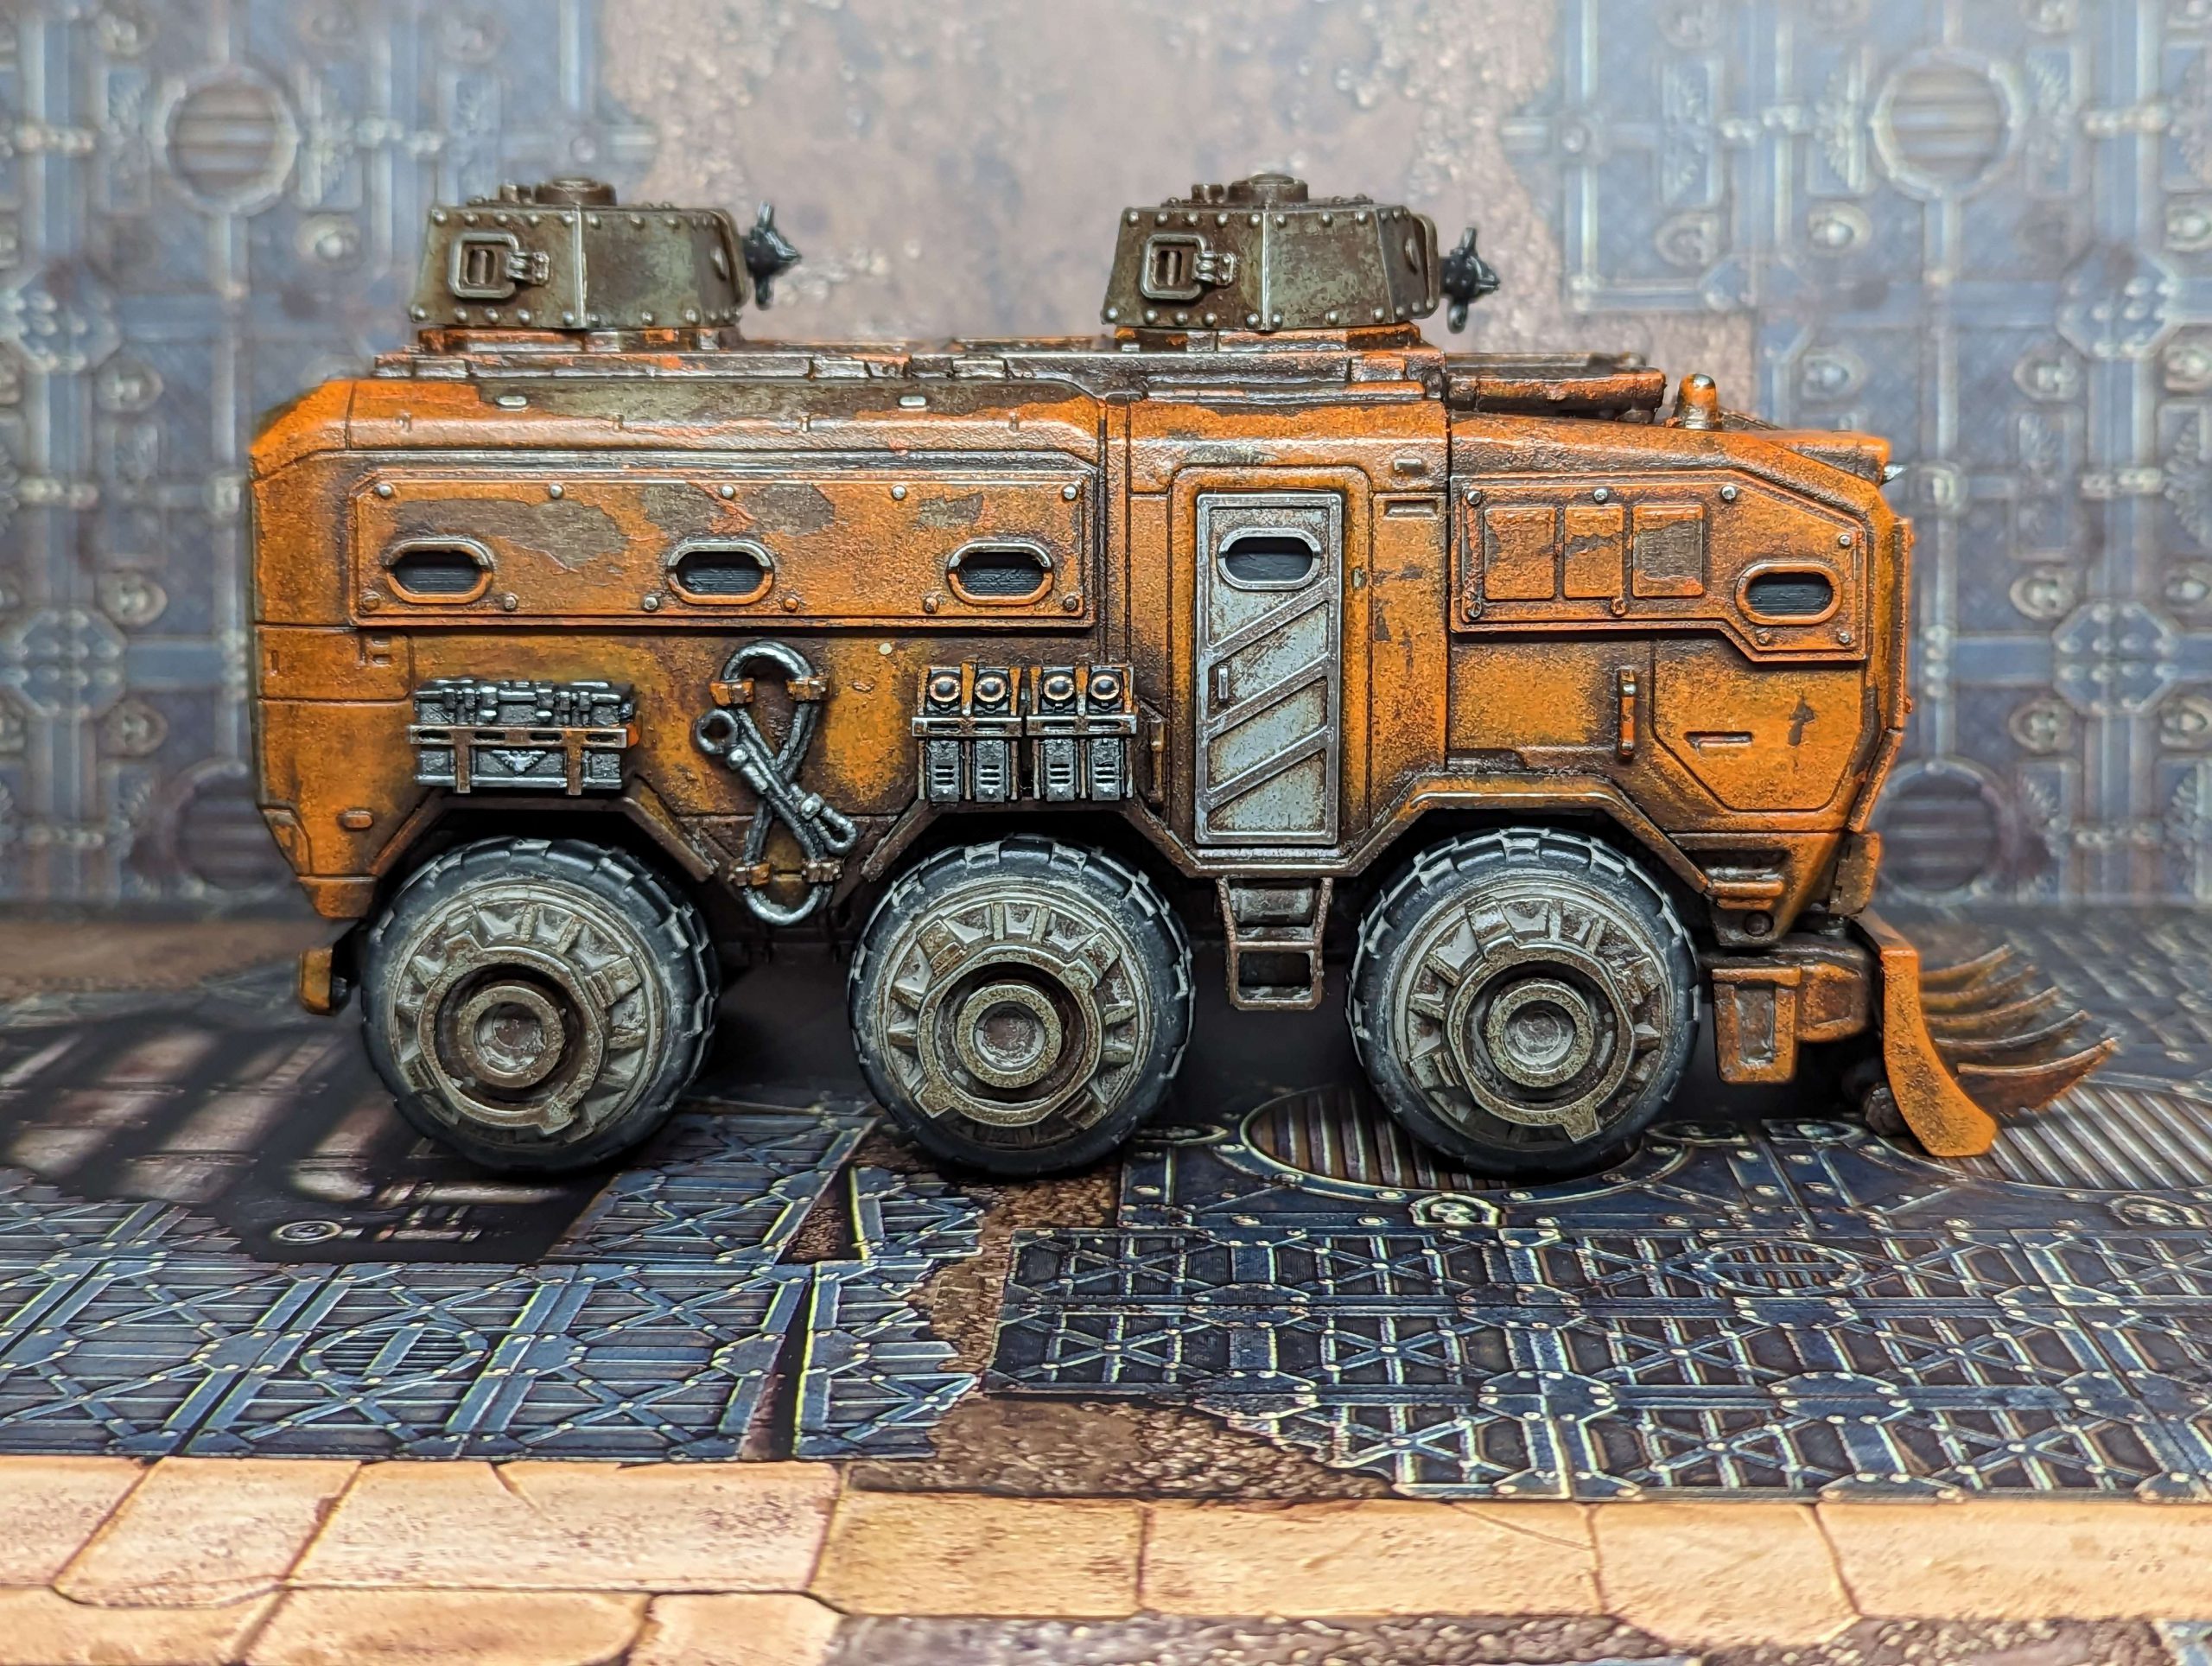
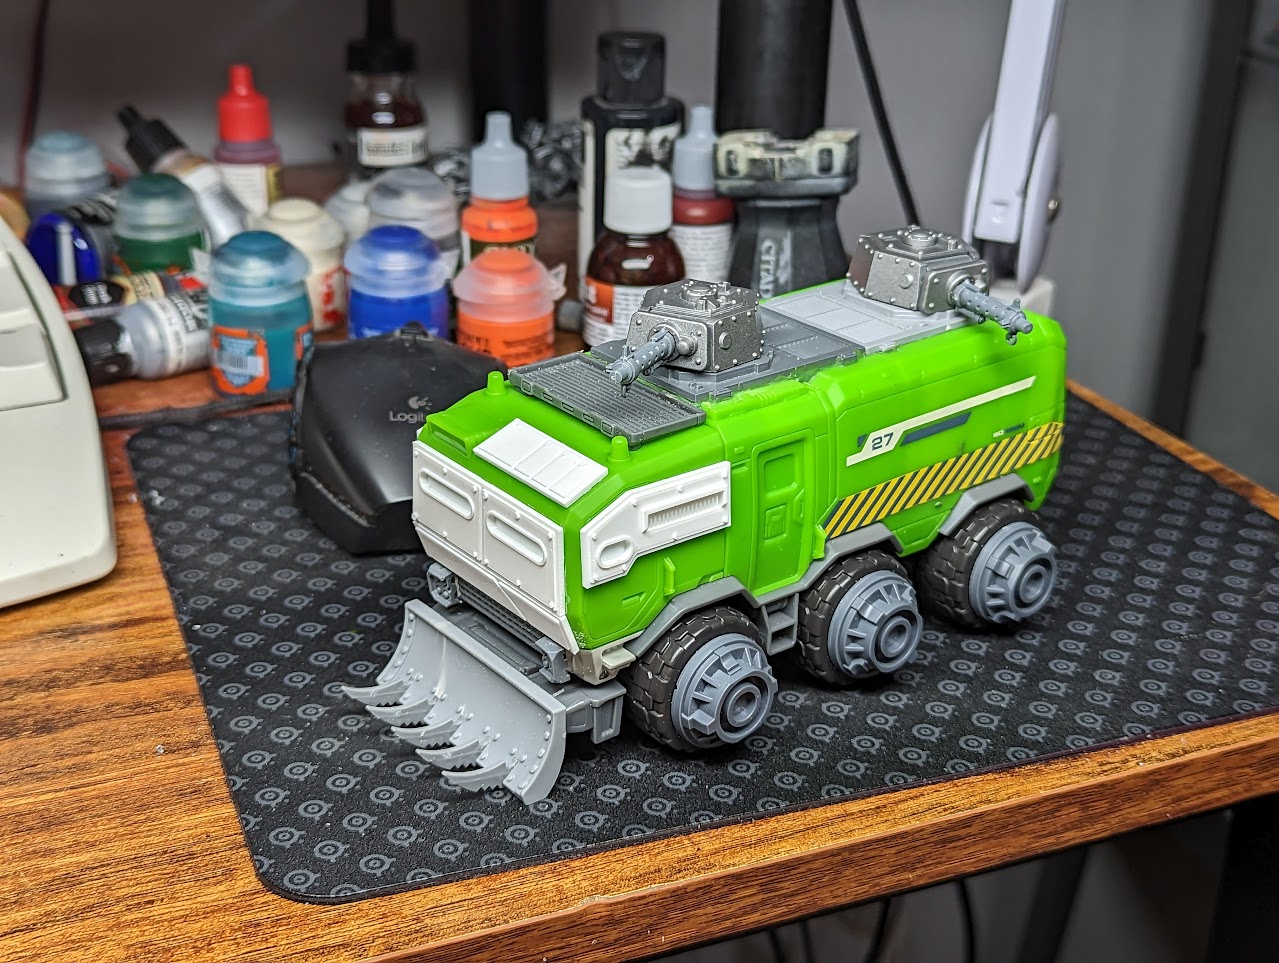
After buying one of these things at Fowler’s behest and then hiding it from my truck-obsessed son for weeks, I was reminded that we’re scheduled to do something and went to work. My goal was to make something that matched the aesthetic of Warhammer 40k, which tends to feature a lot of big heavy rivets, while also making something that would serve as a viable heavy vehicle. That meant finding a way to put two guns on the thing, and after seeing the firing ports from the Chronos Pattern Ironcrawler I thought it would be fun to explore those as well.
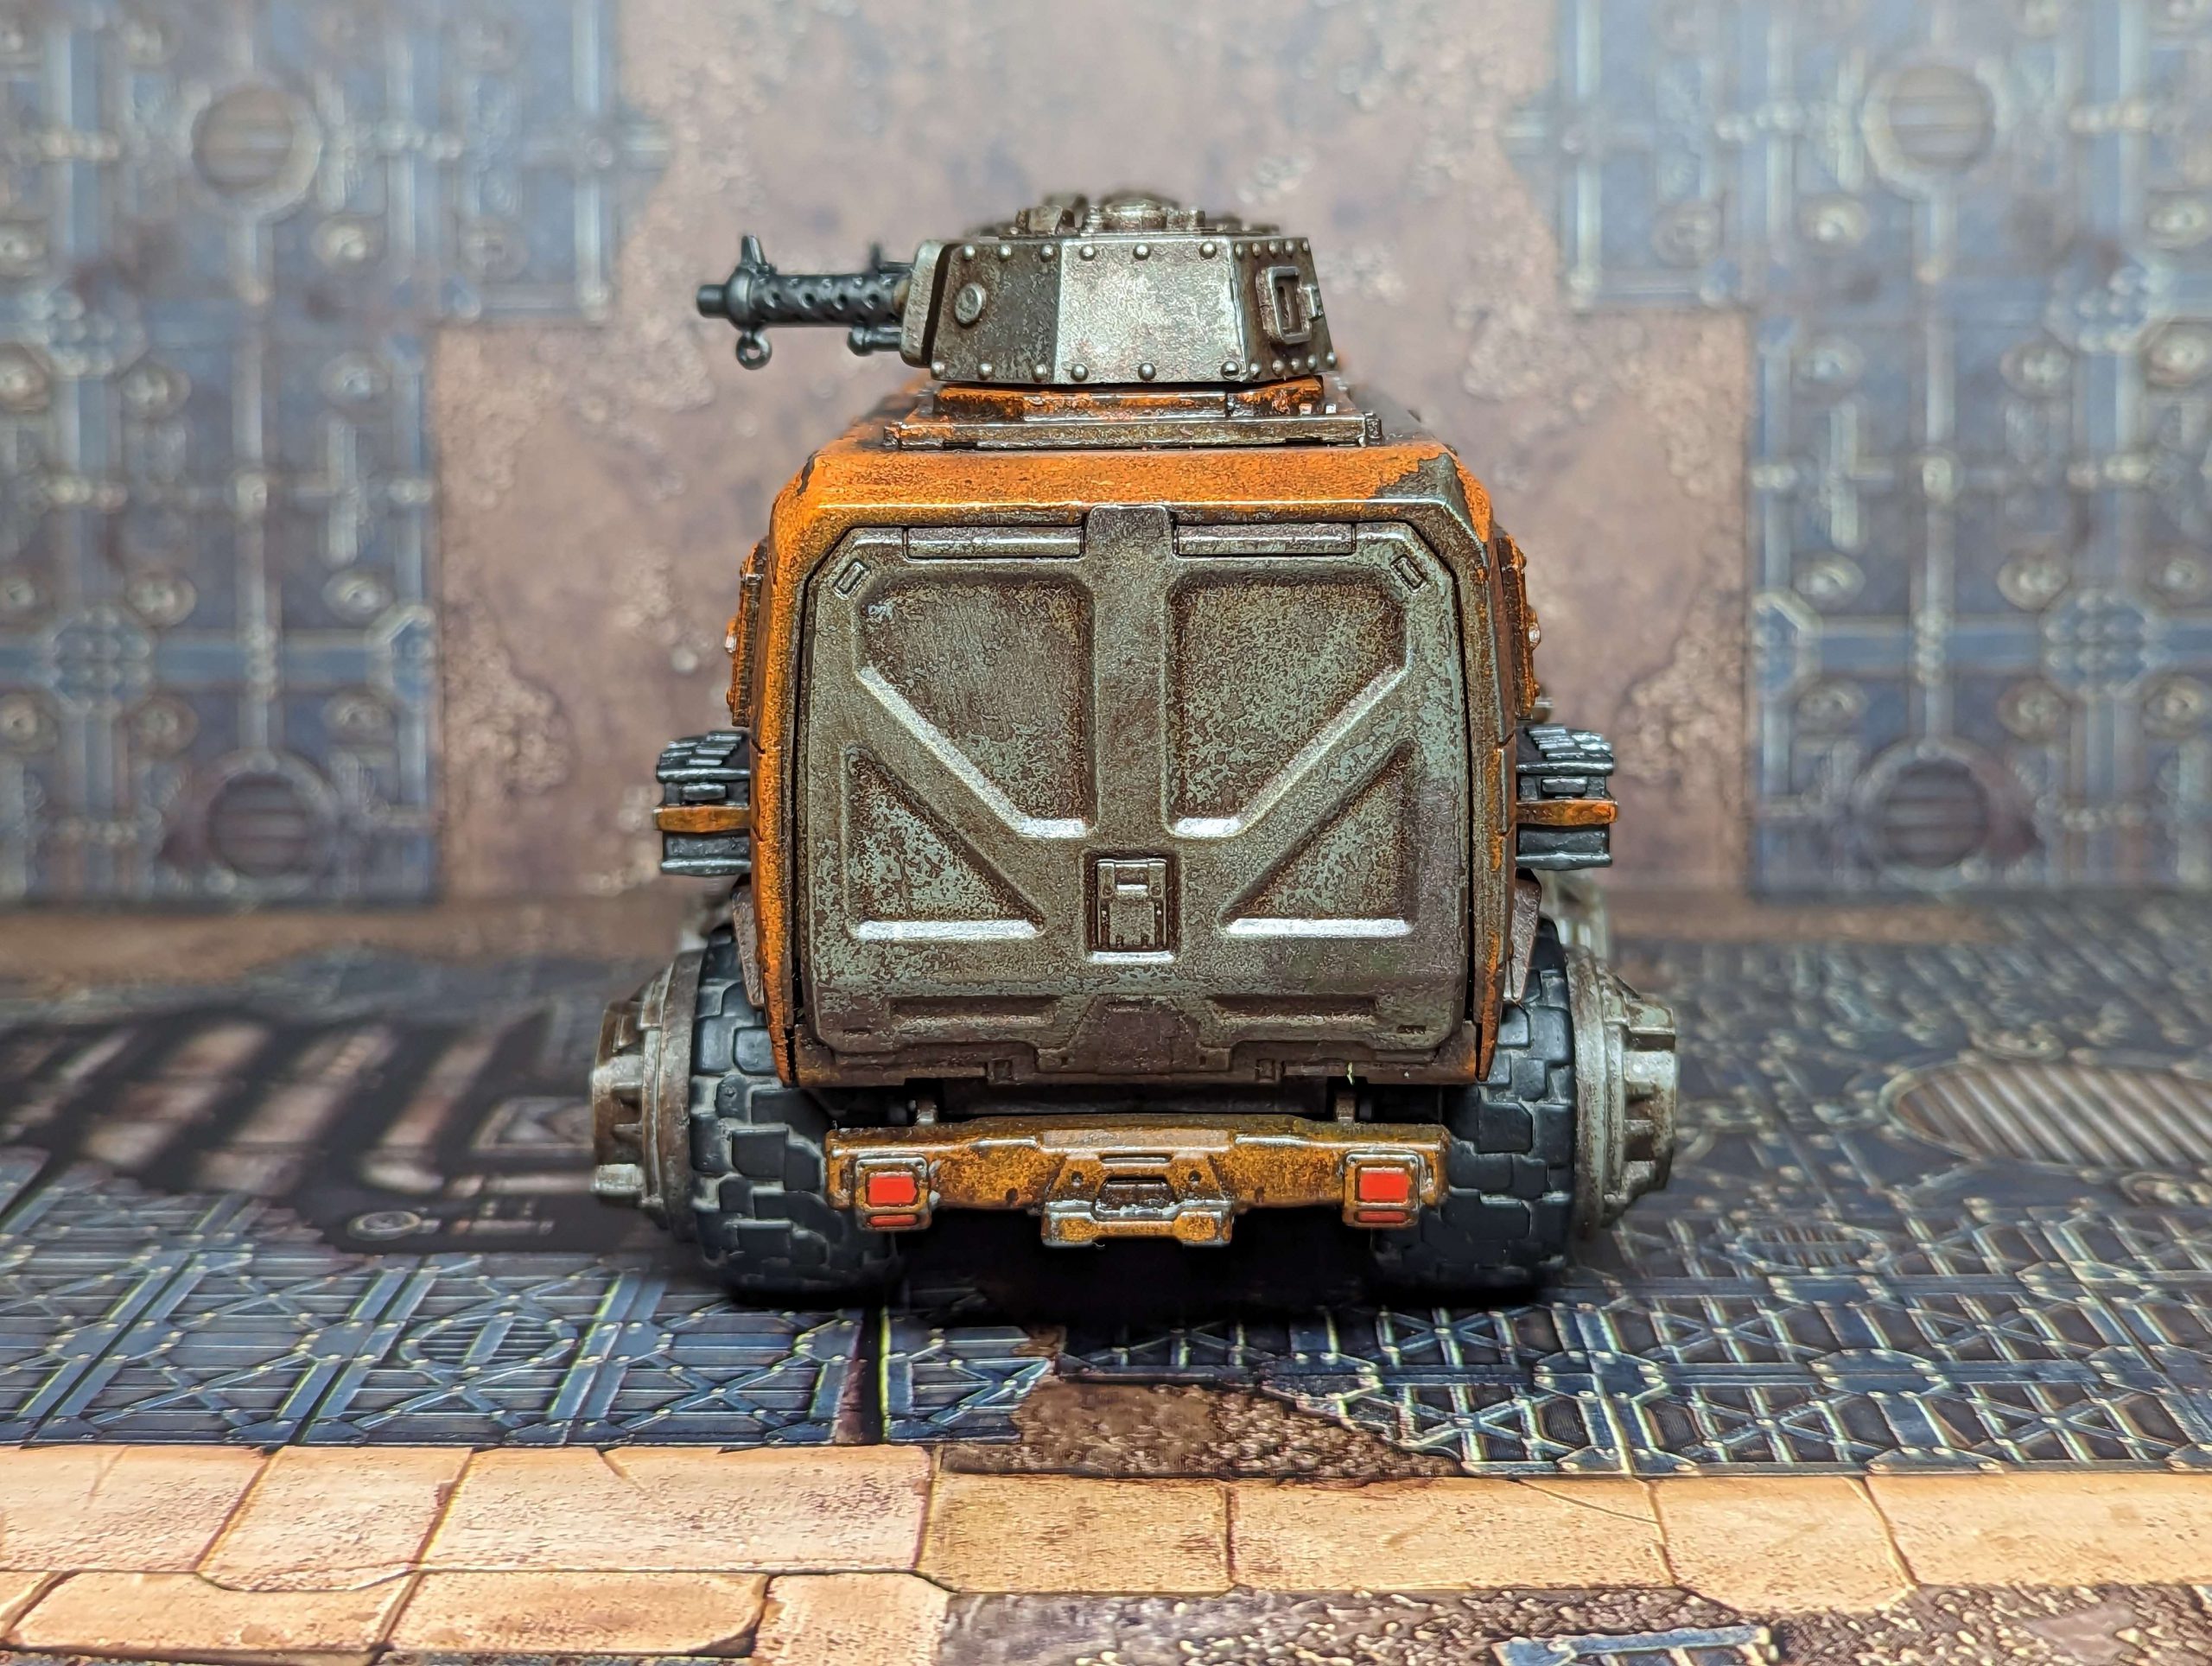
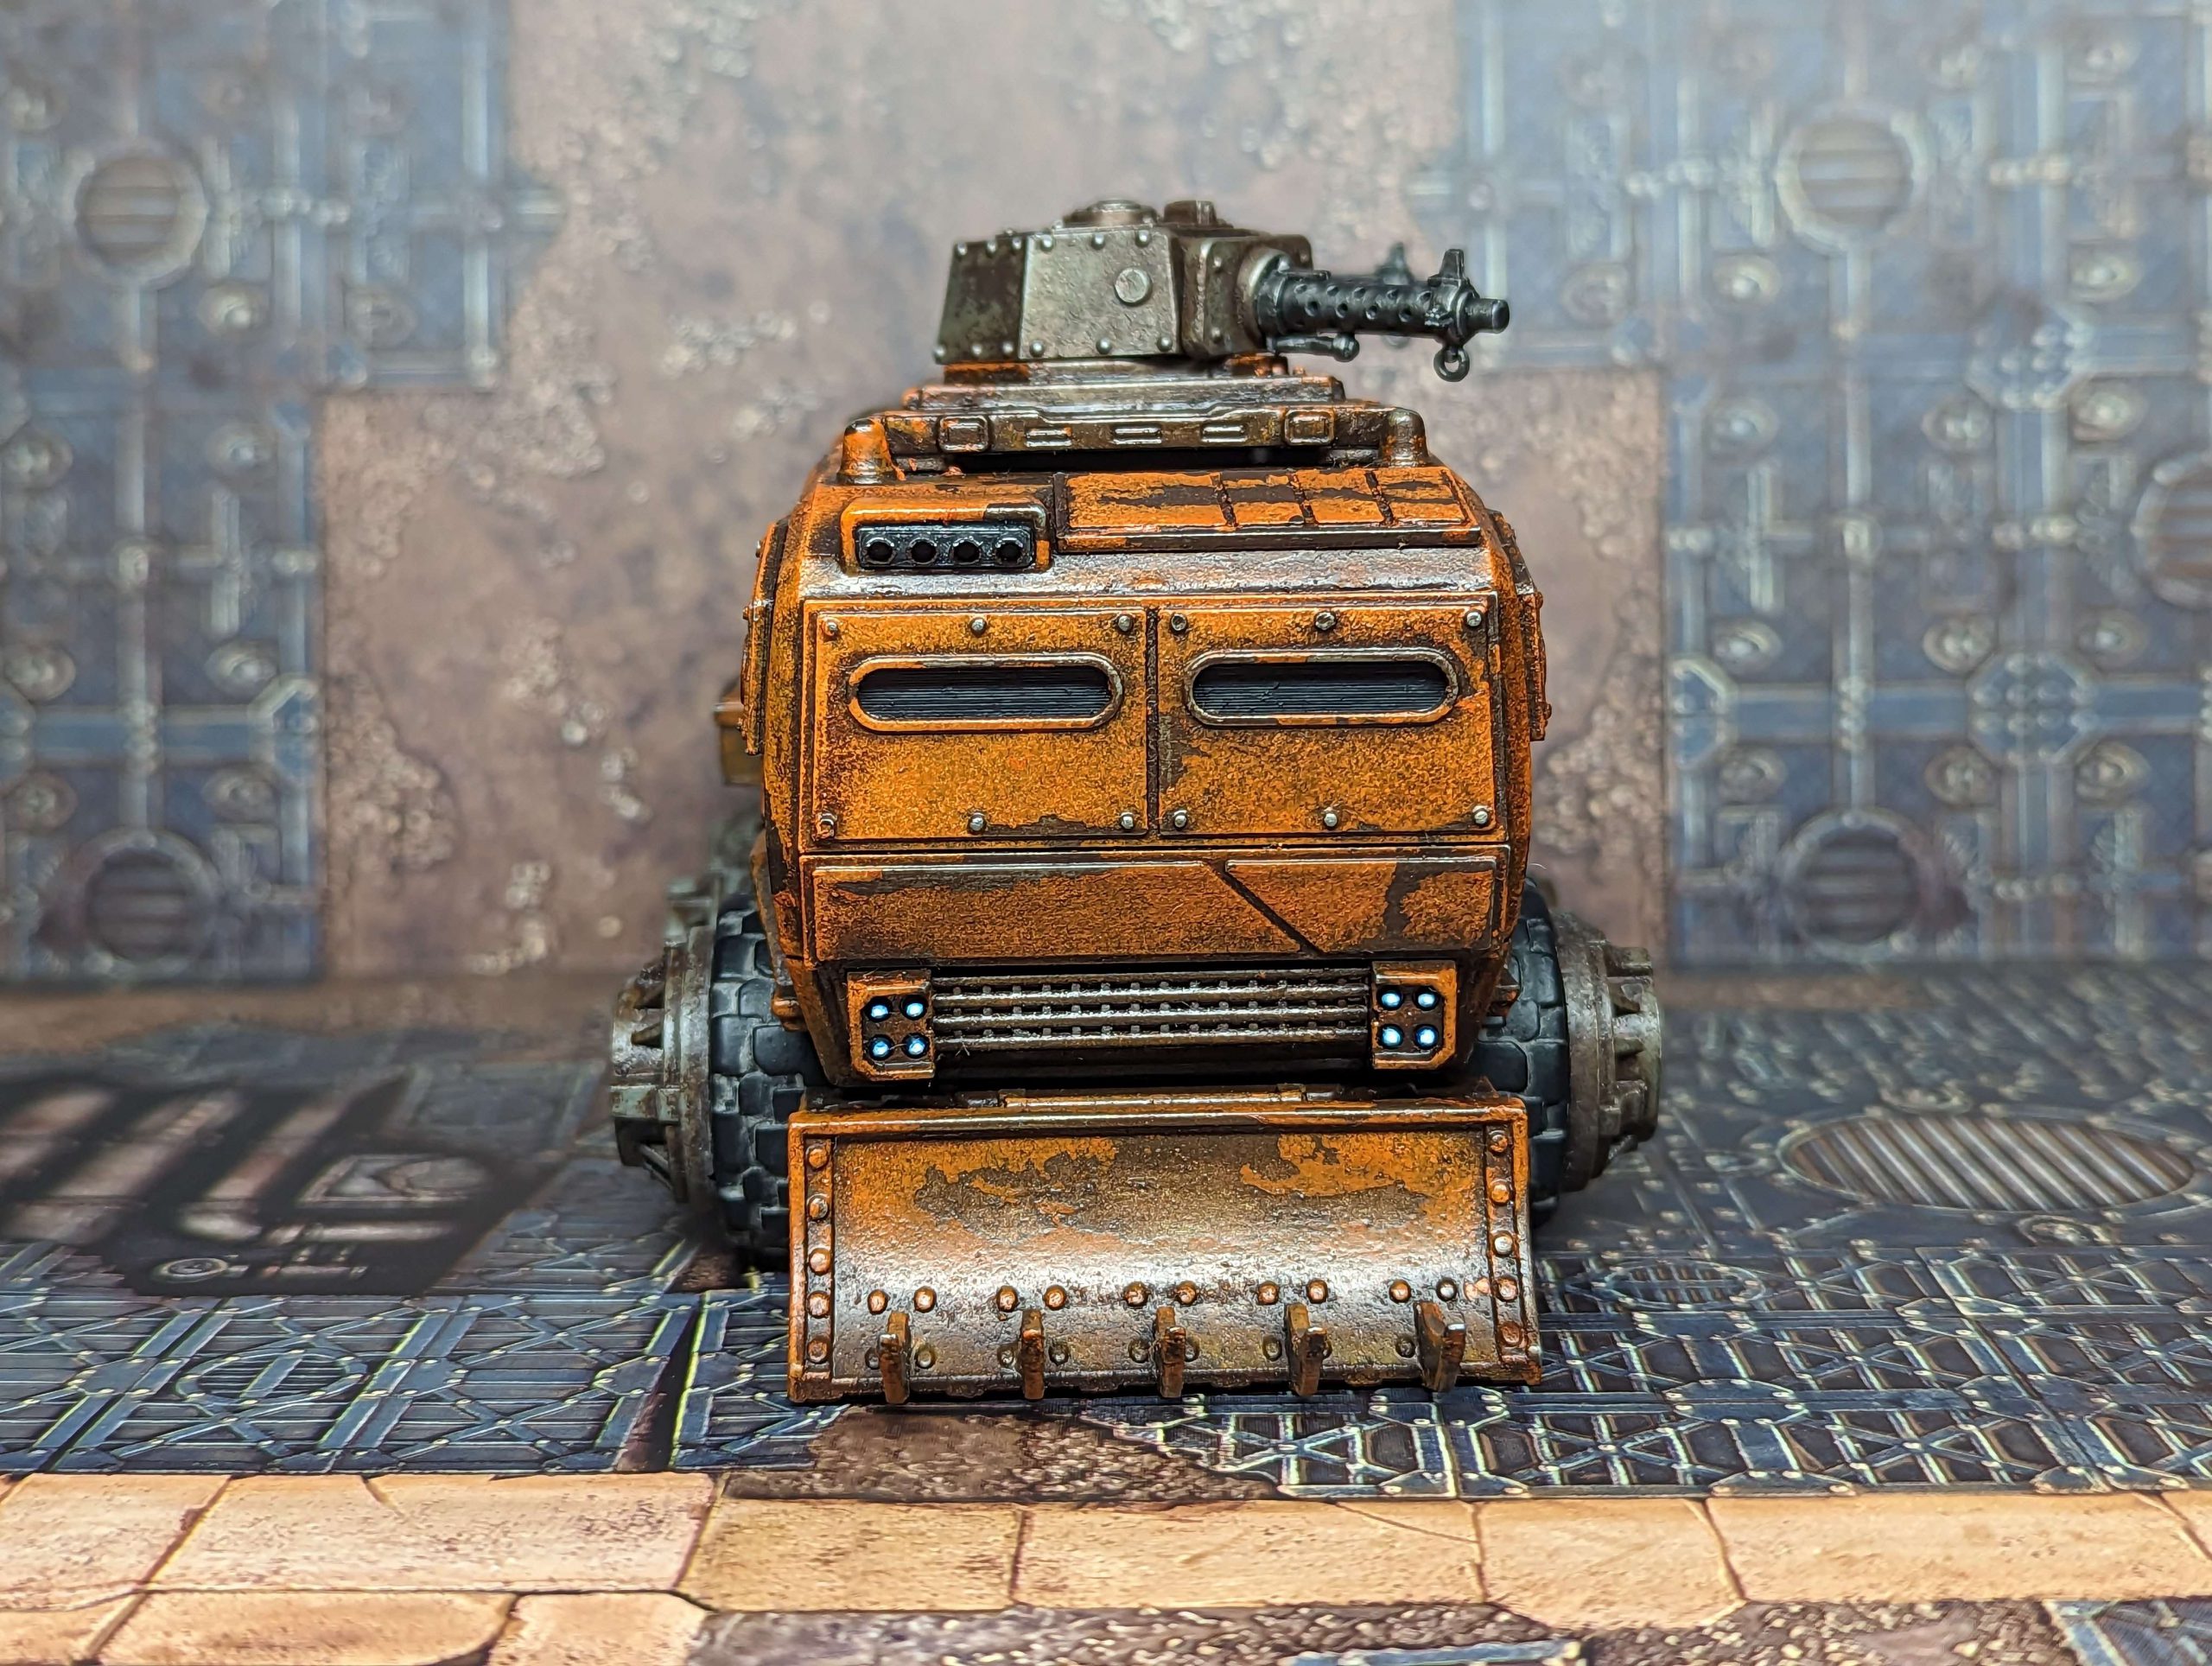
My process is generally haphazard and involves throwing things at a model until I’m happy with the result. First up was the front which was a bulldozer blade from an old Chaos vehicle kit and the hubcaps which are inverted pipe ends from Sector Mechanicus. Next I worked on the guns. First I used a dremel tool to even out the top, then I added two of the turret plates used on Rhinos. A bit of Green Stuff filled any gaps. For the turrets themselves I used side sponsons from a Baneblade with a big shoota barrel stuck on the end. Gluing on a pair of 25mm washers underneath makes them fit perfectly, and I magnetized the barrel in case I wanted to switch it out.
That left the windows. At first I played with some tank bits I had lying around, then experimented with plastic card. Nothing really worked, as either it seemed too jury-rigged compared to the rest of the model or it just didn’t feel sufficiently thematic. That’s when I remember that I have a 3D printer and several years worth of CAD experience, so I took advantage of my Prusa Mk3S+ and modeled some pieces. I took inspiration from the Ironcrawler and the narrow oval windows and modeled pieces for the front and sides. I then followed up with models for the doors and the little square bit in the front. The pieces were printed out of PLA with a 0.25 mm nozzle and a 0.05 mm layer thickness with variable layer height used to reduce printing time. If you would like to try out the pieces yourself I put them on MyMiniFactory.
From there I used the “Wax On, Wax Off” method I discussed last week, starting with an undercoat of Army Painter Gunmetal before adding a layer of Rub n’ Buff Spanish Copper and then orange and gray acrylic paints. The water soluble oil paint used was Windsor & Newton Burnt Umber. For the wheels I used a combination of light gray and asphalt dirt pigments mixed with water and binder; after it dried I used a wet make-up sponge applicator to clear off the excess.
One thing to note was that the plastic on this model is very, very smooth and even the Army Painter primer didn’t stick to it. It is easy to clean up with another application of Spanish Copper, but it might be worth using a plastic-etching primer which might dig in a bit better. You could also consider lightly sanding the toy. I also would recommend using a color other than gray as an accent, as it ended up being really close in appearance to the steel. Something like a blue would have provided a bit more contrast, or you could prime the model brown instead of metal to really emphasize the rust.
Fowler: I typically don’t rattlecan prime, but for this specific case I recommend what Kevin suggested. Personally, I had great results with Krylon 5x Fusion as a primer.
And that’s it! Well, sort of. Fowler bought 4 more of them (and Kevin bought another as well) and we suspect that these trucks are going to make it on to quite a few Ash Wastes tables. We have had our gnomes searching for non-US suppliers of Lightyear trucks but have not had success – if you find these at a UK / European retailer please drop us a line at Contact@Goonhammer.com and we will link out to that store in this article!
