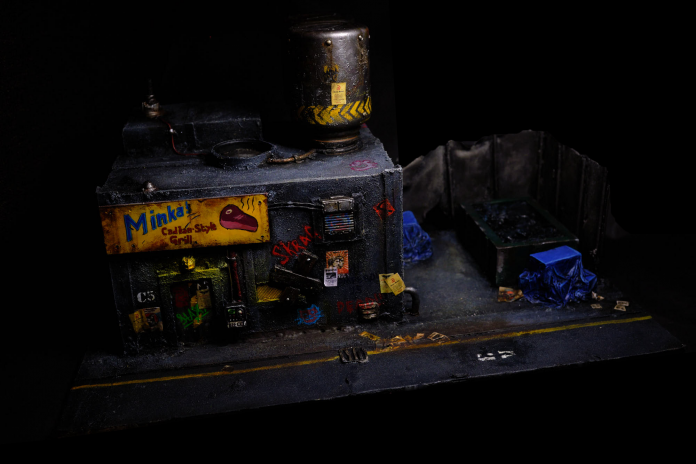
Of all the places people inhabit in the forty-first millennium, hive-cities are perhaps the most miserable. Vast spires rising from ashen wastelands, as though the mounds of cosmic termites. These incomprehensibly colossal agglomorations of mankind are formed into a literal class hierarchy. The wealthy dwell in opulent surroundings high atop the peak, above the smog layer where the light and air are fresh and clean, the rest dwelling in ever more dire circumstances the more one descends the countless layers that make up each hive, until finally, one arrives at the Underhive – where the massed poor dwell among the fallen effluent and garbage of those above.
Even in the darkness and misery of the hive, the hardworking men and women need to eat something, and so too do the members of the hive’s various criminal gangs. Untold millions of restaurants and cafés serve the denizens of the hive’s lower layers, and one such establishment is Minka’s Cadian-Style Grill.
My initial goal for this project was simply to build something that would serve as a good “set” for photos of my Genestealer Cultist models, but what began as a simple block building grew, taking on a life of its own as a piece of gaming terrain that’s also a sort of diorama.
Construction
I began by deciding on measurements that made sense with 28mm “heroic” scale and the type of building I wanted to create: (?Hx?wx?d). With the measurements decided on, I marked out the walls and roof of the building on 1mm thick ABS Plasticard and (very carefully) cut them out with my utility knife. To cut thick plasticard like this, it’s a good idea to score the lines with repeated cuts in the same direction. Put the point of your knife on the line, and using a steel rule, draw the blade along it.
Safety tip: It’s better to use a sharp blade for this, as you’re far less likely to cut yourself using a sharp blade as opposed to a blunted one.
When the scored cut is deep enough, you can snap the card.
With the walls cut out, I marked out a door and window with a ruler and pencil, and cut them out using a hobby scalpel. After some digging around in my trusty Bits Box, I found the perfect industrial-style door. I’ve no idea which kit it came from, possibly the Baal Predator. I cleaned up the mould lines, stuck it together, and glued it into place behind the doorway that I’d already cut into the wall.
I assembled a doorframe from strips of Plasticard and added it to the front for a bit more structure, at the same time I made a lintel and sill for the window. I cut a bit out of a sheet of fine metal mesh and stuck that behind the window hole as a sort of ersatz “security glass”. I also cut up a lollipop stick to use as a plank nailed over the hole. I went back a bit later and added a second, for no real reason.
A rectangle that was left over as the result of the wall-cutting turned out to be the perfect size for a sign, I love a little bit of serendipity in crafting!
With that done, I cut out four right-angled triangles to add a bit of rigidity to the box, before assembling it all with PVA glue. If I were to do this again, I would probably do a lot more at this stage rather than waiting to work on the assembled box. I’d drill the bolt holes in the concrete panels when it was flat, for a start!
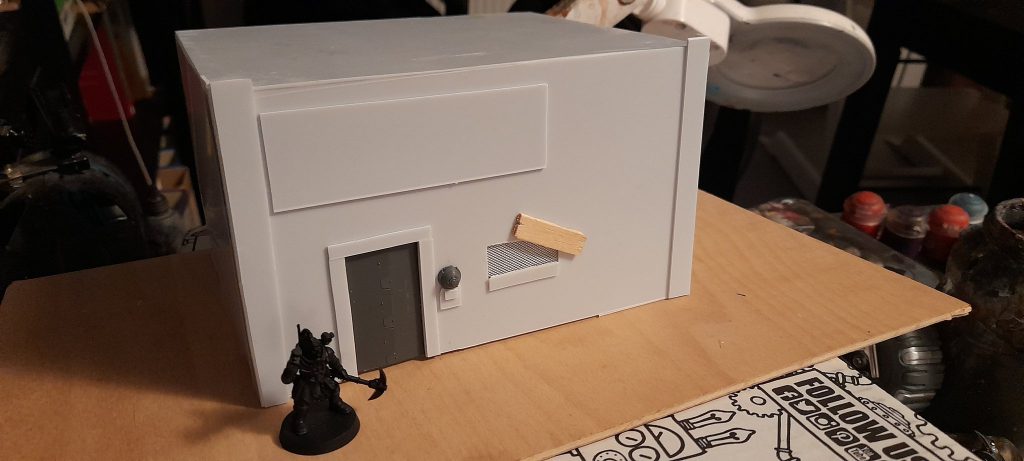
In hindsight, it would have been much more sense to have simply looked for an already-existing box the right size and stuck the plasticard panels on the outside. Oh well, you live and learn, and one of those life lessons is “It’s a total pain in the arse to build a box out of Plasticard from scratch, so don’t bother.”
For a little more structural support, I cut two strips of plasticard and scored them in the middle so they’d fold over to a right-angle, and stuck them to the corners of the box. These vertical struts greatly increased the surface area available for the glue to stick, and they looked quite good as well, bonus! In addition to this, more thin strips were laid across the surface of the box from top to bottom to create the illusion of concrete panels, rather than large flat slabs.
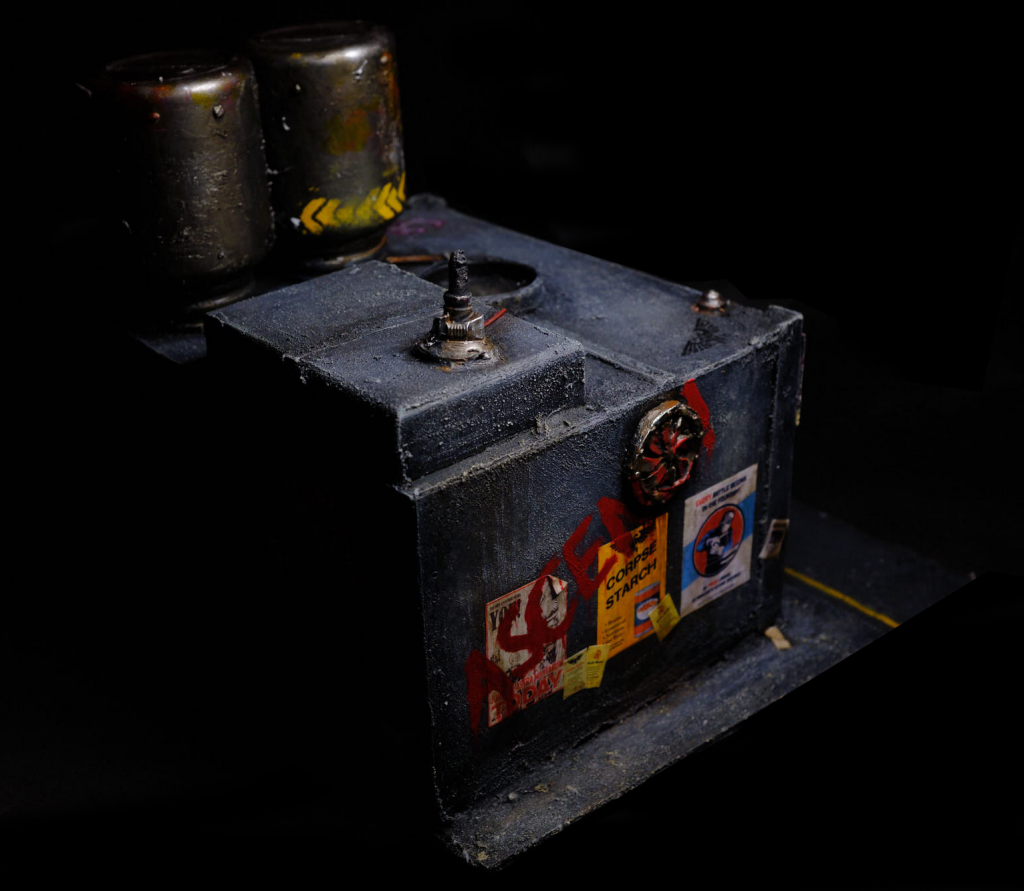
Two empty chewing gum containers with the lids taken off and flipped upside down became water tanks on the roof. The ring around the lid of one of the chewing gum containers with some of the wire-mesh behind it became a skylight. Whether there’s any sky in the hive to make having a skylight useful is immaterial, it helps to break up the flat surface of the roof and add another “obstacle”.
At this point I realised that the box was still not sturdy enough. I can’t stress this enough, do not build your own box, use a box that already exists and glue plasticard panels to the front, you do not need it to be hollow. Fishing around in my cupboard I found a flat piece of plywood from another project, not wanting to cut it down (laziness), the building instantly gained a small yard, a pavement, and a little bit of roadway in front. An extremely cheap (1€~) treasure-chest from a local craft shop, with the hinges and lock removed, became both a dumpster to grace the backyard and a portion of raised ceiling on the roof to denote the “kitchen”. The nozzle from a superglue applicator made a fine flue for the grill oven.
The Bits Box came in handy once again, with a random metal box and the sliding shutter from the Genestealer Cults Goliath kit becoming an upstairs window, sensibly shuttered against the violence and decay of the Underhive. The intercom/door panel was clipped from one of the Necromunda objective markers
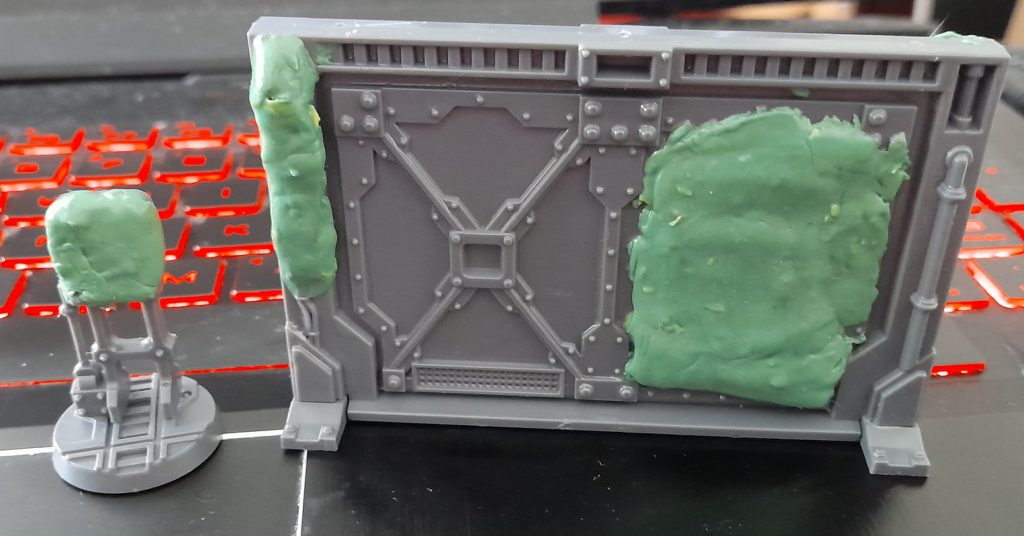
Meanwhile, I made a few press-moulds from green stuff, taking details from the original Necromunda reboot box, and Kill Team Octarius terrain (lots of industrial panels, fans, grates, lamps, and gribblies) and cast them. They would be far better if I had access to Oyumaru/Blue Stuff, but I don’t, so I made do with what I had to hand. The details on the cast pieces are not very sharp, but since they’re mostly rusty junk pieces, it doesn’t actually matter all that much, when they’re painted the softness of detail won’t be very noticable.
The asphalt of the road surface is simply sandpaper. That’s it, nothing special about it, just some sandpaper glued down to make a rather poorly maintained road. Once the sandpaper was down, a plasticard pavement at the side and one of the cast green stuff grates really completed the illusion of a street.
After this I did something rather stupid, covering the “yard” in a piece of Plasticard. There was really no reason for me to do this, I was going to texture the thing anyway, it makes no difference whether the surface underneath the texture is plasticard or wood, whoops. You wasted some good Plasticard there, keewa.
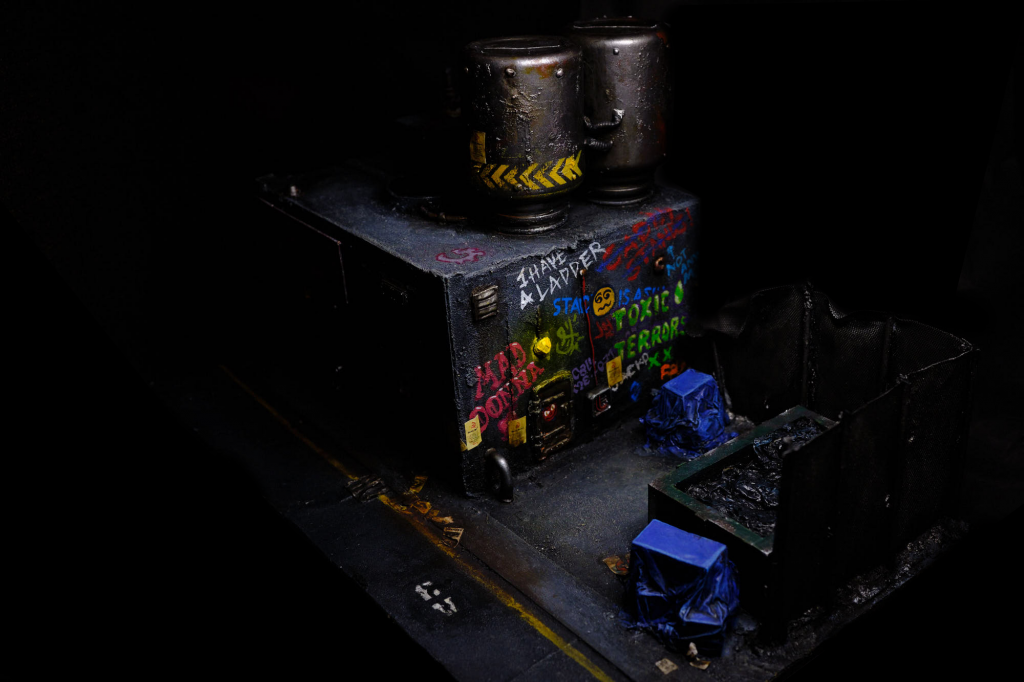
The yard is completed by the addition of some boxes covered with tarpaulin, these were super simple to make, I took some waste extruded polystyrene “stones” that I’d cut for a different project, arranged them in a sort of legible but sloppy manner, stuck them together with PVA (Superglue will melt polystyrene!) and draped the whole construction with a piece of tissue paper soaked with PVA glue, using a damp brush to form the “fabric” around the “boxes”. After drying overnight, these boxes were rock solid, and looked quite natural.
I’ve seen other guides to making these boxes that use cotton fabric trimmed from old t-shirts for the tarpaulin, which is a great idea – at scale the cotton fabric has a nice rough texture that really takes drybrushing well, but if you don’t happen to have any t-shirts that you’re willing to cut up for a hobby project, tissue paper will do.
Around the edge of the yard, I made a long L shaped mound with a 50:50 mix of Milliput and Plasticene, sticking some barbeque skewers in while it was still soft to make the holes for my fence posts, which were then made from those same skewers and glued into place once the Milliput Mound was dry and hard to the touch.
Texture
Armed with my trusty tub of Vallejo Earth Texture Paste (Desert Sand, but the colour was immaterial for this, since I was going to prime everything black anyway) and a spatula, I started spooning generous lumps of gritty texture onto everything destined to be concrete and then spreading it around with my hand at random to create a nice amount of variance in the texture, the goal wasn’t to cover the whole thing with a thick layer of the paste, just enough to ensure that the surface wasn’t too smooth. Even the finest concrete has a texture to it, and I wanted to be as realistic as possible in my approach to the general structure. The contractors in the Underhive aren’t the best, so the general finish here was rather rough, I like that. At the same time, I textured the floor of the yard and the mound I’d drawn for the fence-posts.
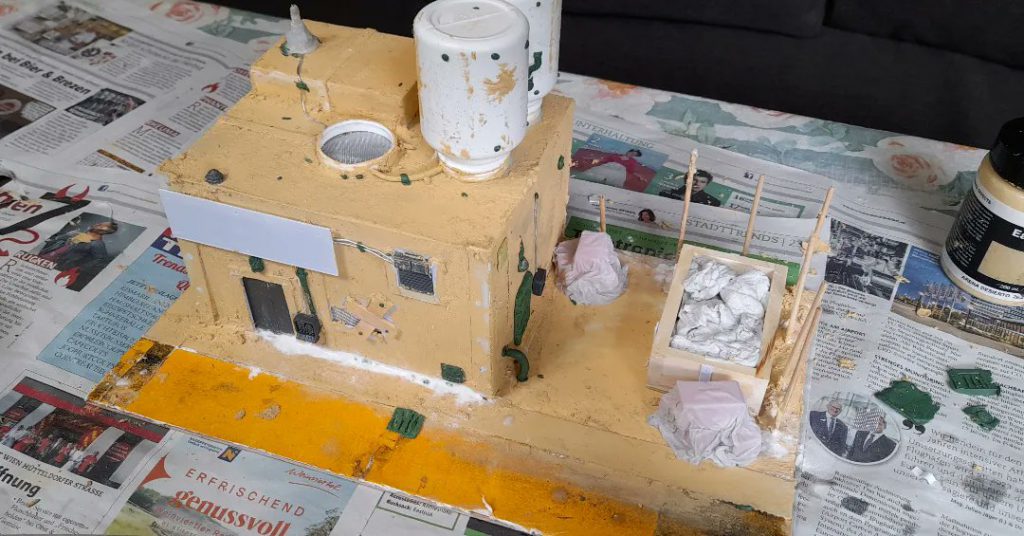
With a little green stuff/plasticene mix I made some skinny sausages and used the GreenStuffWorld roll maker to texture them into various tubes and wires to connect parts with one another, although some of these connections are rather spurious at best. Why would the chimney from the grill, or the water tanks, need to be connected to the skylight? Who knows? Best not to ask. Any wires that were either too long or too fiddly to make with green stuff were made with spare pieces of solder. Using junk and off-cuts and turning them into something cool is a real pleasure of scratch building your own stuff, as long as you’ve got a little creativity and a lot of elbow-grease, you can do it too!
Painting
With everything cured, dry, solid, and stuck down firmly, the whole thing was treated to a spray of Black Vallejo Surface Primer. This actually took quite a long time (around an hour), given that my airbrush is a regular miniature airbrush (0.3mm nozzle) and this “miniature” is rather big. Any spots that escaped the attentions of the airbrush had some primer painted onto them with a regular brush.
After the primer was dry and cured, it was off to the races. Using some cheap makeup brushes (€0.50 instead of €10+ for Army Painter, Citadel etc) I drybrushed like a man possessed, starting with an extremely heavy drybrush of Eshin Grey, progressively adding white to the mix, and finished off with a light drybrush of Grey Seer. All in all, the concrete probably took twenty minutes to go from a flat black to a reasonably convincing, textured paintjob. The asphalt of the street, meanwhile, was simply drybrushed with Corvus Black.
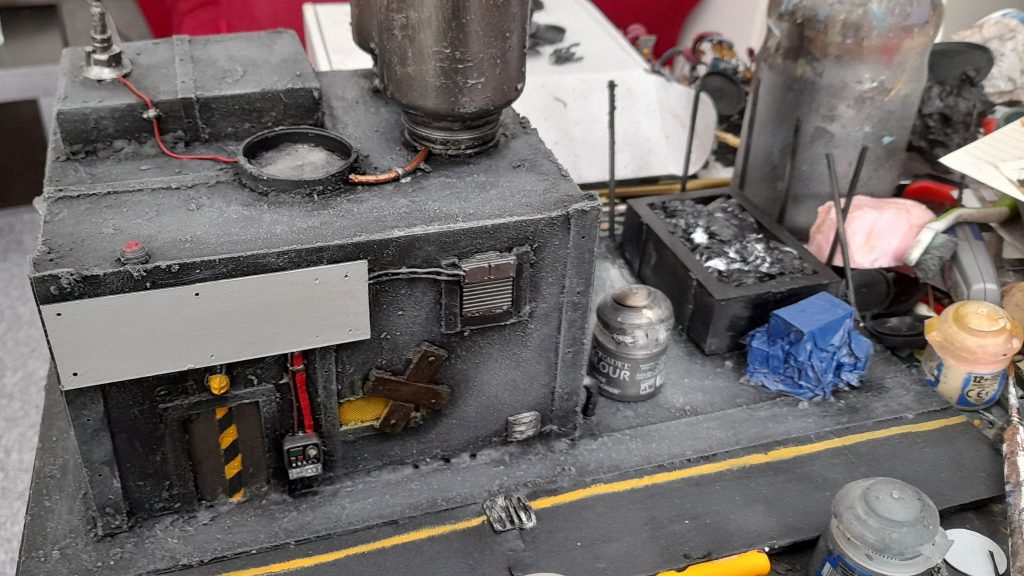
All the metals were basecoated with Citadel Iron Warriors, I like this paint for dark metallics because it’s got a real grimy feel to it, with a teeny tiny hint of warmth in the mix. This is not a world where things are clean and shiny. Non-silvery metals, meanwhile, were basecoated with Balthasar Gold. To get a nice rusty, grimy look, I watered down some Mournfang Brown to a super thin consistency and just slopped it on, letting it run into all the cracks. As the paint was so thin it had essentially split, which is what I wanted, drying unevenly and with lots of variation makes for excellent rusty-grime. Rust typically forms in cracks and recesses where water collects, so in order to preserve the pure metal on the raised parts, I just wiped them with my fingertip. Once dry, the edges of the rusty metal were given a blotchy highlight – Vallejo Model Air Steel delivered via a piece of sponge.
The wooden beams over the window received a basecoat of Catachan Fleshtone, followed by an all-over slopping of Wyldwood Contrast, perfect!
I put some hazard stripes on the front door, first by masking off a strip around the teeth and basecoating it with Averland Sunset. This took ages. I must have painted six or seven layers of that awful stuff on the door before it was a solid enough colour to continue. Keeping the masking tape in place, I used a hazard strip vinyl stencil from GreenStuffWorld and stippled the whole thing with Abaddon Black. Peeling off stencils and masking tape is a particularly perverse pleasure, the anticipation is incredible, has it worked? Has the paint bled under the stencil and made a mess? Will I get the beautiful straight lines I dreamed about?
In this case, no. The paint did bleed under the stencil and make a mess. Ho hum. While cursing the whims of fate, I tidied up with Averland Sunset and tried to keep the lines tidy. The water tanks also got some hazard stripes, but these were just straightforward yellow stencils over the bare metal, rough and industrial, just like the clientele of Minka’s. Wires were either given a coat of Mephiston Red or Abaddon Black. Straightforward enough, no need to reinvent the wheel. After that, everything was washed liberally with Agrax Earthshade or Nuln Oil. For the water tanks, I dampened the surface with a wet brush before dabbing the shades onto the large rivets, allowing it to dribble down the side without leaving some strong tide-marks. I wasn’t too careful with this, it’s meant to look dirty. Feathering the shades by drawing them out with a dampened brush really helped to smooth the transition between light and dark.
Using a pencil, a ruler, and lots of straight lines I constructed the lettering on the sign, which had already been primed with white. I tried to evoke a sort of mid-century Diner feel with the logo and type. I took the name Minka from the Cadian novels by Justin D Hill, which you should read if you get a chance, they’re very enjoyable. Once I was happy with it, I used a fineliner pen to ink the outlines of the design. Once that was completely dry, I dappled the edges of the sign with a piece of sponge, using both Screamer Pink and Pink Horror. This might seem like a weird choice, but no sooner had the pink dapples dried, out came the airbrush and the Yellow Vallejo Game Ink. The yellow ink transformed the pink into a warm rusty colour, and gives the whole thing a “20th century enamel sign” flavour, which I love. With the ink dried, the lettering and logo were painted with bright, vibrant colours, and the edges of the sign dabbed with more of that VMA Steel. Good stuff. At the same time, I sprayed a little yellow ink around the lightbulb pieces to give them a glowing OSL style look.
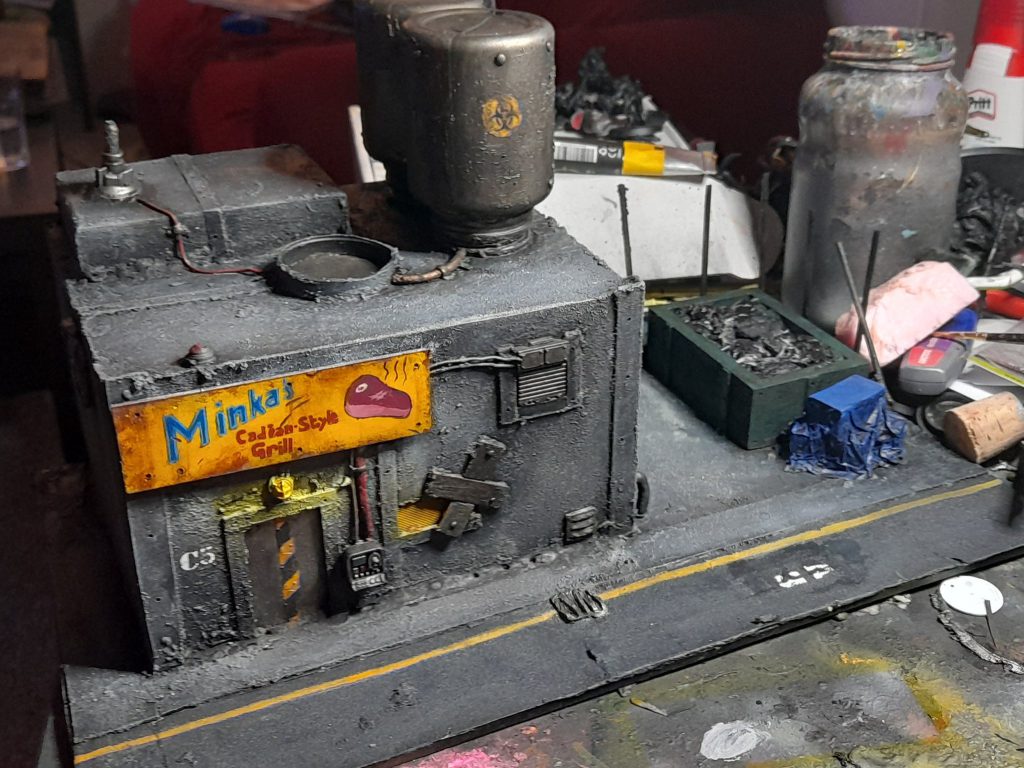
I could probably have left it here and it would have been alright, but couldn’t help myself from adding more “stuff” to the project in the name of detail. Anyone who lives in a city knows that, even in a repressive dictatorial hellscape, the walls never stay this bare for very long, and to that end…
Graffiti and Posters
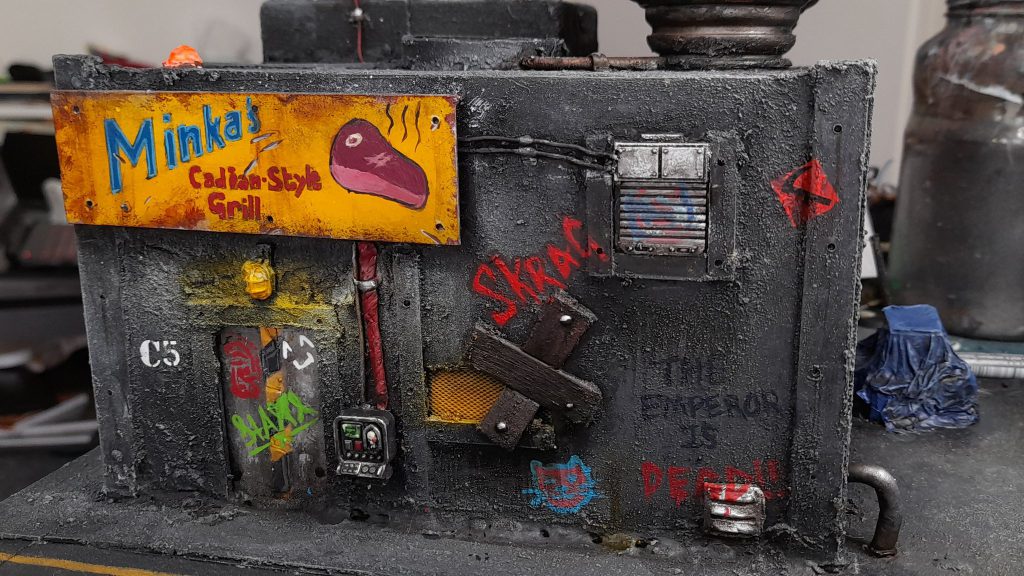
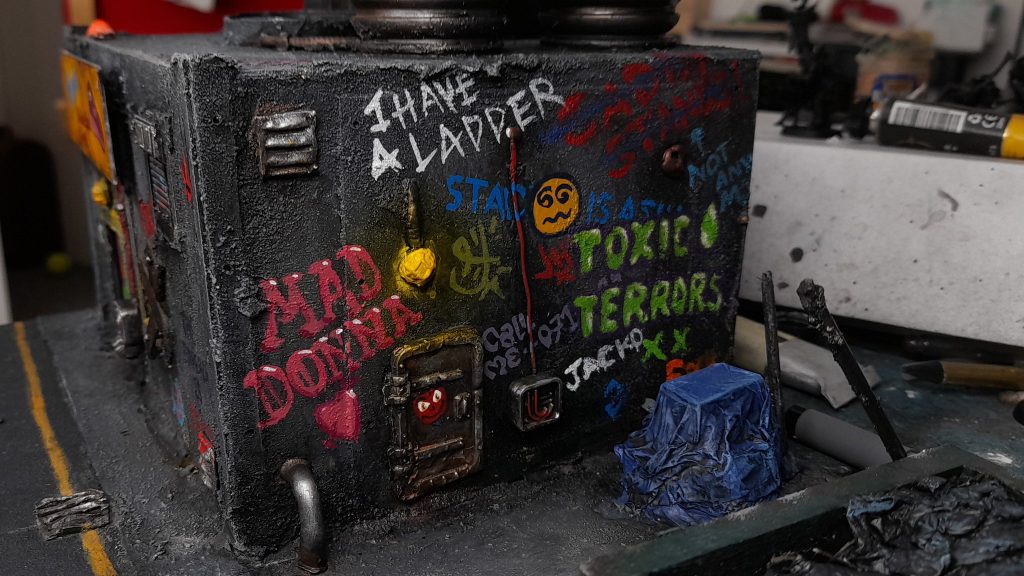
It’s not much of an exaggeration to say that painting graffiti is way outside my comfort zone. There are decals out there that do a very impressive job of replicating the kind of very flashy graffiti you might see on a big surface like the side of a metro train, but as a result of being a commercial product, and thus subject to the rules of copyright, they’re always extremely generic. They can’t refer to anything Warhammer-y, so they just don’t fit in the universe to me.
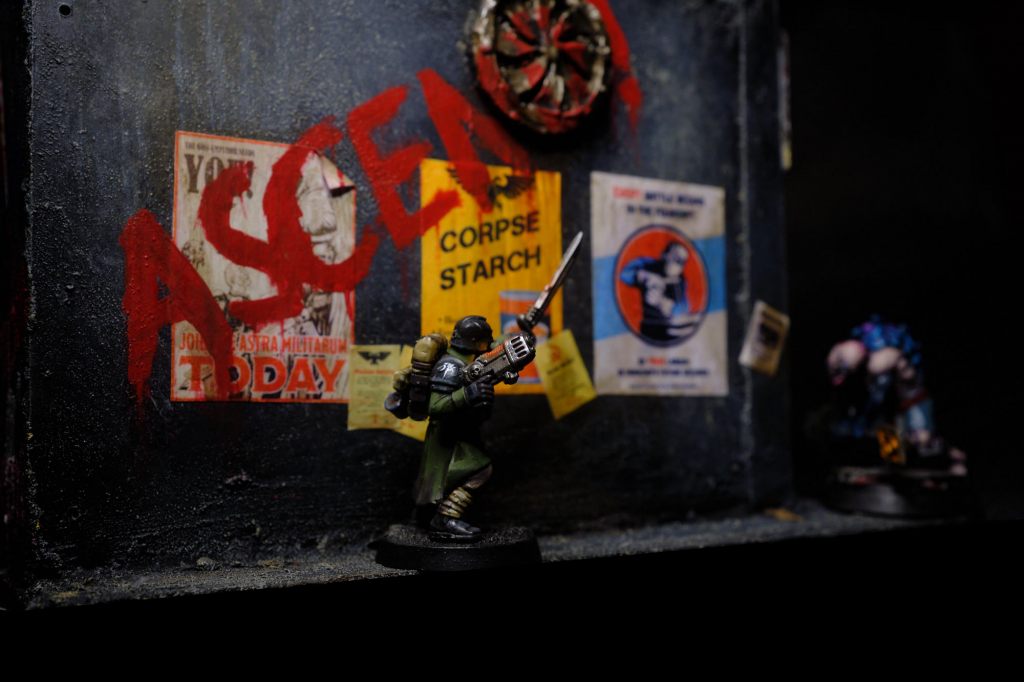
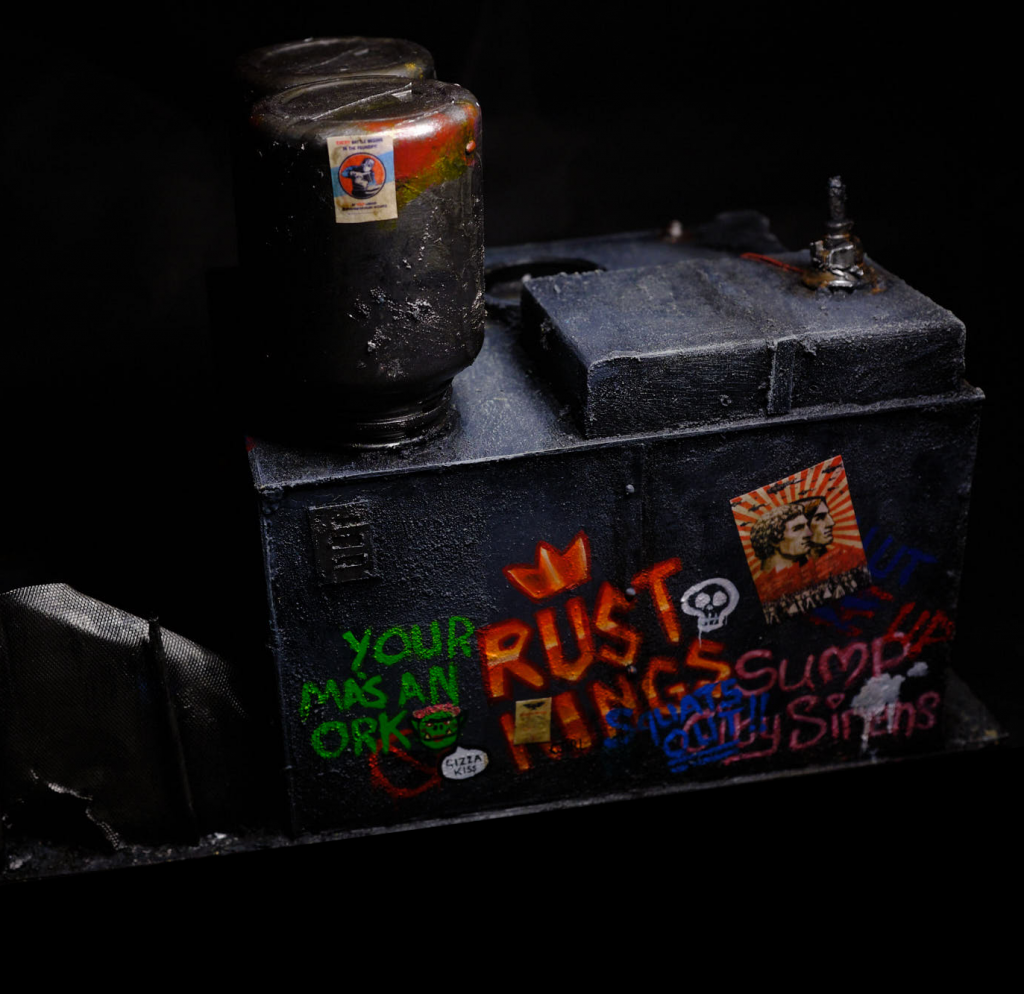
So, armed with nothing but a brush and a dream, I picked my boldest colours and started tagging the walls with a mix of regular tags and more fancy gang tags, drawing inspiration from the gangs I came up with for my Necromunda Eschers and Goliaths, the Toxic Terrors and the Rust Kings. Once that was done, I took a very thin Rigger brush and dragged streaks of Agrax Earthshade down from the window-frames, like the grime that hasn’t been washed away by the rain that you would see on a dirty concrete building. Does it rain in the hive city? Probably not, but it doesn’t matter! To complement the rather unpleasant environs, I also added a pee stain on one of the walls, where a customer might have relieved themselves just moments ago. See if you can spot it!
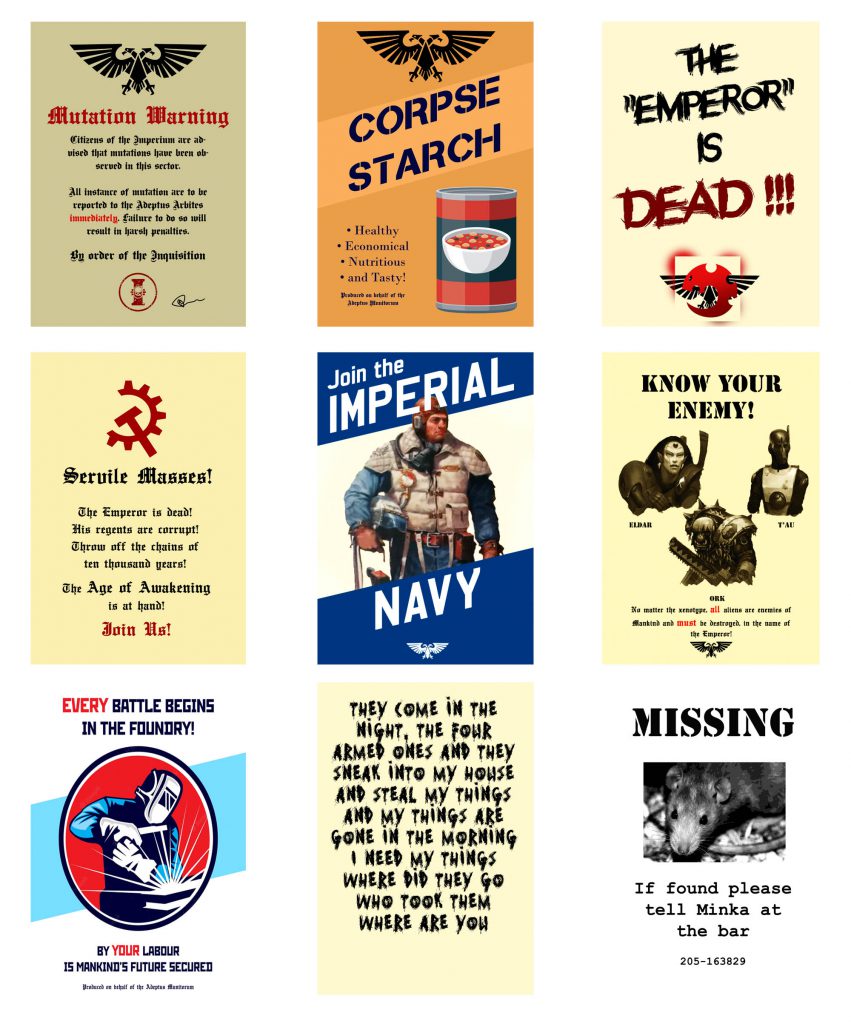
To continue with the theme, I designed some posters and pamphlets in Photoshop, the kind you might see pasted up on walls or strewn about the pavements and gutters. Along with some 40k advertising and propaganda-style posters, I made a print layout of various sizes, cut them out, and stuck them on with a bit of PVA Glue. Once they were dry, two coats of Mod Podge turned them rock-hard and ready to blend into the scene with some dirt.
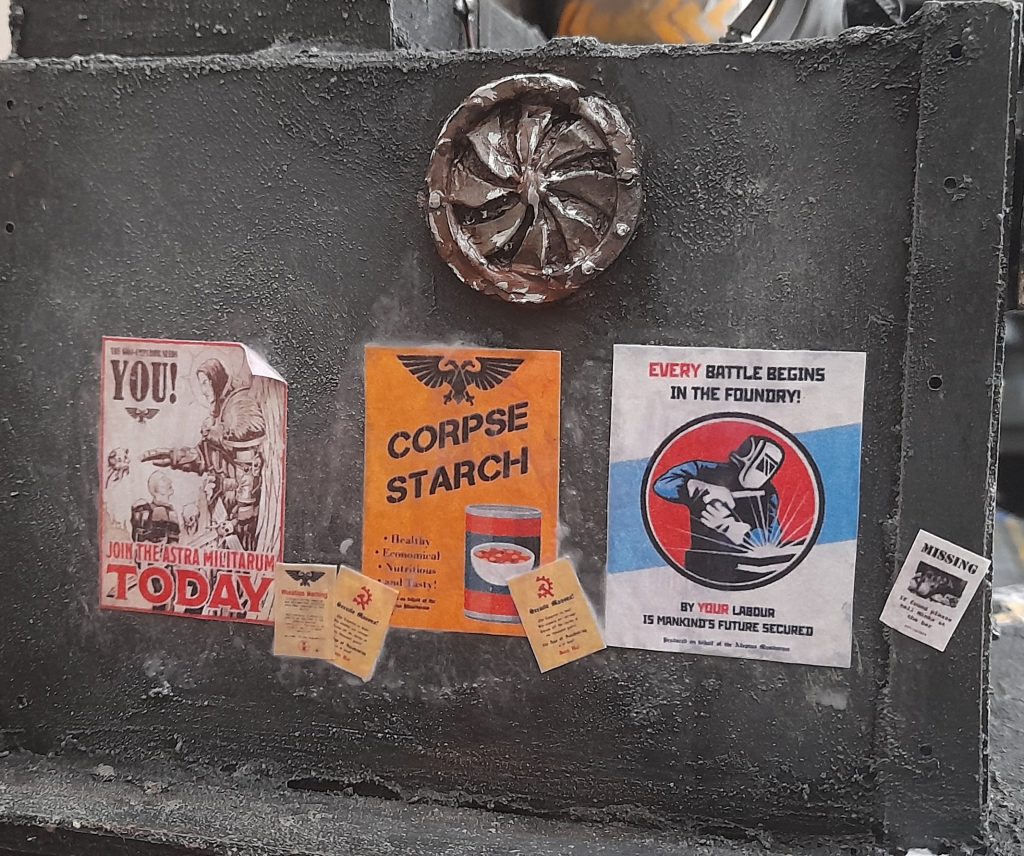
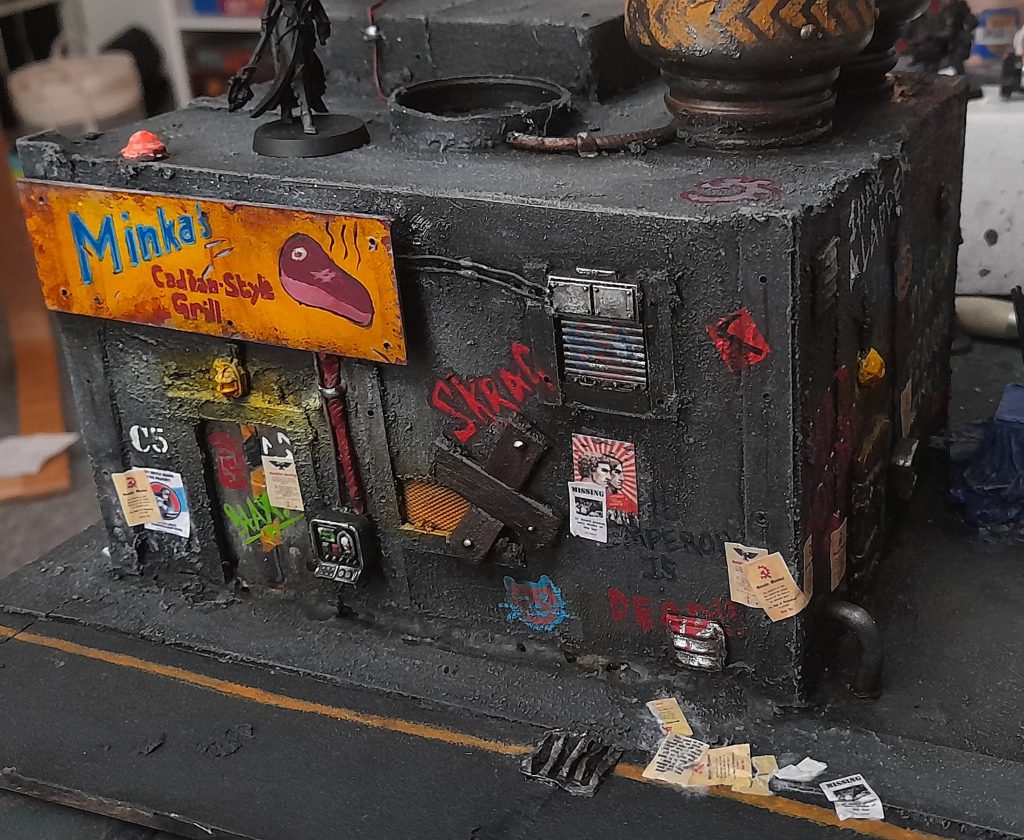
After putting posters on three of the walls, I went and painted the fourth wall. Since this wall is essentially blank, I felt like it was a good canvas to go nuts and try some more outlandish graffiti tags. Since the Warhammer 40,000 universe has its roots in British satire of the 1980s, I like to keep a little humour and levity in my projects, which, in this case, meant some “funny” graffiti.
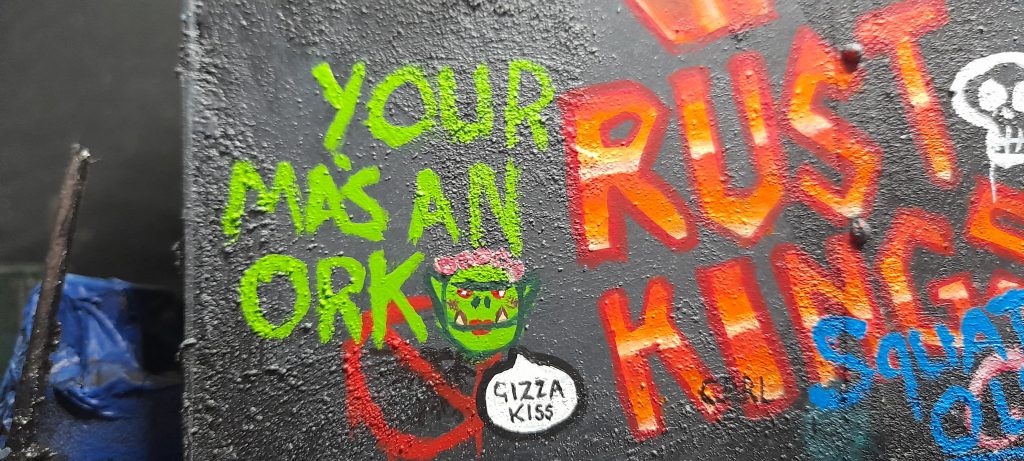
When everything was nice and dry, there followed another smattering of posters, stained with washes and grime.
Fence
To finish this project, I envisioned a damaged chain-link fence, using part of a sheet of metal mesh I had lying around. Unfortunately the mesh is far too fine to look like a rough chain-link fence, but no matter. I poked a few holes in it with a barbeque skewer and tore a crawl-hole. This mesh, probably as a result of being so fine, can be cut with scissors and bent around a 90 degree corner easily.
This stuff can be quite sharp, exercise caution.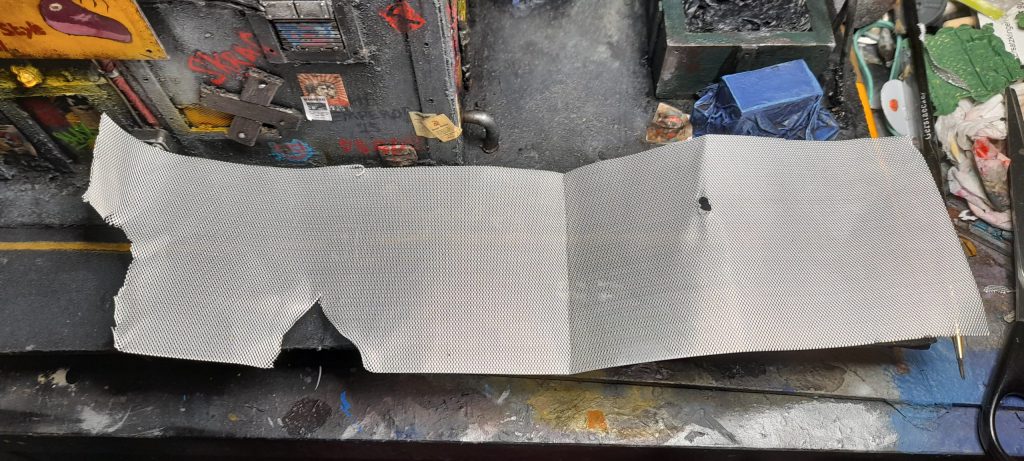
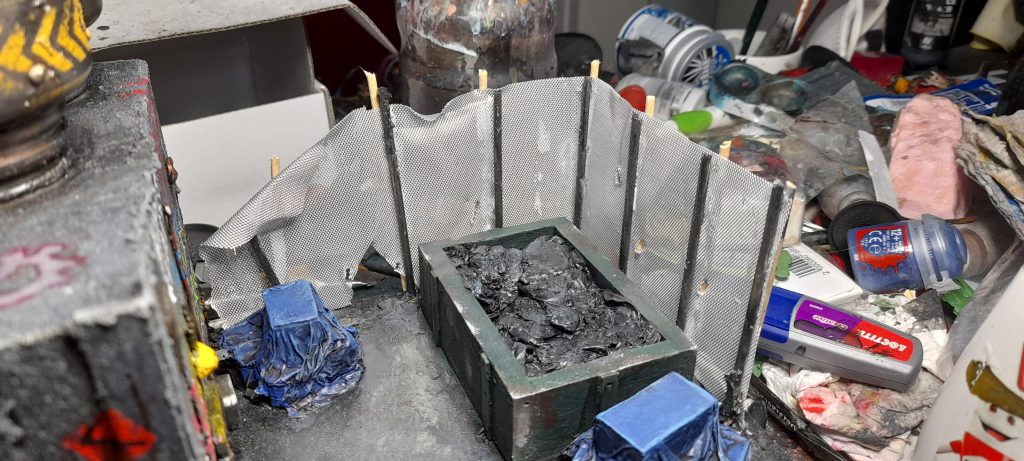
Then, after struggling to glue the fence to the posts I’d glued into the Milliput mound ages ago, I cut some more lengths of barbeque stick and sandwiched the mesh between them. It looks quite shitty, but this is a shoddy fence built poorly by underpaid workers, so it’s fine.
After that, the fence was straightforwardly primed black with Vallejo Surface Primer, brushed on straight out of the bottle, and drybrushed with Leadbelcher and VMA Steel. A little shading and weathering here and there afterwards and it’s done! Minka’s Cadian-Style Grill is complete!
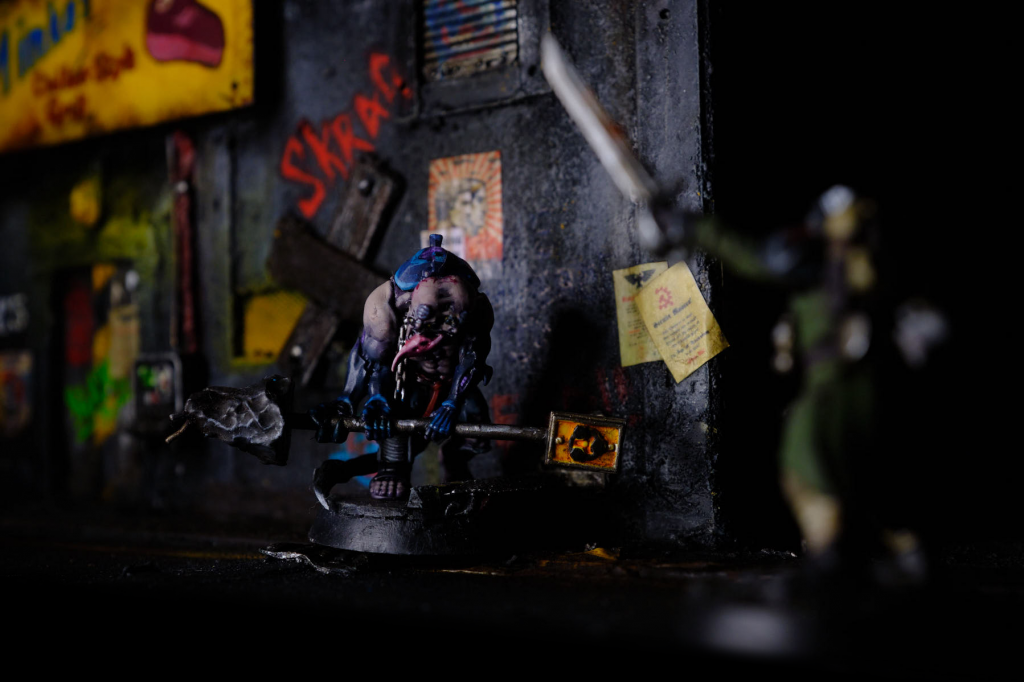
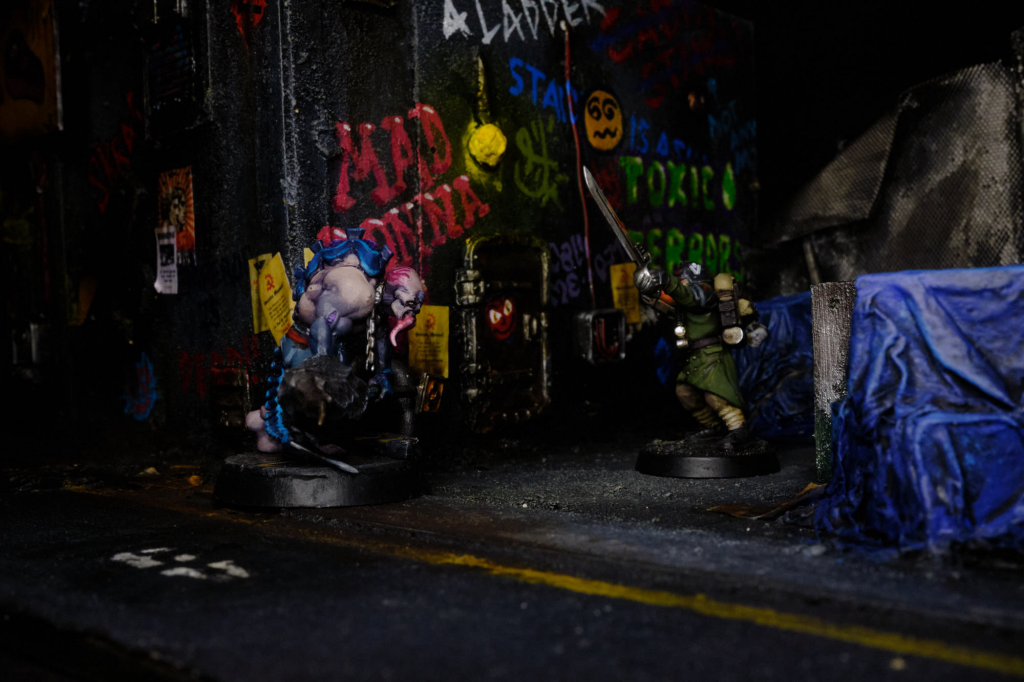
And that’s it! We’ve heard tell that prospects have killed the fast-casual restaurant in the underhive, but you can do your part to bring them back! Want to give props or share your own culinary Necromunda creations? Drop us a line at Necromunday@Goonhammer.com.
