Howdy Scummers! It’s Monday, so we’re back with another edition of Necromunday! This week, we’re having our newest contributor, Genghis Cohen, lead a conversation about what new players are missing in their first few games of Necromunda. Take it away, Genghis!
This article aims to highlight key aspects of the Necromunda rules, many of which are overlooked by new players. Advice on the internet often seems to focus on choosing certain weapons and skills, or devolves into discussions about the admittedly serious balance problems in Necromunda. I think that a lot of advice misses the point. It’s easy and obvious to try and improve performance in your games by taking the best tools – and Gang-building is a big part of the game, so much, in fact, that we’ve written twelve articles on it! However, there is a dearth of good information on how to actually play the game well. Before a new player can learn to play well, there are some unique and interesting rules which have to be understood.
The Issue
It seems that many new players, and even whole gaming groups, play Necromunda while omitting or not appreciating the impact of some rules that vastly change the experience. As we’ll see below, this is part of why common new-player advice is that ‘shooting is king’ in Necromunda and that trying to get into close combat is not a winning strategy. I disagree strongly and will try to explain how the base game rules limit shooting and incentivise close combat.
A lot of players come into Necromunda by way of 40k. There is a basic similarity in the mechanics of both games (e.g. the to-hit/to-wound/armour save process and the model statlines). I think that the basic tactics which both games share – shooting your enemy’s close combat models and assaulting their shooting models, as well as choosing targets which suit your weapon profiles – are well understood. But Necromunda’s system of alternating activations imposes an additional layer of tactics onto the game, which affects a lot of the points below. There are also considerations about the game scenarios, terrain and how games fit into a campaign structure.
Finally, this article is meant to initiate new players into the deeper mysteries of the game, or to explain to intermediate players how they can approach tactics differently. There will be a sequel article centring on applying these tactics in-game. This article will assume basic familiarity with the nuts and bolts of the game – how to move, roll dice to shoot/fight, what a gang consists of etc. If you have never played Necromunda, go and try a few games before reading this. It will help you envision what is being discussed.
Scenarios:
Scenarios in Necromunda are not well balanced – some are very asymmetrical, the attacker or defender is intended to face an uphill struggle. On top of this, as gangs move up or down in relative power during a campaign, some scenarios may be played as hopeless match-ups. Win conditions tend to focus on putting enemy fighters Out of Action (OOA) and/or on keeping your own models alive. Other common objectives are running off the board, picking up movable objectives (loot crates) and running away with them: usually things which require you to move about on the table. As with many wargames, any scenario which isn’t ‘kill them all’ can just be played as such – if you smash your opponent’s Gang off the table you generally get to claim the win. This is slightly complicated in Necromunda by the Bottling Out mechanic and the Lasting Injuries which models that go OOA can sustain. It’s not worth sticking around in a game for a slim chance of victory if that means a high chance of taking more Lasting Injury rolls. Not only do you have to know when to Bottle Out, you have to anticipate when and why your opponent might choose to do so. Many Scenarios stipulate that a player who voluntarily Bottles Out will give up maximum rewards to their opponent, which may keep a losing player in the game a bit longer. Some Scenarios, in an odd loophole, allow either the Attacker or Defender to avoid defeat by Bottling before their opponent has achieved the objective, which makes it attractive to do so at the slightest risk of losing the game. That’s contentious and likely to annoy any of your friends, so it’s something that should be discussed when setting up the game.
A note on how Bottling actually works: Gangs may fail the roll once they have taken casualties and have fewer than 6 models remaining on the board of their starting crew. In other words, Fighters that come on the board as reinforcements don’t affect your total crew size for the purpose of Bottle checks. This means that a player who starts a scenario with a very small crew is more likely to have to Bottle Out. As soon as a gang has taken any casualties, they can choose to fail the roll, even if they have, say, 9 models remaining on the board. They can’t choose to fail before taking any casualties. Think of failing the Bottle roll as ‘step 1’ of Bottling Out. FIghters then individually check Cool to see if they vanish from the board at the start of each round. A player can also choose to voluntarily fail some or all of these rolls. Think of that as ‘step 2’. When Scenarios stipulate a loss of Reputation for Bottling Out, it’s normal to treat failing the initial Bottle roll (step 1) as meeting that requirement. But for Scenarios which treat voluntarily Bottling as giving up rewards to the opponent, there can be some debate. Does voluntarily failing mean choosing to fail the initial Bottle roll or failing the subsequent Cool checks for Fighters? Both? Either? This is something which should be agreed with your group before a campaign as it can make a big difference.
Terrain and Tables:
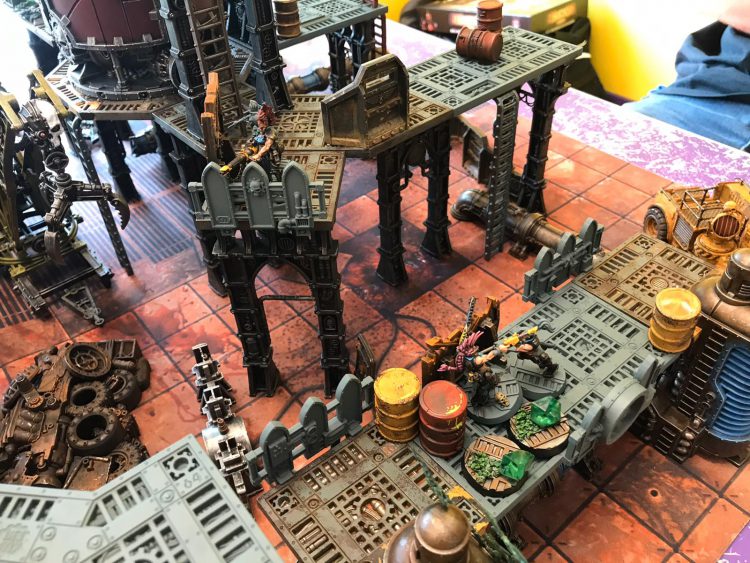
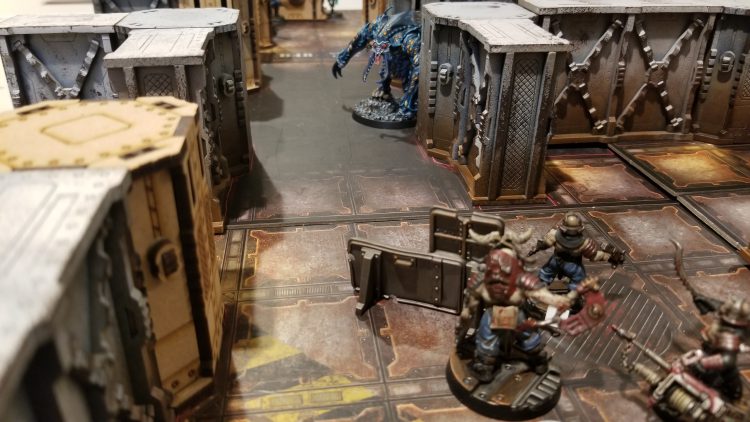
In the Necromunda Underhive release, many scenarios were specified as being for Zone Mortalis (ZM) terrain, ie 2D maps played on tiles full of tight corridors and fully Line of Sight (LoS) blocking walls, or Sector Mechanicus (SM) terrain, ie more traditional wargaming tables with fully 3D terrain, tall gantries etc. The former would likely be 3’ x 3’ or smaller, the latter was recommended as 4’ x 4’. This distinction has slid into disuse in more recent releases like Dark Uprising (DU). ZM terrain is now the term for the plastic set released in DU, which can build 3D terrain, platforms etc. In practice, there is no reason you couldn’t play any scenario on any type of board, and recent books don’t specify. The type of tables you play on will make a big difference to how your group experiences Necromunda. New players who play exclusively on full size tables with high walkways, long lines of sight and little substantial LoS blocking cover will see a game that heavily favours gangs built for long range shooting. If starting on the DU terrain and the 2’ x 2’ play mat it comes with, then new players will find that close combat and templates dominate and any shooting over 24” is irrelevant. Ultimately, for most the type of terrain your group uses will come down to practicality – what you have, where you meet to play, and how much space is available.
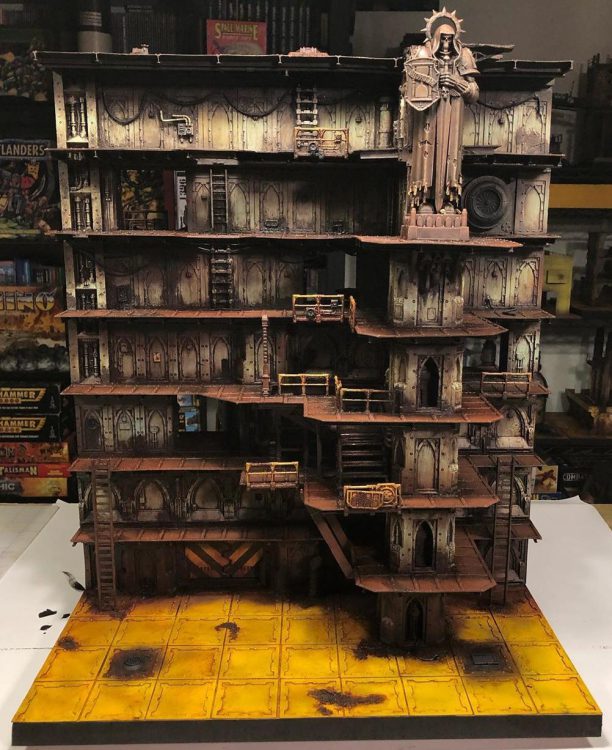
There’s no single right way to play, but if you expect games to feature close combat as well as shooting, Necromunda requires a decent amount of LoS-blocking terrain. New players can be overconfident in moving their fighters behind ‘Full Cover’, where the models are partially visible and can be targeted by shooting, but with a -2 to-hit penalty. This is deceptive. A gang built for shooting, especially mid and late Campaign, can reliably hit targets in Full Cover. There are plenty of ways to offset the to-hit penalties. Your Fighters are only safe from being shot in Necromunda if they are out of LoS. Even then, watch out for Blast weapons when standing near corners!
Get Down and Stay Down: The Joy of Prone
There is a very important and easy to overlook rule about shooting in Necromunda: “Fighters in Hiding”. A fighter cannot be targeted by normal ranged weapons whilst in cover and Prone. To put it another way, when your fighters are Pinned or Seriously Injured, they can only be shot at if they are completely in the open from the shooting model’s point of view. Any intervening cover which obscures the line of fire will prevent them from being targeted. This is extremely important. Overlooking this rule is a huge part of why people say that shooting is the dominant strategy in Necromunda. What are the tactical implications? It limits the chances to repeatedly shoot at a fighter in cover – if he’s hit once, he gets Pinned and becomes Prone, so until he activates and stands back up, he should be safe. Note that Blast and Template Weapons avoid all such targeting restrictions. A fighter who is Prone and in cover can still be hit with a flamer, or by a grenade aimed at a point on the board surface next to him.
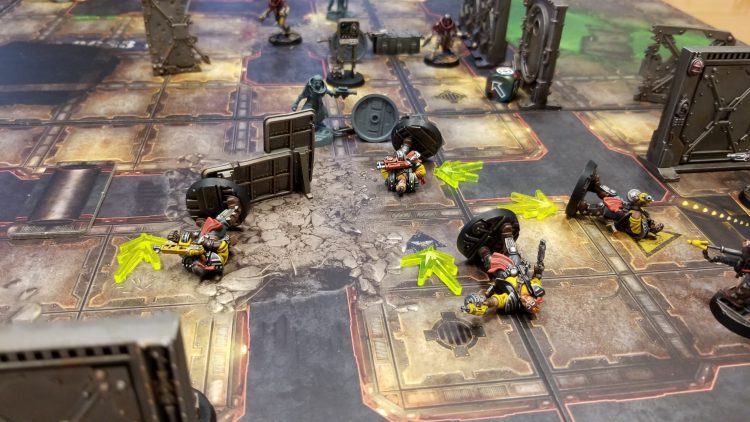
The Take Cover action is a Basic action where a fighter moves half of his Move value and then becomes Prone. This allows a player to hide his vulnerable fighters from enemy fire. Now I think many new players skim over this action when they first read it in the rules. You don’t win a game by hiding, actions are for attacking your opponent, why would you ever Take Cover? Plenty of reasons! You can Move-Take Cover, allowing your model to move 1.5 times and then hide from shooting, when moving twice would leave you vulnerable. You can Shoot-Take Cover, allowing your model to have a blast at the enemy and then hide from return fire if necessary. Basically, if there is a situation where your opponent’s firepower in a section of the board over-matches your own, consider Taking Cover rather than engaging in a firefight you are likely to lose.
The main drawback of using Prone to protect yourself from enemy fire and maneuver across the board in safety is the need to spend an Action to get up in that fighter’s next activation. This means you can’t Move-Take Cover, and repeat in the next turn. You would have to try and reach safety (typically behind LoS-blocking terrain) in one move action. Note that fighters with the Spring Up (Agility) skill and a decent Initiative stat can do this repeatedly, which is part of why it’s such a great skill. So, some blocky cover is still essential to preventing all-shooting gangs dominating bigger boards. Players will also note that using Take Cover will slow down your fighters, they will take more activations to cross the table.
No Turns, No Masters
Patience is a virtue in Necromunda. It differs from most popular wargames which impose a turn limit and depend on scoring each turn, or by achieving the objectives before the end of the game after X turns. Warhammer 40k (now 5 Battle Rounds) and Infinity (3 Game Rounds) both do this. In most Necromunda Scenarios there is no limit on the number of Rounds which can be played. Appreciating this simple fact can encourage new strategies. Players seem to have an ingrained instinct to move their Fighters to attack the enemy in as few Rounds as possible. Generally, even with dense terrain, Necromunda games have 1-2 Rounds of maneuvering at the most before both Gangs are fully in contact with their enemies.
There is no reason this has to be the case. If one player sees they are in a weaker position, they can and should use the Prone rules, as detailed above, and patient maneuvering to get into what they consider an ideal position before really starting to open up the game. This specifically applies to more open boards and close combat focused gangs trying to close with shooting focused opponents. New players frequently try to run their models forward as fast as possible while engaging with any shooters they have, hoping for the best. This is not necessary when you’re under no time pressure.
Damage and Injury Rolls: The Effect on Shooting/Combat Balance
The key element Necromunda adds to 40k’s hit/wound/save process is Damage and Injury Dice. You roll an injury dice for every wound inflicted that would reduce you to 0 Wounds (or further). Each Injury Dice has the following results: 2/6 Flesh Wounds, 3/6 Seriously Injured, 1/6 Out of Action. So even when you wound on 2+, cut straight through Armour Saves, and reduce the target to 0 Wounds, it’s not a guaranteed game over. The chance to just suffer a Flesh Wound is significant, and models can recover from Serious Injury at the end of each Round, at the cost of further Flesh Wounds. Seriously Injured (SI) Fighters are quite likely to recover over a few rounds (dramatically more so if they have a friend next to them to assist) and rather less likely to slip OOA. Of course, what you want to do is put enemies directly OOA whenever possible. Apart from anything else, only directly taking models OOA grants XP. As well as a key part of building powerful fighters, gaining XP and levelling up your Gang members is just one of the most fun parts of a campaign for me. When you activate against an enemy fighter, SI is a nice result. You don’t have to worry about that target for at least a Round, they might be out for the game.
When shooting, the only way to increase OOA chances is to use higher Damage weapons, which is why, as in our previous articles on building and upgrading Gangs, I heartily recommend guns with 2+ Damage. In close combat, when you attack and the resulting Injury dice sends your target SI, you may perform a Coup de Grace (CdG) Action for free, unless there is another opposing fighter within base contact with you. This means that in most situations, when attacking in close combat rather than shooting, the chance to send your target OOA on a single roll of the Injury dice shoots up from 1/6 to 4/6. Given that close combat often involves rolling 2-4 attack dice and shooting, even using Rapid Fire weapons, hinges on 1 to-hit roll, you can see that if you can get there, close combat is a far more reliable way to take enemies OOA. There is a lot of confusion and common mistakes over when exactly the free CdG (it can also be used on already SI enemies as a Simple Action) applies. As of the most recent rulebook, packaged with DU, a Fighter can automatically CdG the opposing model whenever they declare a Fight Action. So, when charging or when declaring the Fight (Basic) Action – but not when making Reaction Attacks.
I think most new players do understand that when enemies are lying seriously injured from shooting, that is a huge opportunity. You can try to get close enough to charge or move in and CdG them to remove them from the game, gain XP and inflict Lasting Injury rolls without direct risk. Your opponent will no doubt try and move models to protect them. A major cause of players voluntarily bottling, in my experience, is having multiple seriously injured fighters who are at risk of being CdG’d. The player is under pressure to end the game, even if it means a loss, rather than sticking around hoping for recovery rolls and to reverse the situation. No one wants to see several models get CdG’d and take Lasting Injury tests without any chance to defend themselves.
The ‘Action Economy’ in Necromunda
The effect of alternating activations on the game is something we hope to explore a lot more in a future tactics article. The order of your activations is as important as the basic tactics of using weapons at the right ranges or picking fights you can win, and the activation game is less widely understood. In most situations where your Ready fighter can attack the enemy, a Ready enemy can also attack him. Think of each round as a mini-game where across the table, you try and get the drop on your opponent, making the most of your activations and minimising theirs. The principles are to activate your fighters who are under threat of enemy attack that round, so they can act before potentially being taken out; to activate against Ready enemies who are in a position to attack you that round, and to force your opponent to activate his key fighters before you have offered them any targets during the Round.
First, there are some rules to understand about actions. Most actions (Basic and Simple actions) in Necromunda are half of your activation. You also resolve actions one at a time. This leads to the most common attacking activation being ‘Move-Shoot’. For whatever reason (I personally blame 40k as the gateway drug to Necromunda for most new players) people default to Move-Shoot all the bloody time. The most egregious rookie error is to forget to Aim-Shoot if you don’t want to move and can use the to-hit bonus. I always remind an opponent of this if they forget, it’s just good manners. Now there’s nothing wrong with either of those combinations. Indeed, in the flow of the game they come up very often. Either you aren’t yet in position to attack, but a single Move can get a bead on an enemy Fighter (Move-Shoot) or you are in a firing position, you’re already in cover, might as well take the chance (Aim-Shoot).
Everyone should keep in mind, however, that you can Shoot as the first action. I’ve mentioned Shoot-Take Cover as a combination above. That can be used to fire (albeit less accurately than with Aim) and then to protect your activating Fighter from return fire that Round. You can achieve the same thing with Shoot-Move if the terrain allows you to Move out of LoS. The big advantage, to me, is that by Shooting as the first action, you can see the result before you decide what to do next. If you seriously injure your target, you might want to move up and threaten a Charge & CdG. If you put them OOA and also fail an Ammo Check, it’s a chance to Reload this round. Basically, if your actions for activating a Fighter seem obvious, just take a moment to consider which order you can take them in.
I focused a lot on Shooting when discussing single Actions above. That’s because the only way to get into close combat (leaving Versatile weapons, which are powerful tools, alone for now) is to charge. Charge and Shooting Unwieldy weapons are Double Actions, and Double Actions are highly restrictive. Not to teach anyone to suck eggs, but if your Fighter depends on a Double Action to attack the enemy, he needs to be in position at the start of the round and he needs to be Standing. Prone fighters have to spend an action to get up, so won’t be able to charge or Shoot an Unwieldy weapon that round. This makes the threat of charges or fire from Unwieldy weapons very easy for you (or your opponent) to envision at the start of the round. It offers the chance for you to pre-empt that threat by Pinning the Fighter making it.
So, executing Charges requires special care. For a fighter seeking close combat in Necromunda, there will almost always be a point in the game that he is able to charge, but must activate before his target and/or other nearby enemies, or likely lose his chance – the enemy only needs to hit him to pin, without worrying about the Wound or Injury rolls. The only ray of hope is that a Fighter does not need line-of-sight to charge a target. The ideal charge is from around a corner or from behind LoS-blocking cover. Greater Move stats from advances or from temporary bonuses like the Stimm-Slug Stash wargear are very useful, but the best thing is for a fighter to have some way to avoid or remove Pinning. Most commonly these are the Nerves of Steel (Ferocity) or Spring Up (Agility) skills, which are far and away the premier choices for any Fighter who wants to get into close combat. The Overseer (Leadership) skill will also help to achieve successful charges, as the Overseer can get a friendly fighter into position to charge. Combine that with a Group Activation, and you’re looking at a far easier charge.
Conclusion
While it’s a lot to remember, those are some of the unique and under-appreciated rules which underpin good tactics in Necromunda. It takes more practice to understand than the common tactics of all GW wargames, which work on target priority, using or circumventing cover, and using the right weapon for the job. All those things are important in Necromunda, but a good player needs to constantly think about using activations to get the drop on their opponent, remove their own Fighters from harm’s way and restrict their opponent’s options.
Thanks a ton, Genghis! Those were some great insights on how to come out of the gate swinging, as it were. We’re really excited to have you on the team, and we look forward to more of your tactics articles in the future!
Scummers, House of Blades is in store next week, and we are champing at the bit to provide you with coverage of all things Escher! So join us in one week as we crack open that sweet, new, Necromunda content and tell you, our dear readers, what to expect. Until, then Scummers, stay frosty!
