
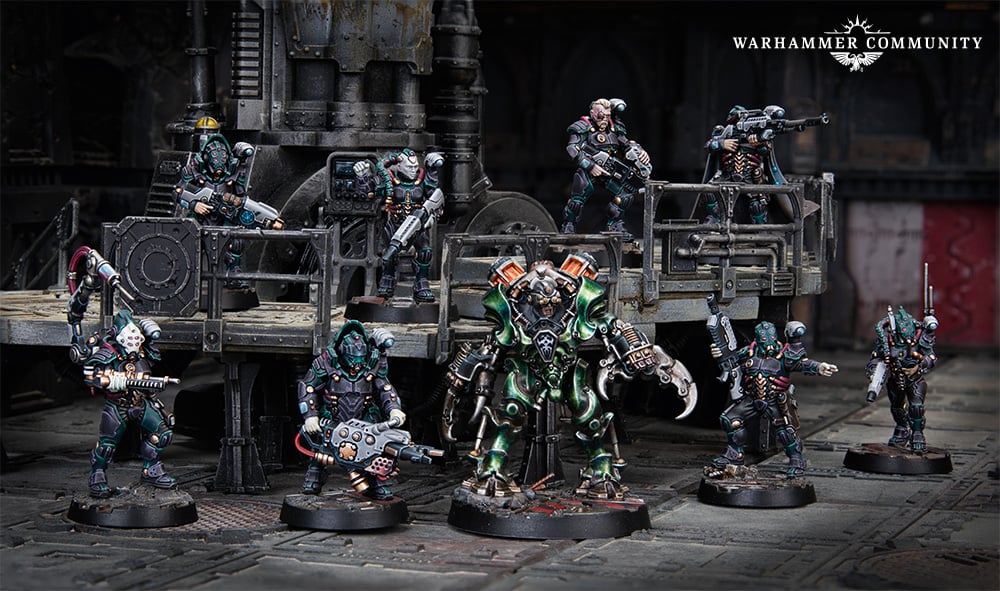
Here we have it, the Book of Desolation. While the Secundus box set and its accompanying terrain were the big splash model release (alongside the other revived Spyrers), this book is what brings all of that goodness into the wider world of Necromunda. Many thanks to Games Workshop for providing us with an advanced review copy of the book.
While Secundus was a self-contained box, focussed on running a set two-player campaign, this book is about running more free-form campaigns in the Secundus setting. It also brings in two new gangs – Spyrer Hunting Parties and Malstrain Gangs – as well as taster menus of both those flavours, in the form of Secundan Incursion gangs, where a Spyrer leads more conventional hivers, and Malstrain Corrupted gangs, for when the Xenos threat has got its gribbly hooks into a normal gang. Bottom line up front, this book is chock full of meaty goodness. We love the Underhells campaign, which might be the best themed campaign yet, we love the new and demi-new gangs, and there are some other new bits and pieces in the form of fighters, vehicles, terrain and Dramatis Personae that are all swell. Let’s read on.
Background & Narrative
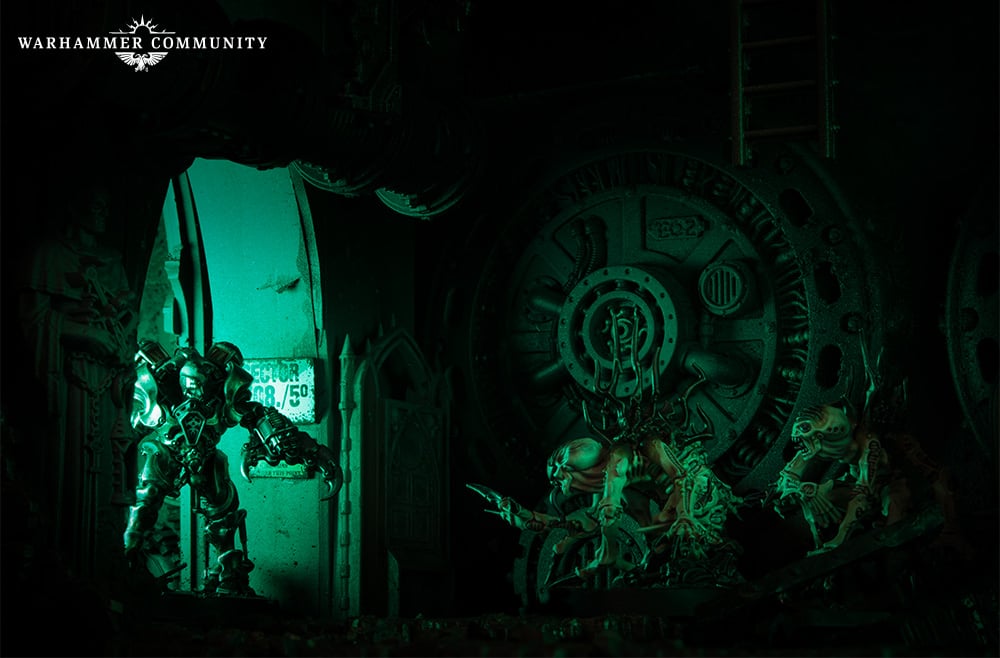
This book is very strongly built around what we at Goonhammer think is a pretty awesome setting within Necromunda – the Dead Zone around the fallen Hive Secundus, the Secundan Abyss which is basically the giant crater formed around the fallen spire after it was blasted from space, and the Underhells of the ruined hive itself. Not only is there some cool dungeon-crawling potential in this deserted ruin, crawling with Malstrain lifeforms and inimical to all outsiders, there’s a lot of that classic Necromunda dystopian, post-apocalyptic goodness in the surrounding environs. In the Dead Zone, survivors and scavengers eke out a precarious existence, corralled by Enforcers and militia and the other arms of totalitarian oppression on the outside, but under constant threat from the Malstrain within the cordon. There is some great detail on their settlements and how they assist hunting parties bound for Secundus. A bit of fluff which wasn’t stressed as much in previous books is just how valuable Secundus was as a trove of knowledge and scientific advancement. This gives other Necromundans an incentive to go there as archeo-hunters, searching for lost knowledge. Within the Abyss itself, time and gravity themselves are unreliable, due to the dark age munitions unleashed against Secundus to try and purge the genestealer infestation. Classic trippy 40k stuff.
Beyond the background, the ongoing narrative for the wider planet of Necromunda continues here. Lady Haera Helmawr, displaced as the new ruler of the planet by House Aranthus, has basically fled her enemies and gone to Secundus, conveniently running into a cousin, Tamino, who wears an Orrus Spyrer suit, and is working with a gang of Van Saar Tek-Hunters to search the Underhells. The macguffin being sought is a unique, relic Spyrer suit, the Sthenian Hunting Rig. This plot serves as a way for fluff vignettes throughout the book to follow Haera on the archetypal archaeo-hunter’s journey through the Abyss and into Secundus.
The Underhells Campaign
Right everyone, we finally did it. After every single Necromunda campaign being built around the same rhythm of Phase 1 – Downtime – Phase 2, the designers have finally broken out of their shell and created a campaign with three, yes three, Phases! What a time to be alive. So this campaign is heavily themed around a journey by archaeo-hunters through the Exclusion Zone, into the Secundan Abyss and thence into the actual Underhells of Secundus. Players can choose for their gangs to be aligned as archaeo-hunters or Malstrain. The book states that it works best if at least one gang is aligned to the archaeo-hunters. Note that (presumably for balance reasons) the gangs are treated mostly the same, this isn’t a fully asymmetrical campaign like the two-player Secundus box version. Most special rules apply to both alignments of gangs (notably, the Roaming Horrors which spawn in games will attack both types without discrimination), although there are some conditions which differentiate.
Beyond that basic assumption that this is a free-for-all campaign, but with each gang nominally aligned with the Malstrain or Archaeo-hunters, there are some key twists in the Underhells campaign:
Territories
While players still hold Territories in the Underhells campaign, they are imagined to be moving on as the Phases progress, so they randomly generate one Territory per campaign cycle, discarding it and drawing another after a very limited number of games. The Territory simply represents where the gang is making camp or the immediate area it’s fighting through. Clearly this would have a restrictive effect on income/Boons, but also a flattening effect on victory spirals – a gang that wins repeatedly doesn’t pull drastically away from its competitors as it starts to rack up more and more sources of income that it can draw from after every game. The individual territories’ effects are quite powerful, presumably to keep them worthwhile. 2D6x10 incomes and/or free fighters with equipment are commonplace. There is a separate D6 table for each Phase (see below), but while these are themed differently, there doesn’t appear to be any ‘power curve’ of Territories by Phase.
Exploration Points
Underhells Campaigns introduce a new gang resource, similar to Reputation in that it is gained via Scenario rewards – typically 1-3 per victory. These can be a determinant of which player gets to pick the Scenario (where previous campaigns have used Gang Rating), and, this is super easy to miss, they are what determines the end of each campaign phase. The Arbitrator is required to track how many Exploration Points (EP) have been earned across the group, when they reach 3x the number of players, the Phase ends, so presumably Downtime begins. In our opinion, this is a bit nuts. Firstly, many groups will want to plan their campaigns around real life commitments, and pick a real-life time limit for Phases and the overall Campaign. Second, in most Underhells Scenarios, the winner gets 2EP and the loser gets 1EP. There is no way to lose/spend them before Downtime. Unless our maths is worse than we thought, this means a Phase is guaranteed to end in 2 games? This really puzzles us. Perhaps the writers meant cycle? Our firm suggestion from Goonhammer is to plan the Underhells Campaign phases to last a fixed time, like most campaigns, and just use EP as a resource. Active Arbitrators could adjust the rate of earning, handing them out and stripping them away under certain narrative circumstances. But RAW, their being used to determine campaign phases’ length just doesn’t make sense.
Anyway, EP can be cashed in during Downtimes:
- 1 EP gets a player D3x10 credits worth of kit from their gang equipment lists. This is the most direct means of cashing them in, and there is a limit of 5EP at each downtime, so a nice 50-150 credits (on a bell curve) to add to the normal 250 credit subsidy.
- 2 EP lets you choose your first post-downtime Territory rather than rolling. Given that you will collect on that Territory’s income/Boons throughout the cycle, and there is considerable variance between the 6 Territories available in each phase, this seems a worthwhile, but only if you have already redeemed the maximum of 5EP on credits – the variance between territories isn’t necessarily going to be more than 2D3x10 at most, so unless you think you might play several games during that cycle, it would be better to redeem the EP for cash and risk the territory-generating roll. Of course if you’ve got more than enough EP at Downtime there’s no reason not to do this.
- 6 EP lets you randomly generate a Territory which you hold and generate income/boons from until the end of the entire phase. This is an efficient option, provided your group’s Phases are planned to last at least a normal amount of time (e.g. 3 cycles or more), because most Underhells territories have some good income attached. If you generate a 2D6x10 income territory with this, even if you only collect income on it 3 times, it’s clearly more efficient than redeeming EP directly for cash, although you have to wait a bit to see the full income.
These functions kind of make sense if you consider the very short campaign phases which a 3EP/player time limit would impose. Under those rules, a player would really only hit 6EP if they had played a couple games in the cycle, so that the 3EP/player limit was exceeded when the cycle ended. Most players would presumably have less. In what we think of as an average campaign phase from previous experience (3-6 games played by most players) then every player would have 5-9 EP, which makes the choices on how to spend them easier.
EP and how they determine the length of phases is something every Arbitrator should review, and communicate with their group about how it can be made to work best for them.
Sentry Guns
Used in one particular scenario, Underhells scenario, Defend the Camp, these are also available to any gang as terrain – meaning they are kept in the stash and can be used in battles. They have a headline price of just 20 credits, but don’t be fooled, they must take either twin grenade launchers or twin heavy stubbers, both of which have their merits. The guns fire automatically at moving targets within their front 90 degree arc, both friend and foe. That sounds terrible, but if the owning player keeps a fighter within 1” of their control console, the guns won’t target friendly models. This is cool, it opens up some counterplay as opponents can either target the gun itself to knock out the threat, or target the controller if the situation gives a possibility of friendly fire.
Data Crystals
In Underhells battles, each player places one of these new Data Stack terrain features ‘outside their deployment zone’ before deployment. This could be clearer. Some of those scenarios don’t have set deployment zones. It also seems odd for the data stacks to appear during the gangs’ journeys to Secundus, instead of in the final phase when they enter the fallen hive itself. Whatever, the rules are workable. Fighters within 1” can take a Basic action to harvest data crystals by passing an Intelligence check – but failure will attract the Malstrain, adding to the next roll to generate Roaming Horrors. Data Crystals can be sold post-battle for D3x10 credits – the coward’s option – or used by the gang to give a chosen fighter a random bonus. This is either D3 XP if you roll a 1, or they gain a skill. On a 2-3, pick a Primary skill tree and then randomise from that, on a 4-5 a Secondary tree, on a 6 pick any Skill tree! That’s an impressive level of choice, but since the actual skill generated is random, it’s still a crap shoot. Still, gaining a new Skill is possibly better, and definitely cooler, than 10-30 credits, so we would take that.
If the terrain is hit by weapons with the Blaze rule, there’s a good chance they will explode and fighters nearby will take hits, as well as making further harvesting of data crystals harder or impossible. Definitely time to bust out the incendiary charges if you see your opponent’s models standing next to a Data Stack!
Campaign Phases
Madness, Desolation and Darkness
There are a set of 3 campaign rules, the Madness, Desolation and Darkness Levels which all ratchet up in intensity as the phases progress, and affect morale, equipment availability and Visibility respectively. This is a very characterful way of doing it, but the 9 special rules this creates are quite hard to digest in the layout, as when they apply vs what they do are spread across several pages. Here’s a summary by phase:
- Important Note: through all phases, neither type of gang can recruit new fighters, or access their gangs’ own equipment lists, during the post-battle steps. This means Underhells campaigns are mostly closed off to any recruitment. Downtimes are explicitly exceptions to this, so are the only chances to add fresh fighters.
- In the Incursion Phase:
- Archaeo-hunters who become Broken and fail to Rally must pass a Willpower check or gain the Insane condition. This is slightly ambiguous, it could be read as testing if a fighter fails their first chance to Rally, or testing every time they fail. We tend towards the latter interpretation.
- Malstrain fighters get -1 on all Nerve tests.
- Archaeo-hunters increase Rarity/Illegality of all TP items by 2; Malstrain gangs by 6 (with Common items gaining Rarity 12).
- Visibility (18”) is in effect for all battles.
- In the Delving Phase:
- Archaeo-hunters who become Broken and fail to Rally immediately gain the Insane condition.
- All TP items increase Rarity/Illegality by 4, with Common items gaining Rarity 10, for both types of gang.
- Visibility (12”) is in effect for all battles.
- In the Survival Phase:
- Archaeo-hunters gain Insane condition whenever they would normally become Broken (ie by failing Nerve tests).
- Malstrain fighters get +1 to Nerve tests.
- Archaeo-hunters increase Rarity/Illegality of all TP items by 6 (with Common items gaining Rarity 12); Malstrain gangs increase Rarity/Illegality by 2.
- Visibility (9”) is in effect for all battles.
Cumulatively, these rules swing the advantage from the Archaeo-hunters to the Malstrain gangs as the campaign progresses. Having a gang with poor Cool and/or Willpower ratings is also going to be punishing for Archaeo-hunters, which is very thematic. But honestly the Visibility rules are probably the biggest change, and affect everyone equally. Clearly, long range weapons will be disadvantaged and players should make an increasing investment in Photo-Goggles, Infra-sights and other such kit.
Roaming Horrors
These are hostile Malstrain creatures which randomly appear on the battlefield, as a condition of all of the Underhells scenarios in the book. They can be Tyramites, Brood Scum, Malstrain Genestealers or Genestealer Alphas. This is usually from the start of the game, but a couple scenarios stipulate that this begins in the second or third Round, or once the alarm has been raised. Every time a player activates a fighter, they immediately Activate a Roaming Horror – but the actions it can take are tightly controlled, so the main difference in which player is ‘Activating’ is that they can choose which Roaming Horror on the board acts in that moment. Each Roaming Horror can only Activate once per Round, so picking one has a lot in common with the other action-economy Activation games we see in Necromunda.
When chosen, a Horror will always move towards the closest enemy. More specifically, Brood Scum have to move within weapon range and attack if possible. They won’t ‘expose themselves’ unless in position to shoot, and if they are in cover with line of sight to a potential target, they will Aim and Shoot. Tyramites and Genestealers, on the other hand, will always try to move within Charge range and will Charge if able.
Roaming Horrors have a couple caveats to make them simpler than other fighters and reduce bookkeeping. They never roll Injury Dice – if they would for any reason (so Gas/Toxin as well as being reduced to 0 Wounds) they are removed. They never roll Ammo tests, and when any Brood Scum are generated, the player with Priority decides what they are armed with (in practice, this should be whatever the available models are shown with).
Clearly, these are sort of NPCs, with a basic control system to enable the game to be played without an Arbitrator present. Our very strong impulse at Goonhammer is that both players need to approach this exercise with an equal balance of narrative/gamesmanship motivation for the system to work. If both players treat choosing Activation as a mini-game, trying to get a Horror to attack their adversary at the most vulnerable point, that’s all in good fun and part of the rules. If either wants to take advantage of the fact that nothing ever says Horrors need to attack the closest/most obvious target, or one where their weapons will be effective, that’s also . . . okay, as long as everyone is on the same page. We are thinking of the many loopholes and creative rules these things open up. For example, a Spyrer player might want to Activate a Horror near his own fighters, taking a negligible risk of damage to ensure his Orrus Spyrer can smash it into paste and garner XP immediately afterwards. Or if a player has no options to Activate a Horror which could attack their opponent, they must Activate one to attack their own fighters. In that situation, RAW they could still avoid shooting at a model in the open, and choose to take a Cool test on the Horror to try a long range shot at a model in full cover, minimizing their risk. There needs to be a mutual understanding on whether Roaming Horrors are being treated purely as a game to be manipulated, or ‘in good faith’ as mutually hostile pieces. In case our bias isn’t obvious, we prefer the latter approach, and being too pernickety about their behavior while seeking your own advantage is definitely being that guy. While we can and do put the onus on players, we do think the writers should either have made the rules tighter, or added in some explicit guidance on the spirit of play.
Assuming the rules are played honestly, Roaming Horrors will verge from ‘free XP’, especially in the early Phases of the campaign and in scenarios where players have large Crews, to a serious bug problem. If you are in a scenario and only have say 5 fighters to start, and have maybe lost one or two, and then 3 Brood Scum spawn in, then a Genestealer Alpha next Round while you’re still dealing with the Scum, it’s easy to imagine how players might get overwhelmed. This is a highly characterful mechanic, but players in an Underhells campaign should be prepared for some games to devolve into a fight for survival. Very cool. They will also need to get some models to represent the Horrors, which is more or less cool depending on budget and players’ existing painting backlog!
Genghis Cohen: I am certainly excited to have some games with these gribblies swarming over everyone, but now I need to find at least one person at the club who has bought the Secundus box. I definitely don’t have time to paint them up myself. Maybe I can do something with my (seemingly uninfected) Hive Scum models and my mate’s 40k Genestealers.
Fowler: As a fan of Downtown Dust-Up, I am excited for Downtown Dust-Up with fangs. Ash Wastes games with an NPC horde sound like a fantastic time. This mechanic seems like a solid way to get value out of the Malstrain models if you bought the Hive Secundus box.
New Underhells Campaign Scenarios
There are six of these, three Underhive (no vehicles) and three Ash Wastes (yes, vehicles) and the table for generating them alters with each Phase of the campaign. So the first two phases are more likely to be vehicular than not, but the third and final phase is purely Underhive stuff. Overall we really like these, a well thought out, varied and fun set which convey the theme of the Underhells campaign nicely.
Underhive Scenarios
- Defend the Camp is a mission with Sentries, so it probably favors the Attacker – they get a Custom crew of 8, the Defender only gets Random 4, with the usual, and abusable, caveat that they can exclude any fighters they consider inappropriate for sentry duty. One twist is that the Defender gets two of the new Trazior Sentry Guns. It’s easy to be cynical and say that’s a ploy to sell new kits. But many players will be keen to buy them anyway, they’d be easy to kitbash or proxy, and Arbitrators could always exclude them and give the Attacker a smaller Crew size. Overall this seems OK, with the normal caution about Sentry missions, but it’s less punishing than Rescue, so it’s good that in Underhells campaigns it replaces it in the procedure for Captured fighters.
- Trophy Hunt. In this battle, crews are competing to kill as many Roaming Horrors as possible, which generate from D3 Spawn Points. This seems like the rare scenario where both gangs are competing to do the same thing and it can’t necessarily be won by attacking the other gang. That can and should still happen (either the player in the lead wants to end the game, or a player is targeting opposing models which can kill Horrors) but gangs might actually play the objective in this one. A small wrinkle is that crews are quite large (Hybrid 3+5) and at least in the earlier campaign phases, the Roaming Horrors might not seem like much of a threat. But actually it’s easy for us to say that and it’s true of Brood Scum or Tyramites; everyone’s a ganger until the Genestealer Prime shows up.
- Underhells Encounter. This looks like a ‘hard mode’ scenario. Crews are just Random (4) with the remainder of gang rosters coming in as Reinforcements at one per Round. Suddenly that makes Roaming Horrors seem more threatening, especially in the last campaign phase. As added flavor, Spawn Points move randomly each Round, using Blast weapons attracts bigger Horrors, and all weapons count as Scarce (or lose the Plentiful rule) to represent the beleaguered gangers running out their expedition’s ammunition stocks. Spicy.
Ash Wastes Scenarios
- Zone Exploration is interesting. With Hybrid Crews (3+4), players take turns placing 6 Archaeotech markers in total. These can then be searched as a Basic action; success on an Intelligence check garners a point (this does not remove the marker). The player with the most points at the end is the winner, and any player with 4 or more gains some bonus Exploration points. Simple, but the twist is Roaming Horrors. In this mission they don’t appear until Round 3. But then, and each Round following, all the spawns must be placed as close as possibly to a randomly chosen Archaeotech marker. This throws a big spanner in the usual strategy for this sort of mission, which is to fight the enemy with your heavily-armed killers and do the searching with any other scrubs. We like this one, seems as if it would play well and lead to exciting endgames.
- Escape the Zone is a Rolling Roads mission, which is always fun. It can last up to 6 Rounds, and Roaming Horrors are spawning each Round from one Spawn Point, randomly chosen from 6 on the table, which players took turns placing at the start. Any Spawn Points left behind are placed in newly appeared terrain. The biggest twist here is that any fighter who falls behind the trailing edge rolls 1 Injury dice. If they are Seriously Injured, they have to see if they succumb to their injuries, and in that case (or if the dice is OoA) it’s a roll on the Lasting Injury table. Harsh! Nothing explaining how to treat vehicles, so RAW they would be okay. A gray area for Arbitrators there. Some may like that vehicles can drive clear; some may want to give them a similar penalty; there will no doubt be fruitful discussions about how to treat fighters on the transport beds of vehicles which fall behind.
- Lost in the Ruins is another very fun one. Crews start scattered across the battlefield, deploying anywhere more than 9” from an edge and 6” from another model. There are 6 ‘Exit Point’ markers along the edges, placed by the players and not within 9” of one another. While the aim is for models to escape the battlefield, it’s not automatic. Instead, if a model can get within 1” of an Exit Point it can perform a Scout action, and it may be a dead end (can’t be used further) or it may be an exit. Once exits are confirmed, models within 1” can leave automatically in the End Phase. How many models the player get out the exit(s) is the sole determinant of victory, so it could be important. In another fun bit of design, guess where the Roaming Horrors spawn? That’s right, from the Exit Points. This one looks a blast.
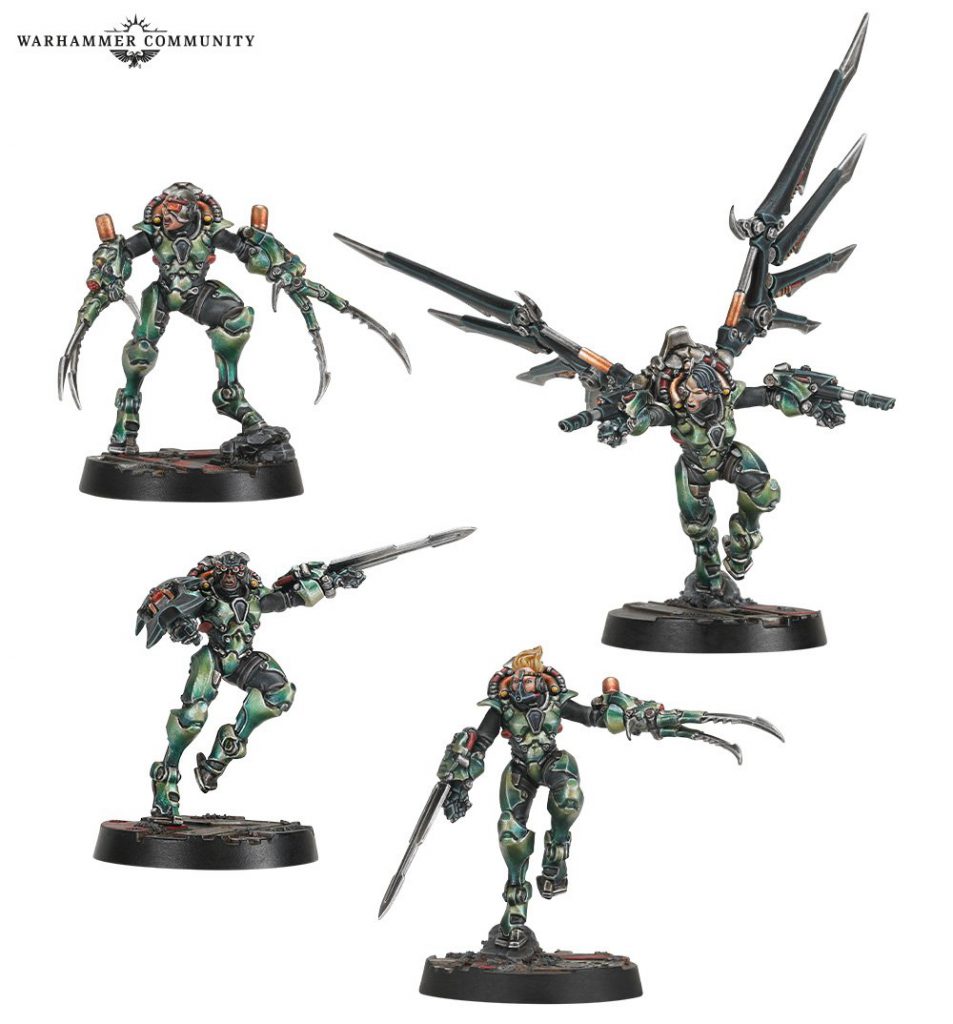
New Gang: Spyre Hunting Party
Usable in any campaign, we have the return of the infamous Spyrers. These noble (in blood, if not behaviour) scions of House Helmawr were a notorious campaign-ruiner in old Necromunda. Without going into those old rules, they were always a highly asymmetrical experience. The Spyrer player always had far fewer fighters than their opponents, so things could go wrong for them, but especially if skillfully handled, they were an exercise in frustration for most ordinary Underhive opponents. This release is the centrepiece of the book for many experienced groups and Arbitrators. Apart from the nostalgia element, Spyrers, while connected in the background to Secundus, are able and intended to be fielded in a variety of campaigns, so this is the single biggest chunk of ‘new stuff’ the book adds to the wider cesspool of Necromunda as a game.
See our detailed explanation of their (lengthy) rules, and guide on how to play Spyrer Hunting Parties here. That’s where we will go into all the equipment options and how they increase in power through upgrades, because it gets rather lengthy. In this review we will try and just hit the headlines.
Spyrer Special Rules in Campaigns
Spyrers are all about being a gang of trust fund brats on a killing spree, and that makes them stronger for handwaved technology-as-magic reasons. So on top of earning XP, they get a second system of Advances, Power Boosts, which means tracking the number of models each individual takes Out of Action (OoA) and boosting their suit and weapon capabilities accordingly every four kills. They get a separate injury chart, Suit Glitches, which replace Lasting Injury rolls completely, and there are some ways to remove Glitches from fighters. They track the Terror Level according to how many enemies the gang in total takes out, and that allows you huge benefits, notably the chance to add two more Spyrers to your gang at certain benchmarks.
That last one is incredibly important, because Spyrers do not earn or use credits in any way; neither do they get territory boons, they only hold territories to deny them to their opponents. Even at Downtime, when Spyrers do receive the standard 250 credit subsidy, that is for additional equipment. Spyrers can’t [in a standard 1000 credits campaign start] have more than four fighters, and some parties will want to start with three. That makes the ones you can eventually gain from raising the Terror Level very significant, especially since Spyrers can’t make use of Hired Guns, Hangers-On etc. Spyrers’ main priority will be to inflict as many casualties on their hapless opponents as they can, to get that Terror up and keep the Power Boosts flowing.
Spyrer Special Rules in Battles
As well as those far reaching campaign benefits, Spyrers have some very important rules that apply during games – without these, for all their puissance and fancy gear, they would be overwhelmed by numbers of opponents.
- Each Spyrer gets two activations per round. This is the biggest single power which makes them workable as a small crew.
- Spyrers only get Pinned if they are actually injured by the attack, i.e. lost a Wound or had to roll Injury Dice. This is again pretty big; it preserves their Action economy and means they can’t be neutralized by numbers of fighters with cheap weapons.
- Spyrers always take Bottle Checks on D3 rather than D6. Clearly, without this they’d have an unacceptable chance of running off as soon as one Spyrer went down. Even with it, Bottling will probably be a common way for their games to end, but that is par for the course in Necromunda.
- Spyrers never take Nerve Tests for friendly models going down or out. This is potentially important (although they’re probably operating solo and have good Cool stats anyway). It’s more for theme, these selfish brats only care about their own skins. When another Spyrer gets it in the neck, presumably they just jumped up the line of succession, or saw a threat eliminated.
Spyrer Fighters
All Spyrer Hunters are Champions (and one Leader) but they have no Group Activation rules, they are very much a band of individuals rather than a team. Any of them can be given a Caryatid Prime, which is a neat pet whose purpose is to grant them some re-rolls. All of them have the Reflex Enhancers, Masters of the Hunt, Kill Count and Spyrer Hunting Rig Glitches rules – those are just the suite of campaign and battle rules we have already described. They also all start with a Primary skill.
All Spyrers, including the leader, have identical, strong ‘mental stats’ of 7+ Ld, 5+ Cl, 6+ Wil & Int. They also share Initiative 3+, and with the exception of the T4 Orrus, a very human S3/T3. So while they are very strong, with the stats of most gangs’ Leaders, they are still just people and can be overcome if enemy attacks hit home.
As makes sense with their not using credits in campaigns, the Spyrers can only ever be equipped with the weapons and equipment on their own lists. The thing with Spyrers is that any credits not spent at Gang Creation are wasted.
Orrus Spyre Hunters
The most expensive Hunter type at 350 credits, and with good reason, because they are the only ones to start at T4 and (besides the leader) 3W. Overall, the Orrus really is the heaviest piece you’ve got as Spyrers. It is deadly in melee, especially on the charge due to its Paired weapons, and because its gun options are Sidearms (and it can access, or even start with, the Gunfighter Skill) it can lay down a lot of attacks at range as well. Provided you can bring one into play – and it’s no less mobile than most Necromunda models, it just isn’t as fast as its cousins – it should be an engine of destruction, with the ability to smash rapid fire into two targets as it closes in, then pulverize one unlucky hiver in melee. The only downside, skipping ahead to gang-building, is the (justified) cost, which means including even one Orrus generally means limiting yourself to three Spyrers at the start.
Yeld Spyre Hunters
The cheapest entry at 220 credits, the winged Yeld are the highest mobility option, optimized for range (BS2+, WS4+), but with relatively light weaponry. No matter how many Power Boosts they get, they will still be limited to Damage 1. They have Agility, Cunning and Shooting as Primary skills, which is just the best possible combination for their equipment and role, with Combat and Ferocity as Secondary. Their exceptional stat is 7” Movement, and of course their wings let them fly over terrain, while also functioning as a (pretty mediocre) melee weapon. These Spyrers definitely want to get where they need to be and lay down fire. Their suit even has an ability, improvable with Power Boosts, to make them harder to hit with shooting.
Jakara Spyre Hunters
The 250-credit Jakara are basically pure melee fighters, only very slightly more mobile than the Orrus at M6”, but themed around offensive skill rather than brute strength. With WS2+ (and BS4+, shooting is barely a thing for them) they boast an unusual 3A base. They have Cunning, Combat and Brawn (in descending order of usefulness) as Primary skills, and unfortunately the excellent Agility and Ferocity trees are only secondary. They will be well protected in melee against a single opponent thanks to their energy shield, but brawling at close quarters is dangerous and they will be vulnerable if targeted from outside their front 90 degree arc. They can take a Versatile melee weapon, the Naga Blade, as the alternative to their traditional Monomolecular Sword, and it is far, far better – see our Spyrer guide for the breakdown.
Malcadon Spyre Hunters
At 240 credits, Malcadon are built for mobility, nearly as much so as the Yeld, but they are geared for close quarters at range and in melee, with WS/BS3+. They have access to Toxin melee and always carry a (short-ranged, non-template) Web weapon, so their emphasis is perhaps more on taking out armoured or multi-Wound targets. While they don’t fly, they boast M7” and have a Grapnel Launcher and Drop Rig included in their suit, so they can usually cross gaps, ascend or drop down sheer surfaces, and other such Underhive parkour. Compared to the pure melee threat of a Jakara, the Malcadon is perhaps less deadly face to face, and lacks a shield, but with better capability for short ranged shooting, and better mobility. Skills are Cunning, Shooting and Combat as Primary, with Ferocity and Agility as Secondary. These spider-men have a pretty good toolbox and seem like a strong all-round pick, for close quarters but not just melee.
Spyre Hunt Master
The leader of all these psychopathic plutocrats is a sort of pick-your-own buffet. Their Sovereign suit is technically its own thing, but they can mount any combination of the Yeld, Jakara and Malcadon weapon options. Presumably the Orrus stuff wouldn’t lend itself to being swapped on the physical models, and offering a whole separate profile to represent a heavier suit was too complex. It’s hard to complain as this is a high degree of customizability. Hunt Masters technically start at 180 credits, but since an unarmed Overseer would be a massive gamble and extremely uncool, final cost is likely anywhere from 260-300, with weapons but before any Wargear. They have a slightly enhanced profile, with M6”, WS2+, BS3+ and a critical 3W and 3A. Their Primary Skills are Leadership, Shooting and Combat, with Agility and Cunning as Secondary. That is an interesting spread; some picks will be determined by the Hunt Master’s choice of loadout, while Leadership has options to consider regardless. Spyrers could benefit a lot from Iron Will, given their Bottle Checks are on a D3, or the Inspiring Presence skill would allow the Hunt Master to Group Activate with one other Spyrer, opening up a way to hunt in a pair.
What’s really unique and interesting here is the flexibility of a Hunt Master’s loadout. They can pick 2 options from a list that reflects everything used by Jakara, Yeld and Malcadon Spyrers. The Hunt Master can start with one Augmentation Level on either a weapon or their Sovereign suit. This pick-and-mix selection gives a lot of potential combinations, but as a rule we’d expect a lot of Hunt Masters to take a good melee weapon, and either a Jakara Mirror Shield or a Yeld gun – there doesn’t seem as much benefit to taking two melee weapons, and you can’t take the Malcadon or Yeld weapons as a full pair.
Caryatid Prime
This is a pet very much in the vein of the existing Caryatid, or Genestealer/Chaos familiars. It’s probably less frustrating than those, to the great relief of Spyrers’ opponents. Its raison d’etre is to stay within 3” of its master, which lets the Spyrer re-roll one failed Ammo check and one failed armor save per Round. That’s very important, as Spyrers are deadly but not especially tough given their cost – they will live and die on a very few armor, or field armor, saves.
Aside from that key effect the Caryatid is basically nothing. It moves 6” and flies, which should let it keep up with most Spyrers. It’s T2 with a 3+ unmodifiable save to keep it safe from harm, and rules to try and avoid any template hits. One point we do notice is that the Caryatid itself doesn’t have much protection beyond its admittedly formidable 3+ save. T2 with only 1W means that you can put some rolls through onto it, and once it fails it is rolling Injury Dice. If you find yourself facing an onrushing Spyrer, with only a piddly non-AP, low damage weapon, it will often be better to shoot the Caryatid first.
Playing Spyrer Gangs
All Spyrer gangs will probably start with three or four fighters (they can technically do two but only by grossly over-equipping their Hunt Master and one Orrus). That wouldn’t work for most fighters in Necromunda, but because of their rules giving them 6-8 Activations, and taking Bottle checks on a D3, Spyrers should be workable as a gang. It’s very hard to tell without lengthy testing quite how they will fare against conventional gangs over the course of a campaign. Double-dipping on progression mechanics with Power Boosts on top of Advances is fairly major, but will they outweigh the rapid growth that a lot of gangs undergo via credits? Ultimately each Spyrer is a potential terror, but they still take a meltagun to the face like anyone else. Using this gang will demand pretty savvy play from their owner.
Semi-New Gang: Secundan Incursion Gang
This gang format is fairly simple – take a normal gang, and replace the normal Leader with a Spyre Hunter of your choice (not the Hunt Master version). This can be done for any of the six House gangs, Palanite Enforcers, Ironhead Squat Prospectors, or Venators. No outlaw or heretic scum allowed! The Spyrer leader obviously doesn’t have the Group Activation rule itself, but it is also explicitly forbidden from taking part in any Group Activations – no doubt the aristocrat in the suit refuses to take direction from any lowly ganger champions. They also won’t help keep friendly fighters around after failed Bottle tests. As with any leader, they can’t retire, and just to make things extra clear, the book notes that if they die, you simply pick another model to be leader as normal, and that model doesn’t become a Spyrer!
It’s important to note that all the Spyre Hunters’ rules specify they can only take the weapons and wargear on their own page, and indeed can only be given new wargear at Downtime. These restrictions would still apply in a Secundan Incursion gang, it’s not carte blanche to load your Spyrer up with Frenzon Collar and Armored Undersuit!
This seems like quite an easy twist on a classic gang and a good middle ground for those who want to play a Spyrer but not go all-out on their unique campaign experience. It seems as if the Spyrer/Leader model will still get Power Boosts, use the Suit Glitches instead of normal Lasting Injuries, and (all-importantly) gets double Activations and resistance to Pinning. But an Incursion gang obviously doesn’t track Terror Level, wouldn’t roll Bottle tests on D3, or some of those other Spyrer campaign rules.
Genghis Cohen: Personally I’m rather addicted to making beastly Leaders and pouring too much of my gang’s resources into them. This seems like a way to front-load that cost. An Orrus leader at 350-400 credits might be rather fun, and with double activation most any sort of Spyrer will justify its cost in a conventional gang. I can’t see my Orlocks bowing down to the man, but my Enforcers would certainly be eager to lick noble boots…
Fowler: I love the idea of a melee beast Spyrer leading a Van Saar gang, or an agile sniper Yeld with a Goliath gang. One of the topics of discussion around the Necromunday water cooler is finding excuses to actually use the cool dudes you build. Incursion gangs are a neat way to get a Spyrer on the table.
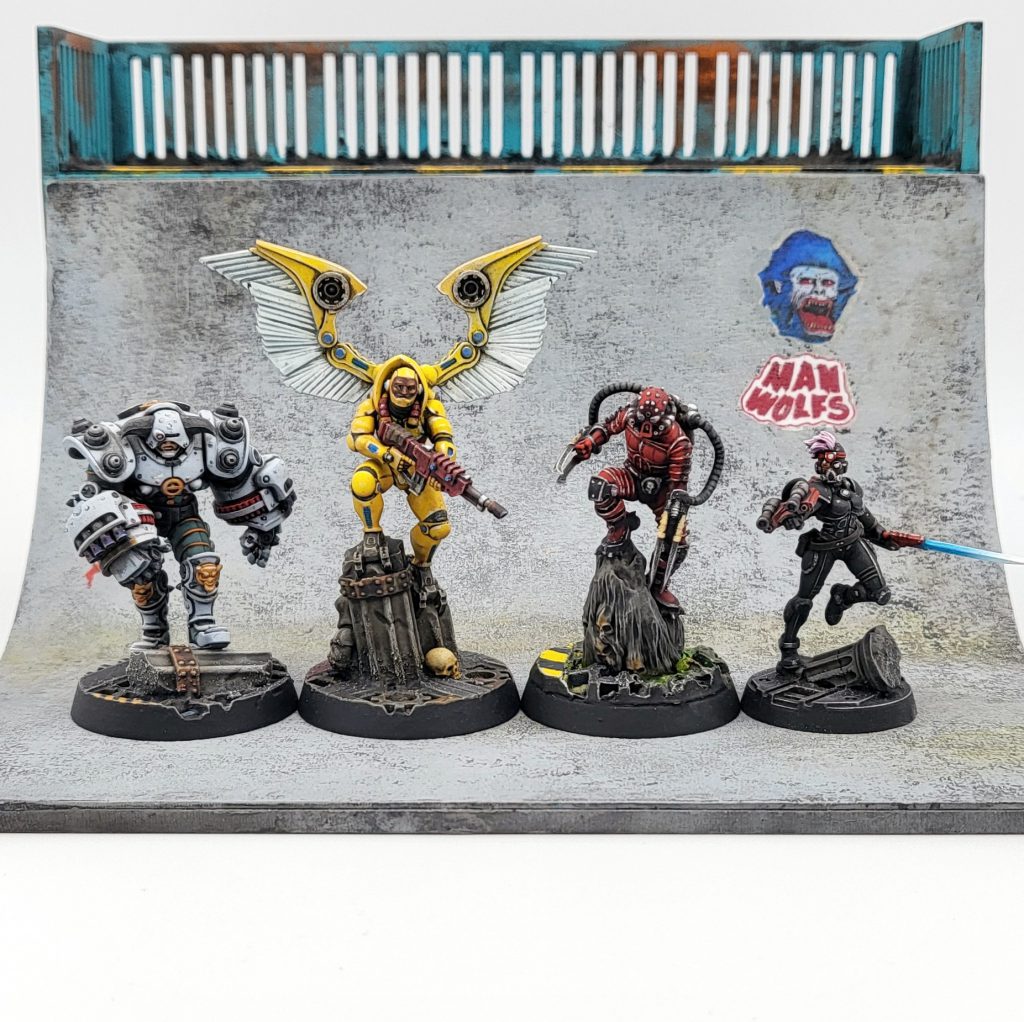
New Specialist (Van Saar): Tek-Hunter
Taken from the specific context of Secundus Campaigns and their own Spyrer-led gang, this book gives the rules for Van Saar Tek-Hunters as ‘available to any Van Saar gang’. That is a little bit vague, our presumption was that players can select one of these in lieu of the one Tek Specialist which would normally be allowed at gang creation. RAW you would not be able to promote normal Teks or Subteks into Tek-Hunters during a campaign. This is one for players and Arbitrators to discuss prior to starting a Campaign using Van Saar, if they want to include these new specialists, because on the whole they are a little better than the House of Artifice equivalents. Not in a game breaking way, but they open up some new possibilities. RAW, they are just fighters ‘available to any VS gang’, so some readers pointed out that a VS gang should be able to include any number of Tek-Hunters! That may be permissible by RAW; our viewpoint as Arbitrators is it would be fine, if the VS player(s) in question want to play with the specialist wargear outlined below. However, if they are doing it to gain unrestricted access to Special Weapons, maybe this isn’t such a good idea. Arbitrators will have to thrash it out with their VS players before the start of a campaign, balancing the need to let them play with their new toys, against being fair to other players.
A Tek-Hunter has the same Skill options as a normal Tek Specialist and shares the normal rules for Specialists – Tools of the Trade and no restrictions on types of weapons. Their profile does boast M5”, which is a nice upgrade, and while their actual weapons list is comparatively restricted, unlike pretty much any other Specialist, they can choose weapons freely from the Trading Post. That’s honestly great. Van Saar don’t really get unique special/heavy weapons except the mediocre Rad stuff (and the Rad Gun is available to certain Tek-Hunters from their own list). They just have some of the best general-availability stuff on their lists. So while a player may have to jump through a minor hoop of visiting the TP, using a Tek-Hunter opens up fresh options for the gang’s Specialist slot. There are some great Xenos-themed weapons which could be modelled as experimental VS tech, like Hrud Fusils. Or hey, if you just want a guy with a plasma gun, the Tek-Hunter can do that just as well as a normal Tek Specialist and there are extra options.
You choose one of four types for a Tek-Hunter on recruitment. Unlike in a Secundus campaign, these don’t perform post-battle actions or any such campaign layer benefits. Their only effect is to unlock unique kit on the equipment list. We detail these below, but just want to point out that in Necromunda, most wargear may be freely swapped between fighters. So RAW you could give some of this kit to one type of Tek-Hunter, then distribute it to another, or a leader or champion elsewhere in the gang, as long as that kit is available from the TP. E.G. a Med-Tek can buy a normal medicae pack – that’s TP equipment, so it could be handed off to another fighter later in a campaign, if the Med-Tek dies for example. They can also take a unique Servo-Medicae. That’s unique to them, it’s not offered in the TP. So no other type of fighter can ever use it. Make sense?
Let’s dive into the details:
- Gunntek. The shooter-themed Specialist is kind of the most obvious choice, because that’s what most VS Specialists do, and they can take the strong Refraction Cloak for 35 credits. This wargear gives a flat -1 to hit against incoming shots, -2 if you didn’t move in your previous activation. That’s honestly pretty great and worth taking as the fighter develops.
- Teknomat. This is not a choice we can recommend, there is no unique wargear, the benefits are access to light carapace armour (overpriced for a 1W Specialist, and anyway can be chosen from the TP for anyone), Rad Guns (a poor choice) and a new flamer/man-catcher weapon. This is unfortunately typo’d in the Book of Desolation, shown as Strength -1 and no AP value given. Looking at the Secundus rules, it’s pretty clear this is supposed to be a S4 AP-1 Blaze template (the same as a normal flamer) and a melee weapon at normal Strength and AP-1, with Entangle. This is a fairly poor weapon for its cost anyway, you could get a flamer and a flail for the same price – but the flamer part gains Unstable, so it’s a terrible pick.
- Med-Tek. This fighter can buy a medicae pack as equipment, which is not useless, but is overpriced at 30 credits. They can also take a unique piece of kit, the Servo-Medicae, which lets you give a downed fighter within 1” an immediate chance to Recover, as a Basic Action. That is again a rather useful capability, but bear in mind that as well as credits, you are paying by using Actions that could be directed towards the enemy. In a lot of situations you might spend your Activation more aggressively, and just try to assist the downed fighter in the End Phase.
- Augur-Tek. This choice gives two options for equipment, one prevents Infiltrate or other setting-up of enemies within 12”, which is actually very useful if you’re getting wrecked by Nacht-Ghuls on the regular. The other, more expensive option gives Group Activate (1). Which again is pretty handy.
Overall the Tek-Hunter is a nice addition to Van Saar gangs’ capability, but it’s just sort of thrown into the book without further comment. Arbitrators and players should definitely come up with some additional guidelines on how to use this content. Throwing one of the four types into a House of Artifice-built gang, and never being able to take another, seems like it’s underusing their potential. Allowing Subteks to promote into Tek-Hunters would be a straightforward buff, but a minor/manageable one. The biggest profile difference is the enhanced Movement and a promoted fighter wouldn’t get that. None of the unique equipment is spammable, since a gang cannot include more than two of any particular specialist type. Having free access to TP weapons is a pretty big deal, but as long as the VS player doesn’t abuse the privilege it’s hardly unfair – normal Tek Specialists have powerful themed weapon options anyway. So consider opening up the Tek-Hunter rules as a full replacement for Tek Specialists in Van Saar gangs. It gives the faction at least something to develop that isn’t “buy better guns and shoot them”, while it does keep that option.
New Alliance: Abyssal Ferryman Team
This Alliance is basically a unique mechanic for the Underhells campaign. Skip ahead in the review to read that context, but in short, archaeo-hunting gangs get this package and their Malstrain opponents get an Ash Wastes style subsidy of 400 credits instead. The Ferryman team sticks around for the first two of the campaign’s three phases. Our instinctive read is that this is a very strong group for a notional value of 400 credits, but that asymmetry makes sense in the campaign context.
What does an Abyssal Ferryman Team actually contain? You get two strong fighters, the Ferryman being a Leader/Champion type, and the Deck Hand almost a Brute, both with generous equipment allowances. You get a bog-standard crew profile in the Steersman, and a very good heavy vehicle, the Custom Rig, with a relatively restrained allowance for its upgrades and weapons. We are going to go through their profiles and the possibilities in detail below, but all three fighters come with a starting Skill, freely chosen from any of the six core book trees, and none can ever gain XP or Advances. The Custom Rig is the only content that, RAW, can be used outside of the Underhells Campaign.
Genghis Cohen: I am head over heels with this alliance as a concept; it’s just so damn cool. I am already planning the conversions — I would love to house rule the team to actually gain XP/Advances (and Lasting Injuries – gotta take the rough with the smooth), and I have plans to introduce them in other types of campaign if appropriate. For example they would be great as the foundation of an Outcast gang, which I think even works under RAW. The Dramatis Personae that are special versions of the concept all look terrific and I keenly anticipate the FW model releases.
Beyond the extra models which may fight alongside your gang, an Abyssal Ferryman Alliance offers some campaign benefits in the Underhells campaign (see the relevant section for context). The player can choose what nature of ferrymen they are working with:
- Explorer teams grant D3 exploration points to the allied gang at the end of each cycle. Free passive income/benefits, always nice. Exploration points can be converted into a very low number of credits (5EP=D3x10 credits, so 1EP=4 credits on average) but have some other campaign uses.
- Hunter teams re-roll all Wounds against Roaming Horror enemies, and allow friendly models within 6” to do the same. This all depends on how big an issue these randomly-appearing enemies are. Unfortunately they will be most frequent and dangerous in the third campaign phase, when the ferrymen stop accompanying the gang!
- Tinker teams allow their gang to add D6x5 credits’ worth of kit from their House lists at the end of each cycle. This is nice, but bear in mind it’s not income into the overall pot. You have to spend it on House available equipment (not generally a problem), but also you can’t save it up, it can only be ‘spent’ in its batches of 5-30 credits, so you can only use this to buy minor stuff.
- Survivor teams allow for one Medical Escort action for free in every cycle. That alone would be big. Visiting the doc has an average cost of 70 credits, so unless a player is very confident they won’t lose fighters OoA, this is a very valuable insurance policy. Additionally, you can perform this Medical Escort on a fighter who suffers a D66 Memorable Death result! That is huge and we recommend taking this one.
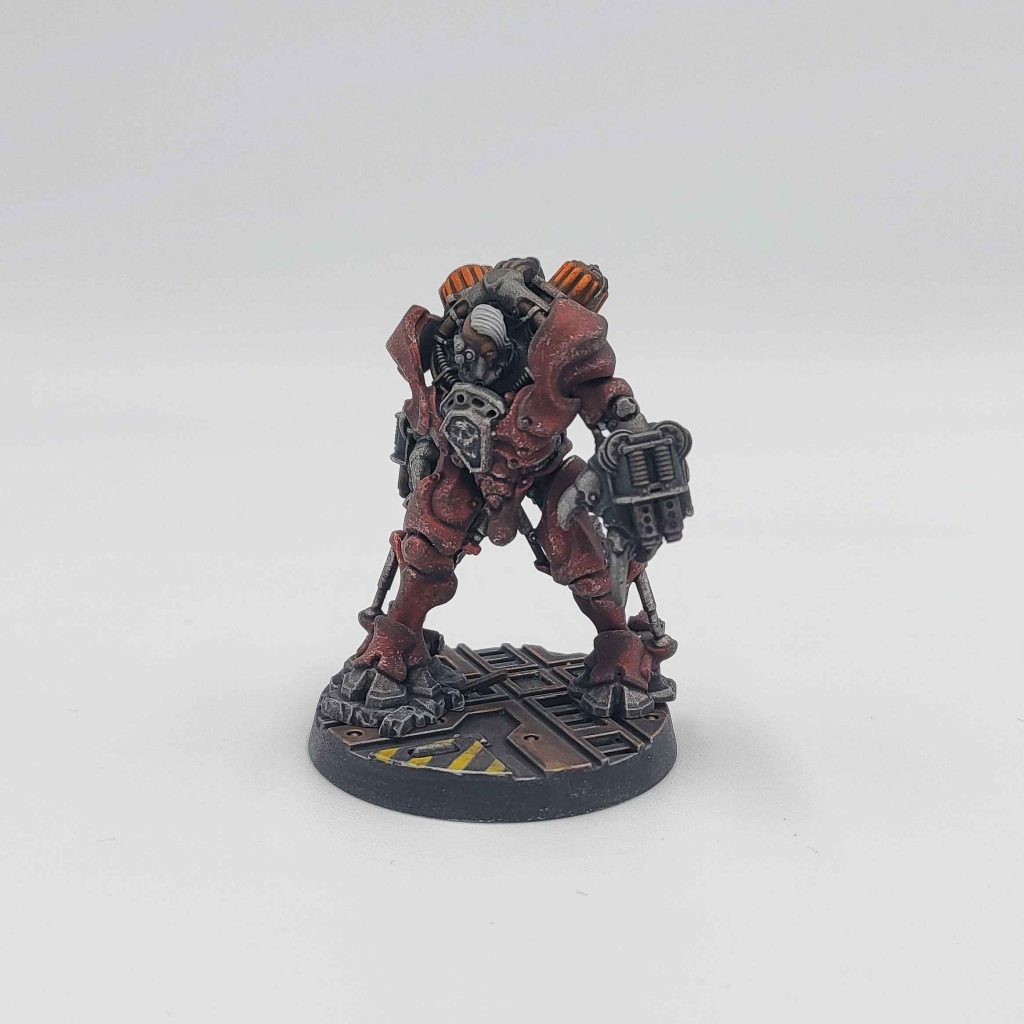
Abyssal Ferryman
Like a Venator or Outcast leader/champion, this fighter has 3 profiles to choose from. They come with Mesh armor and can take 140 credits of weapons and/or wargear from the TP, up to Rarity 10. Now that is a lot of gear. Not enough for the most extreme heavy or special weapons, but you can take some very punchy stuff, or medium-punchy with excellent wargear on top. Given the free Skill choice, you could build literally anything, from a gunslinger to a support shooter to a melee brawler.
Deck Hand
Of the 3 profile options, one is M3”, and 2W, which despite the benefits (S4, higher mental stats) seems like a real dud option. Coming with Flak armor (boooooo) and 100 credits’ gear allowance at up to Rarity 8, these aren’t quite as customisable as a Ferryman. But a Deck Hand can easily afford a prestige Basic weapon, or a more budget Special weapon like a grenade launcher or long rifle, and still take some protective gear or melee weaponry.
Steersman
This is very much the standard crew profile, with BS4+, Cool 6+, and Driving/Shooting as Primary Skills. That’s great! The ability to pick a skill at recruitment is incredibly valuable. I would be tempted to improve Handling Tests, because when driving a big heavy beast like a Custom Rig, the threat of losing control and rolling looms large.
New Vehicle: Custom Rig
First we need to discuss this as a vehicle on its own merits – unlike the Ferryman team, it has an assigned cost – 205 credits – and can be used in Ash Wastes or other campaign play. Bottom line, this is a far better deal than either the Heavy custom vehicle profile from the Book of the Outlands, or the Rockgrinder. It is not nearly as strong as the Ridgehauler, and that is a good thing. If anything, that highlights the vast gulf between the effectiveness of the Ridgehauler and other vehicles. With M7”, T8 on the front and sides, T7 on the rear, this is more mobile than the other ‘lesser’ heavy vehicles, and tougher to boot. Like the Ridgehauler it has a decent Handling of 7+, and of course there are cheap Upgrades to improve this, indeed down to 5+ if staying Wheeled. That is probably the more attractive option, but if difficult terrain is an issue, or if that’s how it is modeled, a Custom Rig can be Tracked at the cost of going down to M6”. With 5HP and a 4+ save, it is approaching the Ridge Hauler’s level of difficulty to take out. Not as hardy, no. But that is 1 more HP than the Goliath or custom heavy, and resilient enough that sustained fire will usually be required to Wreck it – even with high Damage weapons, you would need at least three rolls on the vehicle damage table, although of course losing control and rolling remains a risk. With two weapon mounts, it can be outfitted as a weapons platform and will be the most efficient heavy platform in the game besides the Ridgehauler itself (or the Ironcrawler or Squats’ Skalvian Prospector).
Note that a Custom Rig can take Upgrades, as well as Weapons and Wargear, freely from the TP, like other custom vehicles/unlike the preset types – well worth the Jury-Rigged downside increasing the cost of potential repairs, which shouldn’t come up too often since it’s so difficult to Wreck! This is one of the big upsides from both a modeling and a gameplay perspective. Worried about rolling? Make a Custom Rig with the Turtle Back upgrade and a transport cage inside! The possibilities are endless.
As part of the Abyssal Ferryman Team Alliance, in the Underhells campaign, the Custom Rig is limited to 150 credits of weapons/wargear. That is a lot in many contexts, but not so much with weaponry for heavy vehicles. Basically it is locked out of the prestige heavy weapons, which is appropriate for the campaign setting. It seems most likely that the Rig will be built as a transport platform, with a transport bed/cage and some wargear to keep it rolling, as well as some cheap Basic or Special weapons to make use of its two weapon mounts. Taking anything bigger, like the heavy stubber or mining laser from its own weapon list, will absorb almost all its budget.
New Vehicle Upgrades & Wargear
There are a couple of new upgrades and pieces of vehicle wargear presented in this book; oddly they aren’t on the Custom Rig’s starting list, although it could take them from the Trading Post. They appear to be more of a generic add-in for use on any vehicles, with a theme toward the sort of stuff you’d want when entering the Secundan Abyss. Indeed, some of these things specifically relate to Underhells campaign rules like Roaming Horrors, and won’t be relevant in other campaigns.
Body Upgrade: Chrono Cradle
This lets a chrono-crystal be mounted on the vehicle. What does that do? No idea!
Body Upgrade: Electrified Hull
For 30 credits and at an Illegality (7), this means that any fighter moving onto the vehicle suffers a S3, D1 hit with Shock. This is silly because Shock procs off the to-hit roll. Since the hit is automatic, it will never come up. The fighter just takes a S3 hit. I mean, this is more effective than the existing wargear (Body Spikes) which does the same thing, since that requires the fighter to fail an Initiative test first. But overall, fighters jumping on your vehicle isn’t that big an issue in most games. If it is, because that fighter is hard enough to rip chunks off, a single S3 hit, which is explicitly noted as not Pinning the fighter, so it can’t make them fall off – another bizarre design choice – is not going to help. Skip this.
Body Upgrade: Electrostatic Projector
This is specifically to combat Roaming Horrors. As a Basic Action, you can limit all such models within 18” to a single Action when they Activate, for the remainder of the Round. That’s actually very effective, especially against Tyramites and Genestealers, who effectively wouldn’t be able to Charge. The only issue is that vehicles are in the first two Phases of the Underhells campaign, and Roaming Horrors get to be a big problem in Phase 3 – when all the battles will be Underhive with no vehicles allowed. So this is worth taking as insurance against Roaming Horrors – it’s only 20 credits and Rarity (7) – but the time for it to shine may not appear.
Wargear: Chrono-static Compass
This wargear means players “subtract 1 from the roll” when generating Roaming Horrors. Possibly an example of poor editing or re-drafting, this doesn’t really make sense. In all the Underhells campaign scenarios, Roaming Horrors do enter the game once a certain Round begins. The only random roll involved is the D66 roll to see what type of creatures appear. Obviously, subtracting 1 from a D66 is going to do nothing most of the time (the results on the table are grouped into, eg 11-16, 31-46, that sort of thing). The effect is near useless, ideally it will be clarified in an FAQ at some point.
Wargear: Malstrain Kill Markings
For 25 credits and Rarity (8), this gives the vehicle +1BS when shooting at Roaming Horrors. If taken on a heavy vehicle like a Custom Rig which has two (or more) good weapons mounted, this is actually a good upgrade – but you need sufficient Roaming Horrors to shoot at, and as mentioned, they don’t hit peak density until after the vehicles drive away. So it’s a nice bonus if your gameplan for your vehicles is as bunkers to repel Roaming Horrors.
Genghis Cohen: Interestingly, you really could establish a big Custom Rig as a bastion against Roaming Horrors. Give it the Electrostatic Projector, these Kill Markings, and load it with guns and a big Transport Bed for all your models. The enemy gang might trouble you, but any number of Roaming Horrors are just a turkey shoot at that point.
Fowler: Ridgehaulers are cool looking models, but many campaigns have discouraged or outright banned their use. Having a new vehicle type that can open the model back up to seeing the tabletop in those campaigns is fantastic. As an arbitrator, I highly suggest that you consider houseruling away the Jury-Rigged rule. Encouraging more use of custom vehicles will really increase the variety (and creativity) of the rides that show up in your campaign.
New Gang: Malstrain Gang
Mirroring what was in the Secundus box and rulebook, this option is for a Genestealer cult gang which is unique to Hive Secundus’ gnarly mutant ‘stealers. Apart from being obviously tied to the new Malstrain models and Brood Scum, rather than 40k’s Genestealer models, this gang has a different style. Its Brood Scum gangers are very similar in role to the old GSC’s, or indeed to Helot Cultists, regular Hive Scum or any other cheap and cheerful fighters. But the Malstrain gang’s leadership are not the up-skilled and up-geared humans (or part-humans) that other gangs expect. Instead, all those elite models are actual [Malstrain] Genestealers and up to one Coalescence, which are not very customisable.
Malstrain Gangs are explicitly noted to be designed for the Underhells Campaign and nothing else. But like everything in Necromunda, that’s a guideline and we can’t imagine many groups having too big a problem with their use in other campaigns. They are quite basic, without much in the way of customisation options. The only actual special campaign rule for the gang is that they don’t have a dedicated Leader profile. Instead, you pick one of the recruited Champion models at gang creation, and they just become the designated leader, with no change in profile or Group Activation, although they do get leaders’ ability to try and keep friendly models within 12” from fleeing the table, following a Bottle Test failure.
That lack of customisation and Group Activations, and the fact all post-battle actions are forbidden to Malstrain gangs, really adds to the sense of them being an NPC faction. They are by no means helpless, and can access unique stuff – Genestealers! – but they seem very fixed in what they can do.
Champion: Malstrain Genestealer
These things are exactly what you expect Genestealers to be: melee blenders. They are 270 credits, which is about what most gangs expect to pay for a champion with an excellent melee weapon and some protection, and that’s basically it, besides having Tyramites attached they can’t take any other wargear or of course weapons. How do they stack up? First off, they have a remarkable statline: M6”, WS3+, S&T4, I3+, and most importantly W3 and A3. That’s better than anyone else’s leader. Also, while Ld is basically irrelevant and their Int is a terrible 10+ (these wouldn’t be much use in certain scenarios) they boast a 4+ Cool stat and a very good 6+ Willpower. To add to all this they start with four set skills: Nerves of Steel makes them nigh un-pinnable on that Cool, Dodge and Evade makes them a little harder to kill, Rain of Blows is usually not needed but ensures very little will survive being in melee contact at the start of their activation. On top of their Wounds, Toughness and Skills, they have Mesh Armour and a Bio-Booster. They have two melee weapons (so do gain +1 bonus attack and must split the total evenly, there is no rules caveat specifying which has to be used). Venomous Bite is AP-2 with no other mods, but it is Toxin – this has a good chance to take out most multi-wound enemies. Razor Sharp Claws are S+1, AP-1, but Damage 2 and Rending. Those will be useful against lighter armoured enemies and those with 1W, to get multiple injury dice.
Okay, so a Malstrain Genestealer can get into combat with M6” and Nerves of Steel. It is likely to kill most things in the game (a multi-wound, 2+ save model with rules like True Grit to aid their injury dice rolls, isn’t by any means guaranteed to go down) and it’s not easy to kill it either. Does all this make a purely melee champion worthwhile? Yes and no. A Genestealer is great at what it does, but it’s not particularly efficient in some ways, and for experienced players, the lack of any customization is rather off-putting. It makes Malstrains a simpler gang to play but also something of an ‘NPC gang’.
Of course taking Advances is the one way you can customise a Genestealer. Beyond the obvious stat boosts, they can pick Ferocity or Combat as Primary, and Cunning or Agility as Secondary. With the obvious best pick for melee combatants (Nerves) already there, some ‘stealers may want to target True Grit to stack with their Bio-Booster and improve their chance of escaping death the first time they roll Injury dice. Combat Master would actually be valid, giving them better odds at engaging two enemies at once and mincing both. Even at the increased Secondary price, skills like Infiltrate or Sprint might be better – the Malstrain Genestealer won’t struggle once it’s in combat, it simply needs to get there.
Champion: Malstrain Coalescence
Winning the award for ‘hardest Champion name to spell’, the Coalescence is limited to one per gang. It’s basically a Wyrd model, since it starts with one Malstrain Wyrd power (see below) and can gain new powers in the same way as Primary Skills. It is T4 with 2W, but only comes with Flak Armour as protection. It’s not astoundingly mobile at M5” but does fly, and while it isn’t very skilled (WS4+/BS5+) it does have 3A striking at S4, AP-1, D2 with its Feeder Tendrils weapon – not defenseless in melee. At 155 credits all included, it’s not too expensive relative to other gangs’ beefy models.
So this fighter is slightly less focussed than the Genestealer, but really the only customisation comes from the Wyrd powers it chooses (or Skills, Cunning is Primary and Ferocity/Combat are Secondary). It does seem like the natural choice for a Malstrain gang’s Leader, since it could usefully hang around with Brood Scum while the Genestealers want to be homing in on the enemy like guided missiles with claws. But without Group Activation, or even post-battle actions, that’s a pretty minor choice.
Ganger: Malstrain Brood Scum
Normal scum, really, in their stats and equipment options. Uniquely, though, they can access Basic, Close Combat weapons and Pistols from the Trading Post. That’s a big benefit over normal Scum, but bear in mind this gang never has anyone who can make Trade actions post-battle. So your access will be determined by a straight 2D6 Rarity roll, possibly with a Reputation bonus in late campaign stages. No stacking bonuses from Trading champions to make exotic equipment accessible!
There’s not much more to say here; access to cheap Scum is a leverage-able strength in Necromunda. In yet another case of ‘you can’t have nice things’ they can promote to Specialists, but the gang doesn’t start with one. When promoting a Specialist happens 1 in every 18 Advances, for bog standard gangers who are going to die like flies, we don’t expect to see many special weapons in Malstrain gangs.
Exotic Beast: Malstrain Tyramite
It’s got Dodge! That’s the only nice thing about a Tyramite. They’re 70 credits for a T2, 1W pet, so Dodge, their inbuilt Flak Armor and Bio-Booster will often fail to keep them on the table. They have one good Toxin attack with their stinger, but at WS4+ it’s not that reliable. They might be some melee protection for a Coalescence, since they can easily keep up at M7” and flight. But they lack any rules to counter-charge like a Goliath Sump-Kroc. Genestealers can take them too, but it’s hard to see when they would need them – perhaps as a human (Tyranid?) shield to force enemies to take Cool checks to target the ‘stealer itself. Not as if players will have many other upgrades to spend credits on.
Malstrain Wyrd Powers
Six of the blighters! These mostly center on scaring or debuffing enemies, with one fairly nice buff aura and one damage dealing power:
- Catalyst is your buff. It’s a Continuous effect power and lets friendly fighters Shoot or Fight immediately before being removed, if they go OoA. Not bad for the swarm of disposable Scum Malstrain gangs may be using.
- Hypnotic Gaze is a Double Action but forces a standing and Ready enemy within 9” to lose their Ready marker. That’s actually a powerful tool, but has too many caveats. 9” is within the threat range of just about anything and since it’s a Double Action you’re not doing anything else to them. Unlike Photon Flash stuff, it has to be used on Ready enemies, you can’t stack it to the next Round. So to use this you need to be within 9” with your Coalescence, Activate before your target in the Round, and hopefully have some allies to attack it later on in the Round. Otherwise you’re just holding the enemy off. That could be super frustrating for opponents, if the model you’re affecting is a tooled up Leader or Brute – but one failed Willpower roll and you’re toast.
- The Horror targets an enemy within 12” and they have to take a Nerve Test. Not flat out useless but nearly so. Even against enemies with such low Cool this is reliable, the Broken condition isn’t as painful as being actually hit.
- Leech Essence. Your one direct damage power is a single S3, AP-1, D1 hit. Womp womp. Doing damage does let the Coalescence heal a Wound or remove a Flesh Wound. I guess this could threaten single Wound, lightly armored enemies who aren’t very Tough.
- Paroxysm is a Continuous effect, setting the target’s WS/BS to 6+. Again, that is good, but a 9” range means you are in a risky position when you use it.
- Aura of Despair is a Continuous aura effect, all enemies within 12” suffer -1 Cool. Incredibly minor. Maybe it’s better in Underhells campaigns when your enemies would risk Insanity on failing Nerve tests. But not by much.
Genghis Cohen: Look, I don’t want to get too negative here, but Necromunda is not a mass battle game, and it relies on individual models’ action economy. That means buffs/debuffs, even if they are auras, have to be very strong if they are to be a better use of actions than simply attacking the opponent. Maybe I’m too basic, but I really dislike using a powerful model to spread these conditions while my opponents’ similarly-costed fighters are drubbing me about the head and shoulders with heavyweight melee weapons. The only power I’d even consider there is Catalyst, and even that is just shenanigans, you don’t do that well in games if your strategy relies on your fighters being taken out.
Fowler: Considering the model that is likely to be manifesting these powers, the list is a bit puzzling. Having randomly rolled psyker spells in a couple of campaigns now, there are a ton of (at the very worst) flavorful if not effective powers. Too many of these are situational or incredibly risky.
Semi-New Gang: Malstrain Corrupted Gang
This option exists for players who want the flavor of an existing gang, with the zesty tang of Malstrain infection. It’s a very inclusive Xenos parasite, and you can apply this set of conditions to any House gang, Enforcers (Badzone and Palanite) and to Corpse Grinders. Interestingly, you can’t do this to Helot Cultists – maybe it doesn’t chime with their leadership structure, or maybe the designers just forgot about them as that other Chaos gang. You also can’t do a regular Genestealer Cult infected with the Malstrain, which is fair enough as Gene-ception would get confusing (although there is a narrative hook there for anyone who is interested; conventional Genestealer cultists would presumably be virulently opposed to the Malstrain).
Being corrupted gives a few benefits:
- You can make your leader a Psyker for +35 credits, which includes a single Malstrain power. We’re not too keen on these, but eh, it sounds cool.
- You can take 0-3 Genestealers, and 0-1 Coalescence, as Brutes. This is the big one. Genestealers are awesome, with their starting Skills and mobility they are definitely competitive with other melee Brute options. Coalescence, not so much.
- Leaders and Champions can take 0-2 Tyramites each.
- Any number of Malstrain Brood Scum may be hired. These are fully Gang Fighters (so they count towards your mandatory numbers, weighing against Leaders/Champs and other special fighters), and that is pretty great. Lots of gangs could usefully swap their rank and file bods for 30 credit scrubs who can access the Trading Post for better weapons. Note that they don’t replace your normal Ganger/Juve options, so this opens up quite a lot of flexibility.
Against that, of course you are an Outlaw gang and can’t access your own House’s Brutes or Exotic Beasts, which you probably wouldn’t want to if going in on the Malstrain theme. Frankly this is pretty great and also a much more playable option than the ‘pure’ Malstrain gang. Unless you really hate having Leaders and Champions who can take individualized gear, and/or you want as many Genestealers as you can cram in (okay, that last one might be valid) then the Corrupted gang seems a superior choice. We won’t even discuss the Group Activation of Genestealers with Overseer. Fly, my pretties!
New Dramatis Personae
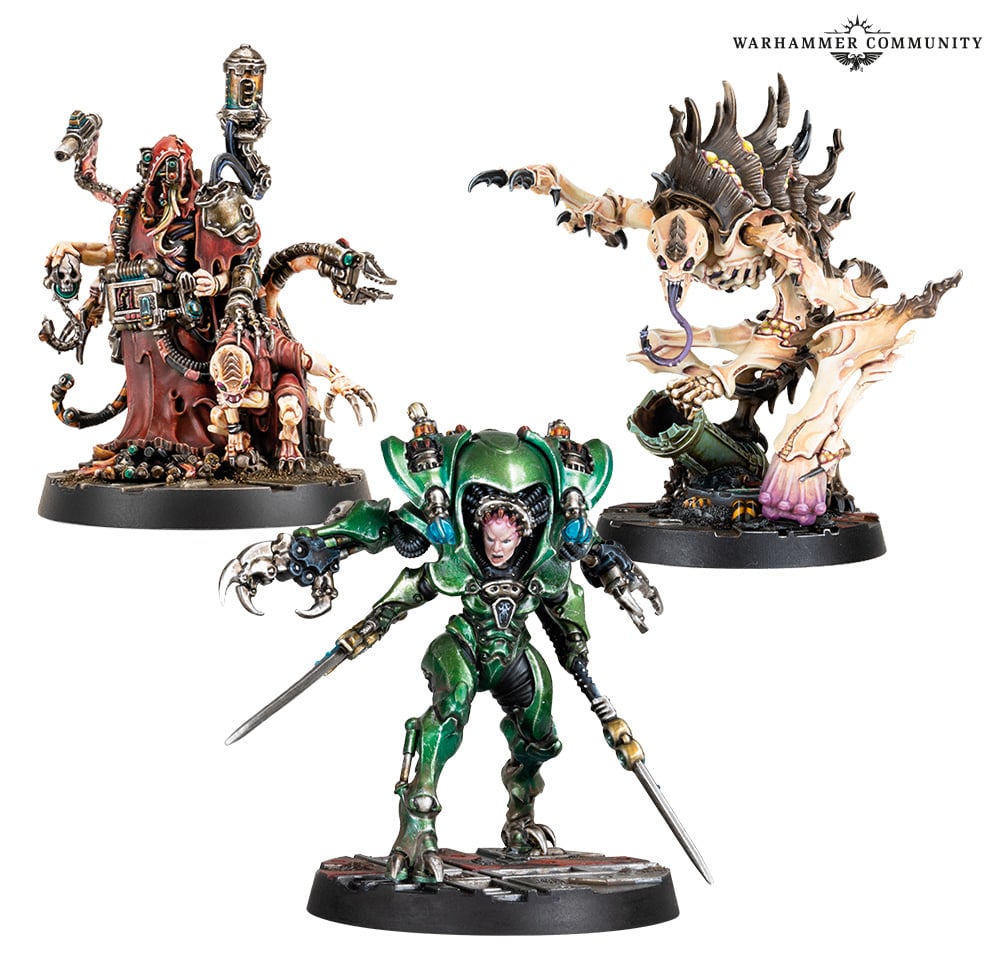
Malstrain Alpha
This Xenos big bad is described as the biggest trophy sought by Spyrers after the “illusive Malstrain Patriarch.” Do they mean elusive, or is this a deniable hint that the Patriarch doesn’t exist, and something stranger controls the Malstrain? Get your tinfoil hats on, scummers.
On the tabletop, it’s a powerful House Agent, available to Malstrain or Malstrain Corrupted gangs, as you’d expect. Basically one of their Genestealers, ie a deadly killing machine, but with additional WS, Attacks and Strength. But more importantly it has the Infiltrate skill and can ‘fade’ as a Double Action – removing itself from the table and redeploying as if with Infiltrate at the start of the next Round, before Priority rolls. Honestly that is terrific. Similarly to how Nacht-Ghuls work, these rules take a simple melee monster and give it the ability to tie your opponent up in knots by appearing where it is least welcome.
Lady Haera in Sthenian-Pattern Hunting Rig
This version of Haera Helmawr is sort of like a House Agent – any Law-Abiding gang can petition her and if rep isn’t too high she can appear in your game for 100 or 200 credits. What’s odd is that you’d think this model could interact with Spyrer gangs; she has a rule, Sibling Rivalry, which makes her weapons Reckless if she Activates within 9” of a Spyrer Hunter. But a Spyrer Hunting Party is explicitly forbidden from using Hired Guns, except for those that are explicitly noted as being able to work with Spyrers. We can’t find any such caveat for Haera in this book. Normally our advice would be to use the rules as (presumably) intended and let her join in the aristocratic bloodsports. But she specifically needs a credit payment to show up, and Spyrer gangs never earn credits. So we suppose the only way to even have her Sibling Rivalry kick in is if the model provoking it is in the opposing gang (which seems like it would go against the fluff of the rule) or if she is petitioned by a Secundus Incursion gang. In which case, keep her away from your Spyrer leader!
Haera in a Spyrer suit is still a deadly melee threat, but what’s incredibly important over her fancy-dress version is she gets the Spyrers’ double activation and resistance to Pinning. If she can get into base contact she pushes out 5 WS2+ attacks on the charge – her Phase Sword is wince-inducing since it hits at S5 and ignores armor altogether, with D2. Her Power Spear isn’t quite as good, at S4, AP-2 (but Power will ignore armor sometimes as well) and D1. However it is Versatile 2”, so effectively gives her an extended charge range, which can be crucial. On top of these weapons she makes 2 additional Power Pack attacks with her suit’s Sthenian Claws, at S4, AP-1, D2. We say this of a lot of models, but she genuinely should mince anything on the charge, some enemies can be developed to withstand an initial rush by having stacked saves or familiars canceling hits – Haera will put a lot of hits through, some of them with Phase. Outside melee range she is limited to throwing her spear up to 8”, which is a fairly meaty hit at S4, AP-2 D2.
But wait, she also has Medusan Projectors, petrifying beams which are “by far the most dangerous weapon in the Sthenian Spyre Hunter’s arsenal.” What murderous capabilities do these archaeo-weapons possess? It’s a single target Flash attack. 12” range. -1 to hit. Womp womp. Flash is a great effect when your Juves are chucking 5” templates of it. A hyper-aggressive melee model has better things to do, so you will never use that weapon. A real disconnect between fluff and rules.
It would be wrong to say Haera is a glass cannon, she has some protective stats at W3 with Dodge, a 4+ armor save and 5+ field armor. But the emphasis is definitely on aggression.
Hermiatus
Genestealer Adeptus Mechanicus! It’s well known that every 40k model release is just Necromunda conversion fodder, but this is one model that may have 40k players clamoring to buy a Necromunda release. This is another House Agent for Malstrain or Malstrain Corrupted gangs. He’s a Psyker with all of the Malstrain Wyrd powers, and also a pretty good melee brawler, with 3A at WS3+, S5, AP-2, D3 and Rending. Honestly quite a powerful house agent, but with a split identity of psyker or melee threat – we’re betting the latter is more effective.
Ferryman Teams
There are two pairs of dramatis personae in the book, Hagthor Jarlun / Aster Felsturn and Madryc Helbane / Lugrun. These pairs are both examples of the Abyssal Ferryman teams, with the first name being the actual Ferryman and the second the Deck Hand. They can be taken as normal Hive Scum hired guns, and if you hire their Ferryman boss, the Deck Hand (Aster or Lugrun) comes in at a much reduced price. Or, and this is a much more attractive option from a gameplay standpoint, you can take one of these pairs as your Abyssal Ferrymen allies in an Underhells campaign, replacing the normal models (note that they still get a Custom Rig with its equipment allowance and a Steersman crew for it).
Hagthor Jarlun and Aster Felsturn
Hagthor is a Squat with a Pulverising shotgun and a Versatile power wrench. Aster is the woman from the cover of the book, with a stub gun and an axe. But while both are notably tough models (T4 with 3W and light carapace armor) they don’t have great damage output for their significant cost. Like most special characters in Necromunda, their kit is flavorful but not too optimized – they get two Skills each, and their equipment actually costs just above the allowance for generic ferrymen, but it’s not exactly what you’d choose. We do really like Hagthor though, he comes with True Grit and Fixer, which are wonderful skills to have on a tough ally.
Madryc Helbane and Lugrun
Crazy names, crazy guys. Madryc seems to be a kind of scumbag pistoleer scoundrel (no concept art in the book unfortunately) and Lugrun is a slave ogryn with a massive harpoon and a skull mask. These dudes’ schtick is they are adrenaline junkies, and as such don’t immediately desert an Archaeo-hunters gang at the start of the third Underhells campaign phase. Instead, they roll after every battle in that phase, and on a 4+ they stick around. Very useful. While Madryc is a bit of an oddball – he has a very punchy, Rapid Fire pistol, with 4 mostly niche Skills and is ‘only’ T3 2W – Lugrun is a melee wrecking ball. He’s a Brute whose signature harpoon and hook are Paired, Versatile and very dangerous.
Genghis Cohen: I am usually much more keen on making my own conversions and characters, and I definitely will do so for the Ferrymen teams, but I am also keeping a keen eye out for when/if GW release these dynamic duos as resin character packs. They really do tickle my imagination and I could see using either set in a campaign.
Fowler: Hermiatus is a techno-baroque weirdo with a little guy. What’s not to love!
Conclusion
We think this is the best book Necromunda has had since the core rule update last year. The new rules for Spyrers bring an iconic threat roaring back in an interesting way. The Underhells campaign is a strongly themed option which offers some great potential for groups that can muster up some Ferrymen and Malstrain models to bolster their existing collections. Honestly the campaign variables and the Scenarios themselves are some of the best-thought-out we have seen for the game (not always a high bar). Even if players have no interest in a Secundus-set campaign, and want to keep playing in their accustomed Underhive or Ash Wastes settings, the Spyrers, the Custom Rig vehicle, the Tek-Hunters and even the Sentry Guns all add some nice content to the wider setting. Trying to be more critical, the pure Malstrain gang seems very much for antagonists not protagonists. But that same criticism can’t be leveled at Malstrain Corrupted gangs, those are strong and good fun, without breaking the game. There are a few rules oddities and tidbits of janky interactions, but in terms of atmosphere and (we predict) gaming experience, this is peak Necromunda.
Have any questions or feedback? Drop us a note in the comments below or email us at contact@goonhammer.com. Want articles like this linked in your inbox every Monday morning? Sign up for our newsletter. And don’t forget that you can support us on Patreon for backer rewards like early video content, Administratum access, an ad-free experience on our website and more.
