


")


Many thanks to Games Workshop for providing us with an advanced copy of the Book of Desolation and the Spyrers box for review.
Introduction – Why Play Spyrers?
Spyrers are the old bogeymen of the Underhive, returned as the new threat on the block. This gang is the original oddball of Necromunda; it plays nothing like any other. All your fighters will be veritable gods of war with capabilities undreamt of by other models, no matter how formidable — and they all act twice per round. You will be able to take advantage of unique campaign progression systems which can rocket you into untold heights of combat power — if you can keep scoring kills (i.e. sending enemy models Out of Action), which is a big thing for this gang. On the other hand, you don’t earn credits in the conventional sense; although there are still a couple ways to add equipment and even new fighters to your gang, they are limited. So opposing gangs may actually start to amass stockpiles of weaponry that genuinely threaten you, and your advantages may fade in a long and/or high-earning campaign.
Spyrer Special Rules in Campaigns
Spyrers have some key differences to how their gang works against the ‘normal’ baseline. They have one leader and all the other Spyrers are Champions; this means they can do post-battle activations, but none of them come with Group Activations as standard or the ability to keep other models from fleeing after Bottling Out. Besides their new Caryatid Prime pets, Spyrer gangs are specifically excluded from any Alliances, Hired Guns or Hangers-On; your only models will be Spyrers. So you have a very small pool of individual, highly elite models – when equipped, Spyrers start at 220 credits and can cost up to 400+ before even piling into wargear, meaning you only start with 3-4 models in a normal, 1000 credit campaign.
We will explain the stats and wargear that make each type of Spyrer Hunter strong in detail below, but to enable this small team to function as a gang, they have some more complex rules at the campaign level:
- Spyrers don’t have a stash (any credits not spent at gang creation are discarded) and the only time they ever earn credits is the Downtime subsidy. These guys have trust funds; they don’t go rifling through pockets. Instead the intent is to upgrade their suits and add fighters via some other progress mechanisms. This also means they never access kit from the Trading Post; they only pick gear from their own lists, and even then only on recruitment and potentially at Downtime.
- An intriguing side note to this is that should Spyrers capture an enemy fighter, they cannot dispose of them, sell them back or take any other action. Their only use is to ‘lure more prey in’. Possibly foolhardy, since playing the Rescue mission as defenders could be punishing for Spyrers!
- A much less intriguing side note is that Spyrers suffer no side effects from Chems and never become addicted. It’s hard to see why this is written, since they can never buy Chems and would never access them as Territory Boons. Perhaps it’s to clean up any edge cases if a hostile player shoots them with Chem injector darts.
- Spyrers can contest/control Territories in campaigns, but not claim any income or Boons from them. Essentially they just deny them to their opponents, and perhaps track it as a campaign victory condition. They always start a Campaign with, and cannot lose, a Spyrer Base Camp territory. This just means that one Spyrer, even if in Convalescence, can always perform a post-battle action. Marginal, but we assume this is intended to stop a small gang being locked out of any actions following a loss.
- Spyrers use a unique injury table, Suit Glitches. It’s the same as Lasting Injuries in that you roll a D66 every time you go Out of Action (OoA). The table is perhaps more unforgiving in terms of stat debuffs. But, it means Spyrers can never be Captured, never have to pay to visit the Doc etc.
- 11 is still +D3 experience and no ill effects. But the other beneficial results from low rolls, e.g. gaining Fearsome, are all removed.
- 12-26 is Superficial Damage, no lasting effects, identical to Out Cold.
- 31-36 is Convalescence. Not big since more post-battle actions are of minimal use to Spyrers and you have some assurance there from your Territory boon and potentially Terror Level (see below).
- There are no Recovery results, including for the higher-roll stat debuffs, only Convalescence. Presumably this is to avoid any unlucky Spyrer players simply ending up with no playable models in their next game.
- 41-64 are various permanent debuffs. These are more varied than the Lasting Injury table, including things like weapon AP and armour save penalties. All of them count toward the Spyrer’s Glitch Count.
- 65 is to roll D3 times on the table. Note there is no caveat saying this can’t result in…
- 66: Memorable Death, exactly as we are used to. Fear the RNG!
- IMPORTANT: At the end of a battle, you check your Glitch Count. If it exceeds the Spyrer’s Toughness, they are deleted from the roster. This is a potential risk, but there are definitely ways for a Spyrer player to manage this.
- Note that during Downtime, the player can pay 100 credits to remove all Glitches from a single Spyrer (as far as we can tell, they could do this twice, with 200 of the 250 credits given as standard). This seems highly desirable if a Spyrer has multiple or important debuffs. Because this is separate to Lasting Injuries, the ways to clear those (e.g. Stinger Mould or Bionics) don’t apply. However, it will probably be more common to remove Glitches using the Power Boost system (see below).
- Spyrers gain experience just like other fighters and spend XP on Advances just as other leaders/champions. The only boost here is that after a victorious game, all your Spyrers gain +2XP from terrorizing the locals. What fun! This is actually a pretty good bonus; across a campaign, assuming you win half the time, your Spyrers are likely to get an Advance or two extra from this, aiding their growth into killing machines.
- I say aiding, because Spyrers all have a full-on second progression system which exists alongside XP. You track each Spyrer’s Kill Count (models taken OoA). As a post-battle action, any Spyrer can essentially spend 4 kills to gain a Power Boost. This can basically clear all Suit Glitches the model has, and clear their ill effects. Or, it lets you roll on a D6 table of permanent stat increases:
- 1. Increase WS or BS, to maximums of 2+.
- 2. Increase Initiative, to a maximum of 2+.
- 3. Increase Movement, to a maximum of 8”.
- 4. Increase armour save, to a maximum of 2+. This one is huge. Spyrers basically cap out at a 4+ armour save normally and don’t have access to the wargear (like Armoured Undersuits) which normal gangs use to improve it. So it makes a big difference if you spike this result as early as possible. You’d want it twice in almost all instances, but it is just a ⅙ chance.
- 5-6. Increase the Augmentation Level of one of your pieces of equipment by 1. When another roll would take the Spyrer over the maximum, this is the result the Power Boost defaults to.
- So what? These Power Boosts, coming every four OoA results inflicted, will vary a lot in intensity based on what sort of scenarios and opponents the Spyrer player is facing. A lowly Cawdor Juve or Helot Cultist counts just as much as a Brute for the Kill Count. Even better, the Roaming Horrors which spawn into the Underhells Scenarios would be a rich source of boosts. We could guess that moderately successful Spyrers will be claiming a boost every couple games. To contrast to the existing progression system, earning one Power Boost would generally entail earning at least 8XP (can be substantially more if the victims are Leaders/Champions) so it’s a comparable rate to Advances. Double dipping is pretty strong, and of course Spyrers are exactly the kind of powerful models that tend to earn XP (and now Power Boosts) at an accelerated rate.
- We should also note that most Spyrers are going to max out WS/BS with two results (one for the leader) and Initiative with 1. Glitches can offset this, but equally you can take XP Advances as well, and of course you can clear any number of Glitches with one Power Boost. So results will tend more towards Augmentation Levels as campaigns go on. Indeed you might want to spend the low XP cost on an Initiative Advance to stack the odds.
- We will go through Augmentation Levels in detail for each Spyrer type, but basically each Spyrer suit can take two Augmentation Levels, and each type of weapon can take three. Given each Spyrer will carry two weapons, that means a model can take up to eight Power Boosts with this result before maxing out. 32 enemies taken OoA is a lot, even for them, but certainly possible in a long campaign. Augmentations tend to be things like improved armour or field armour saves for suits, Damage, Range or AP of weapons, and various traits or stat increases for both.
Terror Level
This is a sort of Reputation-like mechanic which you track for your Spyrer gang. Start the campaign at Level 1. At the end of each game, you add +1 if the Spyrers took at least 4 fighters OoA during the game (or Wrecked 4 vehicles – they count toward the same target of 4 things taken out). You add +1 if an enemy was taken OoA, or vehicle Wrecked, during the first round of the game. Finally, you add +1 for each enemy Leader of Champion taken OoA by a Spyrer during the game. That one is big, because it’s the only one that stacks. Doesn’t matter if you obliterate 12 gangers in the first round of a game, that would still only be +2 Terror Level in total. However you could easily stomp three enemy leaders/champs during a victorious game, and that would be an additional +3.
Terror Level grants your gang boons at certain thresholds. At 5 you can add a free Caryatid Prime. At 10 you can add another Spyrer, up to a value of 300 credits – that’s a big jump. Note this won’t ever be an Orrus Spyrer as they exceed the cost maximum. At 15 you get an additional post-battle action even while in Convalescence (whatever). At 20, you can add another free Spyrer, up to 400 credits! So clearly 10 and 20 are the big thresholds there. This is quite important because I think successful Spyrer gangs should make them in around three and six successful games, at a guess? So while not adding huge numbers, a Spyrer player who doesn’t get consistently stomped will expand their hunting party somewhat during a campaign.
Spyrer Special Rules in Battles
As well as those far reaching campaign benefits, Spyrers have some very important rules that apply during games – without these, for all their puissance and fancy gear, they would be overwhelmed by numbers of opponents:
- Each Spyrer gets 2 activations per round. This is the biggest single power which makes them workable as a small crew. It’s difficult to overstate how this impacts the action and acitvation economy of the game. Your opponents’ calculations of your models’ threat radius and similar tactical considerations are going to play havoc with their mental health.
- Spyrers only get Pinned if they are actually injured by the attack, i.e. lost a Wound or had to roll Injury Dice. This is again pretty big; it preserves their Action economy and means they can’t be neutralised by numbers of fighters with cheap weapons.
- There’s also an interesting question of whether Spyrers should still take Skills that mitigate Pinning. They won’t call on Nerves of Steel most of the time, but when they have to it might be crucial. Spring Up is still great as they can trivially get to 2+ Initiative, then the advantage of being Pinned in cover (cannot be targeted with normal shooting attacks) is worth the risk of not getting up for free. It’s not really clear if a Spyrer can choose to become Pinned by a hit that doesn’t injure them, we think not. But even so the times they do get Pinned are precisely when they most want to be untargetable, to prevent being finished off (assuming they are in cover at the time).
- Spyrers always take Bottle Checks on D3 rather than D6. Clearly, without this they’d have an unacceptable chance of running off as soon as one Spyrer went down. Even with it, Bottling will probably be a common way for their games to end, but that is par for the course in Necromunda.
- Spyrers never take Nerve Tests for friendly models going down or out. This is potentially important (although they’re probably operating solo and have good Cool stats anyway). It’s more for theme, these selfish brats only care about their own skins. When another Spyrer gets it in the neck, presumably they just jumped up the line of succession, or saw a threat eliminated.
Spyrer Fighters
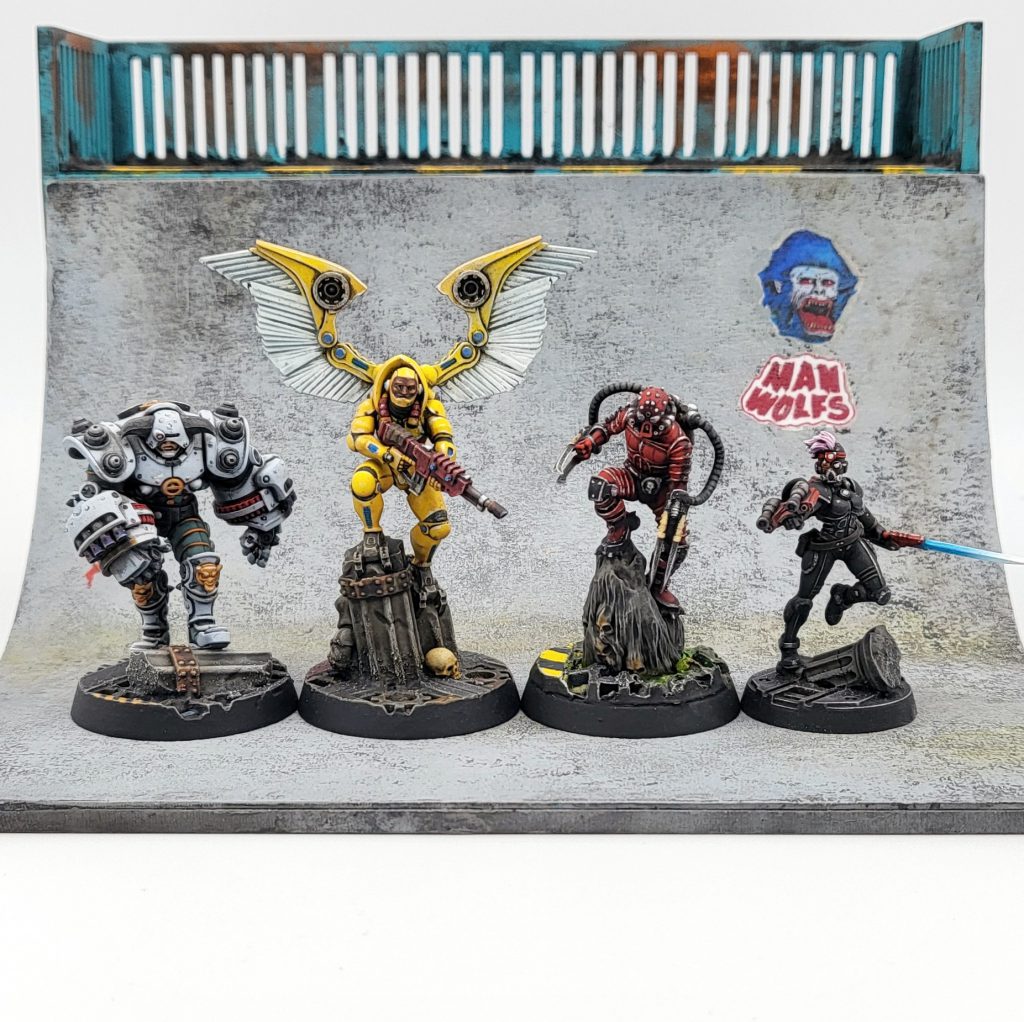
Well that’s a laundry list of special case and exceptions over the ordinary working scum of Necromunda. Let’s look at the actual fighters to see how they put their nightmarish blood sports into practice. We will actually go through the ‘ordinary’ Spyrers first, because the single Leader can mix-and-match weapons from the Malcadon, Jakara and Yeld types, and it will be easier if they are examined first.
All your Spyrer Hunters are Champions (and one Leader) but remember they have no Group Activation rules; they are very much a band of individuals rather than a team. Any of them can be given a Caryatid Prime, which is a neat pet whose purpose is to grant them some re-rolls (details given below). All of them have the Reflex Enhancers, Masters of the Hunt, Kill Count and Spyrer Hunting Rig Glitches rules – those are just the suite of campaign and battle rules we have already described. They also all start with a Primary skill.
All Spyrers, including the leader, have identical, strong ‘mental stats’ of 7+ Ld, 5+ Cl, 6+ Wil & Int. They also share Initiative 3+, and with the exception of the T4 Orrus, a very human S3/T3. So while they are very strong, with the stats of most gangs’ Leaders, they are still just people and can be overcome if enemy attacks hit home.
As makes sense with their not using credits in campaigns, the Spyrers can only ever be equipped with the weapons and equipment on their own lists. We will go into the weapons in detail type by type, but all Spyrers draw on the same fairly narrow list of Wargear (Malcadons and Leaders can also take Chem Synths, which are relevant to their weapons):
- Bio-Boosters. Actually a pretty good upgrade for such elite models. Any chance to escape a deathblow with a Flesh Wound could be critical.
- Photo-Goggles. Great for mitigating Pitch Black conditions, so worth considering if your campaign uses those heavily (as the Underhells campaign does).
- Photo-lumens. I guess this is for if your multi-billionaire nepo babies can’t afford Photo-Goggles.
- Respirators. These would actually be worth it as insurance if you know at least one other player in the campaign will be taking Gas weapons.
- Web Solvent. I guess if you are getting completely dumpstered by Web weapons, but this isn’t usually a good pick.
None of the real auto-takes on most gangs’ Wargear shopping lists are on there. We advise readers to remember that almost all Wargear in Necromunda is overpriced relative to guns and bodies. The thing with Spyrers is that any credits not spent at Gang Creation are wasted, and in Downtime, you can’t recruit normally, you can only spend those credits on equipment. So, at creation, we expect most players will figure out how many fighters of their chosen types they can cram into 1000 credits, then spend any excess on Wargear. At Downtime, while some may need to clear Glitches using credits, that will be the point when Spyrer gangs get a little dump of Wargear.
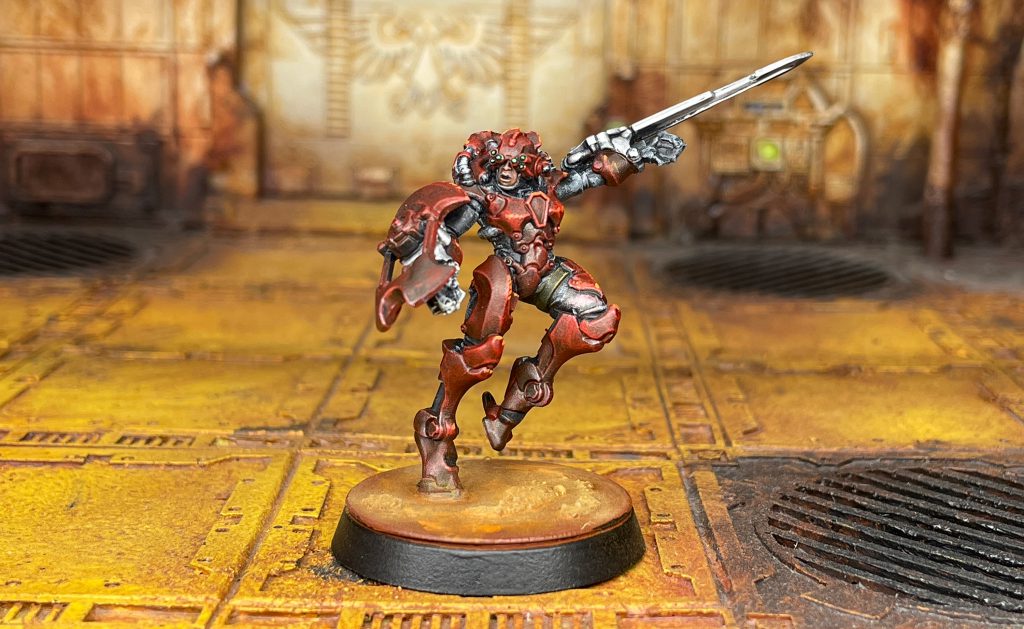
Orrus Spyre Hunters
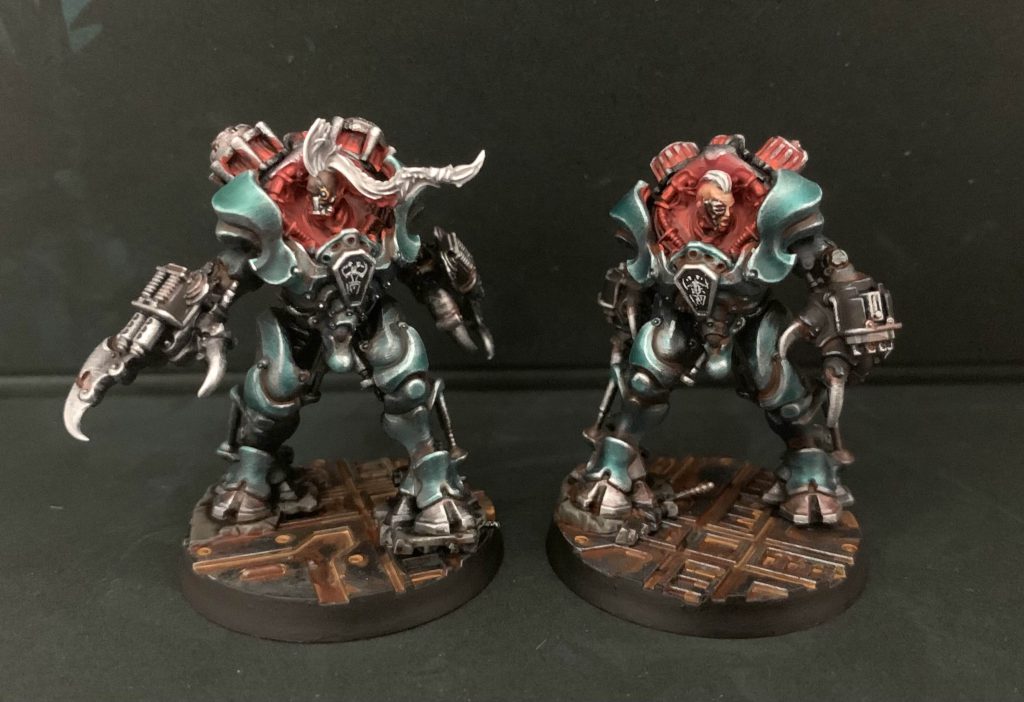
The most expensive Hunter type at 350 credits, and with good reason, because they are the only ones to start at T4 and (besides the leader) 3W. With a relatively restrained M5” and a versatile WS/BS 3+, the Orrus is basically a short to mid ranged brawler, with great melee weapons and pistols with a max range of up to 20” to batter through opponents. They get Brawn (boo), Shooting (hurrah) and Combat (okay) as Primary skills, with Ferocity and Agility as Secondary.
- Rig. The Orrus suit boasts a 4+ armour save, the best of the Spyrer options, and 6+ field armour. Augmentations increase the field save to 5+ and 4+ successively.
- Melee weapons. The stock power talons can be upgraded to power fists for +50 credits. Both have the Paired rule, meaning the Orrus’ base attacks go from 2 to 4 on the charge, and either option will mince almost any human size fighter in that situation.
- Power Talons are S+1, AP-3, D1. Oddly they don’t have the Power trait, a possible editing error.
- Augmenting these adds Rending, then increases Damage (the important one), then makes them S+2.
- Power Fists are S+2, AP-1, D2. Certainly an upgrade over Talons on the whole, but there is a loss of AP, and spending 50 credits makes a big difference on whether and how you can get another Spyrer into the gang.
- Augmenting the fists gives them Pulverise, which is a nice rule if attacking tough models you won’t necessarily overkill, then AP-2, then a whopping Damage 3.
- Our Savants here on Goonhammer say the difference between the starting profiles against lighter targets is negligible. Personally I think the Power Fists seem worth the expense, above all if you want something that can smash your opponents’ tooled up Leaders, Brutes etc.
- Because the range weapons are sidearms you can also use them in melee, which is fun for pasting light targets with Rapid Fire bolts.
- Power Talons are S+1, AP-3, D1. Oddly they don’t have the Power trait, a possible editing error.
- Ranged weapons. These are all two Sidearms. You can’t mix and match, but whichever type you pick, an Orrus can make two attack rolls when it shoots (at -1 to hit), and that is a massive deal, making it unusually reliable — and since Orrus can pick Gunfighter as a skill on recruitment, they can effectively engage two targets in each of their Activations. That is a huge benefit, especially when Spyrers are outnumbered, as will often be the case.
- Bolt Launchers have a Basic Weapon-level max range of 20”, and get +1 to hit within 8”. That alone is a huge selling point for them, because it transforms the Orrus into a mid-ranged model and mitigates its lack of any special mobility. The profile is fairly punchy too, at S4, AP-1, D1, but Rapid Fire. That last is big, since it’s basically a straight-up x1.66 effectiveness multiplier on a ranged weapon.
- Augmenting the Bolt Launchers increases first Damage, then AP, and finally boosts them to Rapid Fire (2). These are great, especially with the first step giving you that all-important Damage stat.
- Volkite Dischargers are the same cost and are basically just worse. They can only fire to 10”, with no accuracy bonuses. They do have S5, but no AP, and get a terrible Ammo roll. They have the new weapon trait Deflagrate – causing a second hit if damage is inflicted by the first – which is a significant trait but in no way sufficient to make up for the range and versatility, let alone Rapid Fire.
- Augmenting Volkite Dischargers, something which a player would only do if consciously trying to rein their Spyrers in, boost Damage, then AP, then gives a hilariously minor extension of long range – from 10” to 12”! This is just a terrible weapon in comparison to the classic Bolt Launchers. Maybe the rules writer didn’t like the model.
- The prestige option, Disintegration Matrices, are extremely deadly pistols, as they should be for +60 credits. They hit at S5, AP-2, D2, but they have Sever. That’s huge, anything reduced to 0 Wounds by these just goes straight out, a very powerful advantage over conventional weapons. Now we still think they’re a poor choice. It’s not because they have 6+ Ammo and Scarce, lots of good weapons have that. It’s not because they only fire to 3” accurately, 12” with a painful -1 to hit penalty. No, they are Unstable. That means a 1/12 chance to go OoA every time you fire. The Orrus carries two pistols. You have a ⅙ chance to remove your extraordinarily powerful model every time it blazes away. That’s completely unmanageable as a risk. Just take the Bolt Launchers.
- If you are mental, augmenting Disintegrators first removes Scarce (not a big deal on a 6+ Ammo weapon), then increases AP and finally Damage.
- Bolt Launchers have a Basic Weapon-level max range of 20”, and get +1 to hit within 8”. That alone is a huge selling point for them, because it transforms the Orrus into a mid-ranged model and mitigates its lack of any special mobility. The profile is fairly punchy too, at S4, AP-1, D1, but Rapid Fire. That last is big, since it’s basically a straight-up x1.66 effectiveness multiplier on a ranged weapon.
Overall, the Orrus really is the heaviest piece you’ve got as Spyrers. Provided you can bring one into play – and it’s no less mobile than most Necromunda models, it just isn’t as fast as its cousins – it should be an engine of destruction, with the ability to smash rapid fire into two targets as it closes in, then pulverize one unlucky hiver in melee. The only downside, skipping ahead to gang-building, is the (justified) cost, which means including even one Orrus generally means limiting yourself to 3 Spyrers at the start.
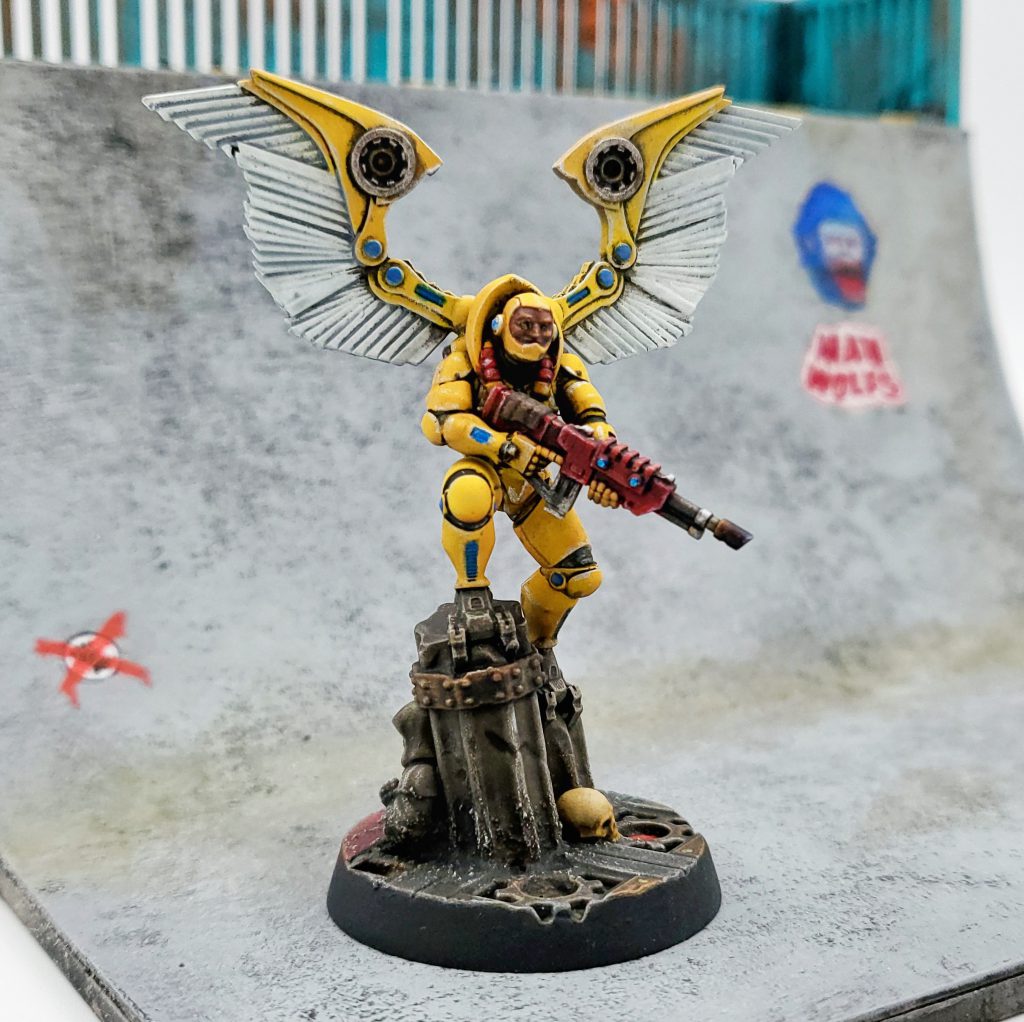
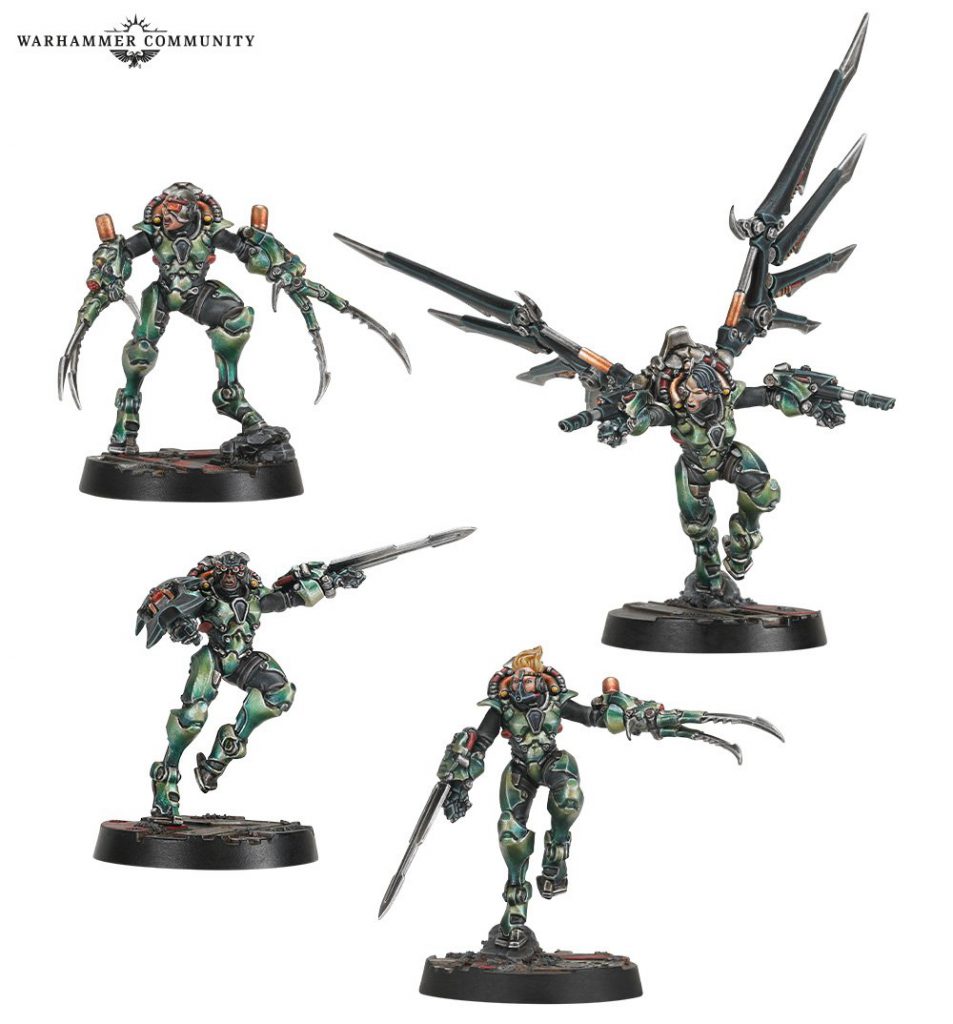
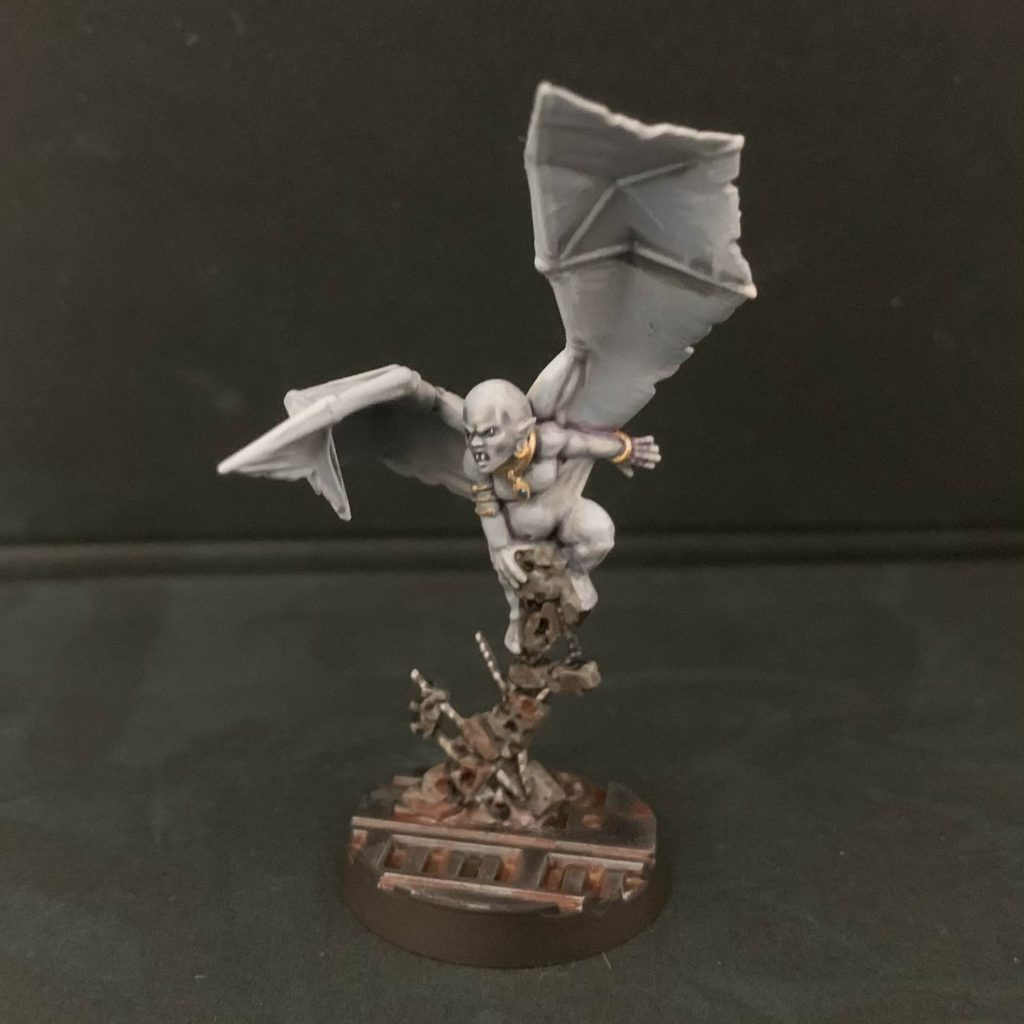
Yeld Spyre Hunters
The cheapest entry at 220 credits, the winged Yeld are the highest mobility option, optimized for range (BS2+, WS4+) but with relatively light weaponry. They have Agility, Cunning and Shooting as Primary skills, which is just the best possible combination for their equipment and role, with Combat and Ferocity as Secondary. Their exceptional stat is 7” Movement, and of course their wings let them fly over terrain. These Spyrers definitely want to get where they need to be and lay down fire. They are comparable to Van Saar Neoteks in terms of mobility.
- The Yeld suit grants a 5+ armour save, but it also imposes a -1 to hit penalty on enemies shooting at it provided the Spyrer did not move during their last activation.
- Augmenting the suit increases Movement by 1”. Note that this does not call out a maximum, and since it is from equipment, my reading as an Arbitrator would be that a Yeld can use Power Boosts or Advances to hit their statline maximum of M8”, then an augmented suit would get them up to M9”. Speedy! A second augmentation level makes the to-hit penalty apply even if the Yeld moved, which is quite nice.
- Melee weapons. The Yeld isn’t quite helpless in melee; although only WS4+, it still gets 2A, and Yeld Wings strike at S+1, AP-1. While not terrible, this is clearly not what the hunter wants to spend time doing. Even the augmentations, while they do help, are focused on keeping the Spyrer out of trouble with enemy melee threats.
- Augmenting the wings first adds Parry; then gives D2; then gives Knockback. We really like that these are more about letting the Yeld try to survive and retreat from combat, to continue shooting. Cooler than just giving it a not-as-good melee weapon which becomes a quite-good melee weapon. Nonetheless, augmenting the wings won’t be a priority for a Yeld.
- Shooting Weapons. Yeld get a same-cost choice between paired Laser or Missile Gauntlets. Unlike the Orrus, these aren’t two separate Sidearms, which is a shame, but they are both Rapid Fire (1). Neither are very punchy, at least until augmented.
- Paired Laser Gauntlets fire out to 20” and are +1 to hit within 10”. They strike at S3, AP-1, D1 with the usual forgiving ammo roll and Plentiful for a las weapon. Now clearly, even with RF(1) this isn’t scaring many opponents, especially if their gang is base T4, like Goliaths or Squats.
- Augmenting the lasers gives AP-2, then a negligible boost to Long Range 24”, and finally S4.
- Paired Missile Gauntlets fire straight out to 30”, but with no accuracy modifier. They boast S5, but AP- and D1, with Knockback.
- Augmenting the missiles grants AP-1, then S6, and finally gives Blast 3”! Which is fun at least, it’s only the second Rapid Fire Blast weapon in the game.
- So both these weapons are only really OK, when you take into account the Yeld’s price tag and Spyrer status. Being Damage 1, even after all augmentations, really holds them back. The Yeld is by no means bad at shooting, it’s just that their guns will do fairly well against targets with lower Toughness or limited Armour; if enemies have both of those protections they will struggle. Our advice for Spyrer players is to choose their targets appropriately. The choice between the two gun options seems balanced overall. Given their high starting BS, and desire to stay far from threats, I do think the missiles’ range profile is better; Knockback can be situationally clutch, mitigating the low Damage. For those reasons I’d pick missiles, but if you take multiple Yeld both are fine.
- Paired Laser Gauntlets fire out to 20” and are +1 to hit within 10”. They strike at S3, AP-1, D1 with the usual forgiving ammo roll and Plentiful for a las weapon. Now clearly, even with RF(1) this isn’t scaring many opponents, especially if their gang is base T4, like Goliaths or Squats.
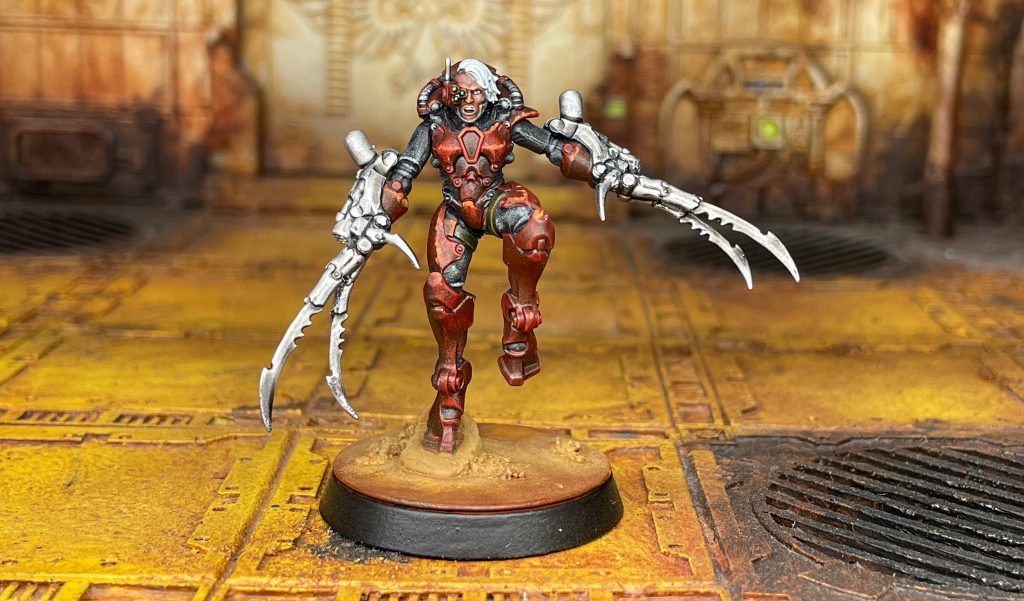
Jakara Spyre Hunters
The 250-credit Jakara are basically pure melee fighters, only very slightly more mobile than the Orrus at M6”, but themed around offensive skill rather than brute strength. With WS2+ (and BS4+, shooting is barely a thing for them) they boast an unusual 3A base. They have Cunning, Combat and Brawn (in descending order of usefulness) as Primary skills, and unfortunately the excellent Agility and Ferocity trees are only secondary.
- The Jakara suit gives a 5+ armour save, that is all. But of course these guys do carry a shield, which helps.
- Augmenting their suit is purely offensive, granting first +1S, then a great +1A. Spicy! As with Yeld, my read of the rules is that this +1A can take them above their statline maximum of 4A.
- The Mirror Shield is one of the Jakara’s weapons, but it can’t be swapped. Weirdly, it’s actually a ranged weapon – a non-lethal Flash which can fire to 4”, or to 8” with a -1 to hit penalty. Since Jakara only start with 4+BS, this isn’t too reliable or useful, compared to trying to get into melee combat. Flash has a reputation as a potentially very powerful way to neutralize powerful enemies for a round. But that is because large-blast grenades can be carried by cheap models, and apply the effect to multiple targets. As a single-target weapon, carried by an expensive Spyrer who can murk almost anything in melee combat, this is nearly worthless. I can’t see when you would ever choose to fire it in a game, unless you were perhaps unable to reach melee combat, already in the best possible position, and had a single action left to use. But, this is an Energy Shield, meaning it grants +1 to armour saves for ranged attacks from the front arc, and +2 for melee attacks. So really it is there as a passive piece of wargear, not a weapon.
- Augmenting the Mirror Shield grants a 6+ field armour save in the front arc, then a very forgettable Long Range increase to 12” (remember it’s still at a to-hit penalty) and finally a 5+ field armour save. The field armour levels, at least, should be fairly impactful as campaigns progress and opponents gather higher AP weapons.
- With the Jakara you’re going to want to be careful about positioning and orientation, since the front arc is so critical for protecting them.
- Jakara get a choice of two identically priced melee weapons, the Naga Blade and Monomolecular Sword. Spoiler: the Naga Blade is miles better.
- The Monomolecular Sword, as well as being difficult to say three times fast, is just a normal, Trading Post-bought power sword. S+1, AP-2, Parry and Power, D1. This is a damn good weapon under normal circumstances, well worth the 50 credits an average scrub would pay for one. But that leaves us rather disappointed given this is a Spyrer.
- Augmenting this option gives powerful, straightforward increases. First D2, then AP-3, then S+2. Which is all great and does make it a very strong weapon when fully upgraded, especially on such a skilled fighter.
- But the Naga Blade starts at S+2, AP-1, D2. On the face of it, this is comparable to the competition, but Damage really is the most important single stat. Additionally, while it lacks the Power trait, it keeps Parry, gets Disarm, and crucially is Versatile with a 2” range. This last bit is so, so important. Beyond the tactical elements like avoiding any possibility of Reaction Attacks, simply adding 2” to the threat range of this almost purely melee fighter is enormous. I would always take the Naga Blade.
- Augmenting this first gives Shock, then AP-2, and finally a tasty D3. So the first level isn’t quite as strong, but it’s definitely worth investing in, potentially ahead of the Jakara’s other options for augmenting kit.
- The Monomolecular Sword, as well as being difficult to say three times fast, is just a normal, Trading Post-bought power sword. S+1, AP-2, Parry and Power, D1. This is a damn good weapon under normal circumstances, well worth the 50 credits an average scrub would pay for one. But that leaves us rather disappointed given this is a Spyrer.
In sum, then, the Jakara is a melee killer with a situational option to try and Flash an opponent if for some reason they can’t stab them. They will be well protected in melee against a single opponent, but brawling at close quarters is dangerous and bear in mind they will be vulnerable if targeted from outside their front 90 degree arc. T3, a 5+ save and 2W isn’t too hardy, so you’d better roll some armor on your Power Boosts, and/or upgrade T/W with Advances. For their Skills, Infiltrate to help positioning would be great, but otherwise the best picks are largely in the Secondary trees for them – either Spring Up or Nerves of Steel would be worth picking, Sprint or Dodge could be considered, as could Berserker or True Grit.
Malcadon Spyre Hunters
At 240 credits, Malcadon are built for mobility, nearly as much so as the Yeld, but they are geared for close quarters at range and in melee with WS/BS3+. They have access to Toxin melee and a (short-ranged, non-template) Web weapon, so their emphasis is perhaps more on taking out armoured or multi-Wound targets. While they don’t fly, they boast M7” and have a Grapnel Launcher and Drop Rig included in their suit, so they can usually cross gaps, ascend or drop down sheer surfaces, and other such underhive parkour. Compared to the pure melee threat of a Jakara, the Malcadon is perhaps less deadly face to face, and lacks a shield, but with better capability for short ranged shooting, and better mobility. Skills are Cunning, Shooting and Combat as Primary, with Ferocity and Agility as Secondary. All useful with some good options spread amongst those.
- The Malcadon suit gives a 5+ armor save. That is all.
- Augmenting the suit gives first +1WS or BS, which is a little disappointing since that’s nothing the fighter can’t gain from an Advance or Power Boost. But still worth having. Then it grants 4+ armor save, which is better than some Spyrers.
- Paired Web Incisors. This shooting weapon is unswappable, and gives the Malcadon a potentially deadly tool if the target is within 8”. It’s a S3, Rapid Fire (1) Web weapon! Which we think is a first for Necromunda. Web weapons are notorious, because they ignore armor and Wounds, as well as most unique defensive gear. You hit, you roll to Wound, if you pass the target is effectively Seriously Injured, which of course means they can barely act, they count towards Bottling Out, and can be easily Coup de Graced. Of course, part of their fearsome rep is because previous Web weapons have been templates, with auto-hits and the ability to affect multiple targets. The Malcadon can inflict multiple hits, depending on the Firepower dice and targets being clumped together, but this will usually be a single-target weapon. As well as having to hit, it is only base S3, which is going to make Wound rolls hard against many things you’d like to Web. Even with those caveats, it’s fundamentally a very strong type of weapon, since it’s effectively Damage equal to the target’s W stat, and an automatic Serious Injury – yes, you can’t shoot someone OoA immediately, but you can’t roll a Flesh Wound either, and that’s more likely. Rapid Fire, again, really helps because half the time you’re getting more chances to Wound.
- Augmenting the Web Incisors gives first a mediocre range increase to 10”, then an important boost to S4, then another meh increase to 12” range. Honestly, Web is so good that if you still have S3-4 targets amongst your opponents’ gangs, which will almost always be the case, this is a good thing to get 2 augmentation levels on.
- Malcadon melee weapons are another identically-costed choice: Paired Slashing Claws or Toxin Whips. Since both have the Paired trait, the Malcadon is very dangerous when charging either way. This is a very meaningful choice simply because claws are just a fairly sharp melee weapon, whips are Toxin and Versatile, and thus open up some very real possibilities.
- Malcadon Slashing Claws. These are a very simple option: unaltered S, AP-2, D1. Beyond Paired, which admittedly is big, they have no special traits. They do get significantly punchier with Augmentation, but are fundamentally best against armored targets which aren’t otherwise that tough.
- Augmenting the claws gives first AP-3, then D2, finally S+1. Wish the damage came first, but that is a solid set of buffs. A Malcadon with augmented claws is going to make a mess of most targets, but may fall off against big Tough things, unless they take some Strength Advances.
- Malcadon Toxin Whips. The first big thing is that these are 2” Versatile, albeit with a -1 to hit modifier outside of Engagement range. That alone is worth quite a bit. The other thing is Toxin. This rule basically circumvents the target’s number of Wounds – a blow that gets through any saves simply forces the roll of 1 Injury Dice. This means it’s not as good as a weapon with Damage greater than the target’s Wounds; but it is far better than any D1 weapon against multi-Wound targets. Toxin is also sort of equivalent to S4: it affects T2 on a 2+, T3 on a 3+, T4 on a 4+, and T5 on a 5+. We can see how this is starting to look better than the starting profile of the claws. The whips have identical AP-2, and also boast a nice little situational trait, Entangle.
- Augmenting the whips gives some interesting benefits. First it removes the -1 to hit penalty when using Versatile. Then it grants the Shield Breaker trait. Finally it lowers the target’s Toughness by 1 when rolling for Toxin – this is basically +1 to Wound in most situations, great.
- We should also mention Chem-Synths, which cost 15 credits. They let the fighter, on passing an Intelligence test at the start of their Activation, apply the exact same effect, and this explicitly stacks with the Level 3 Augmentation effect. It seems highly worth it on any Malcadon using Toxin Whips.
- On the strength of the base profiles, Toxin Whips seem straight up better than Slashing Claws. They are both AP-2, but Toxin is effectively S4, and is far, far better against anything with more than one Wound. The Versatile and Entangle rules are just gravy. The claws do look OK in comparison when augmented – a D2, with Paired, means you can start smashing through multiple D2 hits and overkilling enemies, rolling a lot of Injury Dice and brute forcing through an OoA result. But Toxin raises the threat ceiling so very far, and while a claw fighter is augmenting to that better AP and Damage, the whipper is just making Versatile easier to use and making sure at least some Injury Dice get through. I would always take Toxin Whips, and would take a Chem-Synth unless it meant I couldn’t fit in another Spyrer.
- Malcadon Slashing Claws. These are a very simple option: unaltered S, AP-2, D1. Beyond Paired, which admittedly is big, they have no special traits. They do get significantly punchier with Augmentation, but are fundamentally best against armored targets which aren’t otherwise that tough.
Spyre Hunt Master
The leader of all these psychopathic plutocrats is a sort of pick-your-own buffet. Their Sovereign suit is technically its own thing, but they can mount any combination of the Yeld, Jakara and Malcadon weapon options. Presumably the Orrus stuff wouldn’t lend itself to being swapped on the physical models, and offering a whole separate profile to represent a heavier suit was too complex. It’s hard to complain as this is a high degree of customizability. Hunt Masters technically start at 180 credits, but since an unarmed Overseer would be a massive gamble and extremely uncool, final cost is likely anywhere from 260-300, with weapons but before any Wargear. They have a slightly enhanced profile, with M6”, WS2+, BS3+ and a critical 3W and 3A. Their Primary Skills are Leadership, Shooting and Combat, with Agility and Cunning as Secondary. That is an interesting spread; some picks will be determined by the Hunt Master’s choice of loadout, while Leadership has options to consider regardless. Spyrers could benefit a lot from Iron Will, given their Bottle Checks are on a D3, or the Inspiring Presence skill would allow the Hunt Master to Group Activate with one other Spyrer, opening up a way to hunt in a pair.
- Sovereign Suit. The leader’s suit grants a 5+ armor and 6+ field armor save.
- Augmenting the suit gives first a 5+ field armor save, which is pretty sweet, and then +1S, which is mediocre and also pointless if the leader is geared toward shooting and/or chose the Toxin Whip melee weapon.
What’s really unique and interesting here is the flexibility of a Hunt Master’s loadout. They can pick two options from a list that reflects everything used by Jakara, Yeld and Malcadon Spyrers. But it’s not exactly identical:
- The Jakara’s Mirror Shield and both its melee weapons are separate options, for example. So a Hunt Master can be equipped exactly as a Jakara (for +110 credits), or indeed take one of each of their melee weapons, although there’s no great reason to do so.
- The Malcadon options are a set, for +60 credits, you take Web Incisors and either Toxin Whips or Slashing Claws, plus the grapnel launcher and drop rig. But the melee weapons are not Paired, and the Web Incisors don’t get Rapid Fire.
- Yeld is the most out-of-bounds, since a Hunt Master simply can’t take Yeld Wings. Presumably the ability to combine great melee weapons with the very strong ability to fly was too powerful. Or perhaps the designers just didn’t feel like it. They can take a single Laser Gauntlet or Missile Gauntlet for +30 credits each. These lack the Rapid Fire a normal Yeld gets on their pair, and there is no benefit to taking two or one of each.
Players should note that the Hunt Master can start with one Augmentation Level on either a weapon or their Sovereign suit. Several of the weapons benefit from this, but taking a 5+ field armor save from the suit is a sound pick in any situation.
This pick-and-mix selection gives a lot of potential combinations, but many of them are pointless. First of all, you can technically pick nothing, which regular gangs do intending for the leader to use Overseer, but that seems sub-par for Spyrers as well as being very much against the spirit of the game. When you don’t get Group Activations as standard it removes the main reason people like the Overseer trick, and when you have so few models, it’s just better to cough up for the weapons. Of the individual options, if we are trying to consider the most effective combination it seems sensible to disregard the Malcadon Slashing Claw (outclassed by the Toxin Whip for the same price) and Monomolecular Sword (outclassed by the Naga Blade). That gives us a more understandable set of options to pick two of:
- One Yeld weapon, i.e. an actual gun, albeit a Damage 1 gun.
- A Jakara Mirror Shield, which is mostly an armor buff, and quite a nice one in melee. Note that augmenting the shield is basically pointless on a leader, due to the existing field armor save of their suit. The Mirror Shield is also a Special Weapon and not a Melee one, so it won’t grant an extra attack.
- A Malcadon package of a Versatile, Toxin melee weapon, plus a cool short range gun in Web Incisors and some mobility gear.
- A Jakara Naga Blade, which is perhaps an equally good melee weapon.
From a purely in-game stand point (the actual correct answer being to take whichever weapons you think look coolest) it seems a no-brainer to pick the Malcadon Toxin Whip. It’s not a significantly worse melee weapon than the Naga Blade if it is at all, and for only +10 credits, it gets you the Web Incisors and mobility gear. Toxin is of course situational and some players might prefer the Naga Blade to overkill 1W targets. In any case, most Hunt Masters will want to pick one of those two – why have a WS2+, 3A Spyrer without taking a melee weapon? That leaves the remaining choice of whether they would rather have a shield, a ranged weapon, or a Naga Blade.
A Hunt Master with a Malcadon Toxin Whip/Web Incisors and a Mirror Shield would be 300 credits, and a formidable melee bruiser. Swapping the shield for a gun would bring the price down to 270, swapping protection for the ability to reach out and touch enemies further away. Taking the Naga Blade instead would be 290. Starting Shooting skills can be useful on a leader who takes a Yeld weapon; those who stick to melee will have to choose something from Leadership or Combat.
Caryatid Prime
This is a pet very much in the vein of the existing Caryatid, or Genestealer/Chaos familiars. It’s probably less frustrating than those, to the great relief of Spyrers’ opponents. Its raison d’etre is to stay within 3” of its master, which lets the Spyrer re-roll one failed Ammo check and one failed armor save per Round. That’s very important, as Spyrers are deadly but not especially tough given their cost – they will live and die on very few armor, or field armor, saves.
Aside from that key effect the Caryatid is basically nothing. It moves 6” and flies, which should let it keep up with most Spyrers. It’s T2 with a 3+ unmodifiable save to keep it safe from harm, and rules to try and avoid any template hits. One point we do notice is that the Caryatid itself doesn’t have much protection beyond its admittedly formidable 3+ save. T2 with only 1W means that you can put some rolls through onto it, and once it fails it is rolling Injury Dice. If you find yourself facing an onrushing Spyrer, with only a piddly non-AP, low damage weapon, it will often be better to shoot the Caryatid first.
Spyrer Gang-Building
The hard facts of building a Spyrer gang are that you cannot start with more than four fighters. Indeed, if you include at least one Orrus Spyrer, you are limited to three, unless you run seriously light on the others (e.g. taking two Yeld, and a Hunt Master with just one Yeld weapon). So really the choice is between three (or even two!) well-equipped Spyrers, almost certainly including an Orrus, or four decently-equipped ones drawn from the other types. Lets look at some examples of starting rosters:
Single Box Option
This is a middle-of-the-road gang by Spyrer standards, with one of each light Spyrer, so it can be built from the single box and gives players the chance to experiment with different types. Note that the box doesn’t actually contain all of the options that you can field so this option is specifically what-you-see-is-what-you-get. See below for a similar version that is more optimised. In this list we were at 980 points, so a Respirator was added, as it’s situationally useful – no really good wargear would fit under the cap.
Single Box Option
Single Box Option (with conversions)
Quite a lot of light Spyrers’ weapon options are not included in the new plastic sprues, so making them will require some proxying or conversions. In some cases, e.g. the Naga Blade and Toxin Whips, we think these currently model-less options are superior on the table. If you agree, and are willing to do a little conversion work, or your group simply doesn’t care about WYSIWYG, here is a very similar list with different, and we think better, equipment options:
Single Box Option with conversions
So You Like Orrus Spyrers
The big boys are definitely the hardest model of Spyrers around, and if you take one you will be limited to three starting fighters. So why not take two? This does place some limits on the Hunt Master; we couldn’t even upgrade one Orrus to fists without compromising his equipment loadout (wouldn’t be able to afford two weapons, unless they were both Yeld guns, which is pointless). Instead we end up a bit underpointed and invest in wargear for the Hunt Master instead – the Chem-Synth is very useful although the Respirator is just there to use the remaining points. We couldn’t fit a Bio-Booster with the current equipment.
So You Like Orrus Spyrers
Spyrer Gang Tactics
This is a set/table of 18 tactics. Interestingly, 13 of them are for specific types of Spyrer – three each for Orrus, Jakara, Malcadon and Yeld, and one for the Hunt Master. So depending on what system your group uses to generate cards, and your hunting party composition, you may wish to leave some cards out of the rotation, or ask your opponent/Arbitrator for a mulligan should you draw a card which is irrelevant to your crew in the game. The Hunt Master one is rather nice – Coordinated Strike gives them Group Activation (1) for that activation only. I like cards that give you the chance to get a strike in before your opponent, although it should be noted that Spyrers don’t usually want to be too close to each other – players will have to plan for that one in advance. There are a couple cards which give you a chance to increase Kill Counts or take better rolls on a Power Boost (if certain conditions are met) and that sort of campaign boost is also a good use, given how much Spyrers will rely on ramping up their power curve. Environmental Adaptation looks situationally excellent. Played before the battle, it makes one Spyrer fully immune to Blaze (and Rad-Phage). A damn good pick against Cawdor and certain other threats.
There’s the usual assortment of absolute stinkers as well. Jakaras’ Finesse Strike and Orrus’ Seismic Smash both involve replacing your normal action with a single attack, and the designers neglected to make either one mechanically powerful enough to be worth it over acting normally. We really have to wonder what they are thinking sometimes. There are some much better options which give certain actions as Free for one activation. EG Reposition allows a Malcadon to Grapple for free – a 12″ move before your real actions start is clutch. Equally nifty, and certain to be a hilarious gotcha moment on a boarding action-style table, is Bulldoze. That lets an Orrus go up to through impassable terrain up to 2″ thick during their movement, at the cost of a S4, AP-1, D1 hit (which of course they should survive given their stats). Some real possibilities there to attack enemies that thought they were safe.
Overall this doesn’t appear to be a particularly overpowered set of tactics; we don’t see any that jump out as table-flipping moments for Spyrers’ opponents. While some are strong, most are situational to certain suit variants, so I think many players’ decks will mix these with generic packs.
Conclusion – Final Advice for Spyrer Players
Our parting shot in this review/guide of a new gang is to remind its players not to play it like they would any other gang. Spyrers are a band of ambitious, power-hungry killers and that is just how they are meant to be played on the table. All that matters to them is scoring kills. Winning battles can be useful to deny your opponents’ campaign growth, and it gives that sweet 2XP bump to all your hunters, but in most situations, if it’s a choice between achieving objectives and shedding blood, go for the latter. Piling up Advances and Power Boosts is going to be critical to keeping your party’s gear advantage over underhive gangs that are accumulating credits. It is also massively important to raise the Terror Level as quickly as possible to those benchmarks of 10 and 20 when you can add new Spyrers. So try and target enemies during the first Round (Infiltrate is a key skill to enable this) and hunt enemy Leaders and Champions ruthlessly. Finally, remember that most Necromunda scenarios do not have a turn limit! There is no need to rush in to decisive engagement with outnumbering enemies. Use your Spyrers’ mobility, pick enemies off one by one, whittle their numbers down. Your only objective is to get kills, so finish off one enemy before moving into the next, and don’t get swarmed.
Editor’s Note
Fowler: I want to editorialize a bit here, as Spyrers rightly earned quite a rep in the original incarnation of Necromunda – and arbitrators may be hesitant to let them come to play. The choice of whether to allow Spyrer gangs from a narrative or flavor standpoint is up to you. Maybe you want to reserve Spyrers to be an arbitrator gang, or they may not make sense in the far reaches of the underhive you’ve picked for your campaign. In terms of “power level” though, your average ganger in 2024 is likely to be a whole lot stronger than the starving dudes who were farmed by Spyrers twenty five ago. Every gang has tools that can deal with Spyrers, and from my very brief time trying them on the tabletop – they feel like a tricky team to pilot. Losses will be especially crippling with a small number of bodies. Most importantly – despite the fancy suits, you can generally still light them on fire. Keep an open mind: this is a very different gang, in a wildly different context from the old one. They have strong options, but are not inherently OP.
Happy hunting!
Have any questions or feedback? Drop us a note in the comments below or email us at contact@goonhammer.com. Want articles like this linked in your inbox every Monday morning? Sign up for our newsletter. And don’t forget that you can support us on Patreon for backer rewards like early video content, Administratum access, an ad-free experience on our website and more.
