
![]()
![]() If you missed Part I, you can find it here. Once you’re caught up, settle in – I’m here to talk about Booty and Plunder, the main event.
If you missed Part I, you can find it here. Once you’re caught up, settle in – I’m here to talk about Booty and Plunder, the main event.
Booty and Plunder is always the five-round, two-day Captaincon Malifaux tournament, but it’s been through some changes over the years. Last year, we played with Iron Scorpius, but the changes this year were even more significant. Booty and Plunder 2025 was a team tournament, with three-player teams competing over five rounds for the top prize. As always, the prize wall included a variety of models, some board games, some accessories, and custom glassware. Once again, we had the traditional prizes for first, second a nd third-placing teams, a painting prize, the Wooden Spoon, and two special prizes. Returning from last year, the Malifaux Cartographer award went to the person who brought the best table of terrain, and the Team Spirit award, a combination of sportsmanship and nebulous displays of “team spirit.” No two players could be on the same faction (although that rule was relaxed a bit when teams had a drop or had to sub in an alternate, which happened occasionally).
The teams really got into it – most of us had coordinated shirts, and the Texas team showed up in massive novelty cowboy hats. There were plenty of props and extras, too; Team Danger Planet put together a Trash Talking Tierlist and custom measuring widgets for our opponents.
Here’s how team play works for three-player teams in Malifaux: each round, the scheme pool was the same, but there were three different Strategies and deployment types for the three tables. All six players had to declare a Master simultaneously. Then the higher-positioned team assigned a Master to Table 1, while the lower-positioned team did the same to Table 2. Then they switched, and finally the unassigned players ended up on Table 3 together. There was thus some element of counterpick and bluff available, and both teams had to deal with the difficulty of either picking an opponent based on matchup or based on Strategy.
In addition, the tournament was played with the Bans format, but not the Singles format – so you could declare a second master if you wanted.
Team Danger Planet is usually myself and Doug, but this year Doug had to work, and we needed a third anyways. Danger Planet Brandon joined me, along with friend of the show Nathan Linder, an Explorer’s Society specialist who won the Danger Planet Malifaux GT last summer by soloing Jedza. Brandon, meanwhile, made this his last hurrah with Resurrectionists, focusing on Seamus and Molly. As previously discussed, I planned to run Brewmaster as much as possible, though Jason Moser and I had a gentlemen’s agreement not to declare Brewmaster into each other if we could help it. One of those mirrors per weekend is enough.
Round 1: Honeypot Throwdown
Our Round 1 opponent was team Demon Cats, featuring Grant “Woofbun” on Resurrectionists, Sebastian Padrino on Bayou and Justin Williams on Outcasts. The scheme pool was Let Them Bleed, Protected Territory, Espionage, Hold Up Their Forces and Deliver a Message: a nice, balanced pool with a mixture of positional, combat, and marker schemes. Table 1 was Raid the Vaults on Flank deployment, Table 2 was Plant Explosives on Standard Deployment, and Table 3 was Stuff the Ballots on Corner deployment.
I picked Brewmaster, Nathan picked Jedza (as he did every game this tournament), and Brandon picked Seamus. Woofbun picked Yan Lo, Dustin picked Leveticus, and Sebastian picked Zipp. They had the first pick, and so put Dustin on Table 1 while I took Table 2; they then chose to put Sebastian on Table 2 while we put Nathan on Table 1. Brandon and Woofbun faced off on Table 3.
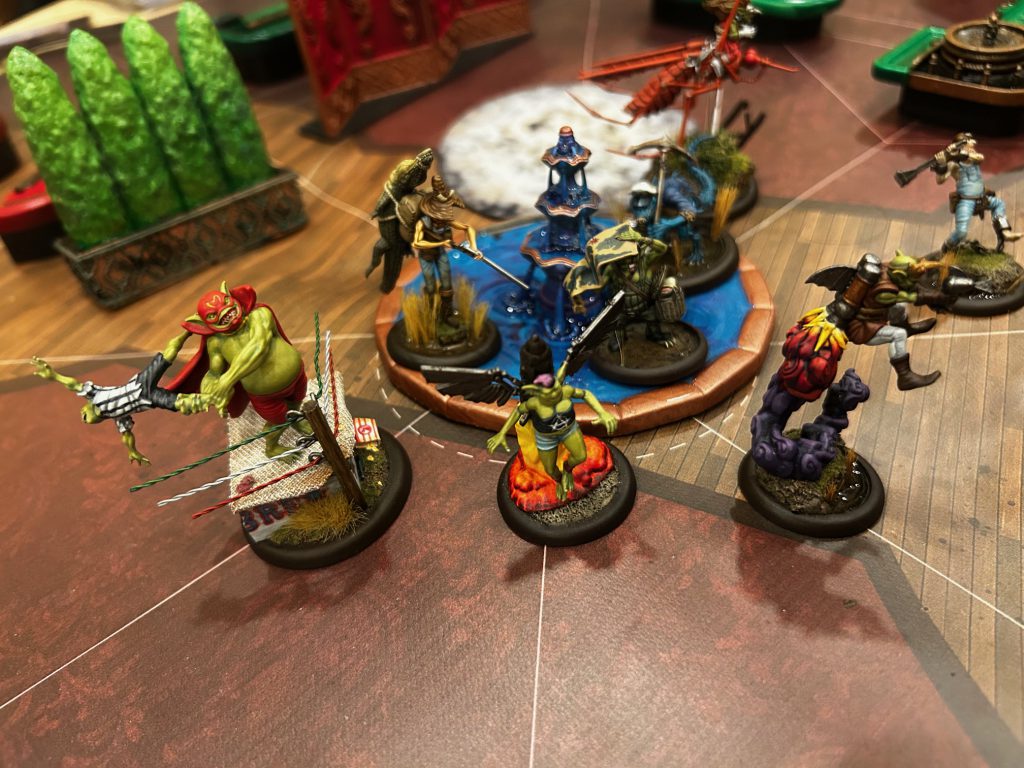
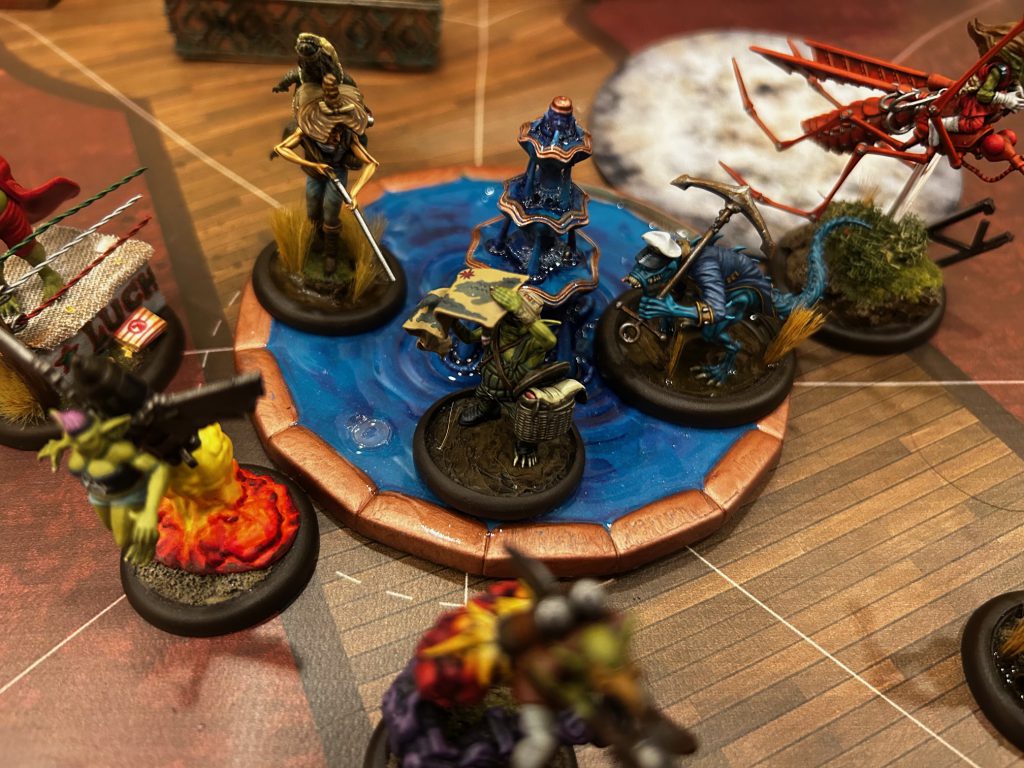
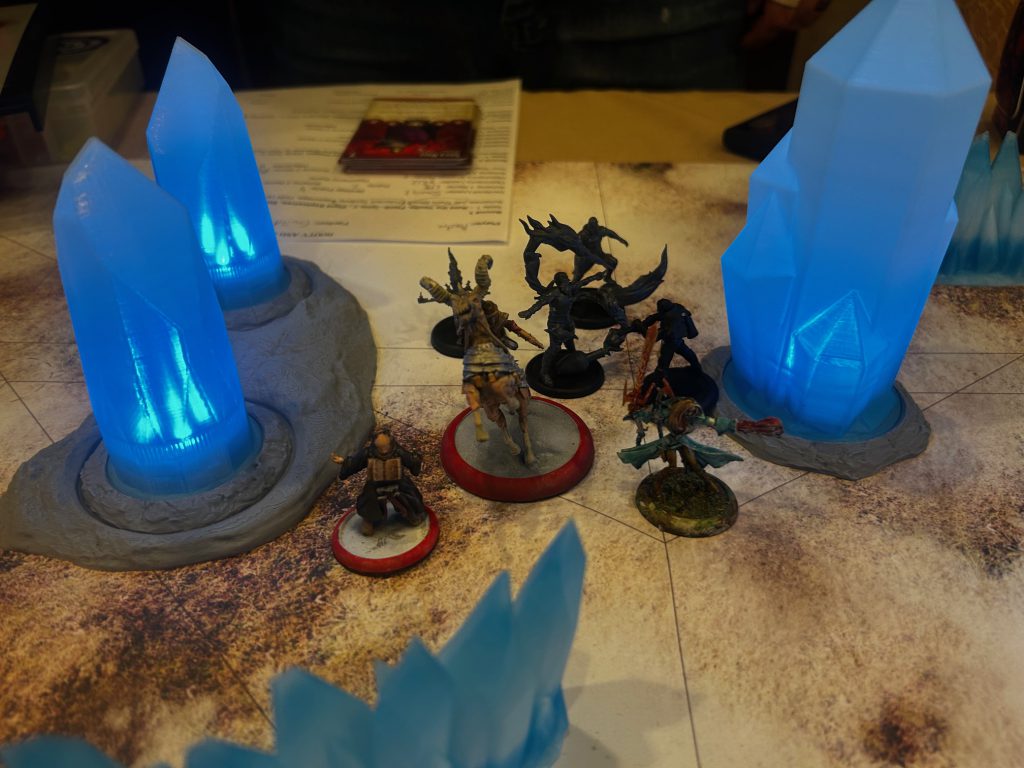
Table 2 was really cool – it looked like a casino (perhaps Malifaux’s famous Honeypot), complete with slot machines, gambling tables, a bar, some potted plants, and a few standing screens to block LOS, as well as a big central fountain. I hired Brewmaster, Moonshiner with Twelve Cups of Coffee, Apprentice Wesley, Cooper Jones, two Fermented River Monks, three Moon Shinobi (two with Ghillie suits), and Hoochdini – this was basically my “standard” list for this event. Sebastian hired Captain Zipp with Twelve Cups of Coffee, Earl Burns, Merris LaCroix, an Iron Skeeter, the First Mate, Beau Fishbocker, Mancha Roja and a Bayou Smuggler.
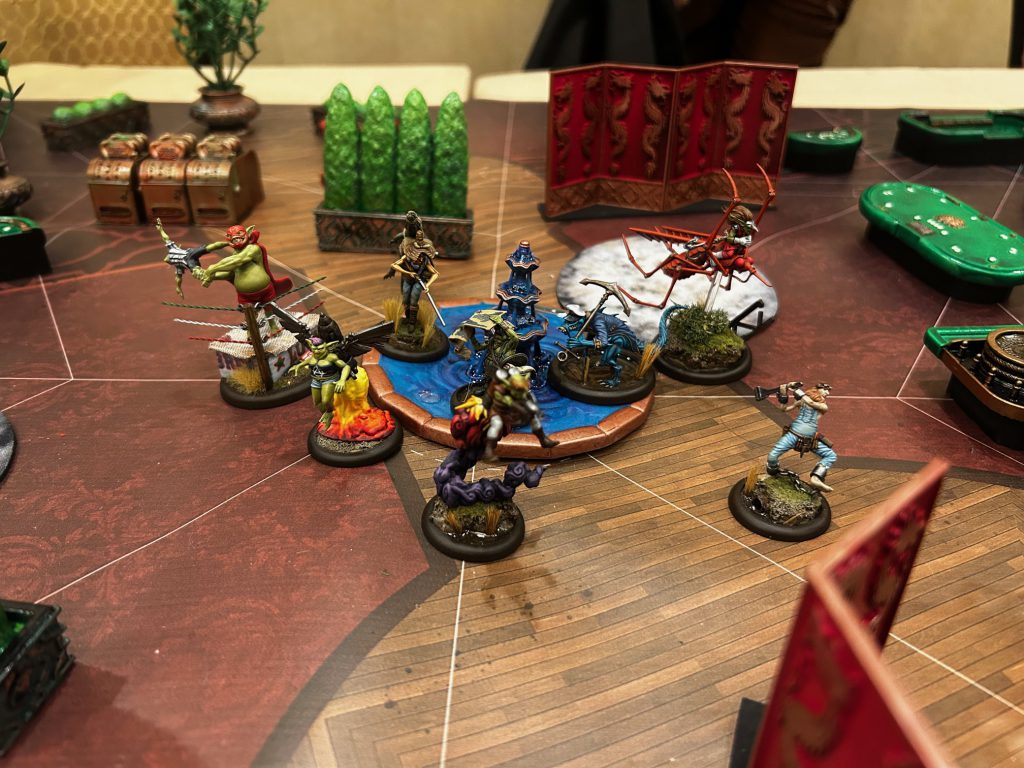
Sebastian’s crew was gorgeous; the man is a truly incredible painter. I took several glamour shots, as you can see. He ended up submitting one of the most mind-blowing Mah Tucket crews I have ever seen to the painting competition (and I dearly regret not getting a picture of it) and winning, to nobody’s great surprise.
Anyways, I like Zipp a lot but he’s not as good at Plant Explosives as you might think, since his inability to Interact really hurts him there. I also know the crew inside and out. I picked Hold Up their Forces since I had lots of cheap minions and he had lots of not-so-cheap stuff, and Protected Territory – which was a bit of a gamble, but I figured I could remove pieces quickly enough that he couldn’t really contest Protected and drop the bombs he needed to win.
I still hadn’t quite made the mental adjustment needed with Moon Shinobi and sent them forward pretty aggressively – two on the left/center, one on the far right. The monks swilled down booze and pushed up more slowly, while Cooper summoned a Whiskey Gamin and Brewmaster staged in the middle of the board. Sebastian went for it with Zipp, dropping pianos and then shooting at a Moon Shinobi. Luckily, he just did Weak damage – I fought for and won initiative on Turn 2, healed it up and got it the hell out of dodge. The Shinobi focused on getting their bombs out, as I was chastened by their brush with death and sent them to drop off the kids ASAP. Hoochdini, who had two of my bombs, ended up failing a ton of TNs and taking forever to waddle across the middle of the table. Luckily, he wasn’t under that much pressure – Sebastian had committed Mancha on the far right, along with Beau, which left them way outpaced by the rest of his crew, and the First Mate only took an opportunistic swing here and there without really committing to bringing anything down. His Skeeter, Merris and Earl traveled together, planning to drop bombs.
The rubber hit the road Turn 2, and Brewmaster dispatched the Smuggler, cutting off his card draw engine while also tagging threatening his Merris/Skeeter clump. My Moon Shinobi scattered, throwing down bombs and Scheme Markers for Protected Territory, and engaging Mancha Roja and Beau Fishbocker for Hold Up Their Forces. The swing came in Turn 3, when two Shinobi and a Fermented River Monk went ape on Mancha and Beau and killed them both. Mancha is sort of the perfect target for Moon Shinobi; he has Df 5, no armor, Hard to Wound gives them a +twist on all damage flips, and he only has a 1″ engage, meaning multiple Shinobi can tri-point him and force him to Disengage if he wants to attack at all. (I did this, and it felt mean). With Mancha and Beau dead, the right side of the board fully belonged to me, and I managed to drop all of the bombs I could ever need as well as score Protected Territory completely safely.
Sebastian Delivered a Message to Brewmaster and scored Espionage using some Merris bonus-action scheme markers, but he was falling behind on bombs; he’d planted one in the corner, but Cooper and her summoned Gamin had caught up with him, and he was having to burn lots of AP just to get his bomb-carriers free of engagement so they could drop them. Once I killed Earl with Cooper, this got even harder. The First Mate could drop his bomb, but Zipp spent a while messing around with pianos; they can be annoying, but since my models are fast and Moon Shinobi can leap right over Pianos with Unnatural Speed, it wasn’t really effective at blocking me out.
Eventually Brewmaster looped back around to kill the Skeeter (with the help of a Monk), leaving him just too shy on material to score more strategy points. I ended up getting all four and maxing out both Schemes, while he scored two on the strategy and one for each scheme, thanks to a last minute Black Joker on a disengaging strike that meant that Brewmaster could waltz away from the scheme marker he’d placed for the end point of Deliver a Message (not that it mattered – just making the disengaging strike triggered Butterfly Jump, so I was out of there no matter what).
A solid win, and Nathan won as well; Brandon narrowly lost, but 2-1 in our favor was a good start.
Round 2: The Inevitable Occurs
Of course. Round 2 we matched into Windy City Malifaux, my friend Landon’s team. Landon is a great player and has been on Guild for the past couple of years, really putting the faction through its paces. He has a thing about playing masters other people think are bad, and was soloing Lady Justice’s original form all weekend.
The scheme pool for this round was Death Beds, Sweating Bullets, Protected Territory, Ensnare, and In Your Face. Table 1 was Stuff the Ballots on Wedge deployment, Table 2 was Cloak and Dagger on Flank deployment, and Table 3 was Raid the Vaults on Standard deployment. We declared Jedza, Brewmaster, and Molly again, while the Windy City boys declared Lady Justice, Seamus, and McCabe.
We dropped Nathan on Table 1 and me on Table 2… where I was promptly matched into Landon. Awesome.
Listen, I love Landon, okay? He’s one of my best Malifaux friends. But I don’t like losing to him, and I do that a lot. My best games against him have been when he’s using off-meta stuff, but the trouble is that Landon often plays off-meta stuff because he’s realized it’s really good and he’s trying to snake people who don’t see it coming.
Brewmaster into Lady J is an interesting matchup, at least. I would be a little afraid of Lady J, Death Touched, but the original is Df 5 and Hard to Wound, which is a profile Brewmaster does not mind taking swings into at all.
I hired the exact same list as last time, trading Hoochdini for a third Fermented River Monk to let me brawl a bit better. Landon surprised me a little by hiring Perdita, Neverborn Hunter as a second master. He ran Francisco Ortega, Director Rodriguez, an Ashbringer, and of course the Scales of Justice. He also hired Lead-Lined Coats on Justice and Francisco.
Francisco with an LLC is a terrifying, near-unstoppable killing machine, especially once Perdita starts larding him up with upgrades. He had a low model count for Cloak but four unstoppable juggernauts (one literally with the action Juggernaut). I had to basically lock him down and drown him in AP to have a chance. I took Sweating Bullets since I had a lot of 2″ engages and Ensnare to use all of that AP I was going to be generating. I considered Protected Territory, but with summons and a Leap his crew was too mobile for me to reliably score it. And the other two schemes were right out.
He powered up the center to begin with, sending the Scales out on the left flank to score strategy points while sending Perdita right to begin harassing me. I did not want to get pinned in my deployment zone, so once I got the obligatory poison out I sent one Moon Shinobi deep to threaten the Scales while the rest of the crew got into position to… die to Francisco, probably, but hopefully scoring me some points while they did. I held back one Moon Shinobi to sweat bullets with and sent the other to pop some Distracted on Francisco.
Turns out Francisco can clear Distracted by using Heroic Intervention (it isn’t limited to Attack Actions – that’s system mastery!) and he quickly started dicing up my dudes, but I was able to throw some Whiskey Gamin at him to slow him down. Meanwhile, I was able to pin Director Rodriguez in the middle of the board with Brewmaster, keeping him from Hovering Flame away with Twelve Cups and scoring Sweating Bullets on him. Turn 3 I put D-rod down hard and felt a lot better about my chances. Lady Justice skedaddled over to kill the Moon Shinobi I had sent after the Scales, but that basically took her out of the action for a turn and a half, which I was ok with.
My Whiskey Gamin did work this game, motoring around and stealing Intel Tokens from the Ashbringer to keep me on parity with Strategy points. I did not bother trying to kill either Master or Francisco, instead focusing on keeping them at bay with 2″ engages and negative conditions and using Brewmaster’s Drunken Clarity to litter the board with Scheme Markers for Ensnare. Landon put forth a heroic effort to deny it to me by using every out of activation movement trick he had, but eventually I had Perdita isolated and was able to just drop Schemes on her. I also put him on Protected Territory and was able to scoot Whiskey Gamin over to deny him the first point – aided by a lucky Black Joker from Lady J, but ultimately I had enough shitters still alive (including the near-indestructible monks) that I could pretty readily keep him off of it.
His summoned Pistoleros were annoying, and I underestimated their threat and let one pop Wesley and evolve into a Monster Hunter, but Brewmaster is really good at sweeping little models like them and the Ashbringer off the board. In the end, I just made the choice to ignore my models’ combat stats and bury Landon in Scheme Markers and 2″ engages. We both scored 3 strategy points (it’s very hard to stop Lady J from racking up Intel tokens if she wants them), but he had positioned Justice just too far from the center to contest the endgame point of Sweating Bullets and he was locked to a single Bullets point himself as well as a single point of Protected Territory. I took the game 7-5, doubling my overall RLWAL (real life wins against Landon) stat in one fell swoop.
Nathan and Brandon won as well, giving us a clean sweep. The Windy City boys… were blown away!!!
Round 3: All Good Things…
Fresh off of beating the terrifying Windy City team, we of course matched into the other titans, the Texas trio. Great. Andre was on another quest – last time he had been beating everyone’s face with Damian2, this time he was on Sonnia1 in an effort to prove her rework had gone too far.
The scheme pool here was Power Ritual, Take Prisoner, Information Overload, Outflank and Espionage. Table 1 had Plant Explosives on Corner Deployment, Table 2 had Cloak and Dagger on Standard Deployment, and Table 3 had Stuff the Ballots on Standard Deployment.
We declared Jedza, Brewmaster and Seamus, while they declared Sonnia, Brewmaster (Moser, of course), and Professor von Schtook. I was hoping to dodge Andre, having just taken on Landon for my team, but it was not to be; he matched into me on Table 2, and we were off to the races.
I went back to my Round 1 list exactly (Brewmaster, Moonshiner with Twelve Cups of Coffee, Apprentice Wesley, Cooper Jones, two Fermented River Monks, three Moon Shinobi (two with Ghillie suits), and Hoochdini). Andre hired Sonnia with a Lead-Lined Coat, the Purifying Flame, Samael Hopkins, Director Rodriguez, the Pale Rider, an Ashbringer and the Guild Steward.
Looking at his list, I picked Take Prisoner on the Pale Rider, thinking I could isolate it, and Espionage, thinking he didn’t have the AP to stop me. I split my Moon Shinobi wide while clustering everyone else in the middle for the boozy unpack. I would have to split to avoid the Pale Rider bonus action from torching my whole crew, but I had time to do that.
The game got off to a lovely start as I Black Jokered Brewmaster’s Shockwave. That is possibly the worst Black Joker imaginable – not only did it cost me a Soulstone (as I had a ram ready to cheat for the Running Tab trigger) but losing that ability loses me 3″ of movement and 3 poison on my entire crew, putting me badly in the hole. It was around this time I tilted off the face of the planet. I don’t mind I got rude or snippy or anything, but internally I was sort of panicking and started making a cascade of bad decisions. For example, I don’t have the reps against Sonnia to realize that any amount of burning on any of your models is dangerous since it lets her summon off you, so I just didn’t clear the one random burning one of my Monks picked up from Rodriguez’s Breath of Fire and thus let him summon a Witchling Thrall. I had a plan to zorch it with Hoochdini and use the Trapped Door trigger to send it where it could do no harm, but he had the Red Joker to beat my 13 of masks and so the thrall was able to unload on a Moon Shinobi who I had pushed up way too aggressively, finishing it off.
Turn 2, Brewmaster had to remove that Thrall, but despite its Hard to Wound giving me a positive to damage flips I could not flip a single Severe (and had none in hand to cheat), forcing me to spend my entire activation killing it.
From there, I was just not able to make good decisions on basically anything. I hung way too far back with my right flank Moon Shinobi, basically costing it an activation and a half, and then sent it way too far forward, letting the Rider pick it up for free. Brewmaster spent a turn beating fruitlessly on Rodriguez rather than killing the squishy Ashbringer, so he just healed Rodriguez back up. The Rider blew up a bunch of my stuff, as it does, and then teamed up with Rodriguez to kill Brewmaster. By that point I knew I had lost, but I could keep it reasonably close; as I suspected, he didn’t have the AP to stop me from scoring two Espionage points, and the first Take Prisoner point on Pale Rider is basically free. I was also able to scrap together two strategy points for a respectable 5 to Andre’s 7; a loss, but not the worst one. Brandon tied, and Nathan won his game by 3 points, leaving us technically ahead by a single point. I’ll take it!
The Unfortunately Boring Intermission
Our team was 3-0 (sort of) going into Day 2. I was personally 2-1, which I could have been happier about, but one of those wins was against Landon, which is worth more than a normal win. Normally this is where I would write about our crazy karaoke hijinks, but as I previously mentioned, I had to work in the evenings… so no hijinks. Sorry, all. I contented myself with a plate of cheese curds from the hotel restaurant.
Round 4: Gone Fishin’
Having played against the Chicago and Texas crews, we were at least confident that our hardest matchups were behind us. The Swiss got a bit weird at this point, since there were only 14 teams, meaning that we were playing people pretty far down the rankings from us; a glance at the leaderboard showed that the Texas team was actually slightly ahead of us, since the placement was based on overall games won, not just “rounds” won. We had identical W/L/D records, but they had a high cumulative margin of victory, the first tiebreaker. So we just had to grind some faces into the dirt on Day 2.
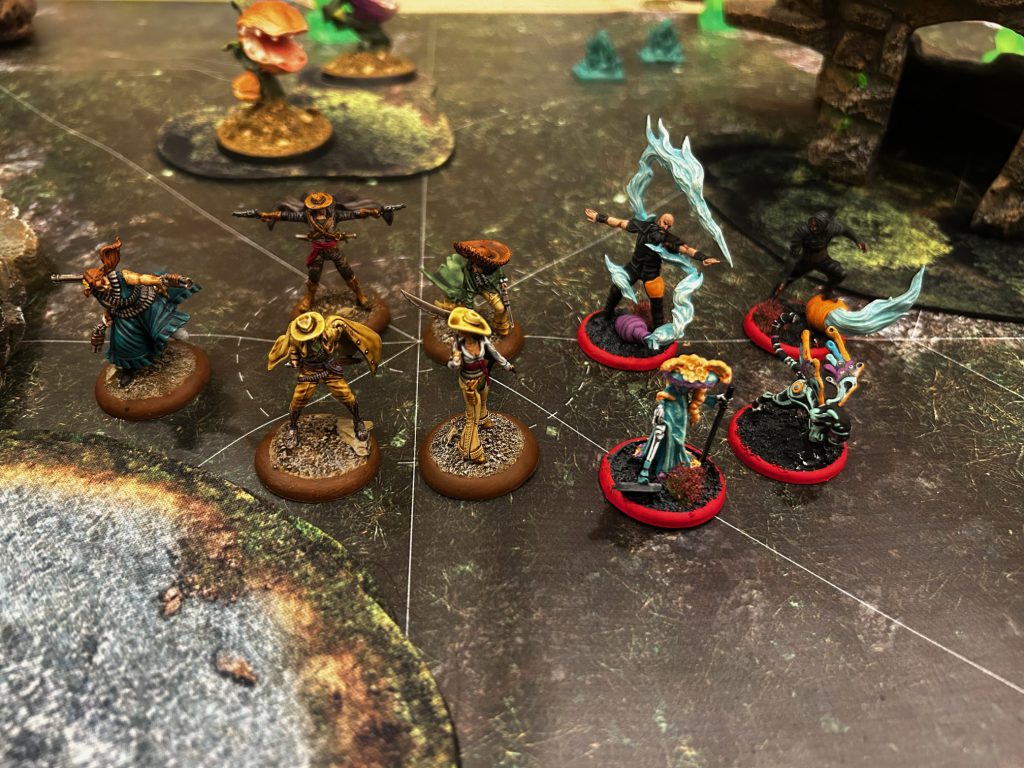
Our first opponents were NOVA Open, the Northern Virginia crew: Owen (who beat me last year with Tara) and then Geoff (who I beat last year) and his son Gavin (who I had never played at all). The scheme pool was Let Them Bleed, Information Overload, Take Prisoner, Deliver a Message and Sweating Bullets. Table 1 was Raid the Vaults on Wedge deployment, Table 2 was Plant Explosives on Flank Deployment, and Table 3 was Cloak and Dagger on Corner Deployment. I was a bit sick of Brewmaster at this point and opted to declare the Clampetts, alongside Nathan’s Jedza (obviously) and Brandon’s Molly. Owen declared Tiri, Geoff declared Bayou Zoraida, and Gavin declared Arcanist Hoffman… and, to my surprise, Gavin matched into me!
I was alright with that. Someone I hadn’t played before, and I was a bit grateful I hadn’t taken Brewmaster since Gavin was a newer player and Brewmaster would be a bit of an NPE. (He’s also not great into all of the Armor +2 Hoffman has). I hired the Clampetts, Fisherfolk, with a Ghillie Suit, Bruce, Uncle Bogg, Aunty Mel, Ser Vantes, Hermits, and Mossbeard with a Ghillie Suit. A small crew on Raid the Vaults, but I figured this would be a brawly game. Gavin opted for Charles Hoffman, Inventor, the Mechanical Attendant, Joss, two Soulstone Miners, Clipper, a Watcher, Melissa K.O.R.E. and Envy.
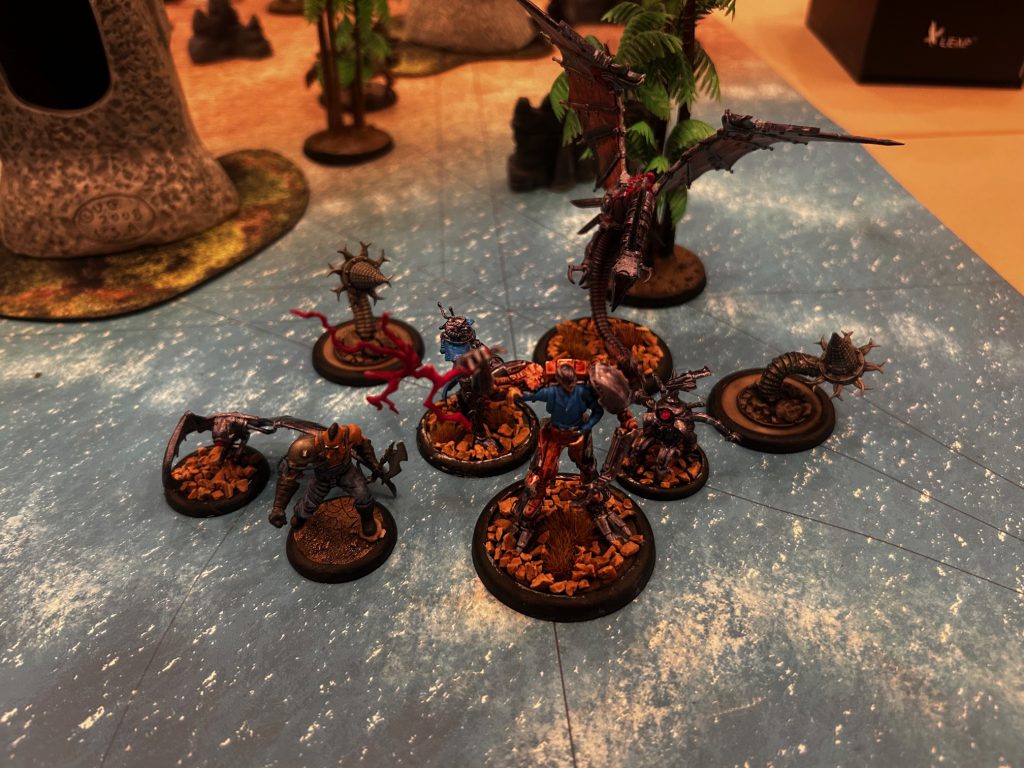
There were some very large pillars that split up the board and channeled our deployment a bit, and some trees that would make maneuvering all of the large bases on both sides difficult – especially with the Impassable Pylons Gavin would be throwing down.
I chose Sweating Bullets on Bogg and Deliver a Message on Mossbeard – I didn’t have the AP for Information Overload and didn’t want to half-kill his heavy hitters for Let Them Bleed, and I thought the game would end up too much of a scrum for Take Prisoner.
Gavin was pretty channeled through a narrow passage just outside of his deployment zone – it wouldn’t hold back the flying Clipper, the bulldozing Hoffman, or Melissa, who didn’t need to get close to me to hurt me, but I was less worried about all of those than I was about Joss. I made Joss Aunty Mel’s prey and moved up into position, holding Ser Vantes’s activation for last so I could hopefully get a pick with him. The Clampetts themselves played pretty aggressively (between Stealth, Disguised, Soulstones and the amount of healing I had, I felt pretty confident I could keep them alive). They were able to get a swing onto Joss and, cheating a high Mask, I was able to Whirlpool-toss him into a forest hemmed in by terrain, so he wouldn’t be able to do anything aggressive this turn. The Vantes strategy paid off and I was able to pick up the Mechanical Attendant at the end of the turn.
Turn 2, the Watcher ran in and Delivered a Message, which was expected; I killed it pretty easily and also poured damage into Joss. I needed him dead before he could start deconstructing my crew. Gavin’s Soulstone Miners popped up near my backfield objectives, which was annoying, but I knew I had some time to clear them out. Bogg and Vantes held down the right flank, with Vantes engaging Melissa at 2″ to make shooting difficult for her.
Joss eventually went down under sustained assault, but the explosion stacked 3 injured on the Clampetts, and Gavin capitalized as best he could. Hermits helped, but my crew had a healthy amount of damage spread around it going into turn 3. I duffed the free heal on Mossbeard by trying to use his bonus action offensively instead of just shooting Ser Vantes (since he cannot gain Distracted) and cheating a low ram, but Aunty Mel and Bruce did their job, healing me up as best as they could. I summoned Richard the gator on the right flank and sent him after a Soulstone Miner, which he killed pretty easily (Flurry is really strong you guys! So is built-in Puncture!). The Clampetts hopped out of danger and used Reel In to position Hoffman so I could score Sweating Bullets, and Mossbeard ran in to Deliver a Message. Gavin was able to Take Prisoner on Ser Vantes, but couldn’t actually kill him through his armor and self-healing.
At this point I was taking pieces off the board much more quickly than Gavin. Armor +2 isn’t that easy to chip through, but with the Attendant dead he didn’t have any repairs, and I just chipped away at Clipper until Richard finished him off. I didn’t bother trying to kill Melissa or Envy, but kept them both engaged to deny their powerful guns while I spread out to leverage my numbers and capture as many objectives as possible.
Gavin could probably have denied me a Deliver a Message point by shooting his own Master to death with Melissa – he was very low on health – but it wouldn’t have changed the outcome. I missed one Strategy point but otherwise scored a health 7, while Gavin scored one each for Deliver and Take Prisoner and two Strategy points for a total of 4.
Round 5: Time’s Up
Going into Round 5, we were neck and neck with the Texas crew. We still had identical W/L/D records, as we had swept last round, but their MOV was ahead of ours. We had to hope that 1) we won all of our games and 2) they lost or tied at least one; those two things together would give us the win.
Our last opponents were the Master Faters, some local Connecticut guys I know well: Shane, Bobby and David. Shane and I had actually been scheduled to play a round in the then-ongoing Malifaux World Series Vassal tournament, though he’d had to call out due to COVID. I was glad to see he was up and about again.
The scheme pool here was Protected Territory, Death Beds, Hold Up Their Forces, In Your Face and Ensnare – a solid, killy pool that encouraged brawling. Table 1 was Cloak and Dagger on Flank deployment, Table 2 was Stuff the Ballots on Standard deployment, and Table 3 was Plant Explosives on Wedge deployment. As an aside, Table 2 was the clear winner of the Malifaux Cartographer award (i.e. best table of terrain): it was a wrestling ring, complete with stands, advertising billboards, working lights, ropes to bounce off of, etc. It looked amazing but was also wholly impractical to play on. Also I couldn’t get a picture – by the time I remembered that I should be doing that, it had been packed up.
Anyways, we stayed true to form and declared Brewmaster, Jedza and Seamus, while the Faters declared Tara, Jakob Lynch and Bayou Zoraida. I love scoring Cloak with Moon Shinobi, so I took table 1, and found myself matched into Shane’s Tara! We would get that game after all.
I hired the “standard” list, featuring Hoochdini, and deployed two Shinobi out on the left flank and one on the right, with the rest of the crew bubbled up in the center. Hoochdini was off to the left a bit to toss his Shockwave down on the two flanking Shinobi in order to start getting some Distracted out there. Shane hired Tara’s original form with Wanted Criminal, Karina, a Malifaux Child, the Nothing Beast, Vee, Hard Stop Herbert, Thirty-Three, and Talos.
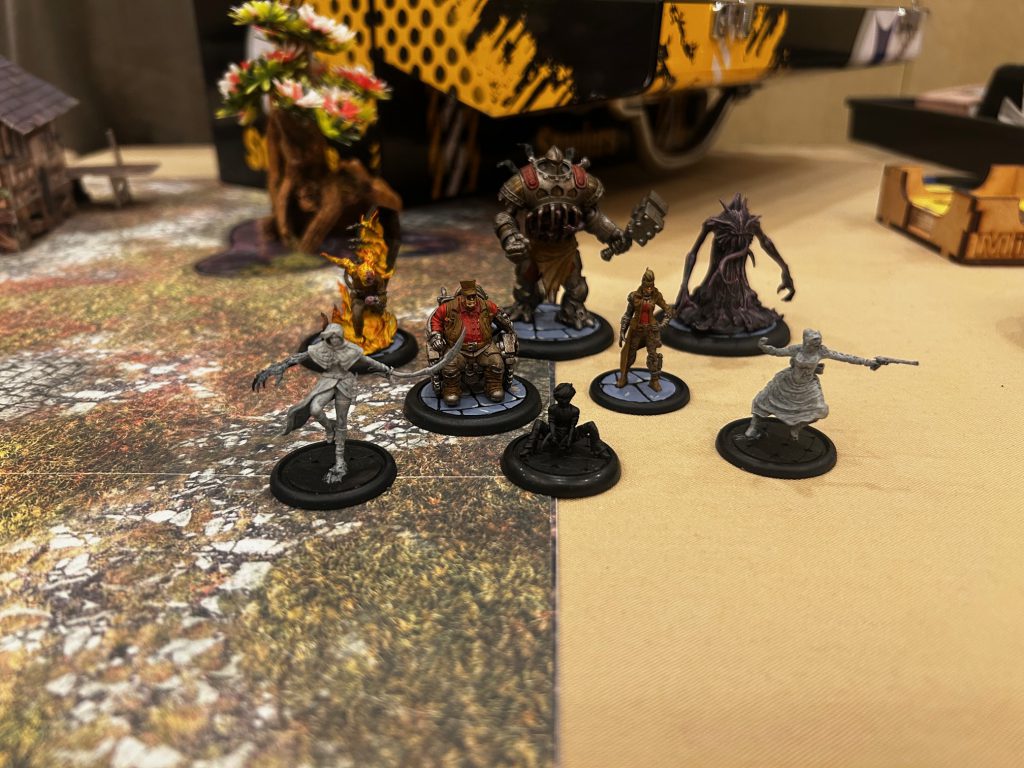
I picked In Your Face, which would be trivial for Brewmaster to score, and Hold Up Their Forces, which my crew could do easily; Death Beds is tough when you have to rely on Strategy markers on Cloak, while Protected Territory is difficult to score with Tara’s second activation giving him permanent activation control.
The turn one unpack functioned basically as it should, including summoning a Whiskey Gamin who promptly fanned out to the right. He sent Tara to the left flank and his three heavies (Talos, the Nothing Beast, and Thirty-Three) right up the middle. Turn 2, the rubber hit the road, or more accurately, the Brewmaster hit his lines. The Terrifying on the Nothing Beast and Talos is annoying to a Wp 5 crew without card draw, but Brewmaster was able to hoover up Thirty-Three on turn 2, the Nothing Beast on turn 3, the Malifaux Child and Karina on Turn 4, and Talos on Turn 5, easily scoring In Your Face. Meanwhile, Vee and Herbert scooted to the right, where they engaged in a high-stakes game of chicken with a Moon Shinobi and a Whiskey Gamin who had headed out that way – whoever took the intel token first would just have it stolen from them.
Tara buried one of the Shinobi that had gone her way, so when he popped out again I sent him right to contest Vee and her brother. The Moon Shinobi proved their mettle here: between High-Proof Punsch and Sidearms they killed Herbert (I was able to cheat in a Red Joker for exactsies) and then Vee on the following turn. Uncontested, they were able to rack up Intel Tokens from the markers in that area.
Talos, on the other hand, was pummeling my monks, and eventually both of them went down. I’m proud of them, though. The job of Fermented River Monks is being absurdly hard to kill, and they did it. Tara brawled a little with the Shinobi in her face and picked up Hoochdini when I got a little too aggressive with him, but she was forced to try to score both the strategy AND protected territory, as I put him on the latter scheme early and picked up the random markers he had been throwing down.
He also tried to declare In Your Face on Hoochdini, only for me to reveal that he only cost 7ss. Gotta read those cards! I built an In Your Face-proof list for a reason!
In the end, I just took material off the board too fast and too consistently for him to keep up. Wesley and the last Moon Shinobi spent the last turns of the game bullying Tara – not threatening to kill her, but forcing her to spend AP to move and interact to not get her tokens stolen. I was able to lock him out of both schemes, as the Nothing Beast was too dead to score the last point of In Your Face and I had the board too locked down for him to score Protected Territory. There was a scary moment on Turn 5 when he buried Cooper Jones with Talos before it died, which meant I had to try to get her into his deployment zone when she unburied; I spent some activations running models towards his deployment zone, then activated Cooper. He popped her out behind a Moon Shinobi, so I shot my own Shinobi and cheated in a mask for the Accidental Roll Over trigger, giving Cooper a free 5″ push and landing her right in the deployment zone. What a fair model!
In the end I couldn’t get the second point of Hold Up Their Forces (too many dead enemies) or the fourth Strategy point, but I held my opponent to just 3 Strategy points for a convincing 6-3 win.
Shane was a good sport about it, but he hadn’t faced Brewmaster, Moonshiner before and wasn’t ready for sheer killing power of Drunken Kung Fu.
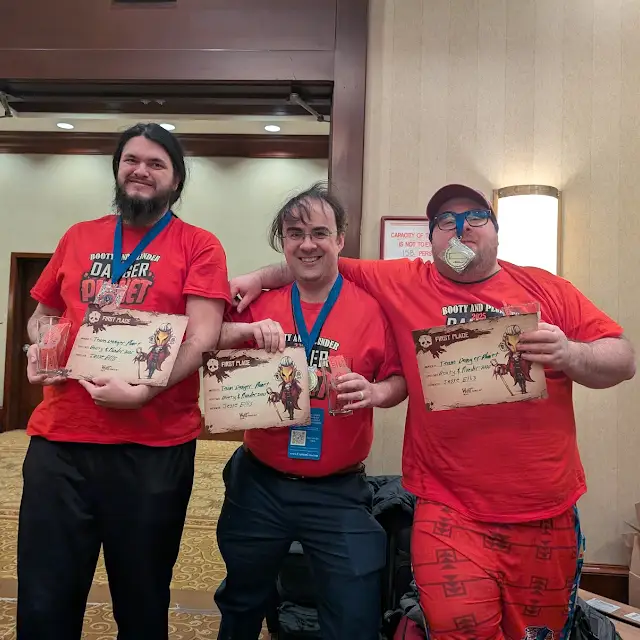
Brandon and Nathan both won their games with 4 and 3 point margins, respectively. We waited with bated breath to learn that one of the Texas players had dropped a game (to Brian, who had tied me with Sonnia on Day 1), making us the champions!
The Laurels of Victory
First place! It tastes sweet. It also felt really good to put physical models on the table and push them around. I need to make time for more in-person events. I have had a lot of Life Events in the past year (good ones!) but I am hopeful that in 2025 I’ll have more me time.
I think I’m shelving Brewmaster for a while. He’s fun, but games a bit samey, and he’s way, way too good. I’ll pull him out when I need to win, but I really want to put some time in with Ulix this year, or even try another faction. My Explorers are calling me…
That’s all for now! Thanks for following along. I am happy to be writing again and hope I will have more Malifaux content for you soon!
Have any questions or feedback? Drop us a note in the comments below or email us at contact@goonhammer.com. Want articles like this linked in your inbox every Monday morning? Sign up for our newsletter. And don’t forget that you can support us on Patreon for backer rewards like early video content, Administratum access, an ad-free experience on our website and more.
