G’day, Goonhammer readers! This is the second in a series of articles covering the strategic thinking involved in each level of the thrilling fantasy battles game that is Kings of War. With an understanding of army list construction under our belts, we will now discuss the tactics involved in army deployment.
Deployment refers to the very first part of an actual game which involves your army. The terrain is set up, the mission objectives defined, and now it is time to put the armies on the battlefield. The deployment area for each army is nearly always 12 inches in from each long table edge, with players on opposite sides. This means a player has 12 inches by 72 inches within which their army can be deployed.
There are a wide array of factors that influence how an army should be deployed, but we have narrowed it down to four of them:
- Terrain
- The scenario
- Your army
- The enemy army
Often new players will focus on only one of these aspects to the detriment of the others, either out of habit or ignorance, and this can result in a severe disadvantage. Even considering two of these factors at once will vastly improve the odds. So, let’s get into them.
Terrain
The third player in any good wargame, terrain is incredibly important in Kings of War. Unlike skirmish games, you can’t just walk around terrain to avoid its effects in Kings of War; the mass movement of soldiers does not lend itself to skirting around a house that happens to be in the way of your cavalry charge!
As in most games there are a few styles of terrain deployment that are commonly used:
- Player-Placed is the usual, casual set up that most wargamers will be familiar with. Both players take turns placing their available terrain wherever they like, and they can work together to build a good looking balanced board. Alternatively, players could place things for maximum advantage, or anything in between. It all depends on casual versus competitive game type.
- Preset is the tournament standard, with terrain being set up as required by the organiser.
- Dot Deployment is a relatively new style of deployment, coming out of the American South region, drawing aspects from both of the above deployment styles. The table is covered by a preset series of dots and the players take turns placing terrain to cover each dot.
Terrain Deployment
Terrain is the first thing to be set up on the table after the scenario is decided. There’s a lot to think about here (if you are actually deploying terrain yourself), and the best approach will change based on your faction and army style.
Firstly, we think the most important thing to know is “What is your game plan?” This will change based on the scenario and how you deploy, but hopefully you’re familiar enough with your list to know your speed and how you want to engage.
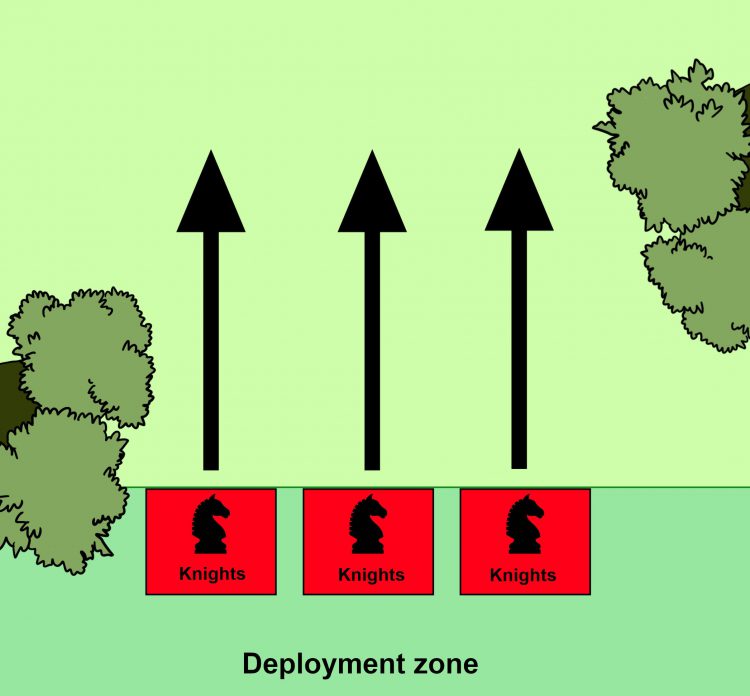
- Do you want to run full steam ahead straight at your opponent’s army and hope you can kill everything with a front charge? If so, you’ll want to make sure you’re not Hindered on the way in. Therefore avoid placing forests in the middle.

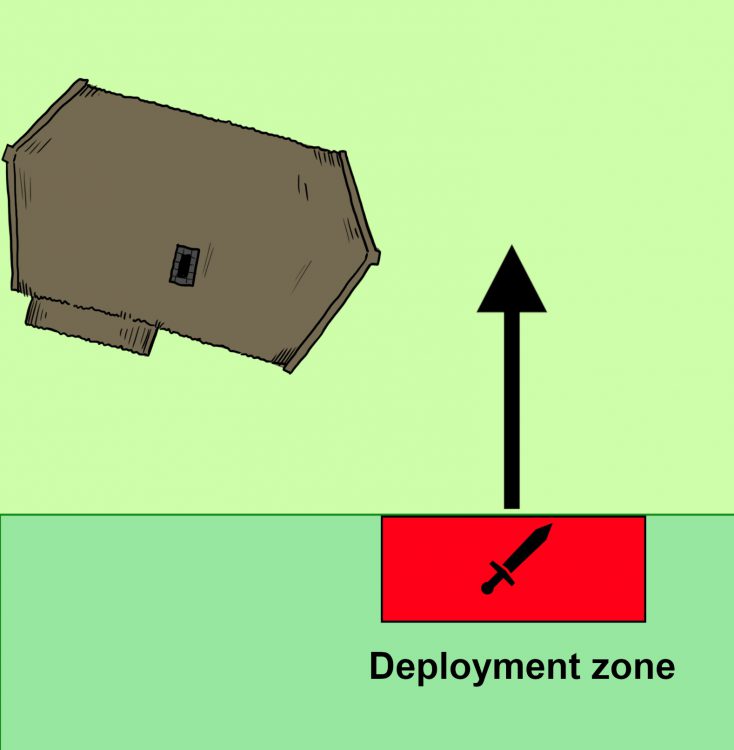
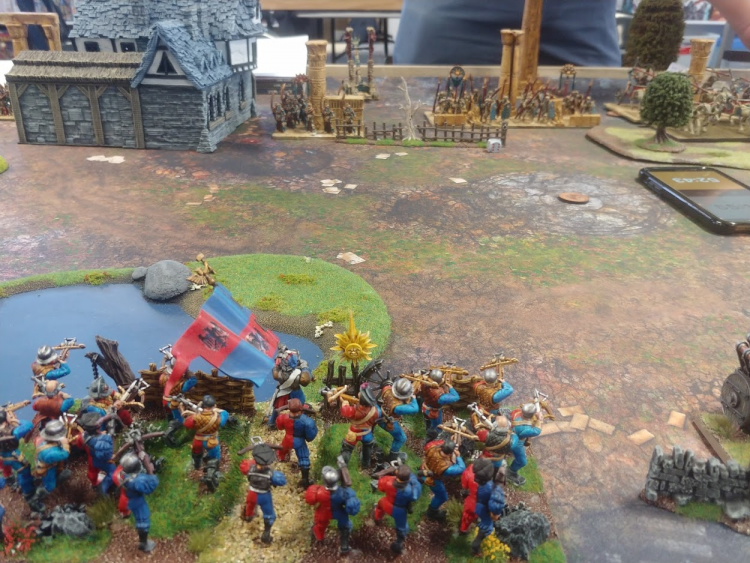
Gaps between terrain are perfect for cavalry, make sure to take advantage of them. - Do you want to take a more cautious approach, moving into the midboard and spending a few turns positioning? Placing some Blocking terrain next to where you envisage your anvil unit (ie. The Foot Guard horde from our army list article) ending up, so that flank charges are impossible. Or place difficult terrain there, so that anyone charging your anvil will end up hindered.

The Foot Guard horde deployed in line with the blocking terrain (the house), enabling easy movement into a secure position. - Do you want to sit and shoot everything off the table? Having hills close to your deployment or trying to make open lanes of fire will be important.
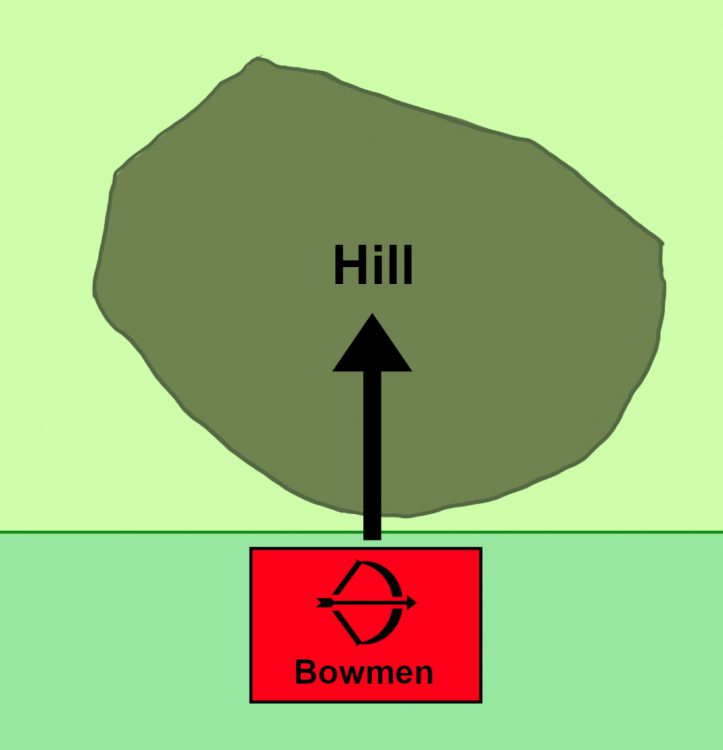
One thing to note, often hills are not allowed to be set up in deployment zones, as this gives war machines a huge advantage. What you can still do is deploy your war machines near the hill (which most likely sits just outside the deployment zone) and move the artillery onto in the first turn. What is lost in a turns worth of shooting is gained from the increased line of sight such a new height affords. More on height shortly.
Terrain and Your Army
The terrain is placed, now it’s time to consider how this might impact the armies that will be battling across it.
Terrain mitigation (ie. avoiding hindered)
Once you know roughly where you want the primary engagement to take place, you need to think about how terrain impacts you and your opponent’s army. The most common negative effect terrain has on units is hindered. This is a status applied to units that charge through difficult terrain, representing the impeded assault being carried out. To most units, this simply means -1 to hit in the ensuing Fight Phase, however many units such as Cavalry, being Hindered also removes Thunderous Charge (by one point, at least). Hence the ability to ignore such terrain penalties, known as terrain mitigation, is invaluable.
Terrain mitigation can come in a variety of forms, though it is most often one of these two special rules:
- Pathfinder: units suffer no movement penalties for Difficult Terrain
- Strider: Charging units are not hindered when charging though/ending on terrain.
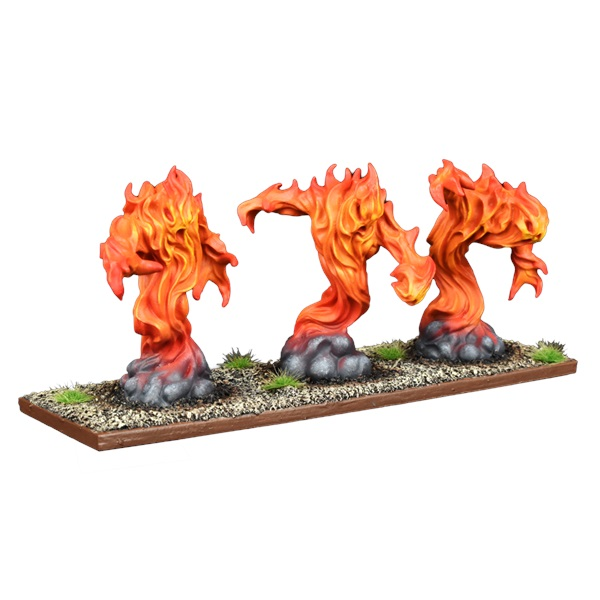
Some armies possess many units with these rules, a perfect example being the Forces of Nature. Others, like the Abyssal Dwarfs, have no Pathfinder and only two units with Strider. Such special rules heavily influence how these armies operate on the battlefield.
One can buy magic items to cover these terrain weaknesses (as we mentioned in our previous article) but only one unit per army list can have each of those items, so you’ll need to make your choice carefully. Most often the best units for terrain mitigation items are the hammer units – the ones that need to hit hard. There is little worse than a horde of Molochs hitting like pool noodles thanks to some intervening swamp.
One important note; if terrain is going to impact you more than your opponent, try putting pieces in your deployment zones, or off to one side. Basically, try to minimise its impact on your army. It may slow down your movement, but having to take the combat -1 to hit penalty on the majority of your army if the terrain is placed in the middle could be much, much worse, especially if your opponent is hitting with no penalties (shakes fist at all elementals).
Cover
While we’ve mostly mentioned the close combat modifiers, terrain also offers ranged penalties. Cover gives a unit targeting something in said terrain a -1 to hit with their ranged attacks (and some spells). This can be very useful against masses of poor quality shooting, and it’s still handy against high quality shooting, too. Note, many war machines have Ignore Cover that, you guessed it, lets them ignore the penalties to hit from cover. If you have a unit that you would like to not get shot off in the first turn, placing it in some terrain can be a good safeguard.
Line of sight blocking and height
Just like in other tabletop games, line of sight blocking terrain is also very important. In Kings of War, all terrain features and units have a height, and in order to see over something, your height value must exceed the height of whatever you’re trying to see over. The height of terrain is generally left up to the players/tournament organiser, but in general, ponds/rivers are height 0, obstacles such as fences or walls are height 2, hills are height 3 and forests/buildings are 6 (or 9 if the organiser doesn’t want anything seeing over said pieces).
Hills are especially important here; a unit on a hill adds the hill’s height to their own, potentially letting them see over enemy units. Suddenly well-hidden heroes become horribly exposed to the lofty voyeur. Another bonus with hills is when charging off of a hill. This gaining momentum bestows Thunderous Charge +1 to the charger, making your units even stronger.
A hill isn’t all upside (hah!), many units are the same height (or less) as a hill, thus blocking their line of sight. When combined with forests and blocking terrain, the avenues of sight can become quickly limited. However, particularly big units, like large cavalry and monsters, will be able to see (and be seen) over hills. This opens a whole raft of extra possibilities, so always be on the lookout for a sneaky, over-the-hill flank charge!
Finally, picking table sides happens after deploying terrain. So don’t stack things too hard in one direction, or you may not end up with the side you want!
The Scenario
The scenario is ultimately the most important factor in actually winning the game. It’s all well and good to have demolished the opposition, but if they have somehow retained their objectives or loot, it would all be for naught.
The scenarios can be found in the Core Rulebook, and rather than exhaustively suggesting deployment options for each one, we have opted to discuss them more generally. Of the 12 scenarios, these can be roughly divided into those focussed on:
- Objectives
- Battlefield control
- Loot tokens
- Simply just killing
All of these scenarios have one thing in common: they only truly matter at the end of the game when they are scored (although killing stuff is good on any turn). Until the game is over, objectives, tokens and battlefield regions have no value, but that doesn’t mean they should be ignored until Turn 6 (as often occurs).
In deployment, putting units into positions where they have a viable means to reach a token/objective/region can be critical. Not so much for fast units such as cavalry or fliers; they have the speed to reach nearly anywhere they need. But for infantry and monsters that are comparatively slow, mapping out how they might reach an objective will help decide where best they should be placed.
One obvious deployment strategy is to place units on as many tokens/objectives/regions in the deployment zone as possible, securing them right from the start! This, however, needs to be done correctly, or your unsupported units will just be killed by a more focused opponent, and dead units can’t hold objectives.
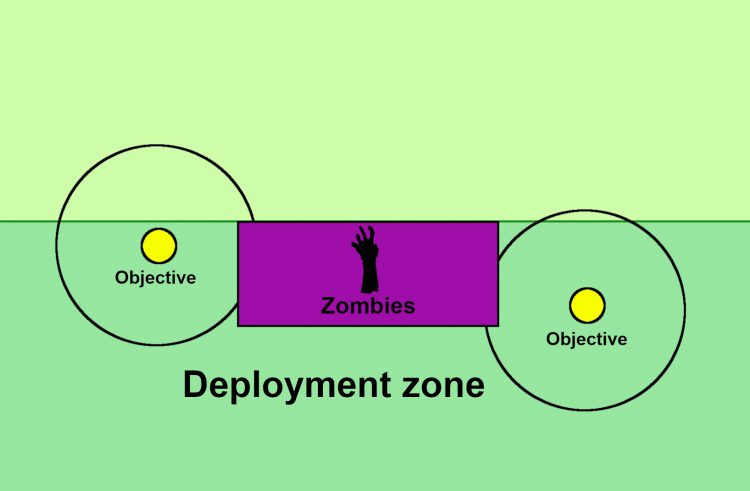
Any unit tasked with holding a deployment zone objective needs to hold it for basically the whole game, so you don’t want to be leaving your best hammer units sitting around on objectives all day. Ideally, you’ve got yourself an infantry horde, who, thanks to their very large base size, can sit between two objectives 12” apart and hold both of them. The ideal example are Zombies. Very cheap and fearless, they take quite an amount of effort to remove, but leaving them behind won’t put an Undead player at any loss. If there is a unit in your favoured army that is like Zombies, this is a very viable role for them.
Your Army
Every army is constructed with a plan in mind whereby the units work together to achieve a common goal; typically obliterating enemy units, while not being destroyed in turn. Deploying an army correctly with unit synergy in mind means that you will not be playing catch up in the early turns of the game.
Inspiring and auras
The most straightforward and universal form of synergy in Kings of War is the rule Inspiring, and is often the first thing new players become cognisant of during deployment. Heroes, monsters and even some units with Inspiring allow nearby units to reroll failed Nerve tests. Placing such units throughout an army bolsters durability. Just make sure all the key units are within 6 inches of an Inspiring unit. Seems simple, but many times an out-of-position character can spell the doom of an unlucky unit.
Auras, similar to Inspiring, also provide a 6 inch bubble around units, but instead can bestow all manner of special rules. While most often these special rules are offensive in nature, having them nearby the units that need them most can be critical to winning a combat.
Layering
In the early games of Kings of War, new players are likely to deploy everything at the battle line, spreading out along that 72 inch stretch. This can have the advantage of overwhelming an opponent, but more often an opponent would simply have an easier time of breaking an army apart piecemeal. It also means that at least some units will have difficulty getting around terrain, so ultimately some units will just be useless.
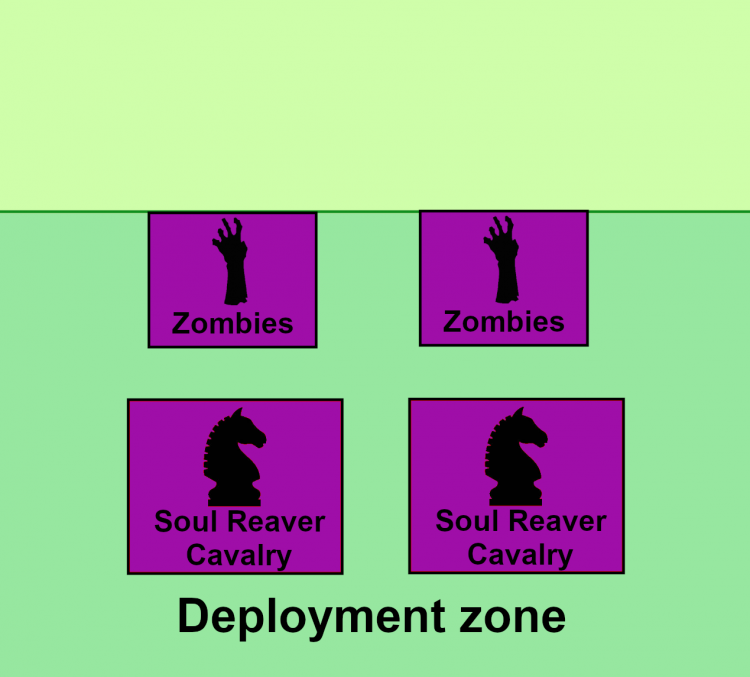
The term ‘layering’ refers to the deployment of units behind other units, creating layers of the army. When done poorly, it can be a literal traffic jam. However, done well this form of deployment enables the protection of key units, and facilitates the instigation of desired combats through counterattacks. The idea is that the first layer of units take the brunt of the enemy assault, then the counterpunch is led by the second layer, which typically consists of units that hit hard.
The front line can be chaff units (weak units that just get in the way), but more often they are a slightly more robust infantry unit. Good traits for a first layer unit are:
- Sufficiently tough to survive being shot at (ie. slightly more robust than the standard ‘chaff’ units’).
- Cheap enough that losing them in the first round of combat is no major blow.
- No taller than height 2, otherwise the second layer units will not be able to see much for their own charges.
- Small enough that if they survive, they can provide enough space for the second layer units to charge and fight next to them (not a problem if the first layer unit is dead).
- Unlikely to waver or suffer the effects of wavering.
- If not wavered, they can be part of a multicharge with your second layer units.
- If dead, no problem! Charge over the fallen comrades!
- If properly wavered, then your second layer units will be stuck!
The distance to leave between units varies. Second layer units need to be close enough to the front units to be within charging distance of the enemy, otherwise what’s the point of this whole exercise? However, being too close might prevent units from pivoting during a charge. A good distance is 1 to 2 inches, erring towards less if the opponent possesses a plethora of flying units.
Chaff
The term ‘chaff’ in wargaming refers to the use of generally cheap, weak units to get in the way of the enemy. Using chaff correctly allows stronger units to be temporarily protected from unwanted enemy charges, and is not dissimilar to the effect that layering an army achieves (see above). The primary difference between chaff and first layer units, however, is that chaff units are very cheap, and if possible, very mobile.
Setting this up starts in deployment. There will be key units in any army that need to be protected by chaff. The chaff can be in front of the unit (like layering), but if mobile enough can also be off to the side, ready to leap in the way at a moments’ notice (Gargoyles do this far too well!).
Battle lines
The placement of units next to one another to form a battle line can have a major impact on the game. Whenever an opponent charges a unit that is part of a battle line, they may only be charging a single unit, but they are at risk of retaliation from nearby units, particularly if the combat is unsuccessful. The opponent must choose which unit in a battle line is the best to charge, and the concept of setting up a good battle line is to make this decision as difficult as possible.
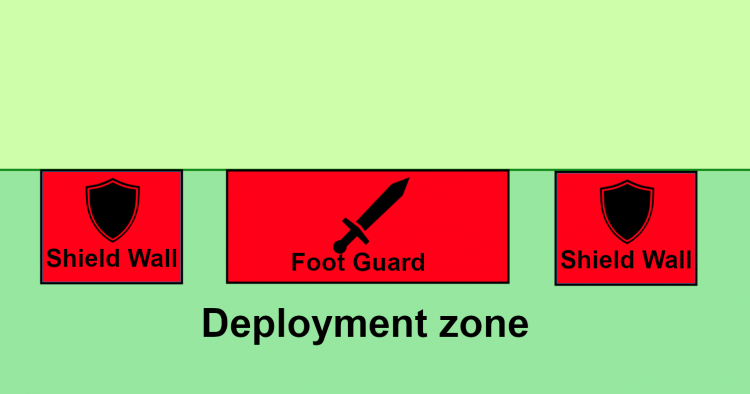
It is also important when creating these battle lines that there is enough space between units so that they can pivot when required. As with layering, this distance is between 1 to 2 inches, and again leaning towards less when the opponent’s army contains many sneaky individuals that might want to slip between units to cause havoc.
Ranged units
Leaving the simplest to last, the deployment of ranged units is primarily contingent on a single variable: line of sight. Hills, forests, blocking terrain, the height of your units and the height of your opponents units all impact where a ranged unit should be deployed. There is no use deploying a unit with ranged attacks when it might not get to use them during the first few turns of the game, and by that point, they might already be engaged in close combat!
The best way to deploy a ranged unit is to first identify suitable targets; low defense units, enemy ranged units or even likely objective holding units. Once these have been identified, then the task is to deploy in such a way that shooting at said target can begin as soon as possible. For most war machines, this will be right away, especially if you get first turn. For ranged infantry, however, this is more likely to be during Turn 2. Therefore it’s important to deploy with a turn’s worth of movement in mind. Where will the opponent likely move their targets? Will you still be able to shoot them at that point? Ideally any ranged unit should have at least two targets, that way your ranged unit will unlikely to be wasting their time.
Your Opponent’s Army
While you are thinking hard and deciding how to set up your soldiers, your opponent will be busy doing the same thing. In Kings of War, armies are deployed in an alternating fashion; an I-go-you-go style. This allows you and your opponent to immediately respond to each other’s unit deployments.
There are two main schools of thought on deployment, and knowing which camp your army and playstyle falls into will be very helpful in your deployment. Some players deploy in their own way to push their game plan, regardless of what the opponent does, while some players specifically go for the counter-deployment strategy, focusing on nullifying their opponents plan.
As discussed above, there are certain combinations of deployment that your army will need to be effective. Some of these ‘battle groups’ are deployed regardless of the opponent’s unit placement, as their focus might instead be to avoid terrain or get to objectives, but some units (such as hammer units and their associated chaff) will have very particular enemy targets in mind.
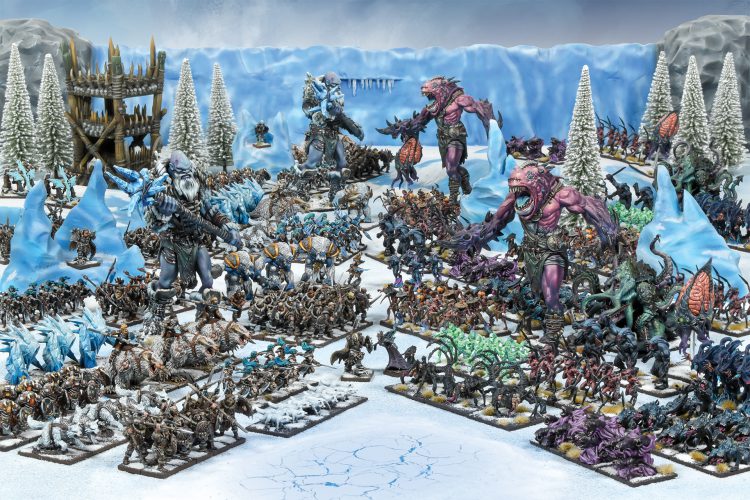
These ‘match-ups’ are often the main focus of deployment, and having the ability to ruin the opponent’s plan is a critical key to victory. Here are some simple examples of deployment match-ups:
- Units with Phalanx deployed opposite enemy cavalry.
- Fast combat heroes placed opposite enemy flyers.
- Hordes of cheap infantry deployed opposite enemy hammer units.
- Fast units opposite vulnerable ranged units.
- Ranged units opposite slow infantry units.
- Cannons opposite the opponent’s prized monster.
To avoid having your best units line up against their counters, try to place them last. Equally, if you have a unit whose sole purpose is to ruin something of the opponent’s, make sure to keep it until the end of deployment. It may not be possible to avoid being counter-deployed, especially if your opponent has many more units to deploy than you (colloquially referred to as ‘drops’). However, there is a magic item that forces your opponent to deploy additional units at the start to help equalize the difference.
Summary
The art of army deployment is a complicated affair with many factors to consider. We hope we have covered a large enough range of them to enough depth that any new (or old) players can broaden their strategies and avoid those nasty surprises that arise from poor deployment.
The effect of terrain, the win conditions of the scenario, the internal machinations of your army and finally the army of your opponent should all factor into the game plan. But this plan should be flexible, because as Mike Tyson once said, “Everyone has a plan until they get punched in the mouth.”
