
The 2024 Edition of Kill Team has overhauled the game, changing rules, datasheets, and bringing with it an updated set of rules for every team in the game. In this series we’re taking a look at each team, how they’ve changed, and what it means for how they play in the new edition.
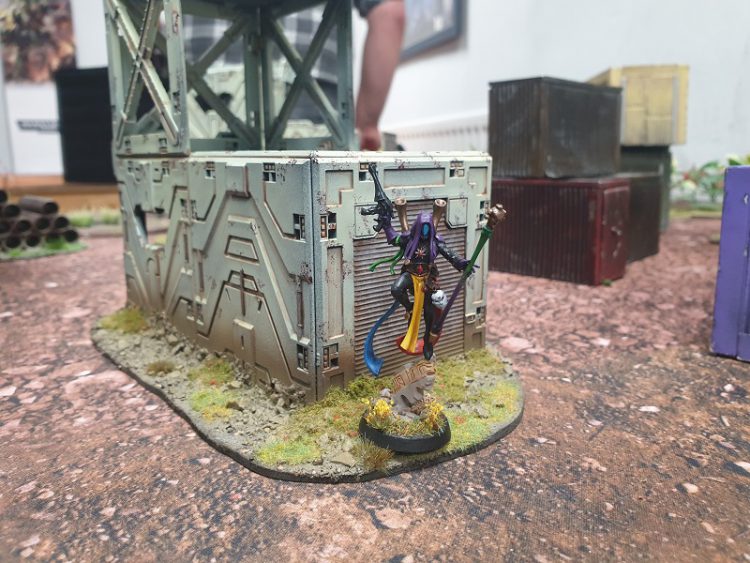
Welcome back, Kill Teamers, to the re-review of the Void-Dancer Troupe, the comedic punchline of the Aeldari range and terrorizers of the entirety of Kill Team 21 — at least until they lost the ability to fly in the middle of the edition. Fortunately for them, they’ve gained some new toys and a reasonable buff when interacting with terrain, making them once again a team that may be worth a joke or two.
In this re-review, we’ll be going over the broad strokes of the changes, and trying to recontextualize the team in the new edition. Especially noting any larger changes that are coming down the line.
Before we dive in, we’d like to thank Games Workshop for providing a preview copy of these rules for Review purposes.
The Video Version of this Review
If you’re interested in watching a video version of this review, we’d suggest this one, courtesy of Can You Roll a Crit?
Team Overview
Harlequins continue to be the elite-side of the elf range, sporting 8 operatives, with 3APL each. Making the faction a sort of in between the Astarte threats, and tougher 10-wide teams. Considering the focus on Recon and Infiltration archetypes, that 3rd APL is always going to have a job, and you’ve got some strong tricks to boot.
Abilities
Saedeth
Once a complicated five-act play choreographed across the entire game, the Saedeth rule has been trimmed down to an allegorical dual choice between Epic, for melee, or Melodrama, for ranged. As a strategic gambit on the first turn, you must select an allegory, and an operative to be your pivotal role. The pivotal role gains the accolade of your allegory, balanced for your type of combat, while also looking to get an incapacitation in that sphere of violence. Once per turn, if your pivotal role gets an incapacitation to match their allegory, you can grant the accolade to any friendly operative.
This makes the Saedeth much easier for everyone at the table to understand. Pick someone to fight or shoot better and get a reward when they murder someone, granting someone else the ability to fight or shoot better. With the leader’s ability to change your allegorical focus, you can mix and match for the situation.
Harlequin’s Panopoly
First, ignore piercing while being shot across the board, which is an incredible defensive benefit, especially while cowering behind a portable barricade. Also, treat all vertical distances while climbing as 1” regardless of actual distance moved; this means small objects only cost 1” to flip over, making the harlequins far far more mobile than other teams barring those that fly. While also freeing up the equipment slot that many opposing teams need to dedicate to ladders. An excellent change from the last edition’s end of edition flip belts. Lastly, move through opposing control ranges, as long as you start and end in a legal position. While this doesn’t help you avoid ending a charge within the first enemy encountered control range, this does give your reposition and dash actions far more flexibility. Combined with the ability to move through friendly operative’s bases in this edition and your harlequins can often get into or out of any trouble you’re looking for.

The Operatives
With 3 APL on each operative, 7” movement, and 3s to hit across the board, all backed up by a 4+ save which ignores piercing, each harlequin is a hero in their own right. Unfortunately, they’re still pretty fragile – with only 8 wounds per operative, you need to be careful how you use them, as you can’t afford to waste any of them. Harlequins are complicated but Void-Dancer Troupes only have four datasheets to learn, helping you get up to speed with the tricks you need to know right away.
Player
Our humble players have gained quite a bit of flexibility, with the addition of Luck of the Laughing God allowing one player during each turning point to use a firefight ploy for free. Each ploy can only be free this way once, but that’s basically 4 free CP! We’ve got the same four melee weapon options with much the same rules, except for the Blades which are now Severe instead of Balanced. Considering that many damage mitigation abilities can’t dodge critical hits, there are many more uses for Severe blades. While Brutal Embraces continue to be good against parrying focused defense and Rending Caresses let you high roll against 10-wound opponents. Lastly, with the Lead Player’s loss of 2+s to hit, our humble players can hold onto our special weaponry to avoid some of the risk of putting all our eggs in one basket.
Lead Player
Lead players look much the same as normal players in this edition, with the exception of the power sword option which lets you get four attacks on 3s, with 4/6 damage, and lethal 5+. Once a battle as a Strategic Gambit, you can Lead the Performance and change the allegory of your Saedeth, instantly moving all operatives with accolades to the new balanced range. Keeping your leader in play to switch gears after your opening salvos have been shot, or vice versa lets you keep an opponent guessing. Sometimes you’ll need to send him in for the kill, and with lethal 5+ that power sword can really make a mess of a Murderous Entrance.
Death Jester
While the majority of our operatives are close in with 8” range pistols, the mighty Death Jester’s prowess is long range suppressive firepower. Anyone damaged by the Shrieker Cannon’s attack dice are effectively injured by its Humbling Cruelty ability. Luckily for opponents this does not stack with the injury status. Though with five attacks, hitting on 3s, 4/5 damage, and rending, it’s not likely that anything past an Astartes is living through the salvo. The operative has been downgraded to Heavy (Reposition Only) meaning we can no longer dash to safety after letting loose so our third APL is probably going to be set aside for doing tac ops. There are worse things in the world than surveilling an opponent after humbling another.
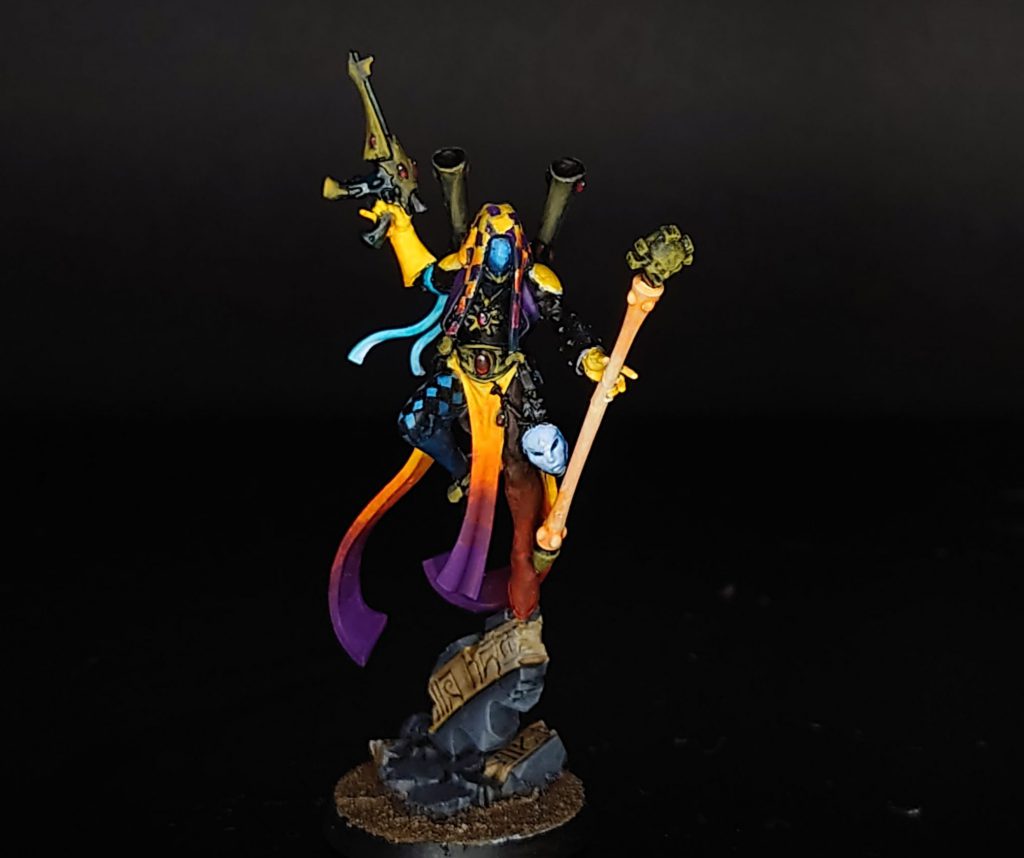
Shadowseer
Utility, utility, utility thy name is Shadowseer, able to let loose with silent, range 6”, Blast 2”, stun grenades to annoy opponents, or use Mirror of Minds to launch a weird psychic attack that can deal up to 8 damage. The Shadowseer is a silent utility piece that can give your opponent fits, slowing an opponent’s activation order with Fog of Dreams with only visibility, or chipping off wounds with its two ranged profiles. Our miststave has been nerfed a tad, coming down to 4 attacks, on 3+s, with 4/4 damage, and shock, able to defend itself but not threaten all that much. Keep them out of harm’s way, to needle at your opponent to support the rest of your moves.
The Ploys
Strong ploys, to defend the frail 8 wounds of your eight operatives, is where most of your team’s power budget lies. Darting Salvo, is very much the Between Colours of old, letting you perform a shoot action during a reposition as long as you land in a legal position to shoot. This ploy effectively gives your Death Jester their move, shoot, dash combo back, and has some other very cute uses, though its power is somewhat limited with 8” range pistols. Rising Crescendo is a new entry, letting us perform a Dash action, after a Charge is finished, letting us snag kills and slink into the shadows. It being a strategy ploy means your whole team can look for these shenanigans, and with The Curtain Falls you can really slingshot to new positions! Prismatic Blur lets us re-roll a defence die if we’ve moved this turning point, which isn’t all that interesting. Primarily useful against shooting hordes, or if you’ve somehow managed to bump yourself up to a 3+ save, not something we expect to use much. Cegorach’s Jest remains our melee defense, letting us force an opposing melee strike to block instead of strike on a D6 roll targeting under our opponents Hit stat. This is less reliable than before, but a 33% to strike first is still going to be plenty powerful when opponents are relying on their melee operatives to win fights.
In our firefight ploys, we find a veritable magician’s kit of tricks and misdirection, remember that our Player operatives can use these each free once a game! Murderous Entrance is a bread and butter skill letting us strike with another normal success immediately after striking in a fight after we charge. We’re basically guaranteed at least 8 damage with almost any charge! The Curtain Falls is slightly worse this edition, requiring a critical strike to trigger, and only offering a free 3” dash/fall back action. While this is nerfed in movement range and triggerability, it’s actually a buff in the sense that you can now incapacitate an enemy and continue moving, something you could not do in KT21. Elusive Target is new, and offers operatives the ability to gain conceal, regardless of other rules, if you are in cover. Historically this was once a strategy ploy for us, and we’ll still be using it to move onto unsafe objectives. Domino Field is another new ploy, letting us have a new way to block dice when being shot, letting us match successful die values against all opposing matching values. Aka a successful defence die of 5, and block any number of attack die of 5. Not incredibly consistent, but it’ll feel like cheating when it goes off.
Equipment
Wraithbone Talisman
Stop me if you’ve heard this before: Once a turn when you roll 2 or more failures, you can discard one to turn one of them into a success. Mildly more useful on a team that saves on a 4+; still somewhat uninspiring.
Shrieker Toxin Rounds
Once per turn, when you perform a Shoot action, you can choose to have that shuriken pistol, or shrieker cannon (focused) gain Devastating 1 weapon rule until that action is done. Probably not consistent enough to be worth focusing on, but notably useful when taking shots against 10 wound opponents. Those injury breakpoints are much easier to reach when you’re taking a little off the top.
Death Mask
If three operatives with accolade rules triggered on them throughout the game are incapacitated, gain 1 CP. A lot of tracking for 1 CP; if you get the sense that the team is very CP hungry it’s probably always good to take this, if not then don’t. We’re still slightly too early to know.
Understudy’s Mask
Once per battle, if your pivotal role has been incapacitated, someone else can don the mask, importantly gaining the relevant accolade role in the process. Having someone in the role to hand out balanced seems pretty important for teamwide reliability so we’re expecting to always take this.
Tragedy in the Family
With the move to less reliable leaders and the loss of seek and destroy, the harlequins are left to more circuitous routes to victory. We’ll imagine we’re playing against the horde teams of the future, opting to abuse our 3 APL and the new counteract phase to outmaneuver those monkeigh. We’ll take the playful choice and aim for Recover Item, playing hard to kill opponents, and have 3-4 operatives left to manage those items. Our primary op will go in the same line, we’re sure to be able to use our 3 APL to snag those items without too much difficulty.
We’ll take the portable barricade and drop it close to a vantage point, and make our tp1 goal to set our death jester on a vantage with that portable barricade. Depending on our panoply to make that first climb trivial, setting ourselves on engage. If our opponent takes the bait, we’ll have a 3+ ignores piercing death jester ready to fire 5 shots down range in counter act. While our Shadowseer drops some sneaky wounds at operatives getting a little too close, aiming to drop -1APL with our grenades on already expended operatives.
With luck we’ll be set up for a murderous tp2, where we send players out to snag kills, only to dash back into covering fire range of our death jester with rising crescendo. This turn is where our players will be working overtime with a free curtain falls or murderous entrance. If we can keep the tempo up, and drag opponents into our overwatch range, we can trap them between our melee and our 3+ ignores piercing monster.
Final Thoughts
The Void-dancers have always been a mid-tier threat for the majority of the lifespan of Kill Team. Able to ignore many of the basic rules of the game and punch incredibly hard, they culled the new from the experienced with frightening ease. Unfortunately for them it meant that at the upper end of the tournaments, few if any ever pierced the veil of top tier threats.
Luckily in this edition, if you have a plan for the Astartes, you have many of the same tools that game players use. With many of your game plans getting new avenues for success, while the counteract phase is a huge boon for them. As void dancers will often be outnumbered, even as the slaughter commences. Additionally the team is just more consistent and less finicky which will let players focus on dancing into just the correct position to finish off their opponents. We’re not expecting things to go that well for the void-dancers, but we wouldn’t be surprised if players found all new things to love.
Have any questions or feedback? Drop us a note in the comments below or email us at contact@goonhammer.com. Want articles like this linked in your inbox every Monday morning? Sign up for our newsletter. And don’t forget that you can support us on Patreon for backer rewards like early video content, Administratum access, an ad-free experience on our website and more.
