I had been planning to once again attend the St Alban’s Smackdown – my favourite UK tournament, and this particular one, in February 2023, was an official Satellite event, granting the winner a seeded ticket to the Interplanetario tournament. I mean I won last time, how hard could it be?
In line with taking White Company to the currently ongoing Infinity Global League on Tabletop Simulator, I decided to revisit Imperial Service Sectorial (ISS) for this event. It has been a couple years since I played them, and that was only for a couple games. They’ve had the Fireteam update since, which gave them some very interesting combinations, including the ability to take 2 Haris teams. I also could see some decent fits, as I thought, for the event’s missions: Highly Classified, Acquisition, and Capture & Protect.
Table of Contents
The Lists
The Aggressive One
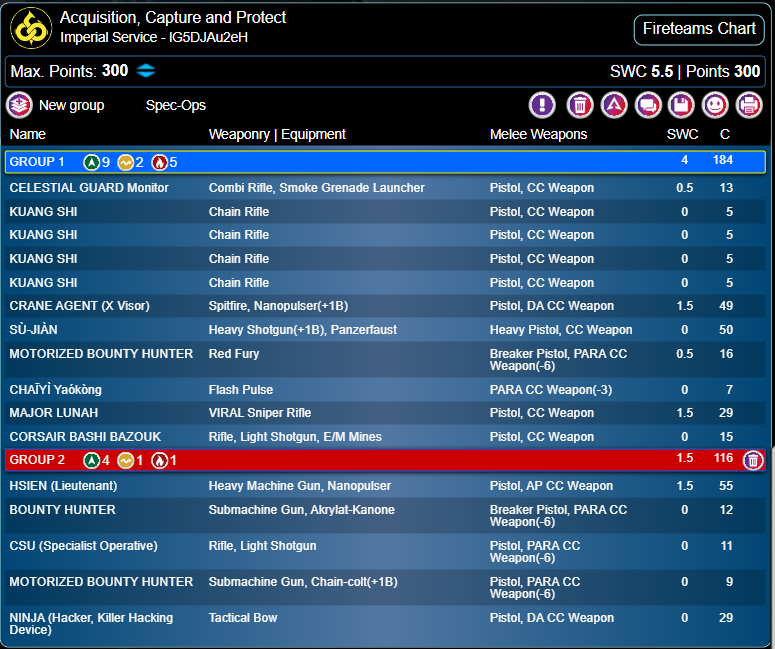
My starting point was for C&P and Acquisition, as I thought these both rewarded fast, aggressive units to move forward, to capture the beacon in the former and just to capitalise on 16″ deployment zones in the latter. And I knew exactly what I wanted to use – the heavy shotgun +1Burst Su Jian. The battle cat is really the premier unit in ISS and in its shotgun form it’s one of the best breakthrough units in the game. To give it a friend who could reliably engage targets outside of 8″, I knew I wanted to Duo it with a Motorised Bounty Hunter with red fury – this is a very points-efficient firepower unit, and with BS12, Mimetism-3 and whatever it gets from Booty (Re-roll) it is a surprisingly decent gunfighter. Those two can race up the table and deal with most AROs as they go. The Su Jian’s main weakness is hacking net AROs, and while I didn’t see any perfect solutions to that, the bounty hunter is at least not a hackable unit so can push through and try to clear those threats. With that being my breakthrough capability, I went to add firepower in the form of a Hsien HMG Haris – this terrific long range firepower model can team up with cheap Bounty Hunters or CSU to gain the sweet +1 Burst, and since he’s already MSV2 & BS14, it makes him an apex threat to anything which isn’t very heavily armoured. Since I was taking the ubiquitous Celestial Guard and Kuang Shi Core Fireteam, I’d also have fairly reliable, and very position-flexible, smoke to enable him to smoke shoot. I also took Major Lunah for further long range options and to deal with Bears. Casting around for another big gun, I decided to add a Crane Rank Agent spitfire (with X-Visor) to wildcard into the Kuang Shi team. My rationale here was that firepower redundancy is super important, more and more so if the tables are open; I also knew that the Hsien would be most safe and efficient I’m the backfield, whereas a Crane, with his superior Martial Arts, 8-24″ range bands, could brawl it up in the midfield if needed, supported by some disposable penal troop chain rifles. I needed a Lt and chose to make it the Hsien – it could as easily have been the Crane, and with the same WIP14 they can decoy each other, but again I thought the backfield role was less exposed to danger. Rounding out my options I had another Motorised Bounty Hunter, as a cheap disposable trading piece, and a Ninja Killer Hacker. This last was for Classifieds, to cap objectives in Acquisition, or try to sneak the beacon in C&P, all of which a Hidden Deployment Mimetism-6 specialist (with a Mission Bonus in Acquisition!) Is great for. It also gave me a close combat option for dealing with some threats, and a way to attack hackers who were threatening to hold up the Su Jian.
I was happy with the structure of this list because it enables wild offense. The Hsien can clear hard stop AROs, or I can send in the Ninja / trade the SMG Motorised Bounty Hunter to remove something (although I would struggle to do all three of these at once, due to Orders). That leaves the entirety of Group 1 Order pool to push the Su Jian Duo. It was interesting to see how that theory panned out. I could experiment with removing the Crane, who is more redundancy than my first choice of attack vector, and the SMG bike, and that would let me include a Pheasant for Chain of Command, Tao Wu for Counterintelligence, and upgrade my Ninja to a regular Hacker with a much more useful SMG. That would further enable the Su Jian push, and deal with my vulnerability to Loss of Lieutenant. But arguably that’s a lot of direct power to give up, for contingency planning.
The Objective One
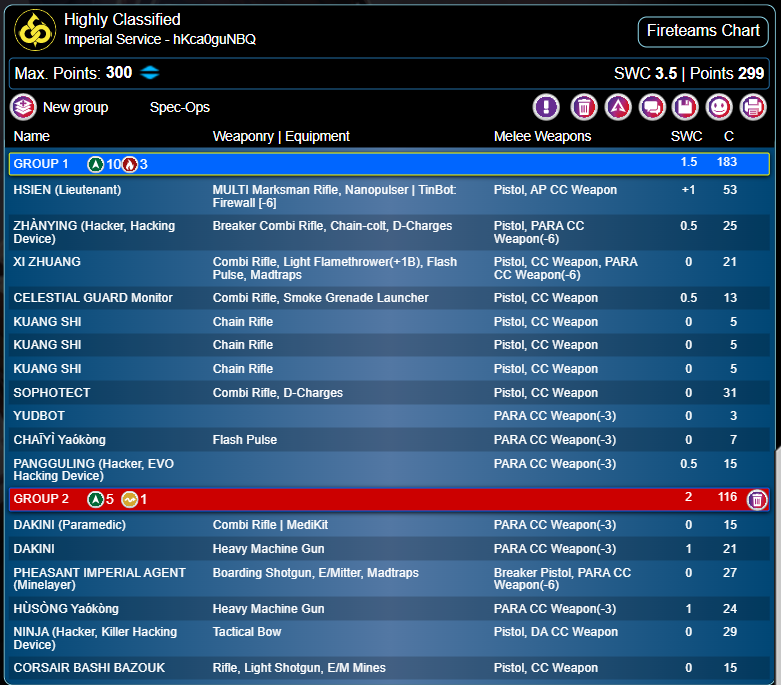
My second list would be to expand my options for Highly Classified. The first list is extremely light on Specialists (if I didn’t get a free Bashi Bazouk specialist option I would be very worried about using this list in Acquisition).
I knew that to cover possibly classified draws, which were impossible with my other list, I needed Doctors, Engineers and regular Hackers and/or Forward Observers. Basically I was locked into taking the Sophotect, ISS’ only doc or engineer option. That meant then taking some remote presence units to enable Test Run classified. I wanted some redundancy on hackers, and while I could pick a Master Breacher to gain D-Charges, and the Sophotect had them, redundancy there was also good.
This led me to a Dakini Haris including an HMG, Paramedic, and a Pheasant who is at least a Veteran/Elite. I included a Total Reaction bot, the ultimate Test Run bait, and the standard Kuang Shi team, reduced to 4 models to save slots. I also had the Ninja killer Hacker again – did I mention it’s great to have a marker state, infiltrating hacker for classified objectives? But the central pillar of my objective hunting was a Haris of a Hsien with multi marksman rifle, Firewall-6, a Zhanying hacker (who has Sixth Sense and D-Charges) and Xi Zhuang, who is a Forward Observer, Minelayer and Number 2 as well as a nifty trading price with his flamethrowers. The latter two are veteran troops and the Hsien being HI with MSV2 make them very flexible indeed for scoring classifieds. In retrospect though, and not to spoil the results, these Firewall-6 Haris teams, while very cute on paper at the list building stage, can be somewhat fragile in play – too many moving parts. So I’m not entirely sure my concept was sound. As with the other list, a Ninja with regular hacking device would have been more Classified-capable. Honestly I’d take 2 Ninjas if I could for this mission, and possibly I should have looked to a Kanren or Garuda instead of investing my objective-scorers in a fireteam that started in my Deployment Zone. Let’s see how it went!
Game 1: Highly Classified
The Objectives, Lt Roll and my Deployment
I drew against Chris’ Military Orders, and while he described himself as a relatively new player, he has obviously been paying attention! The flop of 4 shared Classifieds was: Sabotage (secretly pick a terrain piece in the enemy table half, and plant D-Charges on it); Net-Undermine (veteran or elite to make a WIP roll in the enemy table half); Data Scan (hacker must pass a WIP roll against an enemy model within ZoC); Capture (be in base contact with a Null State enemy at the end of the game). Now these were interesting. Net Undermine is one of the easiest objectives in the deck, provided you actually have valid models, and I had 3, spread across my Haris teams, and I could expect MO to have plenty as well. Sabotage is similarly very achievable given the scenario lets you nominate a Master Breacher at the end of deployment, who gains the necessary D-Charges and +1″ movement. Data Scan is hacker dependent but again quite simple. Capture is the odd one out. It really requires you to either comprehensively beat the opposing force, or to go second. In this mission each player also has a personal, secret Classified, which is worth a whopping 3 Objective Points (OP). I drew Telemetry (Target an enemy model, either by hacking or Forward Observing) which is excellent, but only 2 of my models could do it, both in my active Haris. My opponent drew doctor/paramedic WIP roll in base contact with the HVT, which is quite an order intensive one, and he had one model, his Montesa biker medic, who could do it, although to be fair it’s a great model for it.
Now here I think I made an initial mistake, or at least didn’t think clearly. I won the Lt roll, against his WIP15 (so I knew he had Joan of Arc as his Lt) and I chose to go first. That would be my usual choice in HC. You can lock in objectives, you can try to kill your opponent’s key objective-scoring models, and generally set the scene. Of course you avoid the enemy immediately doing the same to you! With our draw, you could also argue that both players had a very good chance to achieve the 3 easy objectives, but the 2nd player had a better chance at Capture. They would also have an easier time of Securing the HVT for that chunk of 3OP, although I did think I’d drawn a personal Classified I would try to achieve during the game. So in hindsight it would also have been defensible to pick deployment, tuck my head down initially and try to play to the objectives over the course of the game.
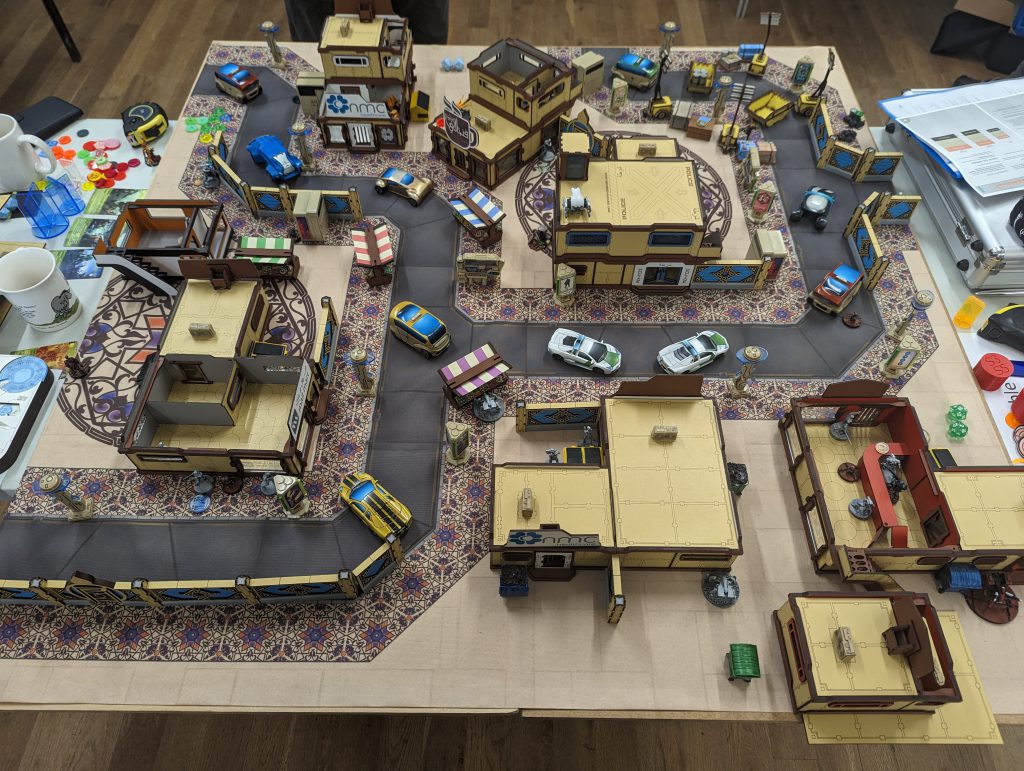
My deployment. I placed my Hsien Haris on the left, committed to storming forward, grateful that none of the Objectives were HVT-related, which can make deploying first a critical disadvantage in HC, at least if you’re relying on DZ Fireteams to do your scoring. My Celestial Guard and 2 Kuang Shi were also in a Core Fireteam on that flank, positioned as Order batteries and to give covering smoke. My centre had a Sophotect, with another Kuang Shi to protect her, or Impetuous forward as relevant. My Dakini/Pheasant Haris was hidden in a building on my right flank, ready to come out and attack long firelanes. I held my TR bot and Ninja in reserve by spending a Command Token.
My Opponent’s List & Deployment
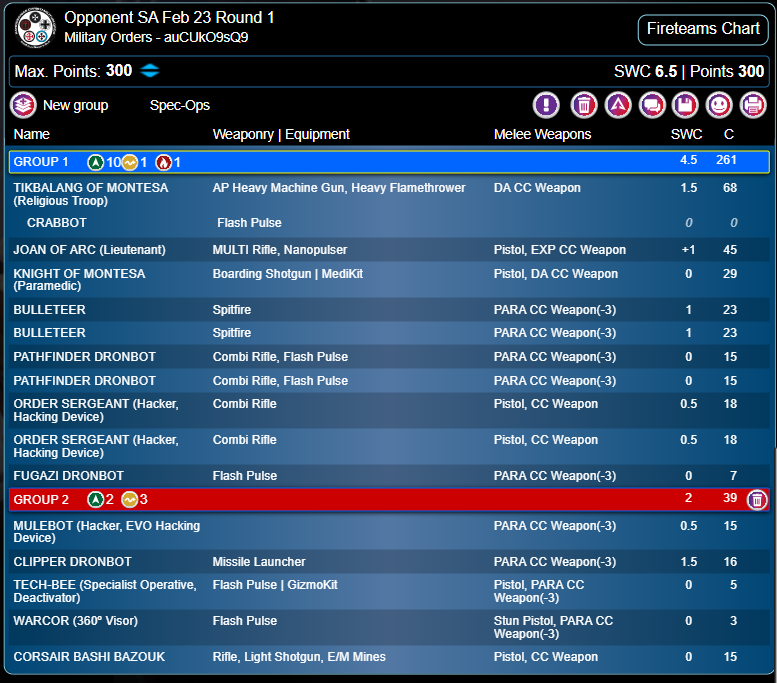
Chris did not deploy quite what I expected. Insofar as I thought about it, I imagined a full Hospitaller Core Fireteam, which is what I’ve traditionally seen Joan used with. In fact he had a load of Duo teams. Joan was Duo’d with the Montesa paramedic, and he had a Duo of Bulleteer spitfires, both pairs in the building on his left flank, with one Bulleteer peeking round the back corner. He had another Duo, of 2 Order Sergeant hackers, in the central building, enabling a Clipper guided missile bot. He also had 2 Pathfinder Sensor/FO bots, which are great with the ITS14 bonus rules (Marksmanship and Tactical Awareness), one in the centre and one forward of Joan and friends. Made Regular by Joan, his Tech-Bee hid in the centre, and his Warcor in partial cover on his left, providing an ARO should my opposite Dakini team peek out. Finally his Fugazi flash pulse bot was on a roof in the centre as a disposable ARO. He held his Tikbalang in reserve.
I deployed my Husong TR bot in the centre, covering the doorway where Joan or friends would have to advance, and my Ninja behind a large building, towards the middle of the table and near any likely advance of his hackers. Chris placed his Tikbalang securely behind cover, in his middle right.
Round 1
Now here I think I really made my first mistake, and didn’t think clearly about the objectives or plan my first turn well. Having been docked 2 Orders in the main group by my opponent’s strategic use Command Token, I drove forward with my Hsien Haris, intent on grabbing Sabotage, and pushing on to attack his Bulleteer and Pathfinder on my left flank, and hem in Joan/the Montesa with my Firewalled hacker. My first contact, in doing so, was engaging his flash pulse bot with my Hsien – however he rolled well and it took 3 FtF Orders to put the bloody thing down! That’s why we take flash bots I suppose, but it really took the wind from my sails. I scored Sabotage and went on to kill his Pathfinder. That went fairly efficiently, but I was a victim of my own success, doing 3 wounds and removing it from the table. I really wanted to leave it Unconscious, in which case I could have imediately tried to score Telemetry and Data Scan. I dropped a MadTrap to impede Joan or the Montesa advancing, and pushed the Haris round the left, where I thought a nice wall would keep me sheltered from Tikbalang vengeance in the reactive turn, and used my final Order to engage his Bulleteer with the Hsien. Disaster struck – he crit and I failed both saves, dropping Unconscious, with my Doctor far away. This was a huge swing of luck (beyond the crit itself, failing both saves is about a 12% chance) and losing a 54 point model in ARO was a big hit. I lost my best gunfighter, and the only one I could really send after the Tikbalang, as well as my Firewall-6 for the Zhanying. The fact it was my Lt didn’t matter due to Chain of Command, thankfully.
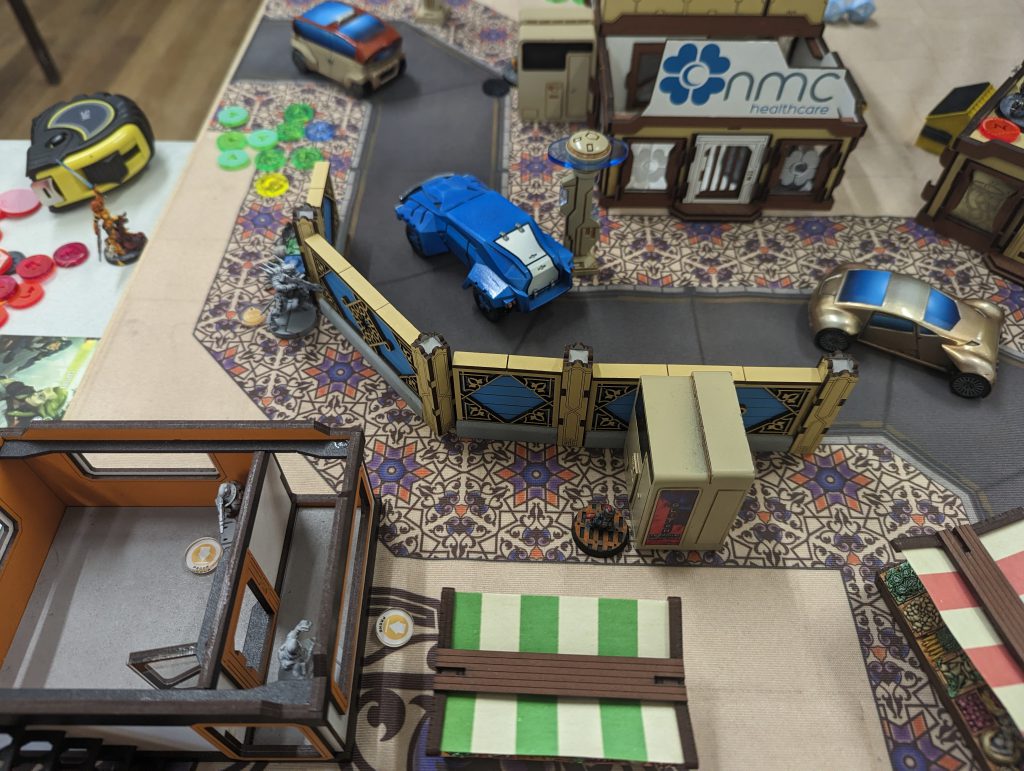
Even worse, I think I tilted slightly in my play at this point. In my second group, I stepped out and back with my Dakini HMG to try and remove his Warcor – we were just within 24″, so my 5x 11s vs his 10, since I had Mimetism, but hadn’t spared the Order to apply Marksmanship. He crit again. Hardly that important, but I really did think I’d take the Regular Order off him there, instead of just wasting one of my own!
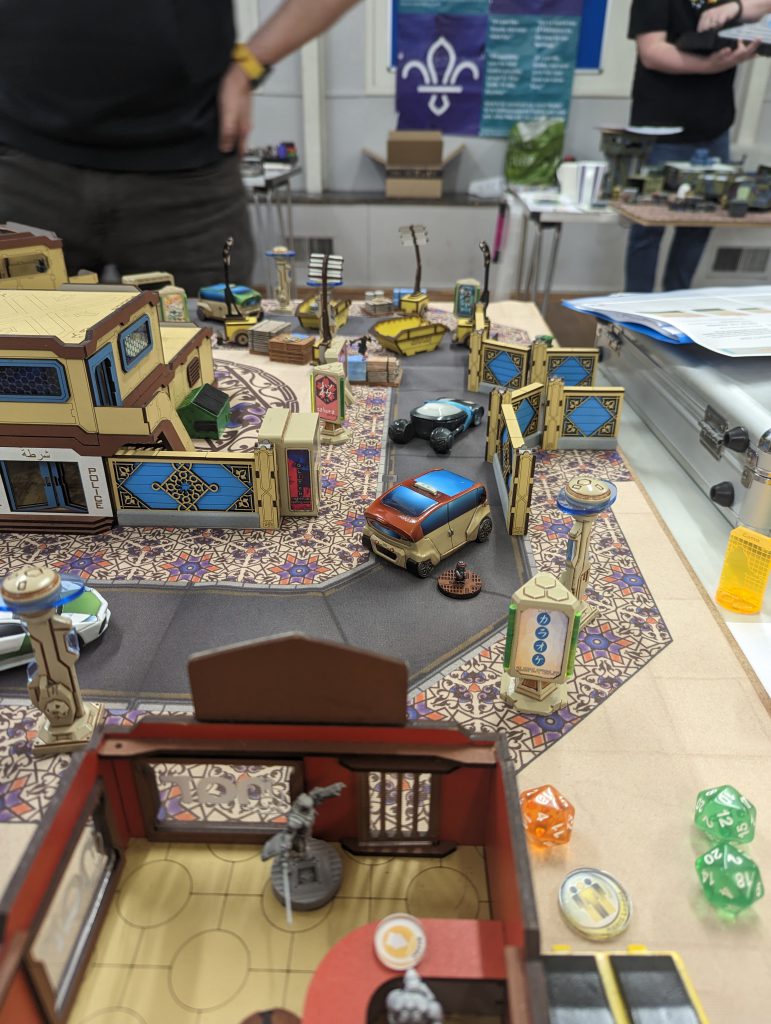
I revealed my Ninja hacker, moved up to his Order Sergeant hackers, and engaged both with Trinity, splitting burst. I downed one, but was Isolated by the other. This was a clear and simple error. I realised at the time this was a vital FtF – downing both would have neutralised his repeater net as well as costing him Orders, and left my Zhanying unopposed in scoring vital Classifieds, while Data Scan would become impossible to my opponent. I could have kicked myself, when afterwards, describing the exchange to a friend, I was asked “why didn’t you move into ZoC of one and Trinity him first, then do the next one?”. I have no excuse. It’s so blindingly obvious. In this FtF, thanks to Trinity and Suprise Attack, I was on 16s vs 10s. While splitting burst made it a crapshoot, it would have been rather much more reliable if I’d had the common sense and good fundamental skills to leverage my Active turn advantage. I don’t know what I was thinking. In hindsight, my first priority in the turn should have been to eliminate his hackers in this way. It would have let me either move less cautiously in my Haris attack (his Pathfinder’s repeater constrained my movement slightly) or simply start trying for Telemetry or Data Scan without fear of hacking AROs.
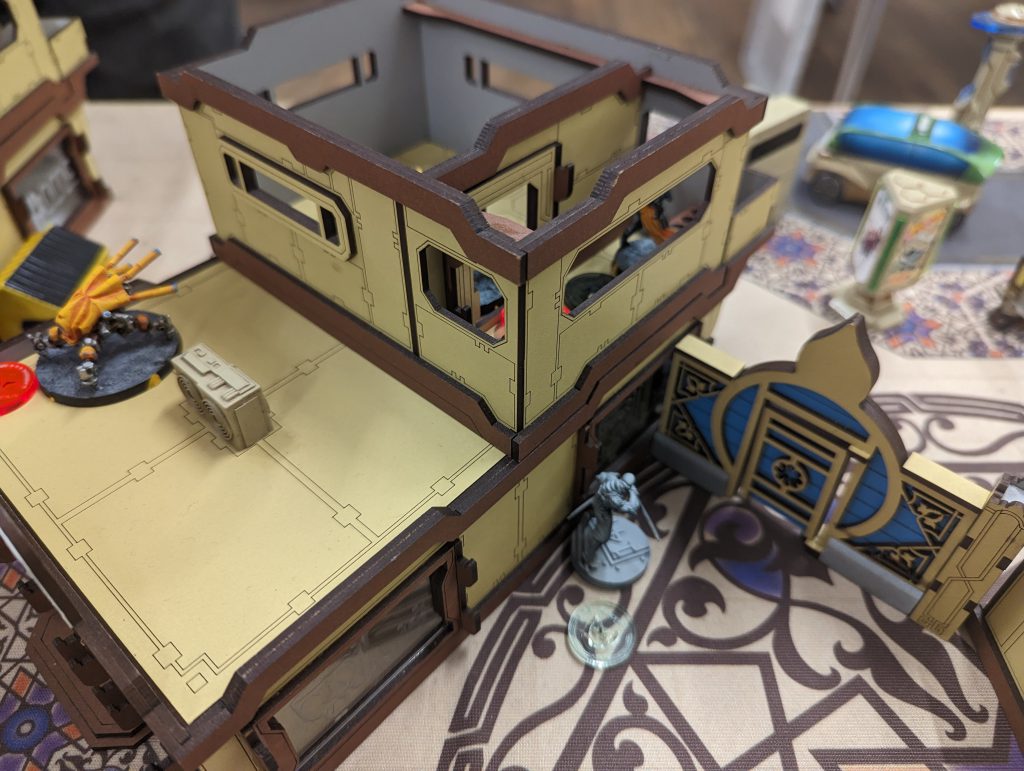
So I ended that pivotal first turn with my Zhanying and Xi Zhuang in fairly safe positions on my left flank, but had only secured one Classified objective. I could have tried Net Undermine and didn’t, which was arguably a mistake but it’s very easy and I expected to have further opportunities in later turns. My real errors were not identifying the killer hacker opportunity immediately, and executing it so poorly, and then overcommitting the Hsien Haris while not correctly prioritising the Classifieds. However I did have notably poor luck, if the FtF rolls in this turn had gone differently I would still have been in a much better position.
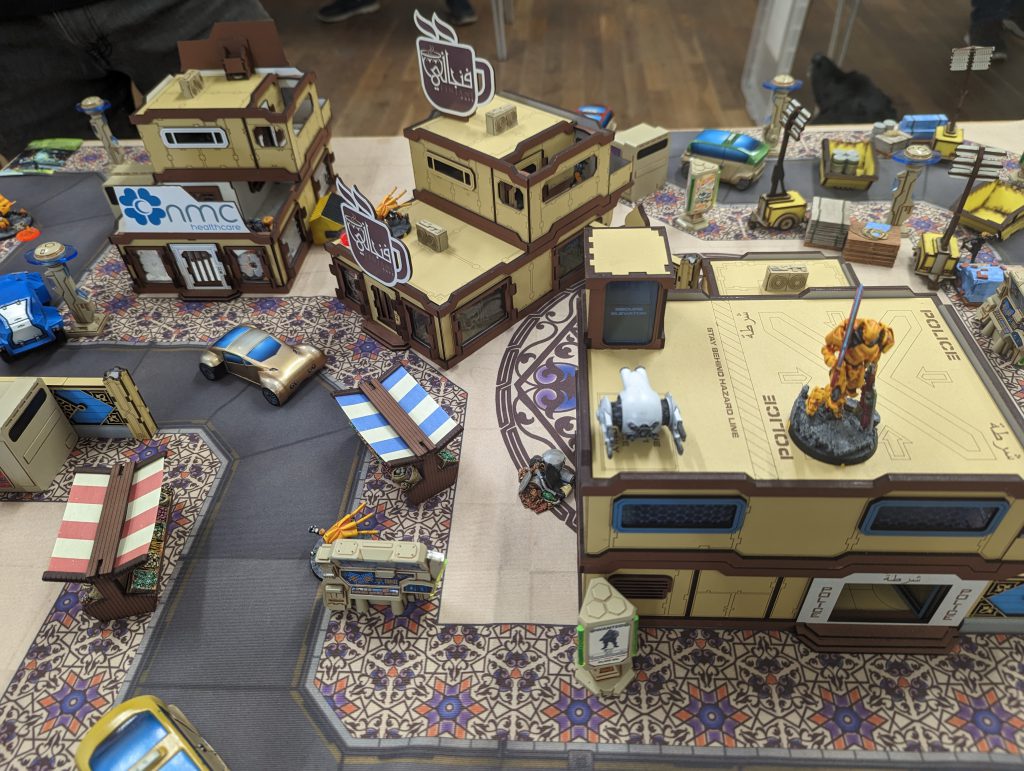
My opponent swung back into a convincing counterattack. My failed Ninja was a heaven sent opportunity for him, since he was able to socre Data Scan immediately, against my -9 Reset thanks to Isolated, and then Spotlight me and blow me up with a missile. I’m not sure if he spent 2 Orders on the Order Sgt hacker to do this or if there was some confusion about Data Scan and Spotlight being different things. But he missed his first missile shot, so I wasn’t hard done by or anything. The Tikbalang easily knocked the TR bot out in one Order, then climbed right onto a central building overlooking my whole deployment zone. It tried to have a cheeky shot over a wall at my non-fireteamed Kuang Shi, but I was lucky enough to save it with a crit Dodge. That Tik was going to be an enormous problem as I didn’t have any good way left to attack it. His other Pathfinder pushed up into the midfield and flanked the Unconscious TR bot, removing it, which was sensible as I had smoke and a nearby Sophotect. His Bulleteer on my far left moved forward as well, peppering the unfortunate, Unconscious Hsien with more spitfire rounds, which amazingly took 2 Orders to remove the body – wish I’d had that luck in the previous turn! Finally, he used Joan’s coordinated Order to out the Tik, Pathfinder and Bulleteer on suppression fire.
Round 2
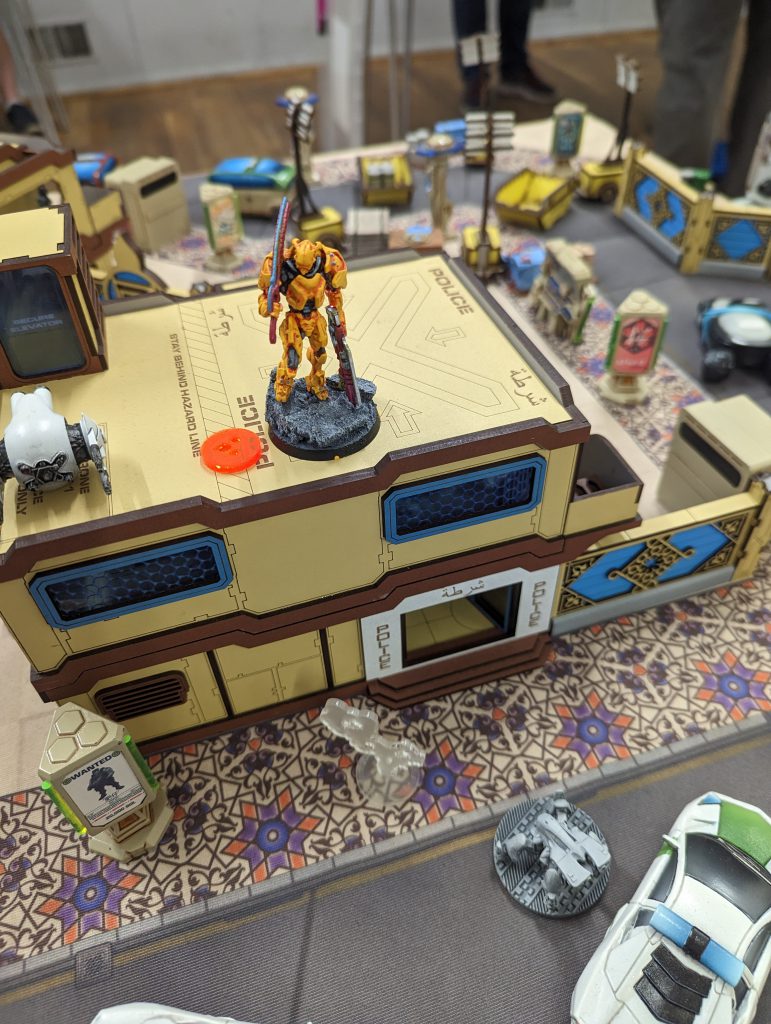
Well damn. I was clearly on the back foot in terms of fighting power, but the situation was rescuable. We both only had 1 classified so far. I did not rescue the situation, in fact I made further mistakes and just overall missed opportunities. First I allowed my Impetuous Kuang Shi to charge suicidally into suppression fire from both the Tik and Pathfinder, to lay a chainrifle template on the latter. I died and he tanked the armour save (I probably would have dodged with the boy and shot with the Tik in that situation, but hey, it worked out for him. So I had to lay smoke masking the Tik with the Celestial Guard, put Marksmanship on the Dakini HMG and used it to kill the Warcor and then the Pathfinder, which was slanted the wrong way so got shot in the back.
That’s all very well, but I was using up my Orders to deal with cheap models put out to hamper me. I did get Net Undermine immediately with my Zhanying, which was necessary, while coordinating movement with Xi Zhuang to sneak up on the Bulleteer. This was another simple error – Xi has Number 2, so they were actually a 2-model Haris, I was wasting command tokens for no reason. This let Xi put flamethrowers on his Bulleteer which was pinning down the Zhanying. I think this would have been an acceptable move in some situations, but again spent Orders without directly achieving the objectives. It didn’t turn out especially well – I lost Xi, which was expected, and the Bulleteer burnt completely off the table – I’d have spent my last Orders of the turn trying for those vital Classifieds, Data Scan and Telemetry, if it had stayed Unconscious. Instead, I compounded my errors, moving my Zhanying out of his safe little room, where he could not have been attacked by anything without getting AROs as they approached (all my opponent’s models were Hackable), and was a serious defensive impediment. I did this to get one desperate roll to Spotlight, against an opposing hack (the only model I could get into range of was a Bulleteer, which of course has a repeater). We both failed the rolls, and my Zhanying was left dangerously exposed.
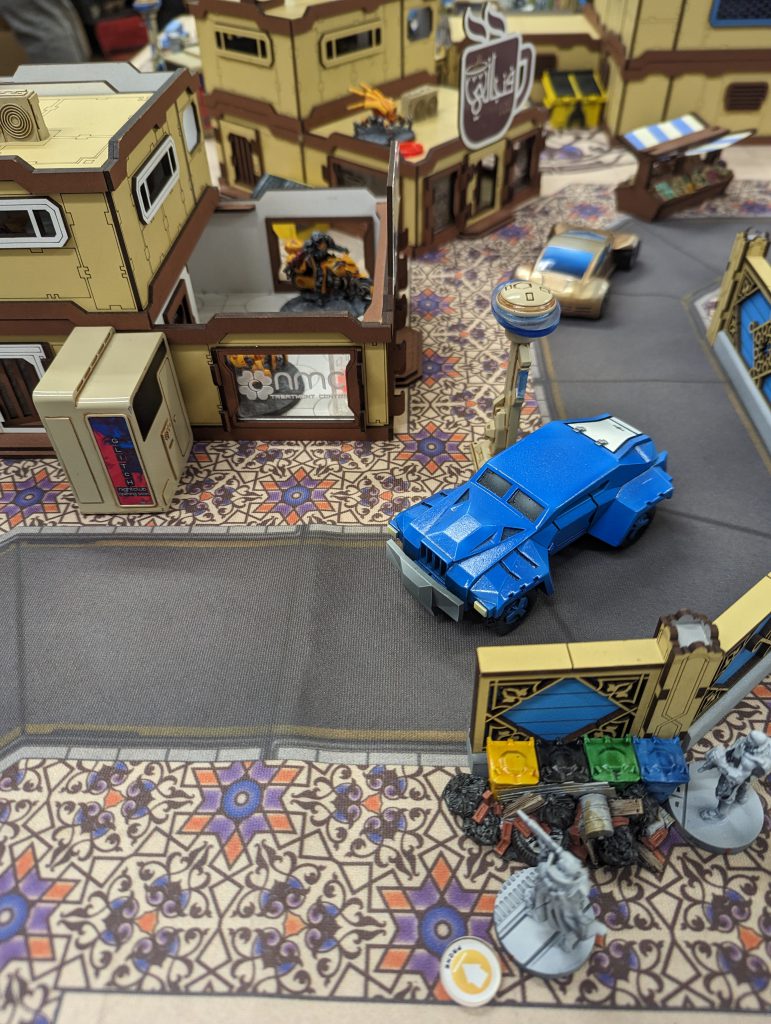
My opponent’s turn 2, while he’d lost perhaps 6 models, his combat power was vastly superior to mine, so he very much had the whip hand. I thought perhaps he would have to move a couple Orders to attack the Zhanying, or approach in a way that would give me hacking AROs, but I’d overlooked the back door to the building the remaining Bulleteer shared with Joan and the Montesa bike. My opponent was able to nip the Bulleteer out the back and gain LoF to my Zhanying, outside of ZoC, in one Order. I had to Dodge, and survived one roll, but then predictably died. He was then able to use 2 more Orders to gain LoF to my MadTrap and shoot it up, freeing Joan and the Montesa to move forward. The Montesa then beelined for my HVT and scored his classified in base to base contact, before finishing the turn with a cheekt template taking out one of my Kuang Shi, while my Celestial Guard was lucky to survive.
Round 3
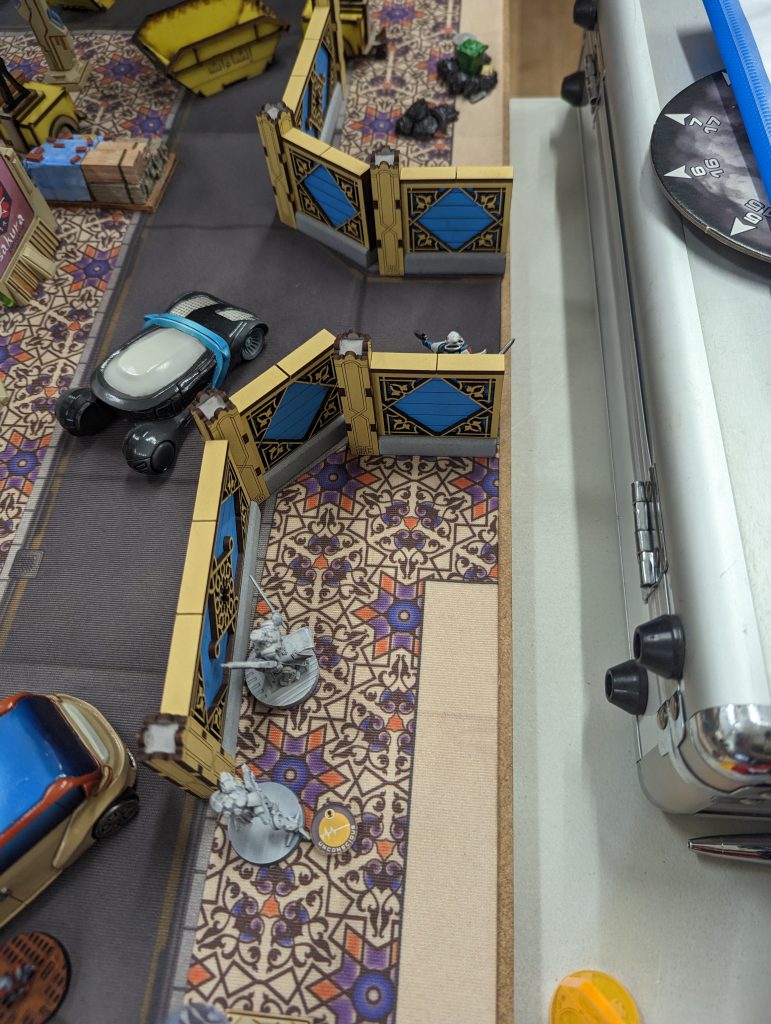
Going into Round 3, I was sure I’d lost. We each had 2 Classifieds scored, but my opponent could certainly get at least one more, and had his personal one, while I was locked out of Data Scan and my personal Telemetry objectives, and positioning as the first turn player made Capture and Securing the HVT nigh impossible, given his force advantage. I was nonetheless quite confused about doing what I could. I tried the Marksman Dakini HMG against the suppressing Tikbalang, and unfortunately we were within 16″ so it was very poor chance – my 5x 5s against his 3x 9s – and went down. I then ran suicidally to secure his HVT, losing the Dakini Paramedic but miraculously surviving with the Pheasant (I had to take one ARM roll and spiked it high). But this was moot because I had a Montesa in my HVT’s ZoC, stopping me from scoring. I tried to kill it with my Celestial Guard and a Kuang Shi, but only did 1 wound, losing both models in the process. Ce’st la vie.
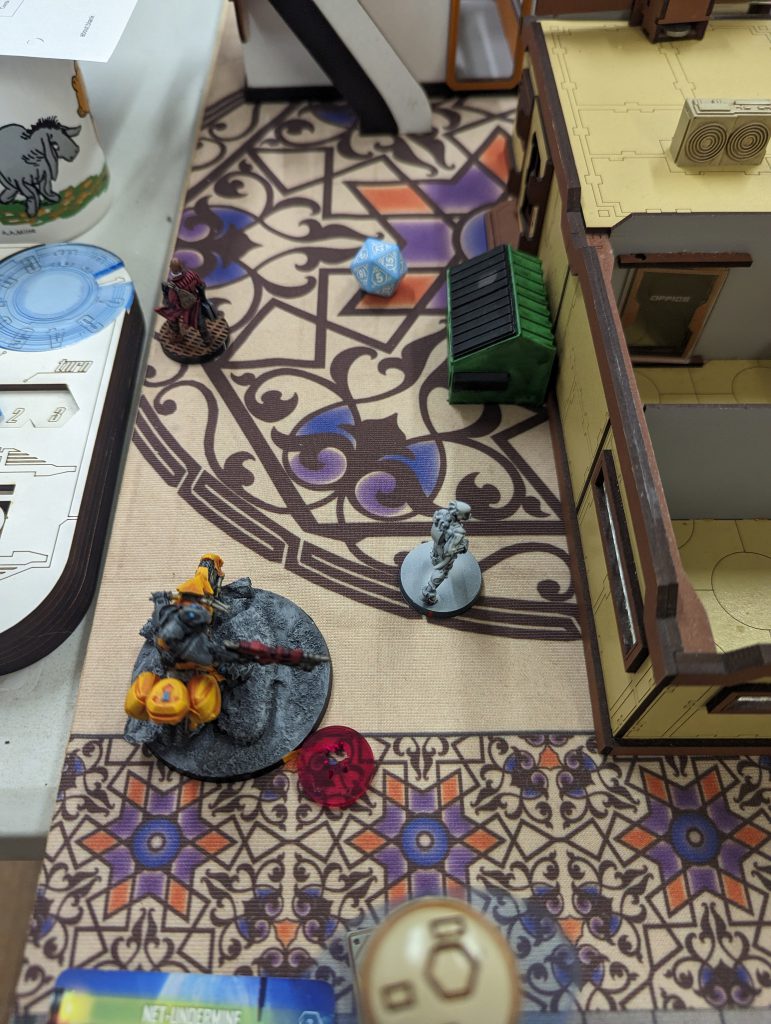
My opponent had freedom of manoeuvre in his third turn, and easily achieved Net Undermine with Joan. He had to choose between going one way to achieve Capture, and another way to try Sabotage. Since I still had one MadTrap protecting his chosen Sabotage target, on my right flank, he avoided that risk and did Capture instead. In hindsight, I think we got confused and did Rescue instead, his Tikbalang casevac-ing a downed Pathfinder; but his Montesa could easily have scored Capture and still denied me the HVT, so it doesn’t signify. This meant I had 2 classifieds to his 3, and his personal objective, for a 9-2 defeat. I had 81VP remaining to his 219.
Lessons Learned
So to summarize, I went first which was probably OK, but might have been better off choosing deployment. More critically, I did not execute my first turn in the right way, and after losing the Hsien to a devastating early ARO crit, I think I lost my focus. I could still have possibly rescued things if I’d not misplayed my Zhanying in Turn 2, offering it up for execution. I think I had some bad luck with the ARO crit and a few enemy models dying when I could have really used their being Unconscious! But I bungled some opportunities to get on top of the hacking and related Classifieds. All this whining about what might have been is also pure conjecture – if I had made different decisions, I’m sure my very competent opponent would have had a say in the matter by adapting his own strategy. While his list was very different to how I’ve experimented with MO, he played it very well, and he was kind enough to say nice things about our previous Goonhammer articles on MO. Chris, if you’re reading this, you may want to take over and send us your thoughts, which have proven more effective than mine!
So I was out of the running for this tournament, but if I really pulled myself together I might be able to scrape 5th or 6th place, and have a chance at a shiny new Gator lying on the prize table – Laina had arranged some great prize support for the Smackdown, and there were a lot of big prizes to choose from.
Game 2: Acquisition
Match-Up and Deployments
I drew against my friend Gabriel, who is an experienced player, usually with StarCo or Shasvastii, but today playing Combined Army. He won the Lt roll, with a WIP of 16, so I was doubly sure he had the Anathematic hacker as his Lt. A very scary piece which I have played against a lot recently. He chose deployment, which I think is fairly sound in Acquisition, because going second is a very strong scoring advantage, while if you do have to go first, given the 16″ DZ size, you have a golden opportunity to simply batter your opponent into submission if you have the deployment advantage as well. Given the match up, and not without soul searching, I decided to go first. Huge risk for scoring, but I wanted to use my aggressive list. I know it’s much scarier as an alpha strike, and without any real hacking defence, or even an Engineer, I also feared being devastated by a turn 1 volley of pitchers and subsequent hacking attacks against my Hackable key models (Hsien, Su Jian and Crane).
So I had to set up first to attack first, and chose to spend a Command Token to hold 2 models back -the Su Jian and its biker buddy. I knew that would be my main thrust and wanted to keep it flexible. I had my Hsien Lt Haris on my left flank, Major Lunah on a high roof on my right, and my Crane and Kuang Shi Core relatively far forward in the centre. I hidden deployed my Ninja next to the right hand objective.
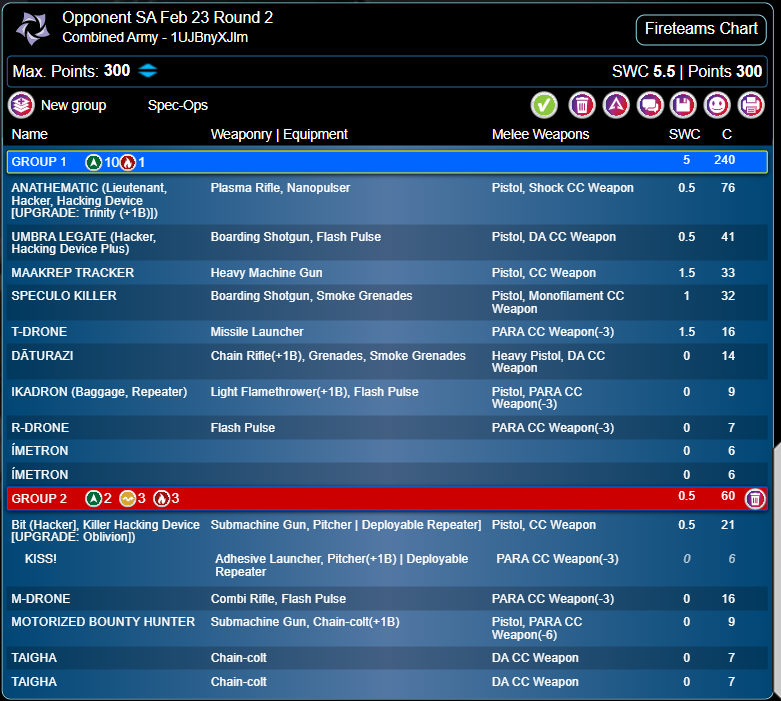
Gabriel placed his array of cheap CA orders and warbands scattered hidden around his backfield, with the Anathematic in the centre and missile bot on his far back left. He had Kiss on a roof in the centre, and his Umbra Legate hacker on his left in a similar prone rooftop position. Interestingly, he had a prone Maakrep Tracker, a 1W MSV2 HMG unit, prone on a rooftop on his right, supported by a Daturazi for smoke. That flank also had a flash pulse bot, Ikadron and sensor bot which were either not prone, or peeking around corners.
I deployed my Duo on my extreme right, out of cover on the touchline, ready to storm forward, as there were no hard stop AROs and I trusted Major Lunah or the Hsien to deal with any that appeared as the reserve drop. My opponent counter deployed his Speculo to hamper, and indeed physically block, their movement up the board edge.
Round 1
In my first turn, I impetuous moved my one non-fireteamed Kuang Shi, on the right by the Duo, and tried to Discover his Speculo, but failed the roll. Just as well, since I realised later this is not an allowed use of Impetuous Orders! My first priority was to use my Hsien Haris to sweep up his Sensor bot, an Ikadron and finally his flash pulse bot. I was happy to cut some Orders and models down so early, and I think Gabriel made a bit of a mistake deploying them so exposed. I accepted his point (when we discussed it afterwards) that he didn’t know where the Su Jian would push through, but he could already see the Hsien position when he deployed, and it’s the ideal unit for removing such speed bump AROs. On the other hand, I made a mistake as well – stretching to my last Group 2 Order to get that final kill, I left my Hsien standing, admittedly in a position where he could Guts Roll prone into total cover.
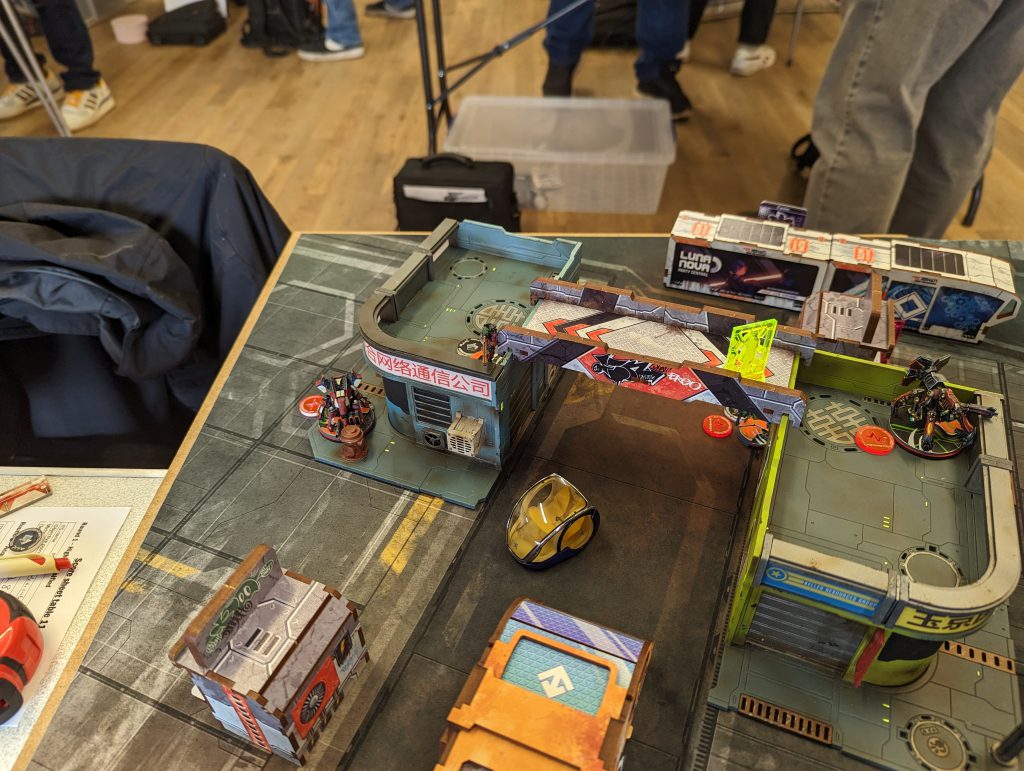
On to the real business of the turn, the Su Jian rush. I decided to bulldoze the Speculo threat head-on and Move-Discovered successfully with one Order, before Discover-Shooting with the next. Gabriel sensibly enough decided to counter with the template, covering the Kuang Shi, Su Jian and MBH. Fortunately, although the Kuang Shi went down and the Su Jian was wounded, the MBH survived (I’d rolled +4 ARM from Booty, but in fact I just spiked a high roll). Of course the 3 heavy shotgun templates removed the Speculo.
I used 1 Order move-moving, then I was into the CA backline. The MBH gunned down his SMG-wielding opposite number from outside ARO template range. Before unleashing the Su Jian, I then split the MBH off with its own Irregular Order, splitting my Burst wildly between 2 Imetrons, a Taigha and either his Dodging Legate or missile bot, I forget which. This failed to accomplish anything, but I tried again and this time put down a Taigha, the missile bot and an Imetron, while tanking successive chaincolt templates from the Taigha and miraculously surviving. Not even using that +4ARM from Booty, I just rolled hot. The Su Jian then moved into the gap, getting within 8” of the Legate (its prone position on a ledge couldn’t save it from the climbing plus Su Jian crawling over some similarly high crates) and murdering it with the heavy shotgun. Finally, it finished off the other Imetron and came to rest.
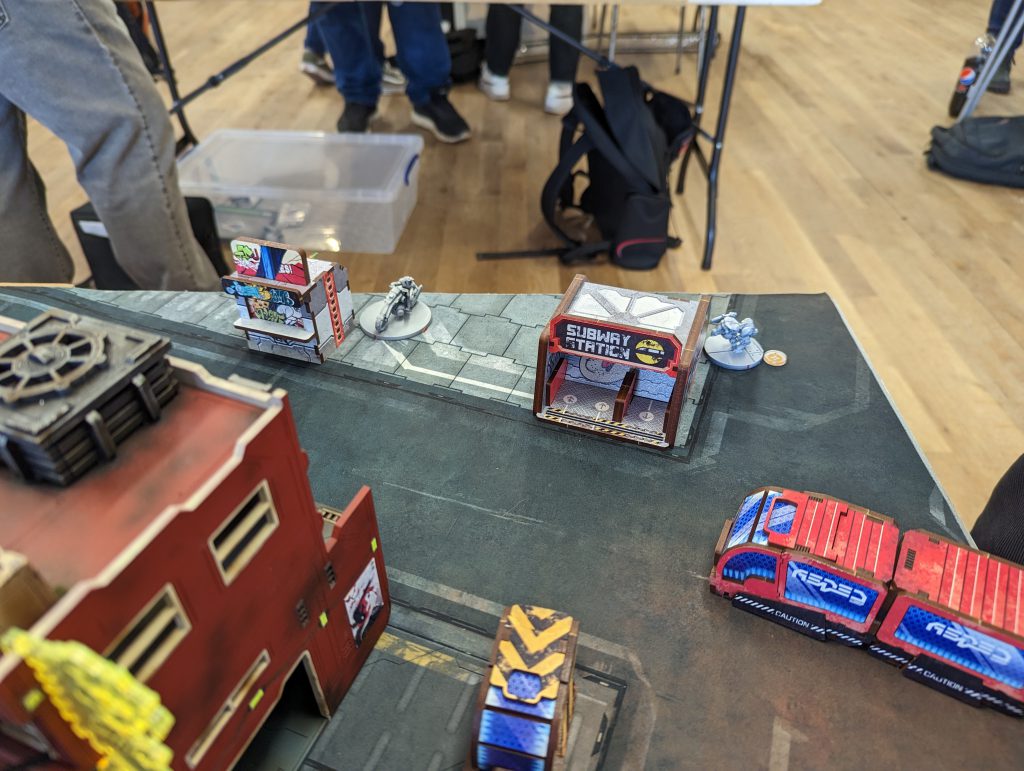
So in my first turn, I had removed: an FO/Sensor bot, an Ikadron, a flash pulse bot, a Speculo Killer, a Motorised Bounty Hunter, a Taigha, 2 Imetrons, a missile bot and an Umbra Legate. 10 models, including 2 very valuable assault pieces! One of the most aggressive first turns I’ve ever had. As mentioned already, I think Gabriel over-exposed a few minor pieces, but most of the shocking butcher’s bill was just due to the speed and efficiency of that Su Jian/MBH Duo, helped, it has to be said, by plenty of luck. I could have lost the MBH right at the start to that Speculo’s shotgun.
My opponent had a few nice strike-backs, especially considering he was down to 5 Regular Orders plus his Lt Order. The Anathematic moved against the MBH and took him out cleanly. Critically, his Maakrep stood up and engaged the Hsien, knocking him out in one Order! I was overconfident in my 2W, ARM4 and Burst 2 BS14 ARO. He just rolled better and got 3 hits through, and I failed two. So for the second game running, my Lt bit the dust in Round 1, and this time I had no chain of command to fall back on.
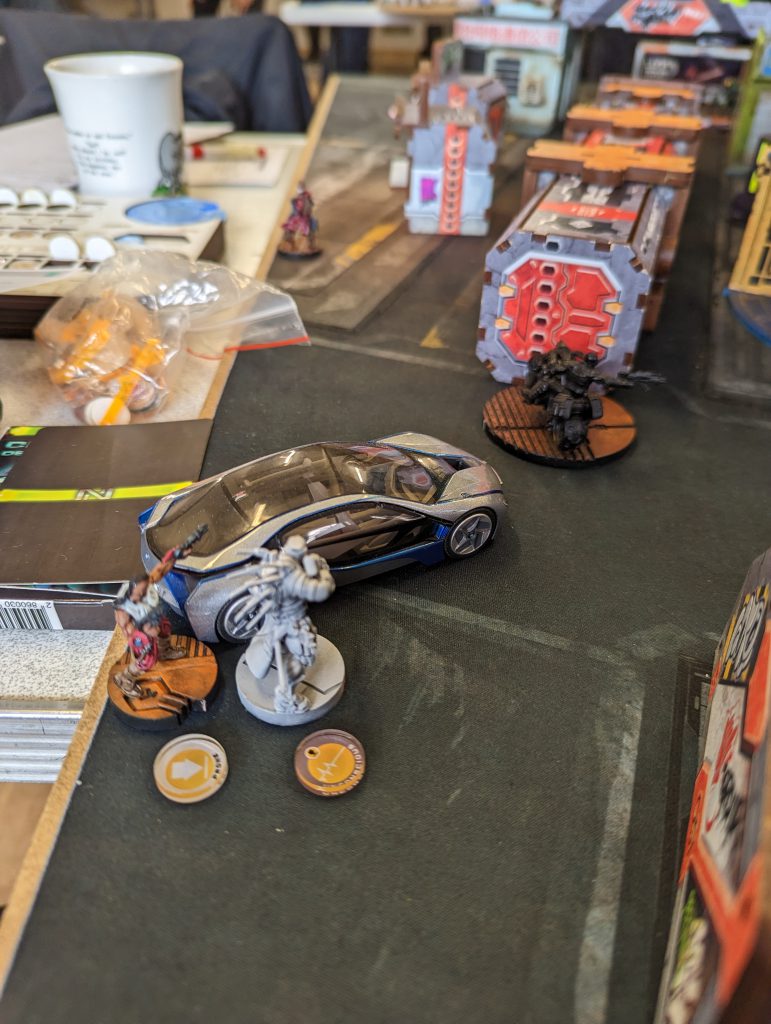
Elsewhere, Kiss landed one pitcher covering my Crane in the centre, but missed his shot at the other covering the Su Jian in the backline. Bit had to stand up to get a pitcher onto the Su Jian, which she did, but got blown up by Major Lunah in ARO. This sacrifice let Gabriel try once to Isolate the Su Jian, but I either Reset or passed my BTS roll.
Round 2
So I began Round 2 in Loss of Lieutenant, but honestly, the enemy casualties had been so heavy, that I didn’t think the game was in any doubt. I revealed my Ninja hacker and he did exactly what I wanted, touching the right hand Objective unobserved and activating it easily thanks to the +3WIP, +1Burst bonus hackers (and engineers) get in Acquisition.
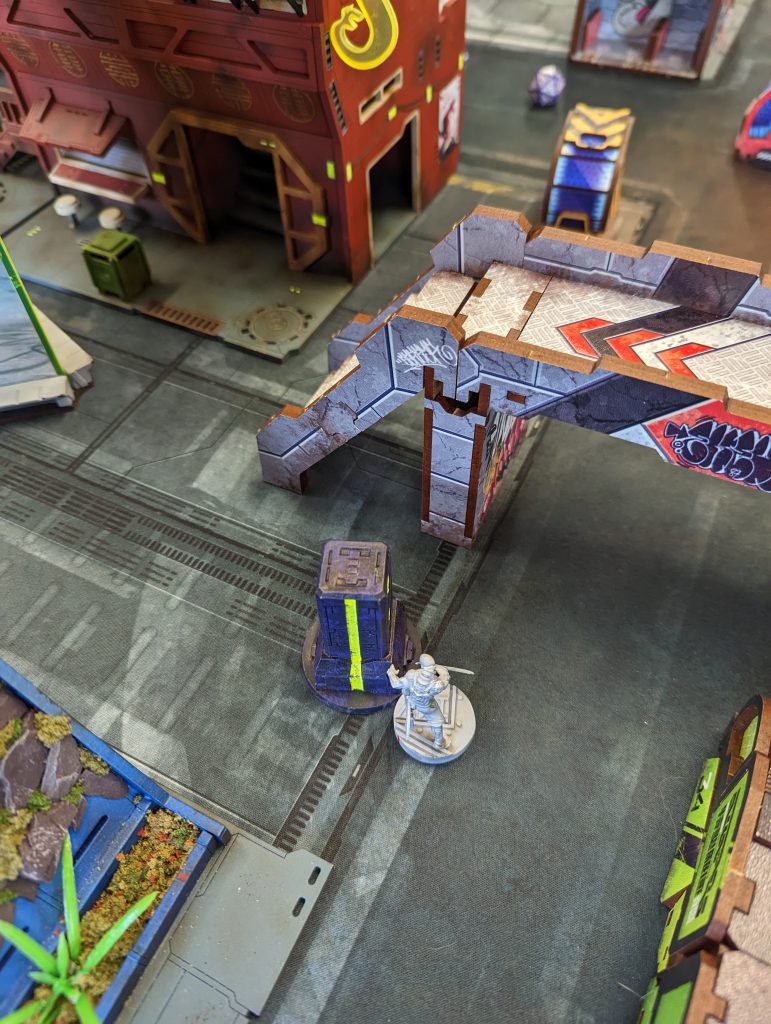
I took a big risk with the Su Jian, flicking out and back to see the repeater threatening it, and blow it up. This allowed the Anathematic a normal roll to Oblivion me, but I figured it was a better long term chance than being remorselessly hacked at Burst 2 in my Reactive turn. Maybe that was silly, but I passed my BTS roll on 14+. If you can’t be good, be lucky. Finally, I converted two Irregular Orders into Regular, to allow my Crane spitfire to engage the Maakrep tracker, just within 24”, while keeping his Fireteam bonuses, and knock it out on the second attempt. I then passed the turn, and to my relief and his chagrin, Gabriel failed the PH11 regeneration roll. Luck was really swinging my way and adding insult to injury.
With only the Anathematic and one Daturazi left, my opponent simply moved and Dodged the Anathematic up to the central objective, daring me to attack him. One flash pulse ARO got through, but apart from that he was unharmed.
Round 3
All I needed to accomplish in Round 3 was remove that Anathematic, which can be problematic as it’s effectively 3 structure, with ARM5, BTS6 and Mimetism-6. Fortunately, trying to control the Objective in the middle of the board, it couldn’t claim cover or watch all the angles. I can’t remember if my suicidal Kuang Shi Impetuous Order did any damage, but I lost the Kuang Shi. The Su Jian tried a panzerfaust at its back but missed. Then my SMG Motorised Bounty Hunter, which had rolled a multi rifle for Booty, approached from a third direction and managed to kill it with more back-shooting.
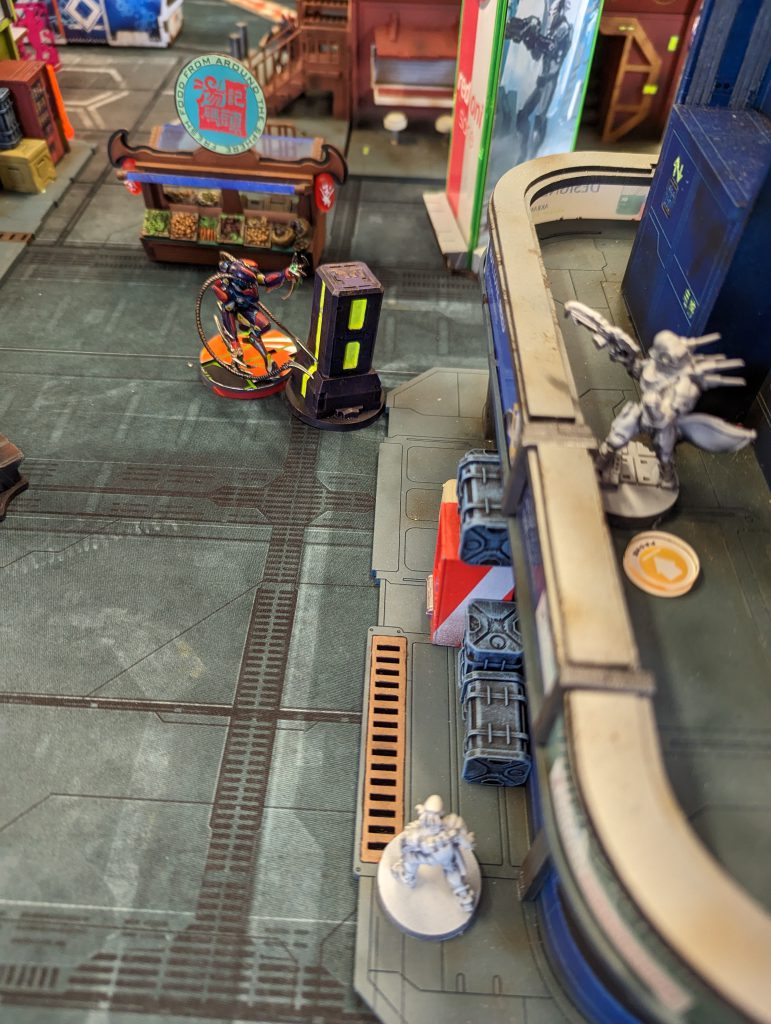
Finally, my CSU specialist approached the left flank objective and luckily rolled to activate it on the first try. I had the CA HVT secure as well, and Gabriel couldn’t accomplish anything with his lone survivor, a Daturazi, in his final turn, so that was a 10-0 victory for me. I had 224 VP remaining against his 14, losing only the red fury MBH (a hero), one Kuang Shi (a villain) and my incautious Hsien Lt (a fool).
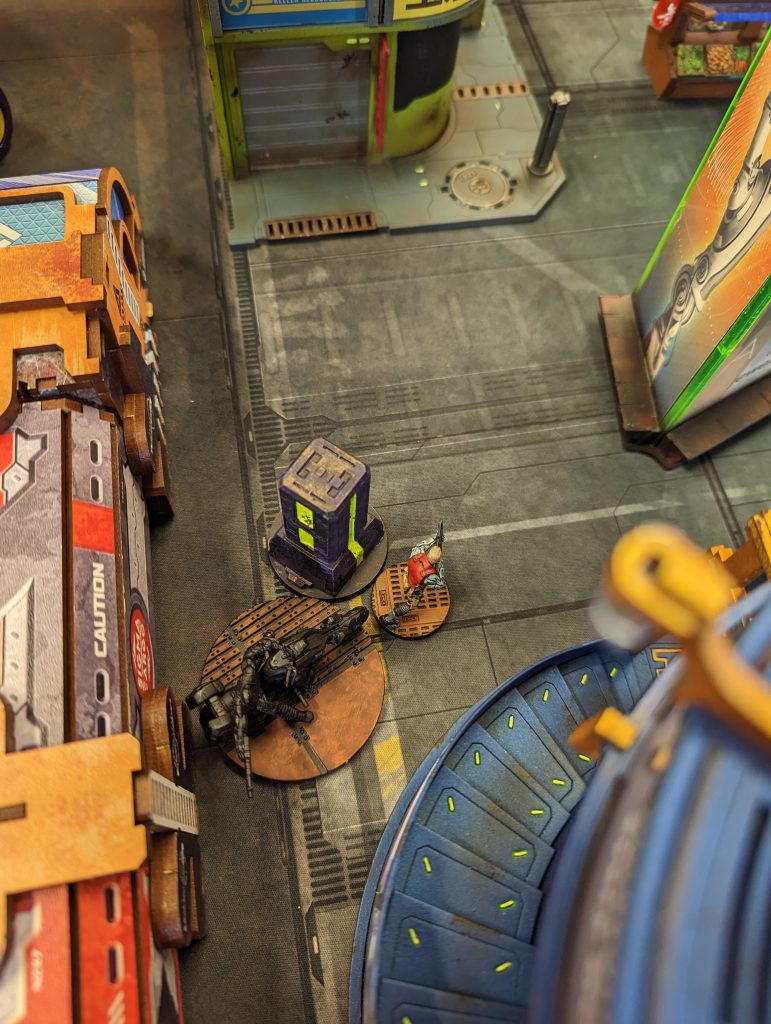
Overall a great initial run for the Su Jian rambo maneuver. Sorry to Gabriel for my merciless behaviour and no doubt aggravating good luck, he was a gentleman about it throughout!
Game 3: Capture & Protect
Lt Roll and Deployment
Playing against Liam’s Kosmoflot, I won the Lt roll and instinctively chose to go first. I was also glad to use my aggressive list again. It was always the plan for C&P due to the 2 bikes and Su Jian, mobile units for to seize the beacon, and I was relieved I had Major Lunah to potentially deal with a Bearpode. Now going first may have not been a great choice. I knew it was much better to strike first than be first struck, Kosmoflot are a notorious alpha strike army. However in this context, my personal goal was to score high OP to place well in the rankings (chasing that Gator as a prize) and it’s quite hard to score over 8OP going first in this mission, because scoring for beacons is at the end of the Round.
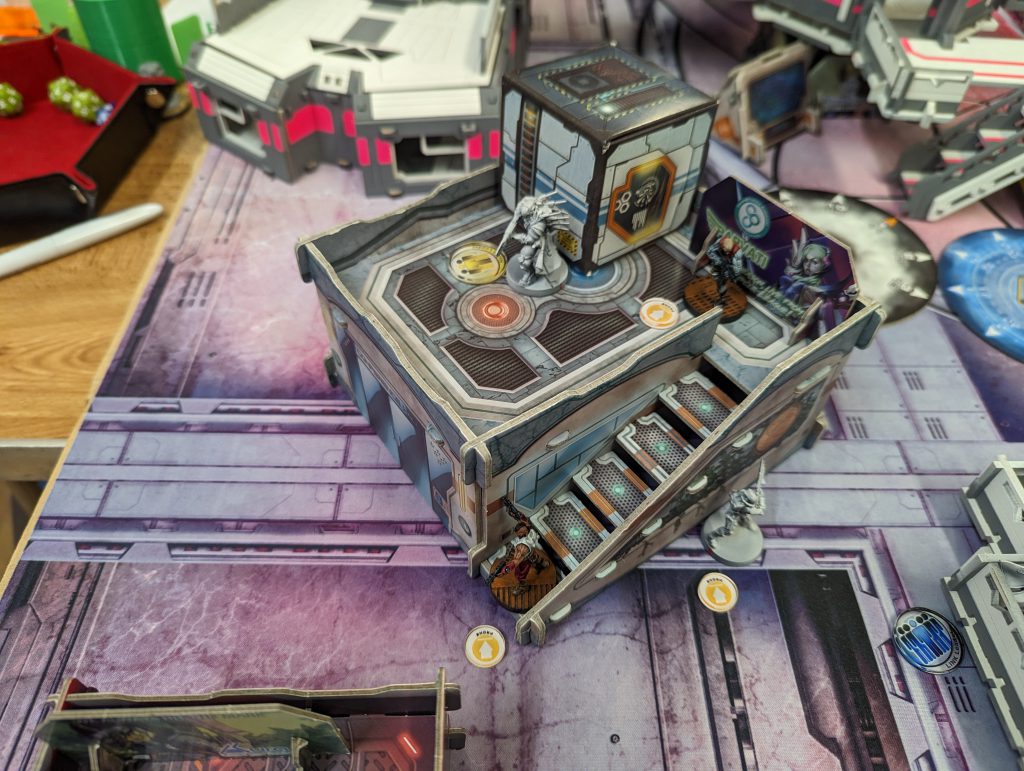
I deployed in a similar way to the last game – Hsien Haris on my left, Crane and Kuang Shi I’m the centre, Lunah well back on the right, and my Duo held in reserve with a Command Token. In concession to the mission, I deployed my flash pulse bot and spare Kuang Shi watching the beacon, while my SMG Motorised Bounty Hunter was on the left and remained Impetuous, in the hope of rushing forward toward the beacon. I deployed my Ninja hidden in the avenue straight between the two beacons, to spring forward or to ambush any enemies coming the other way.
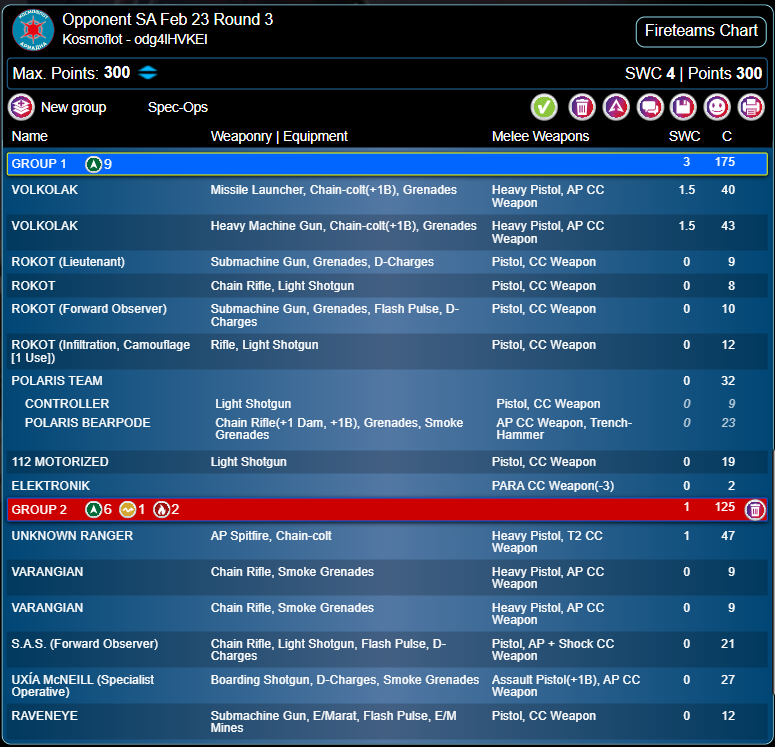
My opponent deployed his Volkolak ML on a roof on his right, covering the approaches on his right and a long cross-table lane to protect the rest of his DZ, with the HMG and Rokot Fireteam members (one of whom was clearly the Lt) prone or behind total cover. A 112 Motorised doctor biker was with that Fireteam, while his Bearpode controller hid in the rear centre and a Raveneye Officer, with its E/M mine, protected the beacon itself. A Haris team of the Unknown Ranger and 2 cheap Varangians was on his far left, supported by the 112’s servant remote. A belt of 3 forward deploying camouflage markers was placed fairly conservatively to protect his table half, with the centre one, lacking Mimetism, clearly a cheap Rokot.
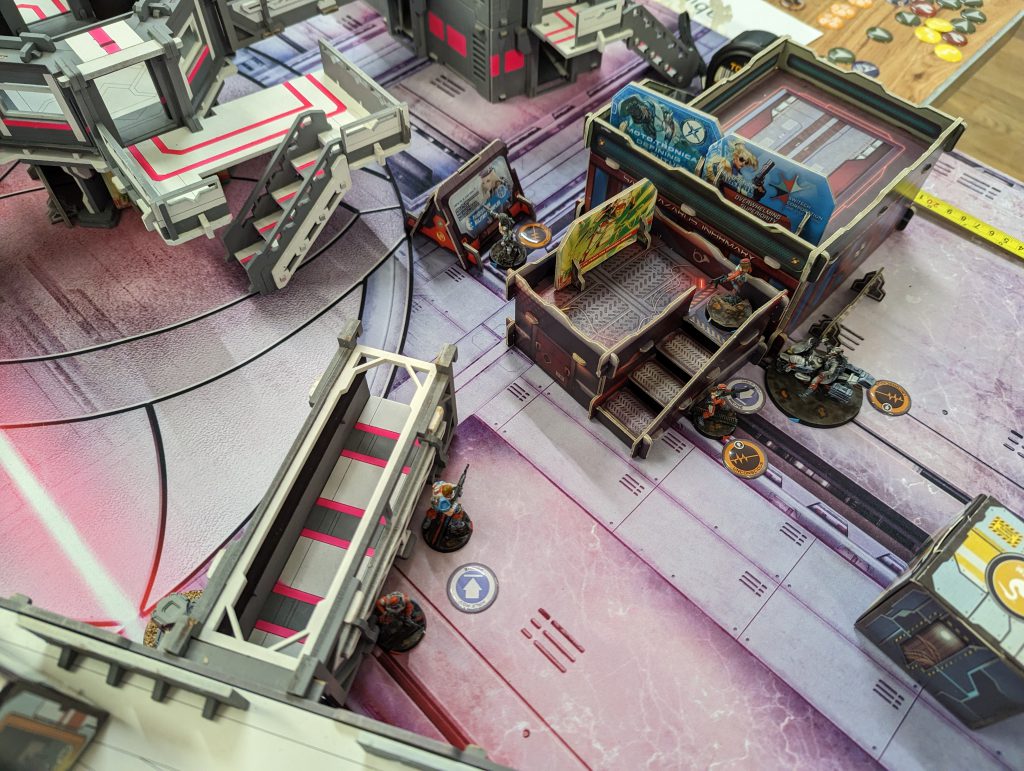
I placed my Duo on the right, ready to move forward into space, and he placed his Bearpode prone on a roof opposite them.
Round 1
At the start of the game, and not without some trepidation, I decided to risk my Hsien Lt and attack his Volkolak ML head-on. It was covering the left hand approach (so I hadn’t taken my MBH or Kuang Shi’s Impetuous Orders) and would entirely block the Su Jian or anyone else trying to break into the enemy DZ. I did believe, correctly, I would be able to get it within 24″, which is a nice benefit against a ML to deny them any range bonus. With 5x 14s against his 2x12s, I had a real advantage in the FtF, but I was painfully aware of the impact of getting unlucky. Would I go three for three of losing my Lt in the first Round? The Volkolak was wounded in the first exchange and my opponent chose to hold his position rather than choose to fail his Guts Roll and drop prone. I think that was a reasonable decision given its importance in defending the beacon and his DZ, as well as the substantial risk I was being forced to take. Fortunately, my luck held, and the second Order killed the Volkolak. This was a really critical pair of FtF rolls and I have to admit the game would have been very tricky indeed if I’d not happened to win them. I would have had to use smoke to get some templates onto the ML, which would have been a realistic play, or pushed my Crane up.
My remaining use of the Group 2 Orders was to push my SMG biker forwards and assault the rest of his Fireteam. Now here I have discovered an error I made in my favour, and owe my opponent a sincere apology – I would have had 2 Orders left after using the Hsien, and I must have used 3 on this attack run, so somewhere I presumably forgot to flip an Order token, and ended up cheating most shamefully. The biker used 2 Orders running up to total cover, with one Camouflage marker declining to reveal in ARO, and then used its final (illegal) Order to blitz right through the Fireteam, threatening to shoot chain colt templates left and right. My opponent ARO’d shoot with pretty much everyone, including revealing Uxia under the camouflage token to do so. I laid split templates over all of the Fireteam and the 112, knocking out the doctor and one Rokot, unfortunately not his Lt. Now while I don’t think this was the critical moment of the game, due to what the Su Jian was about to do on the other flank, the two casualties and revealing Uxia were very important, so I can only apologise again for getting it wrong.
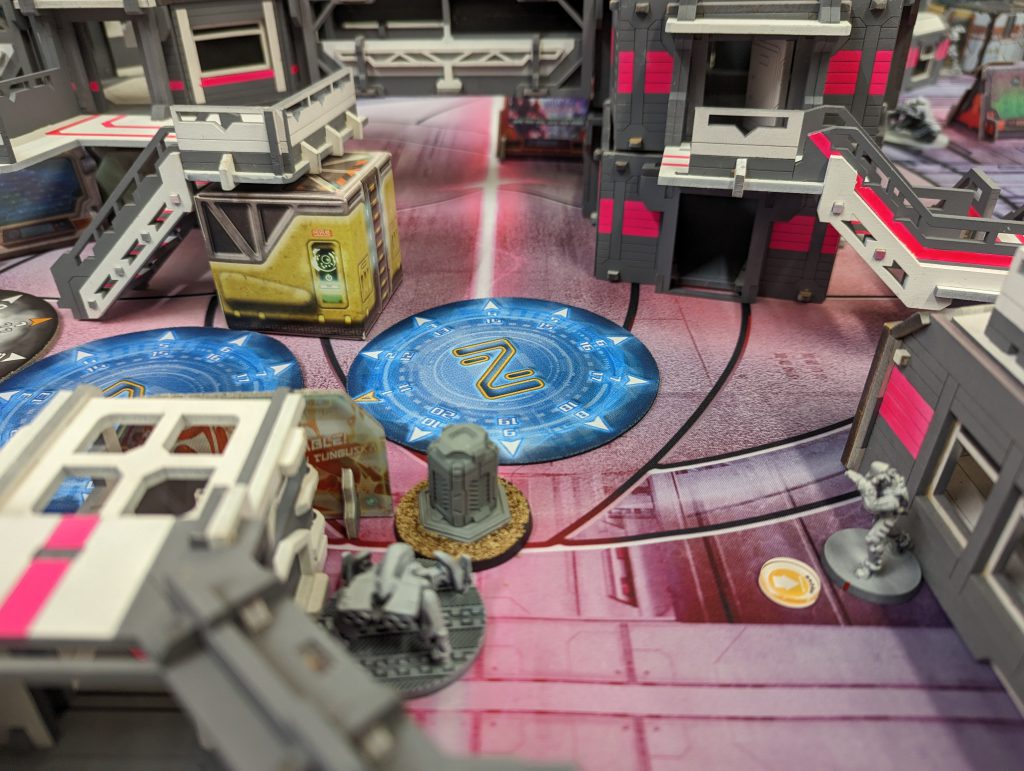
With Group 2 used up, it was time to unleash the Duo once again. One Order was used to speed forward, working through a Decompression Zone, then the red fury drew a line to the Raveneye Officer and deleted it. The Su Jian moved ahead, while a Camouflage marker close by declined to ARO, and fired its panzerfaust at Uxia, who failed her Dodge and exploded. Quite a lucky fluke really. I was then free to discover/shoot the nearby Camouflage, which turned out to be an SAS forward Observer, and also died. The Su Jian then powered right into the enemy DZ, shotgunned the Unknown Ranger to death in one Order, and both Varangians with the next. It took a wound in the last exchange, but had clearly done work, killing 5 enemy models. With my final Orders, I placed the MBH into suppression fire covering the enemy Core Fireteam’s only route forward, and moved Major Lunah to cover the biker and Su Jian from the Bearpode’s vengeance.
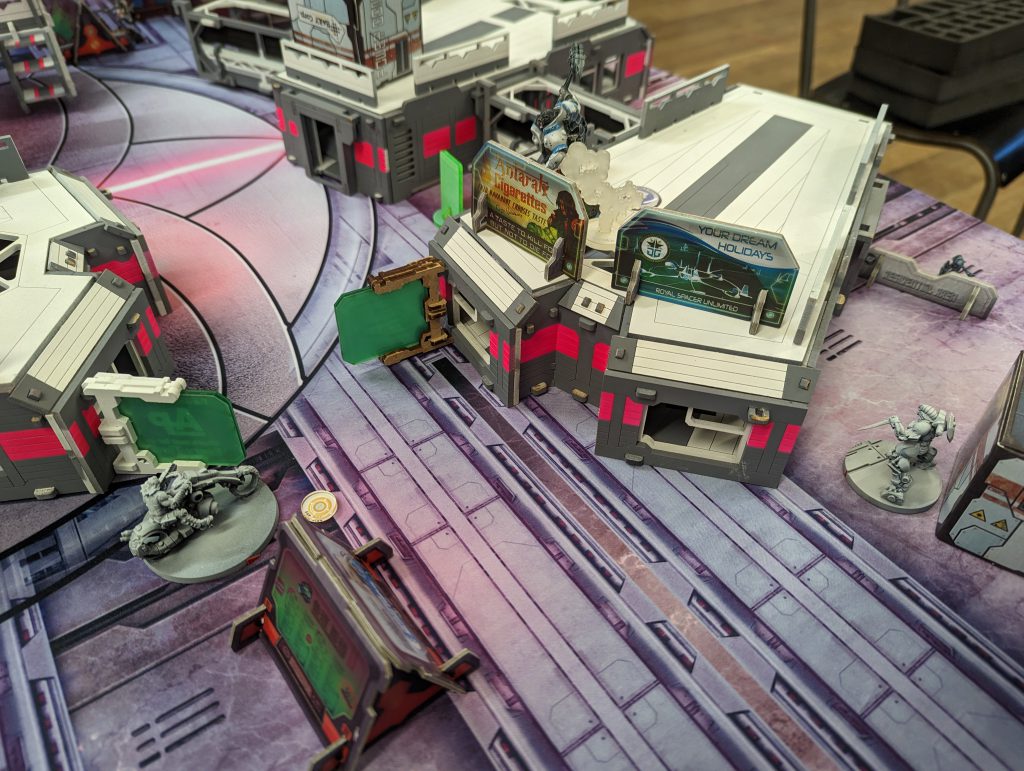
That was pretty well on a par for aggression with my last game! My opponent was down 9 models and 2/3rds of his points. Again, my apologies for the illegal Order usage, but he still would have been down 7 models (possibly 6, since Uxia being revealed got her killed) and in a dangerous position if I hadn’t made that mistake. In fact the extent of my aggression would work against me in the scoring, and if course I hadn’t even tried to secure the beacon in the first turn.
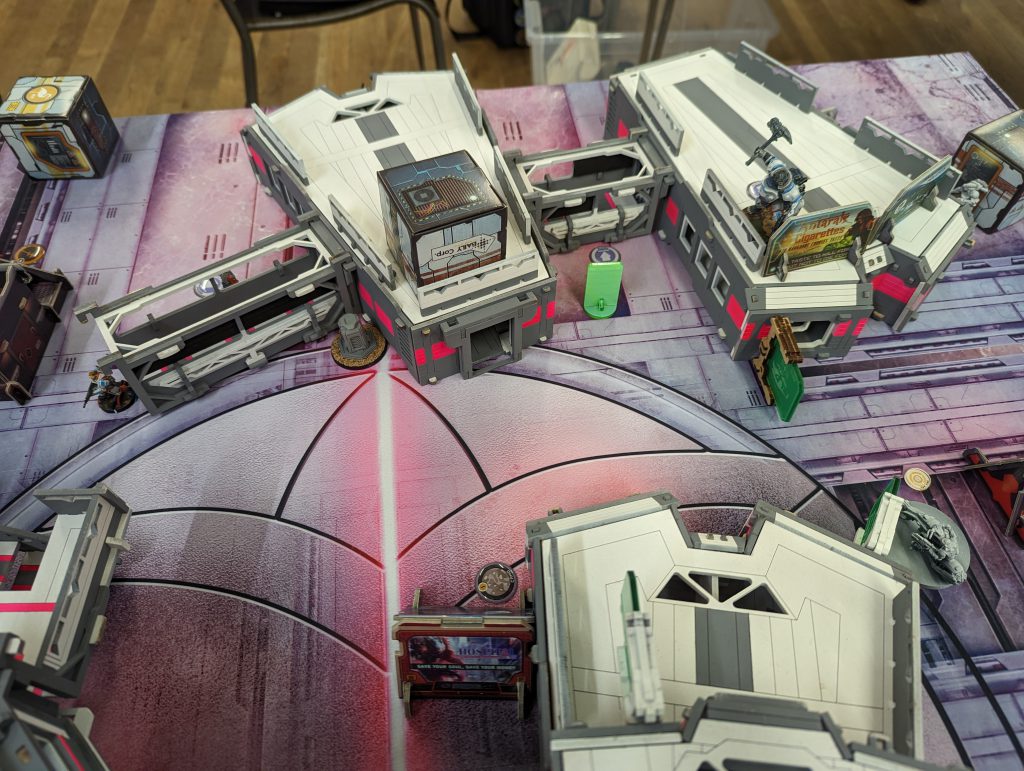
My opponent’s first move was to send his Volkolak HMG forward and clear my exposed non-Fireteamed Kuang Shi, then attack my suppressing MBH. My stacked Mimetism-3, cover and suppression were quite effective here, and the range was just within 24″, so we were both aiming for 6s, although he had Burst 5 to my Burst 3. That’s a very low chance to really achieve your effects, you have to be lucky, and unfortunately he wasn’t. Over a couple of Orders, the Volkolak took one wound and failed to dislodge the MBH. My opponent then tried to use the Bear, jumping into view of both the MBH and Major Lunah. I dodged with the bike, against his twin templates, and shot with the viral sniper, succeeding in both rolls. The Bear died. This was really the death knell for my opponent as he simply didn’t have the combat power left. However, he was perilously close to Retreat and that was now my biggest problem.
Round 2
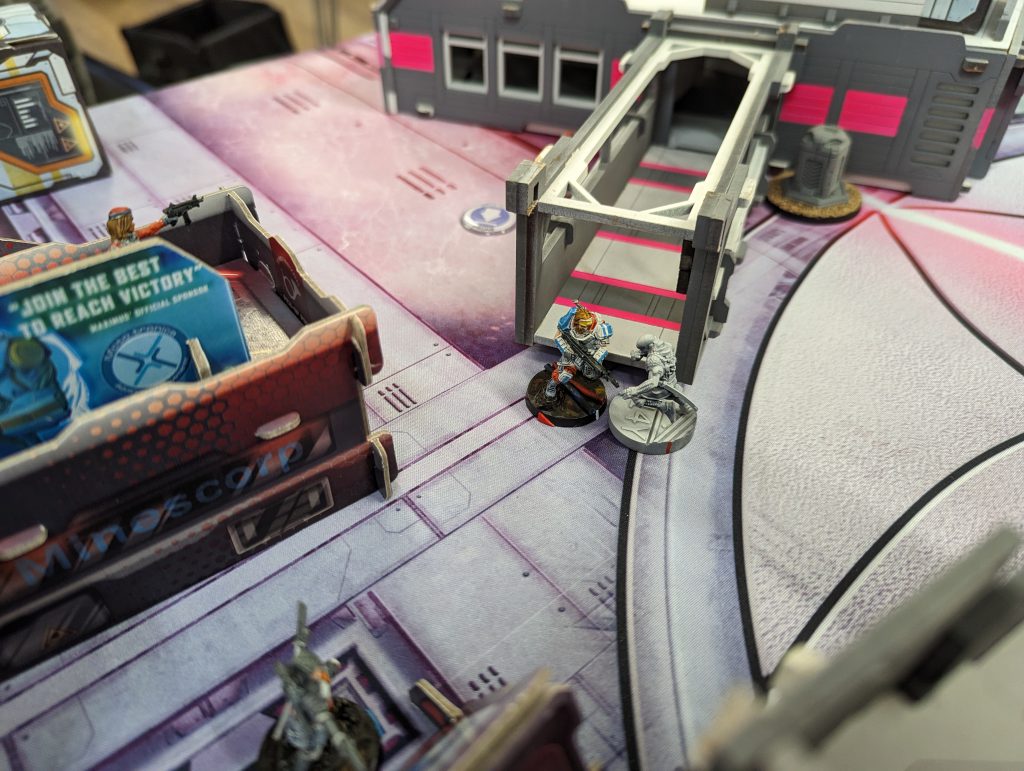
In fact, as I began Round 2, I suspected he was already in Retreat so the game would end at the end of his next Turn. This wasn’t the case, I see now he had 83 pts remaining, but in fact to secure the beacon I would end up killing more and that would send him into Retreat. I sacrificed the MBH to an E/M mine with its own Irregular Order, just to clear it for the Su Jian. I engaged his Rokot, which revealed from camouflage, in the same Order but didn’t kill it. I then moved the Su Jian across the table, killing the Rokot and going into NWI. The only remaining obstacle to seizing the objective and moving back to my DZ was the Volkolak HMG. I revealed my Ninja, moved up to him as a marker, and engaged in melee. This was very early a coin flip as Volkolaks have Natural Born Warrior, but I was still on 23 against 19 thanks to Suprise Attack. I was lucky enough to crit and finish him off. The Su Jian then waltzed off with the beacon.
No Round 3; or; What I Should Have Done
This resulted in a 5-0 win. I had a very healthy 286 VP remaining to my opponent’s 28. Definitely good enough for government work, but I realise in hindsight that I should have looked for a way to keep the game going to Round 3, which would have let me score a bit more. I couldn’t have killed anything, but I could have cleared the E/M mine with the MBH and Dodged, just to leave him as a speed bump, then laid smoke onto the beacon with the Celestial Guard, and claimed it with the Ninja. Holding it through the end of Round 2 wouldn’t have been absolutely guaranteed, but highly possible, and I could hardly have failed to remove the surviving enemies and claim it again in Round 3. As it was, the game ended due to Retreat at the end of Round 2. I couldn’t score my Classified, it was Rescue and I didn’t have anyone in a Null state! This sounds like nitpicking, since in most tournaments I’d just be glad to have the win, but I could have placed one higher in the rankings if I’d eked it out to 7-0.
Liam, my opponent, was another very friendly guy who took his repeated bad luck with a smile. I think he came into Infinity fairly recently and had not played against a Su Jian before much, if at all, and the same applied to Major Lunah, the ultimate bear hunter. These things can be a horrible shock if you’ve not already been shown how they work. Final apologies for that suicidal Motorised Bounty Hunter rush, which should not have happened.
Conclusion
At the end of the day, I placed 8th of 25 players. Not my best result, but had three very interesting and enjoyable games. In many ways the loss taught me more about ISS than the wins, but my god the Su Jian is a hard hitting alpha strike. I was probably lucky to go first in both games I used it, since Combined Army might easily have neutralized it with hacking, or Kosmoflot with a Bearpode. It would be interesting to play it into a faction with a real defensive hacking net, which I think is its Achilles’ heel. That was present to some extent in the second game, but ultimately the MBH and the freedom of maneuver that 8 inch movement gives stopped it being held up. I also definitely need to include Chain of Command, or a Lt who is not my Turn 1 ARO-breaking piece. I am keen to play the Sectorial more, and hopefully even paint the models.
The event was won by Riker, one of the most experienced and consistently successful tournament players in the UK, using Spiral Corps. It was a very tight field, as usual with this event, and many attendees who were “in it to win it” while still retaining a relaxed, fun atmosphere. Props as always to Laina for organising, with excellent prize support and home-baked desserts to boot. Any interested readers can see the full results here.
Have any questions or feedback? Drop us a note in the comments below or email us at contact@goonhammer.com.
