The Initiative Roll and both players’ Deployment in Infinity set the conditions for the whole game. Because of the Orders mechanic rather than a conventional IGOUGO structure where every model can move throughout the game, many of your models want to fulfil their role for the game from their original deployment position. Even for a model you intend to zoom around the table, the less you can move it to start doing its job, the better. You will directly save precious Orders. If you leave a model in a useless deployment position you will at best spend more Orders; at worst you won’t be able to bring it to bear at all. Additionally, the second player knows that their deployment is the position from which they will have to fight their first Reactive Turn. In tournaments, I often take as long for deployment as I do for the first Turn, and I think that’s fairly normal. I can also tell if an opponent is an experienced player just by looking at their deployment. Let’s look at what feeds into these vital decisions.
The Initiative Roll
As mentioned in a previous article, your Mission analysis should have already given you an idea, before you start the game, of whether it’s desirable to go first or second. Some Missions notoriously favour going second. It’s harder to defend in Infinity than it is to attack, because the Active player has control. This means that for Objectives scored at the end of the Round or game, the second player can often sneak out the victory in a close match. Examples of this sort of Mission include Armoury, Supremacy and Frontline.
Against this is the obvious advantage of going first and the chance to take the initiative, setting the tempo of the game. You can remove key threats before your opponent can use them. Some Missions extra incentivise it, when the first player can destroy or remove a primary Objective and lock in Objective Points during Round 1. Examples include Looting and Sabotaging or Supplies. The second player can strategically use a Command Token to strip 2 Regular Orders from the first, and this is a partial balancer in many missions which on the whole favour going first. However it can be insufficient against lists with particularly good mobile attack units, which can leverage extra Tactical Awareness, Impetuous or NCO Orders, or which include Counterintelligence.
Deployment is often neglected in comparison to choosing Turn Order. It can be great to counter-deploy your opponent. But for many lists of 15 models, there are only so many positions on the table anyway. A sound defensive deployment can usually stand up to having to deploy first, blind to their opponent’s start position (this starts to crumble against dedicated DZ attackers like Impersonators or Infiltration(+6)). A good attacking deployment may lose a few Orders to a clever counter-deployment, but it can still have a decent first turn, especially if it uses its Reserve Deployment well (see below). As a note, table sides should be noticeably asymmetrical to make choice of Deployment more attractive, but this is often neglected by event organisers. If you’re setting up a table yourself, remember that one DZ should be stronger than the other!
It’s impossible to give a concrete recommendation on “should I choose Deployment or Turn Order”. My technique is to know in advance which Turn Order is preferable to the Mission. I then come prepared with a default choice should I win the initiative roll. I usually pick Turn Order if the mission strongly favours having the first or second turn. I could modify that based on the table layout and the opposing army – it may have particularly fearsome attack pieces available I don’t want to go second against, or a range of defence options I don’t want to have to spend Orders attacking first. But generally, stick to the Mission. For example, even if you are afraid of going second against an opponent with deployment advantage, it is still better to go second in Supremacy. I find it too hard to score high when going first there.
Because many players are understandably cautious about deploying first and going second, I also sometimes pick Deployment in Missions which heavily favour the second Turn – my opponent may give me the second Turn I want anyway, and if they don’t, I can use my deployment advantage and try to clatter them off the board before Round 3. For other missions, I always pick first Turn if I can. The Mission is the primary factor in my choice.
If the Mission can be turned either way – many fall into this category, where the final go at the Objectives is worth something but probably not quite as much as going first – I often pick deployment. I don’t have a strong preference for going first. This is shaped by my list preferences and personal play style, other players who use different units may well default to picking the first turn. Especially if they have front-loaded some offensive power which aims to win the game early – an extra mobile TAG, or Impersonators, for example.
Finally, in real life tournaments (at time of writing, Tabletop Simulator is more the norm thanks to COVID) you may sometimes be confronted with tables that are poorly designed or simply don’t have enough terrain to significantly block LoF. In such a case, you may almost have to pick Deployment (even if you would have preferred a specific Turn order) to avoid being trapped on the open in your DZ! That may be necessary, but I’d encourage anyone to also challenge the Tournament Organiser in such a case. Even if some makeshift terrain can’t be immediately added to the table, it can be highlighted for future events. Infinity simply doesn’t work without enough terrain, games don’t have any of the interesting decisions which take place on proper tables. You and your opponent will both have a better time if the terrain is up to scratch.
Deployment
Planning the Initial Firefight
New players frequently start to learn Infinity and think that all their models should deploy peeking around cover, ready to ARO the enemy. This is suicide against any competitively built list and good player. Because of Burst advantage and even more because the Active player has near-complete control over movement and of the order of events, and thus over the conditions of the FtF roll, most models set out to ARO at Deployment are going to get killed. Even for double-hard AROs like Bolt, Grenzer or Kamau snipers in Core Fireteams, good opponents will have some plan in their list to defeat them. They may pose more of a risk to the enemy, but you can’t count on their survival. The standard competitive tactic is that most models begin the game hidden away, usually Prone, so that the enemy cannot draw LoF and engage it without investing in a prohibitive number of set-up Orders. The only models which want to easily draw LoF to Active enemies are those strong or disposable enough that the Order(s) the opponent spends removing them, plus the chance they crit the ARO, is worth their loss.
You don’t need to be quite as strong as a Kamau sniper to risk yourself in ARO – any sniper or missile launcher in a full Core fireteam will probably be worthwhile in that role. Other options are cheap obstacles like Remotes with Flash Pulses, or Daylami. The point is to have some models up to delay the enemy. If you deploy completely ‘head down’ then a good opponent can still cross the table and pick off some key units, especially if he brought the right mobile attack pieces. A good resource is Thanqol’s guide to how defence works in Infinity. At deployment, just as when setting a defence during the game, you want a combination of indirect Zone of Control AROs (like Hacking or Perimeter Weapons), Direct Template Weapons covering approaches at short range, and good shooters covering at long range.
Most AROs shouldn’t try to pin down the enemy right at their starting position. The only exception is snipers who want to use extreme long range to stay safe – starting with the enemy in LoF helps them to keep that advantage. In most cases, you want to force the opponent to spend Orders moving into position to engage you before the FtF rolls happen. That way, if you get lucky they’ve lost more, and if they win, they probably spent Orders activating a ranged gunfighter to take out your ARO – not a Specialist to do the Objectives or a mobile unit to rush at your DZ. Always try to have dedicated long-range ARO units, bar the exclusively disposable ones, in a position where they will be completely hidden if they fail (or choose to fail) a Guts Roll, or if they go Unconscious and drop Prone – e.g. behind a low wall. Then your opponent can’t finish them off easily. If you have a Doctor or Engineer nearby, they can move Prone and hidden and easily revive the ARO piece, restoring your control of the fire lanes. This combination is almost mandatory for things like Total Reaction Remotes and Core Fireteam snipers.
Even when going first, start the game Prone except for dedicated ARO pieces. You don’t want to be visible at the start of your Orders, in case your opponent has some trick up his sleeve with his Reserve deployment, to pin your attack piece down under multiple AROs. As discussed above, the Active player has powerful control over how they engage AROs – provided they’re not in LoF at the start of their Order! Especially when you are deploying first, your opponent has scope to seek out sly angles on targets – this gets harder if they are all Prone. Don’t think ‘does this model need to be Prone’, think ‘is there any reason this model wants to stand up?’. Prone is the default.
Remember the danger posed by Impact Templates when deploying. Your opponent may have a Missile Launcher, Heavy Rocket Launcher or Plasma Rifle. Even if you can’t see one, Impact Templates are popular choices for Hidden or Reserve deployment precisely because of how they can catch people out. So even behind Total Cover (e.g. Prone behind a low wall) don’t have your supporting models within 2.5” of a visible ARO piece. Indeed, don’t have your models that close together full stop. This will prevent them from being caught in the blast zone during a FtF – something which is bad in your Reactive Turn and flat out disastrous in your Active Turn, when you can’t even attempt an ARO Dodge. Ideally, every model in your deployment would be more than 5″ from every other model, reducing the threat of Speculative fire templates (which don’t need to be centred on a model) but that is practically impossible with 15 models in a typical DZ. Be aware of the possibility though, especially when deploying Fireteams or other clusters of important pieces.
Planning to Seize the Objective(s)
Most players will quickly internalise the above rules about deploying their ARO pieces, attack pieces and supporting models. It makes sense and is easy to focus on, because those positions will shape the opening moves of the game. Equally important, but perhaps less obvious, is planning your deployment to enable moves on the Objectives. You need Specialists deployed to efficiently move to the Objectives (typically in the centre) without being too vulnerable in their starting positions. This is a balancing act. We’ve mentioned, in discussing list building, how valuable it is to deploy your Infiltrating Specialists right next to the Objectives. But obviously that puts them closer inside your opponent’s reach. When going second, your primary concern should be keeping those key Specialists alive. When going first, you need to commit at deployment either to using them in Round 1, in which case they should be deployed right next to the Objectives, as long as they are covered from enemy AROs; or you commit to spending Round 1 attacking the enemy to gain a wider advantage in Orders and board control, in which case the primary concern is still the Specialists’ safety. In most missions I opt for the latter when going first. As discussed in our first article on strategy, it’s usually sensible to assert dominance over the enemy force before grabbing Objectives. So in summary, you want models to have efficient routes to move to the Objectives, but don’t make them too easy for your opponent to attack. Conversely, when you’ve taken an Active Specialist to perform the Mission Objective, don’t put them in such a secure midfield position, e.g. Prone atop a multistorey building with no stairs or ladders, that they can’t get out and move to where they need to be! That defeats their purpose entirely.
Planning to stop your opponent seizing the Objectives is harder. The Active player has a great deal of control, as we’ve noted, so exposing your models to ARO at Deployment can just end up getting them killed. Then you lose the firefight, you don’t have the Orders, firepower or board position to control the game, and your opponent seizes the Objective in a later Round anyway. Plan in advance when playing Missions where you need to defend a primary Objective to stop the first player grabbing it in Turn 1. Looting and Sabotaging is a good example. If you do not have a dedicated ‘point defence’ around the main Objective (at the front centre of your DZ) in that Mission, and end up going second, your opponent can easily lock in 5 Objective Points in Turn 1. This problem should be partly covered at list building (just as both players will include an attacking option to overcome the defence). But it will also require a more aggressive deployment when going second than most Missions. In less extreme Missions where Objectives are in the midfield and can be ‘flipped’ throughout the game, deployment is more focussed on keeping your models secure. But even then, be aware that moving out to cover the Objectives at the top of Round 3 is good strategy. So you want your support models well hidden and secure, but if you are going first, ideally they would also be in position to stand up and move into ARO positions with a single Order if necessary.
For Missions which don’t require activating Objectives, but moving points into certain Zones, deployment again needs to be considered beyond the basic needs of keeping your troops safe. Every model you’d conceivably spend Orders on should have an efficient route out of the DZ toward the scoring zones. Especially if the Mission scores at the end of the Round, not the end of the game, you need avenues of advance that you can use – preferably behind Total Cover from the opposing DZ. You don’t want to get pinned down outside the scoring zones, and the safest, most reliable way to ensure this is to completely avoid any LoF as you move up.
In such per-Round-scoring Missions you can also consider deploying your AROs more aggressively to hinder the opponent moving up – just be aware of the overall risk to the integrity of your force. If the opponent spends all their effort and Orders removing your AROs, that may win you the points in Round 1, but will it ultimately cost you control of the game? Similarly, you need to have included models in your list, and deploy them, to aggressively hunt enemies out of the scoring zones.
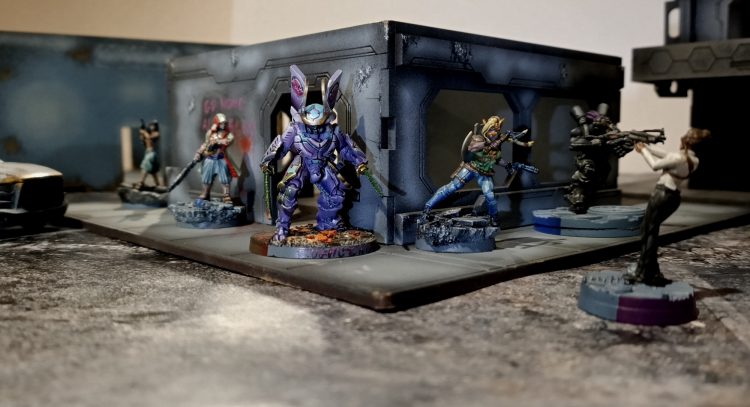
Using Reserve Deployment
If going first, your Reserve Deployment is typically your most valuable attack piece, either a ‘sweeper’ to remove AROs or a mobile piece which will try to rush the Objectives or enemy DZ. If going second, it’s often your best ARO piece or a vital model you want to be safe for a subsequent counter-attack. In either case, if deploying first, at least consider spending a Strategic Command Token to place 2 models as Reserve Deployment. This can really help set a good defence or keep options open for an initial attack. The main reason not to do this is the opportunity cost of Command Tokens – they are valuable!
Try to pick a Reserve that does have multiple potential positions for deployment. It’s nice to counter-deploy your opponent, but there may be an obvious position you’d have put that model in regardless. In that situation, holding it as a Reserve is obviously less valuable. You want your Reserve to be placed in reaction to your opponent’s options following on from their deployment. Other natural Reserve Deployments would be Lt models (in missions where their identity is Open Information, their assassination is an enemy Objective and you want them to be safe) or Impersonation/Infiltration(+6) models, who really can blow open the defence and penetrate the enemy DZ if placed just right.
Deploying Fire Teams
New players often expose their Fireteams unnecessarily during Deployment. The classic competitive method here is that only 1 member is visible from outside of very close range – the dedicated ARO piece, if taking one. Anything else, even a good ranged shooter like an HMG which is more valuable in the Active Turn, should deploy well hidden. Don’t think for a minute that a model will be able to protect itself in ARO with a weapon outside its good range bands, even with full Fireteam bonuses. Additionally, if you deploy multiple members to ARO, your bonuses degrade with each casualty. So by engaging them one by one, the opponent is taking less of a risk from ARO each time. If they can take out a couple of weaker Fireteam members first, then your dedicated ARO piece is far more vulnerable.
If possible, the Fireteam should be scattered, Prone, between bits of solid terrain so that a single Direct Template can’t hit too many at once. The leader should be one of the most secure models – definitely not the exposed ARO piece! The approaches into the Fireteam’s deployment area should be covered by one of the more sacrificial members, ideally with a template weapon, or some other cheap Warband outside the Fireteam. Finally, it may be difficult to find decent positions for a full Fireteam with everyone within 8” of each other. You only have to be within 8” of the leader. Just be aware that if your starting leader is in the centre with members up to 8” either side of it, then you won’t be able to easily activate the Fireteam to attack. Making anyone but the central-position members the link leader will cause others to drop out of the Fireteam. So if possible, keep the whole deployed Fireteam within 8” of each other. That may be difficult to do while keeping them all in safe positions – one of the inherent balancing factors to Fireteams’ obvious strengths.
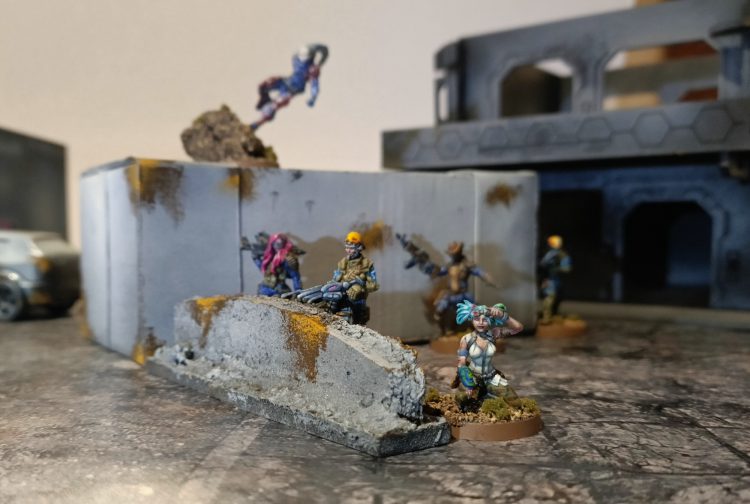
Evaluating your Deployment
Now that you’re fully deployed, take a moment to think from your opponent’s point of view. If they are going first, how would you crack your own defence, using their tools? If they are going second, do you think they can resist your initial attack, and what AROs or obstacles are they relying on to do so? Try and see the weaknesses you may have missed when positioning your models in the natural places most tables will leave for them to deploy in.
Your overall deployment should be a mix of positions that are hard to attack by virtue of position – your opponent will have to spend many Orders to get to them – and models that you want your opponent to attack – things you can afford to lose and/or present a real risk for them to attack head-on. You may need to deny access to certain Objectives and you should deny access to your DZ. Think, is there any place where one powerful flanking model could efficiently cut up all your more vulnerable support units?
These considerations focus on defence, and for good reason. The defence you set up at Deployment is in place, ready to go. It needs a lot of thought, because even when going first, most of it will remain in position to withstand counter-attacks. You don’t want to spend more Orders than absolutely necessary further bolstering your defence, you need those Orders to attack and to take Objectives.
Going first in Infinity gives you a chance to take the initiative and keep your opponent on the back foot, it doesn’t guarantee it. For offense, the important thing is to have Specialists and attack pieces where they can efficiently move to the Objectives or to gain LoF to key targets. But always be aware of how vulnerable they will be when your first Active Turn ends. If you haven’t had a chance to activate that model, will it be exposed to immediate counter attack? If you do activate it, where does it want to end up if it completes its initial task?
Next Time: Common Plays and Tactical Situations
As important as list building and understanding the Objectives are, ultimately the Initiative Roll and initial Deployment will set the conditions for each game of Infinity. While there are clearly some troop types and army compositions which out-compete others, and Missions strongly favour tailored forces, the decisions made at Deployment and during the Orders phase of each turn will decide the outcome of the game. Good positioning executed in support of a sound plan focussed on the Objectives is all you need to win in Infinity.
Now that we’ve deployed our models, in the next and final article in this series, we will go into a variety of common situations and engagements which arise during games, and how to approach them.
