
The German Army of the first World War was one of the strongest military forces in the world at the time. They entered the war with flashy Pickelhauben and fancy moustaches. But as the war went on, they had to adapt to the new type of Warfare, slowly phasing out the more fancy aspects of their uniforms in favor of functional parts.
In this HTPE I will show you three variations of the German uniform during the first World War. Examples of uniforms are always a little hard to come by online, luckily there’s Bekleidungsamt XIII who makes replicas of old uniforms. This will not be an exhaustive guide on every step. I’ve highlighted the parts that I feel are unique to the German army of WW1. All paints used here are by Vallejo. Please also note, I am using the paint colors on the paint cards as they’re presented by Vallejo in their online photos, some of these however don’t quite match with what the actual paint looks like; So please bear that in mind.
Landsturmschnitt M1913
The Landsturmschnitt M1913 was the base model for the early years of the war. While there were many variations in details, the overall design remained the same. Notable are the piping on the sleeves and front. The color of these would indicate the regiment/branch affiliation(for example green was Jäger). While many examples show a more muted green grey uniform, I opted to go with a somewhat brighter color to make the miniatures stand out more.
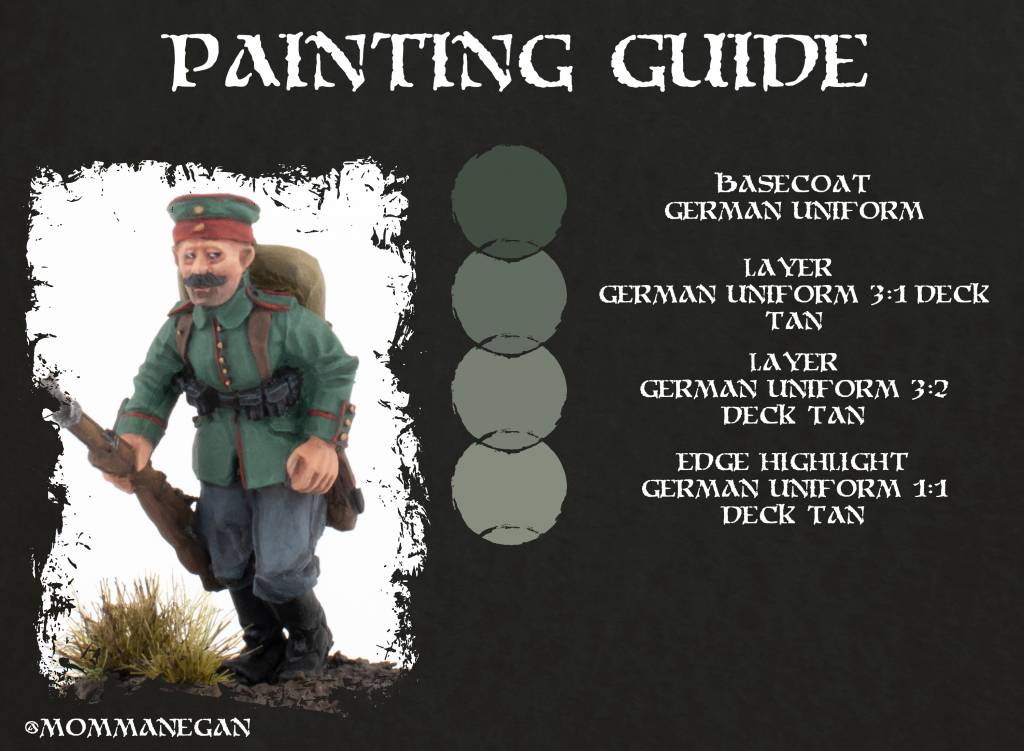
Here’s the first example of how the digital colors are not reflective of the actual paints.
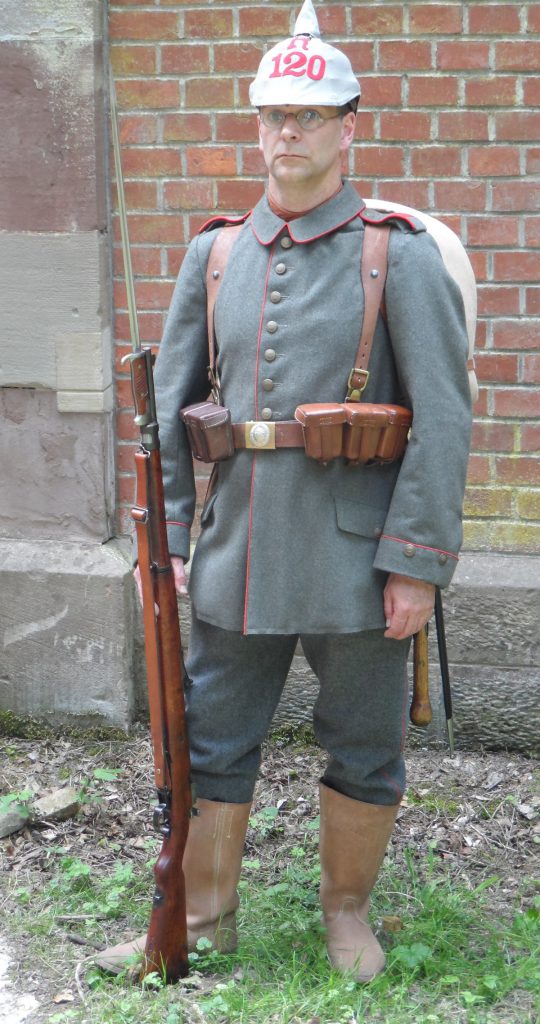
The last steps missing are the piping and the buttons. You can simply take a bright red and carefully line out all the areas that have red piping. I’ve added a photo here for a guide on where the piping is located(and realized I forgot it on the collar myself). There’s also a question about how you paint the ammo belt and boots. While webbing was almost exclusively brown leather, you can find examples of black leather boots and ammo belts.
Blue Litewka 1900
An unusual sight are the Landsturmbattalions. These were the last levy of the Kaiserreich and thus equipped with older uniforms, specifically the Litewka. While some battalions managed to be equipped with proper uniforms until the end of the war, I’m gonna show you how to paint the blue Litewka instead. If you look on the Replica page, you will find, that there’s also older green and black uniforms given out to Landsturmsbattalions.
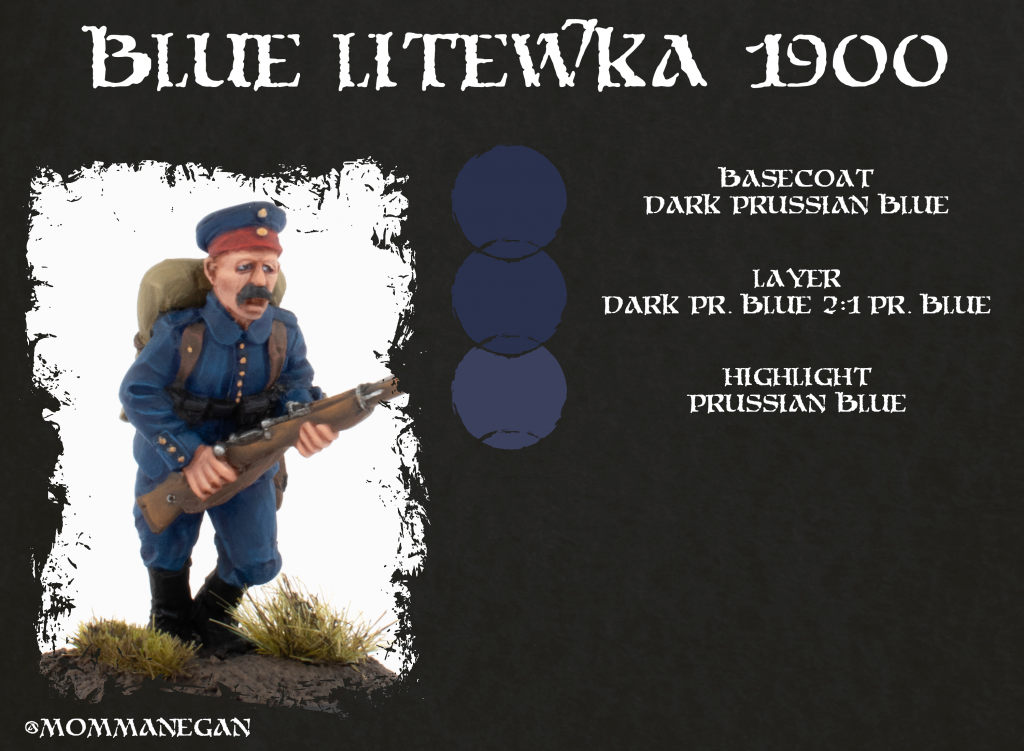
If you want to paint Landstumsbattalions, you’ll have to make some adjustments, for example they usually didnt wear the normal field caps as seen above, but older Prussian models which are usually not modelled.
M1892 Überzug
To protect the pristine Pickelhaube in the field, the German soldier was issued with a canvas wrapping for the helmet in 1892. This protected the helmet and also had the soldier’s regiment number stitched onto the front in red. Given the amount of early war German miniatures featuring this Überzug, here’s a quick way to paint it.
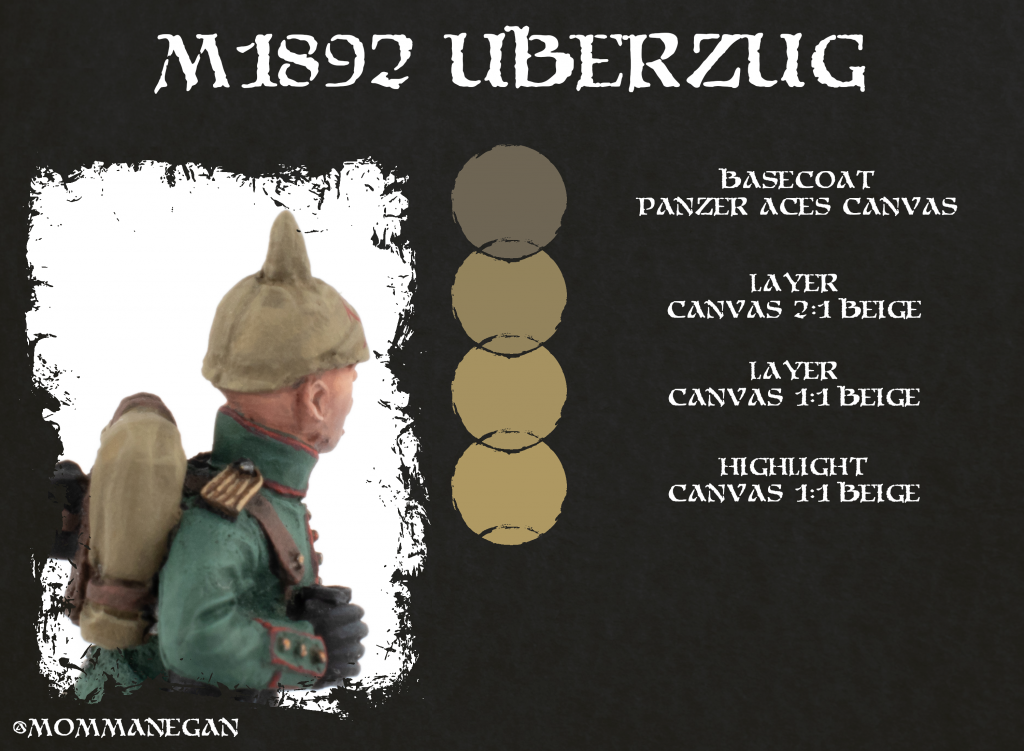
Once you’ve done the Canvas, you can take the same red used for the piping and try to freehand a big number on the front of the Überzug.
Feldbluse M15
Around 1916, most of the German army was issued with new uniforms, this included the introduction of the infamous Stahlhelm, a new strealined and less decorated field tunic. The color changed to be more drab and they removed the bright red piping. As with many uniforms, the brightness of the color varied heavily due to age, environment or simple fabrication changes.
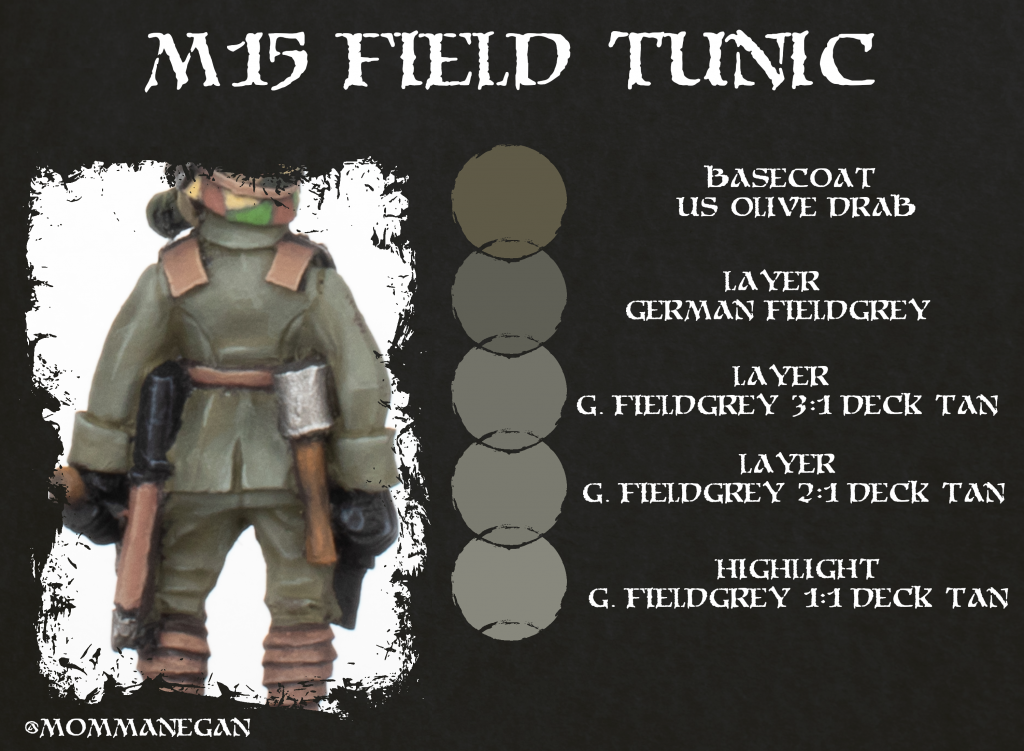
This technique will result in a rather bright and washed out looking uniform, but by simply varying the amount of highlights you’ll be able to get a more dark look.
M1915 Gas Mask
With the invention of chemical warfare came a need for protective equipment. One of these measures was the German M1915 Gas Mask. Now a rather iconic staple of the era, back then it must’ve probably been rather intimidating, both for people wearing the mask and those outside.

[Note: I found out while making this guide, that Vallejo discontinued their Panzer Aces line. They do produce a Canvas color for Model Color, but I can’t guarantee it’s the exact same tone, sorry :/]
This method leads to another rather washed out look for your mask. You could probably skip the last highlight to give the cloth material it’s original dark brownish look, but that’s up to you.
And that’s the uniforms for World War 1 Germans. I hope you found this guide useful and can use some of these recipes in your forces. I also hope you’ve been enjoying our series on World War 1 so far and are excited for the rest of the articles!
Have any questions or feedback? Drop us a note in the comments below or email us at contact@goonhammer.com. Want articles like this linked in your inbox every Monday morning? Sign up for our newsletter. And don’t forget that you can support us on Patreon for backer rewards like early video content, Administratum access, an ad-free experience on our website and more.
