This article is part of a larger series on how to paint the Thousand Sons. To return to the parent article, click this link.
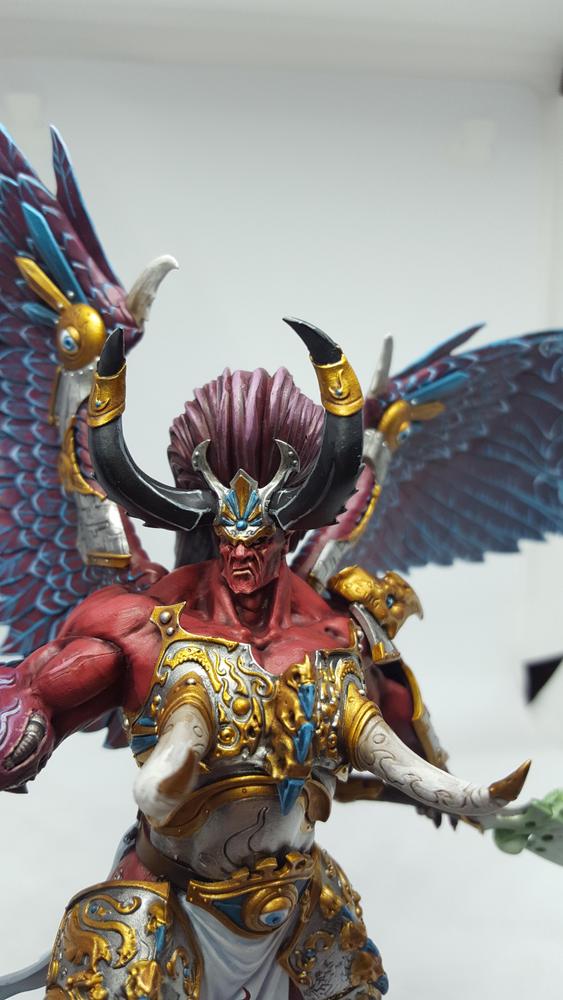
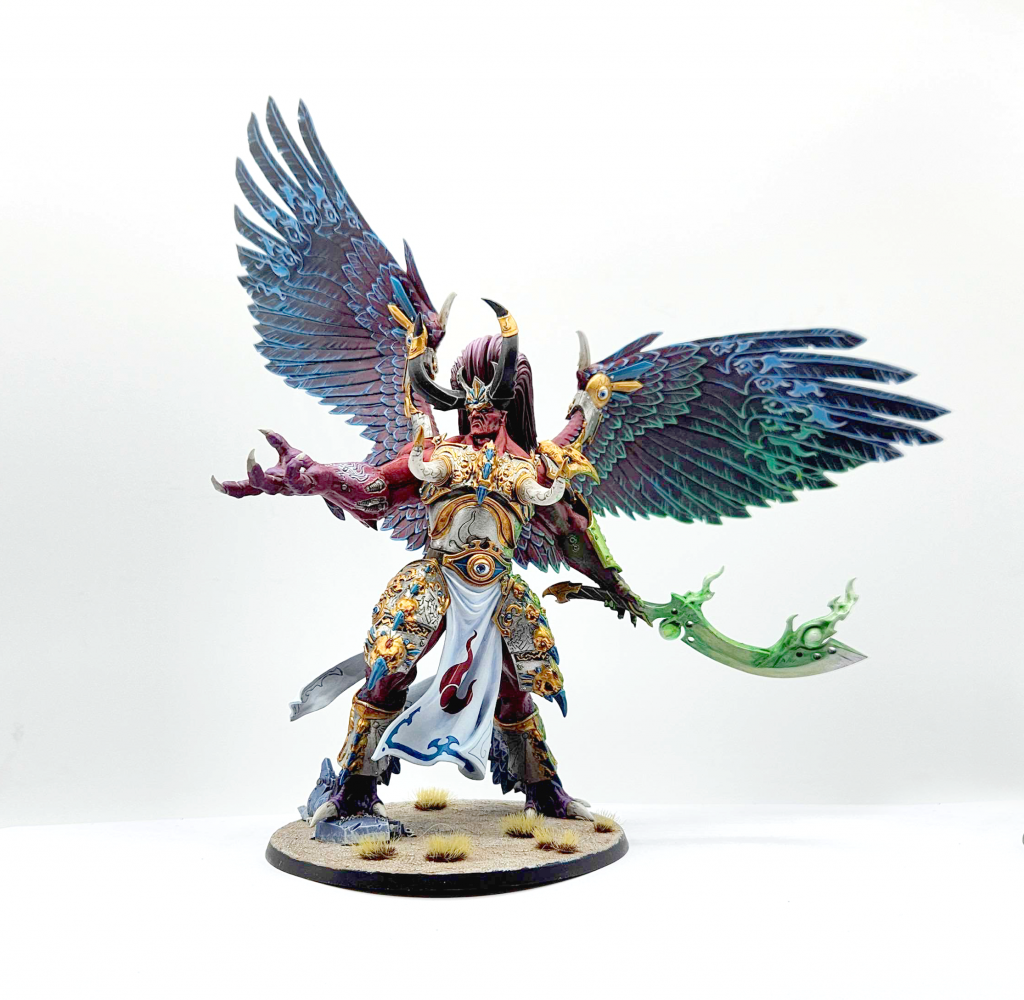
The first plastic primarch model released for Warhammer 40,000, Magnus the Red is one of the most imposing models in the Warhammer 40k range, with several options and a ton of different aspects to paint. I originally painted this Magnus back in 2019, though I’d later revisit it to touch up parts and add some OSL.
Priming and Subassemblies
I used three main subassemblies for Magnus:
- The Main Body. I assembled Magnus’ main body without his armor or wings. This made it easy to paint the parts that would eventually get covered by armor. I glued on the tabard for this point but if I had to do it again I’d glue it on after painting.
- The Armor. I left off the armor on Magnus’ legs and upper body in order to make it easier to hit the spots under that armor. This had the unfortunate consequence of meaning that when I put the armor on his body it had some visible gaps in it where the two plates met along the shin seam.
- The Wings. I left Magnus’ wings entirely unglued, and have continued to do so since. They sit in there pretty well with friction alone, though recently they’ve become a lot looser, so if I had to do this over I’d magnetize his wings to make him easier to transport. I put the armor on the wings before painting Magnus.
I primed Magnus with Abaddon Black.
Basecoats
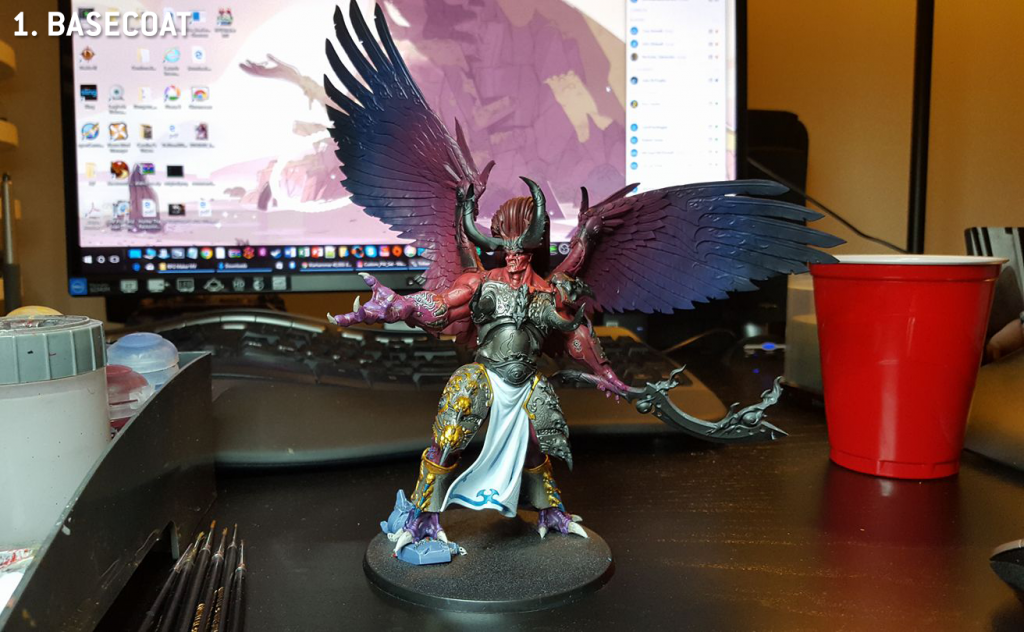
There’s a lot here and some gradients to work with. I basecoated the main body with Khorne Red, and blended that to Screamer Pink and Naggaroth Night on the arms and legs. the arm transitions have to be a bit smoother, but you can cheat the leg transitions because they’ll be hidden by the feathers and shin armor.
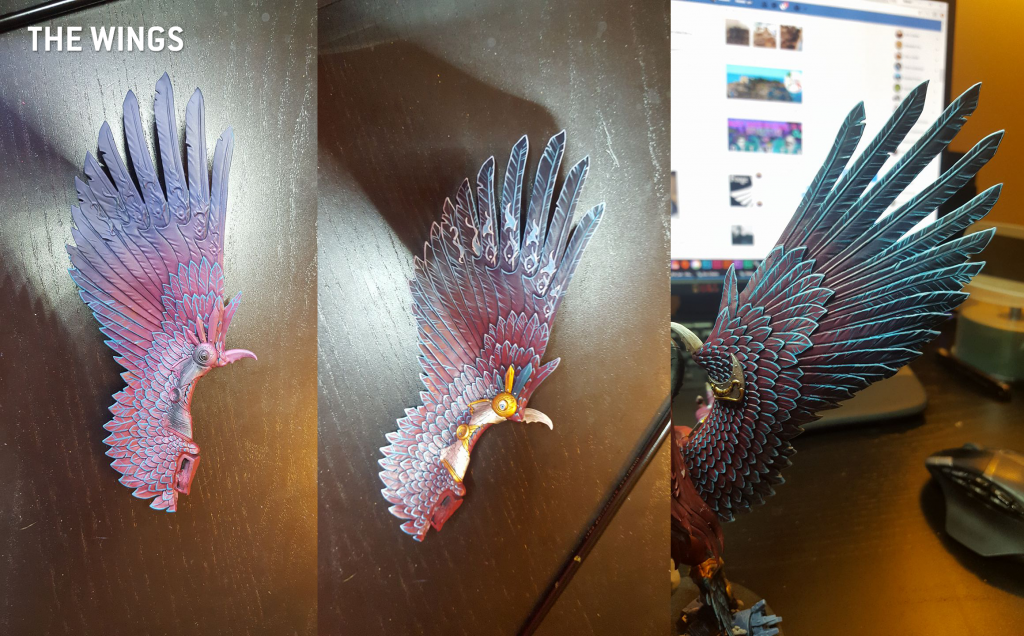
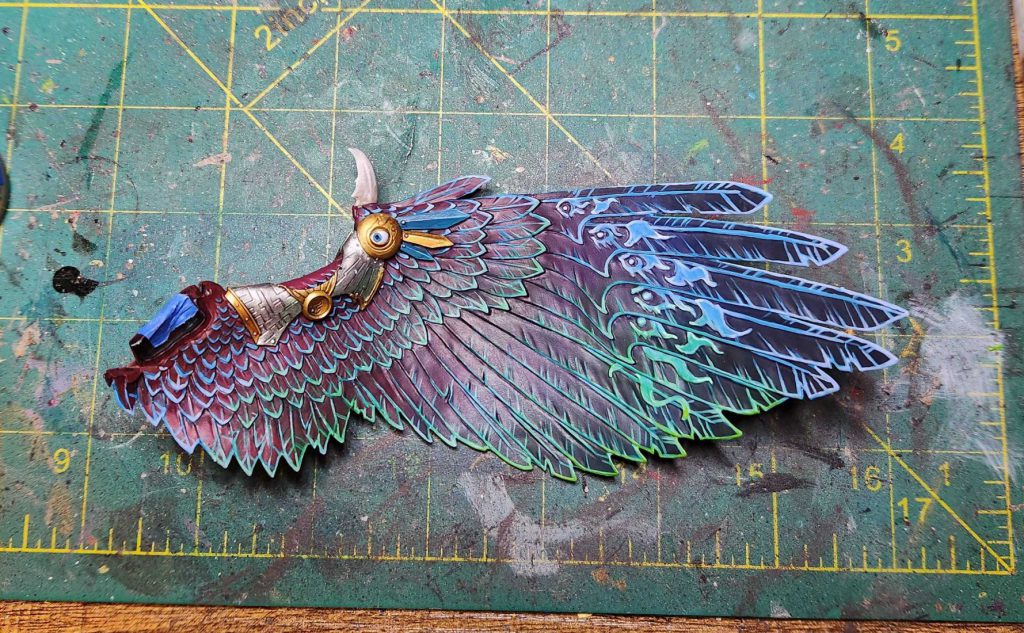
For the wings I transitioned Khorne Red to Screamer Pink to Kantor Blue to a Night Lords Blue and a mix of that with black. This was mostly done with wet-blending, though I’d later come back and paint the inner feathers with Screamer Pink more concretely – the edge highlighting work I did covers up a lot of the transition errors anyways.
The armor was painted Leadbelcher, while trim was painted Retributor Armour and the beaks on birds were painted with Incubi Darkness.
Magnus’ Skin and Hands
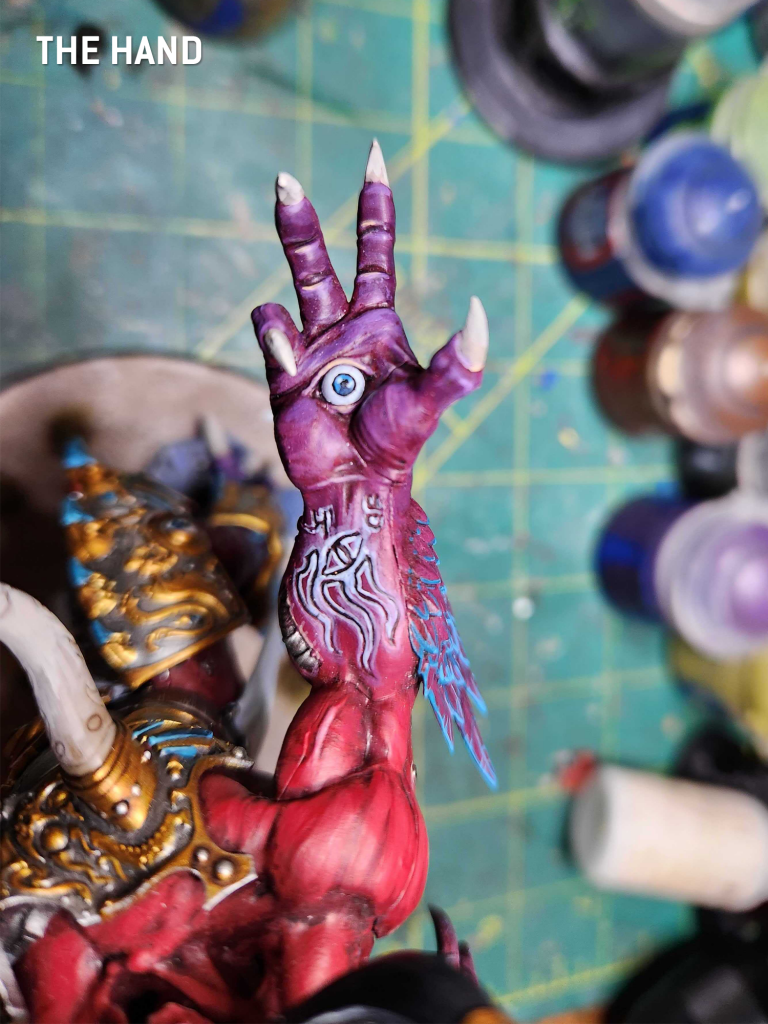
The skin was the next major part to tackle, and I did a lot of this before gluing on the armor. I washed the skin with Carroburg Crimson, then painted it back up highlighting with thin coats of Khorne Red and Khorne Red mixed with Wild Rider Red. The goal here is to paint the muscles in strips, leaving stripes of darker paint in-between to provide additional definition on the muscles, as you can see with the darker lines above. This is an area where it helps to understand the muscle anatomy, as you want these strips on his deltoids and pecs and not so much the biceps and triceps.
the highlight color shifts as you move out to the more purple sections of the model, where I did more highlights with Xereus Purple and a mix of Xereus Purple and Cadian Fleshtone, working up to pure Cadian fleshtone. I did edge highlights on the runes with Reaper Snow Shadow and highlighted that with Reaper Ghost White.
The Wings
The most time-consuming part of Magnus was easily the wings. Each took me about a week to paint, mostly because of the sheer amount of details on each. Once I’d done the gradient, I did some clean-up with Screamer Pink, and then I did the edge highlights. I edge highlighted each feather with Sotek Green, then I did a second pass with Lothern Blue, followed by a third pass of Reaper Snow Shadow and a fourth pass with Reaper Ghost White, working outward each time to create a gradient effect on the highlight. These ended up pretty chunky but in the end still looked great and the work paid off.
The blue armor sections of the wing were painted Incubi Darkness and highlighted with Sotek Green, while the bone spur was painted Rakarth Flesh and washed with Agrax Earthshade before being highlighted with Rakarth Flesh and Reaper Polished Bone.
The Tabard
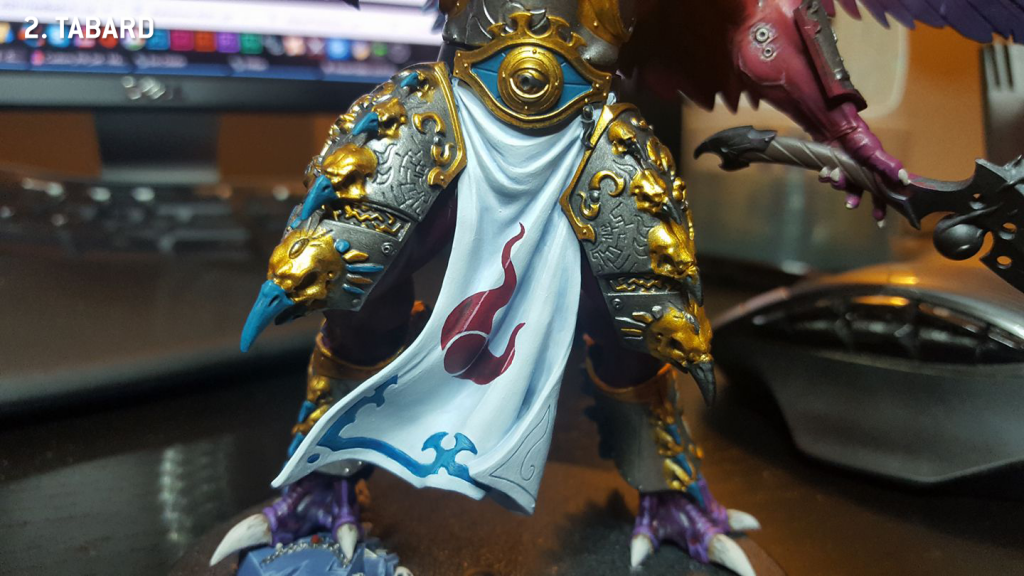
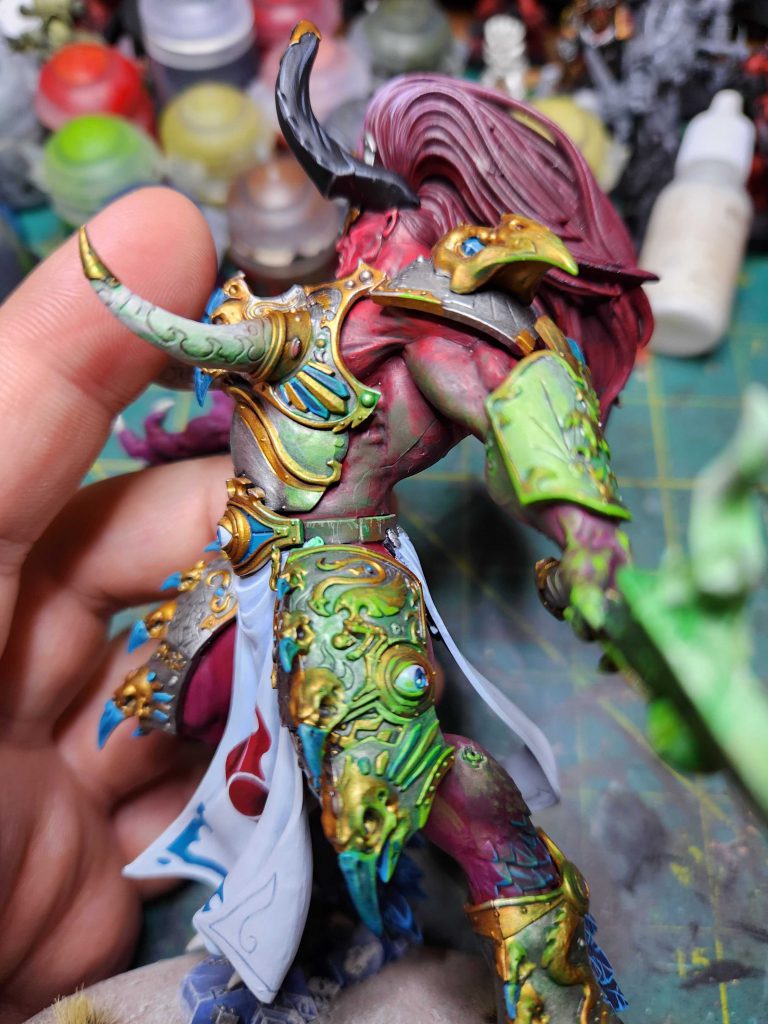
There’s not an easy way to do this one. I painted the tabard with Reaper Snow Shadow and then worked up to Reaper Ghost White and Reaper Pure White, trying to make the transitions as smooth as possible. The Tabard icon is freehand done with Screamer Pink, then shaded with a mix of Screamer Pink and Nuln Oil. The whole thing was a tremendous pain with the folds and probably the most nerve-wracking part of the process, since it had to be done over a finished tabard. The blue sections were painted with Incubi Darkness and Sotek Green highlights.
The Face and Other Details
The horns on Magnus’ Face were painted Abaddon Black and shaded up to a mix of Abaddon Black and Mechanicus Standard Grey, though these days I’d replace that with Corvus Black. The Edge highlights were done with Mechanicus Standard Grey and Celestra Grey. The hair was washed with Druchii Violet and then highlighted with a mix of Screamer Pink, Xereus Purple, and Reaper Pure White.
The armor went pretty quickly – the gold was washed with Agrax Earthshade, then highlighted with Retributor Armor and edge highlighted with Runefang Steel, while the armor was washed with Nuln Oil and highlighted with Runefang Steel.
I make it sound faster than it was, but generally once the wings were done Magnus went pretty quick – he’s a big model, but not insanely detailed compared to Mortarion or Angron.
Coming Back to Make Improvements and Add OSL
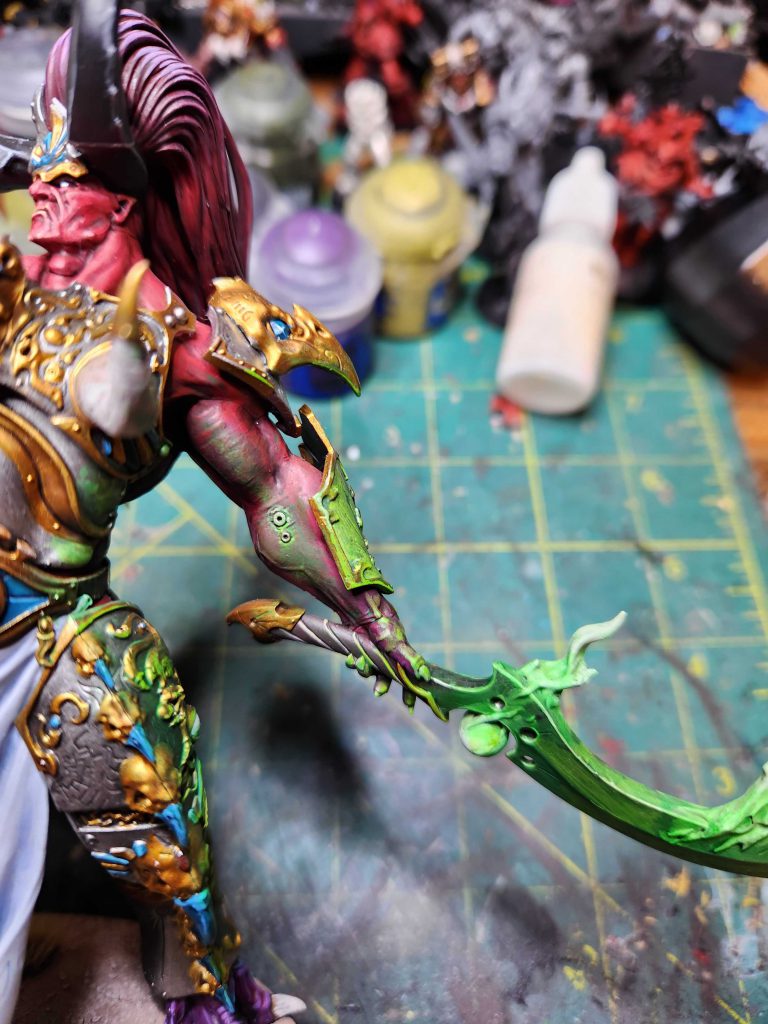
I’m very proud of this Magnus but he definitely looks like a model I painted six years ago and as I was heading into the GW US Open Tacoma event I wanted to touch him up and improve him as much as I could. As such I decided to add some OSL to the model around the sword.
My current OSL process usually starts with a mix of drubrushing and contrast paint. I painted the lit surfaces with Tesseract Glow and highlighted the raised parts properly with Moot Green. I used mixes of Tesseract Glow and Screamer Pink to get some of the blends, and used a mix of Moot Green and Dorn Yellow to do the closest raised edges near the sword.
I also wanted to get some of the light bouncing around – the silver armor is very reflective and will bounce green light up onto Magnus’ underarms, so I added some slight, duller highlights in those areas, blending them with the Khorne Red in those spots. This part is the roughest because green lighting on red is going to produce a lot of grey so you have to go with a light touch.
Finally there were the wings, which were much easier – this is just Tesseract Glow washed over the areas where I wanted the glow to reach, then I went back over those edge highlights with Moot Green.
The final model was one I was much happier with, but still likely a liability in best painted competitions – there are a lot of areas I could improve my technique and remove gaps and mould lines to make him tighter from an execution standpoint. I’m still very happy with the scheme overall though however and the wings still look great, with the OSL being a nice touch that adds some additional depth.
This article is part of a larger series on how to paint the Thousand Sons. To return to the parent article, click this link.

