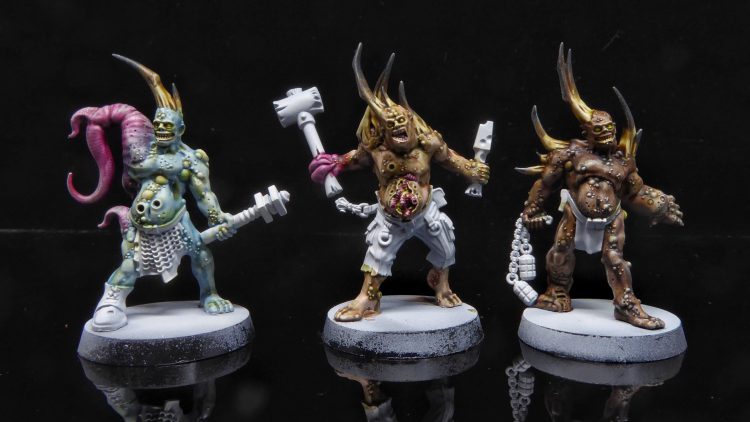
In our How to Paint Everything series, we take a look at different armies of the Warhammer universe, examine their history and heraldry, and look at several different methods for painting them. With Halloween fast approaching, we’re looking at how to paint the spookiest monsters around. In today’s HTPE, we’re looking at how to paint the legions of the walking dead. Specifically, zombies.
Few monsters define the American zeitgeist of the late aughts as well as zombies. For a ten-year stretch from about 2004 to 2014, zombies were everywhere in popular media, showing up in film after film, scores of novels, and video games. The first mentions of zombies in writing show up in the early 19th century, and the word and concept originate in Haitian folklore as undead revenants created by reanimating corpses with magic. The more modern incarnation of zombies was introduced in 1968 in George Romero’s Night of the Living Dead, where the dead – for various unexplained reasons – returned to walk the world of the living, feasting on their flesh and turning those bitten into zombies themselves. The movie was a massive success – at the time the most successful horror film ever produced outside of a major studio – and it was also controversial for its depictions of gore. Romero followed up on this with Dawn of the Dead in 1978, his most successful film of the trilogy and a global success and considered by many to be a superior film to the original and Romero’s best work.
From that point onward, zombies were pervasive in popular media, showing up in Michael Jackson’s 1983 video for Thriller and a host of B-movies. It wasn’t until the late 90s that their popularity began to really come back however, when games like Resident Evil and House of the Dead would re-introduce zombies as video game antagonists. Mindless and able to stand up to multiple bullets, zombies were in many ways the perfect video game antagonist, and the success of those games would kickstart a slow build of renewed interest in zombie media that would begin to kick off with 28 Days Later in 2002 and would really explode in 2004 with the remake of Dawn of the Dead. That same year also gave us Shaun of the Dead and from there we were off to the races, with major zombie-related releases every year. Zombies went from slow, shambling threats to fast, crazed monsters in films like 28 Days Later and the 2004 Dawn of the Dead, they went from mindless antagonists to potential love interests in Warm Bodies and iZombie, and have become a natural disaster unto themselves in works like World War Z. This craze pretty much capped off with 2010’s The Walking Dead series on AMC, an adaptation of Robert Kirkman’s Image Comics series of the same name. With a dynamite pilot directed by Frank Darabont, the series became a massive success and is still going strong after 10 seasons, though cultural interest in zombies has definitely cooled.
Regardless of whether they’re reanimated by magic, a highly contagious virus, or just Hell being full up, zombie works aren’t really about zombies so much as people and how the remaining humans handle the apocalypse. Whether fast or slow, zombies provide a real sense of creeping dread against which authors can explore the fouler aspects of human nature and the difficult decisions that surface when society collapses.
Where to Read/Watch More
OK, this is gonna be a long list but zombies probably have more meaningful works created about them in the last 20 years than any other monster we’ll look at in our How to Paint Everything series on monsters, so let’s dig in.
Books
- World War Z by Max Brooks is probably my favorite zombie book, written like an oral history of the zombie apocalypse years after its end. It covers a ton of interesting geopolitical implications of a disease, and has some scary parallels to modern day and the Coronavirus pandemic, including the virus’ origins in Western China and the way it spreads when infected people bribe their way out of the country or infected organs are sold on the black market to wealthy folks in need of a transplant. It’s missing the post-2016 angle of “people getting infected on purpose to own the libs,” though.
- Also by Max Brooks, The Zombie Survival Guide is an interesting look at what surviving a zombie apocalypse would actually entail, and talks about some of the more interesting dynamics you might not have considered, such as destroying the staircase in a house to prevent zombies from following you up.
- Zone One by Coulson Whitehead follows a group of operatives patrolling Manhattan in a post-apocalypse America that has begun its restoration. The crew is tasked with sweeping the city and clearing out any remaining zombies on a mission to make the city inhabitable once again. The book asks the question of whether survival on the long-term is even possible.
- The Walking Dead comic by Robert Kirkman is a pretty good read, especially in its first two volumes. Take a look in your local comic shop for The Walking Dead Deluxe, a re-release of the comic in full color. #2 releases in early November. There are also a series of prequel novels that track the life of The Governor before the comics which are definitely worth checking out, especially in audio format read by Fred Berman.
Movies/TV
Phew, this list. OK, let’s cover the major beats:
- It’s absolutely worth your time to check out George Romero’s original trilogy – Night of the Living Dead, Dawn of the Dead, and Day of the Dead – especially if you’re a fan of horror movies. All three movies are wonderful (Day of the Dead is an underrated gem), and have different things to say about humans and how shitty we can be when we think there aren’t any consequences for our actions. These movies basically lay out the blueprint for modern zombie works to follow.
- The 2004 Dawn of the Dead Remake really kicked off this explosion of new zombie media and it’s worth your time too. It’s not great per se – it’s a little vapid compared to other works, but it’s got some great scenes, it’s really effective and it’s probably the best work Zack Snyder has done as a director. The soundtrack is pretty solid, too.
- 28 Days Later is also a good movie to watch while we’re at it. The second half doesn’t hold up nearly as well but the first half of the movie is great, particularly with the shots of a deserted, desolate London .
- The first season of The Walking Dead is a strong entry, though for my money it never quite lived up to the promise of its pilot episode and the one following. There are some great moments in later seasons, but the show itself drags pretty bad while they’re on that damn farm. AMC recently released a new limited series called World Beyond that focuses on teenagers in Nebraska ten years after the apocalypse. It’s got a lot different, more hopeful tone. It’s a few episodes in right now so it is worth checking out.
- On the more comedic side, Shaun of the Dead is an all-timer for the way it blends comedy and pathos, effortlessly switching between taking the piss out of zombies and exploring the drama around difficult decisions that have to be made in the name of survival.
- Zombieland is also a fun look at survival in the zombie apocalypse, with an all-timer celebrity cameo.
- REC and its inferior-but-still good US remake Quarantine are both solid, following a reporter and her cameraman as they’re trapped in a building following an incident where residents are infected with a disease that turns them into zombies.
- Train to Busan by Yeon Sang Ho will remind you of Snowpiercer a bit with its train setting, but it’s a great work on its it own, balancing horror and comedy in equal parts.
Video Games
- We can’t have this list without mentioning the Resident Evil series. Before the remakes, I’d have told you to go back and play the original PSX version of Resident Evil 2 since it takes the most from Romero’s works and while 4 is more beloved and a stronger game it strays pretty far from the zombie concept. But now I don’t have to say that, because the Resident Evil 2 and Resident Evil 3 Remakes that have come out over the last 3 years are excellent, and bring the series back to its zombie roots while grounding it in a bit more realism (fewer giant spiders and zombie sharks). The remake of 2 is the better of the pair but they’re both worth your time.
- Dead Island is a pretty solid entry into the video game canon, having players fight off zombies as they attempt to escape a resort island. A Duke Nukem Forever-esque sequel to it was announced like 8 years ago.
- There’s a lot to recommend about the Dead Rising series, which sees players taking on the role of different characters in a zombie apocalypse. The series is particularly notable for its 72-hour time frame, weapon crafting, and the main antagonists being the company that manufactures and distributes Zombrex, a drug that, if taken daily, will prevent an infected from turning into a zombie. In Dead Rising 2, your goal is to keep your daughter alive by securing enough doses of the drug. The series is pretty decent overall, though the first two games are considered the strongest entries.
- Left 4 Dead and its sequel both offer fun cooperative horror gameplay that has players making their way through a zombie-infested landscape. It’s a fun game with an innovative AI system called the Director, which paces zombie attacks in a rising and falling way to maintain suspense.
- The Last of Us series is a critically-acclaimed misery simulator that follows the survivors of a fungal zombie apocalypse in their attempts to survive. The games are equal parts captivating and miserable to play and Naughty Dog does a great job creating the world you play in.
- Telltale’s The Walking Dead series is another critically-acclaimed series with lots of interesting decisions to be made.
Painting Zombies
Painting zombies is mostly about painting rotting flesh, tattered clothing, and gore effects. Because they frequently feature loose skin sloughing off the body and lots of folds and wrinkles, they take very well to washes and contrast-heavy methods of painting.
Mugginns’ Method – American Civil War Zombies for Dracula’s America
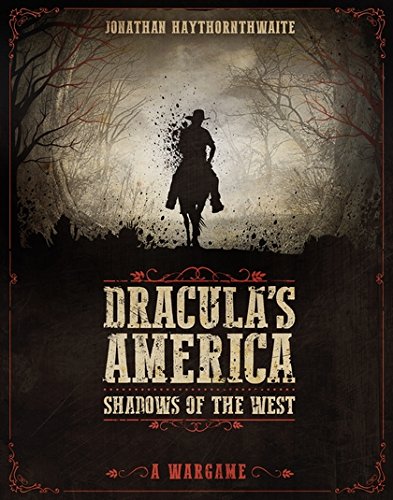
I have had this book on my shelf for a while and haven’t touched it yet. To be honest, Weird West isn’t my biggest draw. I’d usually just rather play regular Wild West. However, the factions in Dracula’s America are really interesting – an ex-enslaved people faction complete with abolitionists, werewolf US cavalry, vampire cowboys, and shape-shifting Native Americans. While I could foresee myself painting a posse for a few of these, I chose to start with the Dark Confederacy because I already have some of the models for it. They’re basically the big bad evil faction in the game with a necromancer leading former rebels and zombie soldiers.
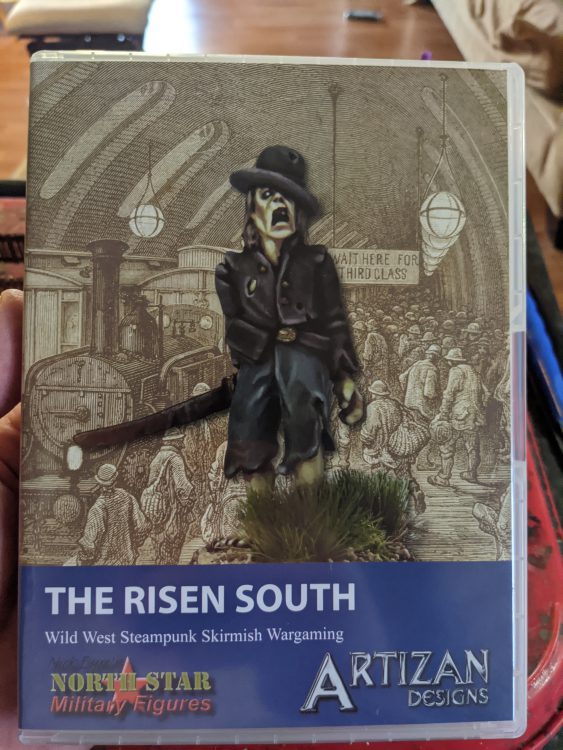
I grabbed these minis from eBay and they’re great – characterful, accurate, and gross. They come in these big plastic boxes with great photos of the models:
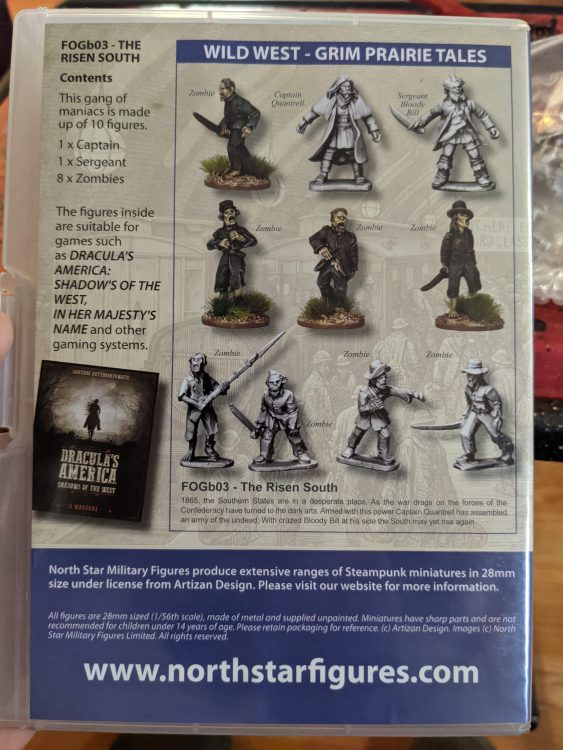
For now I don’t really need Bloody Bill or Quantrill, they’ll be painted later for the posse. I painted the zombies because the posse can summon D3+1 zombies each game and I’m sure there will be others that are needed for scenarios. I painted mostly using Stone Mountain Miniatures paint because they have colors that match the uniforms pretty well. I used Army Painter Necrotic Flesh for the skin as that’s the color I use for pretty much all zombies.
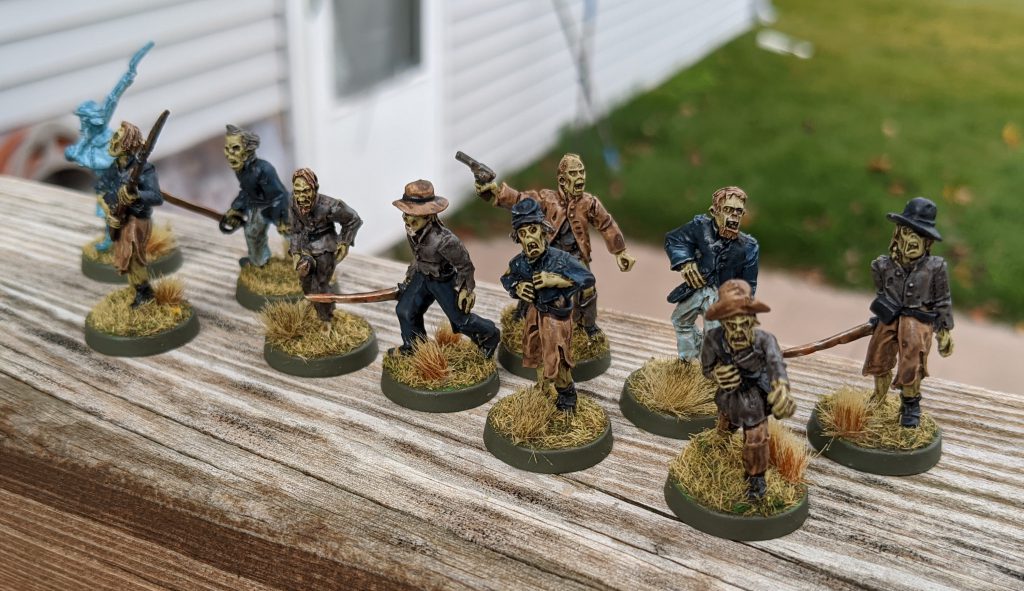
After a basecoat, I used Army Painter Soft Tone to fill in the shades and recesses. I use AP Washes on pretty much everything I paint.
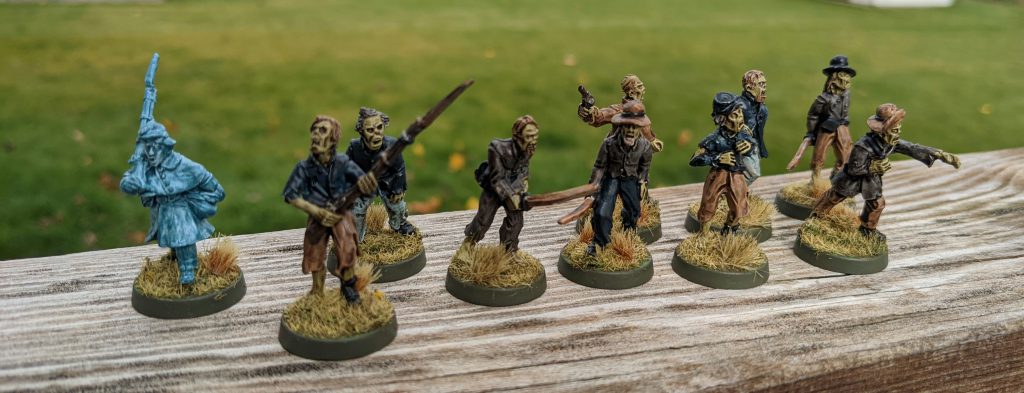
I also painted a Wargames Foundry soldier with an overcoat on using Games Workshop Nighthaunt Gloom to make it look like a spectral soldier. In Dracula’s America he’ll be a ‘Vengeful Shade’ that the necromancer can summon and send at the enemy posse.
TheChirurgeon’s Plague Zombies
Turns out zombies still shamble the grim darkness of the 41st millennium, albeit in a more colorful, cheerful form. Specifically, I’m talking about the Death Guard’s Plague Zombies, who tend to allow for a lot of brig combinations of greens and yellows while also having lots of tentacly appendages. You can get as bright and colorful as you want with them, or keep them more subdued and realistic. I chose the former.
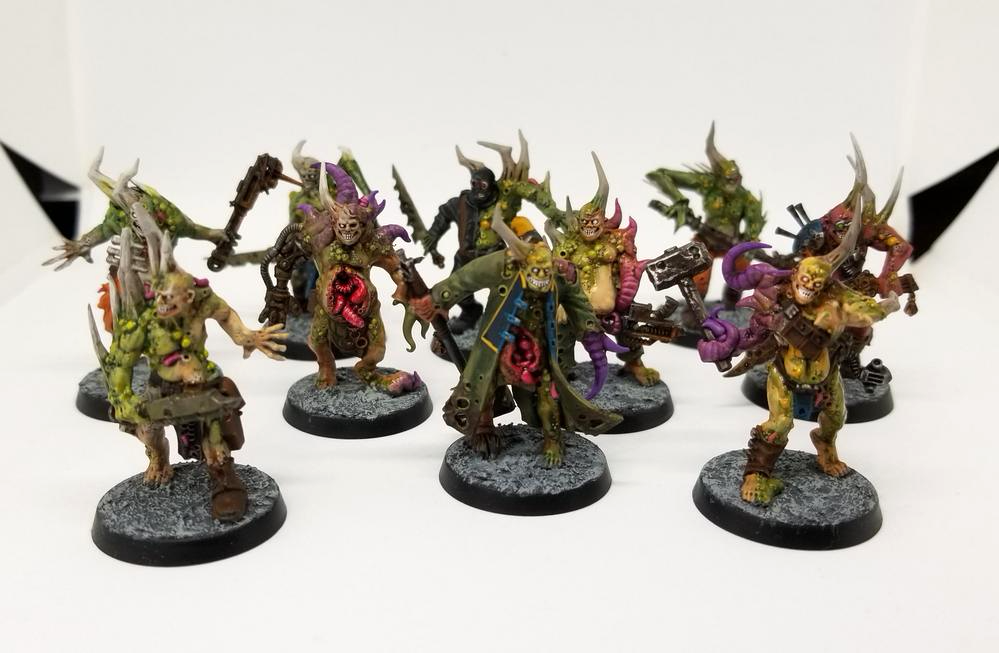
There are three big elements here to consider: The skin/flesh, the tentacle bits, and the boils/pustules. For the most part, I tended to uniformly paint the pustules with a yellow shade – typically Averland Sunset with a dot of Flash Gitz Yellow as a highlight, before coating them in Nurgle’s Rot to give them a glossy, pussy look. If you want something less snot green, then ‘Ardcoat will work very well for this.
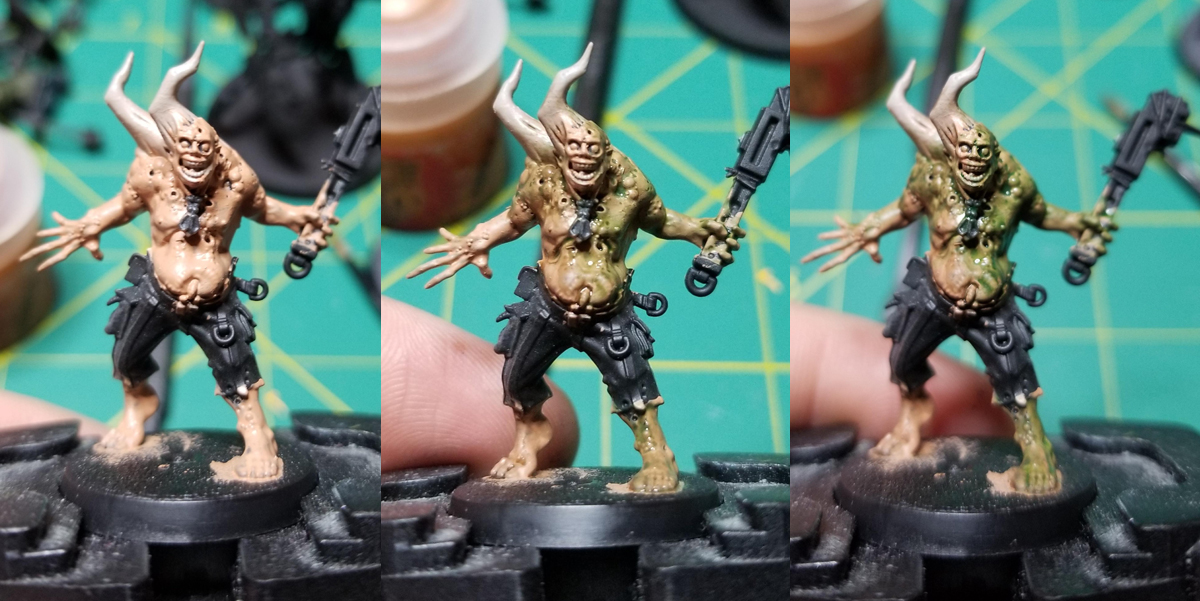
The Skin is where you can really stretch out and try some interesting combinations. Essentially for the skin I’m starting with one of several flesh tones – usually Rakarth Flesh, Kislev Flesh, Bugman’s Glow, or Dryad Bark (with Bugman’s Glow for the base color on the pinker tentacles) and then using different shades and washes on that to create interesting combinations, then coming back and doing a little wet blending around the edges. For this guy, I’ve started with Cadian Fleshtone and shaded him with Agrax Earthshade on the fleshier parts and two coats of Biel-Tan Green on the parts I want to look green and sickly. I’ve tried ot hit everywhere there are going to be boils with the green in order to lay the groundwork for those diseased parts of the body. You can also get some interesting combinations here by shading Kislev Flesh with Biel-Tan or Coelia Greenshade, which is typically how I did the green sections of flesh, and shading with Carroburg Crimson and Druchii Violet is helpful for doing the tentacles – and the areas where the washes meet give you some great contrasts and transitions.
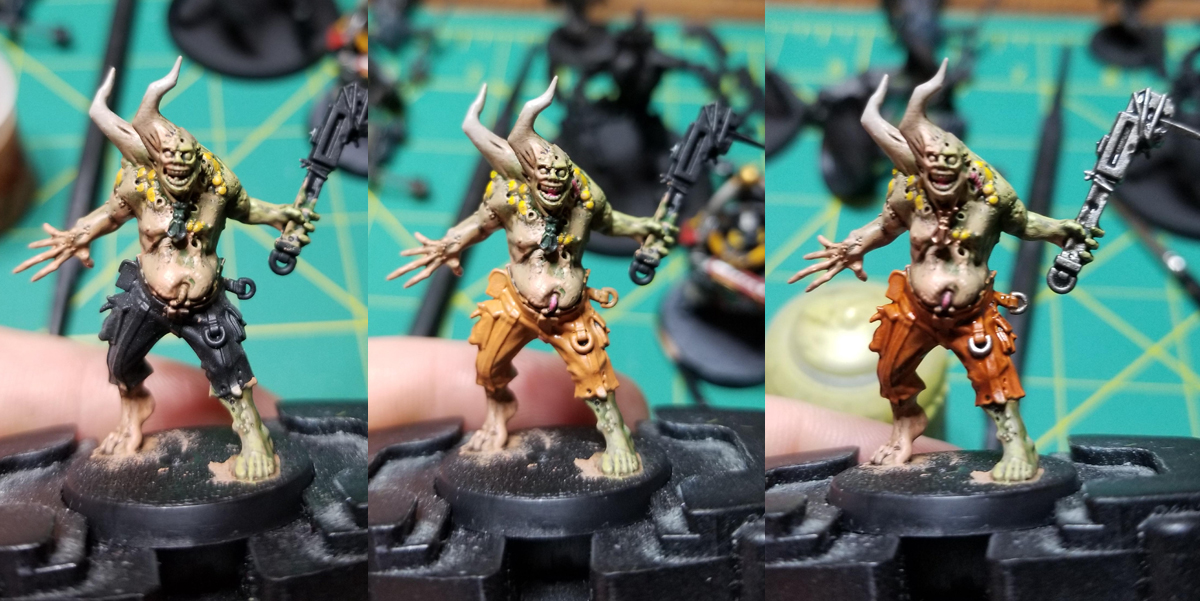
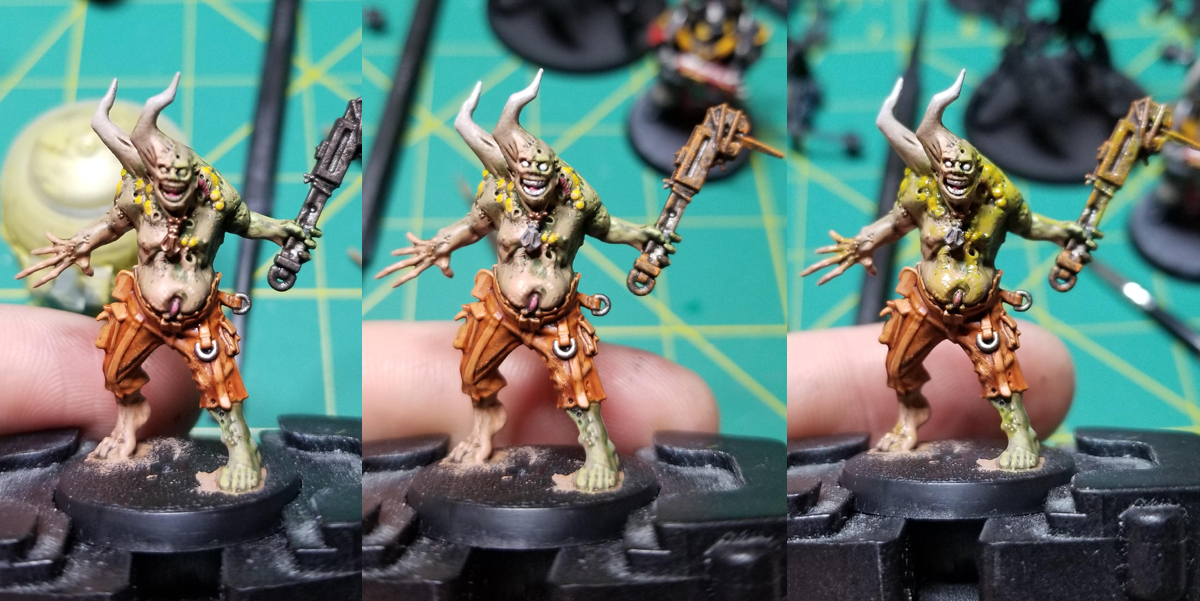
Once I’ve laid out the washes, I come back and highlight the fleshy spots with a mix of Cadian Fleshtone and Ogryn Camo for the greener spots. The pants here got a coat of Jokaero Orange before being washed with Fuegan Orange and Agrax Earthshade (the re-highlighted with Jokaero), and I paint the pustules at this point with Averland Sunset and spots of Flash Gitz Yellow for the highlights. The tongue and pink maggots will get a coat of Emperor’s Children at this point as well and I highlight the bones with Rakarth Flesh.
There are a few bits to finish here – the steel gets a coat of Leadbelcher and then spots of Typhus Corrosion and a drybrush of Ryza Rust to look old and rusted. The copper parts get a coat of Balthasar Gold and then a coat of Agrax Earthshade. Finally I need this guy to look and feel gross, so I coat big chunks of the model with Nurgle’s Rot, paying particular attention to the boils and snotty parts of the model to make him look appropriately gross. If I’ve done things right, the model will look kind of wet even when it’s dry.
PierreTheMime – Zombies
There’s nothing like the classic concept of the walking dead. Zombies run the gamut from completely harmless to extraordinarily dangerous, depending on the storytelling involved. Often times they are a grim reminder of death, the slow growth of an ideology within a society (which is always topical), and/or a tragic and cautionary tale. Other times they sing in musicals, but we don’t talk about those here.
For my quick-paint HTPE Zombies example, I’m going with a zombie out of Fantasy Flight’s Mansions of Madness boardgame which offers a large variety of cult/mythos-inspired beasties for players to run through/from. For this particular model I decided to go with a long-buried zombie, which I figured would be a nice break from all those purples and greens from their 40K brethren. These models are small, so they’re a bit light on details but we can make up for that with a little extra paint. As I tend to prefer darker tones (unless I’m using contrasts), I primed this model black.
Step one, I made a base 50/20/30 mix of Abaddon Black, Balor Brown, and Ushabti Bone. I watered it down just a touch before applying it to let it apply thinner on raised areas to give a little extra shading. Use a little extra paint and occasionally give it a little water so you can continually add colors to the mix as you go.
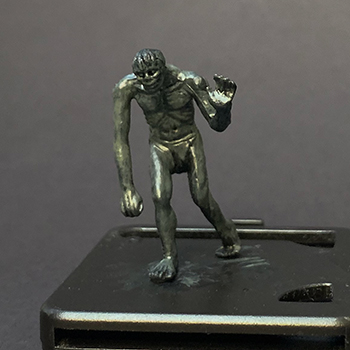
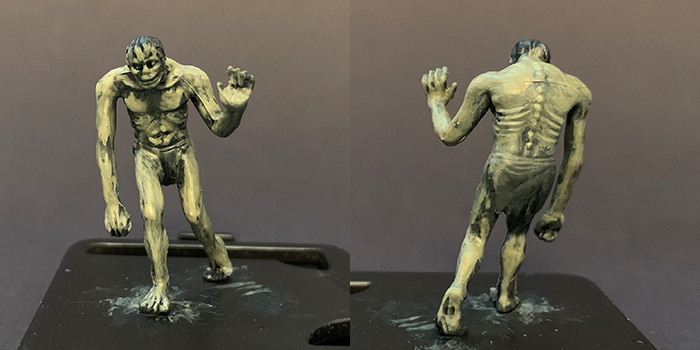
Next, add in some additional Balor Brown and Ushabti Bone, going over raised areas with multiple layers to improve the consistency. Additionally, start adding some streaking lines along the muscles to add some definition. Withered a decaying bodies with dried up tendons show pretty well and it’s a simple way to get more detail onto the model.
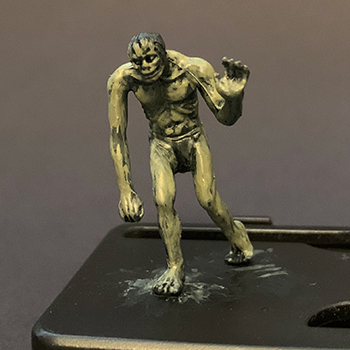
Add some additional Ushabti Bone and do another round, this time further going over raised areas and adding better detailing to the skeletal structure (this shows pretty well on the back on the photo below).
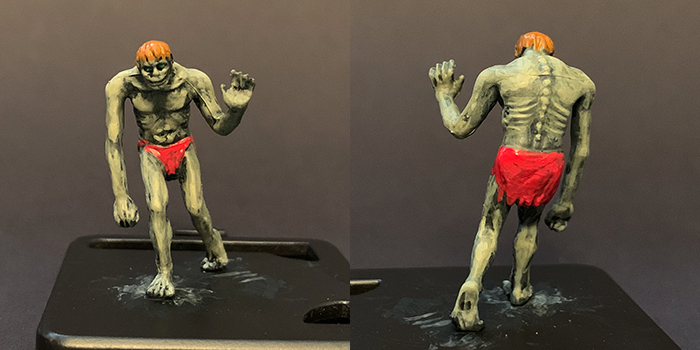
Next, do your non-flesh colors. I used Balor Brown for the hair, Warpstone Glow for the eyes, and Wazdakka Red for the tastefully placed rags.
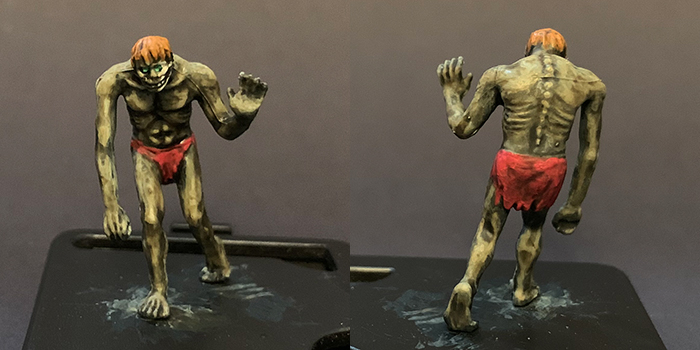
On this model there was a bit of exposed bone on one side of its face, so I used a watered down application of Wraithbone to add in the showing cheek and jaw bone, along with some teeth. Finally, hit the zombie with a wash of Agrax Earthshade and perform some touchups where appropriate. The example below took about 20 minutes from primed to complete. There you have it, a quick and dirty shambling monster!
As a Death Guard player, I am positively swimming in Poxwalkers–I have around 60 painted, not that I almost ever play close to that many. I may as well offer some examples of my zombie horde, powered by the magic of contrast and washes:


Evan’s Pastel Palette Zombies
Like TheChirugen, I wanted to showcase a brighter method of painting zombies. Probably my biggest joy in painting them is that you can toss pretty much whatever colors that you like in there and they’ll look great. Green, Blue, Purple, Yellow, Orange, Pink? Any color will look great as an undertone for zombie skin. For this tutorial I’m using a mantic plague zombie model.
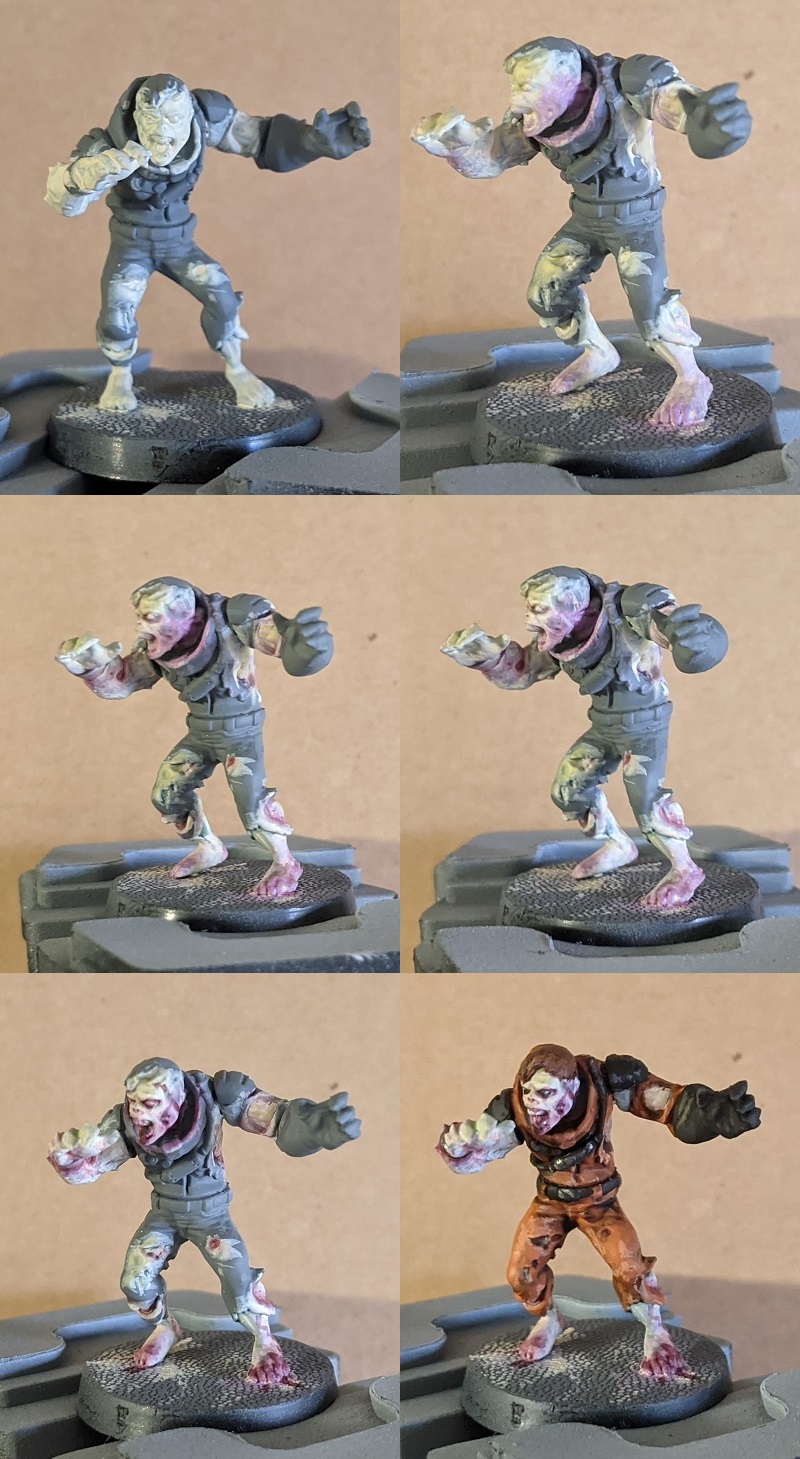
My zombie starts with a solid undercoat of VGC Elfic Flesh. I’d advise a coat more than I put on, as the unevenness I left in bits has to be patched up later. This is a very pale, slightly green/yellow tinged flesh tone that I don’t often use for actual flesh, but paints a mean zombie. Any similar cool off white such as Pallid Wych flesh will do admirably, or you can easily mix your own with very little paint.
Step 2 is to mix in a tiny bit of purple into your off white base. I used VGC Hexed Lichen. It’s hard to overstate how little purple you need here. Take a beat up, preferably somewhat larger brush and stipple this on in areas you want to be purple. I concentrated on areas likely to see a lot of bruising, like his feet and the swollen, bloated area on his right arm where there is a metal brace constricting his skin. As an artistic decision, I also wanted his face to fade from purple to cooler colors, so I made sure to hit the backs of his cheeks and neck with my purple mix. Then I took VGA Dead Flesh (A very pale green), mixed it about 1:1 with the Elfic Flesh, and stippled that on some other areas to give the skin more tonal variation and cover up some bits I hadn’t properly covered with the basecoat.
For Step 3 I thinned down some washes with Vallejo Glaze Medium. I thinned them a lot, enough that water would make the paint. Honestly, any medium will work just fine for this, so if you have contrast medium, lahmian medium, or even matte varnish, it should work just fine for this step, you’ll just get subtly different results with each one. I hit the purpleish areas and the skin around them with thinned Carroburg Crimson, and the rest with thinned Coelia Greenshade to give the model a bluish, dead look.
Step 4 is a very subtle highlight back in with some of the Elfic Flesh mixes that were still on my wet palette, brightening up and redefining just a couple areas like toes, the shape of the face, a few boils, and a couple spots where the wash had been a bit too much.
The last step on the skin was to go in with unthinned Carroburg Crimson and very selectively pick out a few more recesses and accentuate the bruising. I probably should have thinned it slightly to keep the effect more subtle, but I think he turned out well in the end.
Finally, you paint the rest of the owl. The orange hazmat suit is Jokaero Orange washed with Agrax Earthshade and then gone over with Jokaero Orange again, leaving the recesses, then a quick final highlight of orange with Elfic Flesh mixed in to tie it into the pastel scheme. The gloves, belt and eyes are VGC Black with some white mixed in as a highlight (The eyes getting a dot of fairly bright grey mixed with the same.) The metal is Vallejo Mecha Air Dark Steel washed with Nuln Oil and highlighted with Vallejo Mecha Air Steel. Finally, the mouth got some VGC Warlord Purple and a wash of Carroburg Crimson, followed by a highlight of Warlord Purple with some Elfic Flesh mixed in to bring it closer to pink, and pure Elfic Flesh to pick out the teeth.
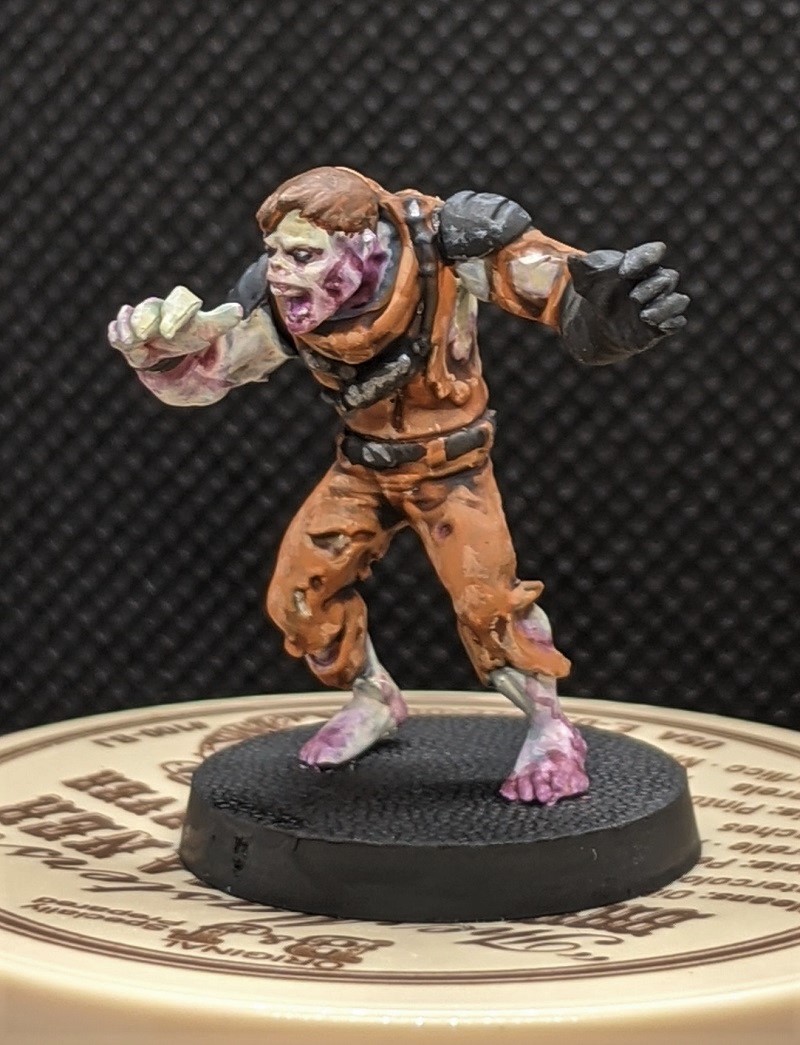
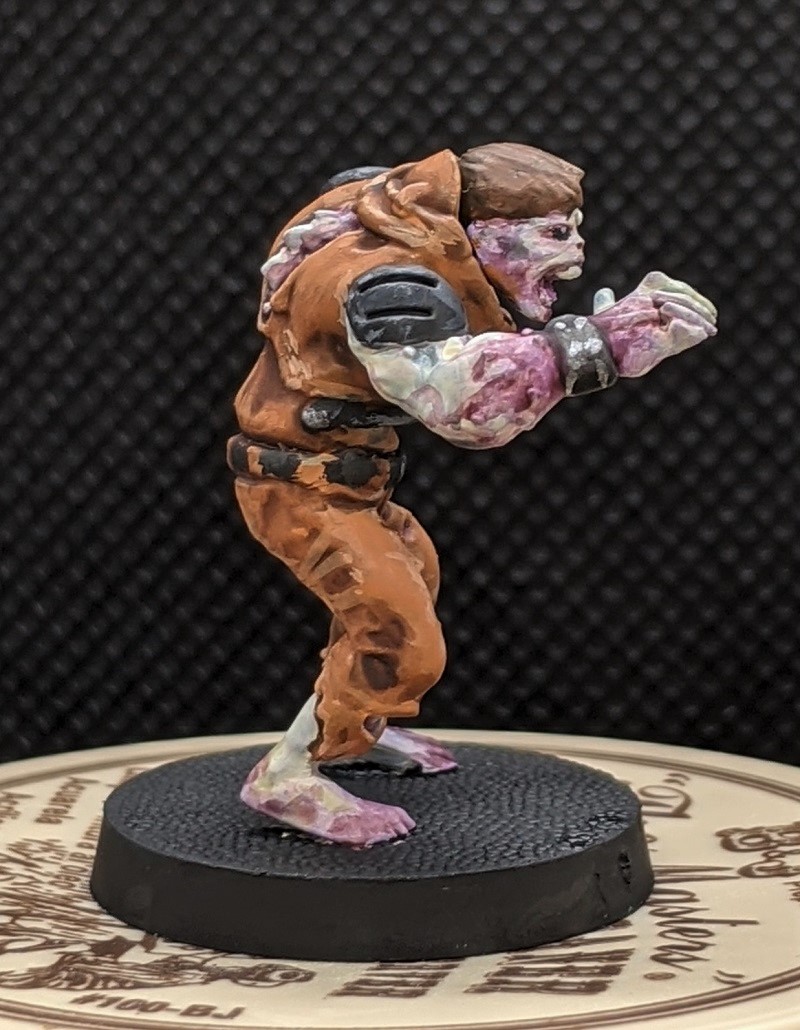
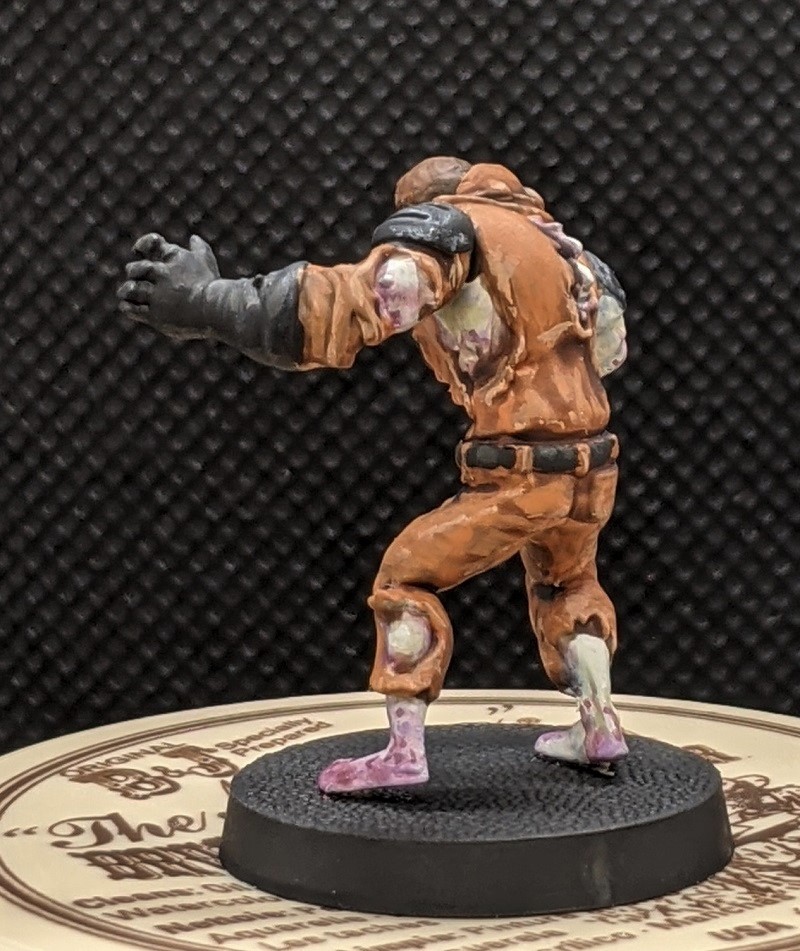
And your zombie is complete, in all it’s glory!
Craig “MasterSlowPoke” Sniffen’s Blackstone Zombies
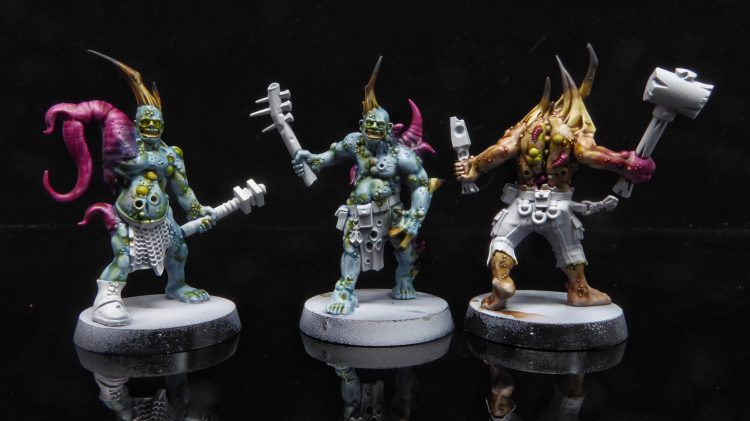
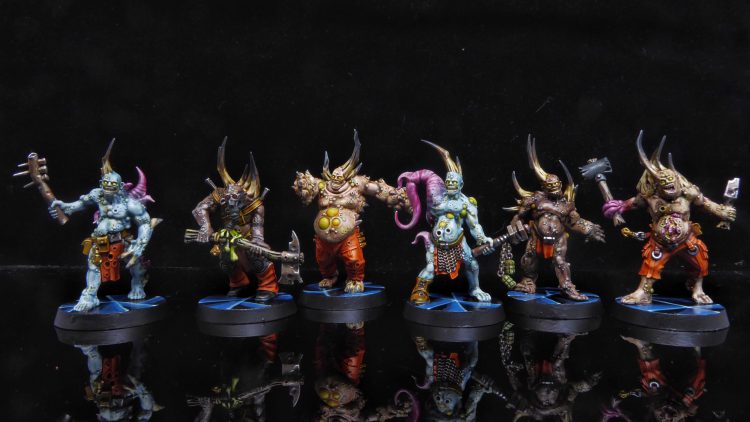
In Blackstone Fortress: No Respite, you will typically encounter Poxwalkers in small groups and having an easy way to identify them is important. Most zombies find clothes incredibly constricting, so trying to pick them out based on what little tattered rags they wear is difficult. I did some searching around and could not find a whole lot written about how to paint dark skinned zombies, so I decided to try my hand at it. I also wanted to try some long-dead zombies, where the blood has largely left the body, with a pallid blue hue. Along with your more typical white dude zombies, I figured that’d be enough to help identify which group is which on the tabletop. Despite buying a lot of Contrast paints last year, I haven’t gotten really to use them a whole lot, and zombies felt like the perfect models to test them out on.
The light skinned zombies got a relatively thin coat of Guilliman Flesh. You want them to still look pale, so keeping it thin is best practice. The darker skinned zombies got basecoated with Cygor Brown. Some contrast paints are more densely pigmented than others, and I’ve not found one thicker than Cygor. You’ll want to thin it with at least 50% Contrast Medium to preserve some of the detail and get the contrast effect we want. On the bluish zombies I used Nighthhaunt Gloom. This is a weird paint. It’s not quite a wash, it’s not really contrast, and it’s not a glaze. To get it to work as a contrast paint, I also mixed this one 50/50 with Contrast Medium. For all of these, you will want to avoid any of the largest boils and sores, as we will make them stand out a little more. I also kept a small halo of primer along the outer edges of the tentacles to make blending easier later.
The rest of these steps are going to be identical for all of the skin colors, to help them be cohesive and look natural with each other. To shade the skin from this point, I used the wash Athonian Camoshade. This is an excellent and versatile color that’s great for making things look grimey in an organic way, and there’s no better organic grime than zombie juice. You’ll want to put a little around the big boils, but try to keep from slopping it onto the boils themselves.
Poxwalkers are lousy with horns and bone. There are three schools of thought when it comes to shading them – leaving them pure bone (like antlers), or shading them light to dark, either from the top or bottom to the opposite end. These are all acceptable choices, but I decided to go light base to dark tips as it looks a little more sinister. The horns got an all over coating of Skeleton Horde. Then, while it was still a little damp, coat the two thirds in Wyldwood, then the top third with Black Templar. Contrasts are great for wet blending on the models themselves. The teeth were also hit with Skeleton Horde, but not the rest of the paints, as blending on a 0.1mm tooth is a bit much for zombies.
I also at this point tagged the sores with Plaguebearer Flesh, then when that was dry did a thin glaze of Casandora Yellow to heighten the saturation and make them look more gross.
For the tentacles some of them have, I first put a small ring of the flesh contrast paint around the base of them. I then grabbed Vulpus Pink and blended with the flesh contrast to create a gradient between the zombie itself and whatever demonic thing controls that tentacle. Vulpus Pink is one of my favorite contrast colors and I try to find any use for it I can. You might want to do another thin coat of Vulpus on the upper half of each tentacle to make the color more intense.
Finally, to brighten the zombies up and bring all the colors together, I did a light drybrushing of Screaming Skull. You will want a large soft brush for this – a cheap round makeup brush will do well. Do it very lightly and avoid staying in one spot too long. Drybrish this over the whole model, though I would go a little lighter near the tips of the horns. I am not very skilled at drybrushing and I overbrushed in a few spots, but at the end of the day you can’t cry over zombies too much.
The models are finished by painting the clothes and metals in whatever manner you think best suits them. Because these models were going to be used in Blackstone Fortress with the glassy teal basing style, I picked orange for their clothes, mostly done with Gryph Hound Orange with a little Agrax Earthshade. The rusty metals were basecoated Ironbreaker, then shaded in spots with Agrax and Feugan Orange, before doing an edge highlight of Stormhost Silver. The eyes were picked out in Flash Gits then Dorn Yellow. I am really happy with the way these Poxwalkers came out, especially the gnarly blue ones. It really makes me want to start Death Guard, but I know I have far too many armies sitting in the wings before I can even consider that.
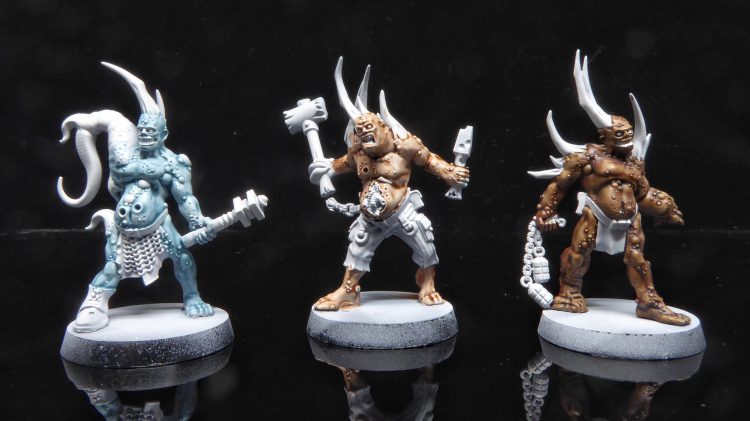
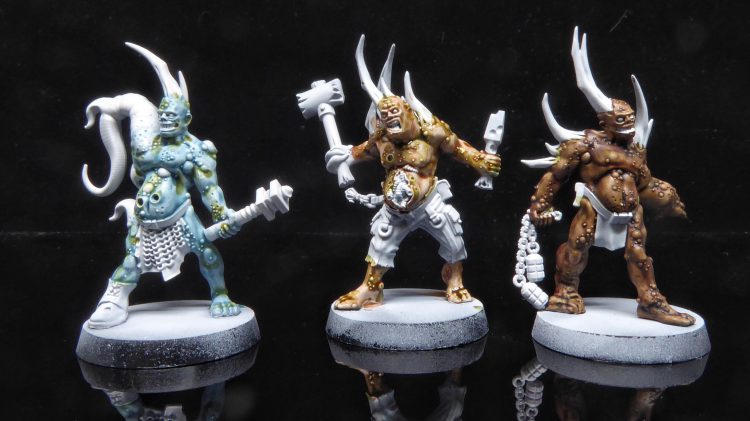
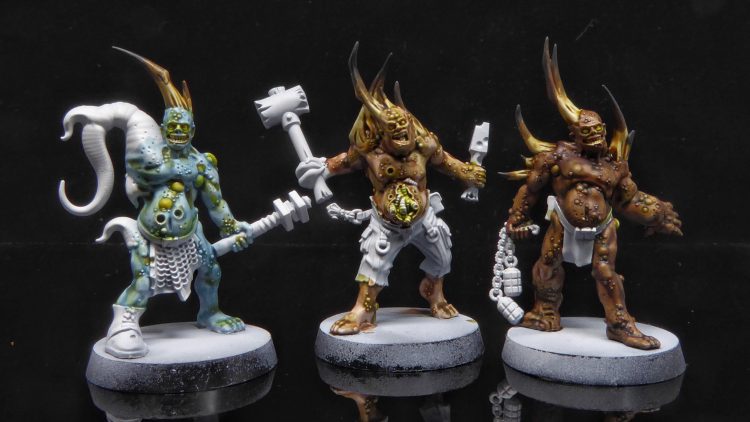
Daniel ‘Skails’ Rodenberg’s Deadwalker Zombies
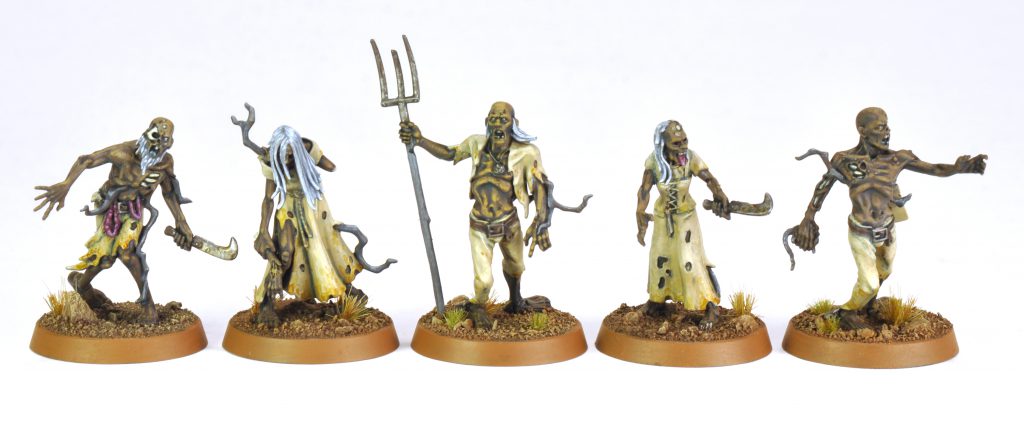
These Age of Sigmar Deadwalker Zombies are for my Hyshian Gravelords. I wanted to go with a look of dried out leathery zombies, reminiscent of Moorliechen or bog bodies.
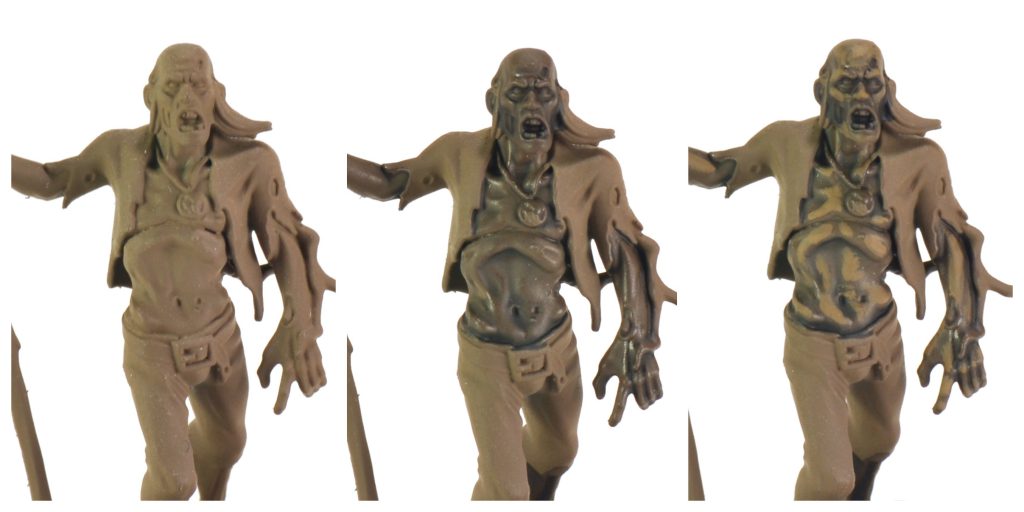
Left: Prime with stynylrez ebon flesh or basecoat medium brown.
Middle: heavy wash of nuln oil. Put it on thick. This helps define shadow and identify easier the raised areas that could use highlight.
Right: Layer of 2:1 Vallejo model color burnt umber to Vallejo game color bronze fleshtone.
Left: highlight layer of 2:1 mix bronze fleshtone to burnt umber.
Middle: spot highlight bronze fleshtone with previous mix. I like to make this layer more splotchy/stippled/sketchy.
Left: thinned incubi darkness in recesses.
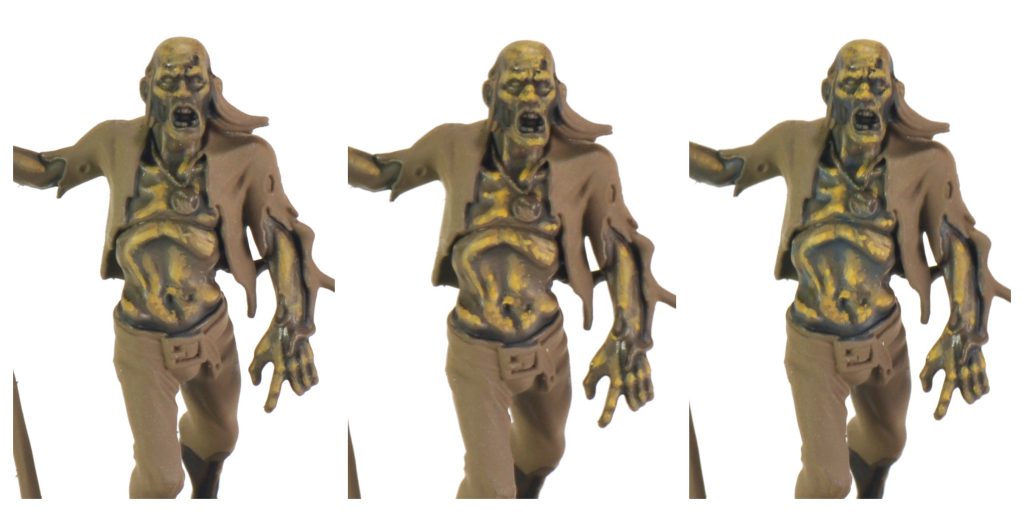
I eyeball most of my mixes, and for the pics I followed my guessed ratios exactly. A lot of my zombies probably had a closer to 1:1 mix of umber & bronze for step 4 (left on second pic). Anyhow some variation looks great in a zombie horde.
Lenoon’s Gross Bruised Method
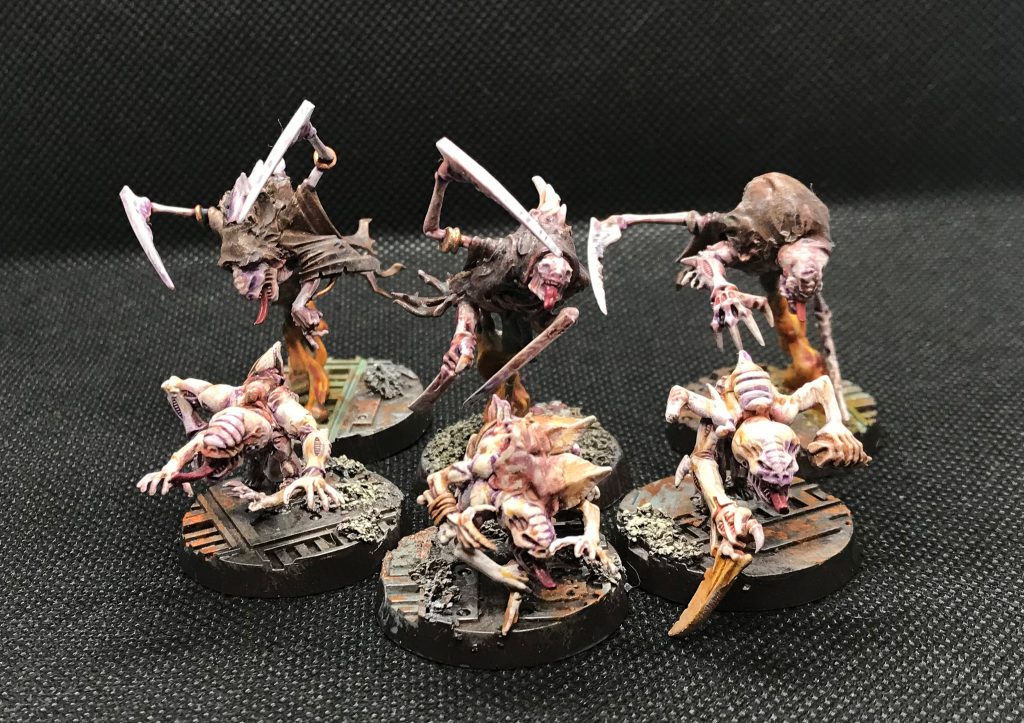
Genestealers were the first bit of 40k lore that I really dived into as a young ‘un which probably did me more harm than good. Since then I’ve built up various snatches of hive fleet with a distinctly vanguard organism feel. The strictly Tyranid part of the force is allied to my GSC, and examines what happens to a hive fleet when it fails in taking over, languishing in the literal doldrums as it gets sickly and weird in the underhive.
These guys are Age of Sigmar Bladegiests and Ghouls with various Genestealer, Hormagaunt and GSC acolyte bits crudely welded on with big messy blobs of greenstuff. Everything is given a spray of wraithbone to start, and then a heavy wash of druchii violet. Before that dries, take a sponge and randomly dab bits off – not just off the top, but getting the corner of the sponge into the crevices as well, letting it go where it will to really pull the wash unevenly.
The “normal” bits of skin then get a very watery layer of 1:1 Druchii violet and Pallid Wych flesh, and an extreme highlight of Pallid Wych flesh. Any mass of scar tissue or area I want to be a bit more disgusting will get a 1:1 mix of Kislev flesh and Ratskin, then pure Kislev and roughly applied lines and blobs of 1:1 Wych and Kislev.
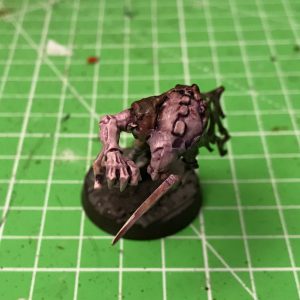
After that comes the fun part. On the colour wheel Green/Pink and Yellow/Purple more or less form complementary pairs, and the flesh wash over Pallid Wych ties it together to give a very “natural” look of shifting tones where your brain fills in a lot of textures and details that you’re not picking out deliberately. So take your mankiest, oldest, stickiest washes in flesh, yellow, red and green. Add the green to the deeper crevices, then water down until it’s barely there and add a glaze over any large areas of skin. Before that dries, blob on some of the yellow, red and flesh (I used Biel-Tan Green, Flesh Wash, Baal red and Lamenters yellow glaze). The watered down green should spread this unevenly, giving you a sickly, bruised look. It’ll mix in places and pool in others and generally look disgusting.
Once that’s dry, carefully pick out highlights if you fancy – I looked again at faces, head ridges and fingertips. Hitting tongues and interior ribbing with a strong red tone (Dark Flesh then Khorne Red), a violet wash and blood effects and the occasional talon with sepia and flesh tones finishes them off. You can scale this up well to the big tyranids, but watch out for pooling washes on large chitin panels. For the bases, the rusted, corroded and shitty underhive look is a simple boltgun metal base layer with watered down layer of typhus corrosion is finished with stippled Ryza rust and liberally dolloped on nihilakh oxide. Ta daaa! Some disgusting Tyranids spawned from a polluted gene pool.
When There is No More Room In Hell…
…our editors will still demand content from our contributors. Well, that wraps up our look at the walking dead and the nuances of painting their shambling corpses. If you’re looking for other techniques that will work on these models, be sure to check out our articles on painting Skeletons and Ghouls, which will give you some good alternate techniques. In the meantime if you have any questions or feedback, feel free to drop us a note in the comments below or email us at contact@goonhammer.com.

