In our How to Paint Everything series we look at how to paint, well, everything. That means not just how to paint models but also how to do certain techniques and use certain tools and materials. In today’s article, Head58, Kevin “Primaris” Genson, and srm are looking at how to use Decals and Transfers.
Putting transfers onto your models can help them look great and really tie an army together. And the good news is that Games Workshop throws a sheet of decals in with nearly every model for free out of the kindness of their hearts.
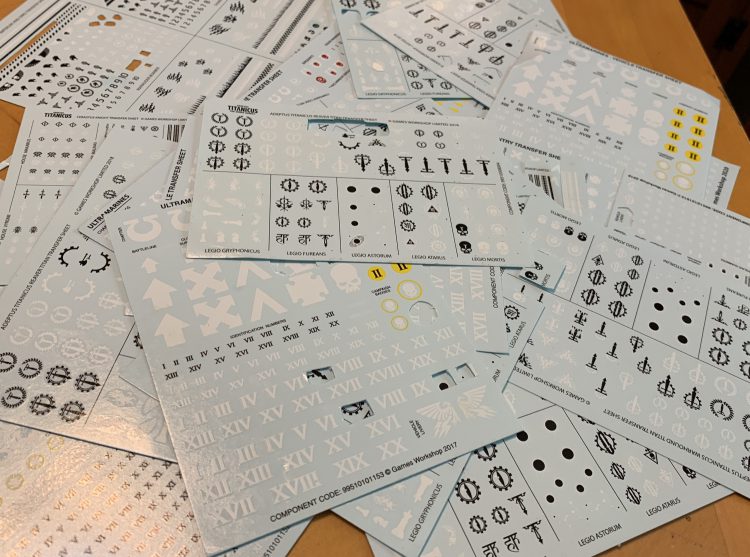
Before getting too deep in I want to clarify how I’m going to be using some terms. When I say “image” here I’m talking about the picture itself – the little Aquila or crossed swords or whatever. I use the term “decal” to refer to the sheet of paper that has a bunch of images on it, or a little cut out piece of the paper with the particular image you want. When I say “transfer” I’m specifically referring to the bit of plastic film that has the image on it, once the backing paper has been removed. Sometimes people may use the terms interchangeably but I’m distinguishing here for clarity, especially if it is your first time applying transfers.
But how do I get those little images onto your freshly painted jewel like objects of wonder? It’s actually incredibly easy. You only need a few tools and odds are you already have them in your kit:
- A sharp modeling knife – you could use scissors but you’re going to be cutting out some pretty darn small decals so using a knife (on a cutting mat! Don’t ruin your table!) may be easier.
- A shallow bowl of clean water. You don’t need much water; just enough to get a tiny piece of paper wet. If the decal gets really wet it will sink, so you probably don’t want to use a coffee mug (like I may have done) as it may be tough to fish your decal out. And don’t use your paintbrush cleaning water – you don’t want to discolor your decals. A damp tissue or paper towel is also a good place to get transfers damp enough to separate, but not soaked. Transfers don’t like separating once they’re submerged.
- Tweezers for pulling the decal out of the water and handling it as you get it towards the model.
- Micro-Set and Micro-Sol. I don’t usually like to specify brand name stuff but these are what you want. A small bottle of each will last you forever. Micro-Set softens decals and helps them follow the curves and details of surfaces, while Micro-Sol dissolves the film around them and gives a “painted on” effect.
- A paintbrush you don’t care much about anymore. I don’t know if Micro-Set and Micro-Sol will damage brushes but I’m not risking my kolinsky sable brushes in it. You want one small enough that you can apply some Micro-Set over a kneepad or something, but it doesn’t need to be an insane detail type brush.
Here’s how you do this thing: First, put some gloss varnish down on the part of the model where you want to put the image. That makes the surface nice and smooth, which helps your transfer to lie flat. Citadel’s Ardcoat will do the job, and much like the Micro-Sol, a single pot will probably last you forever. Let the varnish dry so it’s not tacky. It shouldn’t take more than a few minutes based on the humidity of where you’re at, but you can wait up to an hour to be on the safe side. This is a somewhat optional step, but we’re walking you through how to do this the right way, not the SRM way.
The decal sheets themselves have the images on a piece of paper covered with a thin layer of clear film. They are what’s often called “waterslip” or “waterslide” decals, because when they get wet the transfer with the image on it slides (or slips) off the backing paper. You don’t need to peel off the film or anything before you use the transfers. Just choose the right sized image for your model and cut out around it with your knife. How tightly you cut the decal is going to vary based on design and where you’re placing it, as you may find that Ultramarines decal doesn’t quite sit right on the curve of a pauldron unless you cut it pretty tightly. You can definitely still have some film around the decal though, as said film is transparent and will later be dissolved by Micro-Sol, and blended in with varnish.
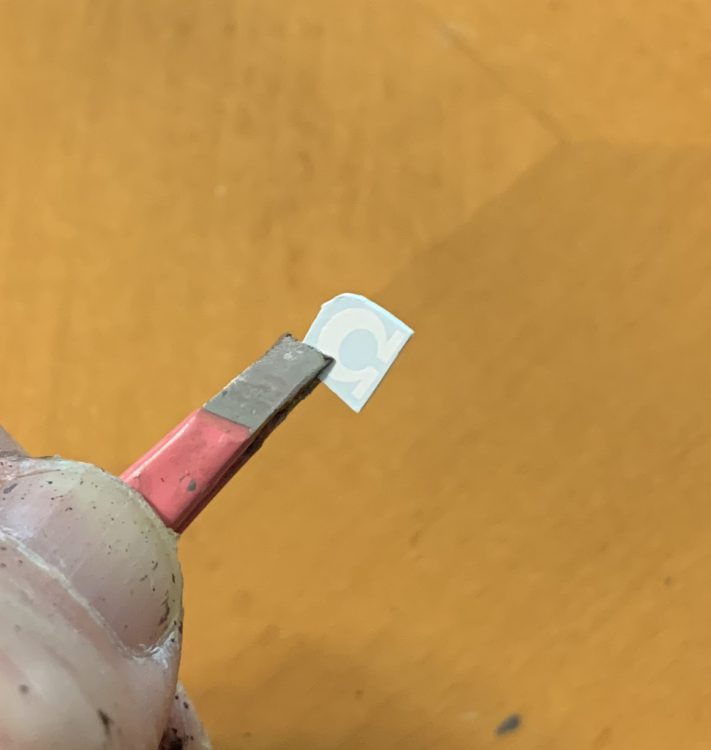
Once you have cut out your decal just open palm slam it down into the water or tissue. Leave it there for a couple seconds, it doesn’t take too long. Dependent on the age and brand of the transfer, this could take anywhere from 15 to 90 seconds. While it’s soaking grab your brush and put some Micro-Set (the blue one) on the model where your image is going to go.
Take your tweezers and pull the decal out of the water. I usually put it onto my fingertip, image up. Then you can very gently brush the decal with another finger or with your tweezers and the transfer itself will slide (or slip) off the paper. Use the tweezers again to put the transfer onto your model.
SRM’s note: I just pick the transfer up with my brush, place the whole dang thing, paper and all, next to where I want to put it, and pull the transfer onto the model using my brush. It’s not a better way to do it, just another way to do it.
From here I usually use the tweezers or the brush to position the transfer exactly where I want it and make sure it’s straight. Put a little more Micro-Set on top of the transfer once it’s in place, especially around the edges of your transfer. The Micro-Set will dissolve the film, flattening it out and leaving your image behind on the model like magic.
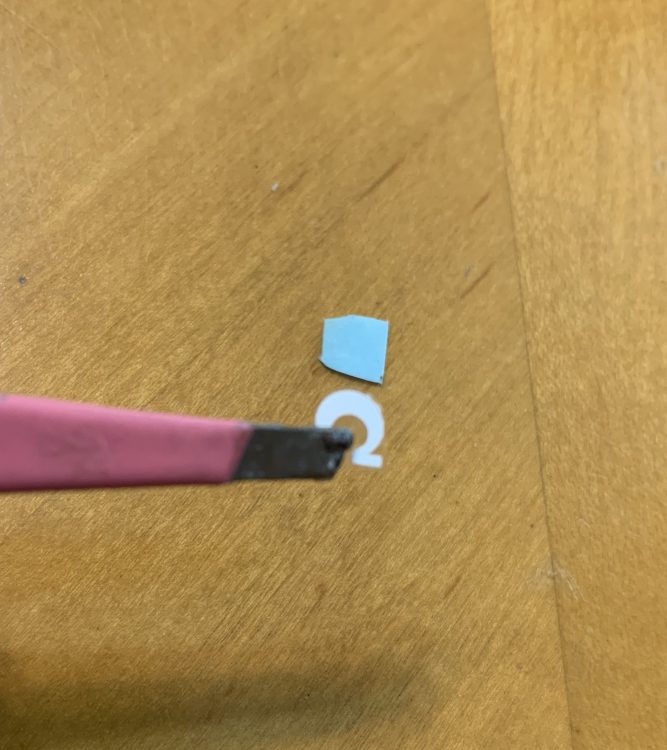
Give it a minute or two to dry and then pat over it with a damp piece of paper towel to work out any wrinkles. That’s not usually much of a problem except for on larger decals, but keep an eye on it in case it starts to wrinkle up. If there are wrinkles, wait for it to dry completely and apply another coat of Micro-Set. Continue doing this until all wrinkles disappear and the transfer is exactly where you want it. If there are wrinkles or bubbles that are still being stubborn, poke them with a needle or the very, very tip of your sharpest modeling knife and apply more Micro-Set.
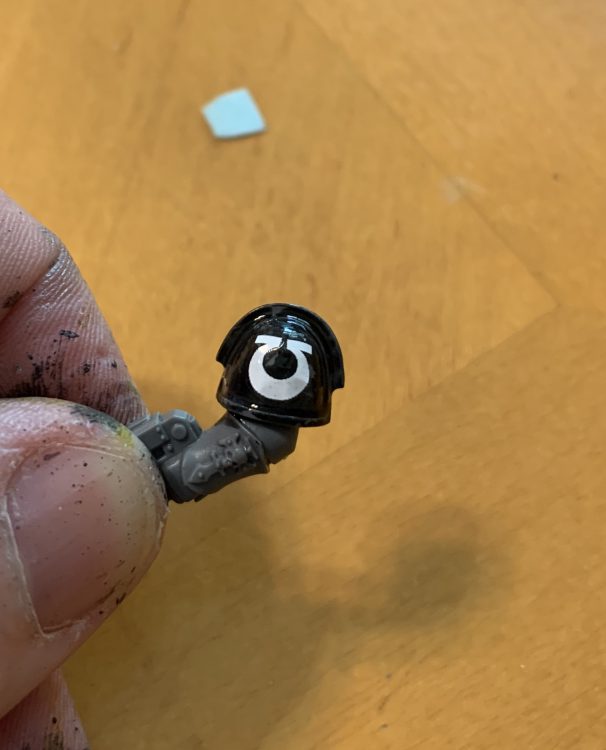
If the place you’re putting the transfer has an unusual surface, like a lip or something you want the decal to bend over, put on a little Micro-Sol and that will help the film be more flexible. I don’t use Micro-Sol very often – you don’t really need it for shoulder pads or rhino doors or surfaces like that.
SRM’s note: I use Micro-Sol on literally every single decal I use, as invariably a two dimensional object (a transfer) will not play nice with a three dimensional object (a Space Marine’s tiny kneepad). This is especially useful on surfaces with texture, such as vehicles where there’s rivets and panel lines. Use this as you see appropriate.
Set your model aside to let it dry and then you are good to go. Remember to always do any weathering after putting on transfers so you don’t have a nice neat image in the middle of your oily, grimy model – that wouldn’t look very cool. You should definitely varnish your entire model when all is said and done. Transfers are delicate, and Micro-Set/Sol only make them moreso. Varnish will also even out any inconsistencies with the decal or any stubborn bits of film the Micro-Sol didn’t dissolve. There’s a number of spray and airbrush varnishes available, but a simple matte will do.
SRM’s note: I use Testors Dullcote. You can get it anywhere and it does the job remarkably well.
Other Sources for Transfers
If your model doesn’t come with the transfers that you want to use, you can always look around the world wide web. There are lots of vendors out there who make waterslide (or slip) decals with images with various sci-fi/fantasy/historical/whatever themes. Some places do custom decal sheets, which may be more expensive but can give you exactly what you need. Just make sure the vendor you choose isn’t selling sheets of crypto-fascist insignias like black sun symbols or totenkopfs and shit. Spend your money elsewhere.
SRM’s note: Or message the decal maker and let them know they’re selling hate symbols! Sometimes manufacturers will make products based on customer requests and won’t know the history behind what they’re making. If both of you are reasonable, they may stop selling them.
Don’t neglect looking at model railroad supply sites either – those folks are serious old school modeling nerds and have all kinds of tricks they’ve worked out over the decades. Especially if you’re looking for standard letters or numbers you may find exactly what you want (and cheaper) on a train site.
Making Your Own Transfers
Sometimes the design you want for a transfer isn’t commercially available, such as a custom Chapter or Knight House. If your freehand just isn’t going to cut it, you can try to make your own transfers. To do this you will need:
- An image file
- Waterslide Decal Paper
- An inkjet printer
- Acrylic spray sealer
You can make the image file for your design in whatever way works for you – illustration software, draw it out on paper and scan it, find something public domain (wink) on the internet, etc. All that really matters here is that you can scale the image to the size of where you want your transfer. If it’s going to be something the size of a Space Marine pauldron keeping it simple is best or the detail will get lost when it is shrunk down. Drop that image into a document that can be printed, maybe with varying sizes just to be safe. Make multiple copies of the image on the document if you know you’ll be needing several of your transfers.
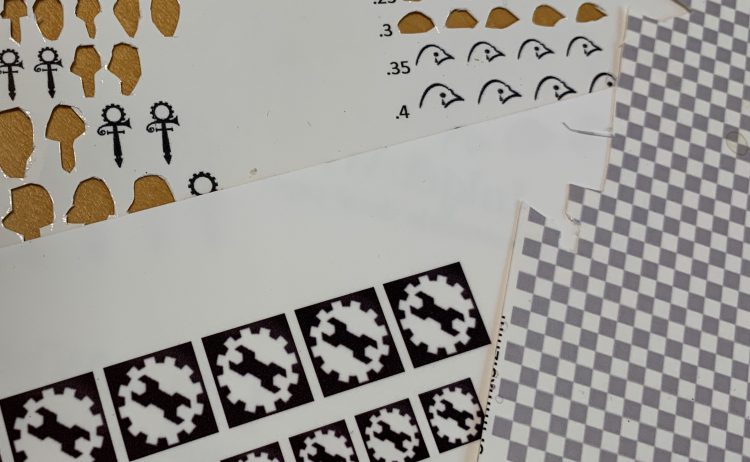
You can get waterslide decal paper online or possibly at an office supply or craft store. It’s used by normals to put designs saying “Live, Laugh, Love” on mugs and vases and the like. Gross. The paper comes in standard printer paper sizes, and if you buy a decent sized pack and you may be all set for years, so go ahead and splurge on the best quality paper you can find.
There are two different kinds of decal paper, clear and white, and it’s important to think about the design you’re using to know what kind of paper you want. The problem is that inkjet printers can’t print white ink. If you make an image with parts that are colored white the printer just leaves those spots blank. So if your design has any white in it you’re going to need to use the white paper rather than the clear (which as the name suggests would just show whatever color is underneath it when there’s a blank spot). This isn’t terrible but when you’re cutting out the transfer you’re going to have to be much more careful to cut around the edge of the image so you don’t have a big white border. When using a Games Workshop transfer or a homemade one on clear paper you don’t have to worry about the edges because they’re clear. So in general if you can avoid white in your design you’re usually better off. I’ve found the white paper transfers don’t blend into the model as well because of the defined edges. It’s okay, but not great.
Once you have the design and the paper it’s time to print on your waterslide paper. You need to use an inkjet printer and not a laser printer for this because it needs to actually leave the ink behind to be bound to the film for the transfer. When printing your document with your designs on it be sure to use the highest quality settings possible – most inkjet printers are pretty dumb and don’t give you a lot of fine setting choices but go for Best quality and photo printing options if you have those available.
When the page has printed let it dry for a couple minutes and then give it a very thorough coat of clear acrylic spray. I use Krylon Crystal Clear Acrylic because I saw it recommended on a number of crafting websites, but you can use whatever is available for you. Let that first coat dry and then give it another coat, then let that dry and hit it a third time. You want to make sure the paper is completely sealed.
From there it’s just like using any other transfer – cut it out from the sheet, drop it in water to remove the backing, stick it on with Micro-Set and Micro-Sol and you’re off to the races!
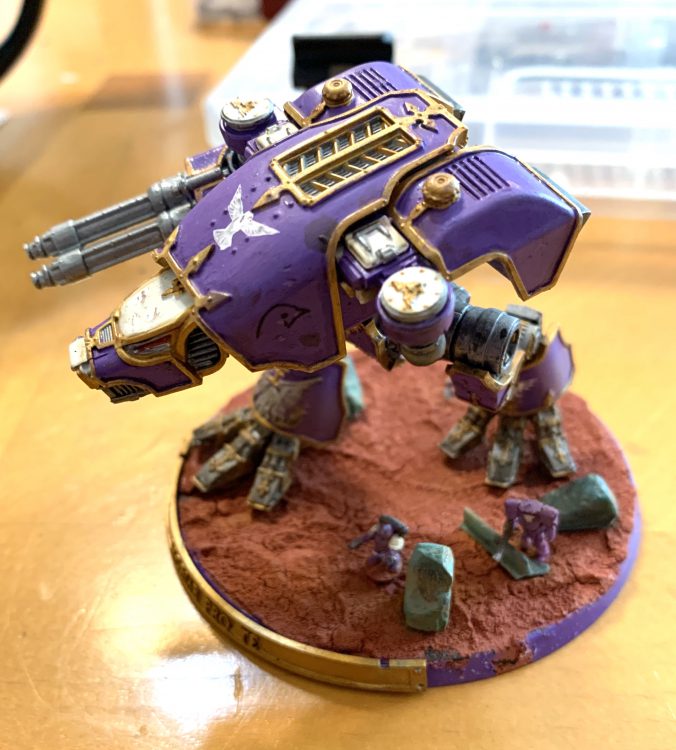
Weathering Transfers, the SRM Way!
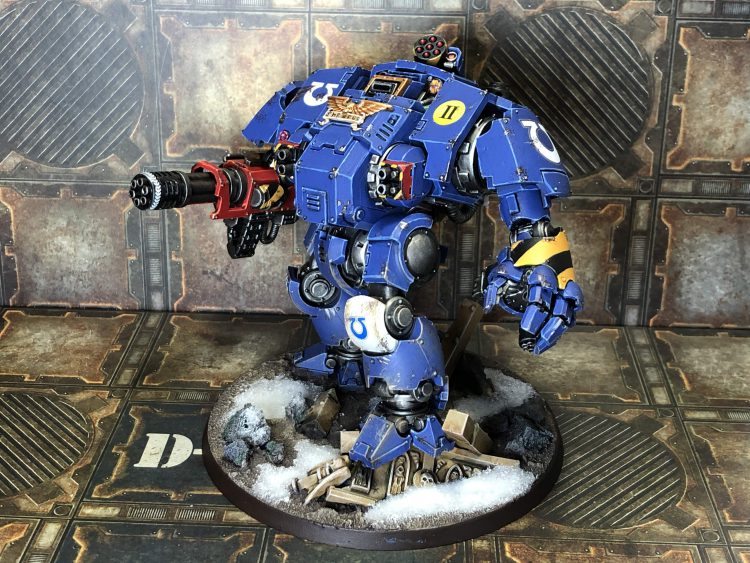
The last step towards really integrating transfers into your scheme is to weather them. As head58 said earlier, a pristine decal among all the grit and grime of your tank is going to look downright silly. If you’re not weathering your model you don’t really need to worry about this, but I’m a fan of sponging, drybrushing, and weathering powders. You can do this after varnishing, or be like me and do it right before. I find multiple coats of varnish can dull the colors of a model, and if you’re using weathering powders you’ll want to varnish afterwards anyway.
Transfers are delicate, but they’re also slippery. Paint will have a hard time sticking to the transfers, even after they’re partially dissolved. To solve this, I would brush on some matte varnish or be a total Philistine like myself and just use Citadel Lahmian Medium. It’s not a varnish, but it will cover the transfer for the time being and give you a more workable surface. Don’t flood the area with it, just a barely thinned brushload will do. After a few minutes this will be dry, and you can get to work.
Sponging
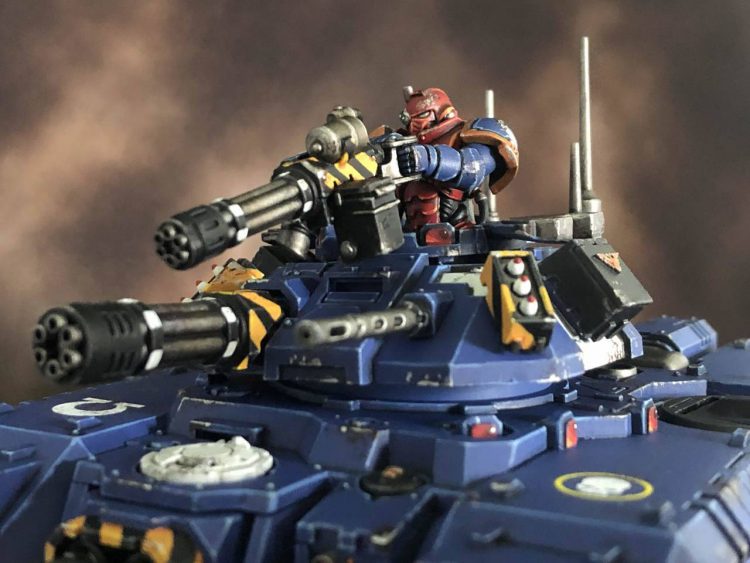
Sponging is a technique where you take a bit of sponge or foam (the pluck foam of any army case will do, as will the foam packing from a blister pack) and use it to dab paint in a semi random fashion to represent chipping, peeling paint, light battle damage, whatever. Tear off a small piece of foam, dab it into the paint of your choice (I use Citadel Rhinox Hide, a dark and ruddy brown) dab a bit off onto a paper towel, and get sponging! Focus on edges and areas that would get the most wear and tear, but still try to apply it fairly randomly. I always try to hit each decal just a little bit, as it helps blend them into the model. Less is always more when it comes to weathering, and it’s easy to add more later.
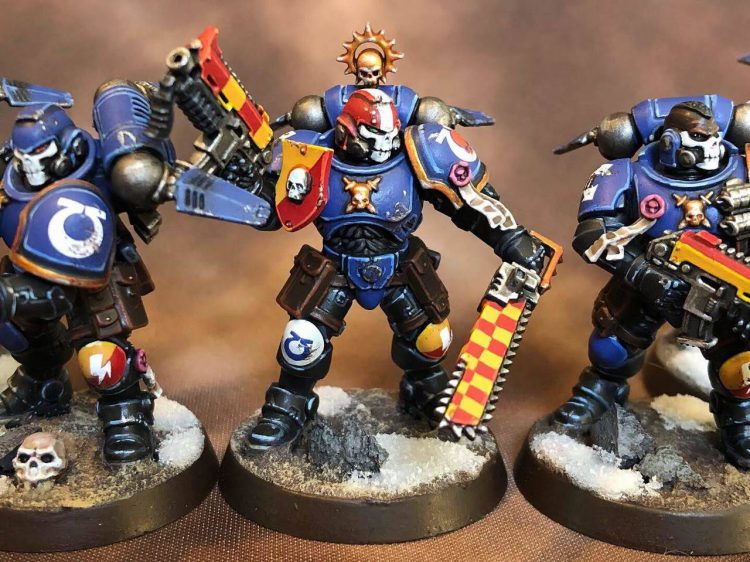
Chipping
There are tons of techniques out there to show this off, but I like to cheat a little and just fill in where I’ve sponged. I find the areas that have the highest concentrations of brown from the sponging and fill them in a little with jagged patches of metal. I use Citadel’s Stormhost Silver for this as it stands out quite a bit, but pick what works best for your scheme.
Drybrushing
I don’t really do this on infantry models, but on all my vehicles I usually drybrush up to about 1/3 of the way up the model to simulate dust and dirt being kicked up. Naturally, there will be transfers near the bottom, so I’ll hit these up in the process of that drybrush as well. I try and build up 2-3 layers of browns, starting with a darker brown at the very bottom, a lighter brown covering that and going just a bit higher up the model, and an even lighter one going slightly higher than that. I usually use Citadel’s Steel Legion Drab, Tallarn Sand, and Karak Stone for my progressively lighter trio of dusty browns, but you do you.
Tying it All Together
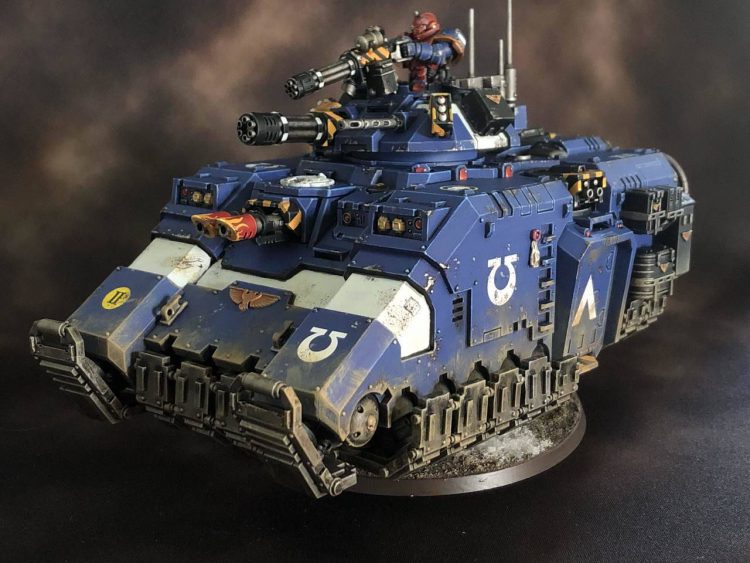
And there you have it! Your transfers look as dirty as your model is and have been properly integrated into your paint scheme.
Have any questions or feedback? Drop us a note in the comments below or email us at contact@goonhammer.com.


