This article is part of a larger series on how to paint Space Marines. To return to that series, click here.
The Tome Keepers are an Ultramarines Successor chapter who were first introduced in White Dwarf #453 as part of a new series on designing a chapter. Although the series was ostensibly about creating your own chapter, the Tome Keepers stuck around afterward as a sort of flagship chapter for White Dwarf and received a number of rules updates, from custom chapter rules to special characters to Crusade rules in 9th edition. At the time of this writing, they’ve just received an update with Crusade rules for 10th edition.
Tome Keepers Heraldry - Click to Expand
Painting Tome Keepers
Painting Tome Keepers is a pretty straightforward process as a chapter that’s largely monochrome. You could ostensibly prime these guys Wraithbone, shade them and call it a day but I think that makes them a little too bright/white for what their scheme actually calls for so I’ve gone with a bit darker take.
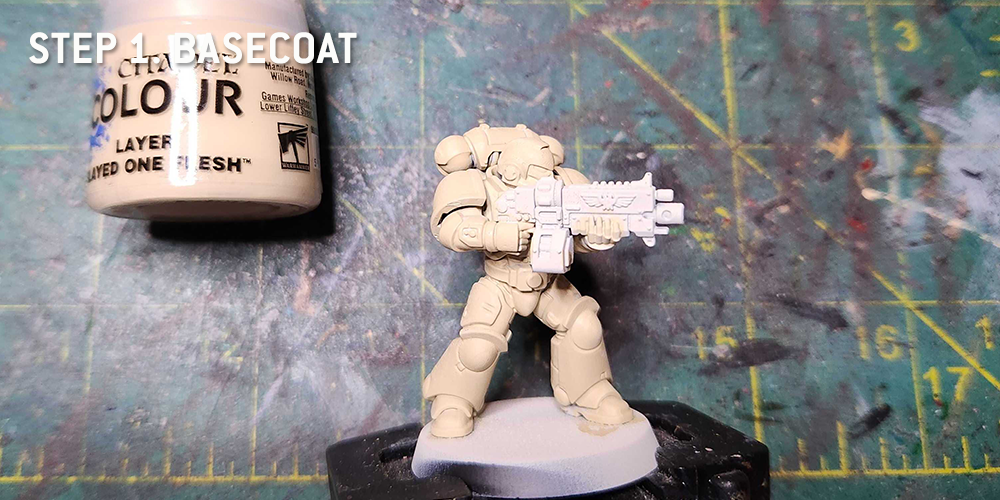
Step 1. Priming and Basecoat
I’ve chosen to prime the model Wraithbone here, as trying to get good bone/paper color over black would have been too much of a chore. I wanted a darker color after that, and while I debated going with Rakarth Flesh I ended up choosing Flayed One Flesh as my base color. If you want something a little more brown, Rakarth would work fine here.
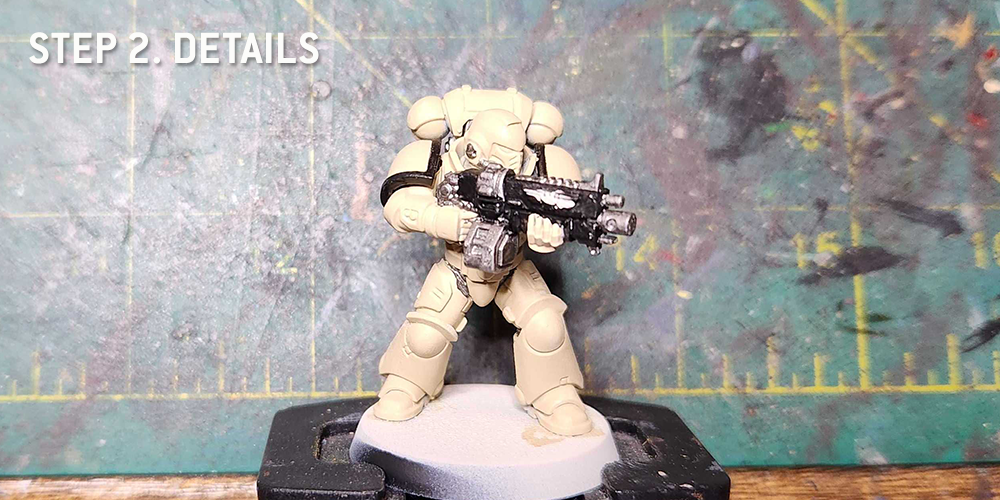
Step 2. More Basecoats
Next I basecoated the other parts of the model, doing the shoulder trim and bolter with Black Legion contrast paint and the metal parts with Leadbelcher. The chest aquila I painted with Flesh Tearers contrast paint.
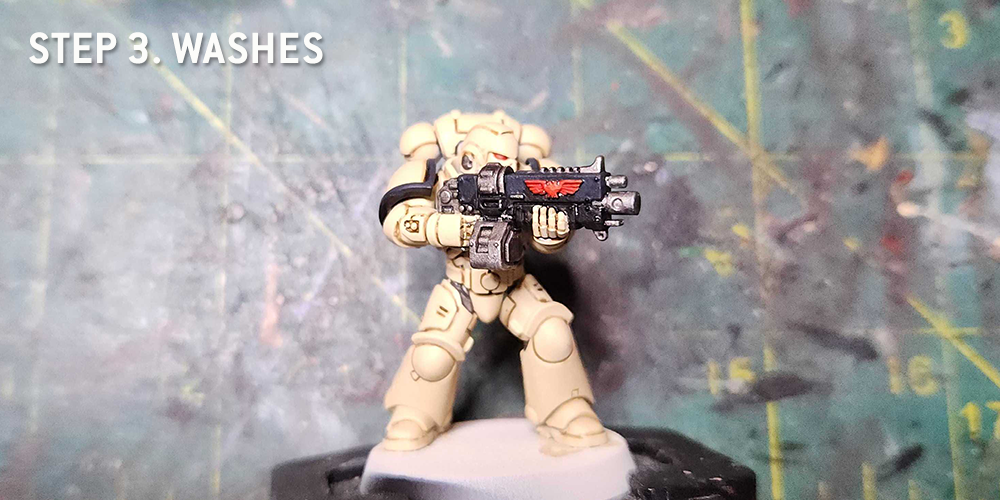
Step 3. Washes
This was the most time-consuming part of the model. I painted the cracks and crevices using a small brush (5/0) and Agrax Earthshade, basically panel lining the entire model. Pretty easy process, but if you mess up you can just fix with some Flayed One or your edge highlight, depending on where you messed up. The metal parts of the gun and the underarmor were shaded with Nuln Oil.
This is also where I painted the eyes and gun aquila, using Mephiston Red. I do this after panel lining because I want to shade the eye socket first to give the eye lens a dark outline.
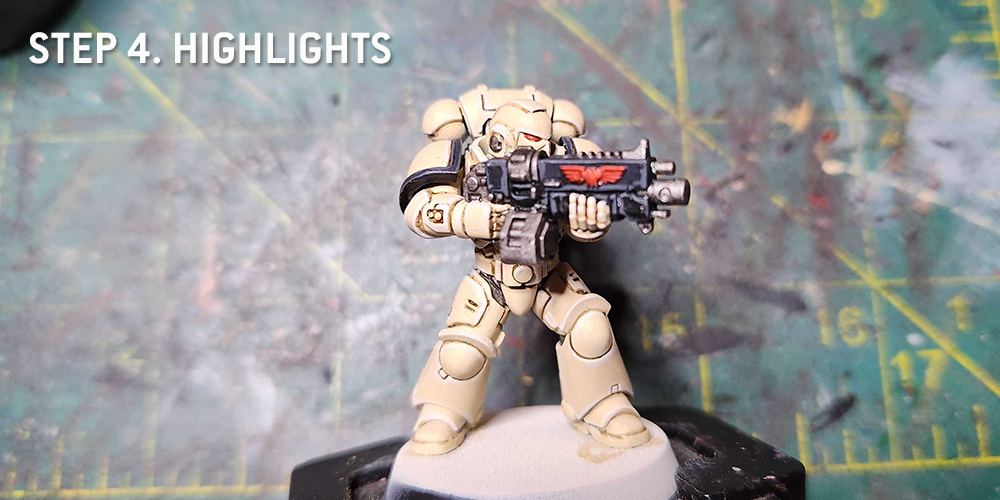
Step 4. Highlights
Now the other time-consuming part, which is basically edge highlighting the whole model. The gun and shoulder pad rim were edge highlighted with Mechanicus Standard Grey while the armor was highlighted with Reaper Polished Bone (though Wraithbone would do if you only have GW paints).
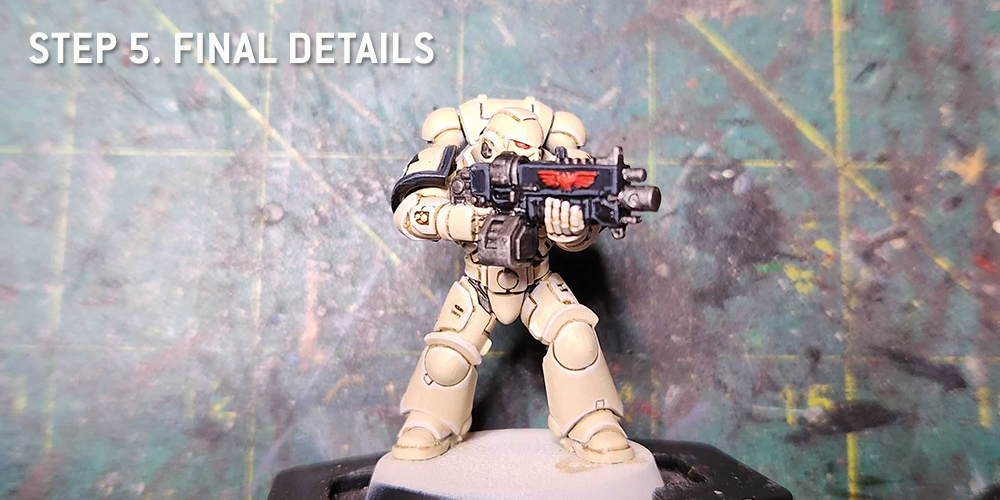
Step 5. Final Details
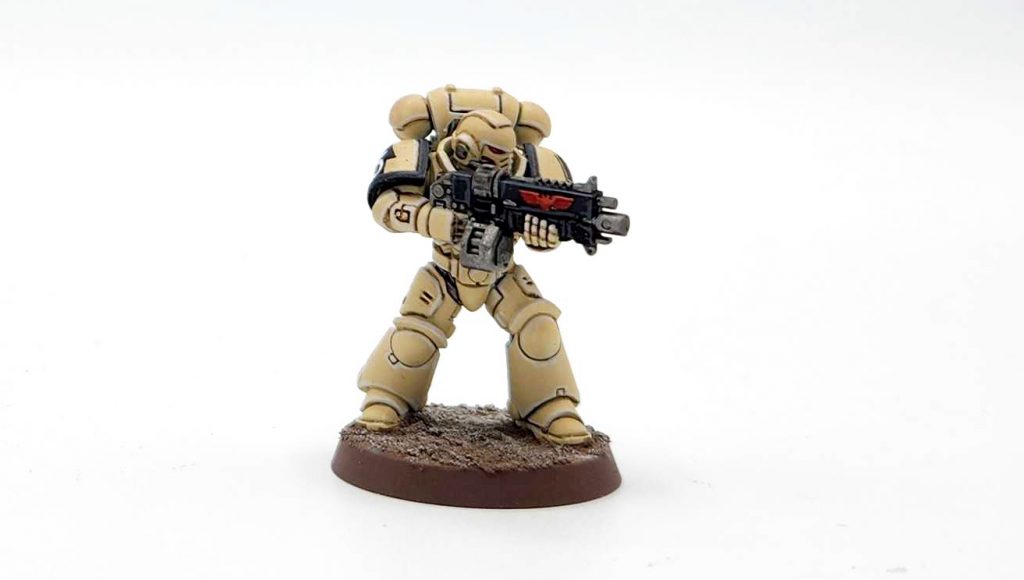
Just some final details and touch-up work here. I shade the gun aquila a bit with Carroburg Crimson, put a dot of Evil Sunz Scarlet on the eye, and paint the shoulder pad icons (or if you prefer, apply transfers). I’ve gone a bit lazy here but there’s definitely another set of highlights you can add if you want to make the model pop – you can edge highlight the metal bits with Runefang Steel, and do a second stage of corner highlights on the model. I’d use Celestra Grey for second stage highlights on the black parts and pure white for the armor.
Otherwise, that’s it. Slap your favorite basing scheme on the model and you’re done. This is a pretty easy scheme to paint up and do in bulk, but looks pretty striking on the table nonetheless.
Have any questions or feedback? Drop us a note in the comments below or email us at contact@goonhammer.com.
This article is part of a larger series on how to paint Space Marines. To return to that series, click here.


