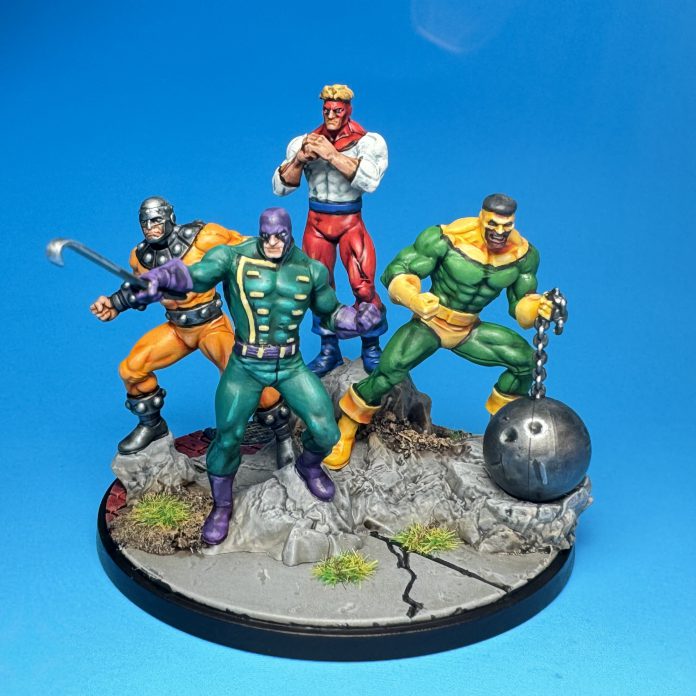
The Wrecking Crew represents a new approach to character design in Marvel: Crisis Protocol. Instead of individual models, the four members of the Crew are joined together on a single large base. They work together as a single character, with various rules on the card representing each member. It’s a fun design, but what about painting this MCP boy band? Read on to see how I approached it. Thank you to Atomic Mass Games for providing these models for review.
Prep Work
With four models all included on a single base, you’re going to want to approach these guys a little differently. I strongly encourage not assembling all of them on their base. If you do, it’s going to be a frustrating process. It will be difficult to access all areas of the models, and you’re probably going to get paint on a model you didn’t intend to. Do yourself a favor and keep them separate. Like me, you probably have plenty of extra bases sitting around. I lightly superglued three of the crew onto temporary bases. (If you have MCP bases with curbs on them, these work particularly well for Wrecker and Bulldozer with their bent-leg poses.) As always, I primed the models white, the objectively best primer color.
Piledriver
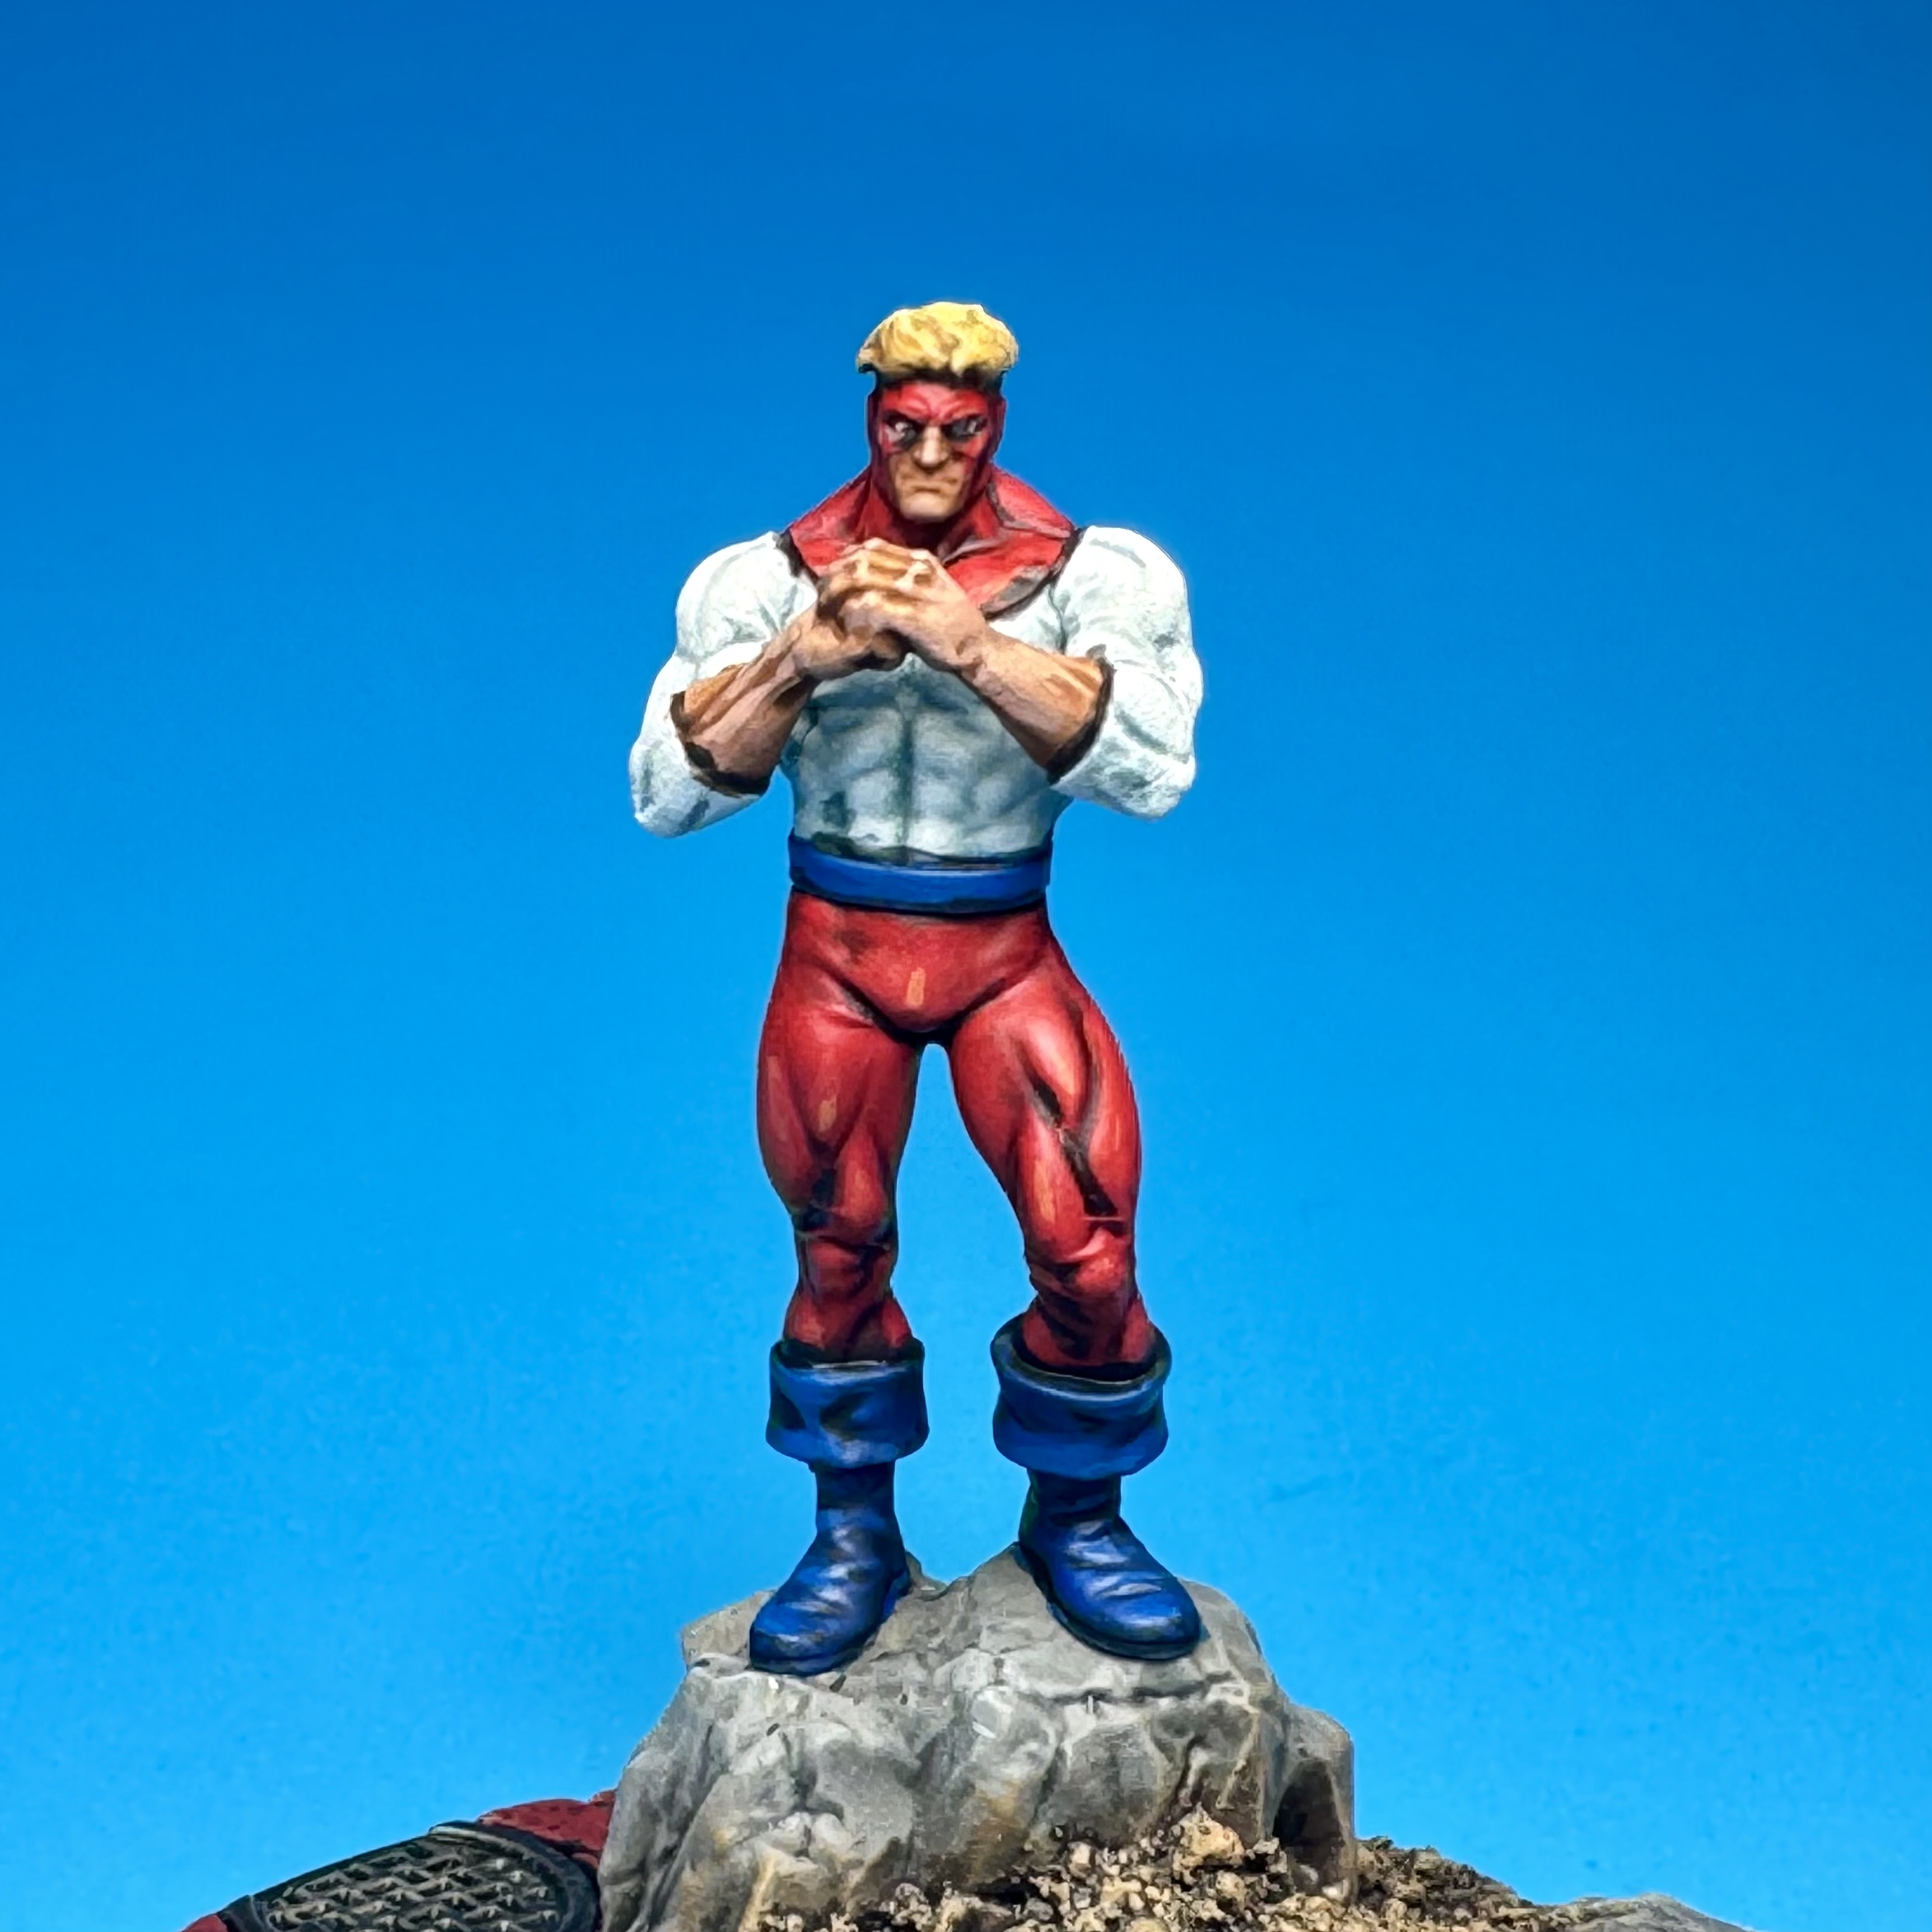
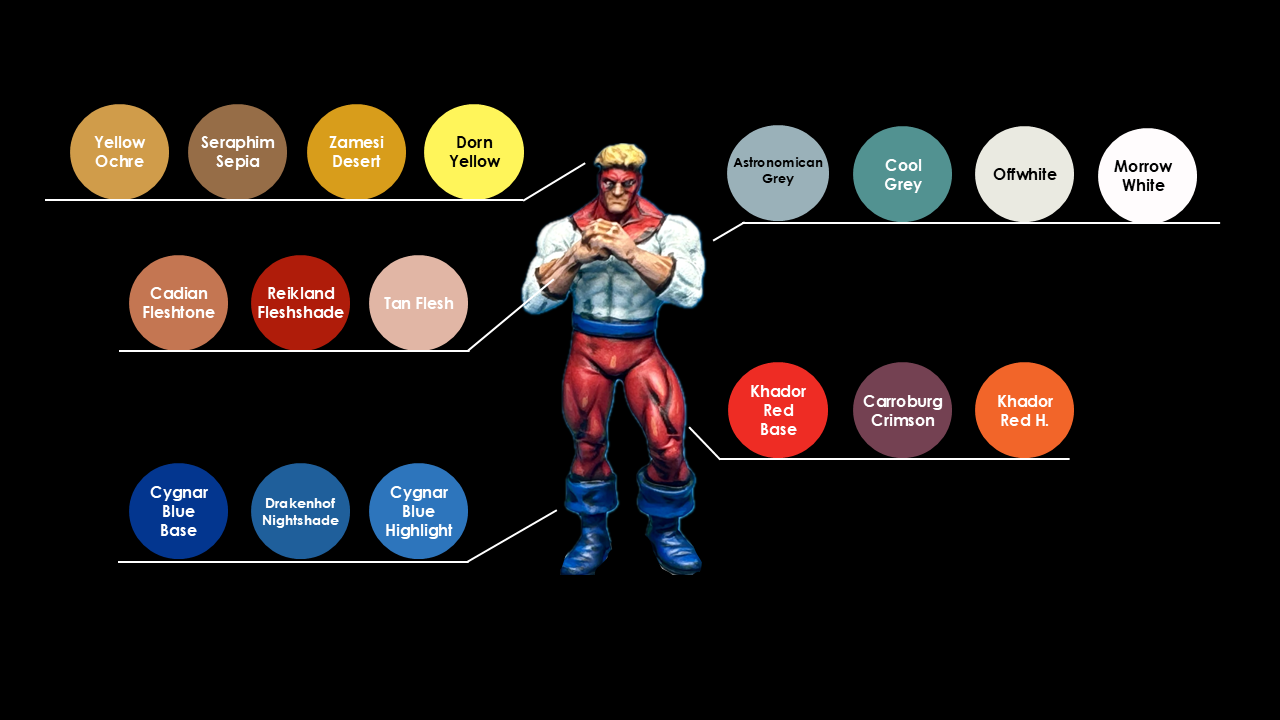
- White areas were based with GW Astronomican Grey, then washed with SWM Cool Grey. Both are OOP. Any suitably light grey will substitute for Astronomican. The wash is harder to replace, but you want a not-too saturated bluish grey wash of some kind. GW Soulblight Grey can be used instead, but won’t give the cool blue tones of course.
- I then mixed Vallejo Offwhite into the Astronomican at about 1:1 for highlights. I followed this with pure Offwhite and then very sparing highlights of P3 Morrow White.
- The red was based with P3 Khador Red Base, then washed with GW Carroburg Crimson. I highlighted with a 1:1 mix of Khador Red Base and Khador Red Highlight. A few spot highlights were added with pure KRH.
- The blue boots and belt were based with P3 Cygnar Blue Base, then washed with GW Drakenhof Nightshade. Highlights were provided just like the reds above, subbing in Cygnar Blue Base and Cygnar Blue Highlight.
- Skintones started with GW Cadian Fleshtone followed by GW Reikland Fleshshade. I then mixed in Pro Acryl Tan Flesh for first highlights, then pure Tan Flesh for the final highlights.
- The hair was based with Pro Acryl Yellow Ochre washed with GW Seraphim Sepia. I used GW Zamesi Desert then Dorn Yellow for smaller and smaller highlights via drybrushing.
One down, three to go!
Thunderball
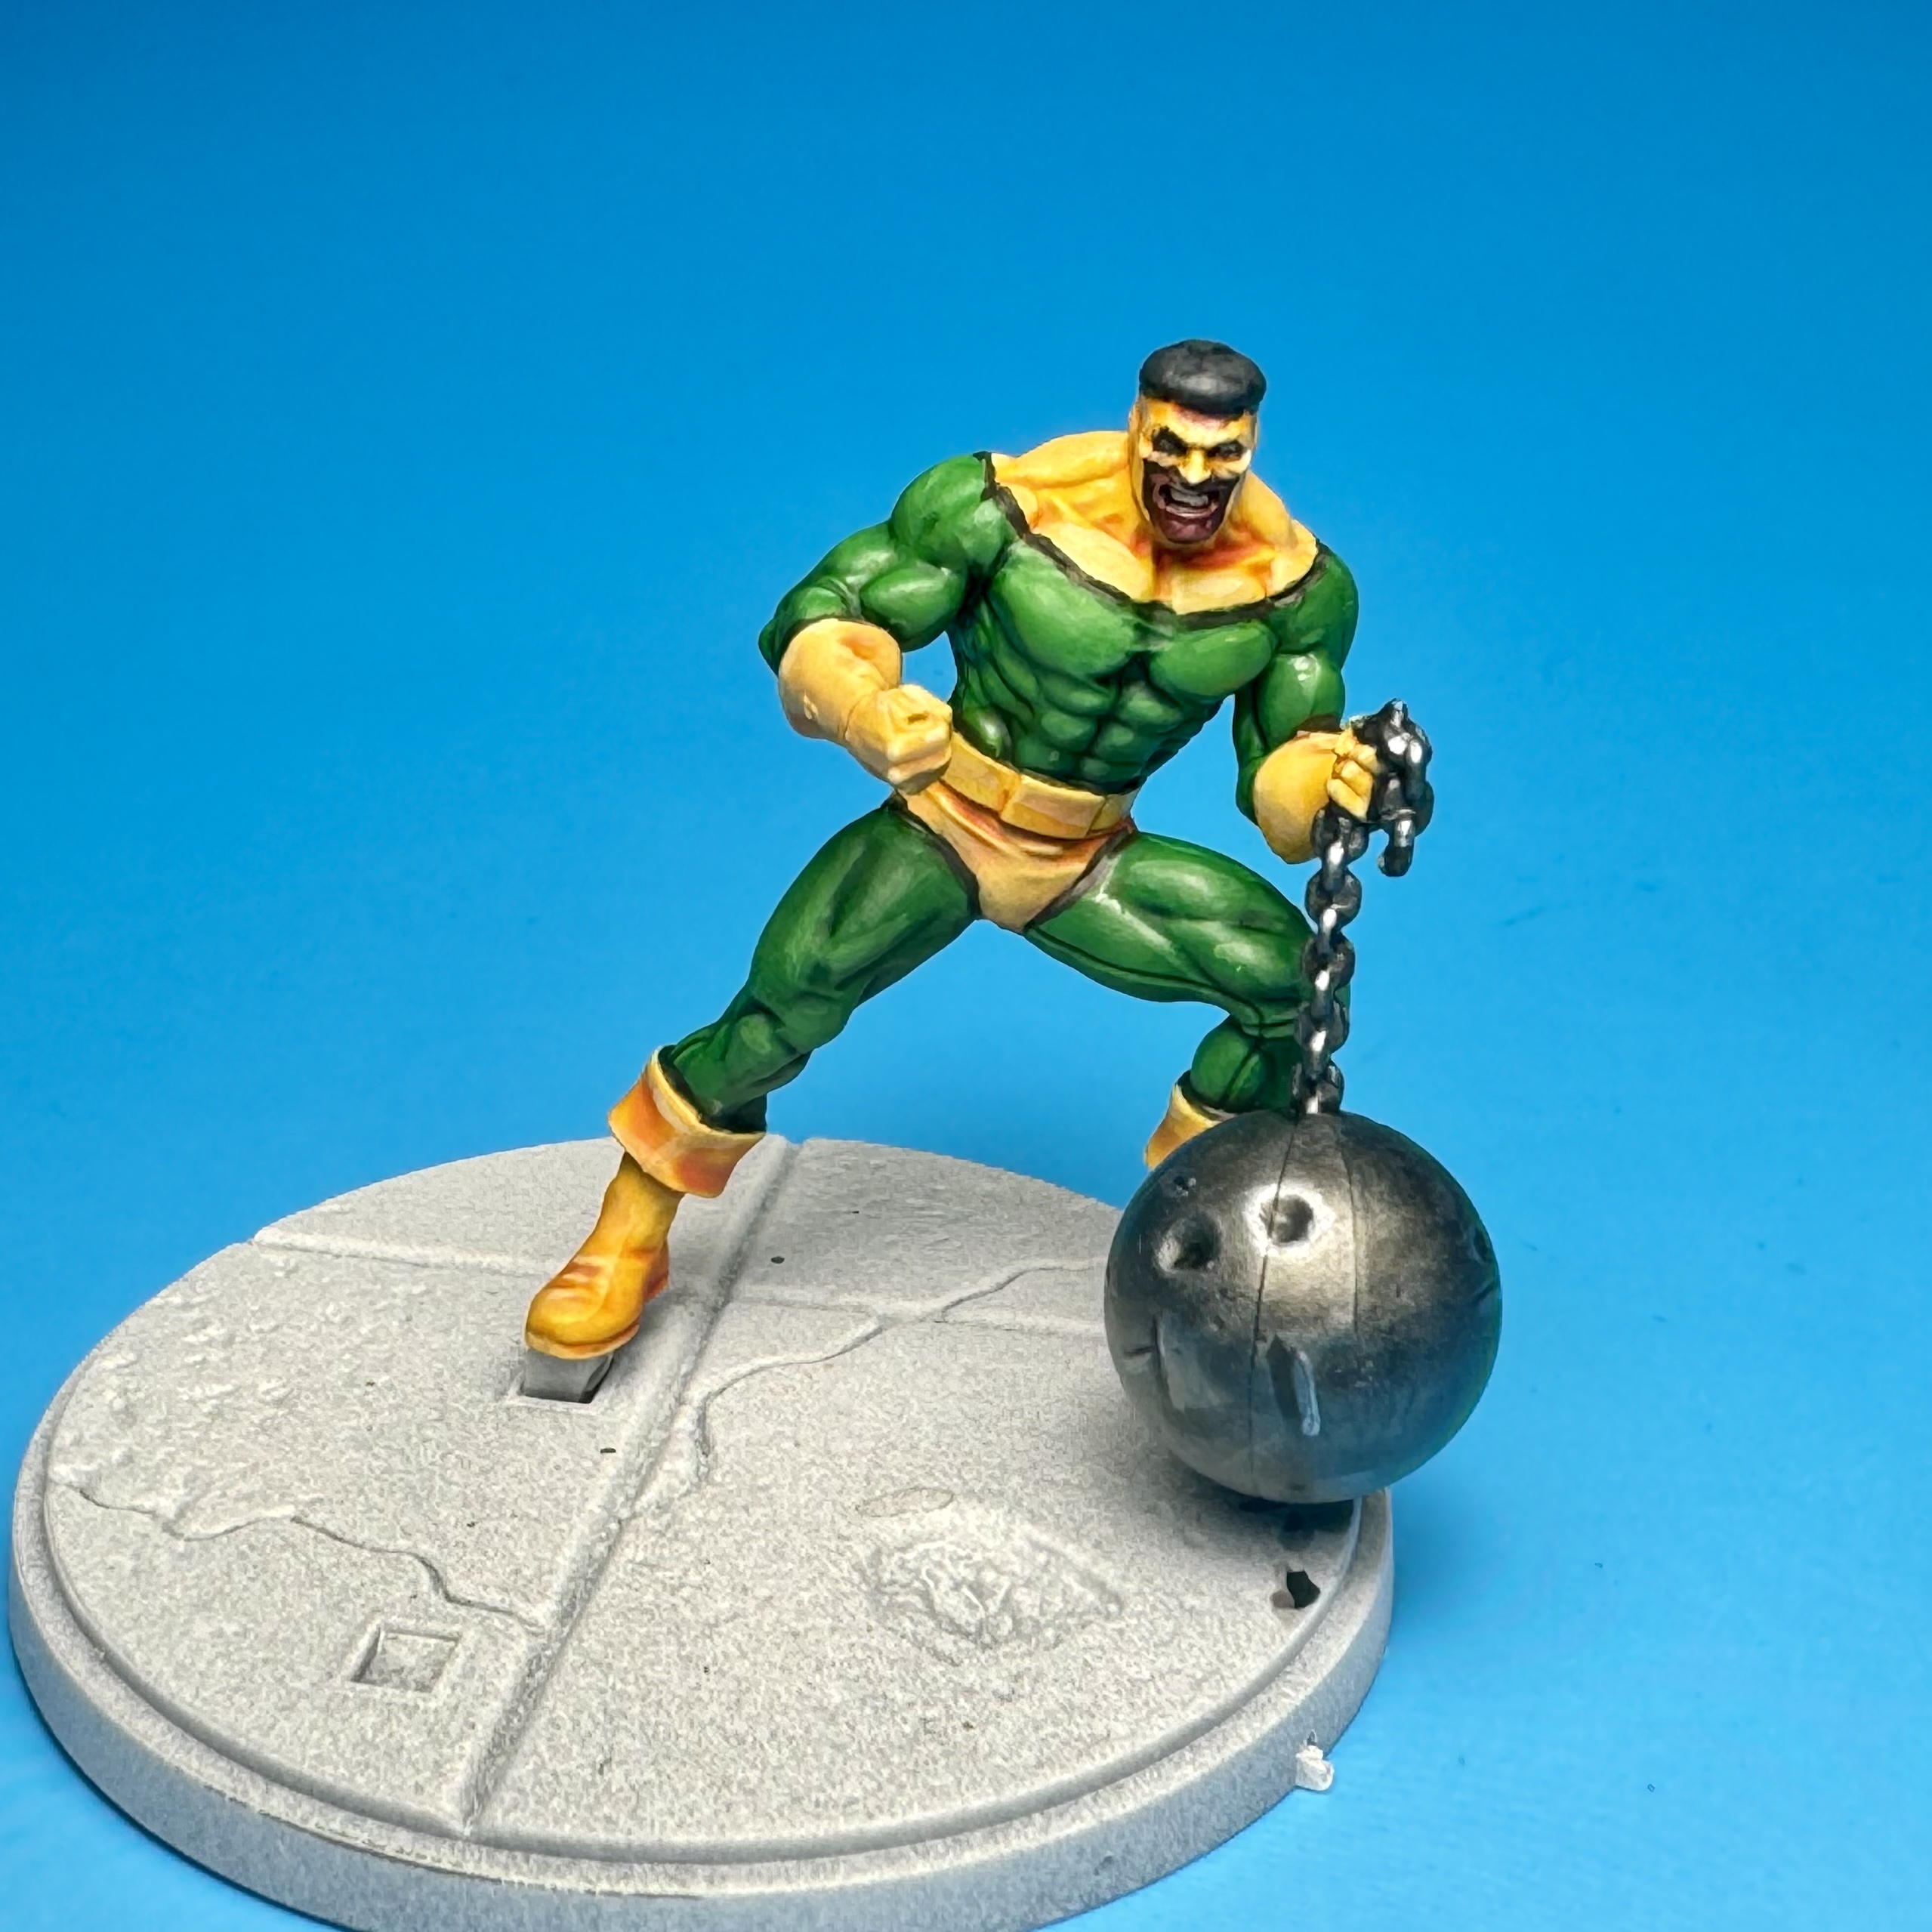
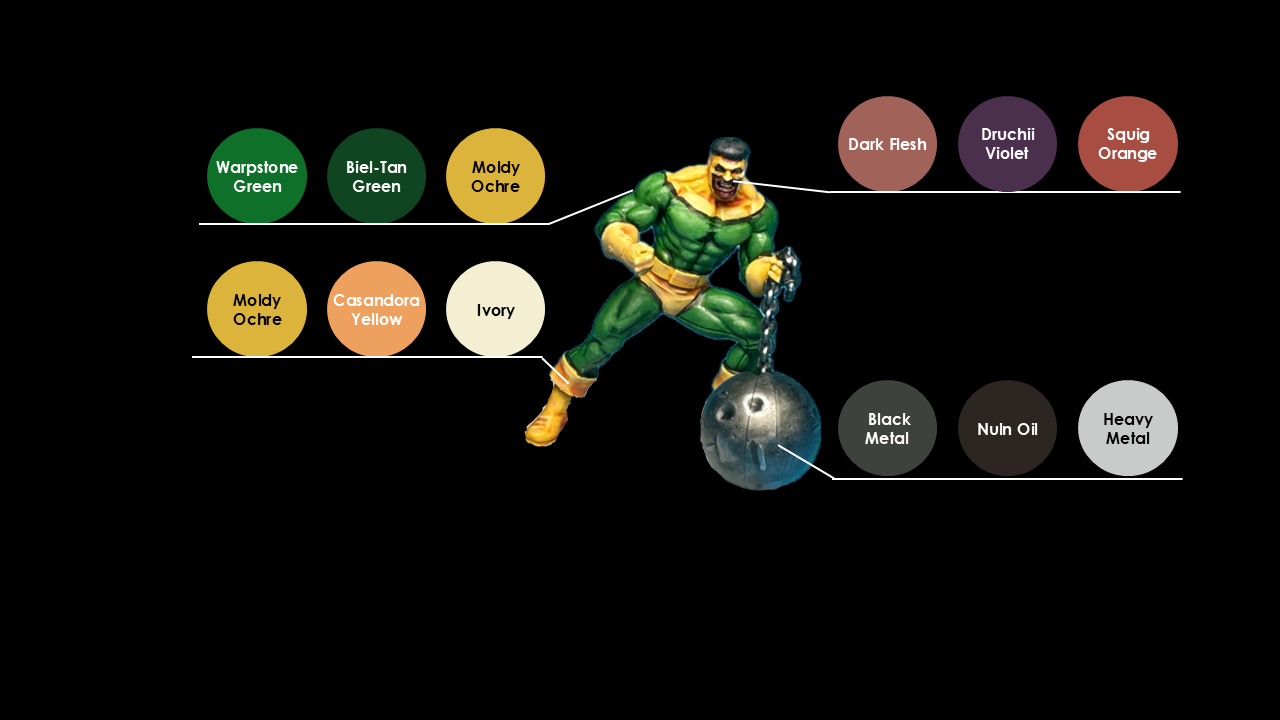
- Green costume areas were based with GW Warpstone, then washed with GW Biel-tan Green. Highlights were done with a mix of Warpstone and P3 Moldy Ochre.
- The yellow started with Moldy Ochre as a base, washed with GW Casandora Yellow. Vallejo Ivory was mixed into the Moldy Ochre for highlights.
- The metal ball and chain were primed white of course, but to make sure the metal had some extra depth, I hand painted it all in black. I then based it with Scale75 Black Metal, washed with Nuln Oil, then highlighted with Scale75 Heavy Metal.
- Fleshtones here started with Pro Acryl Dark Flesh which I then washed with GW Druchii Violet. I then re-layered with Dark Flesh, then highlighted with a roughly 1:1 mix of Dark Flesh and GW Squig Orange. Seriously, purple shading and orange highlights are great for painting darker skin tones. Try it!
- The hair was painted with Scale75 Blackgrey, then washed with Nuln Oil.
Halfway there now!
Bulldozer
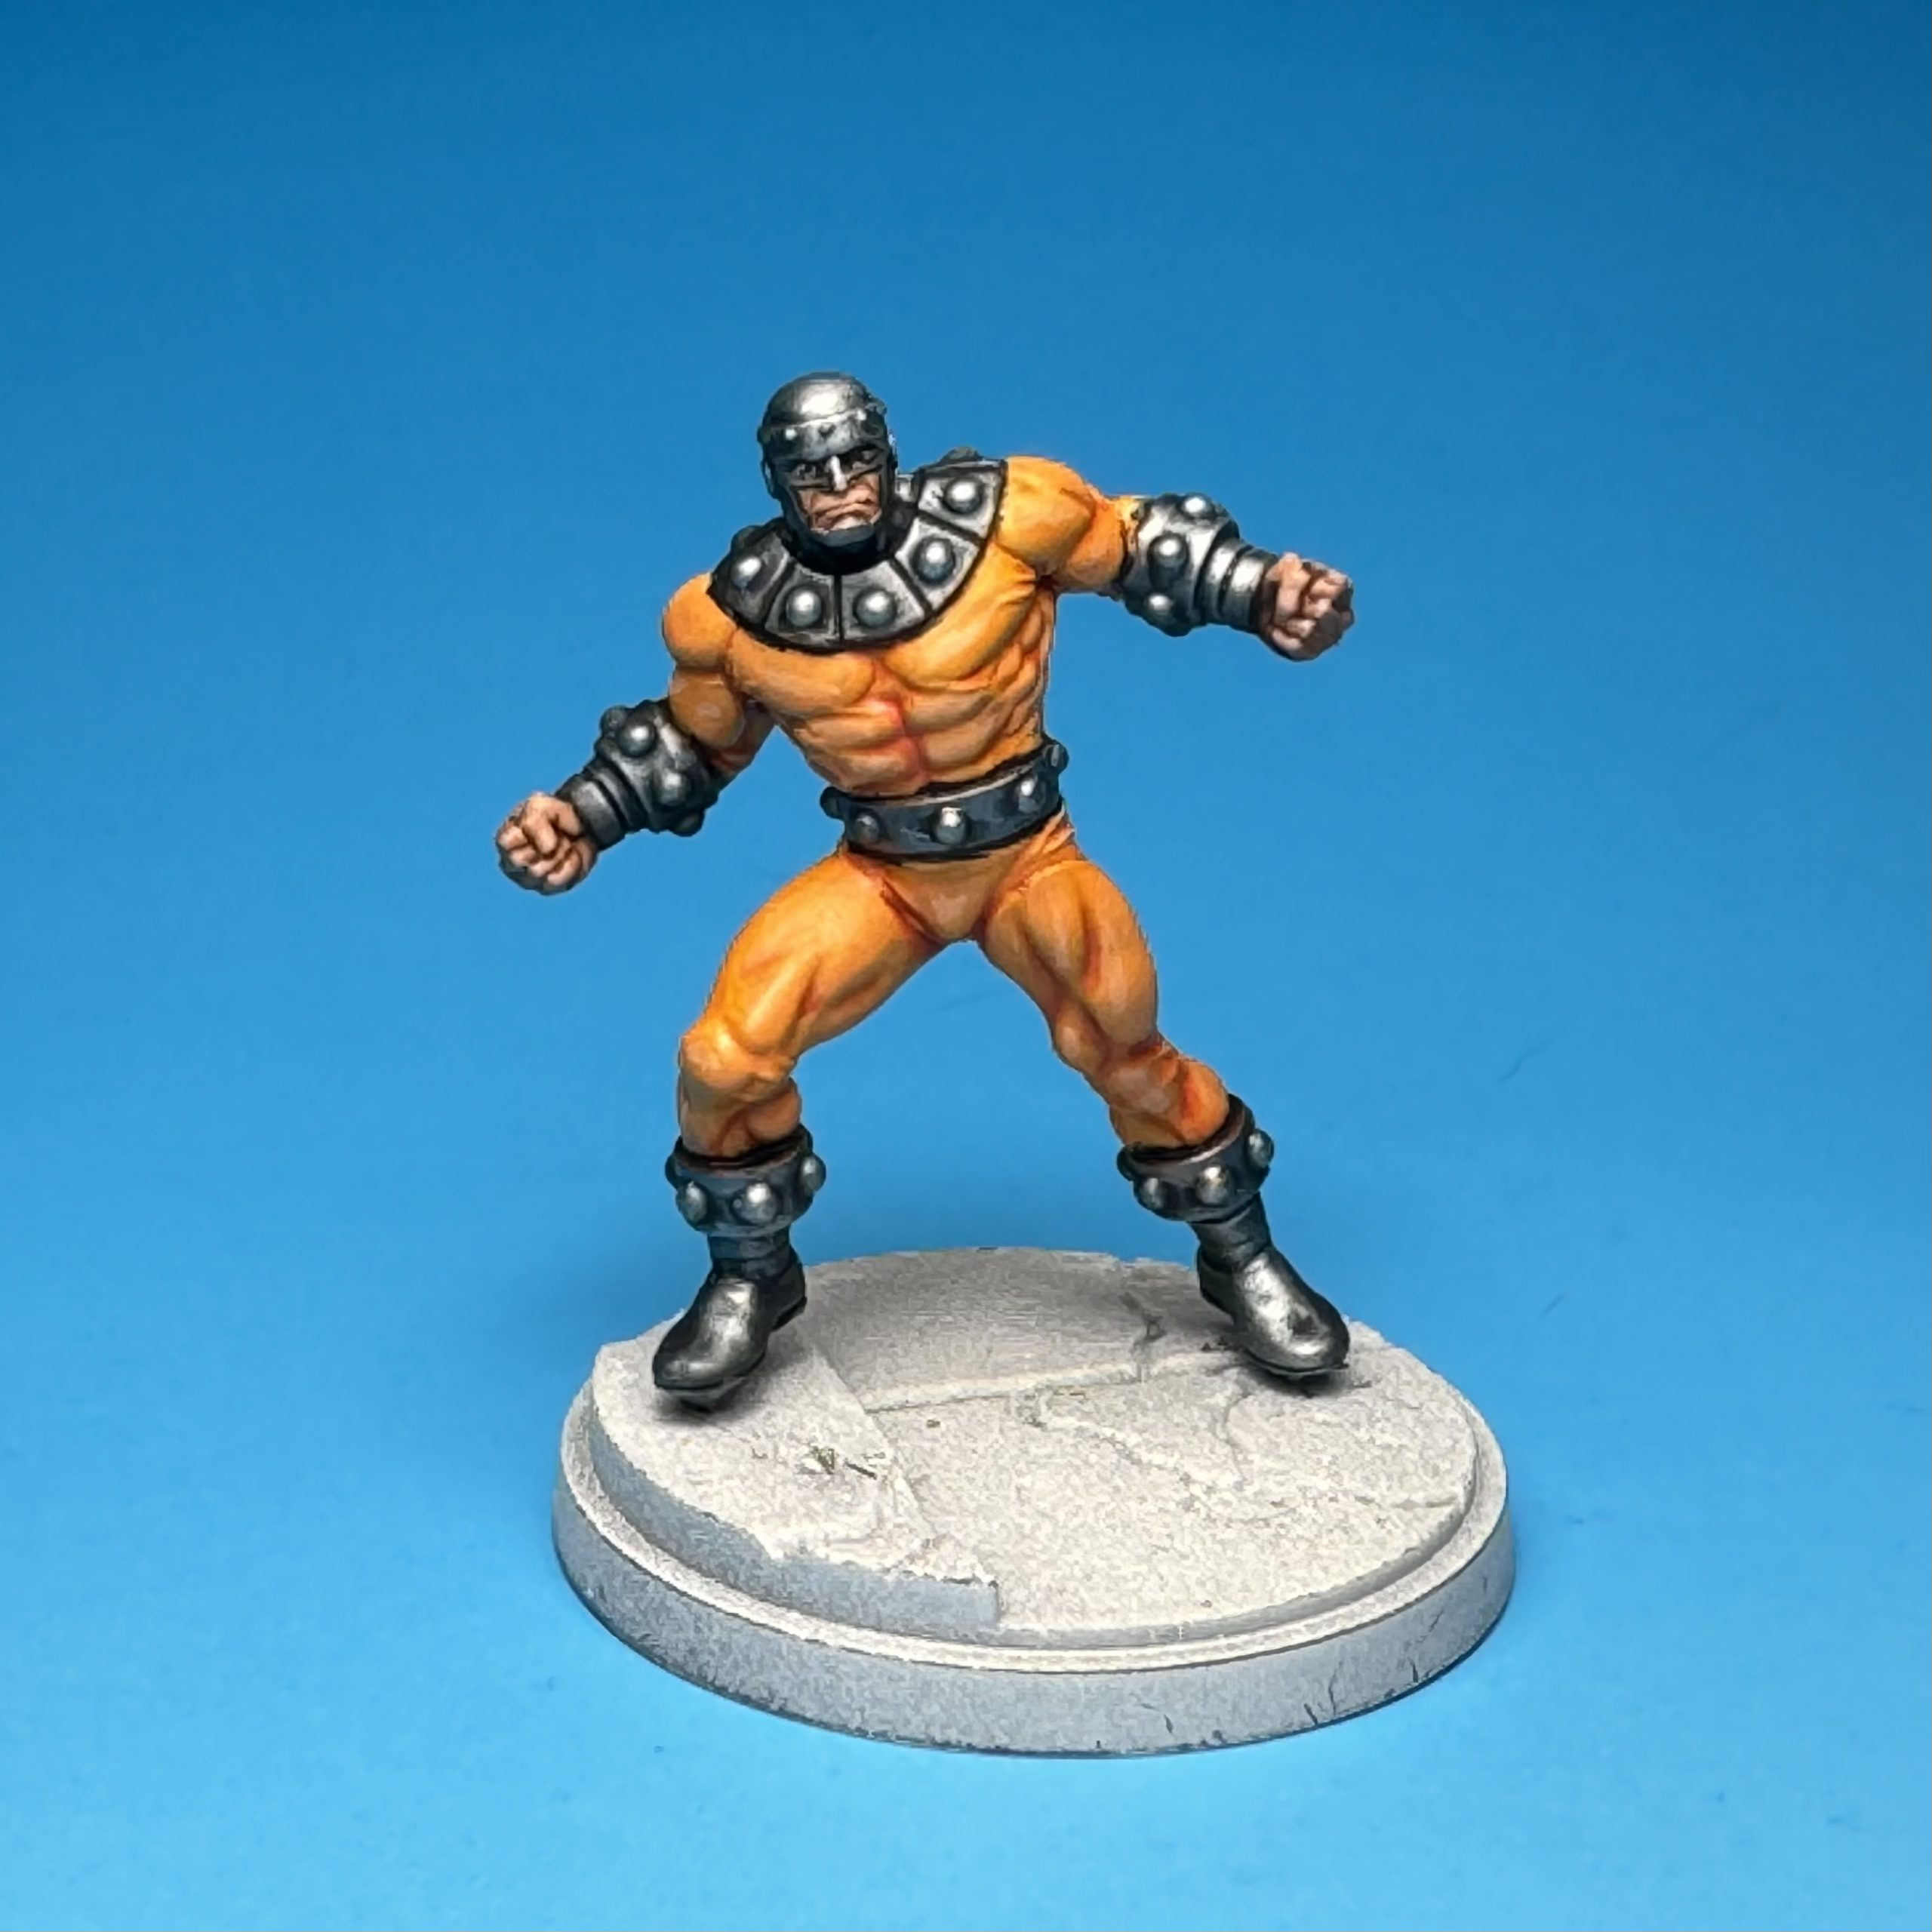
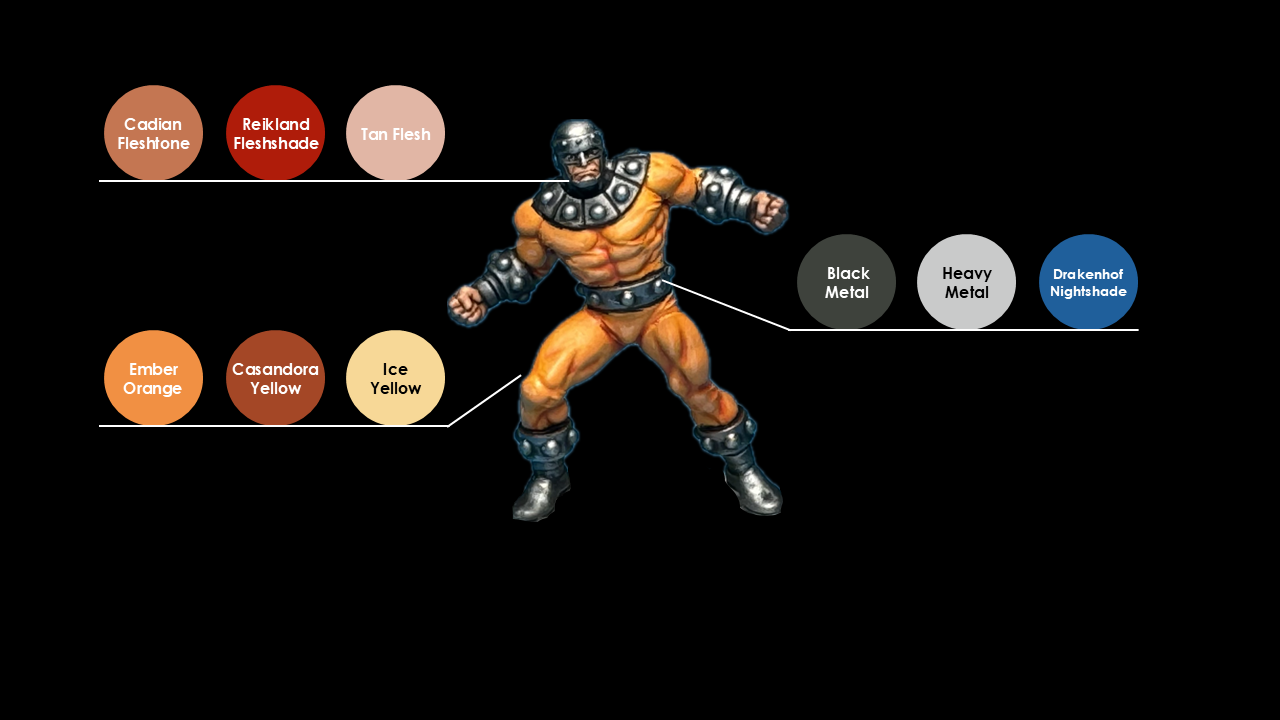
- I started with metal areas, as my metal techniques tend to be somewhat messier and I didn’t want to have to redo any orange. The metal was basecoated with Black Metal, then drybrushed with Heavy Metal. I then washed it with Drakenhof Nightshade. This gives it a different tone and feel than your standard black wash, but still gives good shading. If you haven’t before, definitely try different shading colors for metals! After the wash dried, I did a careful drybrush with Heavy Metal again for some additional highlights.
- Skintones were basecoated with Cadian Fleshtone followed by a Reikland Fleshshade wash. Highlights were applied first with another layer of Cadian Fleshtone, then a 1:1 mix of Cadian Fleshtone and Tan Flesh.
- Finally, for the orange areas, I basecoated with P3 Ember Orange. This can be tough to find (hopefully changing with the imminent relaunch of P3 paints) but it’s a beautiful orange I highly recommend. I washed this with SWM Orange Wash. This is another OOP product, but a nice, not-too dark orange wash will substitute here. That being said, this wash didn’t so much shade as intensify the orange basecoat. So I followed this with GW Casandora Yellow wash. Despite the name, it skews orange (as it should for shading yellow) and worked well here since Ember Orange is a somewhat desaturated orange to begin with. Highlights were provided first with Ember Orange again, then a mix of Ember Orange and Vallejo Ice Yellow.
Almost there now!
Wrecker
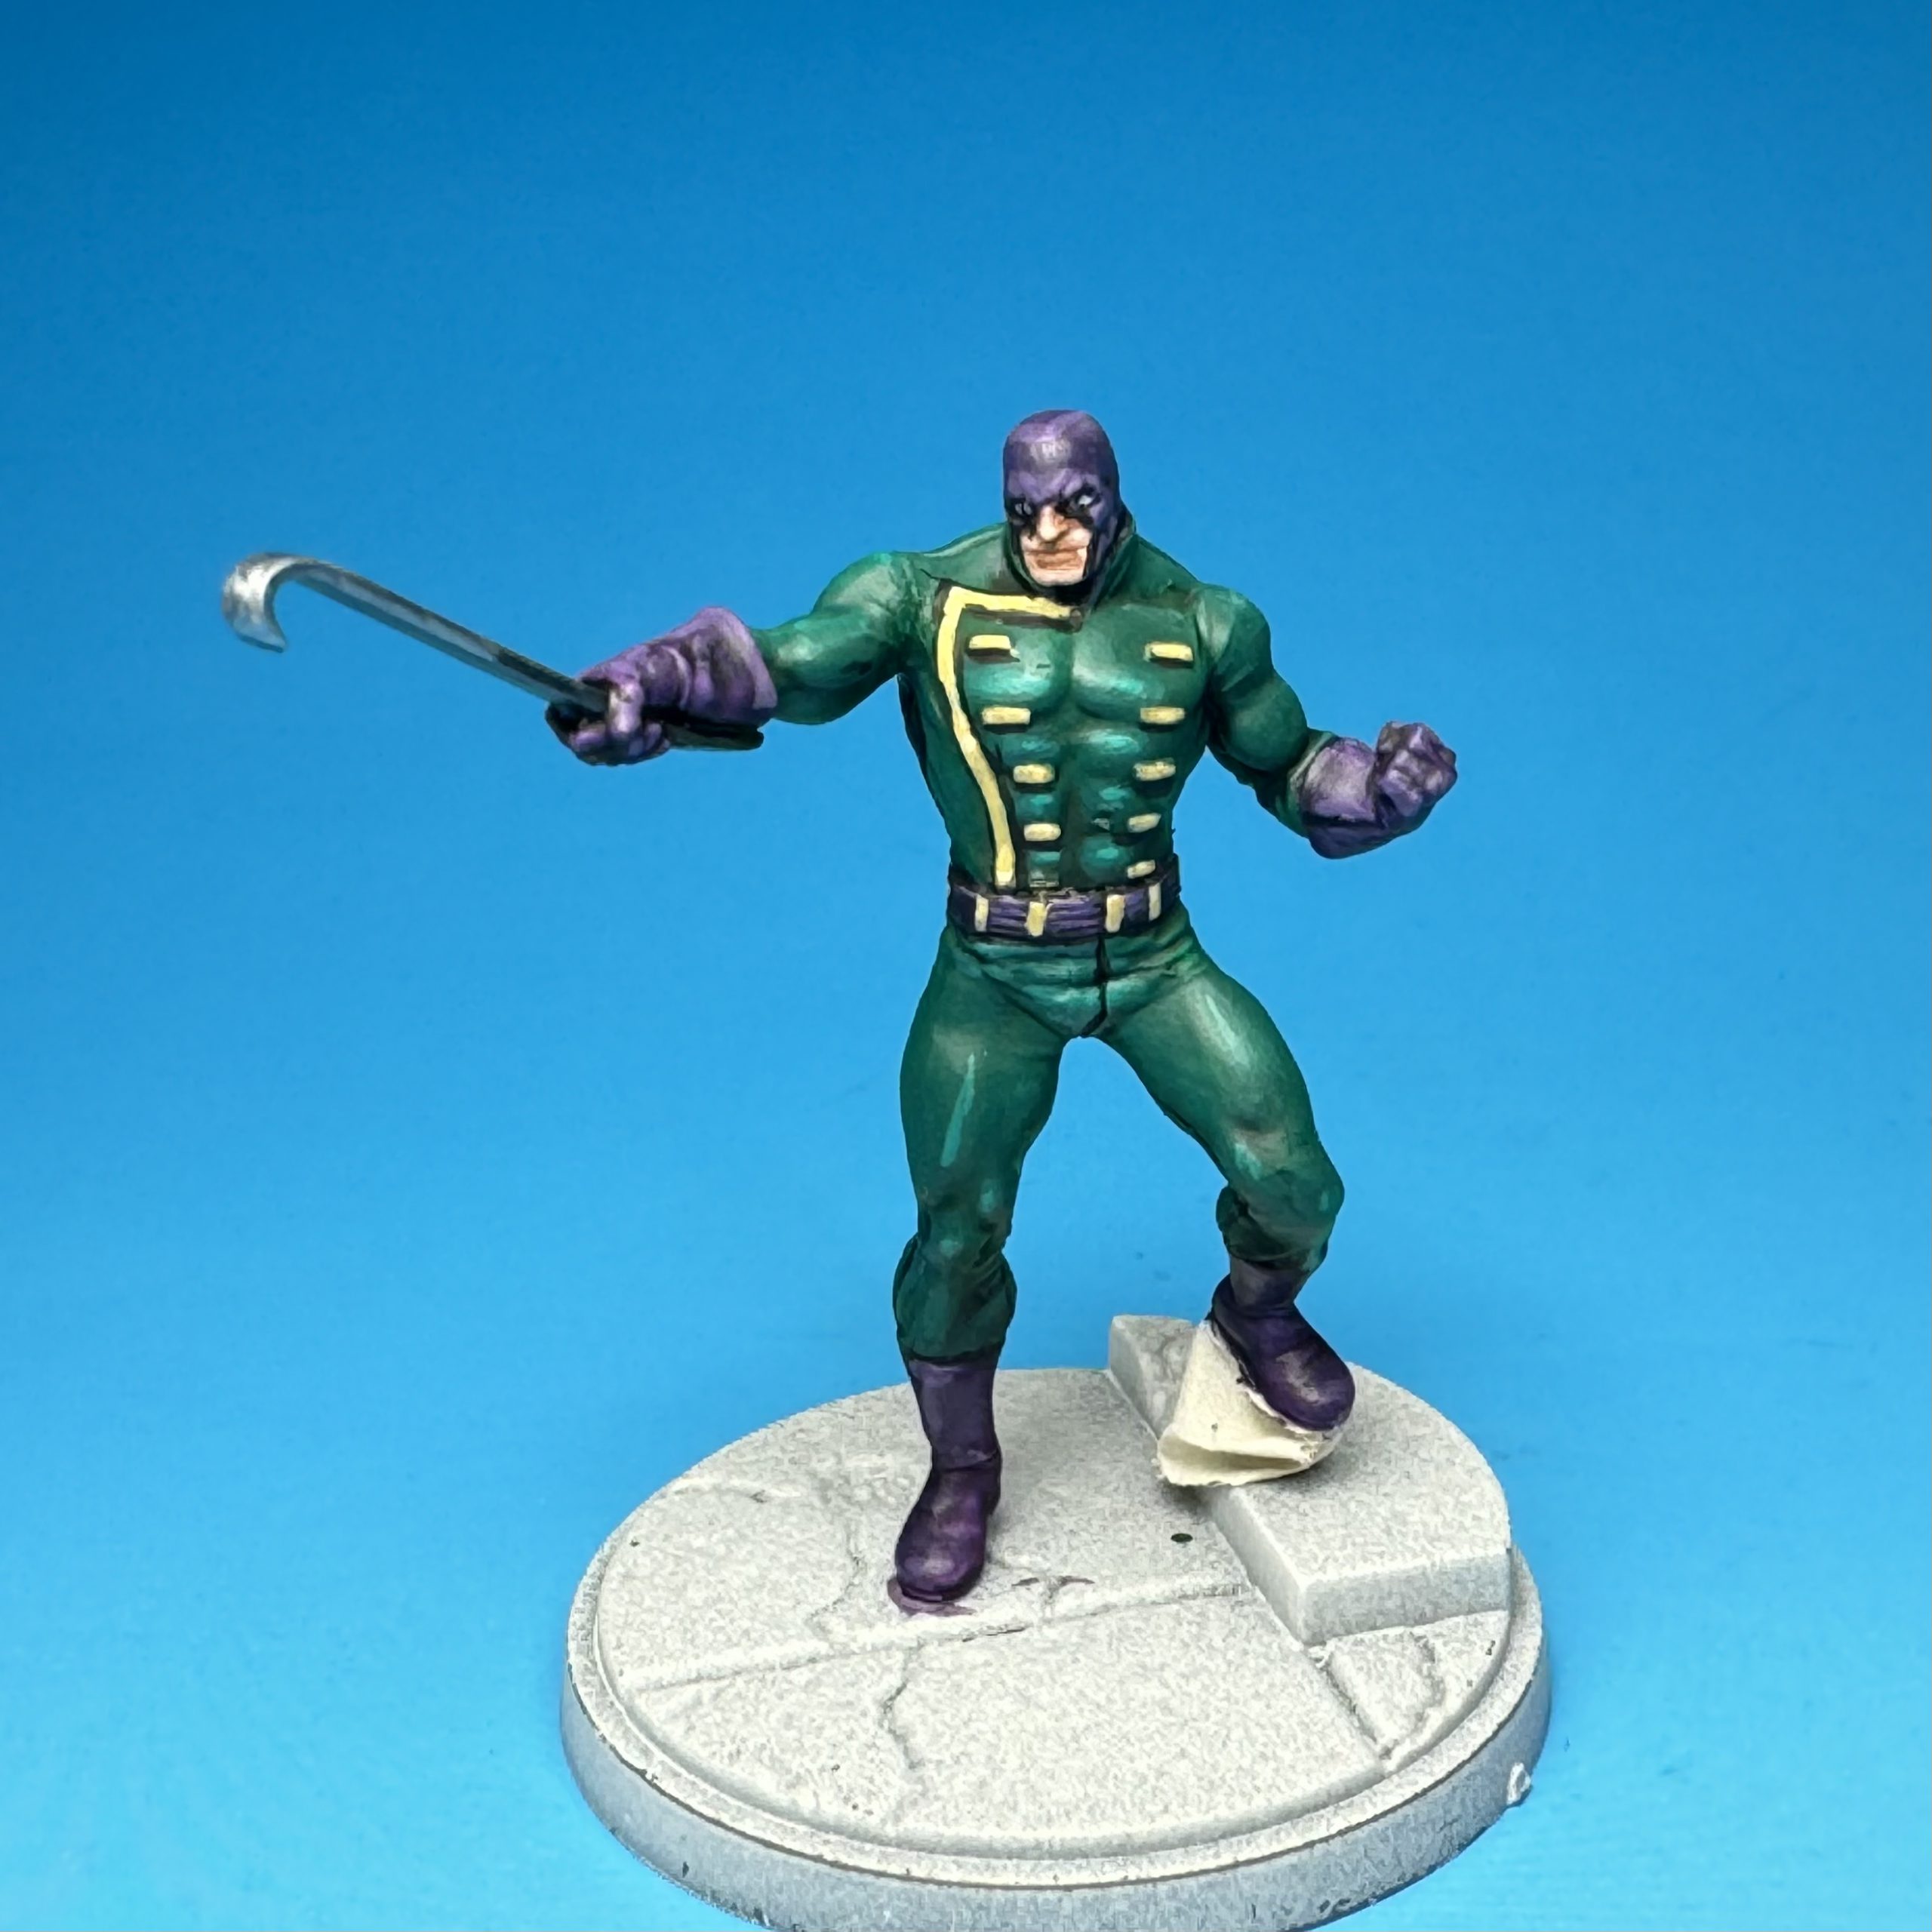
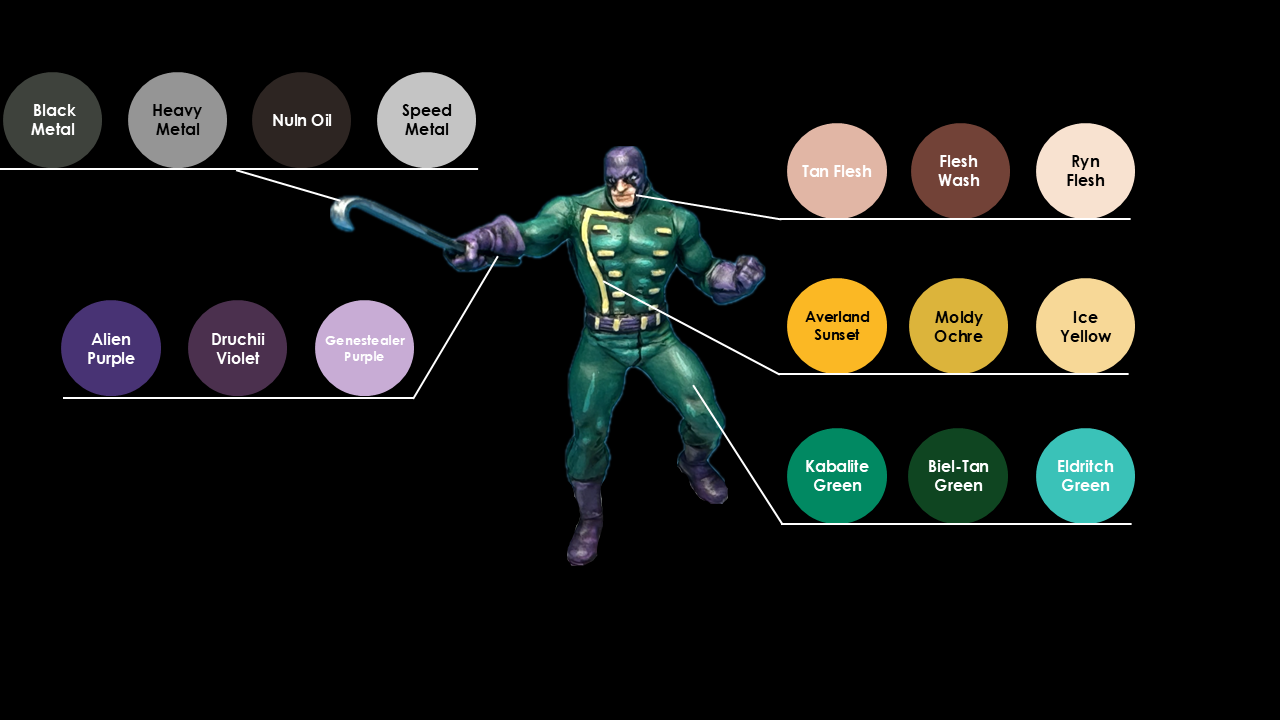
- I wanted a green that was distinct from Thunderball, so I basecoated with GW Kabalite Green. This is a darker and more cool-toned green. It got washed with Biel-Tan. Highlights were done with a 1:1 mix of Kabalite and P3 Eldritch Green, then sparing highlights with pure Eldritch.
- The yellow was based with GW Averland Sunset. Because the yellow bits were all fairly small, I didn’t wash them but moved right to highlights with Moldy Ochre. I did some spot highlights with a 1:1 mix of Moldy Ochre and Ice Yellow.
- Purple areas were basecoated with Army Painter Alien Purple, and washed Druchii Violet. Highlights were done first with the base Alien Purple again, followed by GW Genestealer Purple.
- Fleshtones were based with Pro Acryl Tan Flesh and washed with Pro Acryl Flesh Wash. Highlights were done first with Tan Flesh again, then Tan Flesh with some P3 Ryn Flesh mixed in.
- The metal crowbar was painted per Thunderball’s…thunderball above, except with an additional bit of edge highlighting with Scale75 Speed Metal.
With that, I was able to carefully glue all the models onto their final base, and job complete. These models were honestly more fun to paint than I expected. They have just enough detail for a bunch of B-tier mooks, but the variety of costumes and colors kept me engaged throughout. Thanks again to Atomic Mass Games for providing the models. And thank you for reading my take on them. I hope it’s helpful in getting your models painted and on the table!
I want to see your takes on these guys! Find us on our Discord, or reach out to Goonhammer social media with your own takes.
Have any questions or feedback? Drop us a note in the comments below or email us at contact@goonhammer.com. Want articles like this linked in your inbox every Monday morning? Sign up for our newsletter. And don’t forget that you can support us on Patreon for backer rewards like early video content, Administratum access, an ad-free experience on our website and more.
