In our How to Paint Everything series we look at how to paint, well, everything, with different techniques and approaches from different artists. In this article we’re looking at how to paint a Bretonnian Knight of the Realm.
BananaLee’s Method
It’s good enough for tabletop level, and will more then certainly meet the three-colour standard required. Are there better methods which produce better results in less time? Sure. But this is how I do it.
Step 1: Choosing the Colour Scheme
The Knight: Pre-planning is the fun part of Bretonnians. If you’re unsure of what colour scheme to use, take a look at our previous article on selecting a colour scheme. I’ll wait.
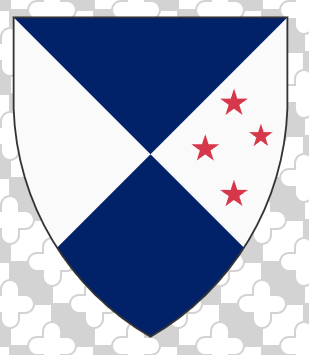
So for this knight, I’ve chosen to go back to my roots and go for a blue and white field with red star charges. In addition to their personal colours, there will be hints everywhere of their actual Lord, the green and yellow per bend field.
The Steed: The other thing to consider is what colour you would like your horse to be! Horses famously come in many colours and shades and our colleagues over at historical have you fully covered with their guide on painting horses. However, there are two good benefits to painting Knights of the Realm:
- There isn’t really that much horse to paint and a good heraldry job will cover up any inaccuracies on the horse
- If you are using a wet pallete and painting several knights over a period of time, you can make almost every common shade of horse by mixing Mahogany Brown (70.846), Cavalry Brown (70.982), Flat Flesh (70.955), Light Grey (70.990), and Black (you don’t need a model number here). Put a drop here and a drop there, mix it about to get some variety, splatter on horse. Paint points as necessary.
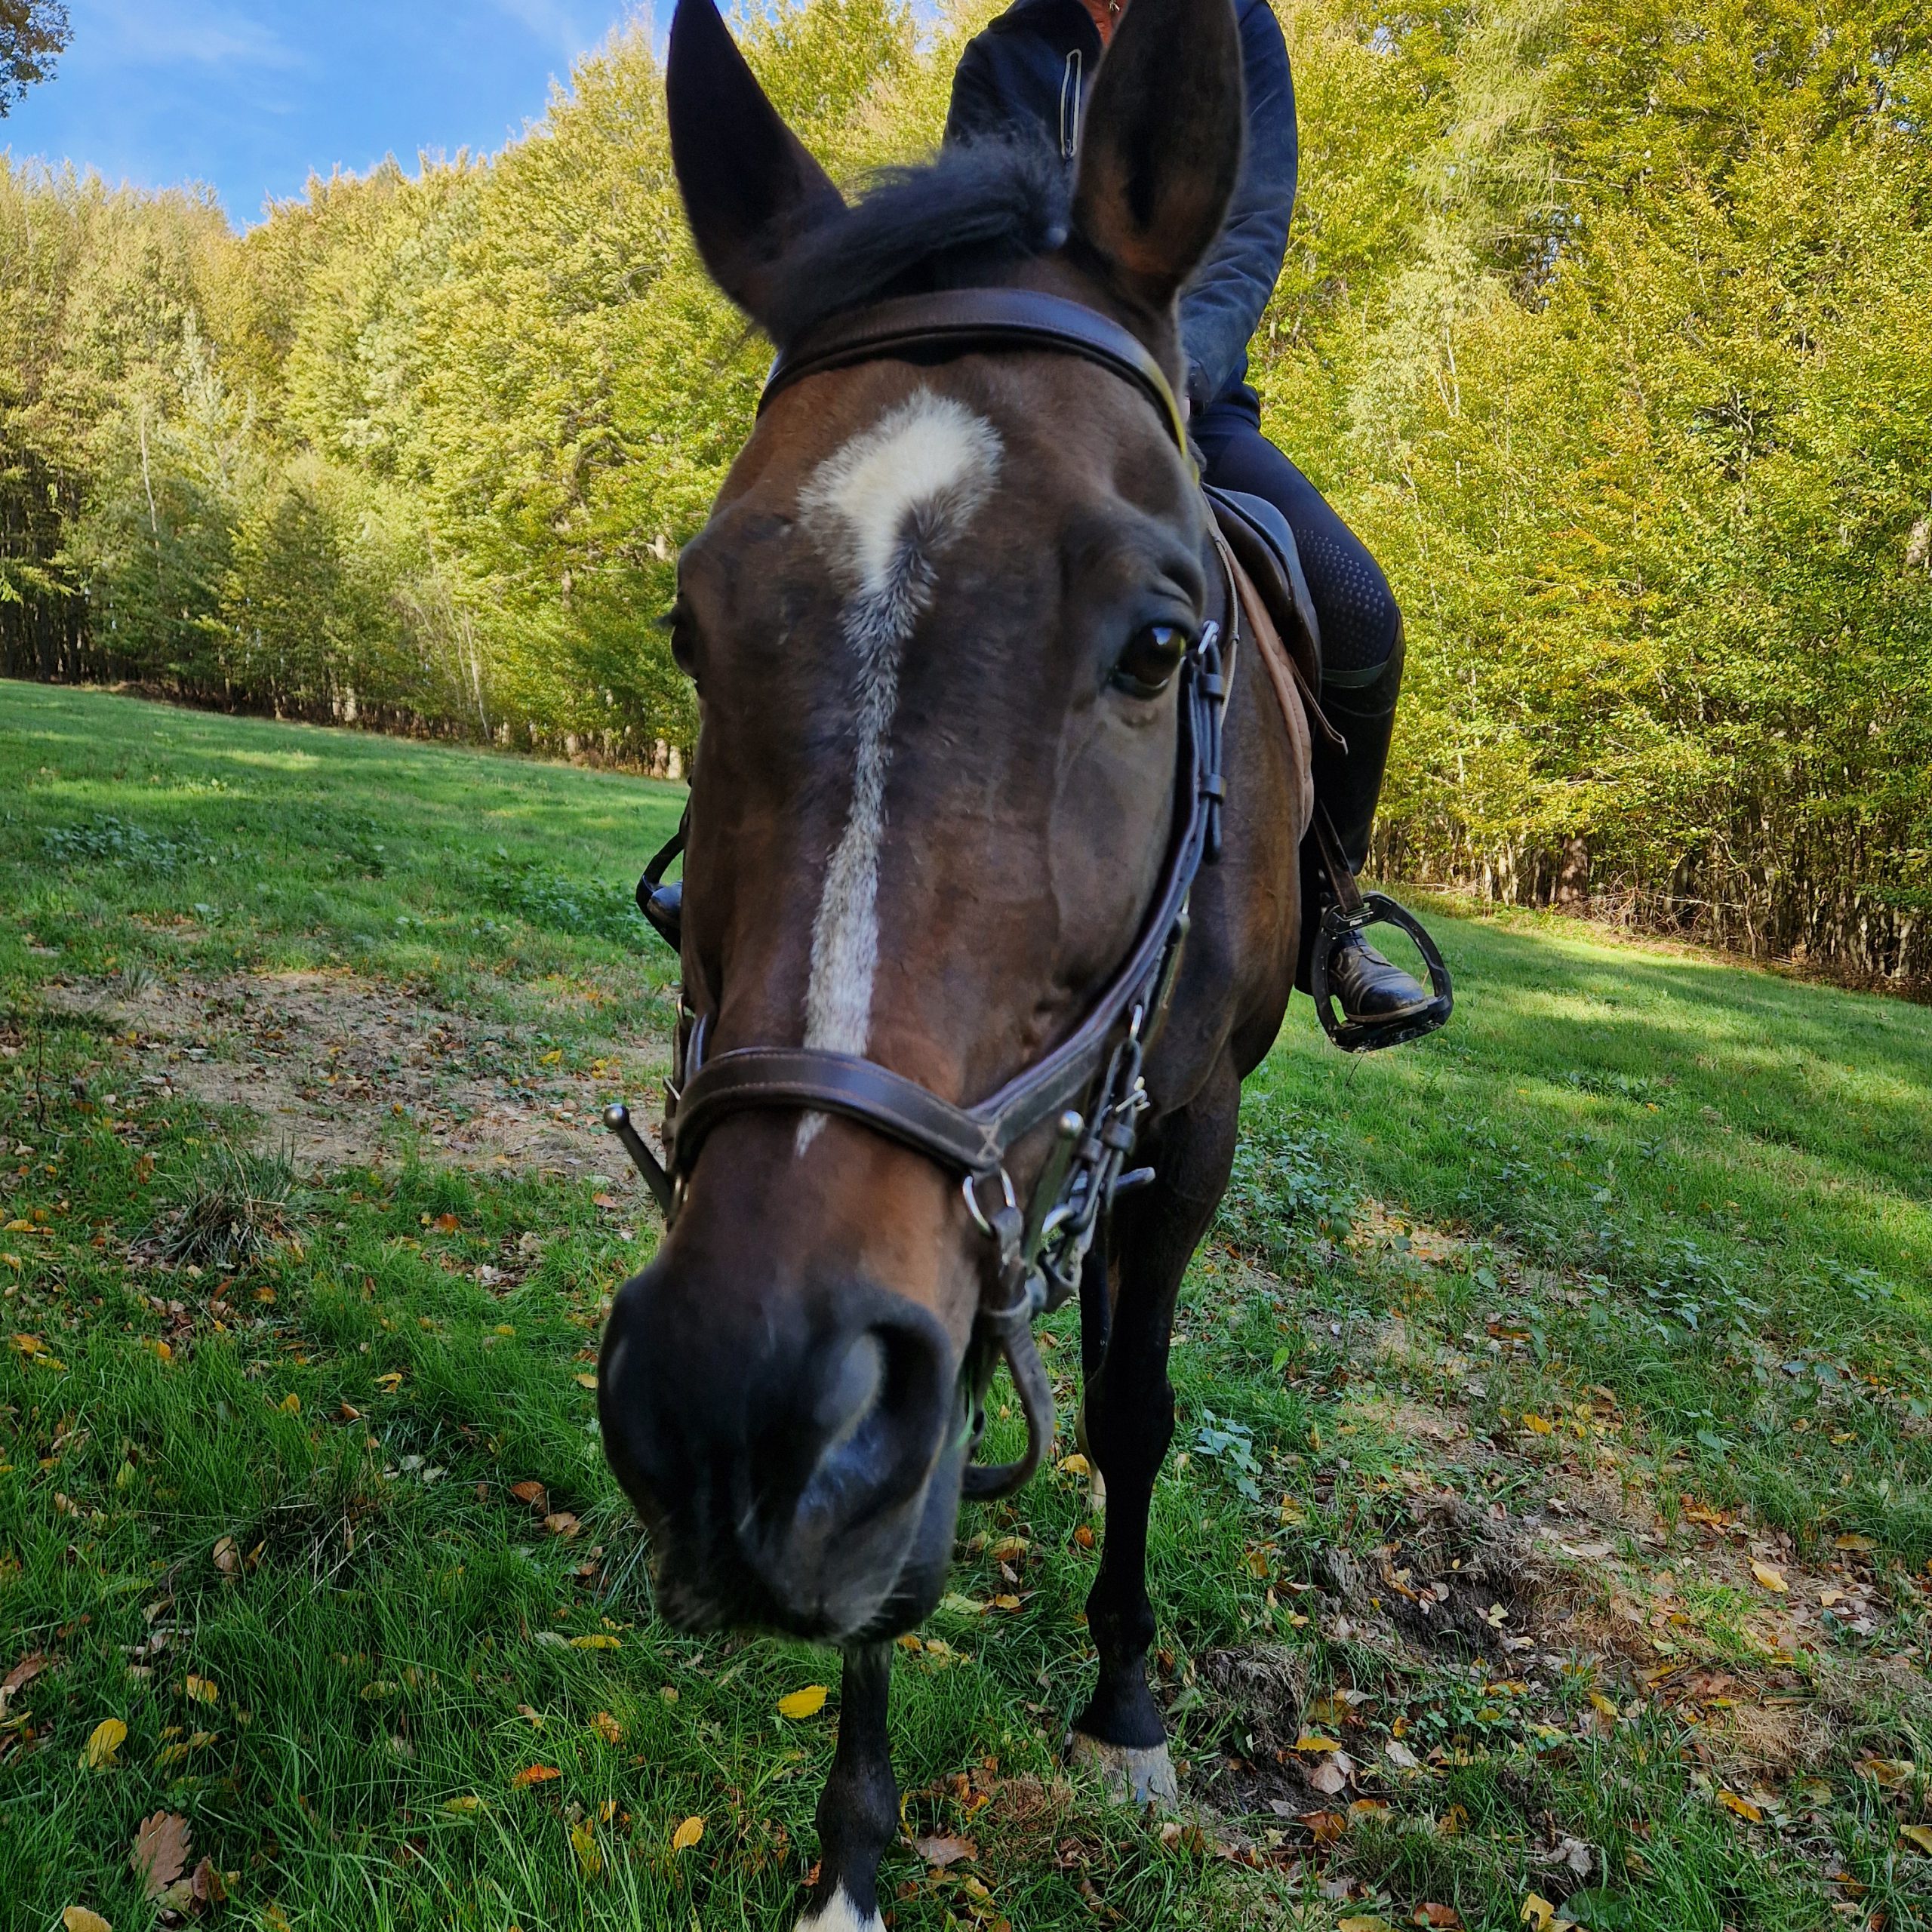
So here, I have chosen for a simple dark bay horse with markings here and there as I feel like it.
Step 2: Assembly
The age-old question, do we assemble the knight and horse together, or do we assemble and paint them separately? Much better painters than me stand with Team Together. However, I have neither the hand-eye coordination nor the skill to do it properly (trust me; I’ve tried). Therefore, I’ve found painting them separately to be much less anxiety-inducing, if perhaps more time-consuming.
Step 3: Priming
Now, for this setup, I’ve just primed the model with Army Painter: Ash Grey out of a spraycan. Given that I will not be using contrast or speed paints, the priming colours are not as important.
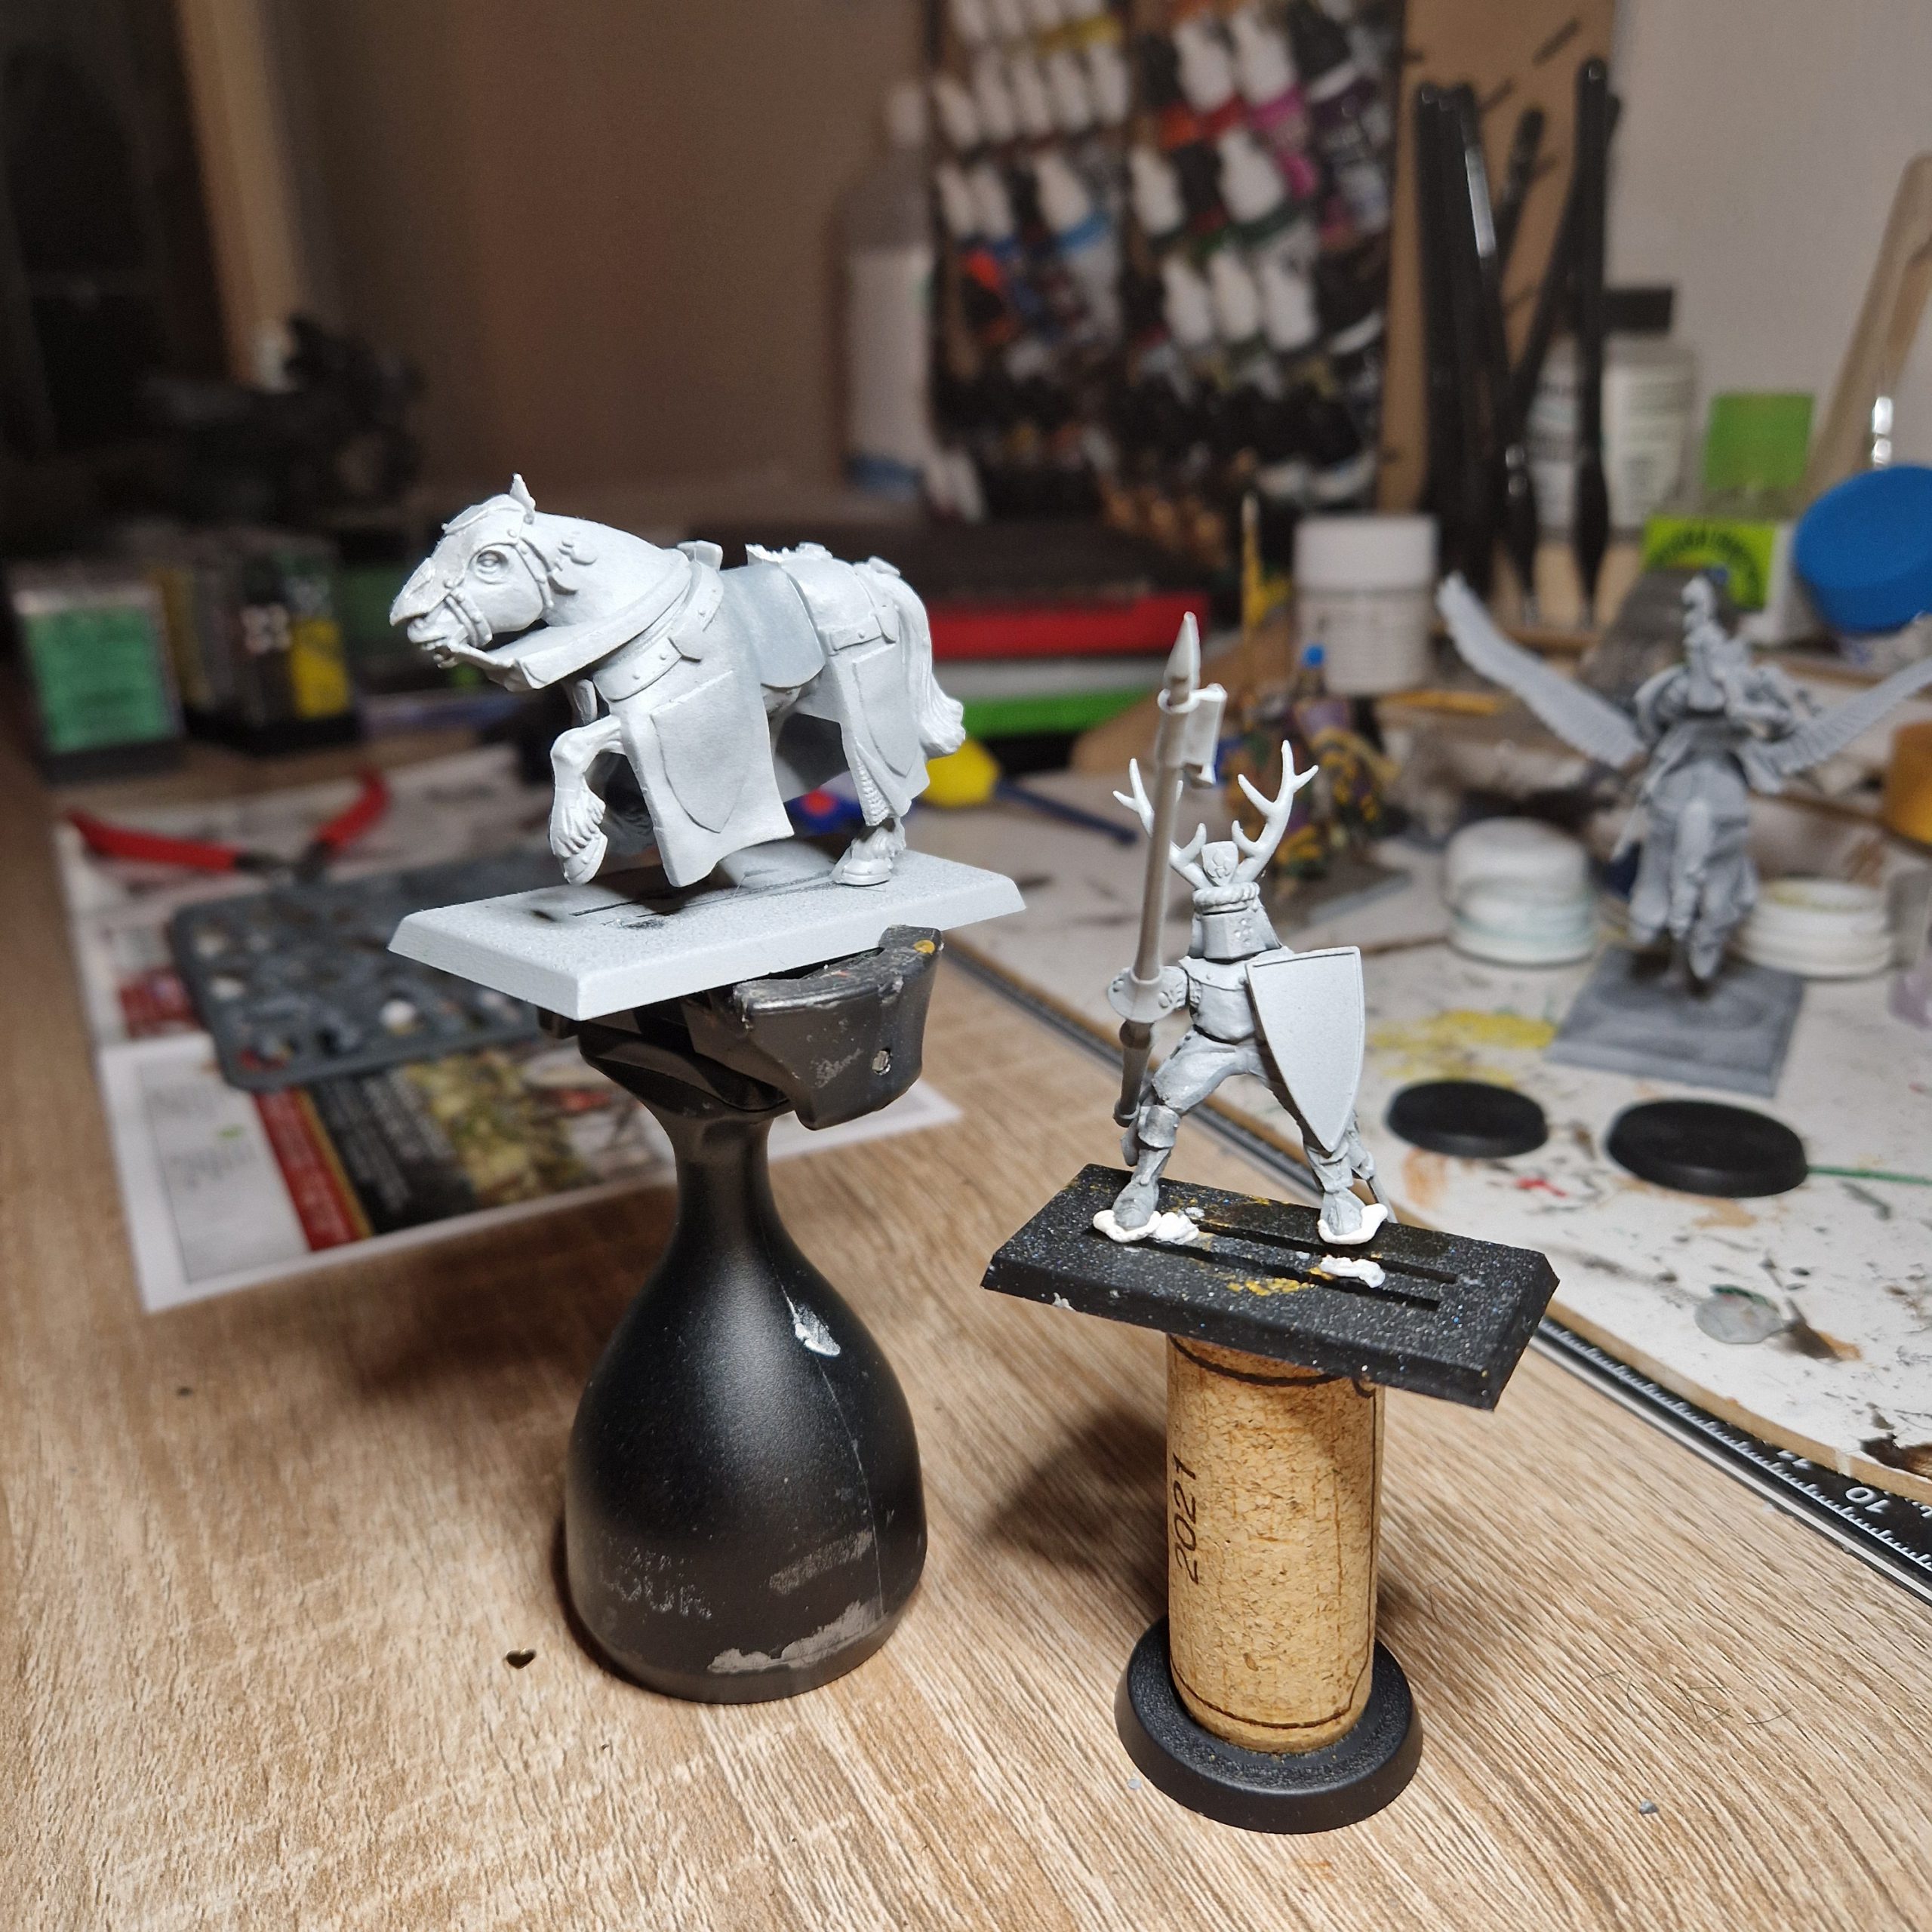
Step 4: Base Coats
Personally, I like to start with the horse as I can work on the heraldry techniques on a stabler platform compared to the wobbly knight on Bluetac. So let’s talk through the technique.
Step 4a) The Steed
Generally, I attempt to go for an inside-out technique, i.e. paint items on the inside first and slowly move out. However, as there are so many colours to go on a KOTR, I’ve decided to go on a colour-by-colour basis with a general attempt to go from inner bits outwards. My painting process as well as paints used in order is: –
- Horse main coat (Vallejo 70.846 Mahogany Brown + Vallejo 70.950 Black): Add black to taste. Given how little area there is, sometimes even one drop of paint is way too much. However, if you have the time to do so, it’s worth mixing things around to get a variety of horse coats. Make sure you get into the exposed skin by the eye.
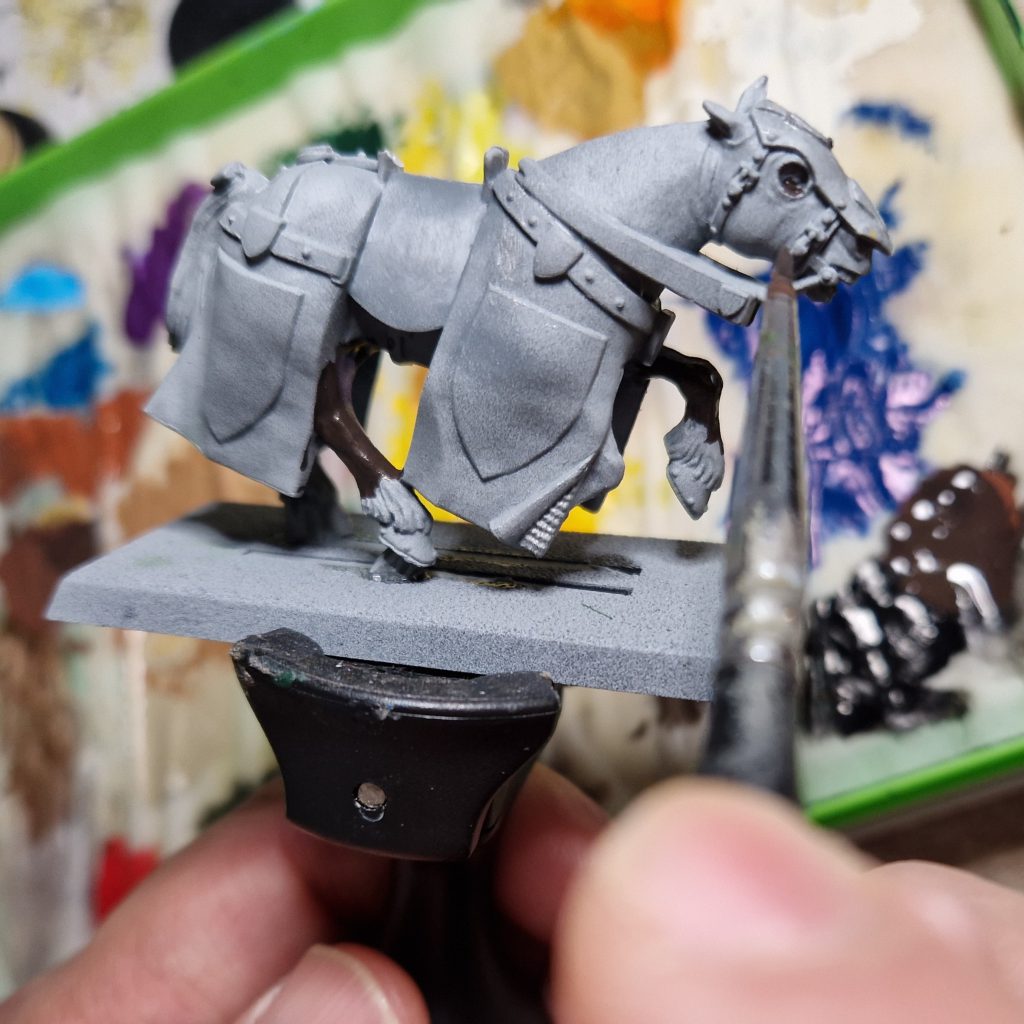
- Horse points (Vallejo 70.950 Black): If you haven’t read How to Paint Everything: Horses yet, you should. But TLDR, the points are basically the lower legs, nose, tips of ears, and hair. I use a more watered-down than normal (but not yet a glaze) black so that the black at the points blend with the coat better. Don’t worry too much here about messing into the main coat. Take and enjoy the happy little accidents. Drop in some black into the eyes while we’re here.
- Hooves (Warpaints Fanatic: Skeleton Bone): Simple paint on. It might not look too natural right now but it will nice up in the wash.
- Armour and Other Metal Bits (Warpaints Fanatic: Plate Mail Metal): I’m not being sponsored by anyone, but from all the metal acrylics I have tried, the Warpaints Fanatics paints have been great in terms of shininess and paint-on-ability. I usually put on a thin coat but I do not water it down. Use the Plate Mail Metal on the horse’s helmet, the chain mail bits sticking out of the barding, the bit (that’s the part in the horse’s mouth) and if you feel like it, the horseshoes.
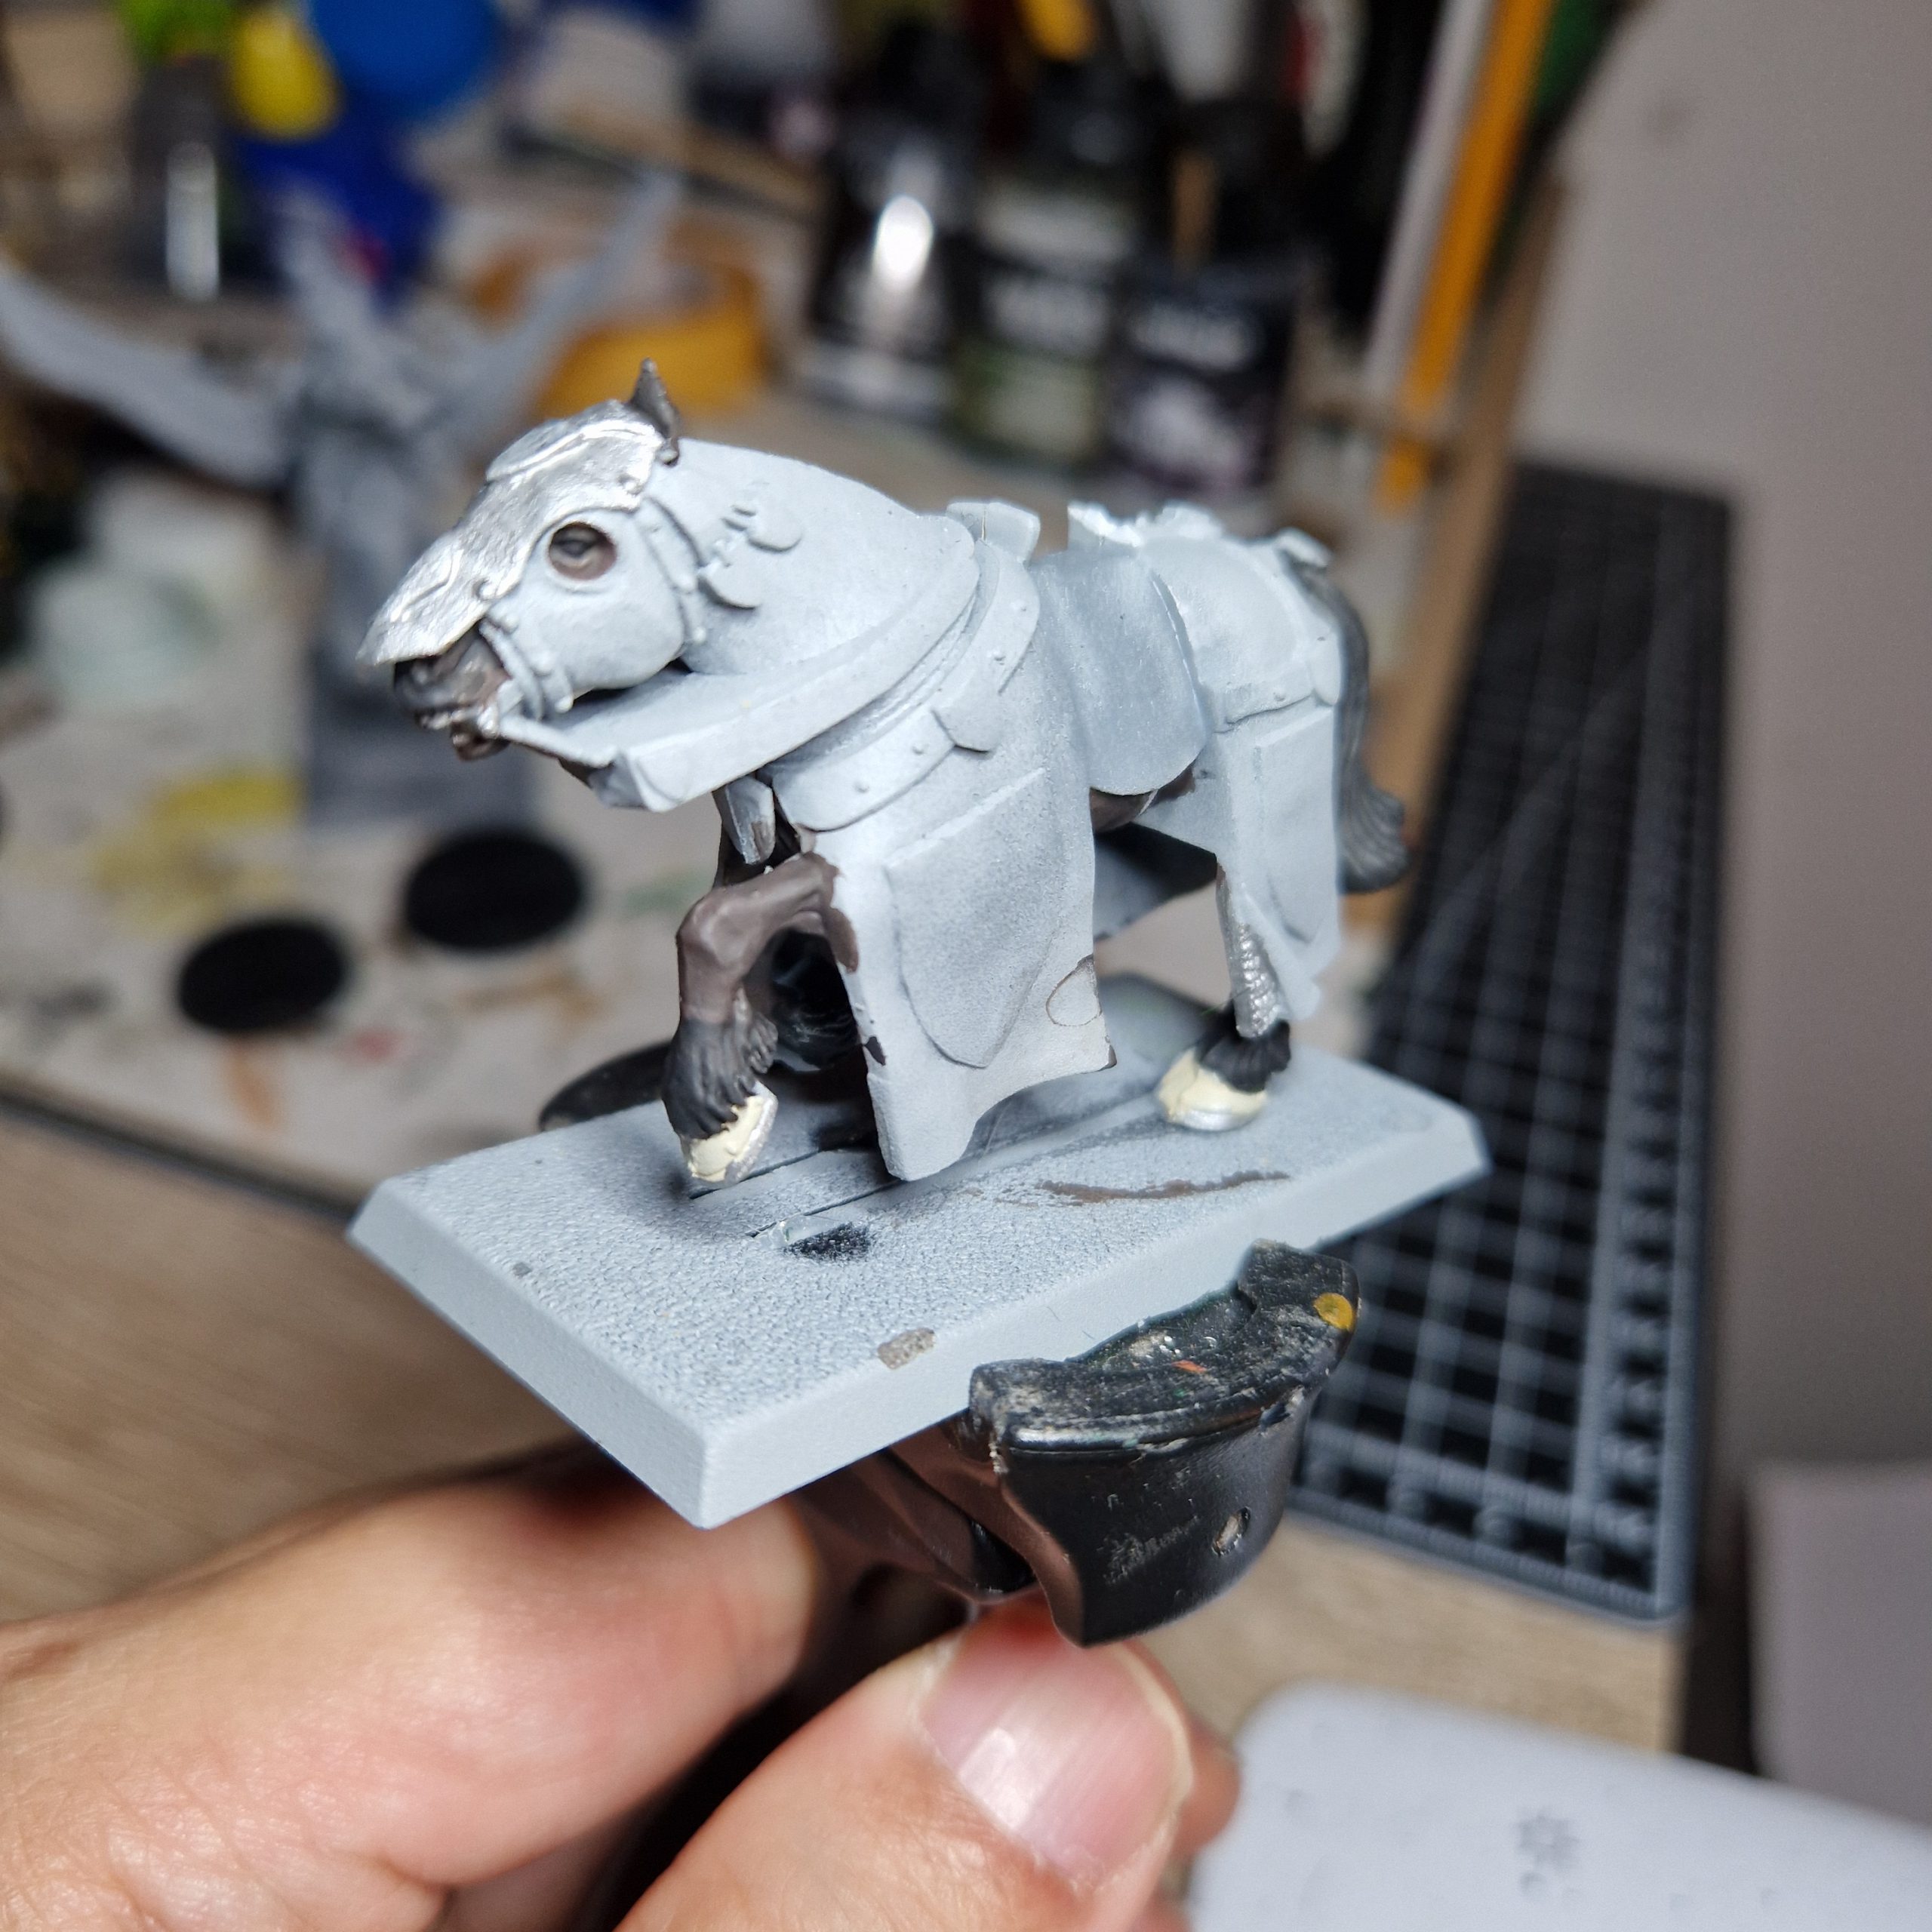
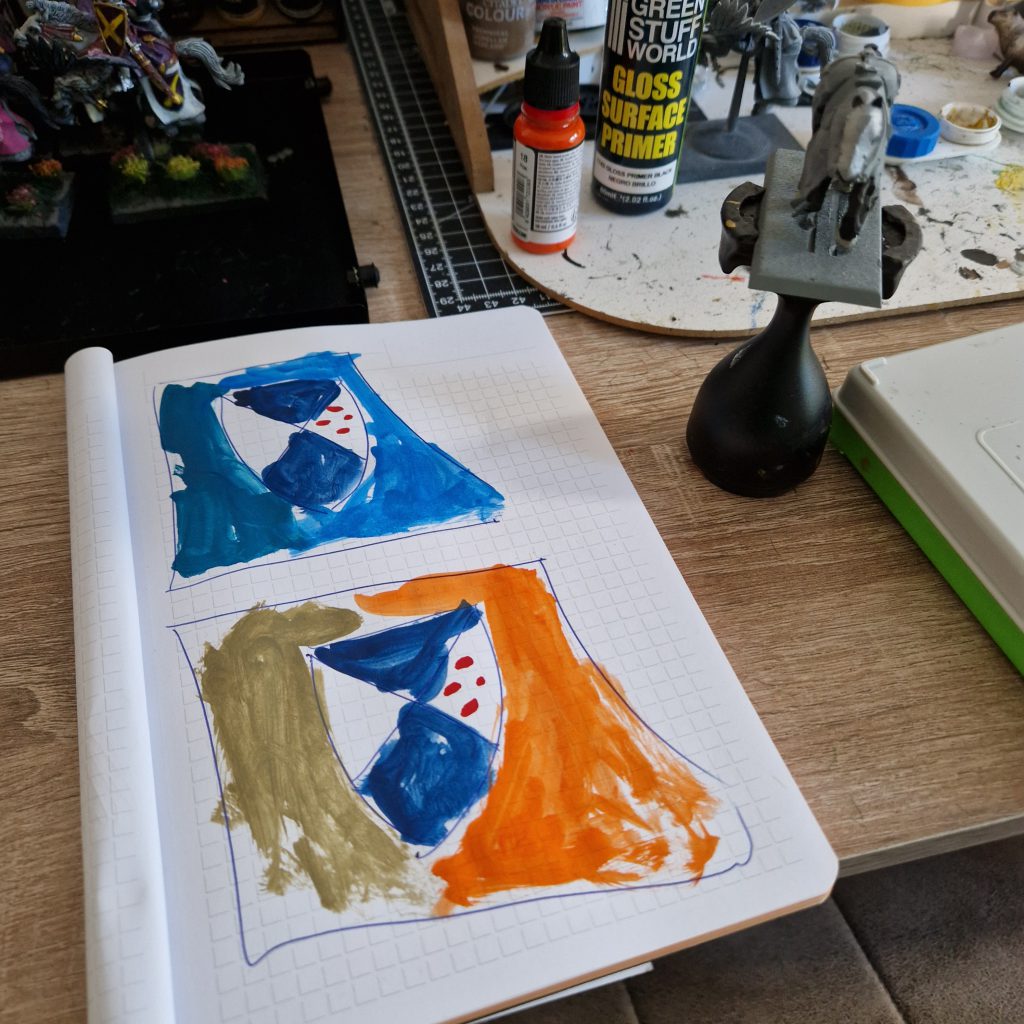
- Barding (Vallejo 70.988 Khaki): Before I get around to painting on the heraldry, I’ll paint the cloth barding around the horse. Now, there are a million variations – most commonly, having the colours of your shield half-half (e.g. blue on the left side and white on the right side). However, because I’m choosing to go off-piste here, I decided to go for a very non-tradtional khaki/olive/golden-brown barding because it’s the complementary colour of the blue shade I intend to use. I picked this after testing various options (from the paints that I had on hand) out on paper to see what it would look like.

Testing out various barding colours against the chosen heraldry, the old-school way - Heraldry (Vallejo 72.920 Imperial Blue, Vallejo 70.918 Ivory): This one is pretty straightforward. Take an HB pencil to draw the field lines you need, then take your time painting them in. The red Southern Cross stars will come later as a decal.
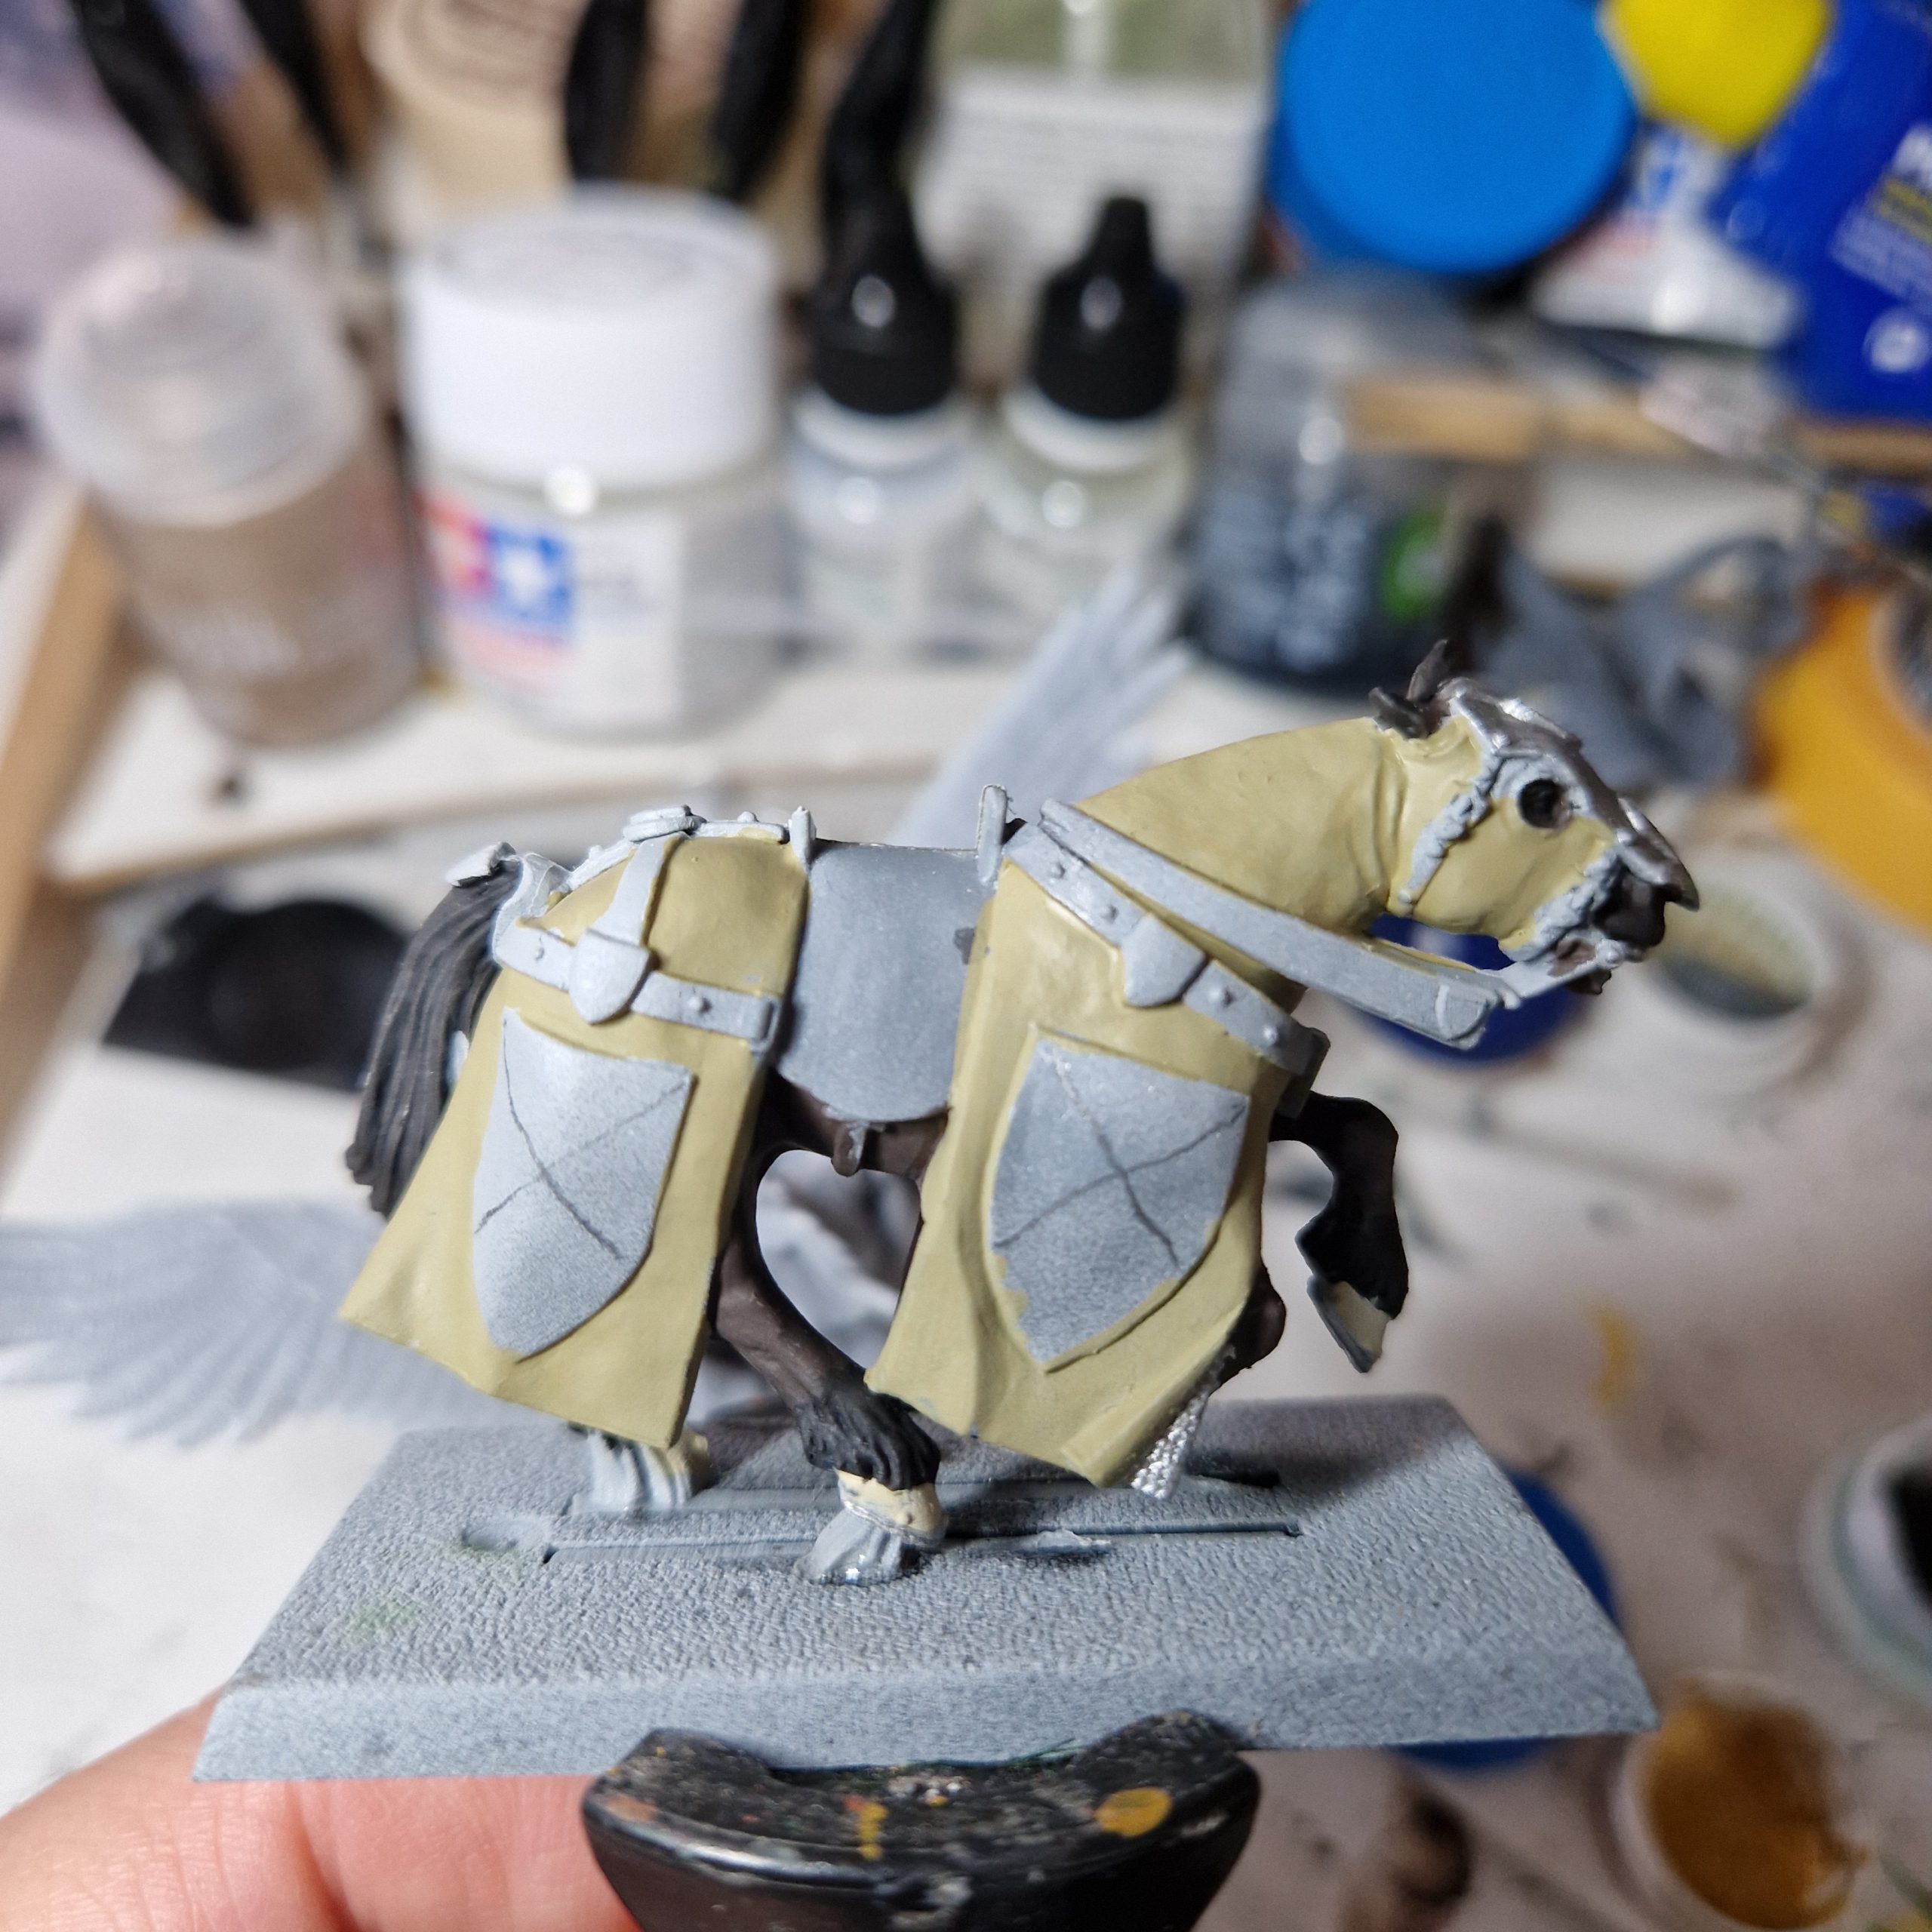
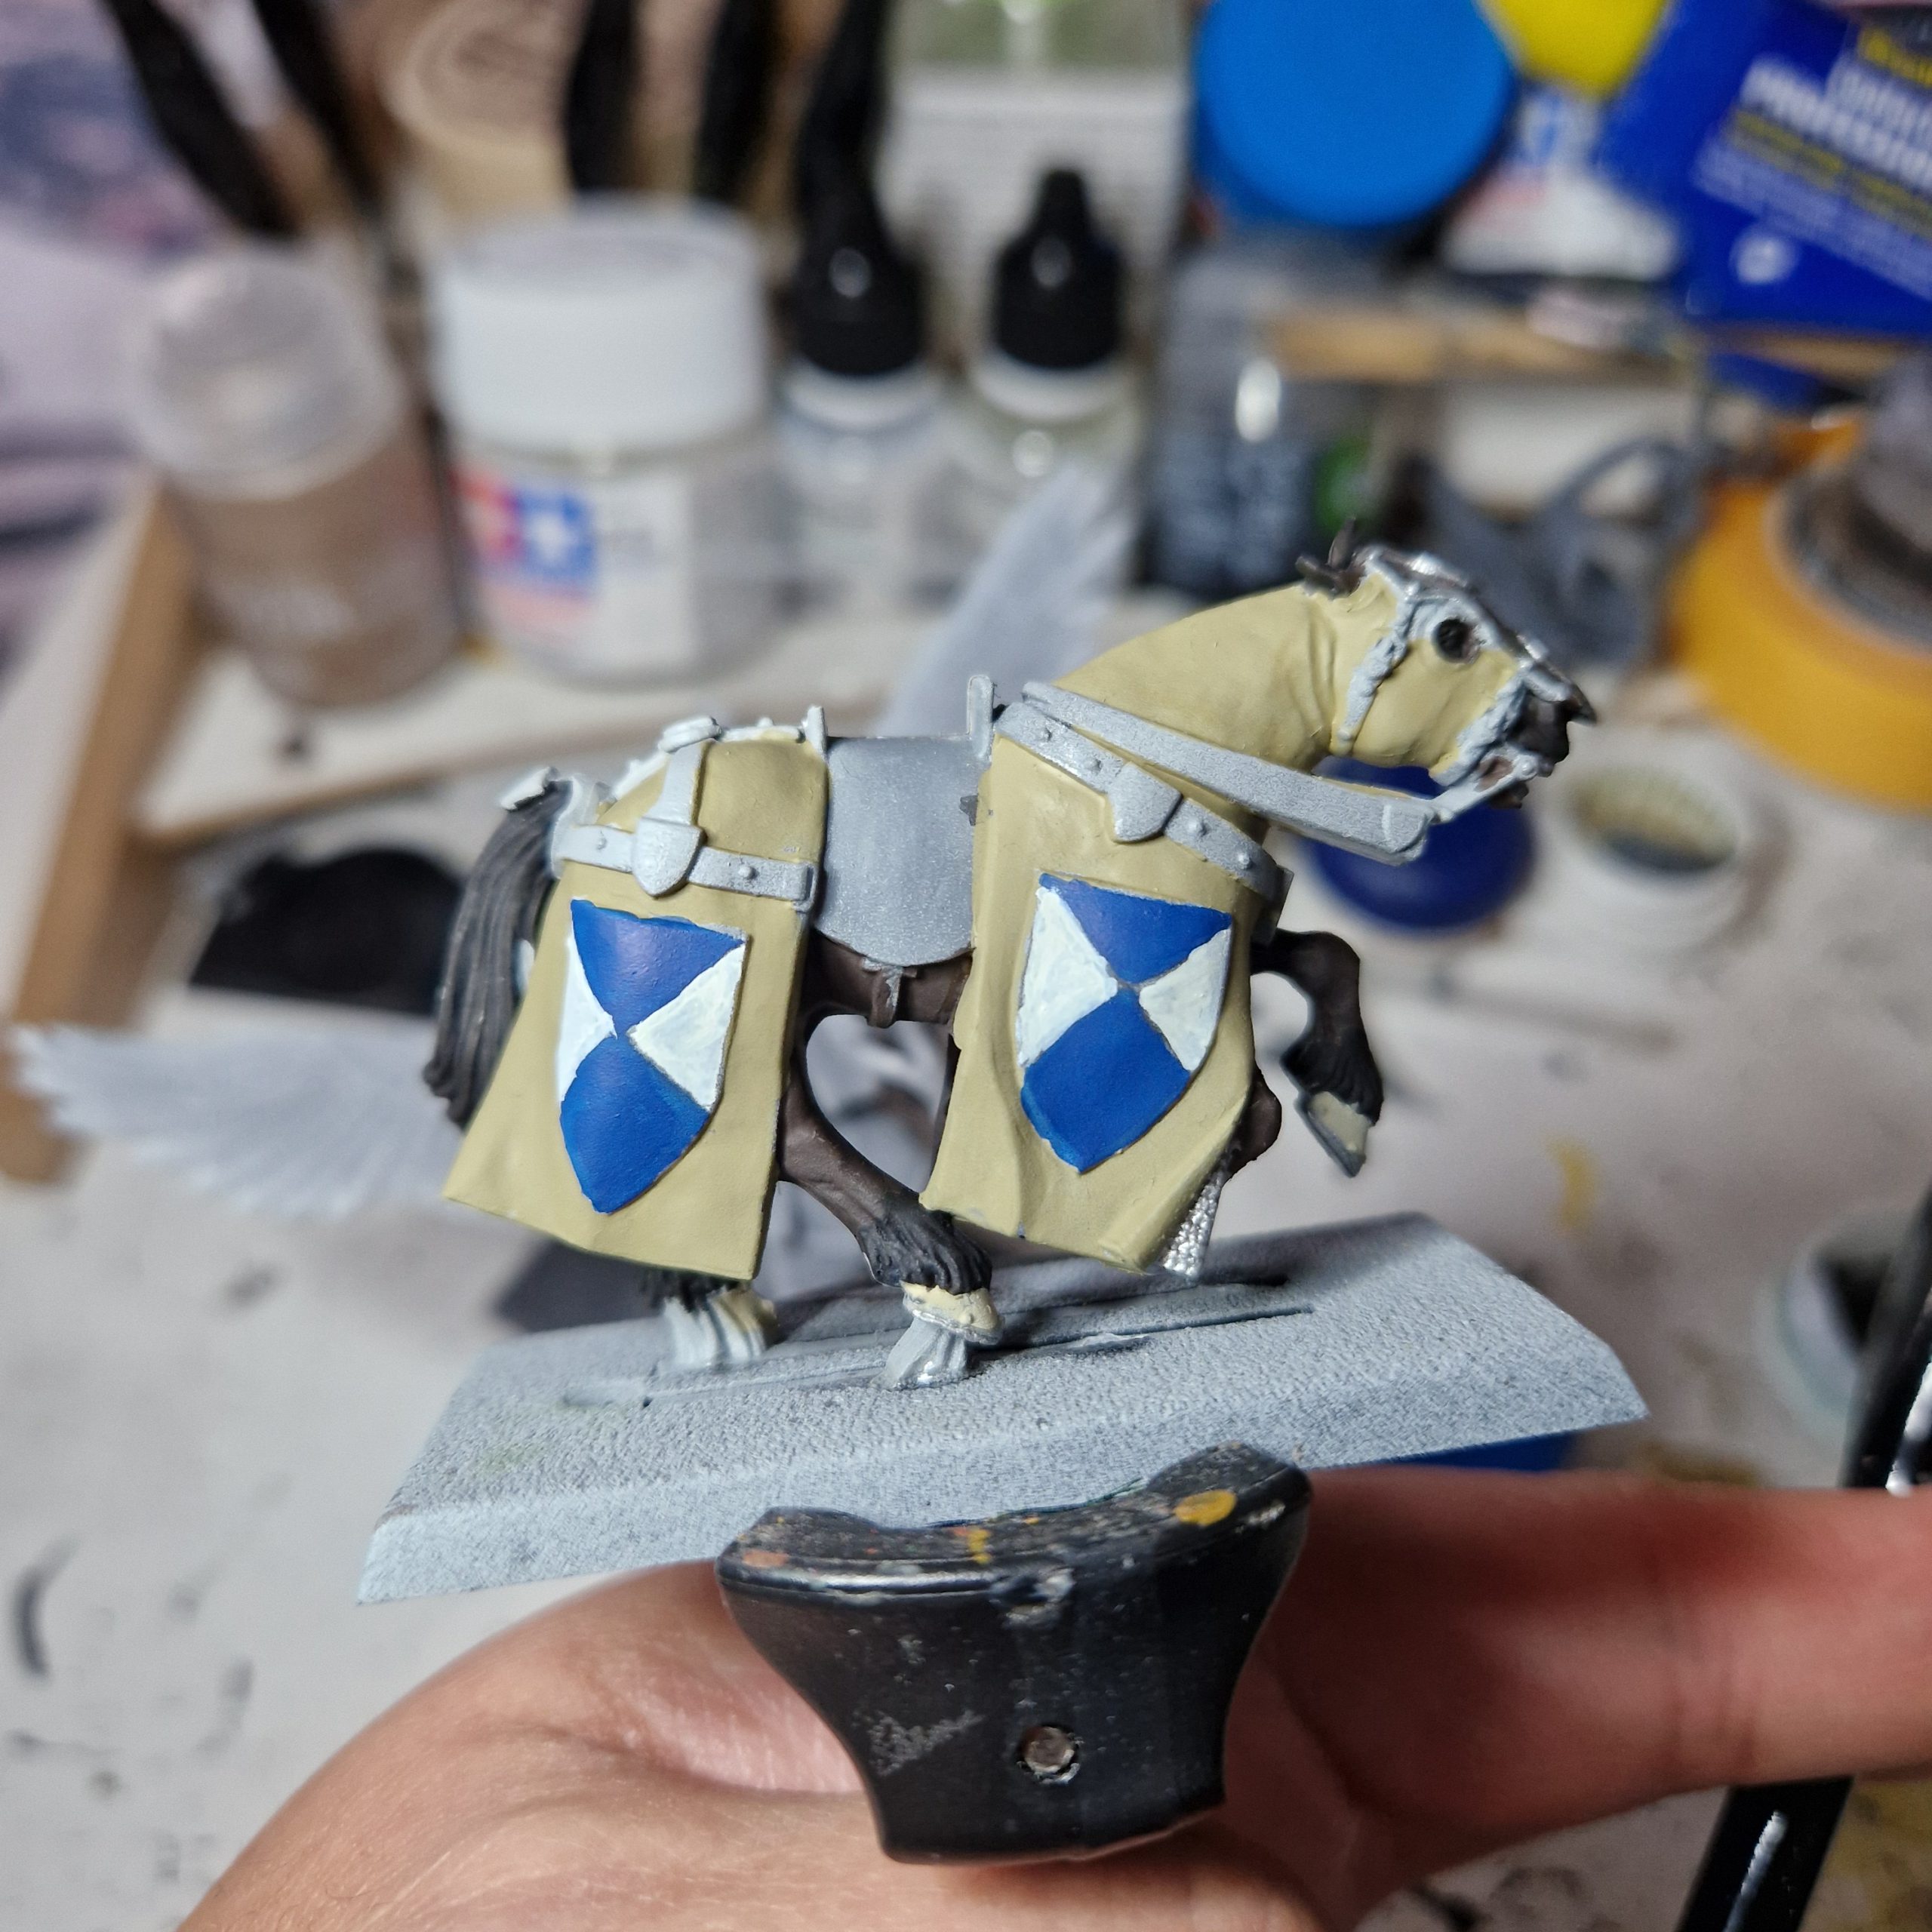
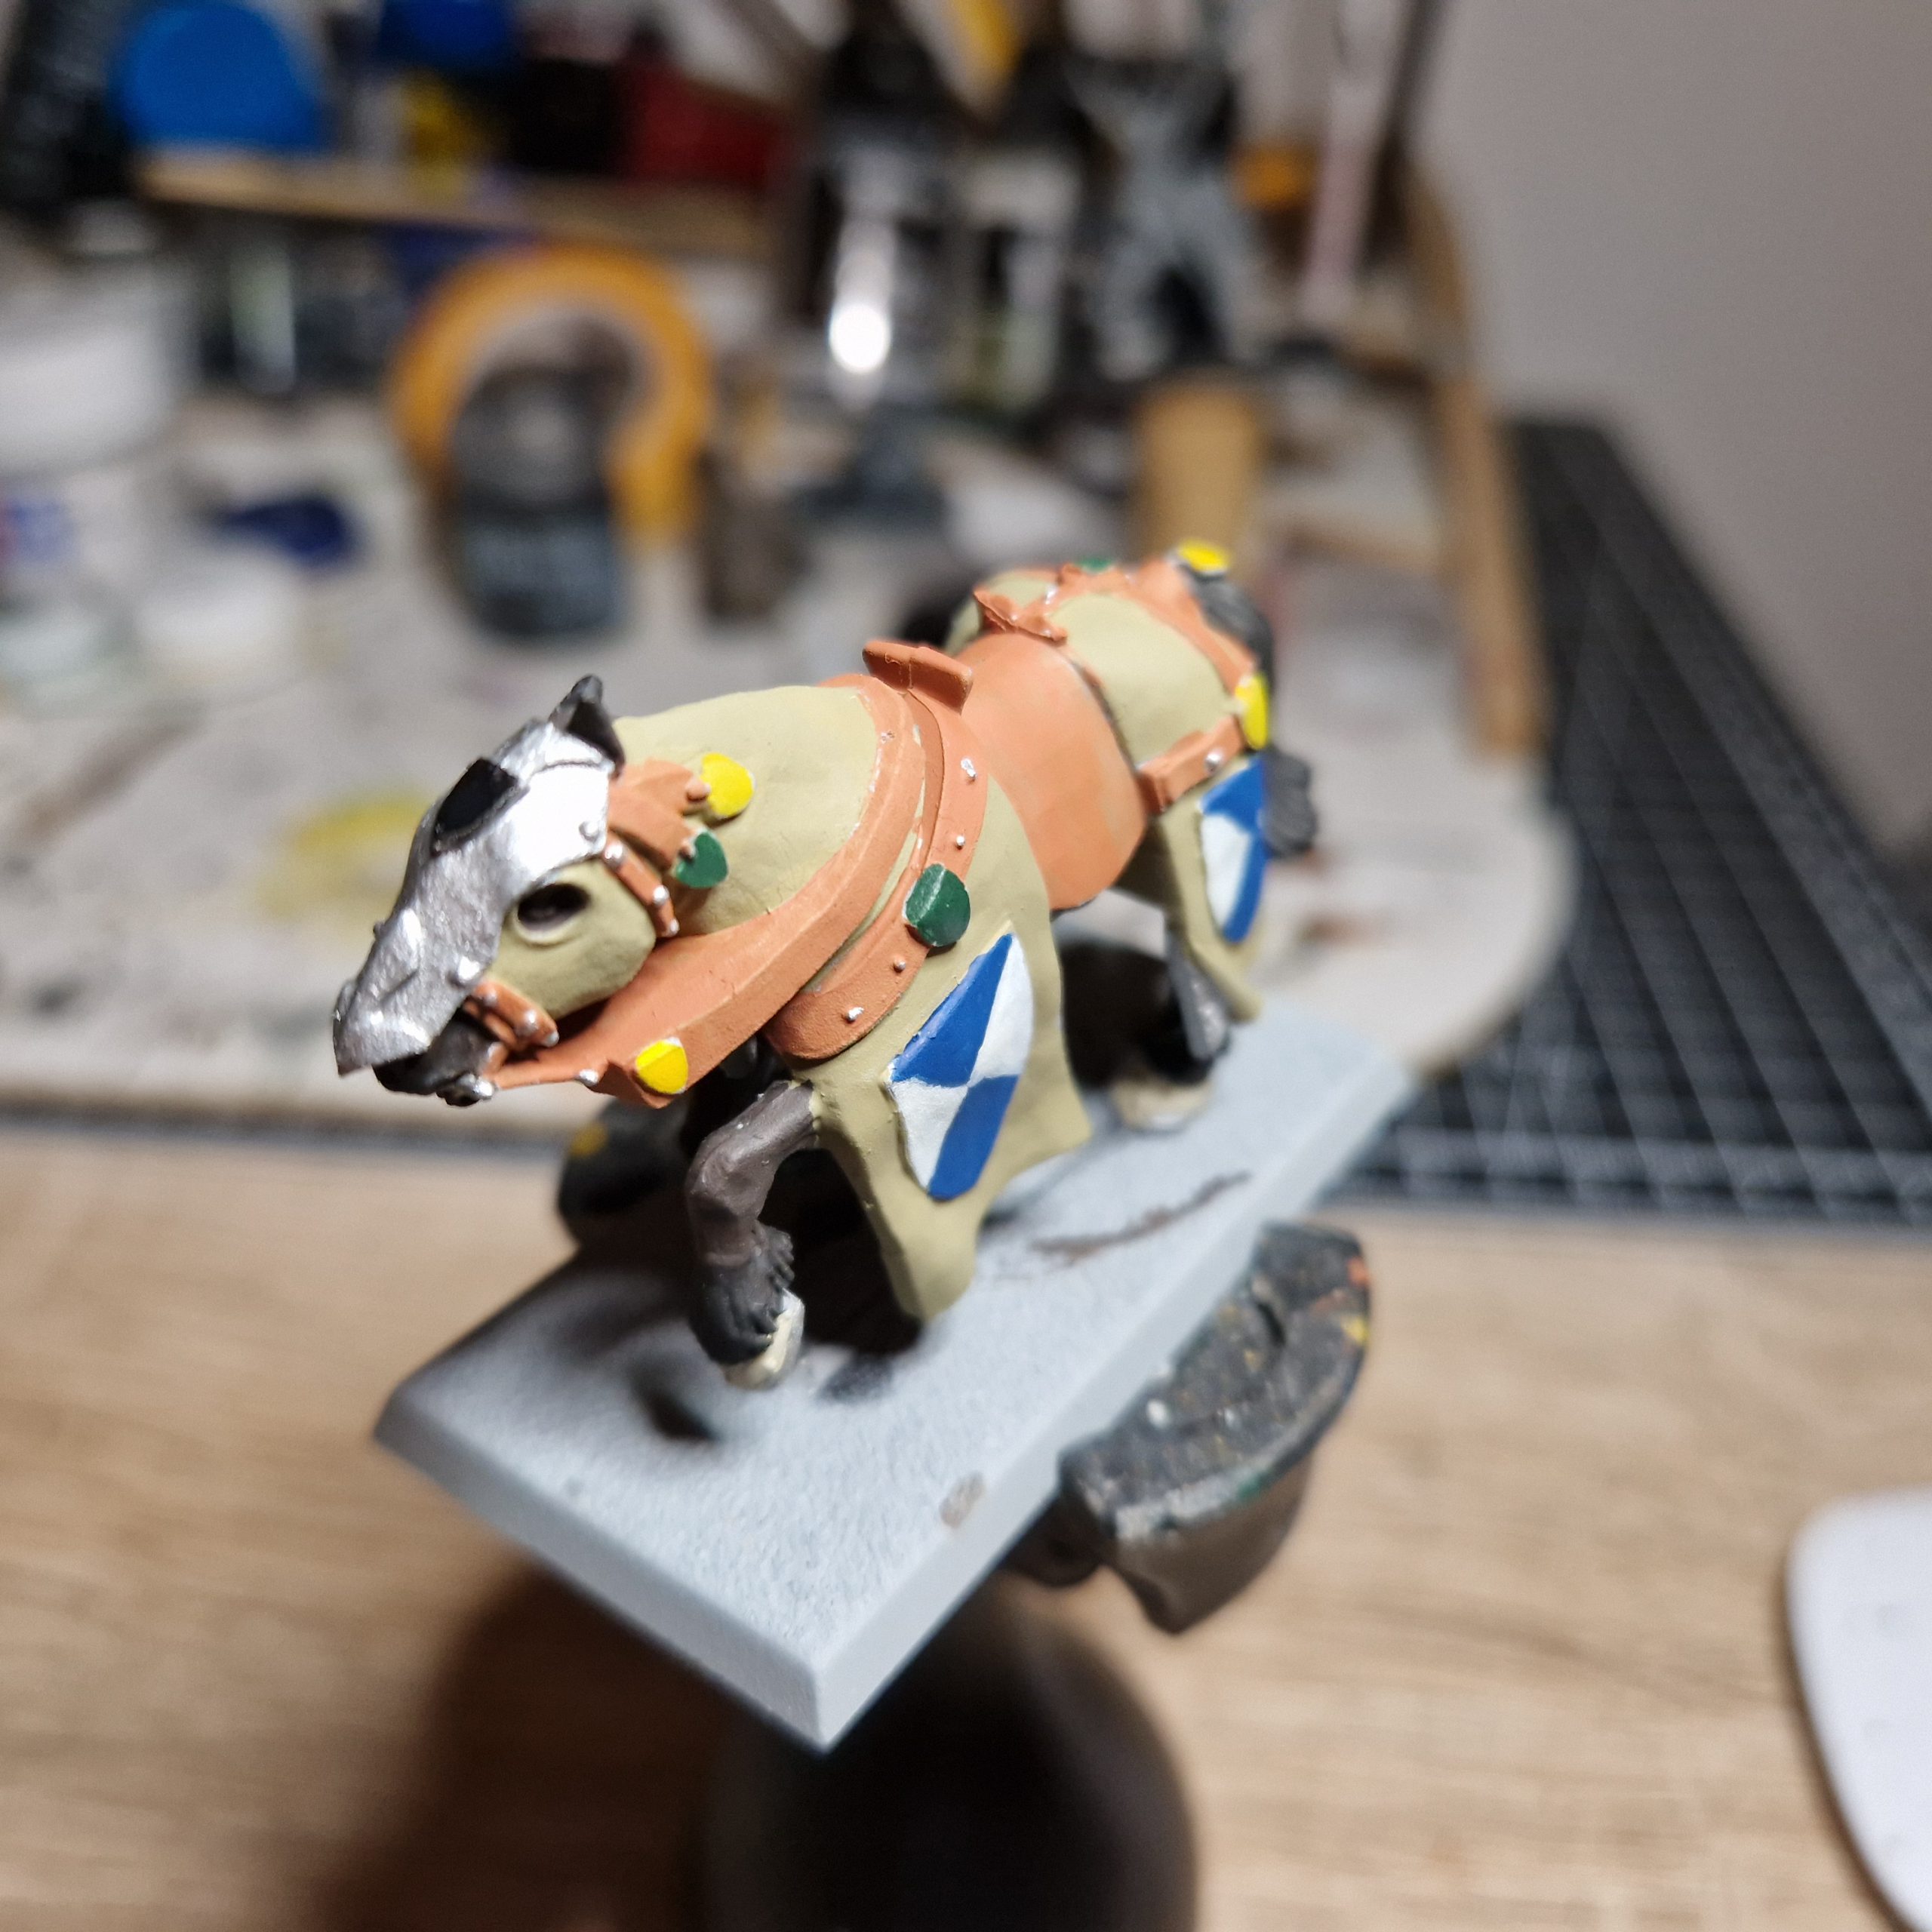
- Leather Bits (Vallejo 70.871 Leather Brown or Vallejo 70.818 Red Leather): Choose the leather type to taste. I sometimes use a combination if I care enough about a model but my choice is usually driven by what looks nicer with the chosen barding and heraldry as well as horse colour. In this case, I’ve chosen to use the Red Leather.
- Personal Touches and Shiny Bits: In this bit, I just colour up the teeth (Vallejo 70.918 Ivory), colour in the shields – in Baron colours (Army Painter Angel Green, Vallejo 72.006 Sun Yellow), and adding some silver bits to the naily parts of the horse (Army Painter Mithril). I’ve also decided to do a bit of a fun experiment, and for this, I’ve taken some Green Stuff World Gloss Surface Primer on the little shield on the horse’s head.
Step 4b) The Knight
Basically the same here. I try to go for an inside-out technique, but this is tempered by not having to repeat colours: –
- Armour and Other Silvery Metal Bits (Warpaints Fanatic: Plate Mail Metal): The helmet, the greaves, the arms, bits of weapons, and the tip of the lance.
- Heraldry (Vallejo 72.920 Imperial Blue, Vallejo 70.918 Ivory): Again, leaning on my inspiration, I’ve painted blue and white horizontal stripes with blue
shortscloth bits at the bottom. The cloth behind the helmet gets the same treatment too. Then of course, there’s the shield. - Wooden Components (Vallejo 70.843 Cork Brown): Knights of the Realm are relatively ‘horde’ so I’ve taken a bit of liberty to use the same colours for components. In this case, the lance shaft, the rope-looking thing on the helmet, the stag horns all share the same colour. I’ve also painted the back of the shield with this colour
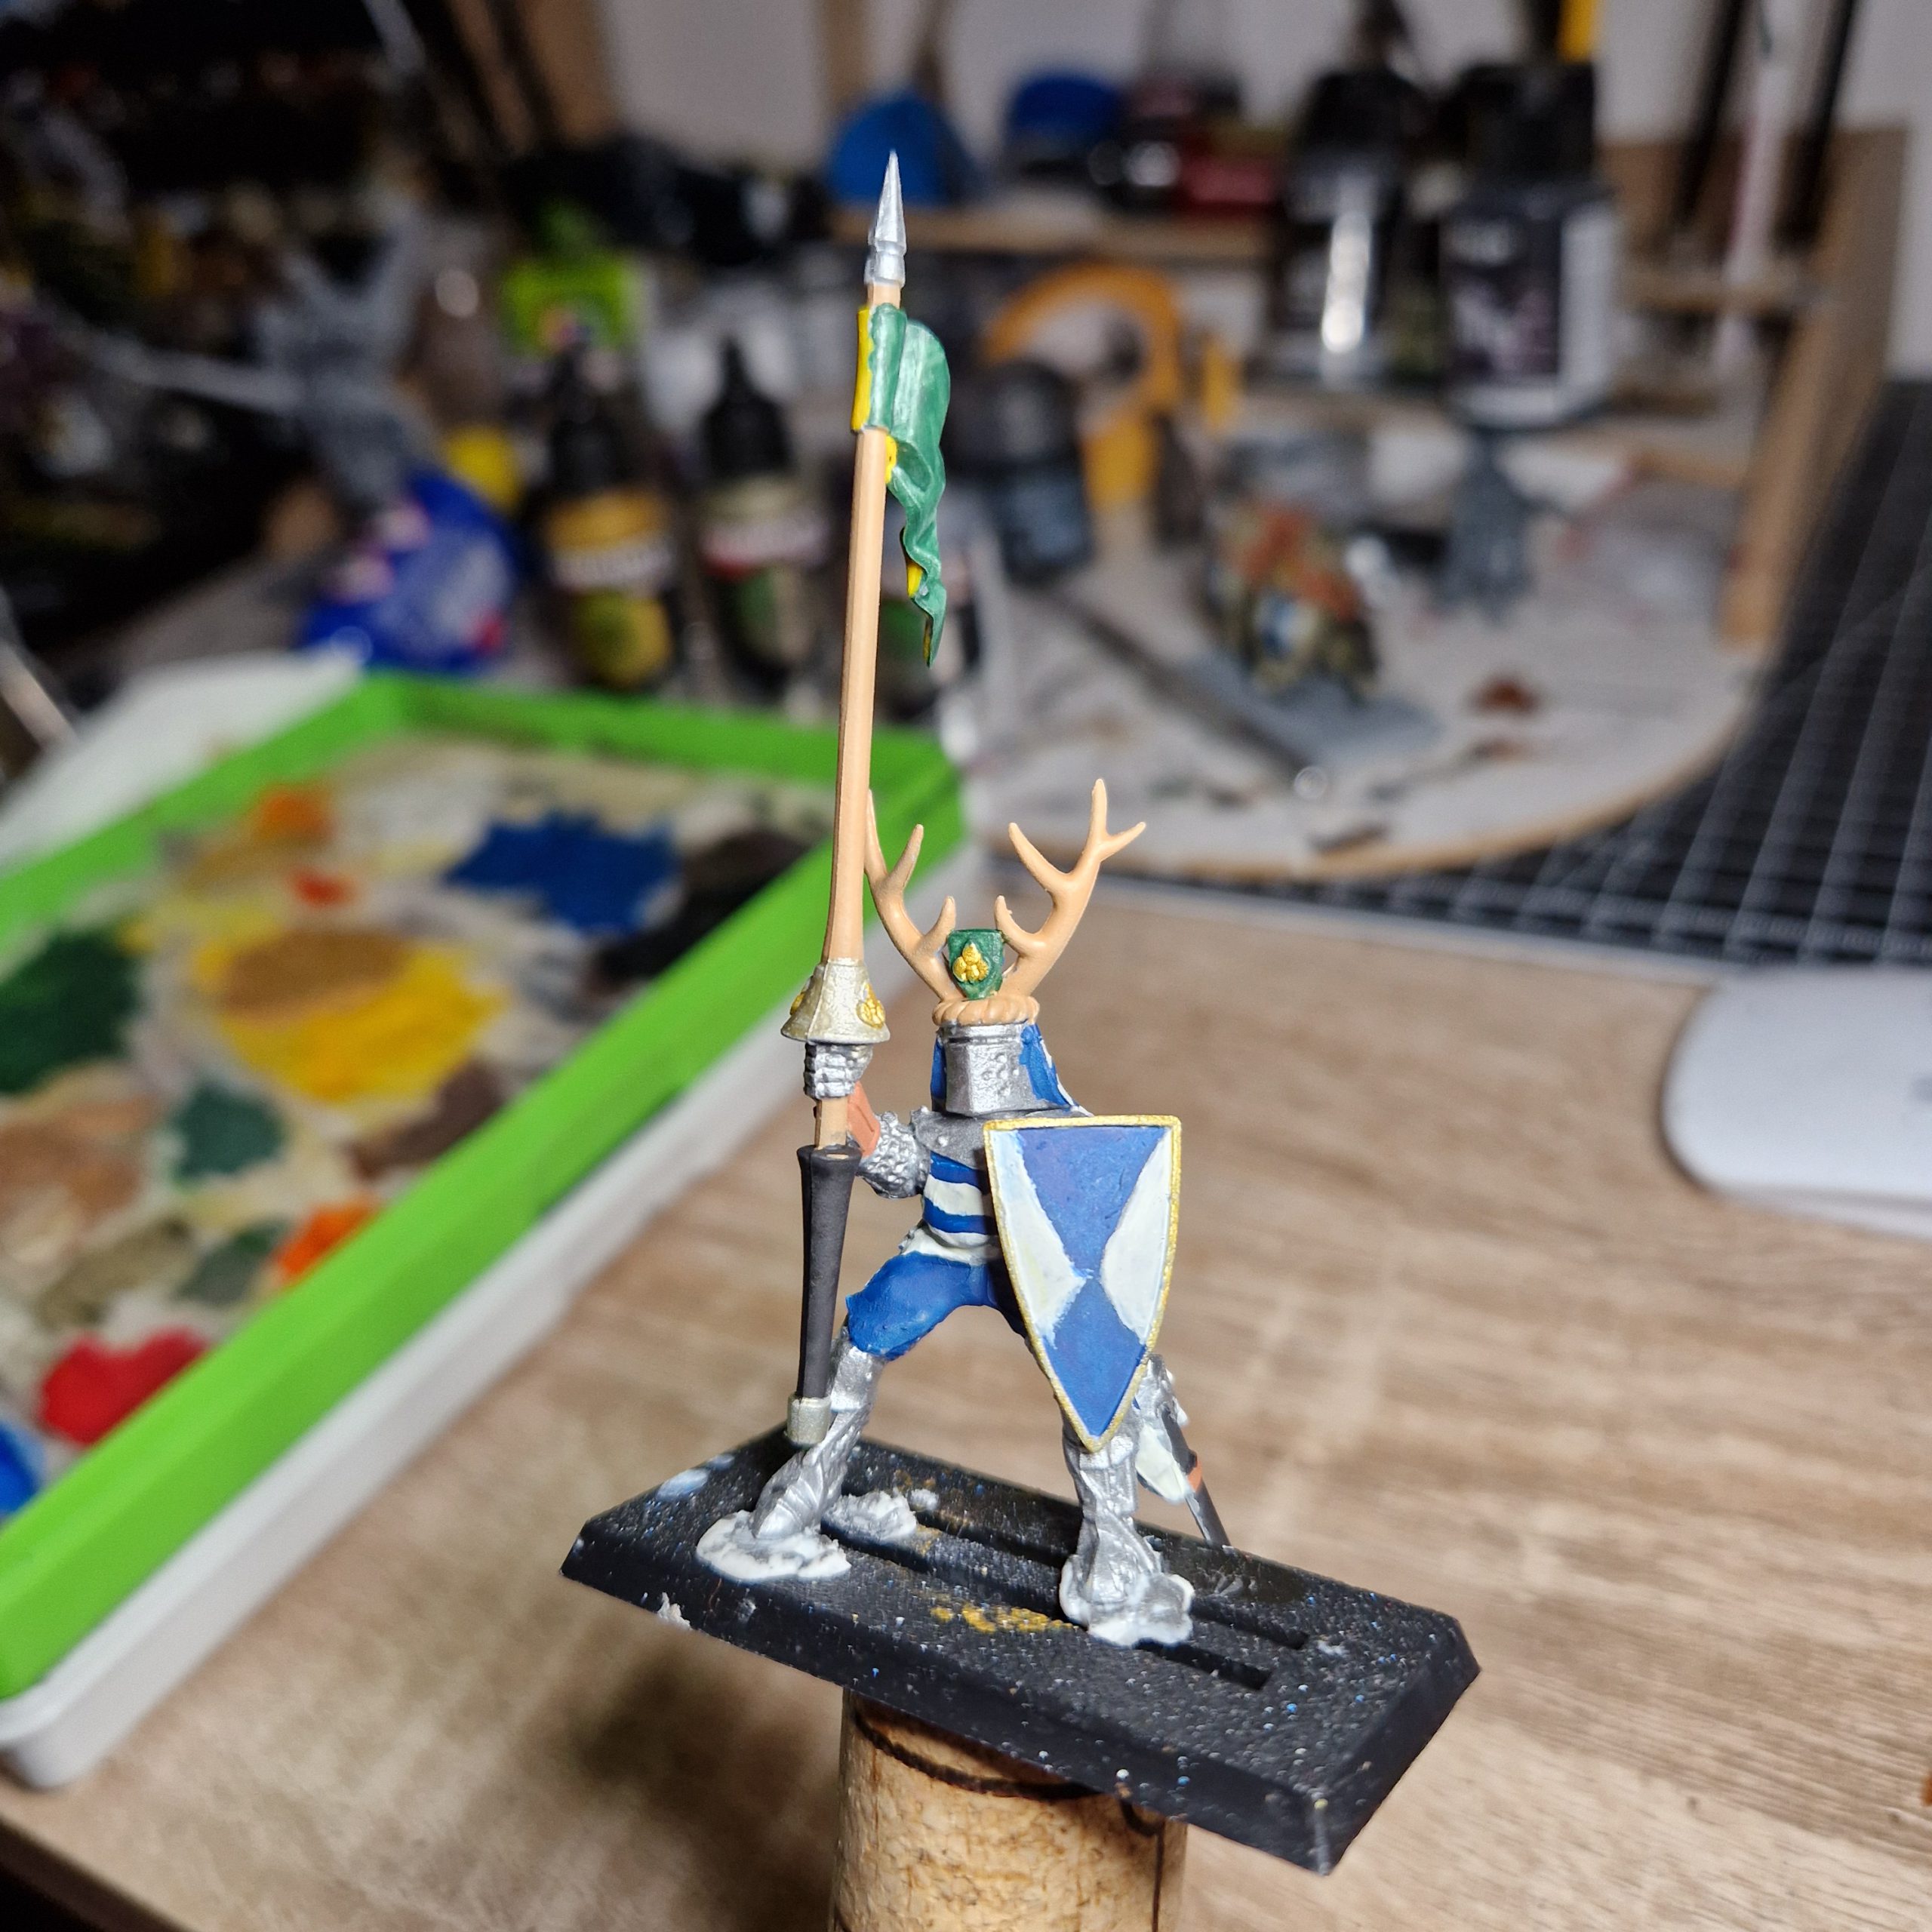
- Leather Bits (Vallejo 70.871 Leather Brown or Vallejo 70.818 Red Leather): Just like the horse, choose your leather colour to taste. The only essential are the hanging leather bits of the sword, but I’ve also coloured in the scabbard holder and the right gauntlet.
- Personal Touches and Shiny Bits: The pennant gets Baron colours (Army Painter Angel Green, Vallejo 72.006 Sun Yellow), scabbards and lance haft is black (Vallejo 70.950 Black) and I use Army Painter Mithril, Army Painter Bright Gold, and Army Painter True Brass for metallic parts.
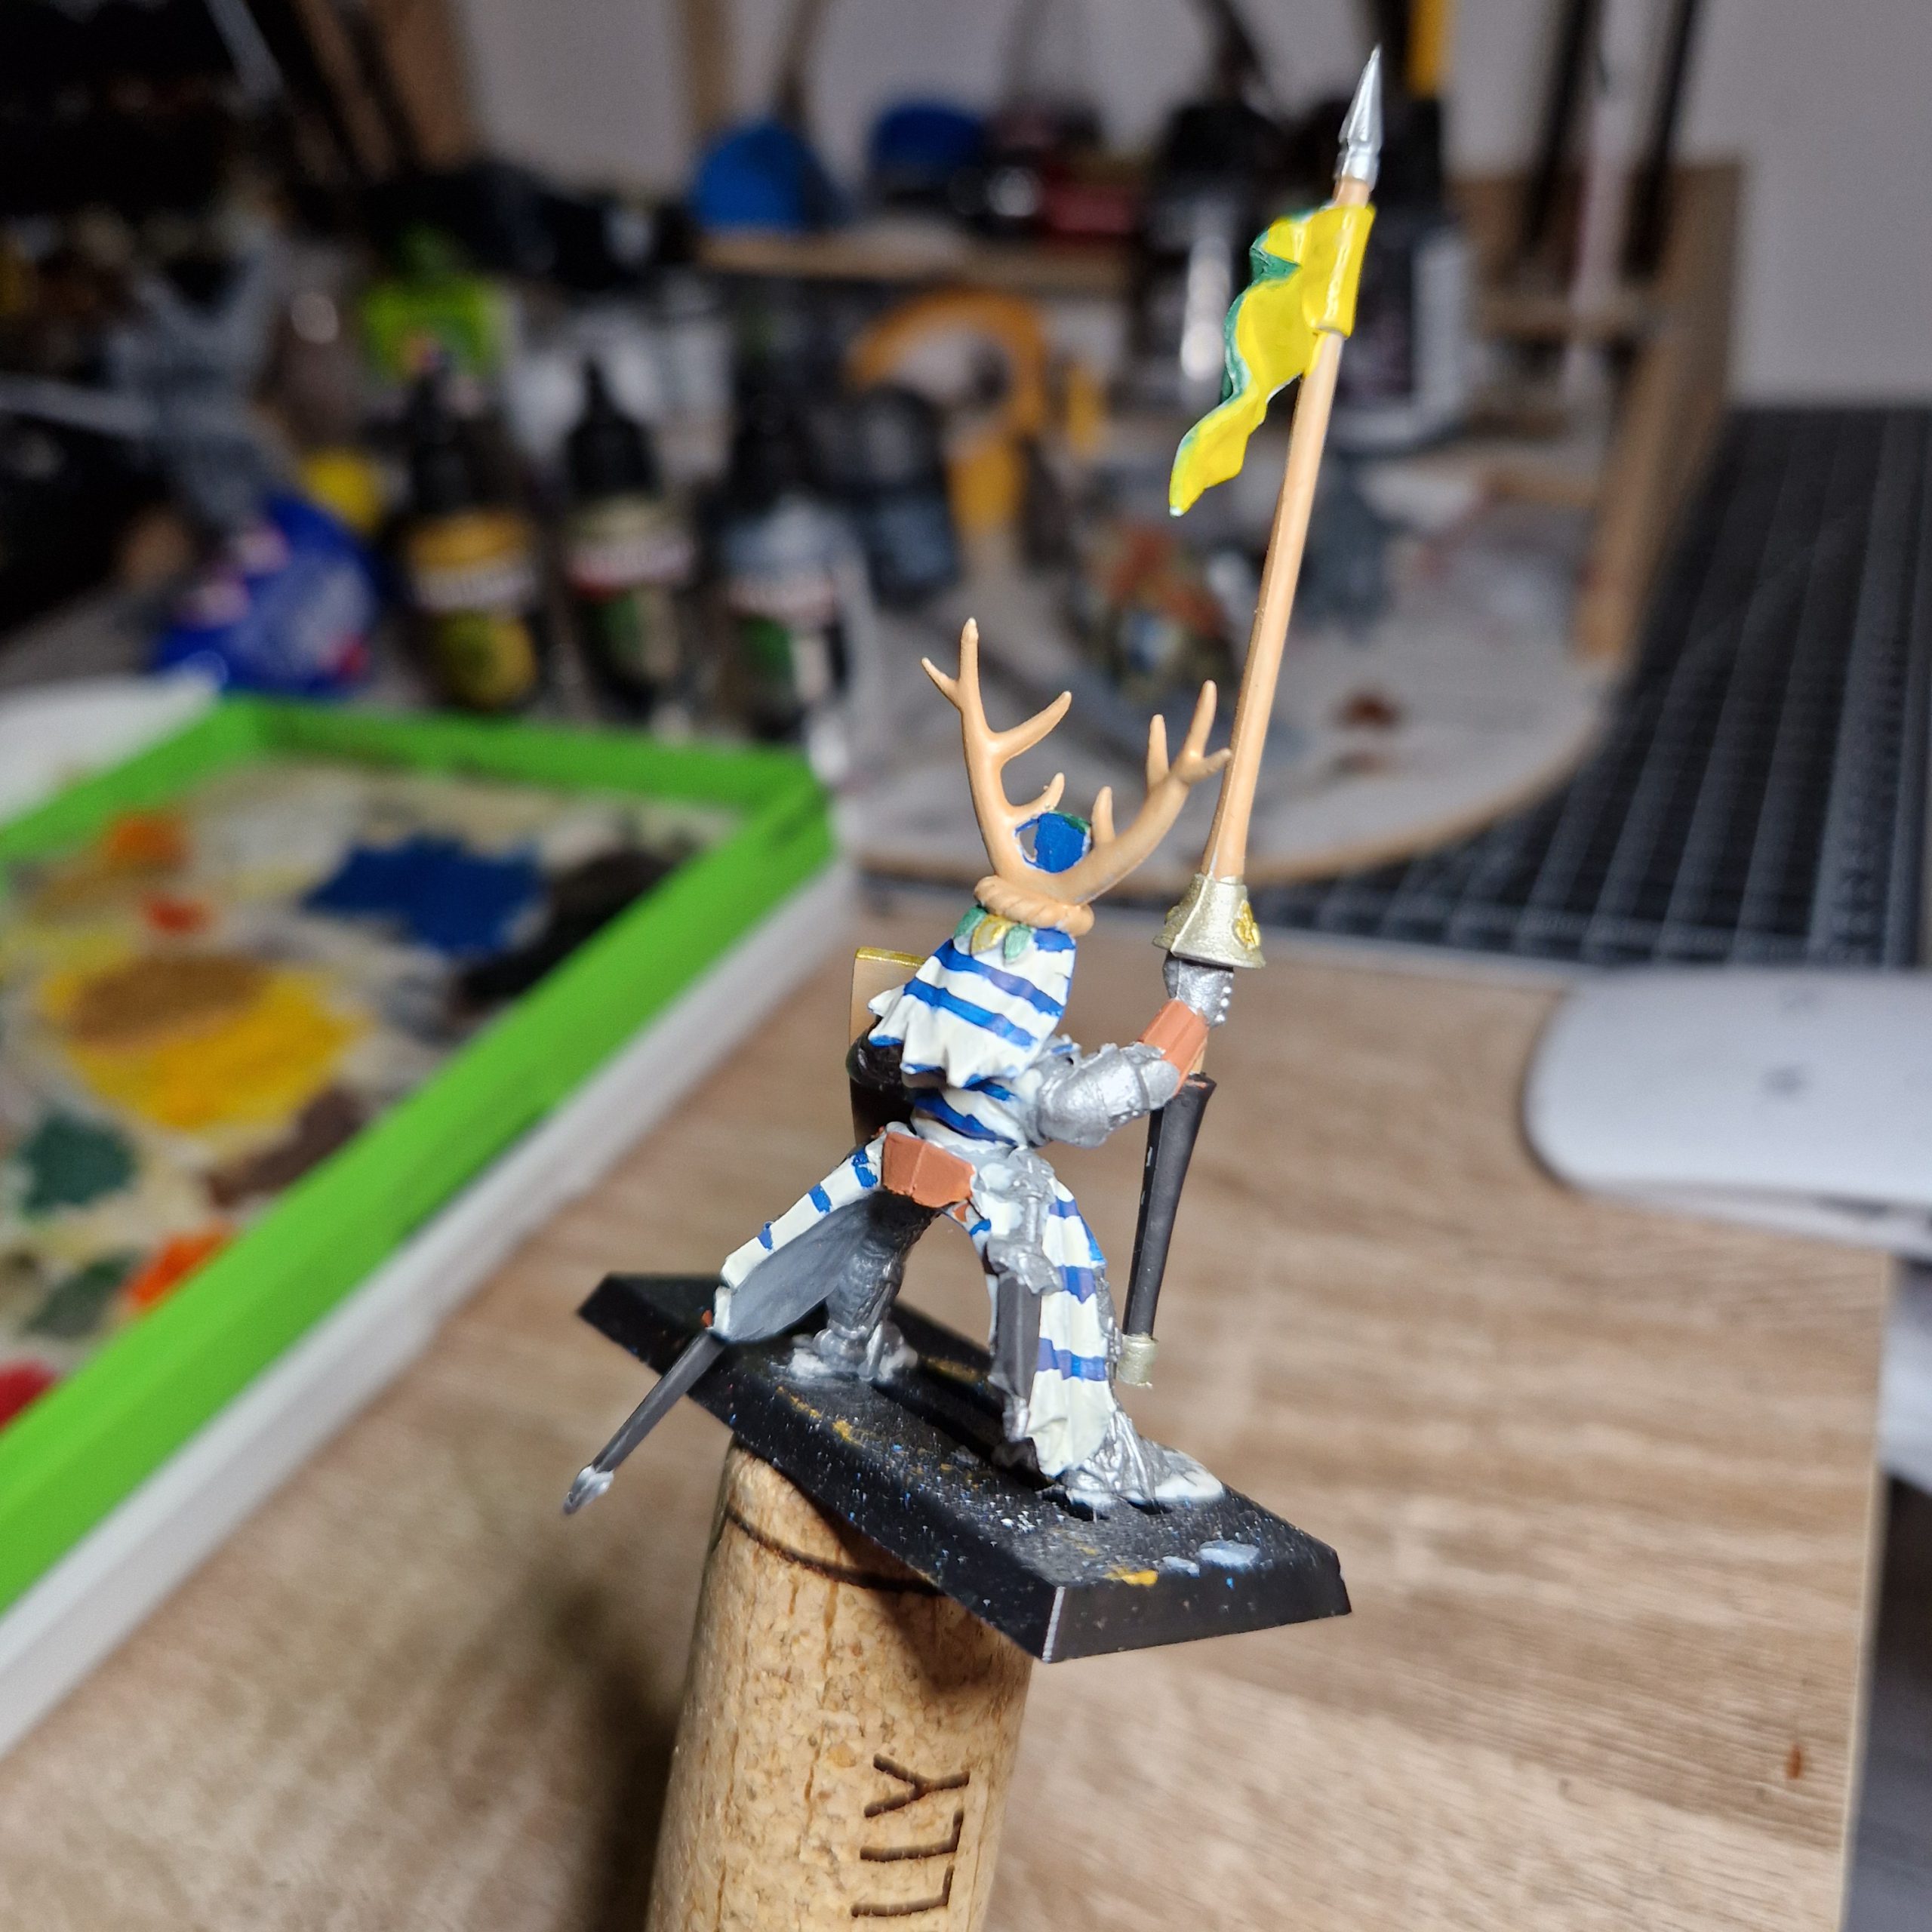
Once both horse and knight are based, we can stick them together ready for a wash.
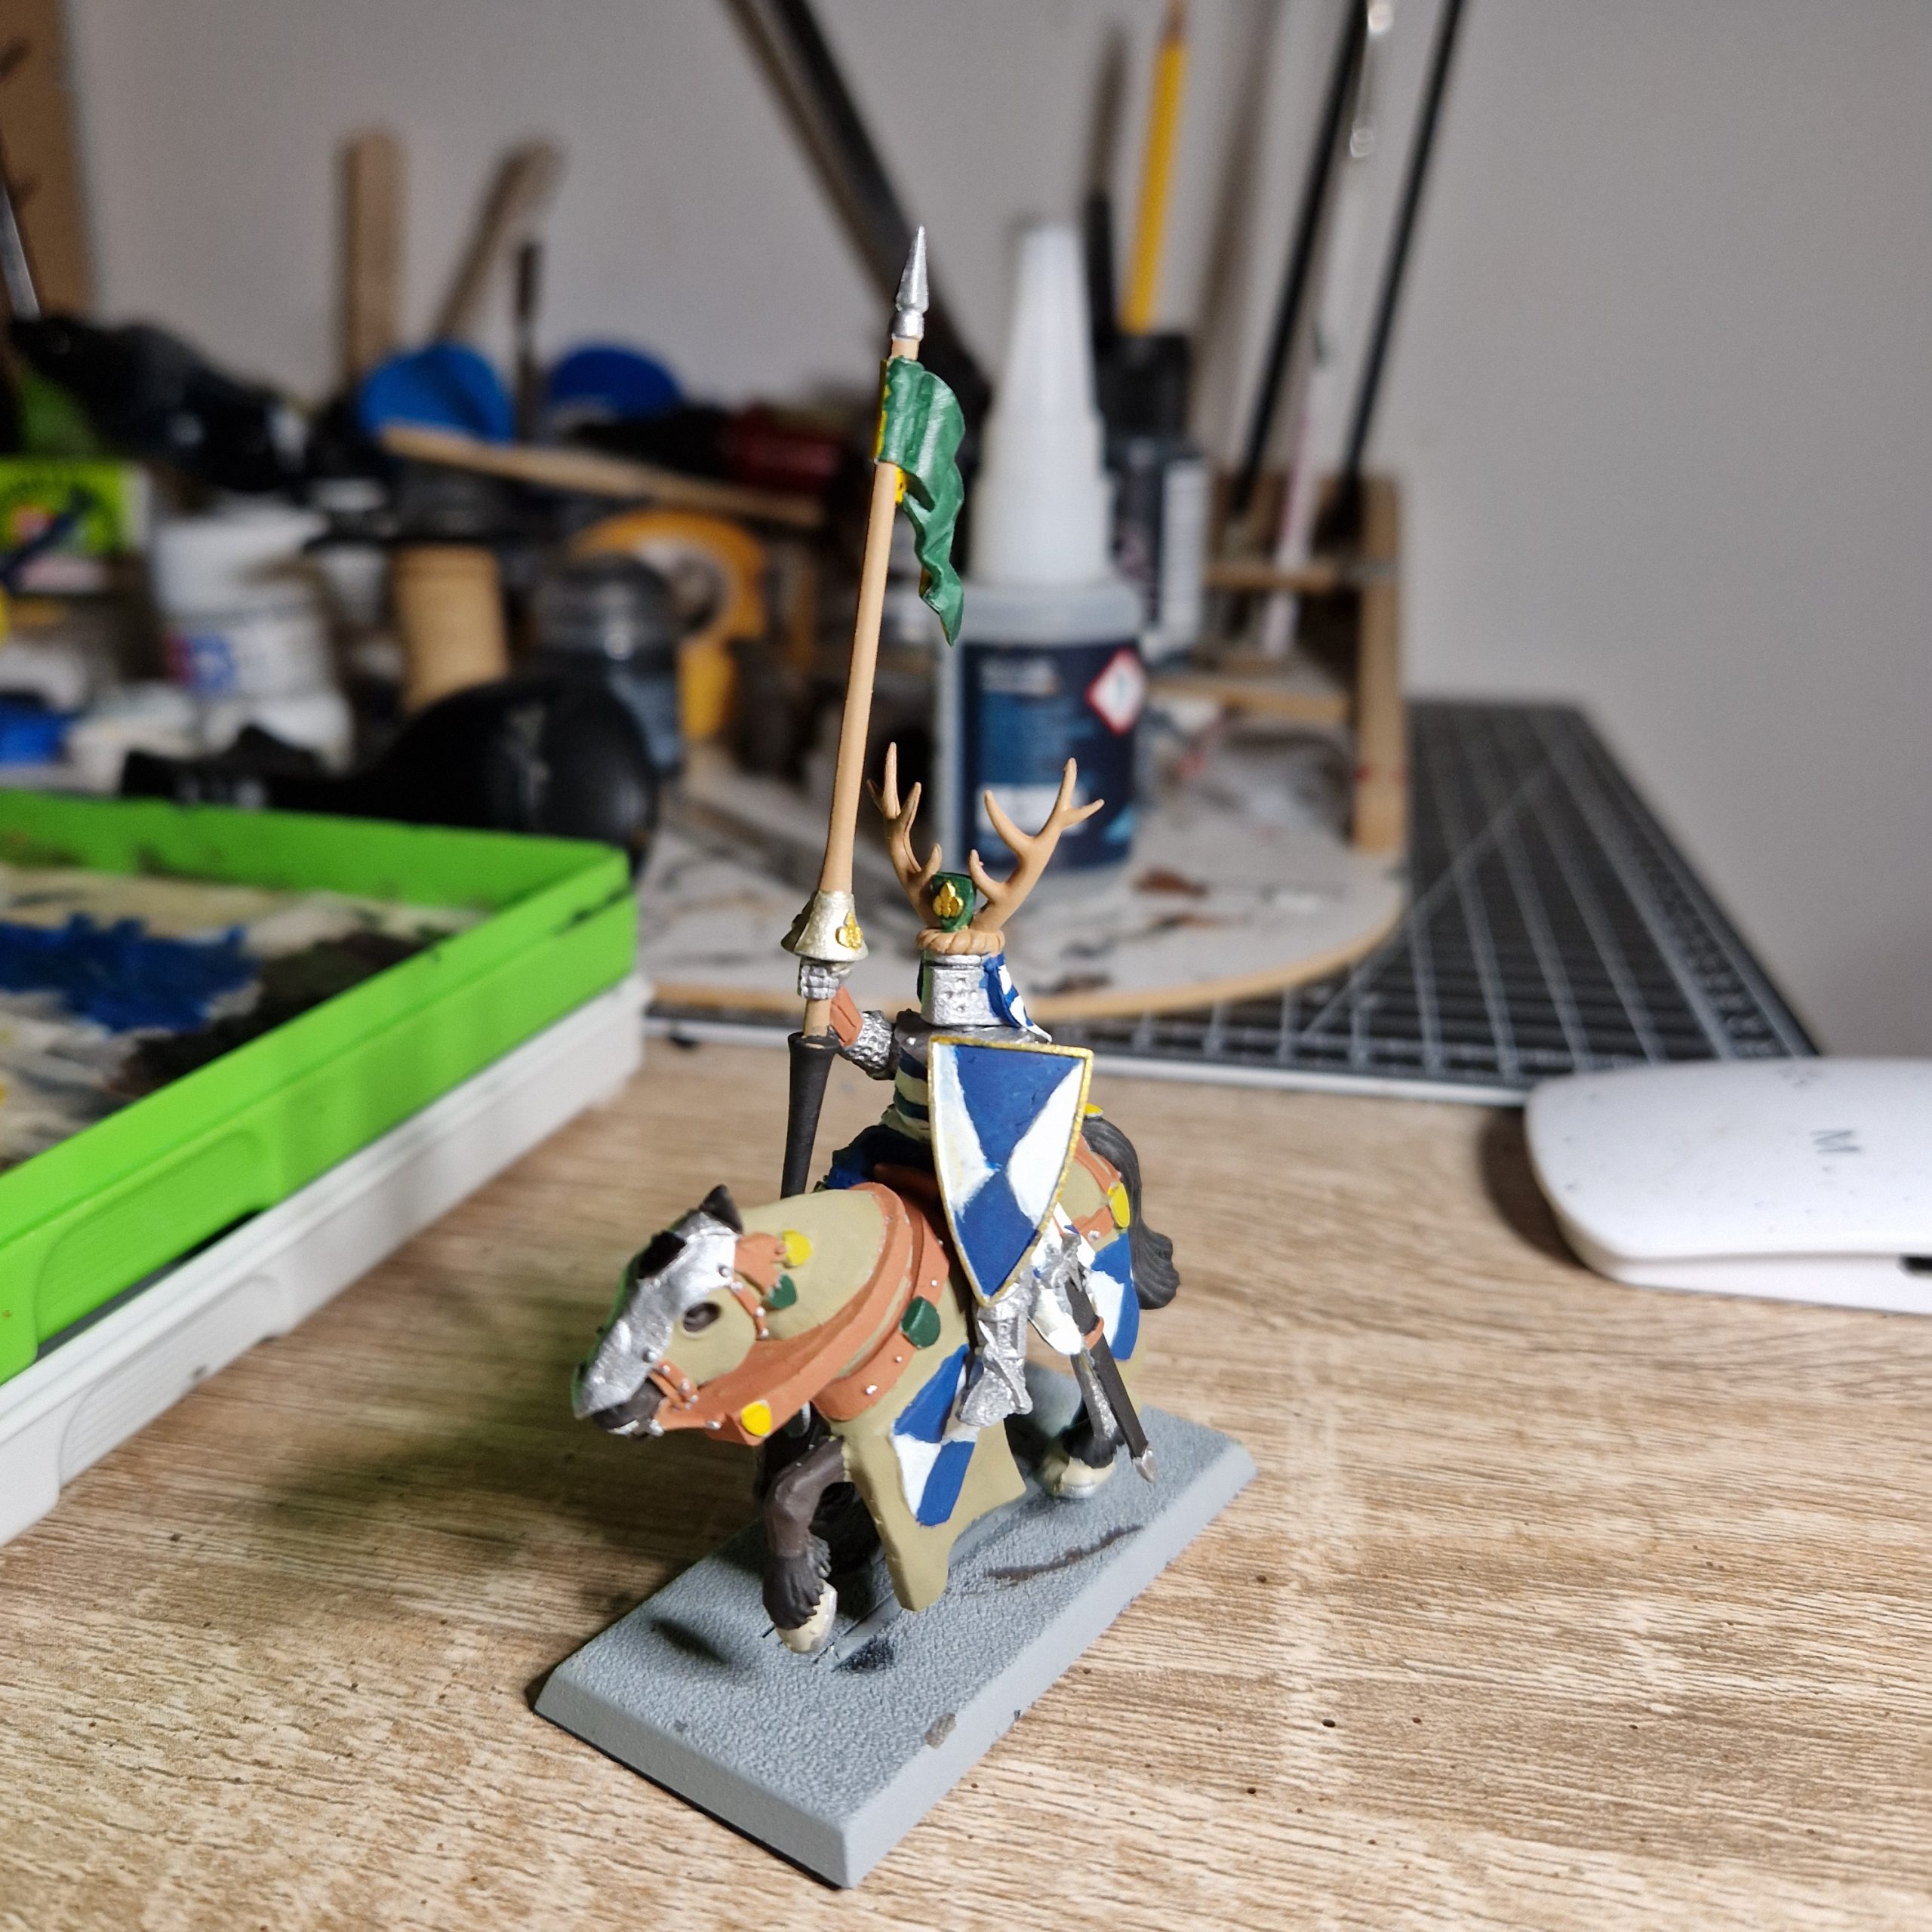
Step 5: Wash
Traditionally, I used Citadel washes here (Nuln Oil on Silver, Agrax Earthshade on the rest). However, I had just stumbled on an apparently magical substance called Aly’s Brown Liquid. This consists of 40% Agrax Earthshade, 40% Seraphim Sepia, 20% Lahmian Medium, and a few drops of Drakenhof Nightshade.
Now, I’ve never used this before so the results coming below are just as much a surprise to you as it is to me.* As I understand it, it provides a much less intense shadow and the Lahmian Medium prevents it from pooling too much as well, so I’m going to slather it on with a flat brush.
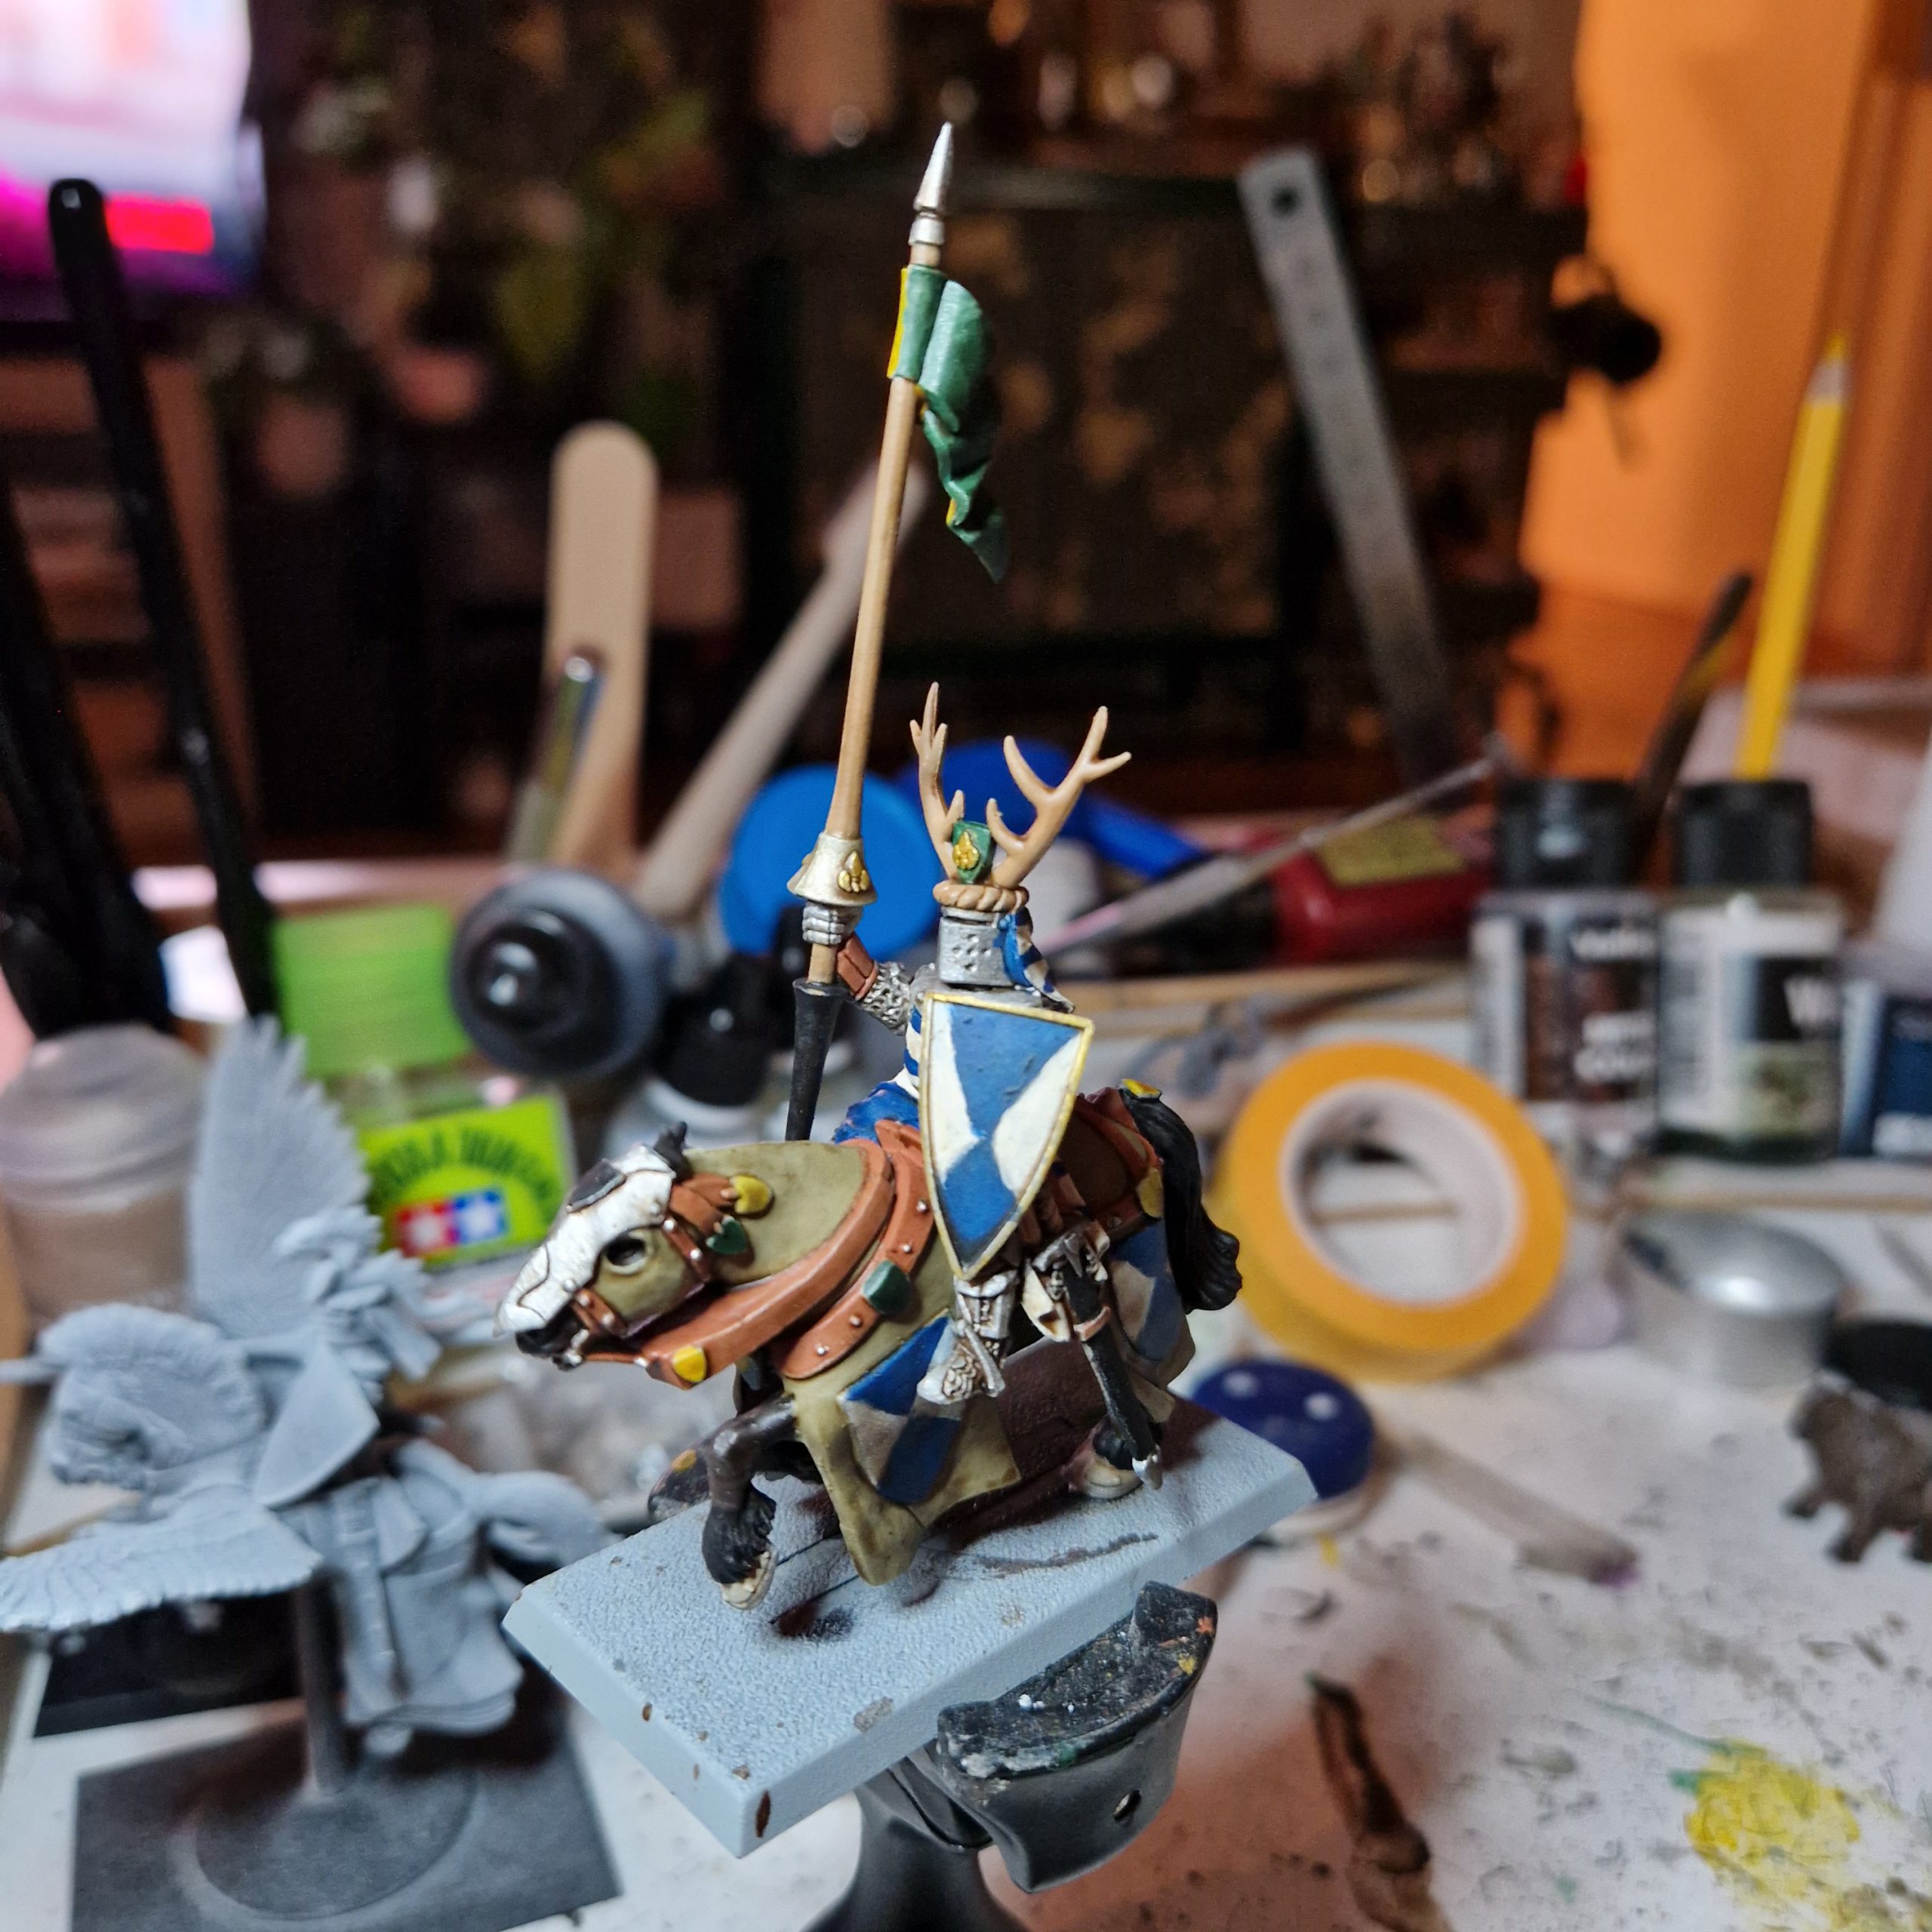
And I’m actually very convinced now – the mix does not pool too much and the lighter colour means it doesn’t put everything into shadow, even on white and yellow colours. If I’m particularly lazy, I could get away with this and not do anything. However, it wouldn’t be a full guide so let’s move on to…
Step 6: Relayer and Highlight
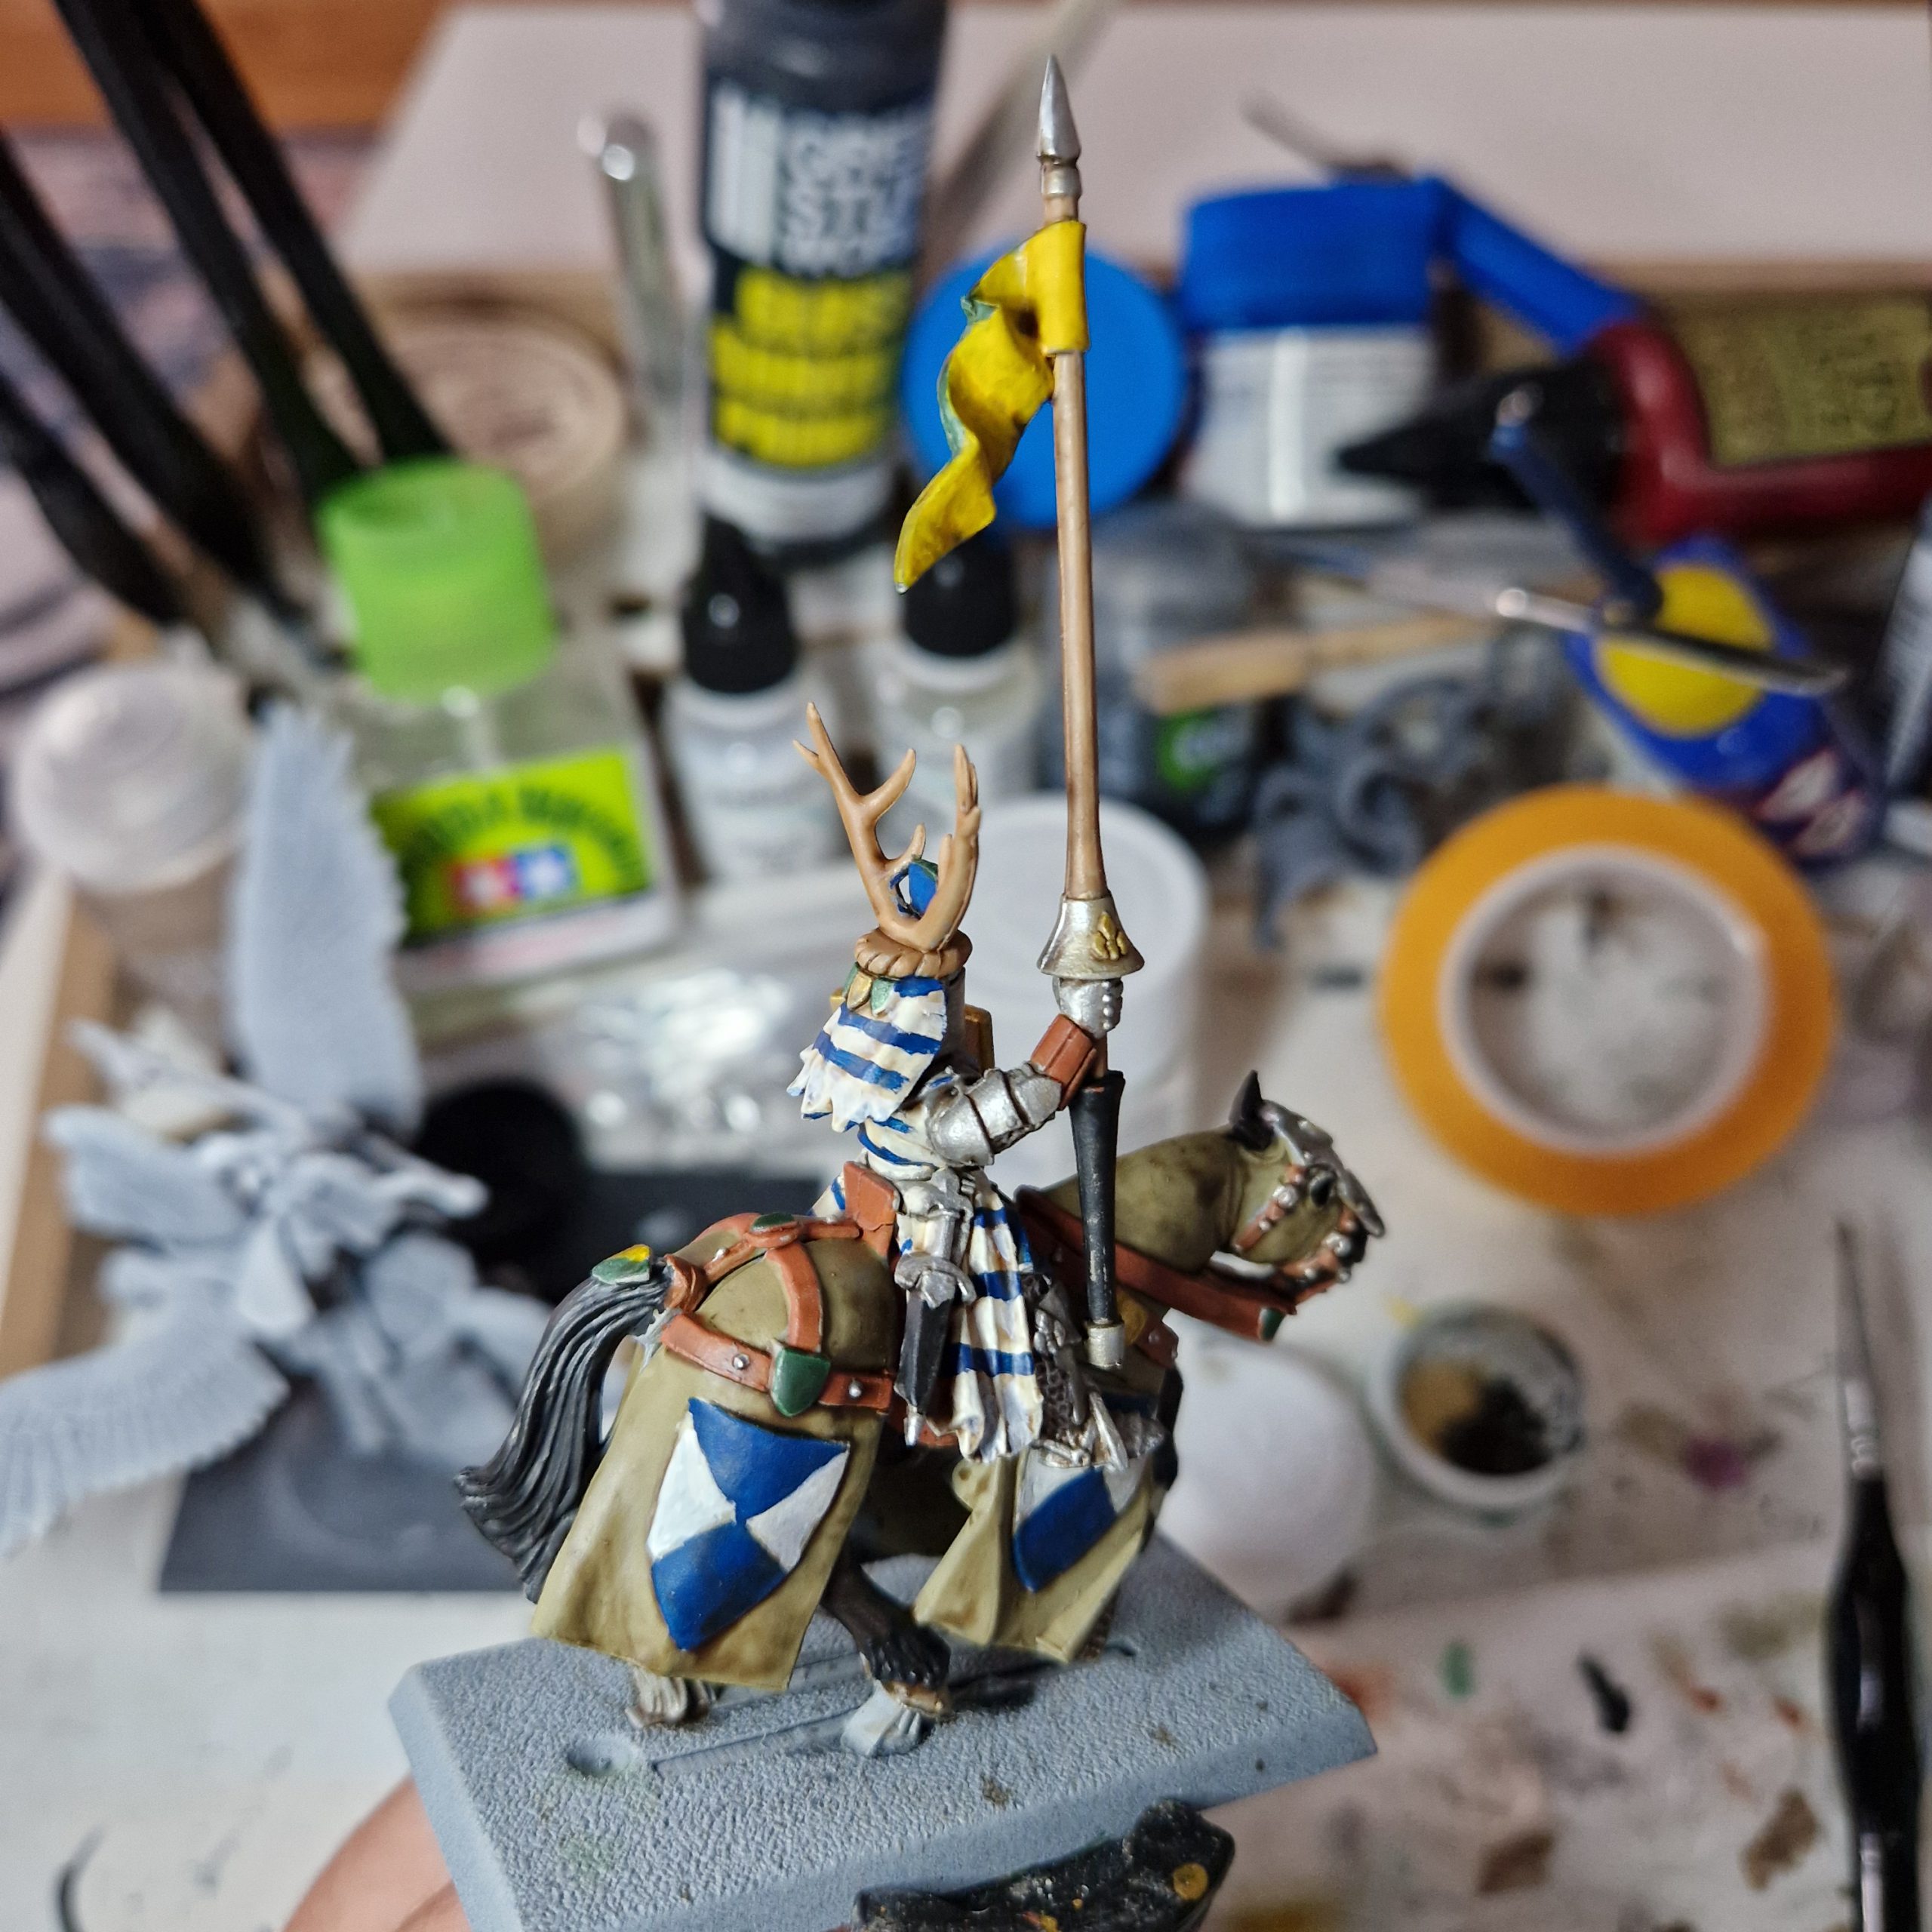
Because Aly’s Brown Liquid was so good, I decided just to put a bit more white back on the white bits, Mithril on the silver bits, and touch up on the gold bits.
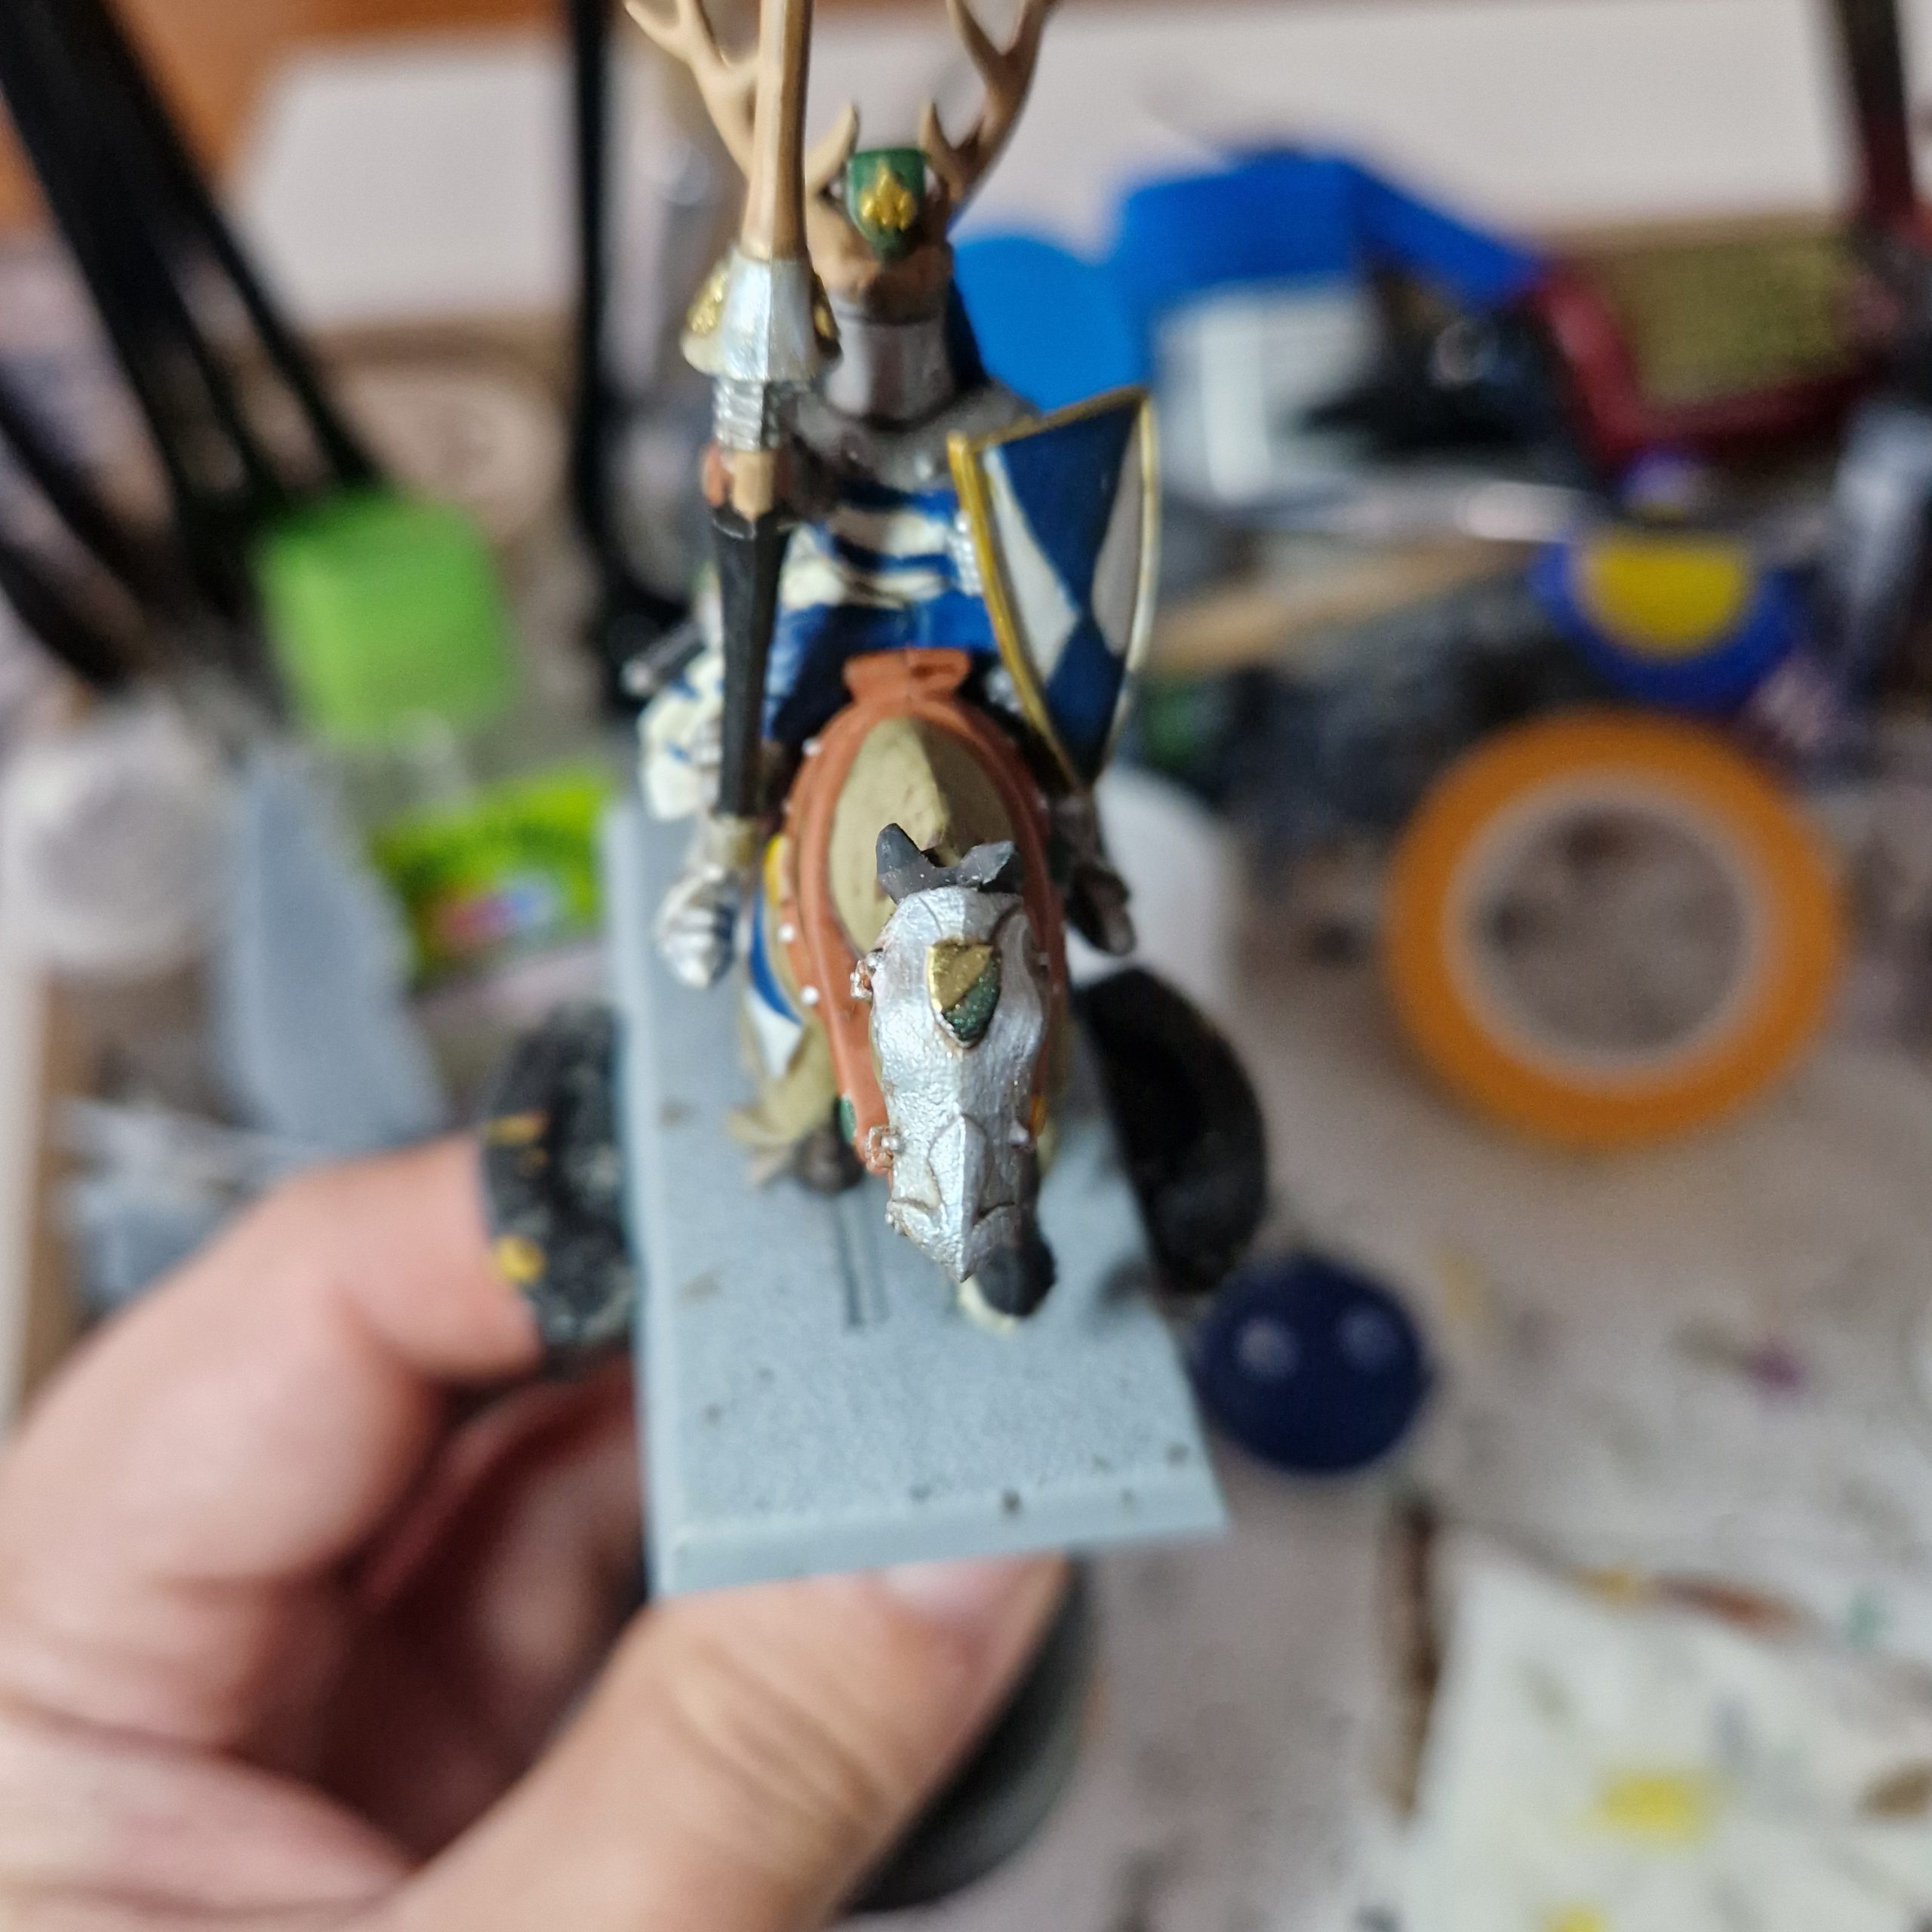
On the gloss black shield, I used some Green Stuff World Chrome Metal Gold and Green Stuff World Metal Filters Green Interference in the shape of my Baron’s colours just to get that extra shininess. (Note that these are alcohol based paints so you’ll need a supply of alcohol nearby to clean your brush). The brush finish definitely isn’t as nice as an airbrush application, but I still enjoy it.
Step 7: Drybrush as Necessary
For a horde unit like KOTR, I usually don’t bother too much with drybrushing or highlighting. However, I do want to make the horse a bit more realistic, so I just slap on a light drybrush of Army Painter Ash Grey mixed in with a bit of black on the horse’s points, nose, and tail.
Step 8: Decals and Charges
Now, I usually don’t do this (partially out of laziness, and partially out of lack of skill), but if you read our colleague’s work in Hobby 102: Working with Transfers and Decals, you’ll be an expert in no time!
I had planned to paint on my red stars, but it seems a bit difficult and I also couldn’t be bothered printing out decals for it – so for the purposes of this tutorial, I pulled out the stack of decals I had and slid them on.**
Step 9: Basing
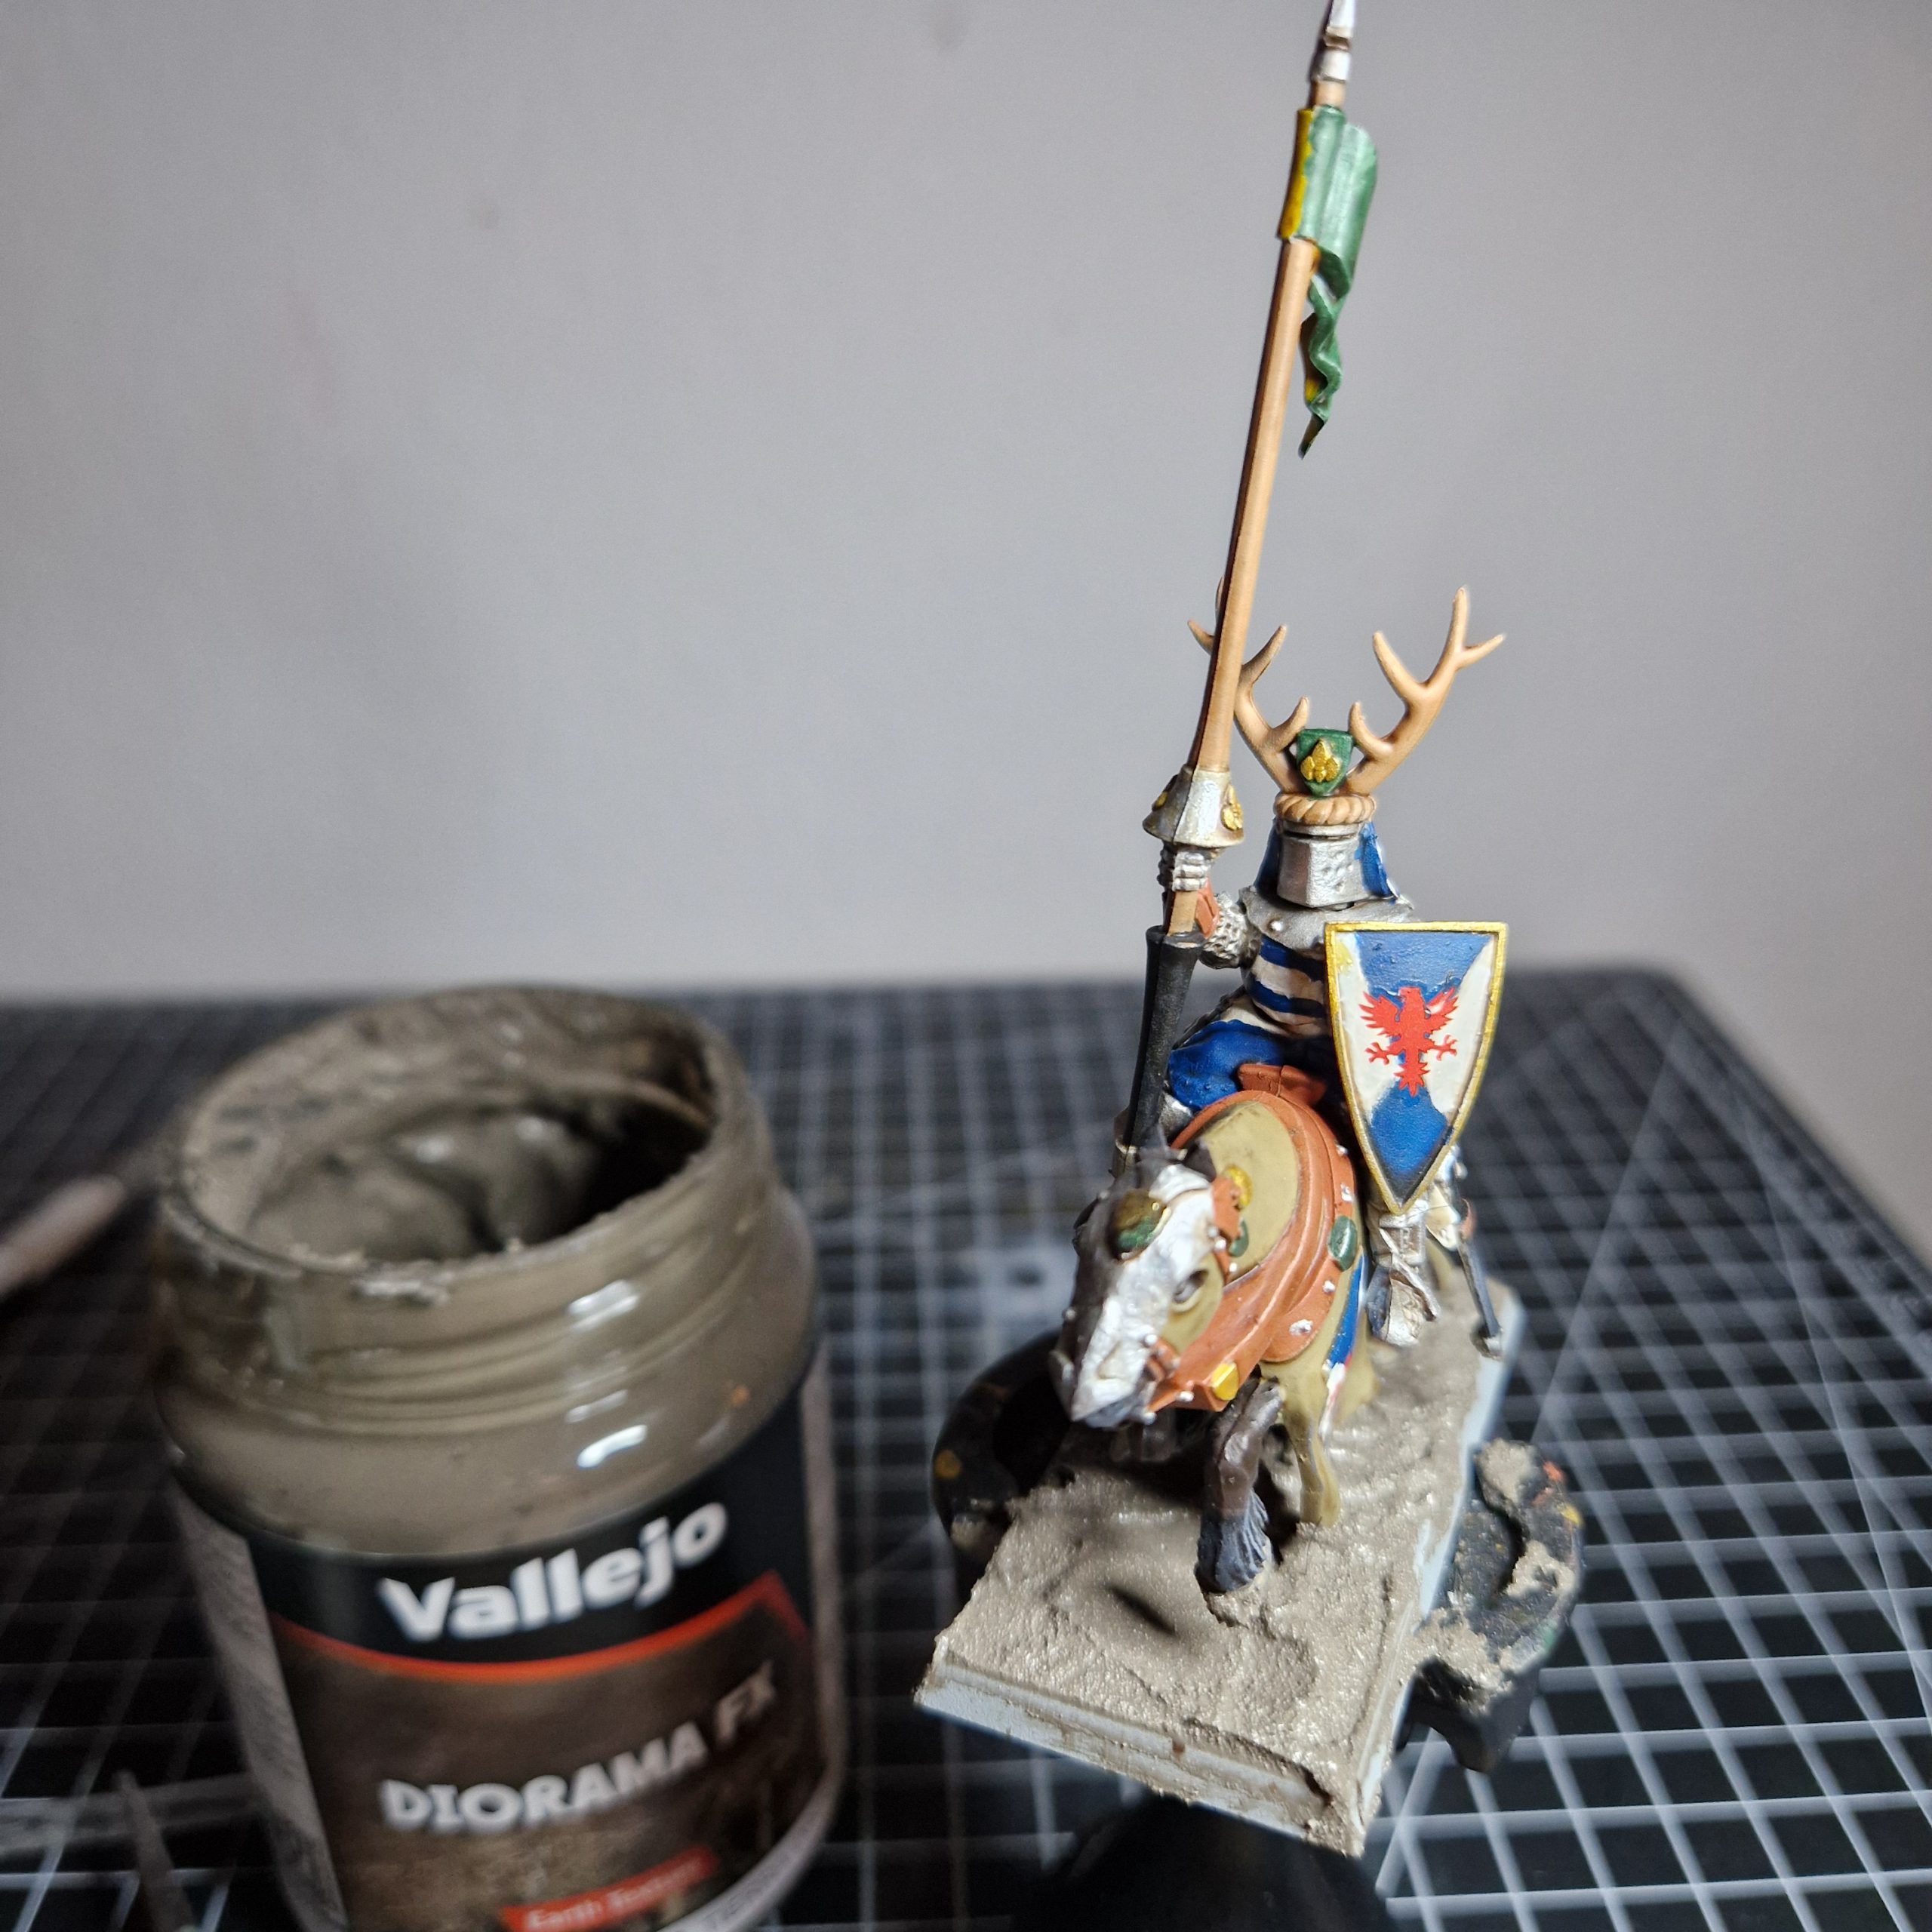
Last but not least, we finish off with a layer of Vallejo Diorama FX Dark Earth***, adding flock with PVA glue, and some happy tufts from your supplier of choice (I got a stack from Green Stuff World).
And to show it’s really done, I paint the base black.
Summary
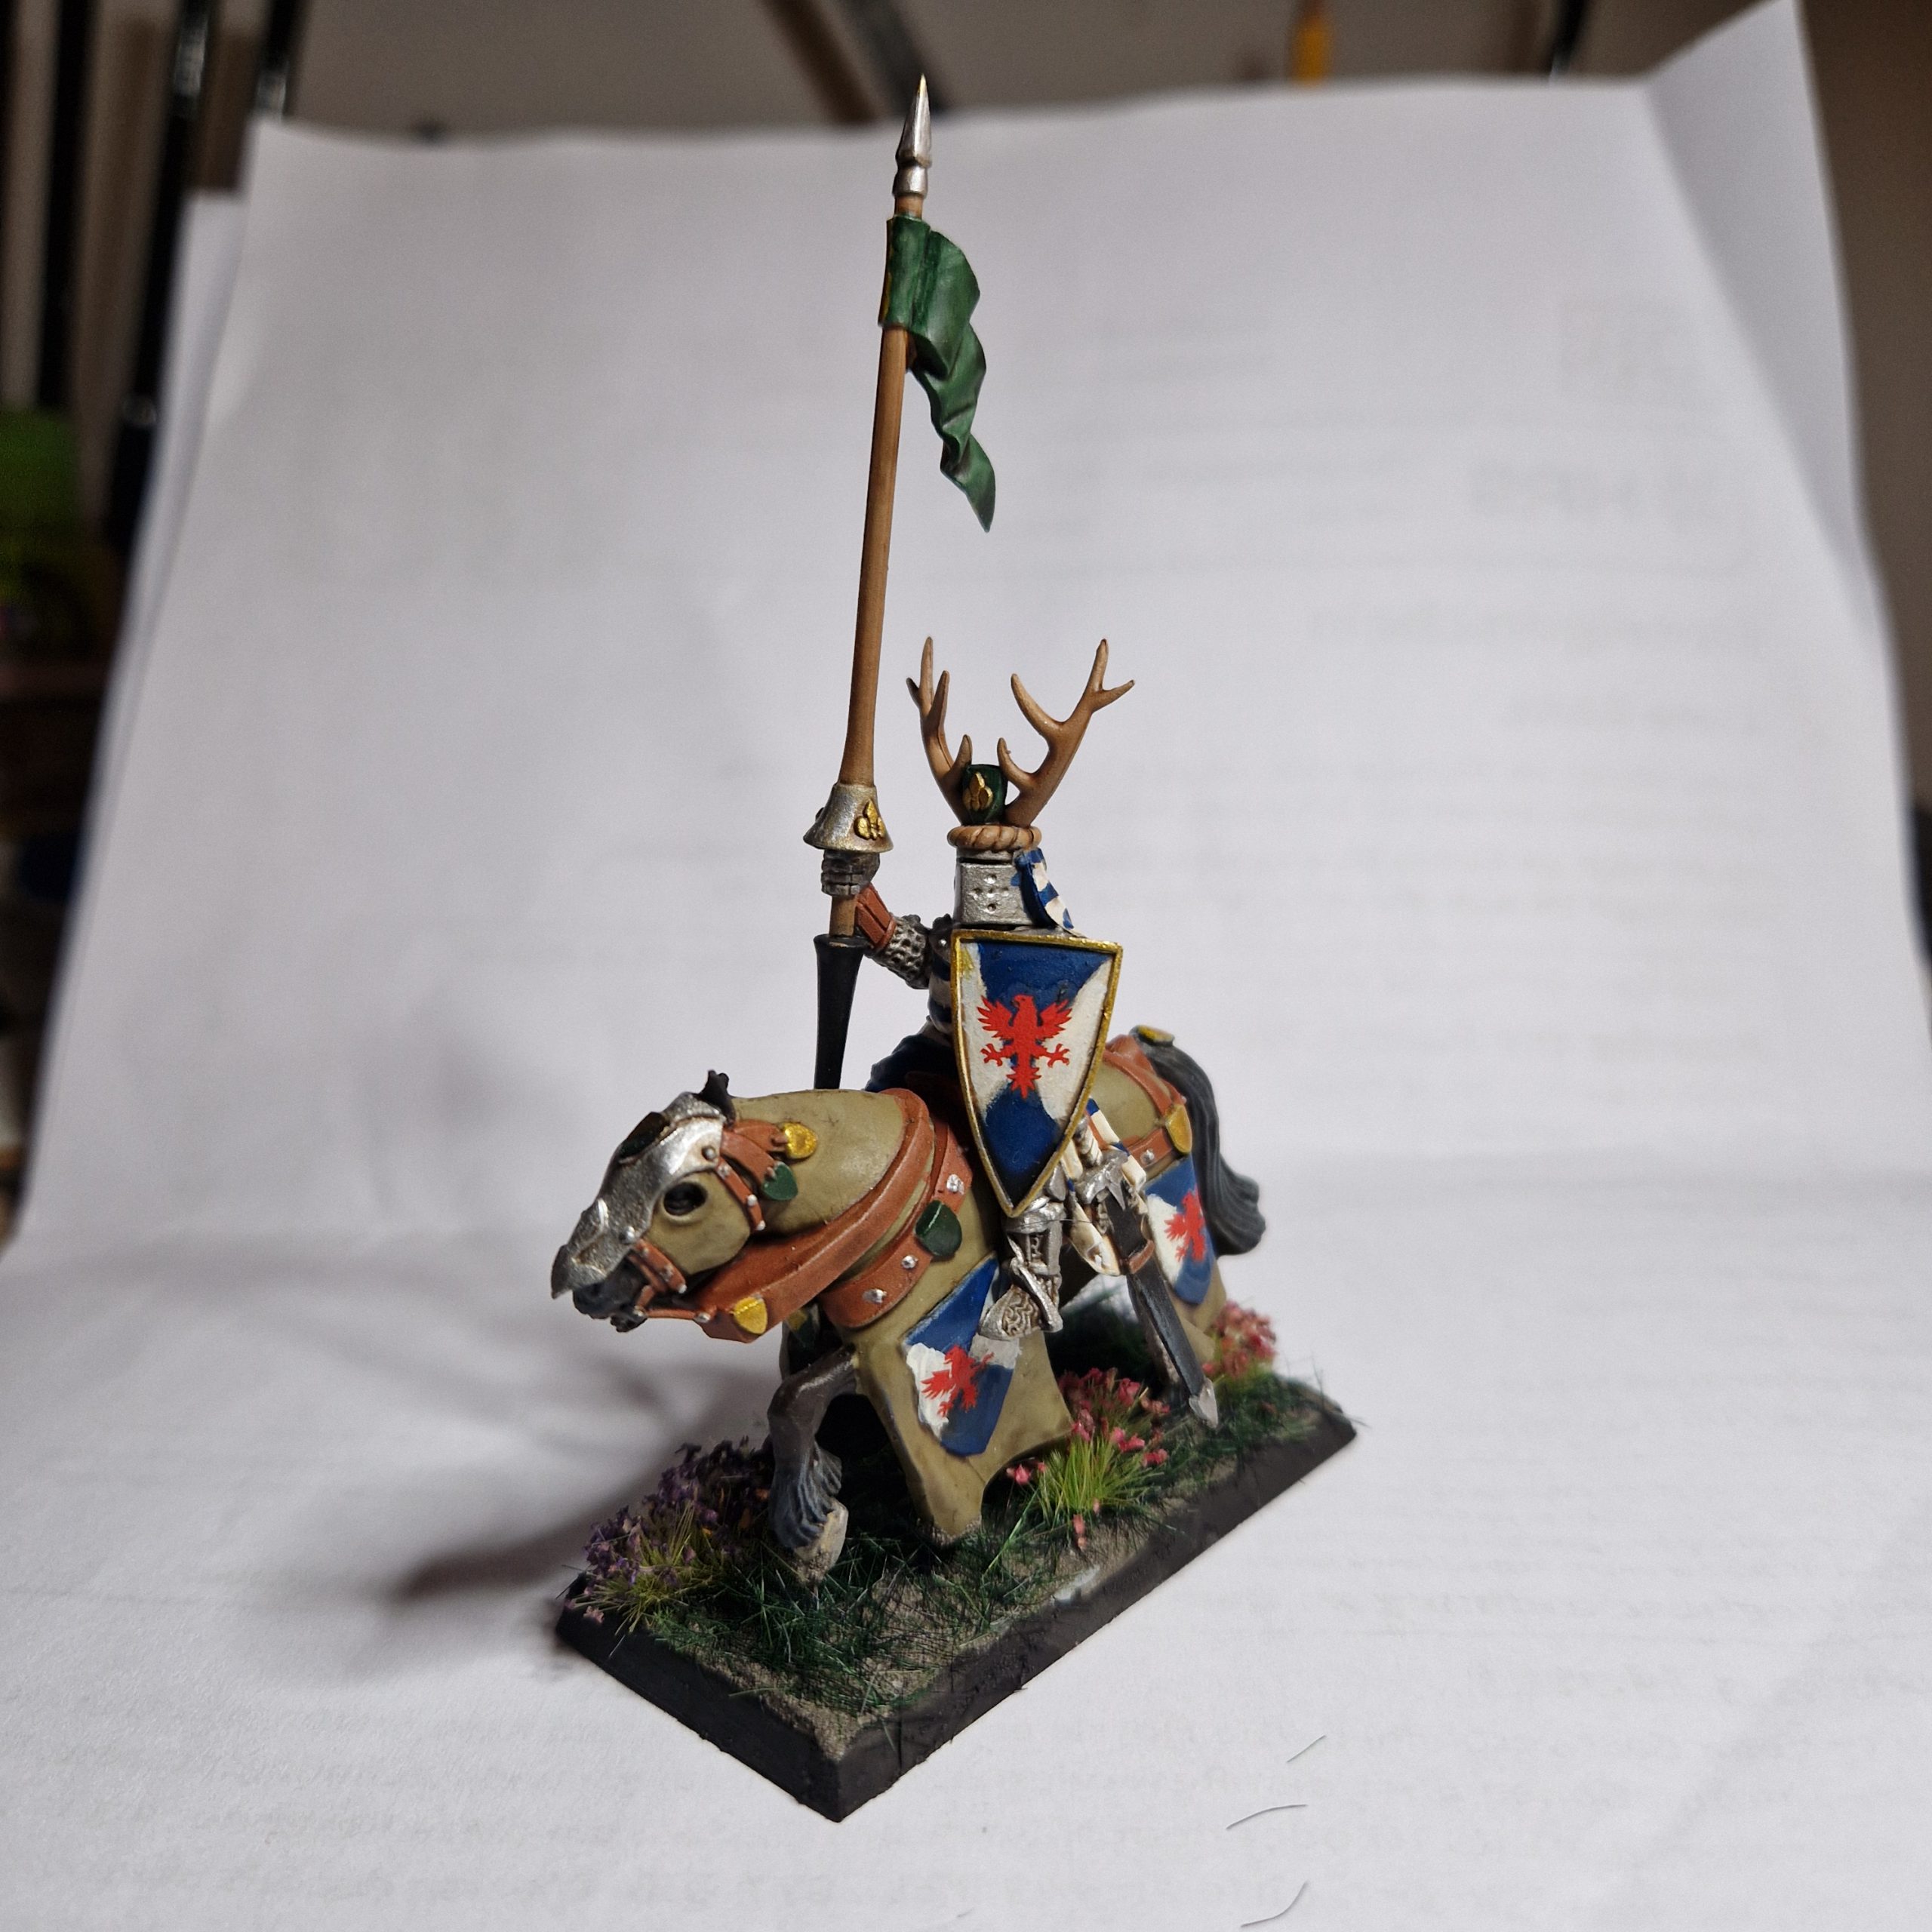
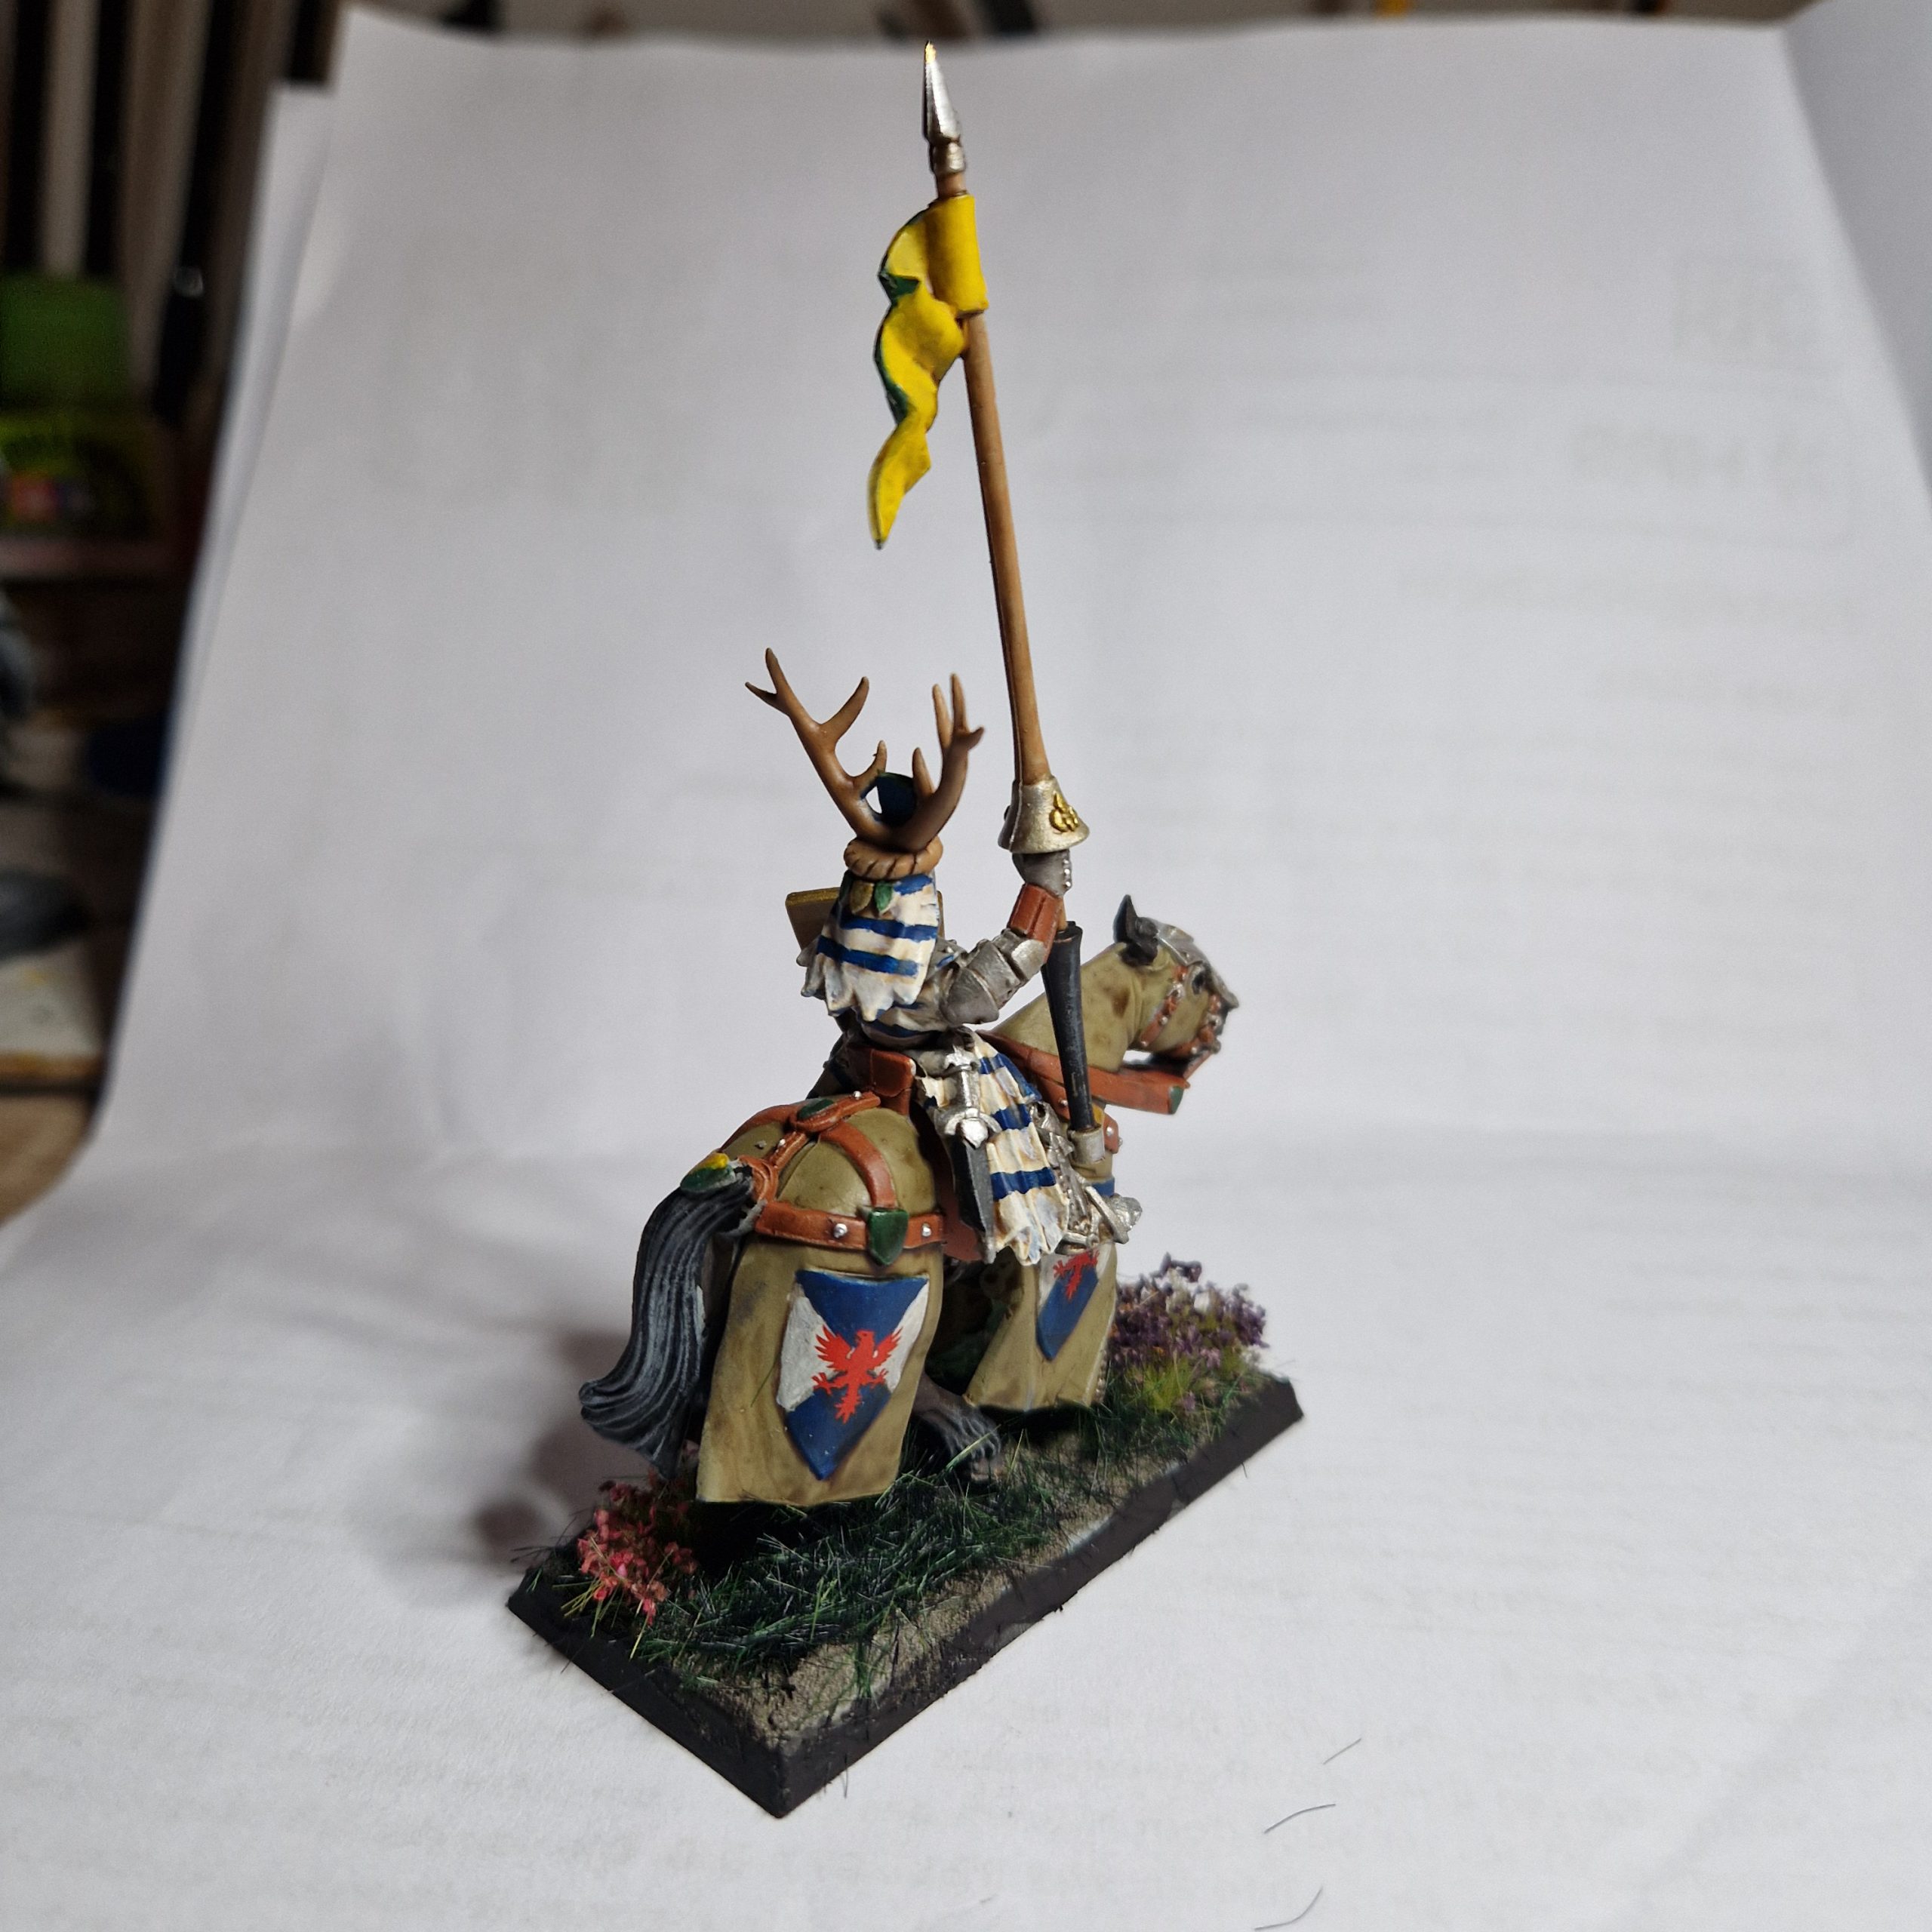
So here we are, an okay enough Knight of the Realm, ready to take his place in the big lance I have planned.
Total time was just shy of three hours (not including waiting for stuff to dry). The most time spent would be in colour selection, but once you get going, things get quite easy.
If I’m mass-painting, I would plan out all the heraldry and horses, then I’d do the horses first (remember the tip about varying the mix level of black and brown), and then the knights before a mass-wash, mass-layer (I assume your wet pallette would be full of the right colours by then), and mass-decalling.
But most importantly, have fun!
* I’m also writing this as I paint.
** So I had an issue where the decal refused to move after getting put on the surface. It turns out, the trick is to leave the decal in the water a bit longer than “just a few seconds” as recommended in a lot of guides before sliding it on.
*** To be honest, I’d actually go for Brown Earth instead which allows a lot more variation through using shades.
Have any questions or feedback? Drop us a note in the comments below or email us at contact@goonhammer.com. Want articles like this linked in your inbox every Monday morning? Sign up for our newsletter. And don’t forget that you can support us on Patreon for backer rewards like early video content, Administratum access, an ad-free experience on our website and more.
