In our How to Paint Everything series, we take a look at different armies of the Warhammer universe, examine their history and heraldry, and look at several different methods for painting them. With the recent release of the Dominion boxed set, we’re looking at the two factions involved and how to approach painting them.
The Dominion box is packed full of miniatures, with massive model counts on both sides. It comes with nearly a full army of Stormcast plus a ton of the new Kruleboyz for Orruk players. In this article we’re covering techniques for painting the various Kruleboyz models.
Painting Kruleboyz
The Kruleboyz models have a wonderful aesthetic that’s different from much of what we’ve seen before in the Age of Sigmar. They’re more detailed and a bit grungier and less cartoony than traditional Orruks in Age of Sigmar. This opens them up to a wider variety of techniques – you can still make them bright and cartoony, particularly where the shields are concerned – or you can go for something darker and more Lord of the Rings-like. They’re also very good models for drybrushing, thanks to all the small details.
RichyP’s Method
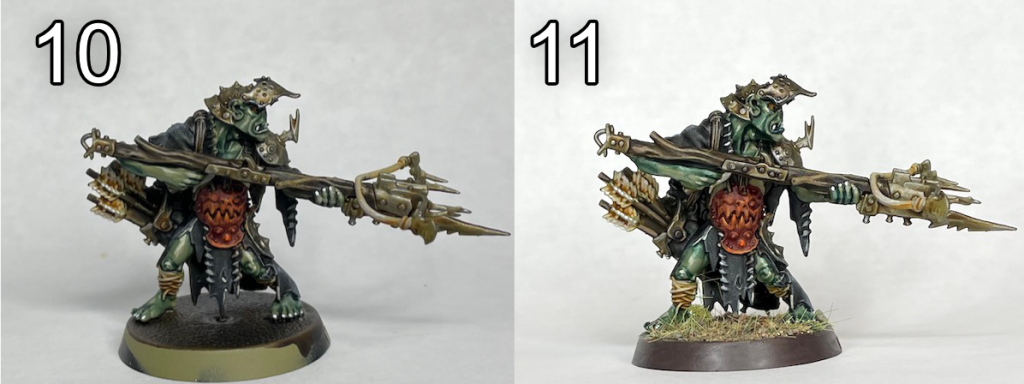
Being an Ork/Orc/Orruk fan, I couldn’t wait to get my brush on these guys and me being me I couldn’t wait to find a way to paint them up really quickly. The method I used is a slight variation on the one I use for my Gloomspite Gitz.
- Like most thing I paint at the moment, I primed the model Citadel Death Guard Green Spray.
- Wash the flesh with Citadel Coelia Greenshade.
- Paint the cloth in Citadel Contrast Black Templar.
- Paint the red areas with Citadel Contrast Flesh Tearers Red. Drybrush the cloth with VGC Blue Grey.
- Paint the metal areas with VMA Gunmetal.
- Paint the wood and any straps with Citadel Contrast Wyldwood and any ropes/bandages/feathers with Citadel Wraithbone.
- VERY lightly drybrush everything with Citadel Karak Stone. Highlight Red with VMC Orange-Red.
- Wash the wood, metal and Wraithbone areas in Citadel Seraphim Sepia Shade.
- Highlight flesh with thinned Citadel Death Guard Green and the off-white areas with Citadel Karak Stone.
- Highlight Flesh with Citadel Karak Stone, the red areas with VGC Sun Yellow and the off-white areas with white.
- Paint Citadel Coelia Greenshade into the recesses of the flesh and Citadel Contrast Basilicanum Grey into the recesses of the cloth and you’re done.

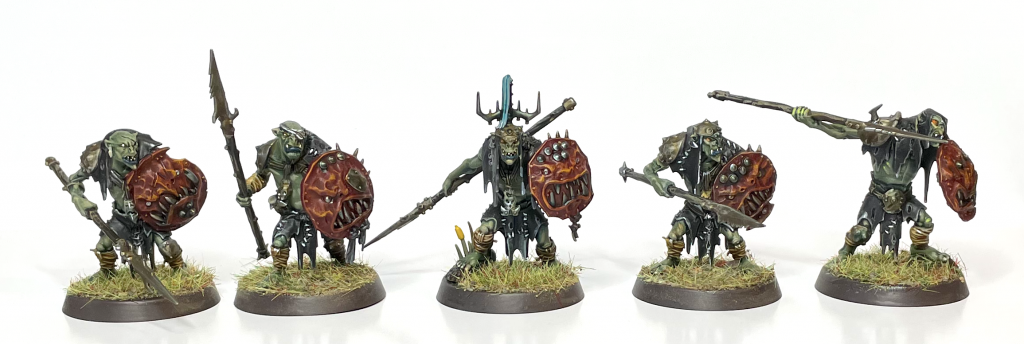
Same technique applied to the Guttrippaz
RichyP’s Bonus Quick Hogrots
No step-by-step for these, but they’re really easy to describe.
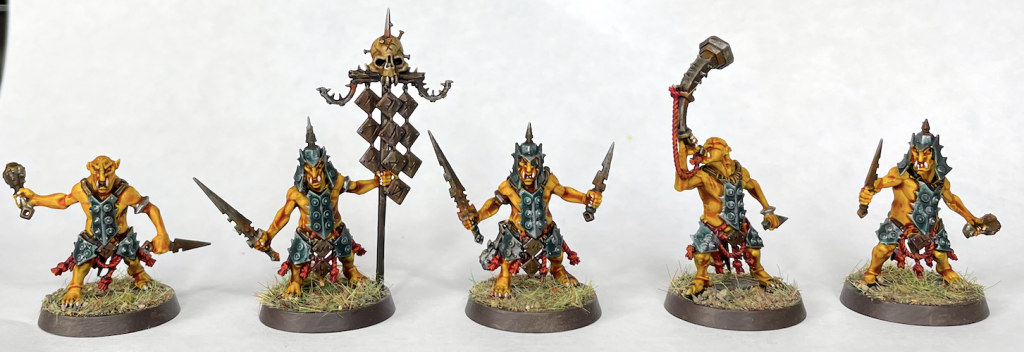
- Prime Citadel Wraithbone Spray.
- Paint the flesh with Citadel Contrast Iyanden Yellow.
- Wash the flesh with Citadel Serpahim Sepia.
- Paint the metal areas with VMA Gunmetal
- Paint the ropes with Citadel Contrast Flesh-Tearers Red and any Wood or other straps in Citadel Contrast Wyldwood.
- Wash the Armour-plate metals and the eye sockets with Citadel Coelia Greenshade and the other metals with Citadel Contrast Basilicanum Grey.
- Pick out teeth with Citadel Wraithbone.
- Highlight Flesh with very thin VGC Sun Yellow and the ropes with VMC Orange-Red.
- Rust up metal weapons and banners with Citadel Technical Typhus Corrosion and stab it with VMC Orange-Red.
- Paint eyes with a dot of VGC Orange-Red and you’re good to go.
Here’s a group-shot:

Overall I’m really chuffed with how these all turned out, and both paint jobs are super-quick to paint. The Hobgrots in particular are only a couple of hours to do in batches of 5, which is great when there are so many in the box. The Kruleboy colours are also really forgiving and you can get away with a lots of sloppy mistakes as the washes and the dry brushes tie everything together. I’m really looking forward to applying these schemes to the rest of the army.
Raf’s Kruleboyz
Hobgrots
I also forgot to take work in progress pictures, but the steps aren’t too difficult to replicate.
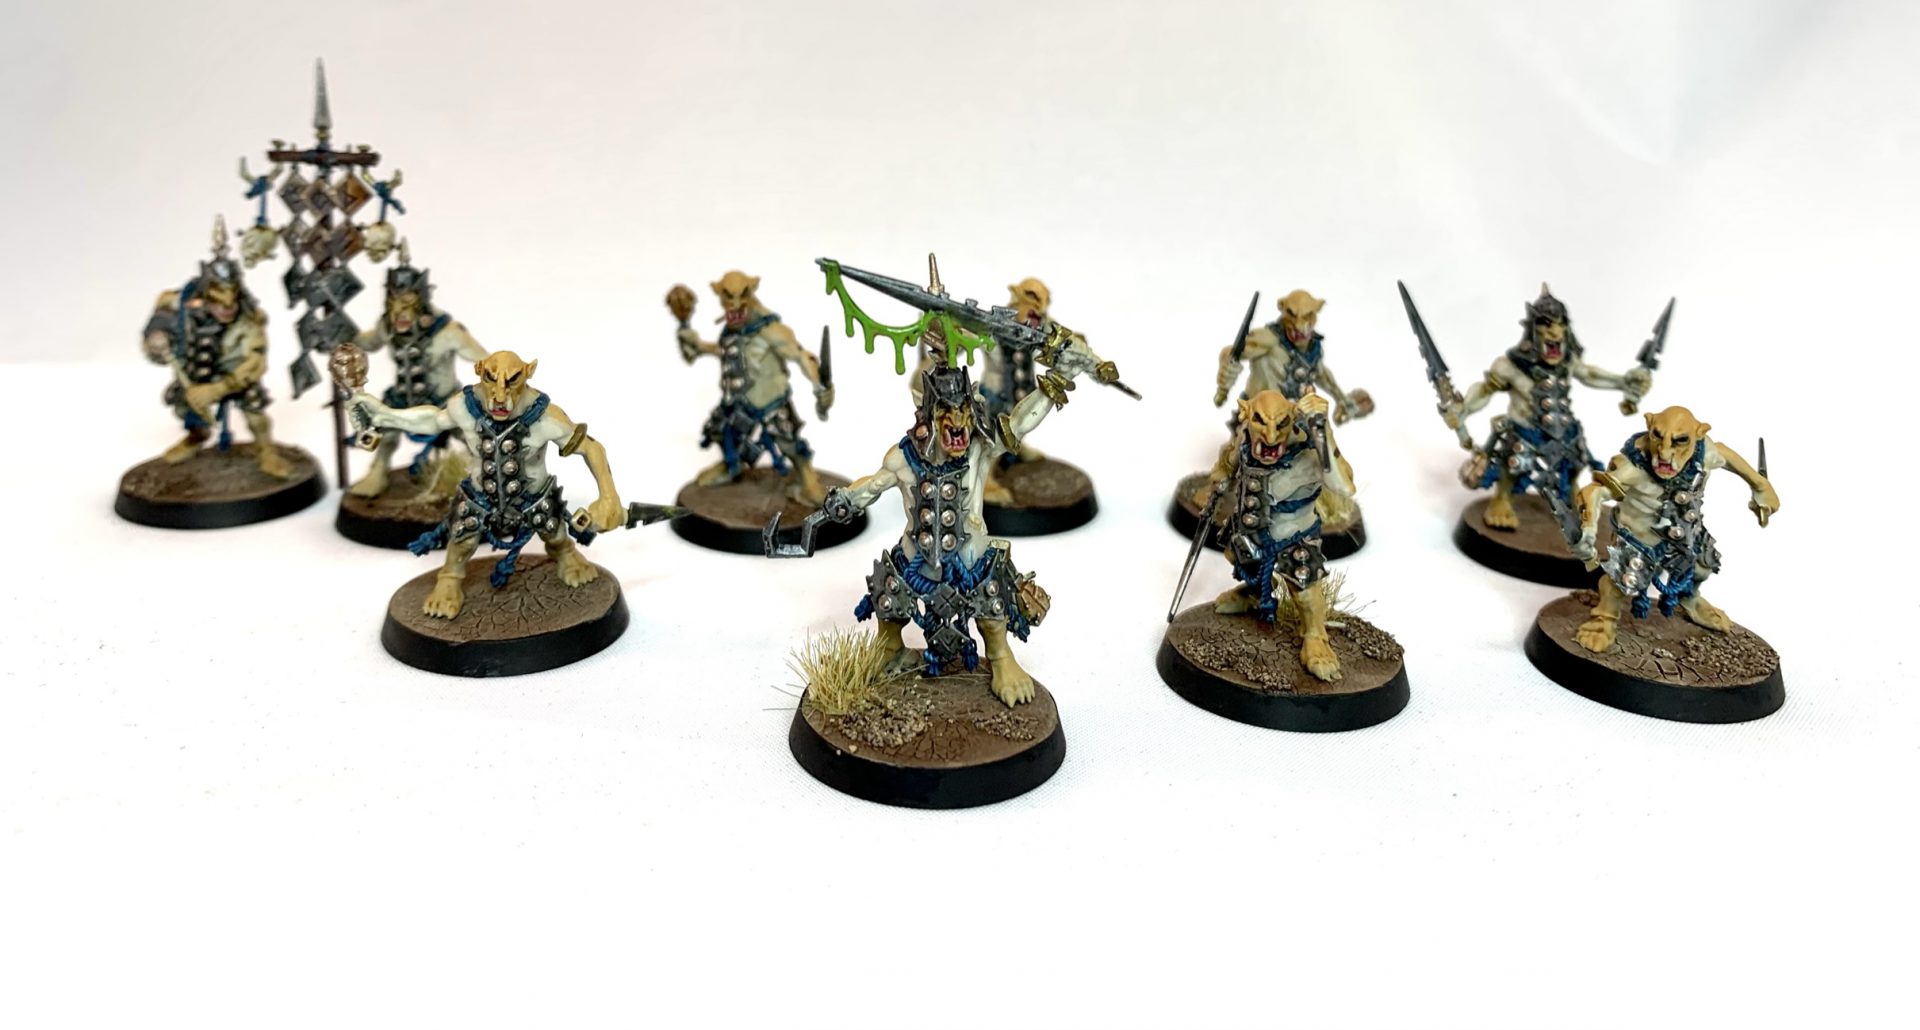
My paint scheme begins as most of mine do: weird research. I knew I wanted to get out of the swamp and started researching desert amphibians. I found the Peter’s Banded Skink which looks like a lizard going through a My Chemical Romance phase and figured it’d be perfect. That led me into a broader search of skinks. My Kruleboy heroes will be painted like the Blue-Tongue Skink; this lets me carry the eyeshadow motif through the entire army and use blue as a thematic spot color. The Hobgrots adorn themselves with blue in honor of their larger, stronger master.
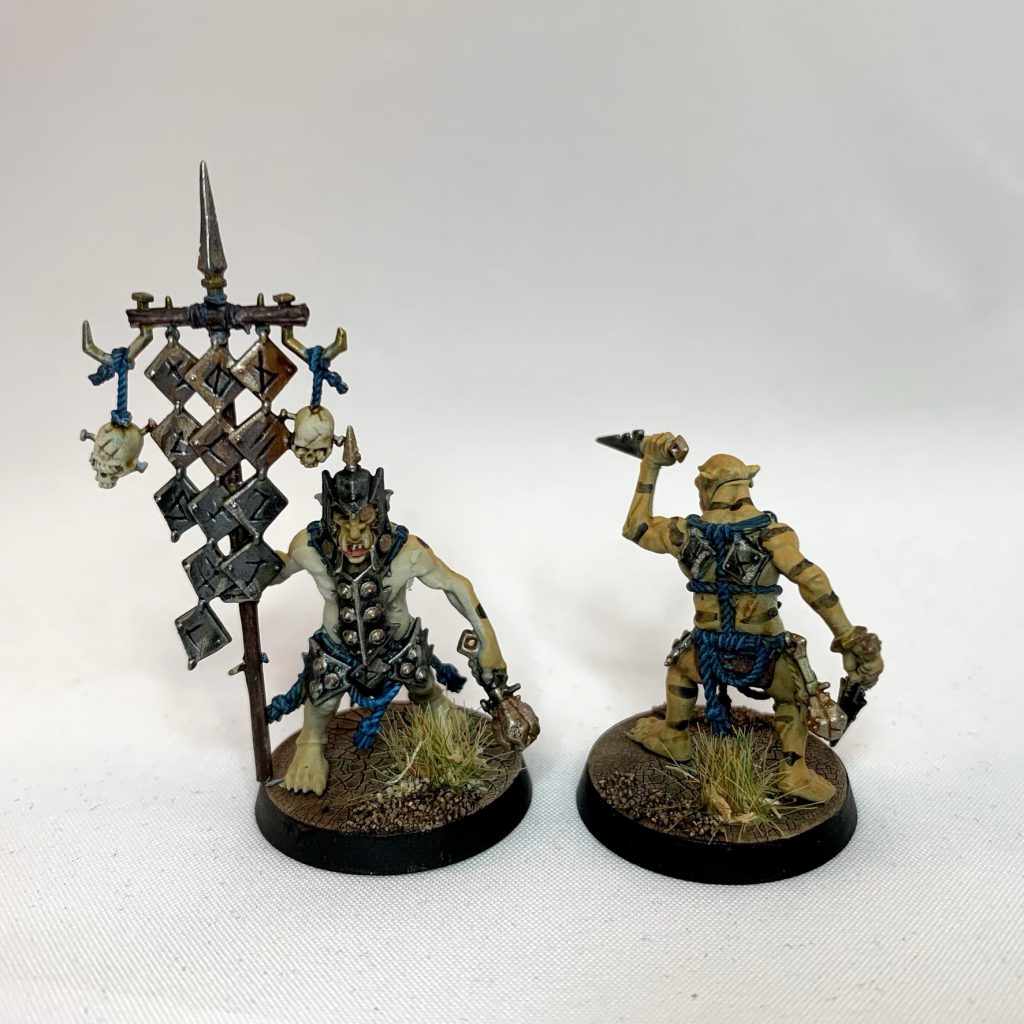
- Prime Black
- Create a Zenithal undertone by painting them Rhinox Hide, Ushabiti Bone, and Skull White.
- Lightly airbrush the backs and faces with Reaper Tanned Leather (looks very much like the new Hobgrot Skin).
- Lightly airbrush the front with Ushabiti Bone. Highlight with Wraithbone.
- Apply thin wash of Seraphim Sepia to back and face.
- Metallics begin with a coat of the bright silver
- Apply a solid coat of Contrast Black Templar or Gore-Grunta Fur. See the banner for both effects side by side.
- Drybrush bright silver
- Pick out rivets with Runelord Brass
- Edge Highlight with Canoptic Ally
- Ropes are basecoated with Stegadon Scale Green
- Drybrush Kantor Blue
- Light drybrush Baharroth Blue
- Black stripes are painted with Contrast Black Templar.
- Eyeshadow done with Nuln Oil
- Base with Agrellan Earth, sand, and Agrax Earthshade
- Take photos and realize you forgot to paint the nails, commit to going back and painting them black one day.
Overall I’m happy. They are a little messier than my normal minis mostly because I was pushing to get them done. However even if I slow down it won’t take too long and is easily replicated!
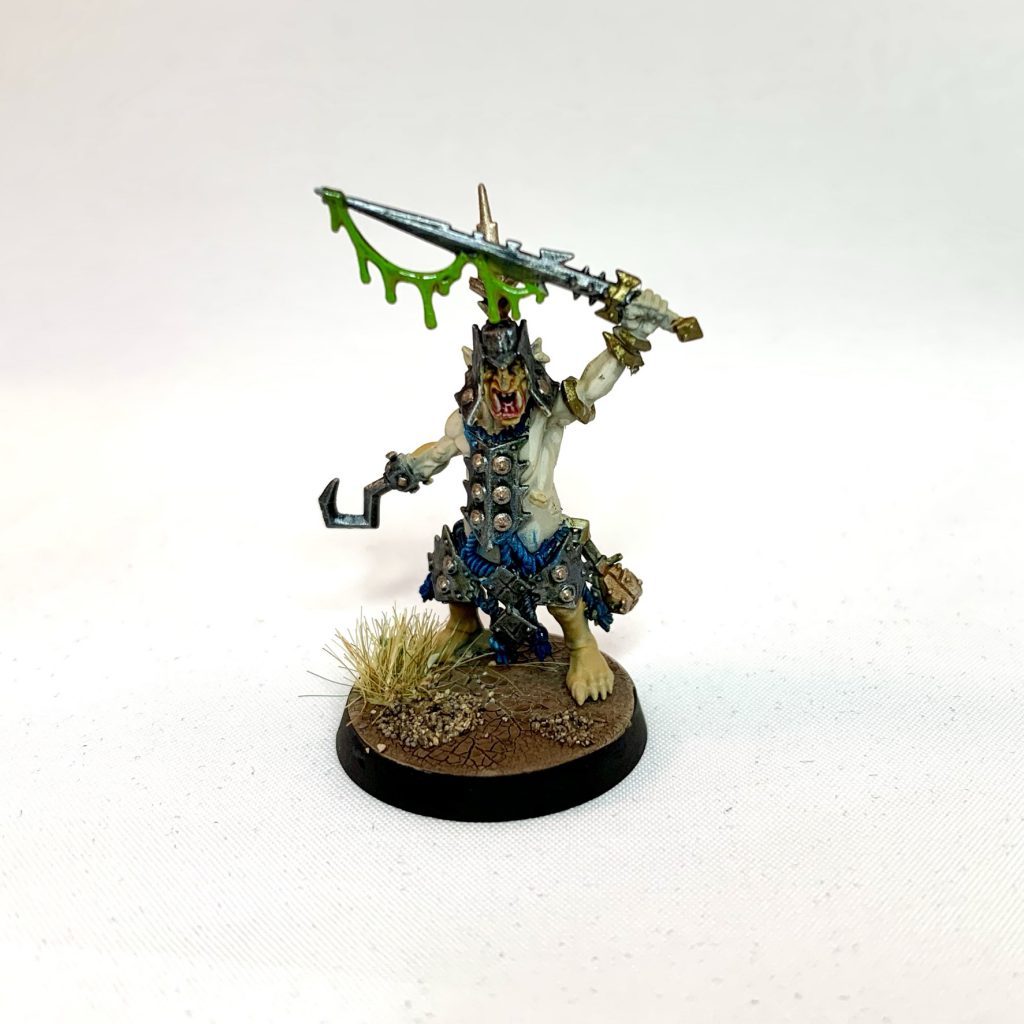
Murknob
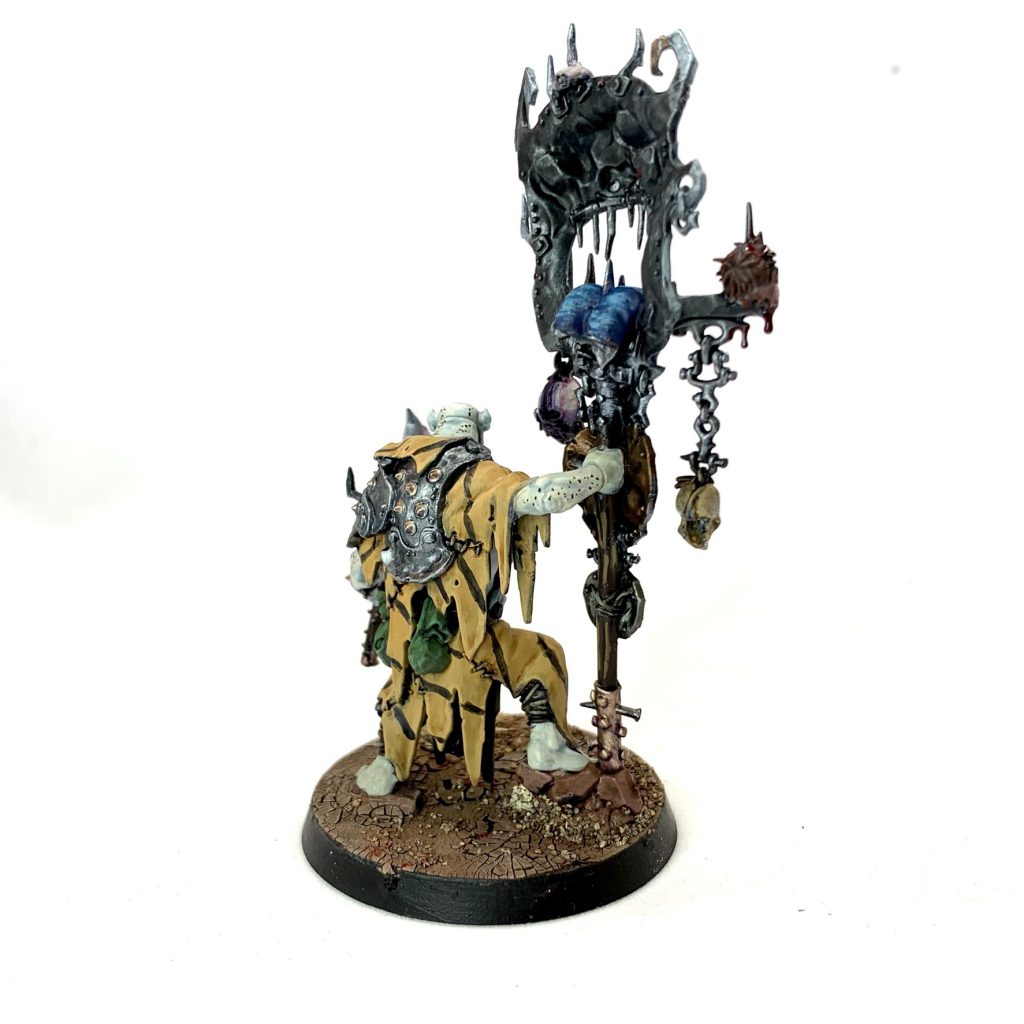
As I mentioned above, my Krulboyz hero scheme is based on the Blue-Tongued skink. Initially I was going to carry the blue spot color motif forward onto the heroes, but ultimately decided that that didn’t make as much narrative sense. The Hobgrots are subservient to the larger Kruleboyz. Instead, I decided to carry the Hobgrotz skin forward as the leather worn by the hero. It’s a vicious society and any Hobgrot that steps out of line is turned into hides.
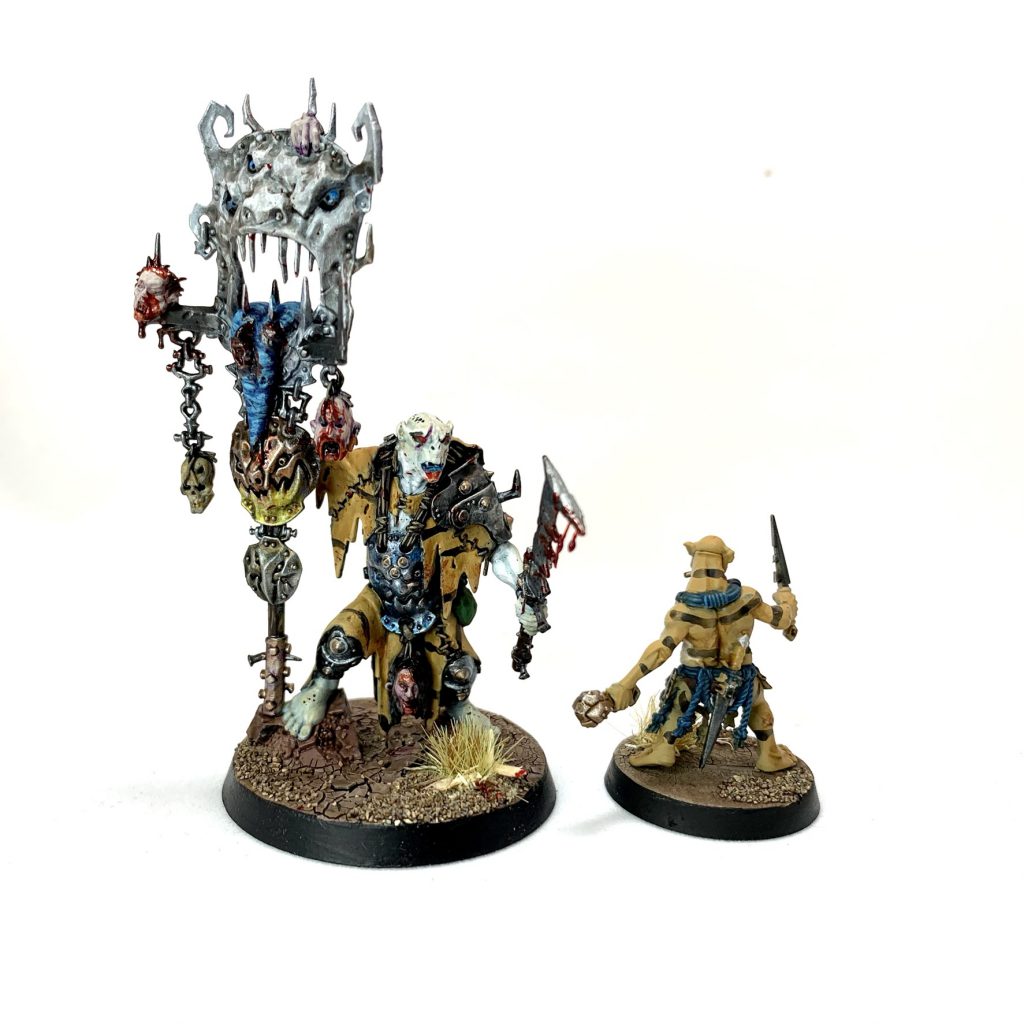
The hides were done in the same way as the Hobgrotz, only with a traditional brush instead of an airbrush. The shoulder and leg armor is also done the same way as the Hobgrot armor. The metallic faces are done with Contrast paints over metallic. Gore-grunta Fur for copper, Nazdrag Yellow for gold, and Skeleton Horde for a sort of dirty silver. The large face was Apothecary White over metallic, with bright white metallic (Scale 75 Speed Metal/White Alchemy) drybrushed over it.
The pale skin is a two part process. Like the Hobgrotz, the hero is countershaded but the effect is much more sublte.
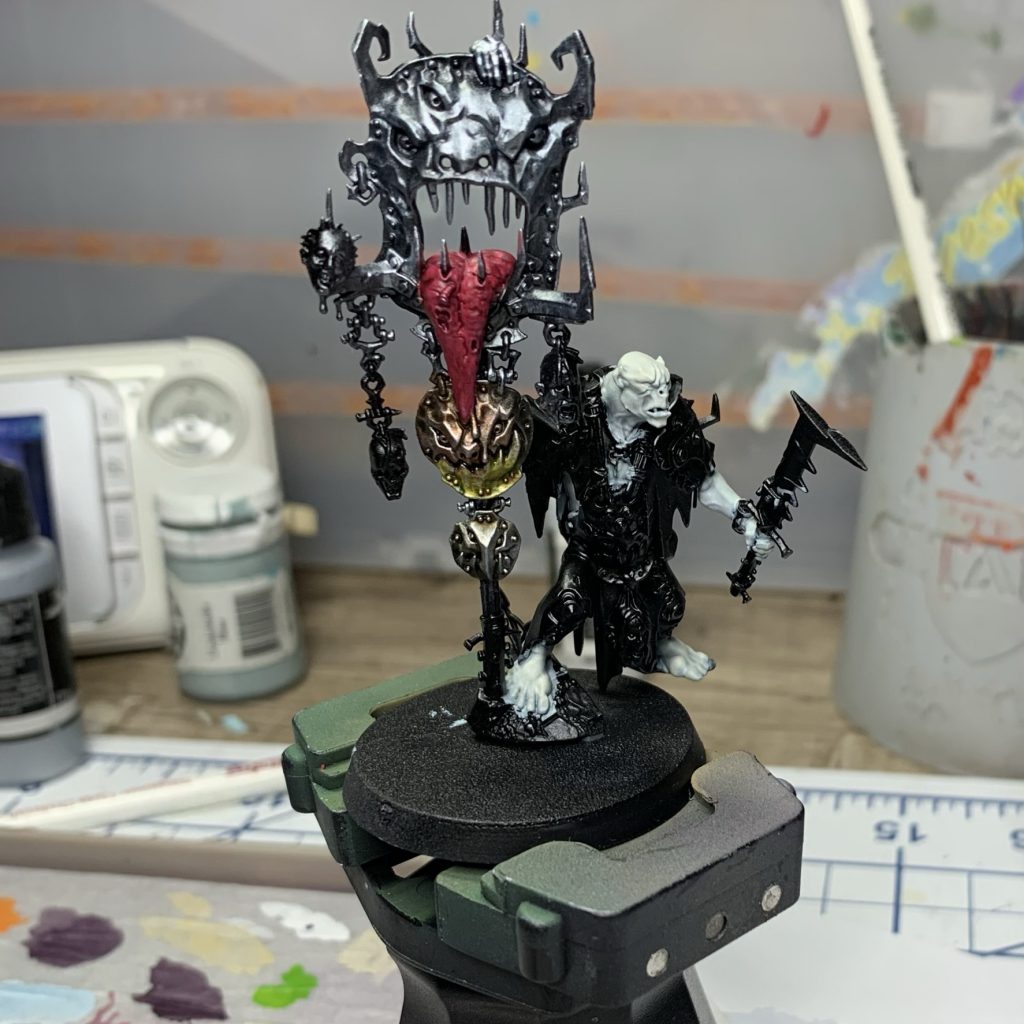
Belly, chest, lower jaw, and inner arms:
- Basecoat with P3 Underbelly Blue (Citadel Blue Horror with a touch of white)
- Highlight by blending up with pure white
Upper face, back, back of arms, and top of feet.
- Basecoat with a pale ivory (I used Reaper Splintered Bone)
- Highlight with pure white
- Glaze very thin Seraphim sepia onto the top of the head and muscles. This is backwards to normal highlighting, but check the Blue-Tongue Skink image as a reference.
- Apply mottling with Black Templar
JoeK’s Swampbogglers
I tried to make a tiktok of me painting my Kruleboyz.
It didn’t work.
Is this what getting old is like?
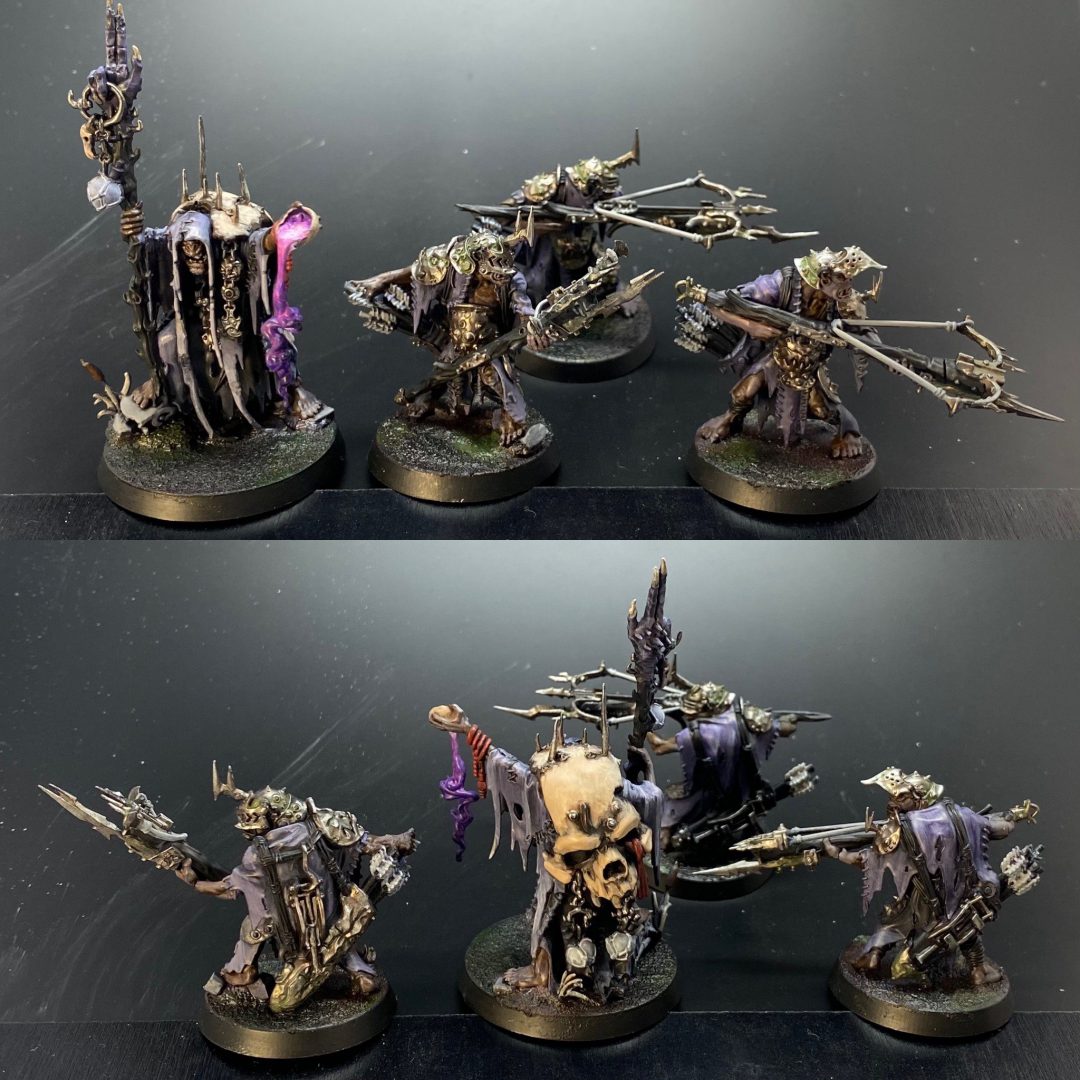
Anyways, for almost all of my painting I go back and forth between airbrush and normal brush.
- My first steps are Zenithial Highlights with the airbrush, but instead of doing them with black to white, I color block the model in zenithial grey-purples from a black base, as that will be the main color of the robs later on anyway.
- Next was the skin, using about a 50/50 water/Vallejo Air brown wash over the skin of the Orruks.
- That was then highlighted with a mix of purple, brown and grey, to dull out the browns previously washed over them. And for a final highlight I mixed in some ivory into the the last step on the skin.
- The metals were a uncalculated mix of Vallejo magnesium and Vallejo rust, each time my brush went back to mix those paints, it was never the same ratio, to give the metals more of a worn/imperfect feel.
- They were then washed with watered down dull green from Vallejo.. the color name wore off the bottle so, that’s all I got for you.
- And finally edge highlighted very sparingly with (again the name has worn off, but I think its aluminum.)
- The arrows, handles and staff were all just blacked out.
- The robes were then touched up with some targeted black/hexxed lichen (purple) shading and edge highlighted with hexed lichen/cold grey/ivory mix.
The bases were GW texture paint, that after the overspray from the original airbrushing, were washed with the same dull green I used on the metals, spotted washes of Vallejo dark green, some additional browns pushed around the edges of the greens and then all washed with GW. Nuln Oil “Gloss” to give the ground the damp-swamp feel.
Colin’s Hobgrots
As with all my Kruleboyz, I wanted the Hobgrots to have the pale blue flesh of creatures who aren’t accustomed to seeing much sunlight. I also figured they wouldn’t have access to a wide array of materials to make armor/clothes/kit, so there’s a very utilitarian feel to their gear. It also has the added bonus of being very efficient to paint and it helps to unify the scheme across a very diverse set of models. This scheme is very straightforward, but also very effective. I use a LOT of non-GW paints on my models. You can achieve the same results with GW paints in similar colors, I just use other paint lines and have for a long time. The exact paints are less important than the colors and the techniques!
My Kruleboyz so far:
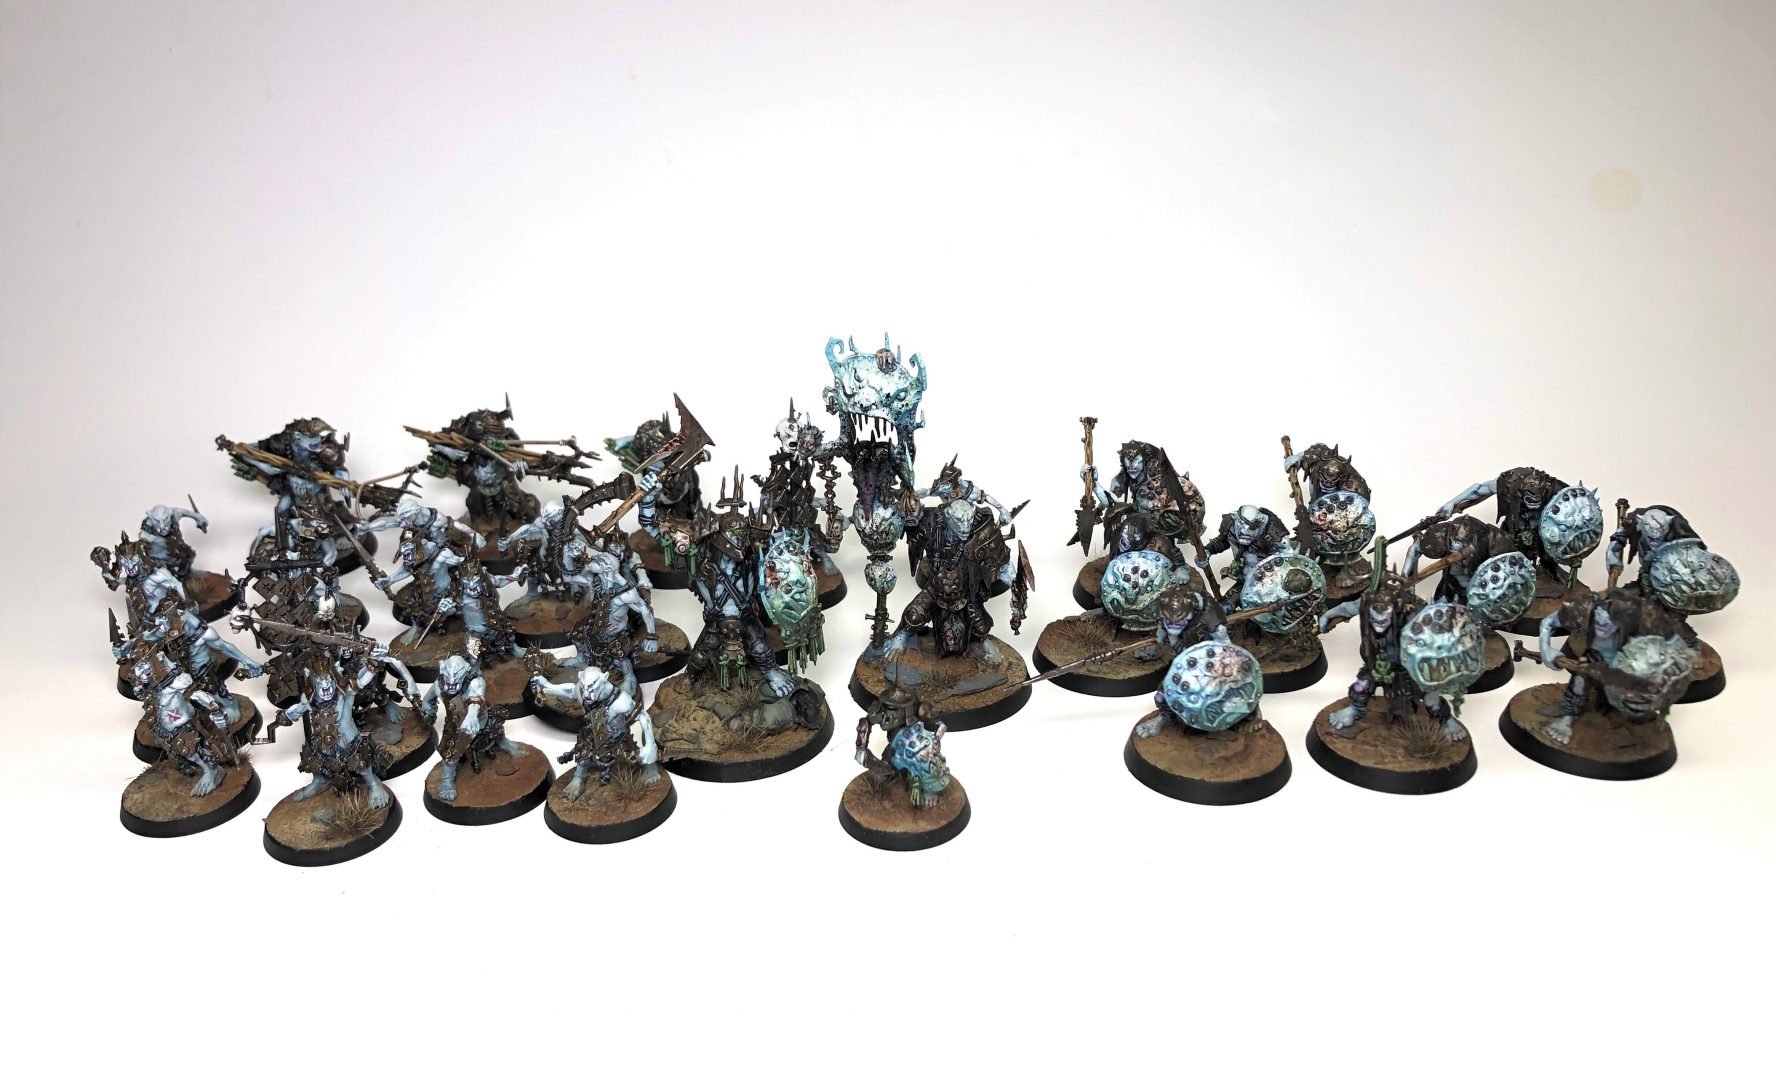
Hobgrots! (I really hope these guys are good at some point, as I could very easily knock out 100 of these):
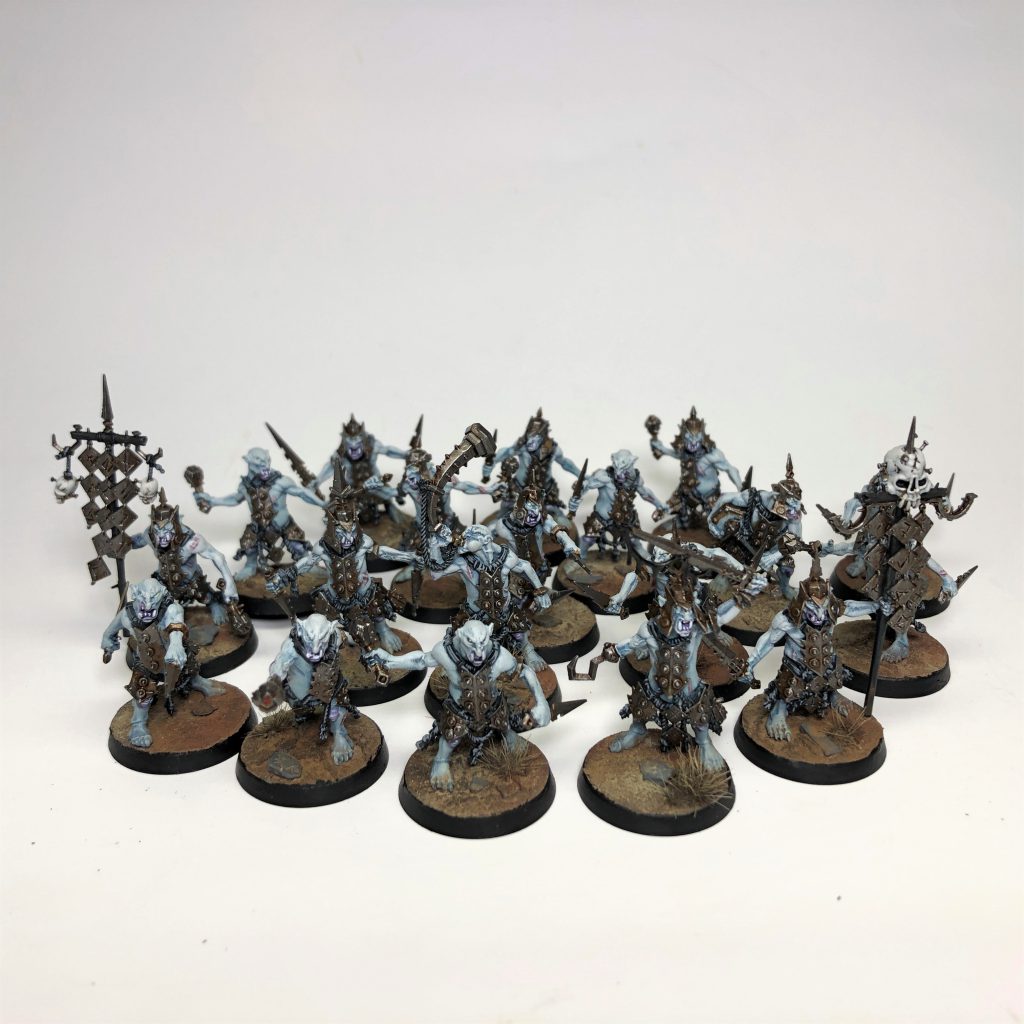
As I neglected to take step by step photos along the way, here are the methods/recipes I used to paint the Hobgrots alongside a couple of screenshots!
Skin:
- Basecoat model with Vallejo Model Color Pale Blue
- Wash with thinned Army Painter Blue Tone
- Drybrush with a mix of Pale Blue and Vallejo Model Color Pale Greyblue (yes, really)
- Drybrush with Pale Greyblue, focusing on the arms, shoulders and head
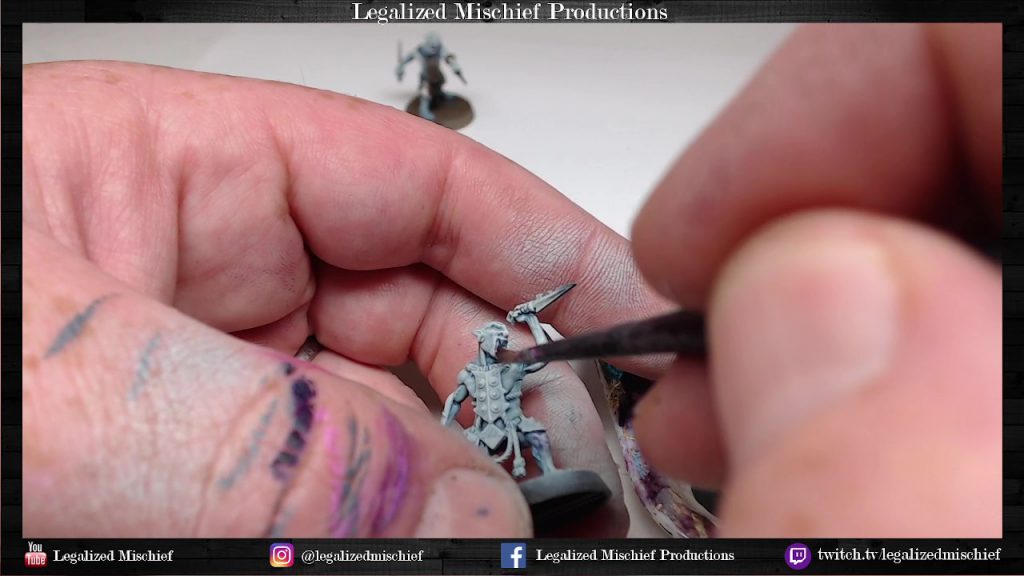
- Paint mouth, elbows, and knees with thinned Army Painter Purple tone. I did this to give the model some definition and to add a little color into the scheme where
- Highlight face, elbows, and knees with Vallejo Model Color Silver Grey. This helps to integrate the purple into the overall skin tones
- Paint teeth with Vallejo Model Color Ivory
- Paint eyes with Vallejo Model Color Ice Yellow
Metallics and Ropes:
- Basecoat armor and weapons with Vallejo Metal Color Burnt Iron
- Basecoat ropes and shorts with GW Black Templar Contrast
- Wash armor and weapons with a 3:1 mix of Army Painter Strong Tone and Vallejo Sepia Ink (any brown ink will do)
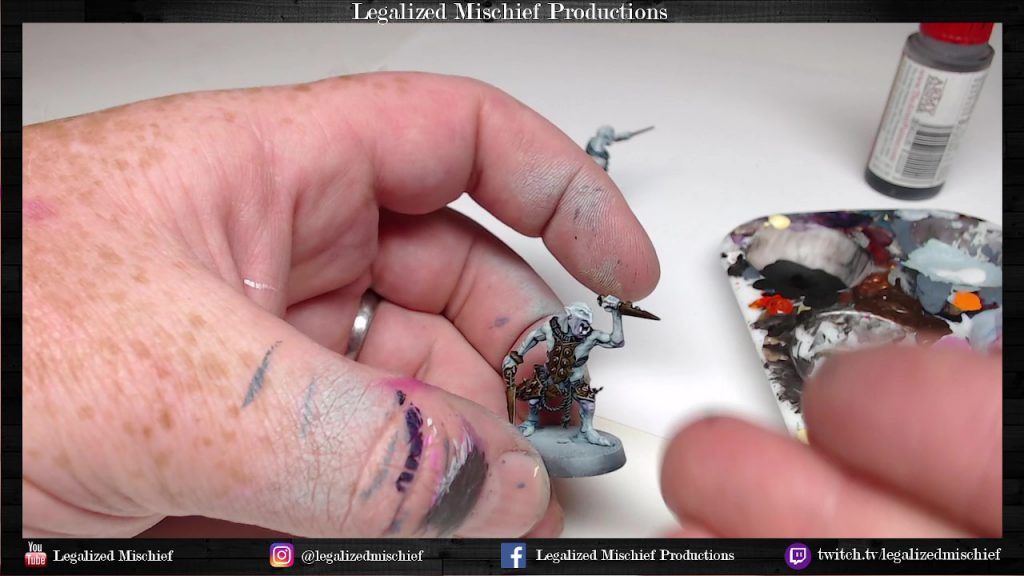
- Highlight armor and weapons with a VERY light drybrush of Vallejo Metal Color Exhaust Manifold (Focus near the top/front of these elements, the steel is not supposed to be shiny!
- Highlight ropes with a mix of Vallejo Model Color Black and Vallejo Model Color Deck Tan
DONE. Really. That’s it. The basing I’ll have to cover another day, but it’s essentially Vallejo Earth Texture sprayed with a green/brown, then had a few pigments mashed on top of it before a heavy coat of pigment fixer. Very very easy and effective basing. The grass tufts are Mininatur Tufts of Desert. I will be doing another article on the Kruleboyz themselves at a later date, but if you’d like to see full video tutorials on the Kruleboyz and more, you can find them on my Patreon.
Have any questions or feedback? Drop us a note in the comments below or email us at contact@goonhammer.com.


