
Welcome back, Star Wars: Shatterpoint fans! This time I am covering how I approached the That’s Good Business Squad Pack, which includes fan favorite Hondo Ohnaka and his Weequay cronies.
These models were painted for fellow Goonhammer author Mugginns, historical gaming fanatic and supposed player of Star Wars: Shatterpoint. These were assembled by him, which will be relevant later in this article. Luckily, he had not primed the models yet. I’ve firmly established myself as an advocate for white primer, which I once again used here. It’s simply the superior choice, end of discussion.
Hondo Ohnaka
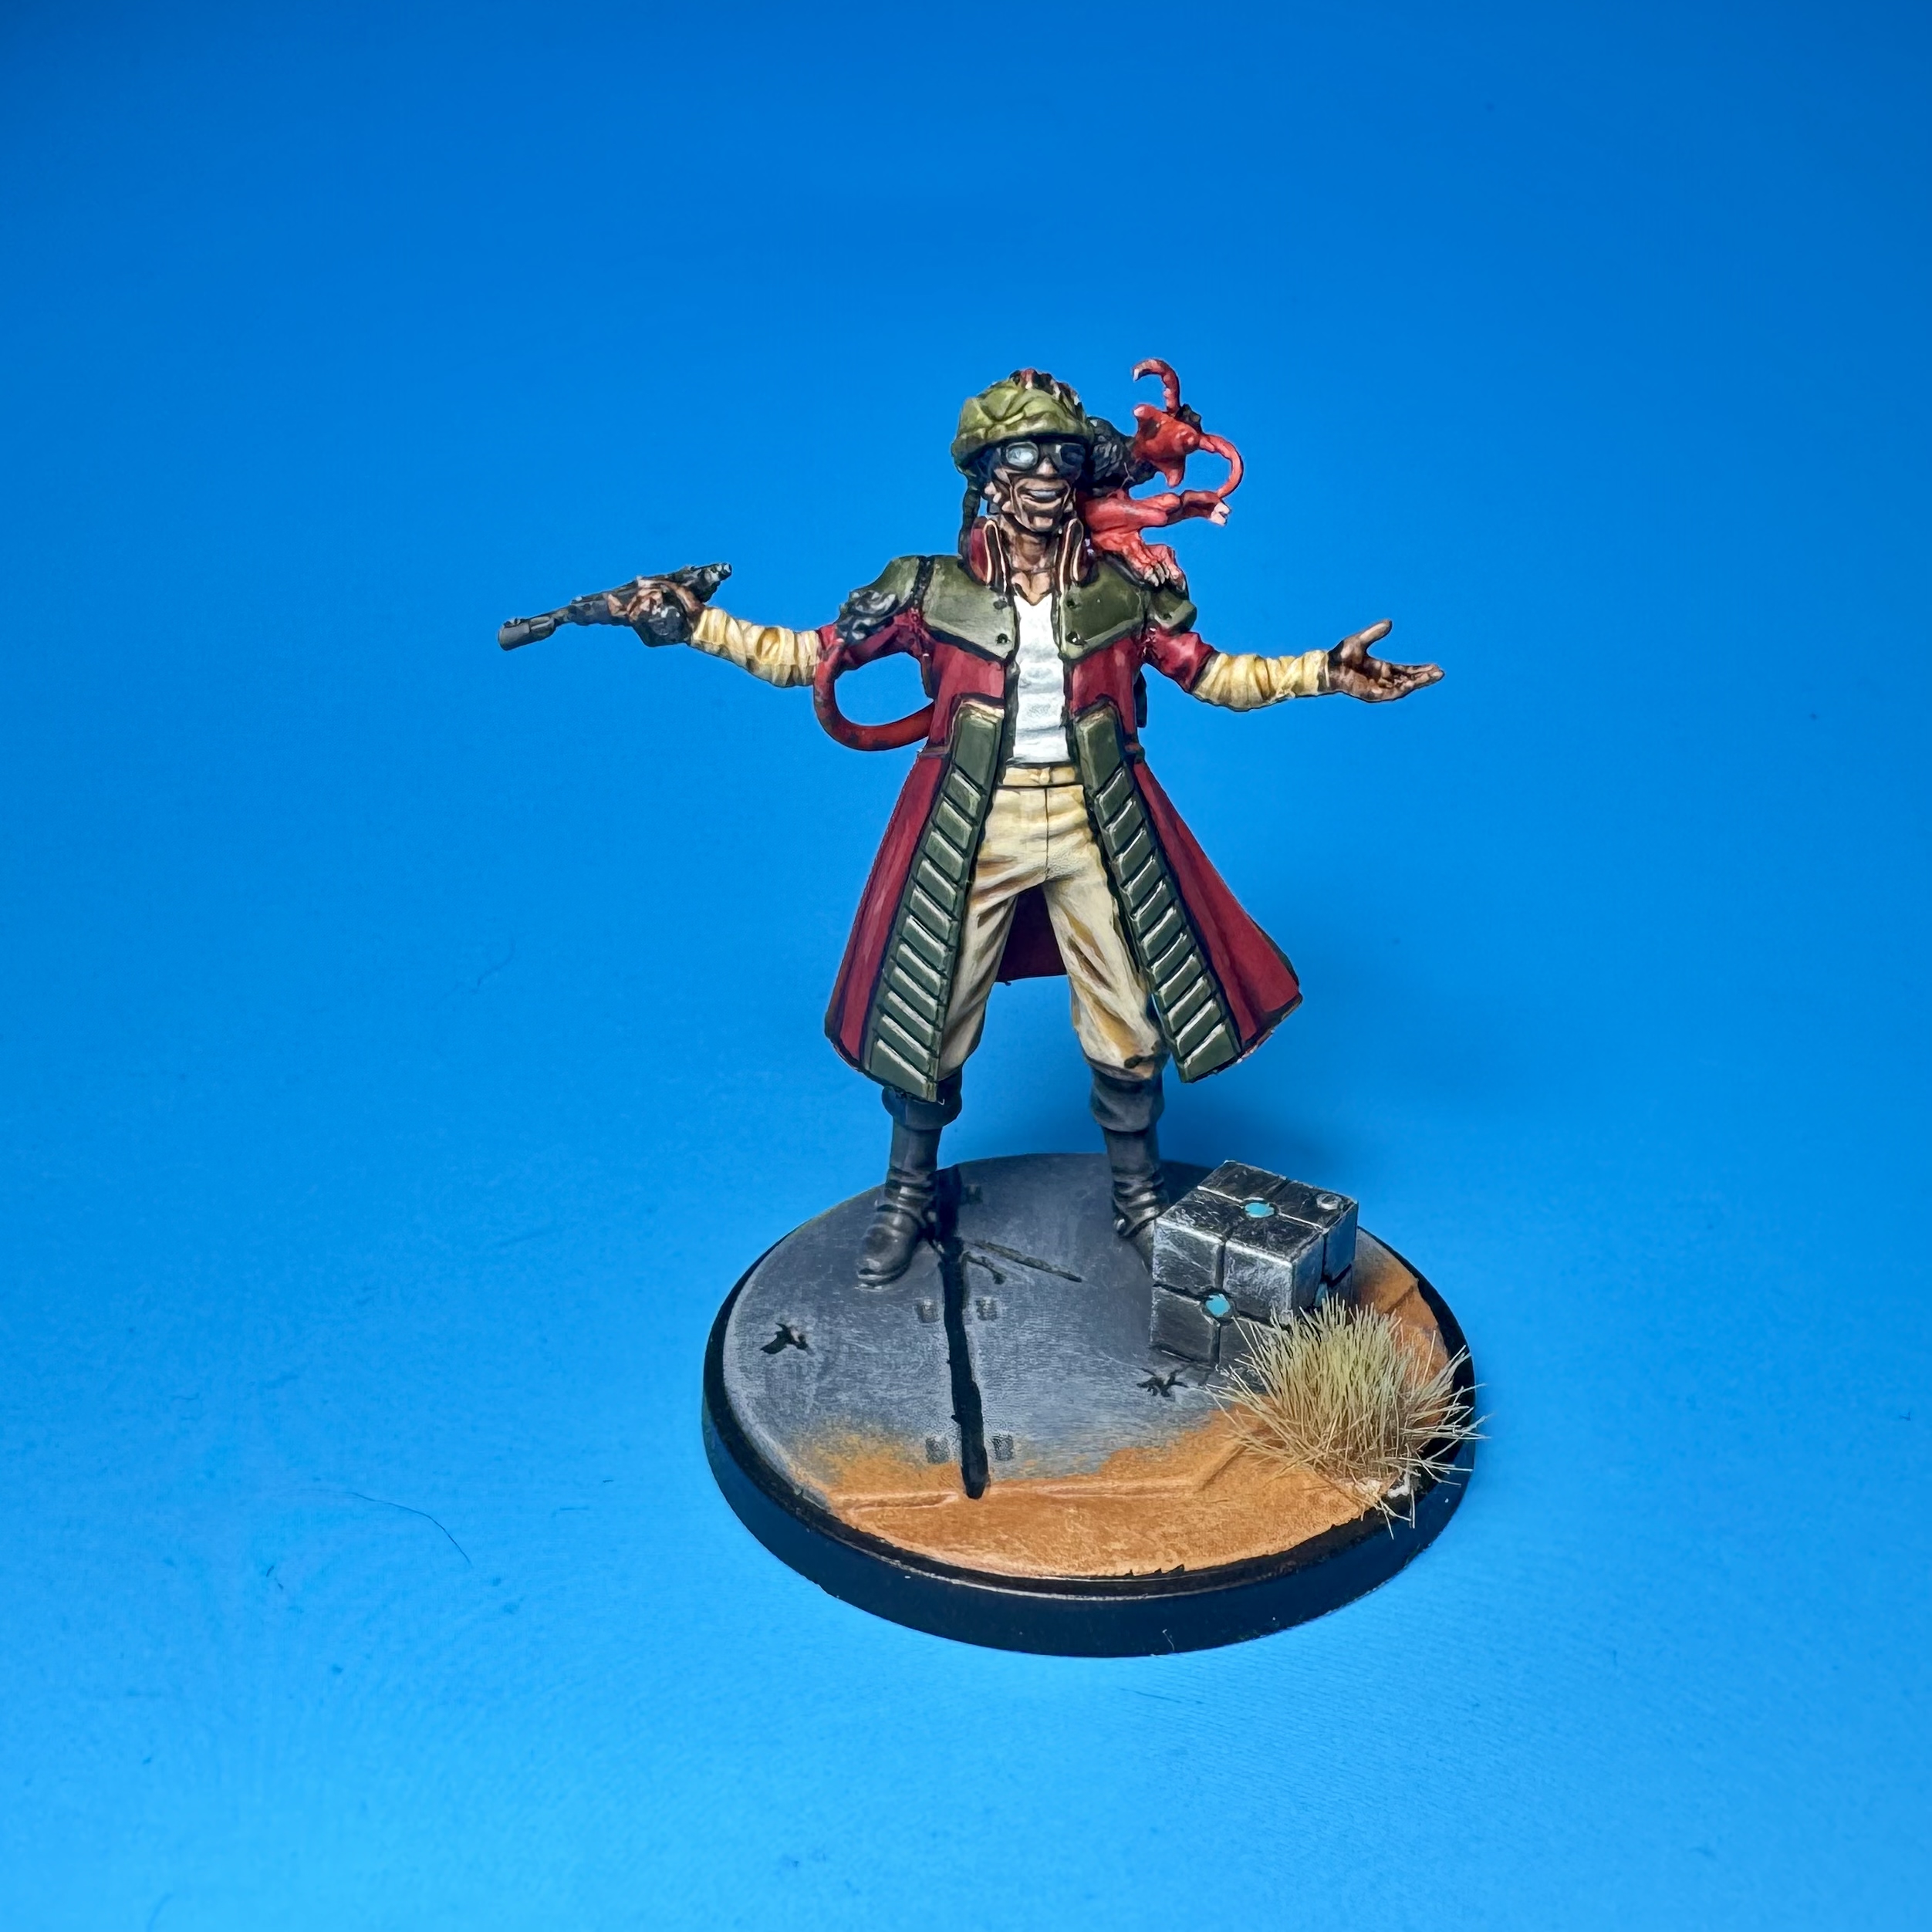
I usually save the primary for last when painting a squad box. If I’m being honest I wish I had done that here. I enjoyed painting Hondo, but the other models in the box (particularly Gwarm) were not especially interesting. Nonetheless, here’s how I went about painting the consummate businessman.
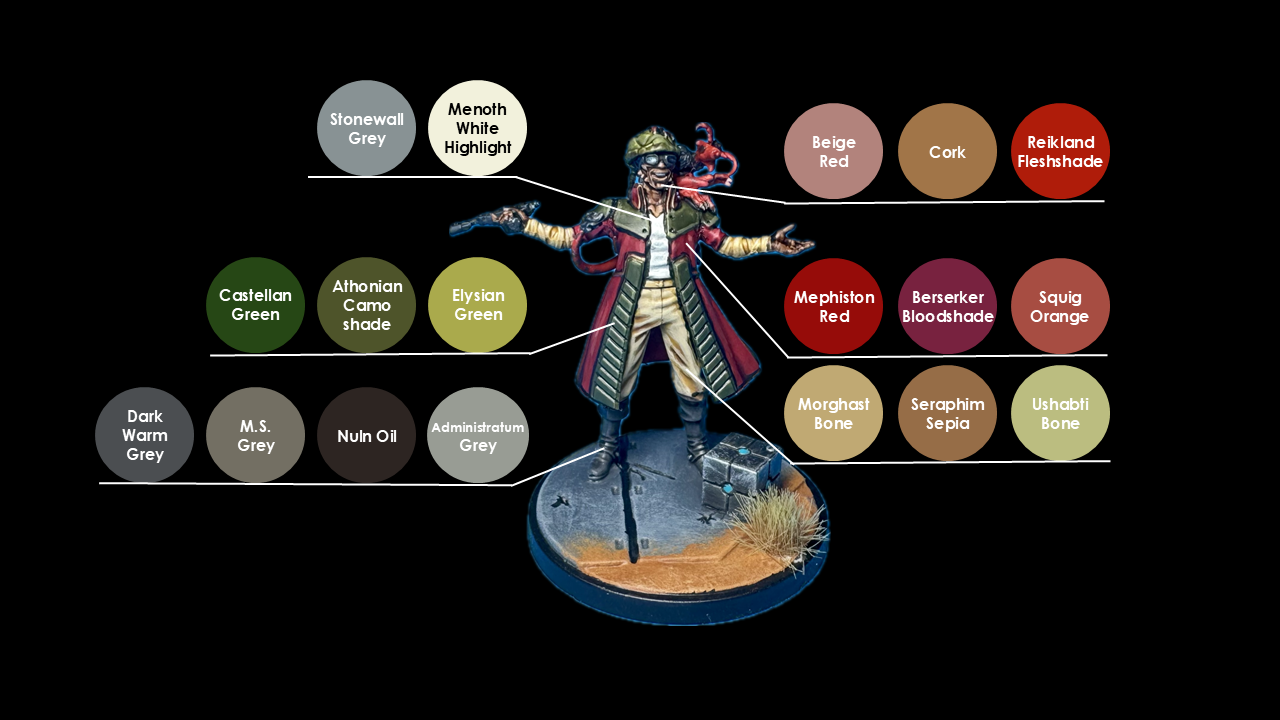
- Hondo’s space-Dockers were painted with GW Morghast Bone. This was washed with GW Seraphim Sepia. When that dried, I highlighted first with Morghast Bone, then a roughly 1:1 mix of Morghast Bone and GW Ushabti Bone. I followed a similar scheme for the wraps on his arms as well as the braid wrapping on his back.
- His undershirt was painted first with VMC Stonewall Grey. I then kept mixing in P3 Menoth White Highlight and layering up increasingly smaller areas until I was happy with the brightness. The primer was a little patchy here, or I might have gone with just appling GW Soulblight Grey wash over the white primer. This is a surprisingly effective method for white in my experience!
- Hondo’s boots and his gun were basecoated with Pro Acryl Dark Warm Grey. I drybrushed both with GW Mechanicus Standard Grey, then washed with Nuln Oil. I then did some line highlights with the MS Grey and finally the MS Grey mixed with GW Administratum Grey.
- The cloak was basecoated with GW Mephiston Red. I then applied GW Berserker Bloodshade. When that dried, I highlighted and cleaned up with the Mephiston Red, then applied highlights by mixing in more and more GW Squig Orange to the red. Some final spot highlights were done with pure Squig Orange.
- The green panels started with a basecoat of GW Castellan Green. I washed this with GW Athonian Camoshade. Highlights were were done by mixing GW Elysian Green into the base color. Some edge highlights were done with pure Elysian. The helmet followed a similar scheme, except I started with Straken Green rather than Castellan Green.
- The Kowakian monkey-lizard is a good spot for getting extra creative, so go nuts here IMO. That being said, for the skin I used some leftover mix of Mephiston Red and Squig Orange on my wet palette. I painted the fur with leftover Dark Warm Grey. I also stippled some spots onto the skin using this same grey. The skin got washed with GW Fuegan Orange, and the fur with Nuln Oil. Remember how I was not the one to assemble these models? Here is where we point out the body-horror art Mugginns created by gluing the poor monkey’s nose into the spot where his neck was meant to go. It’s surprisingly easy to miss, especially from tabletop height. But it really adds that little bit of je ne sais quoi, yes?
- Lastly, Hondo’s flesh tones. Weequay generally seem to be depicted with lighter human-like skin tones that are still just a little different. I tried to produce something similar by mixing in non-standard colors into the process for all the models in this box. In Hondo’s case, I basecoated with a mix of Pro Acryl Beige Red and AK Cork. (I know, I know. I bought it before I knew about their whole deal. Sub in a similar ochre/tan color of your choice.) I washed with GW Agrax Earthshade next. But that shade didn’t play well, even after I started highlighting back up with the base color. So after repainting with the base, I used GW Reikland Fleshshade and was much happier with the result. I mixed in more Beige Red to produce highlight shades.
- After a few more details and blacklining, that was it for Hondo.
Gwarm
Despite having an amazing Star Wars-y name, Gwarm was a much less interesting model to paint. Granted, you don’t have to stick to studio or canon paint schemes, but I did with him for some reason.
- His jumpsuit was based with Dark Warm Grey and washed with Nuln Oil. I followed this with re-layering most of this with the DWG again, as the end result was too close to black. I highlighted with P3 Bastion Grey, then a little bit of Administratum Grey for final highlights.
- The gun was based with Pro Acryl Dark Silver, then drybrushed with Scale75 Speed Metal. This all got washed first with Nuln Oil, then GW Druchii Violet. The latter added a bit of a purple sheen and interesting color to break up the dull colors on most of the model. It doesn’t photograph well unfortunately. But I definitely recommend experimenting with different washes for your metallics!
- Leather bits were based with GW XV-88. This was washed with Agrax Earthshade, then highlighted again with the XV-88.
- I started Gwarm’s skin with a bix of GW Cadian Flesh and Beige Red. I also based the bone/horn bits with Morghast Bone. All of this got washed with Reikland Fleshshade. I highlighted the skin just using the base color again. For the horn, I mixed some white into the Morghast Bone for highlights.
- After the usual blacklining, that was it for our buddy Gwarm believe it or not. Super simple, especially coming from all the color and detail on Hondo!

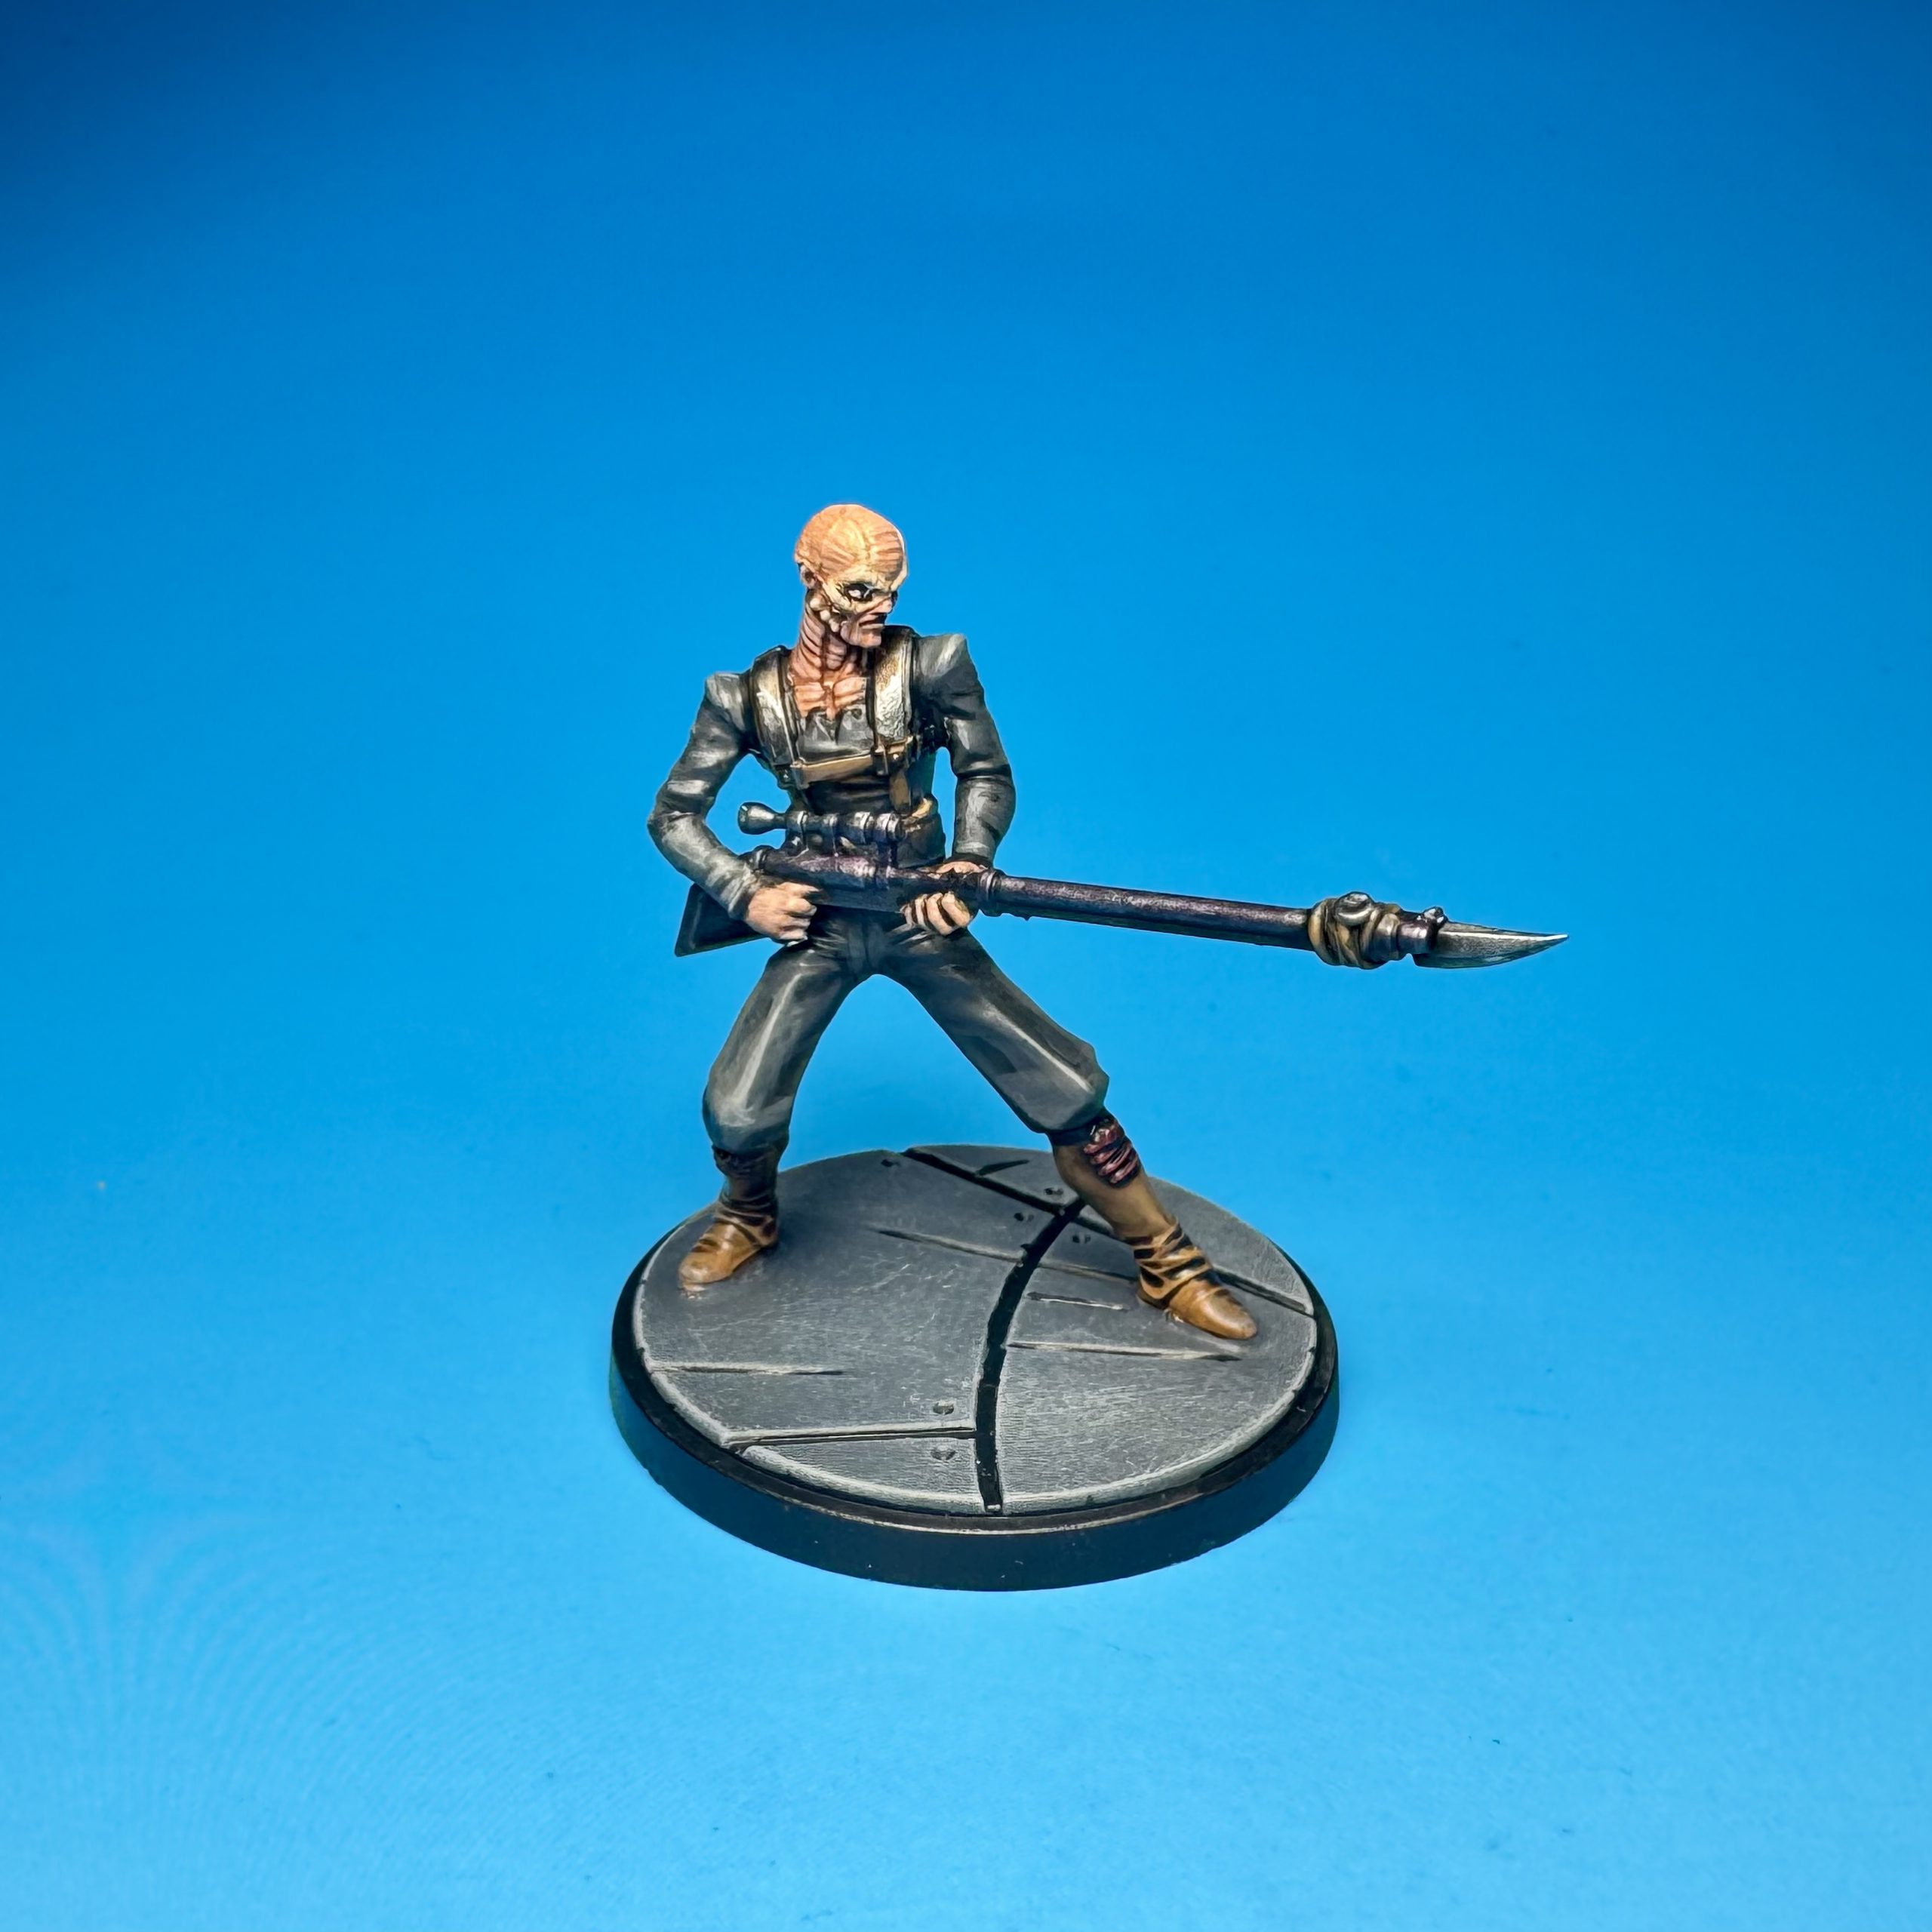
Weequay Pirates
Last up are the Weequay Pirate supports. These models are an excellent opportunity to explore your own color schemes and get a little wild with it if you want. I didn’t go crazy with these, but I did experiment with different colors and textures at least.
- Both models started with Bastion Grey for their jumpsuits. I also basecoated the blasters on both with P3 Coal Black. Finally, the boots and other darker leather bits were basecoated with Pro Acryl Blue Black. All of these got washed with Nuln Oil. The dark leather got highlighted back up with the Blue Black. I later applied a few spots of metallic silver on some of the blaster greeblies.
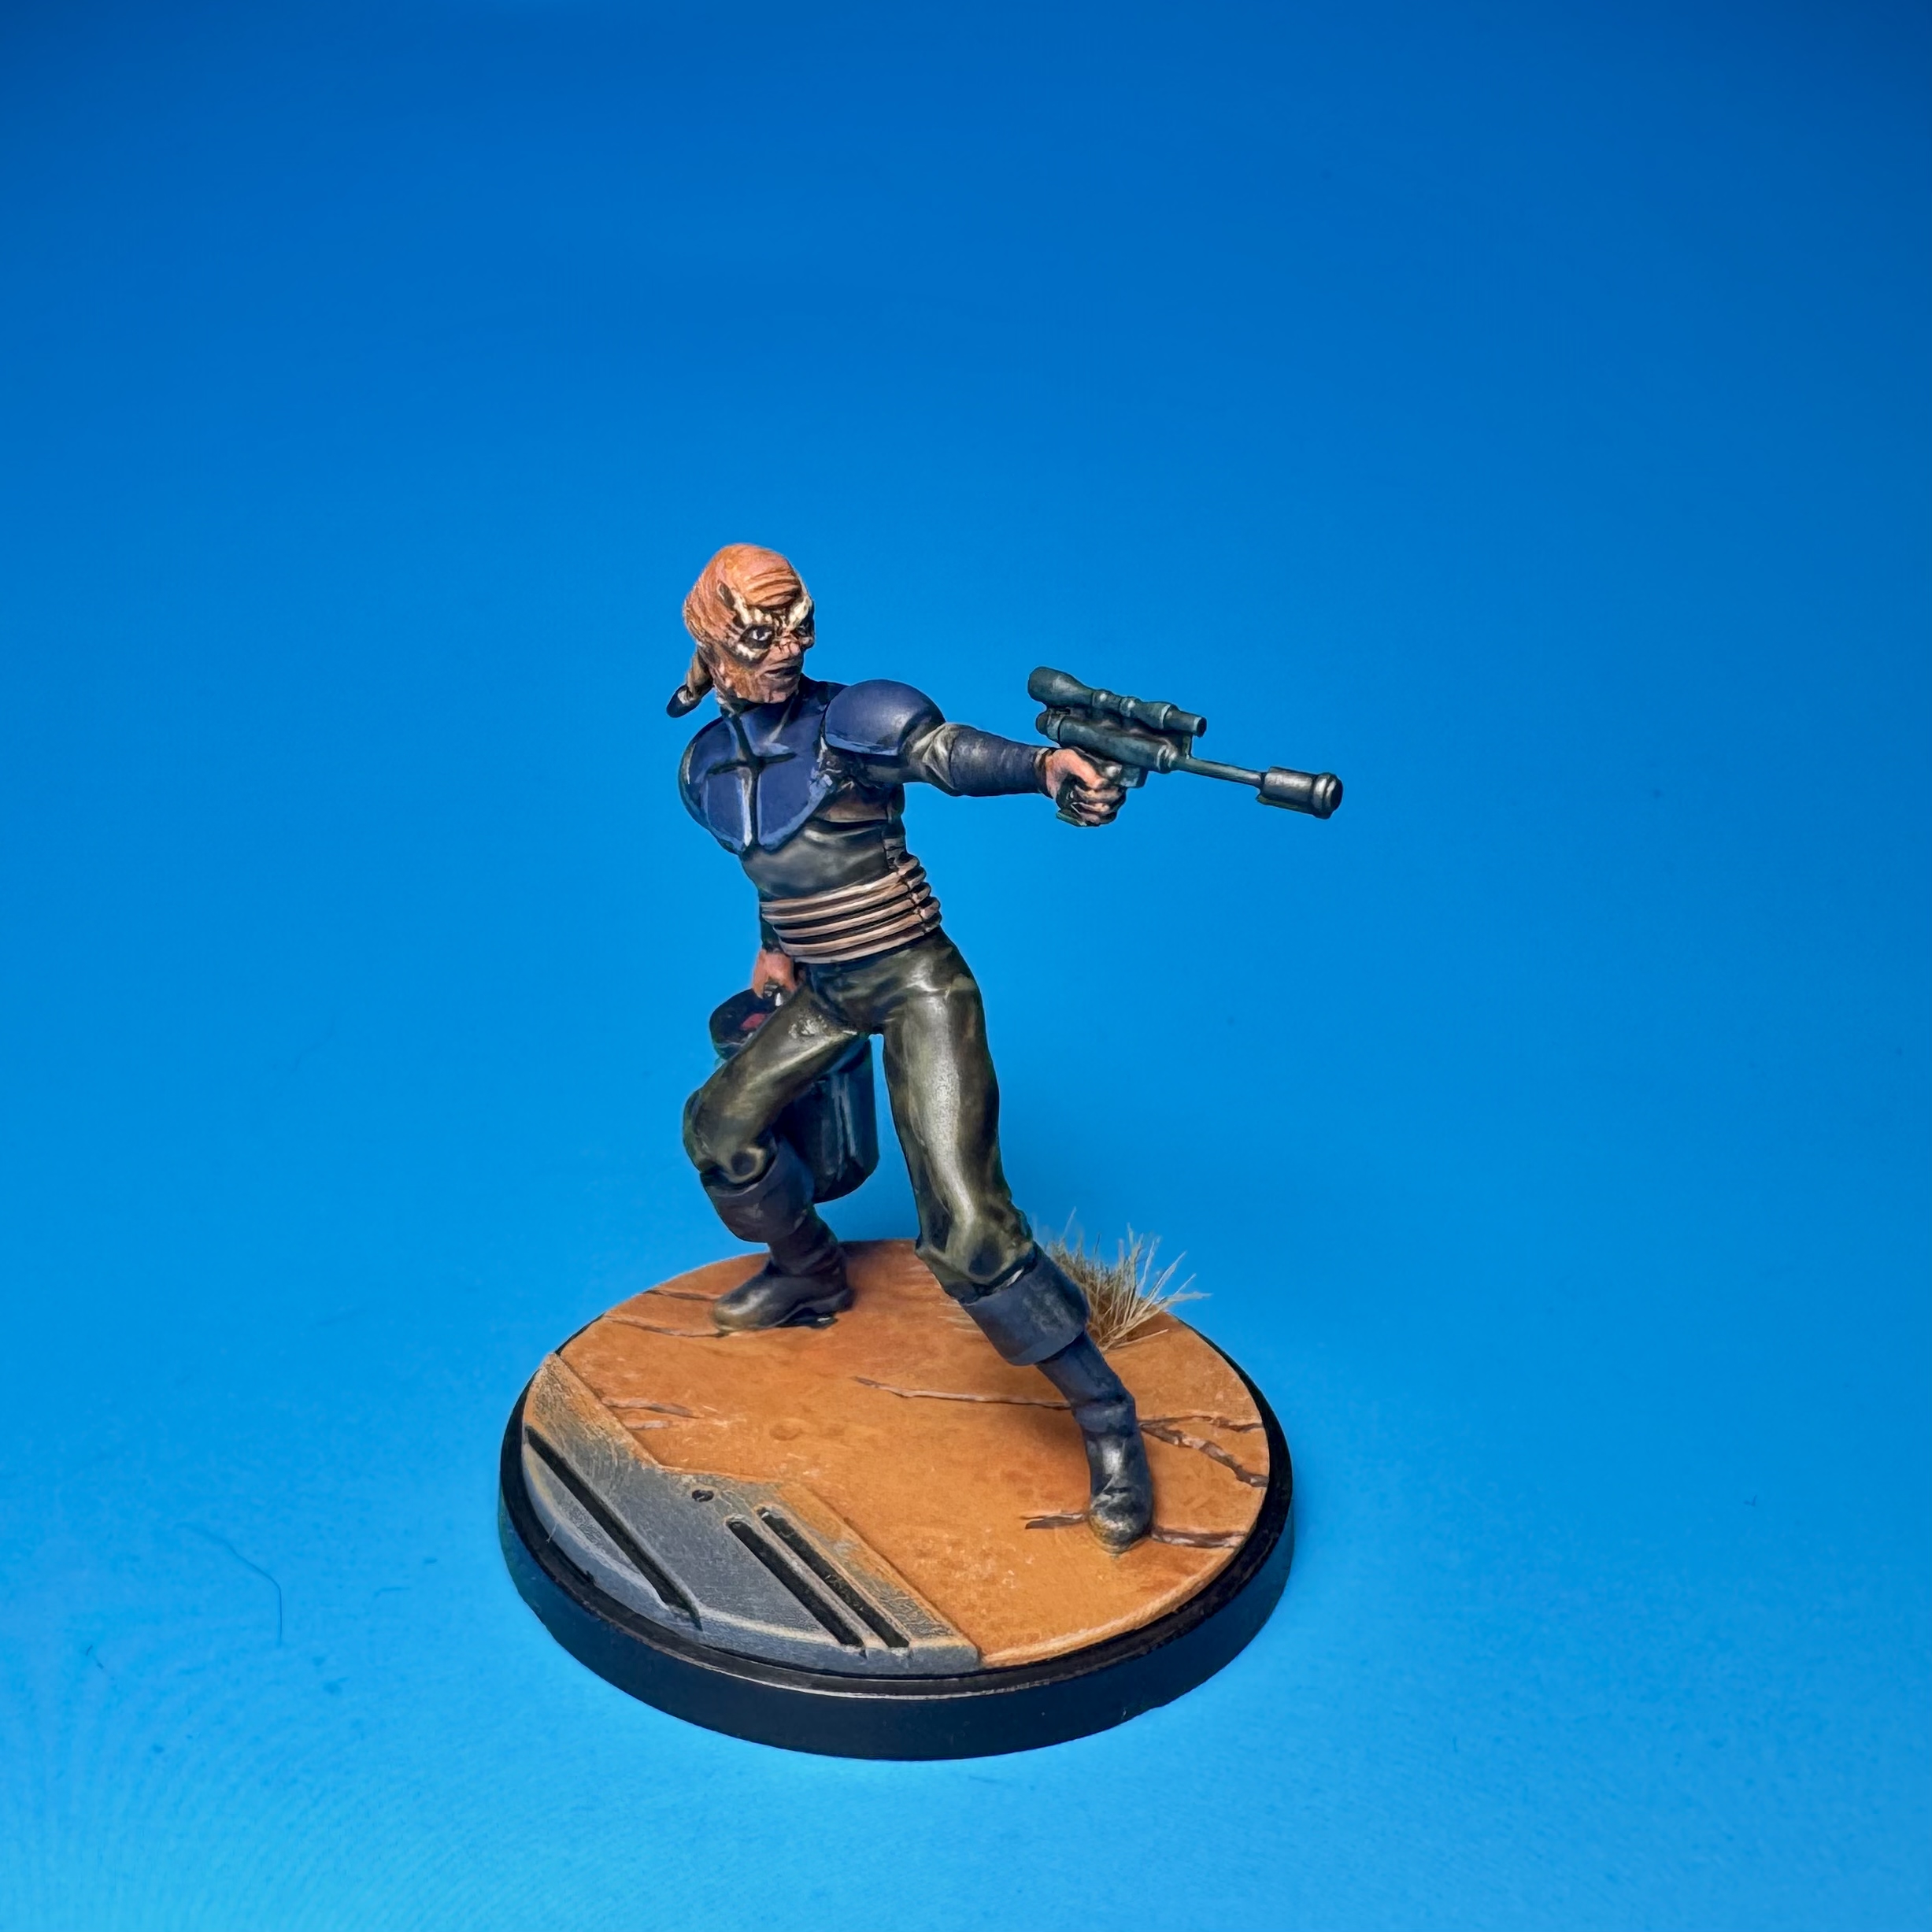
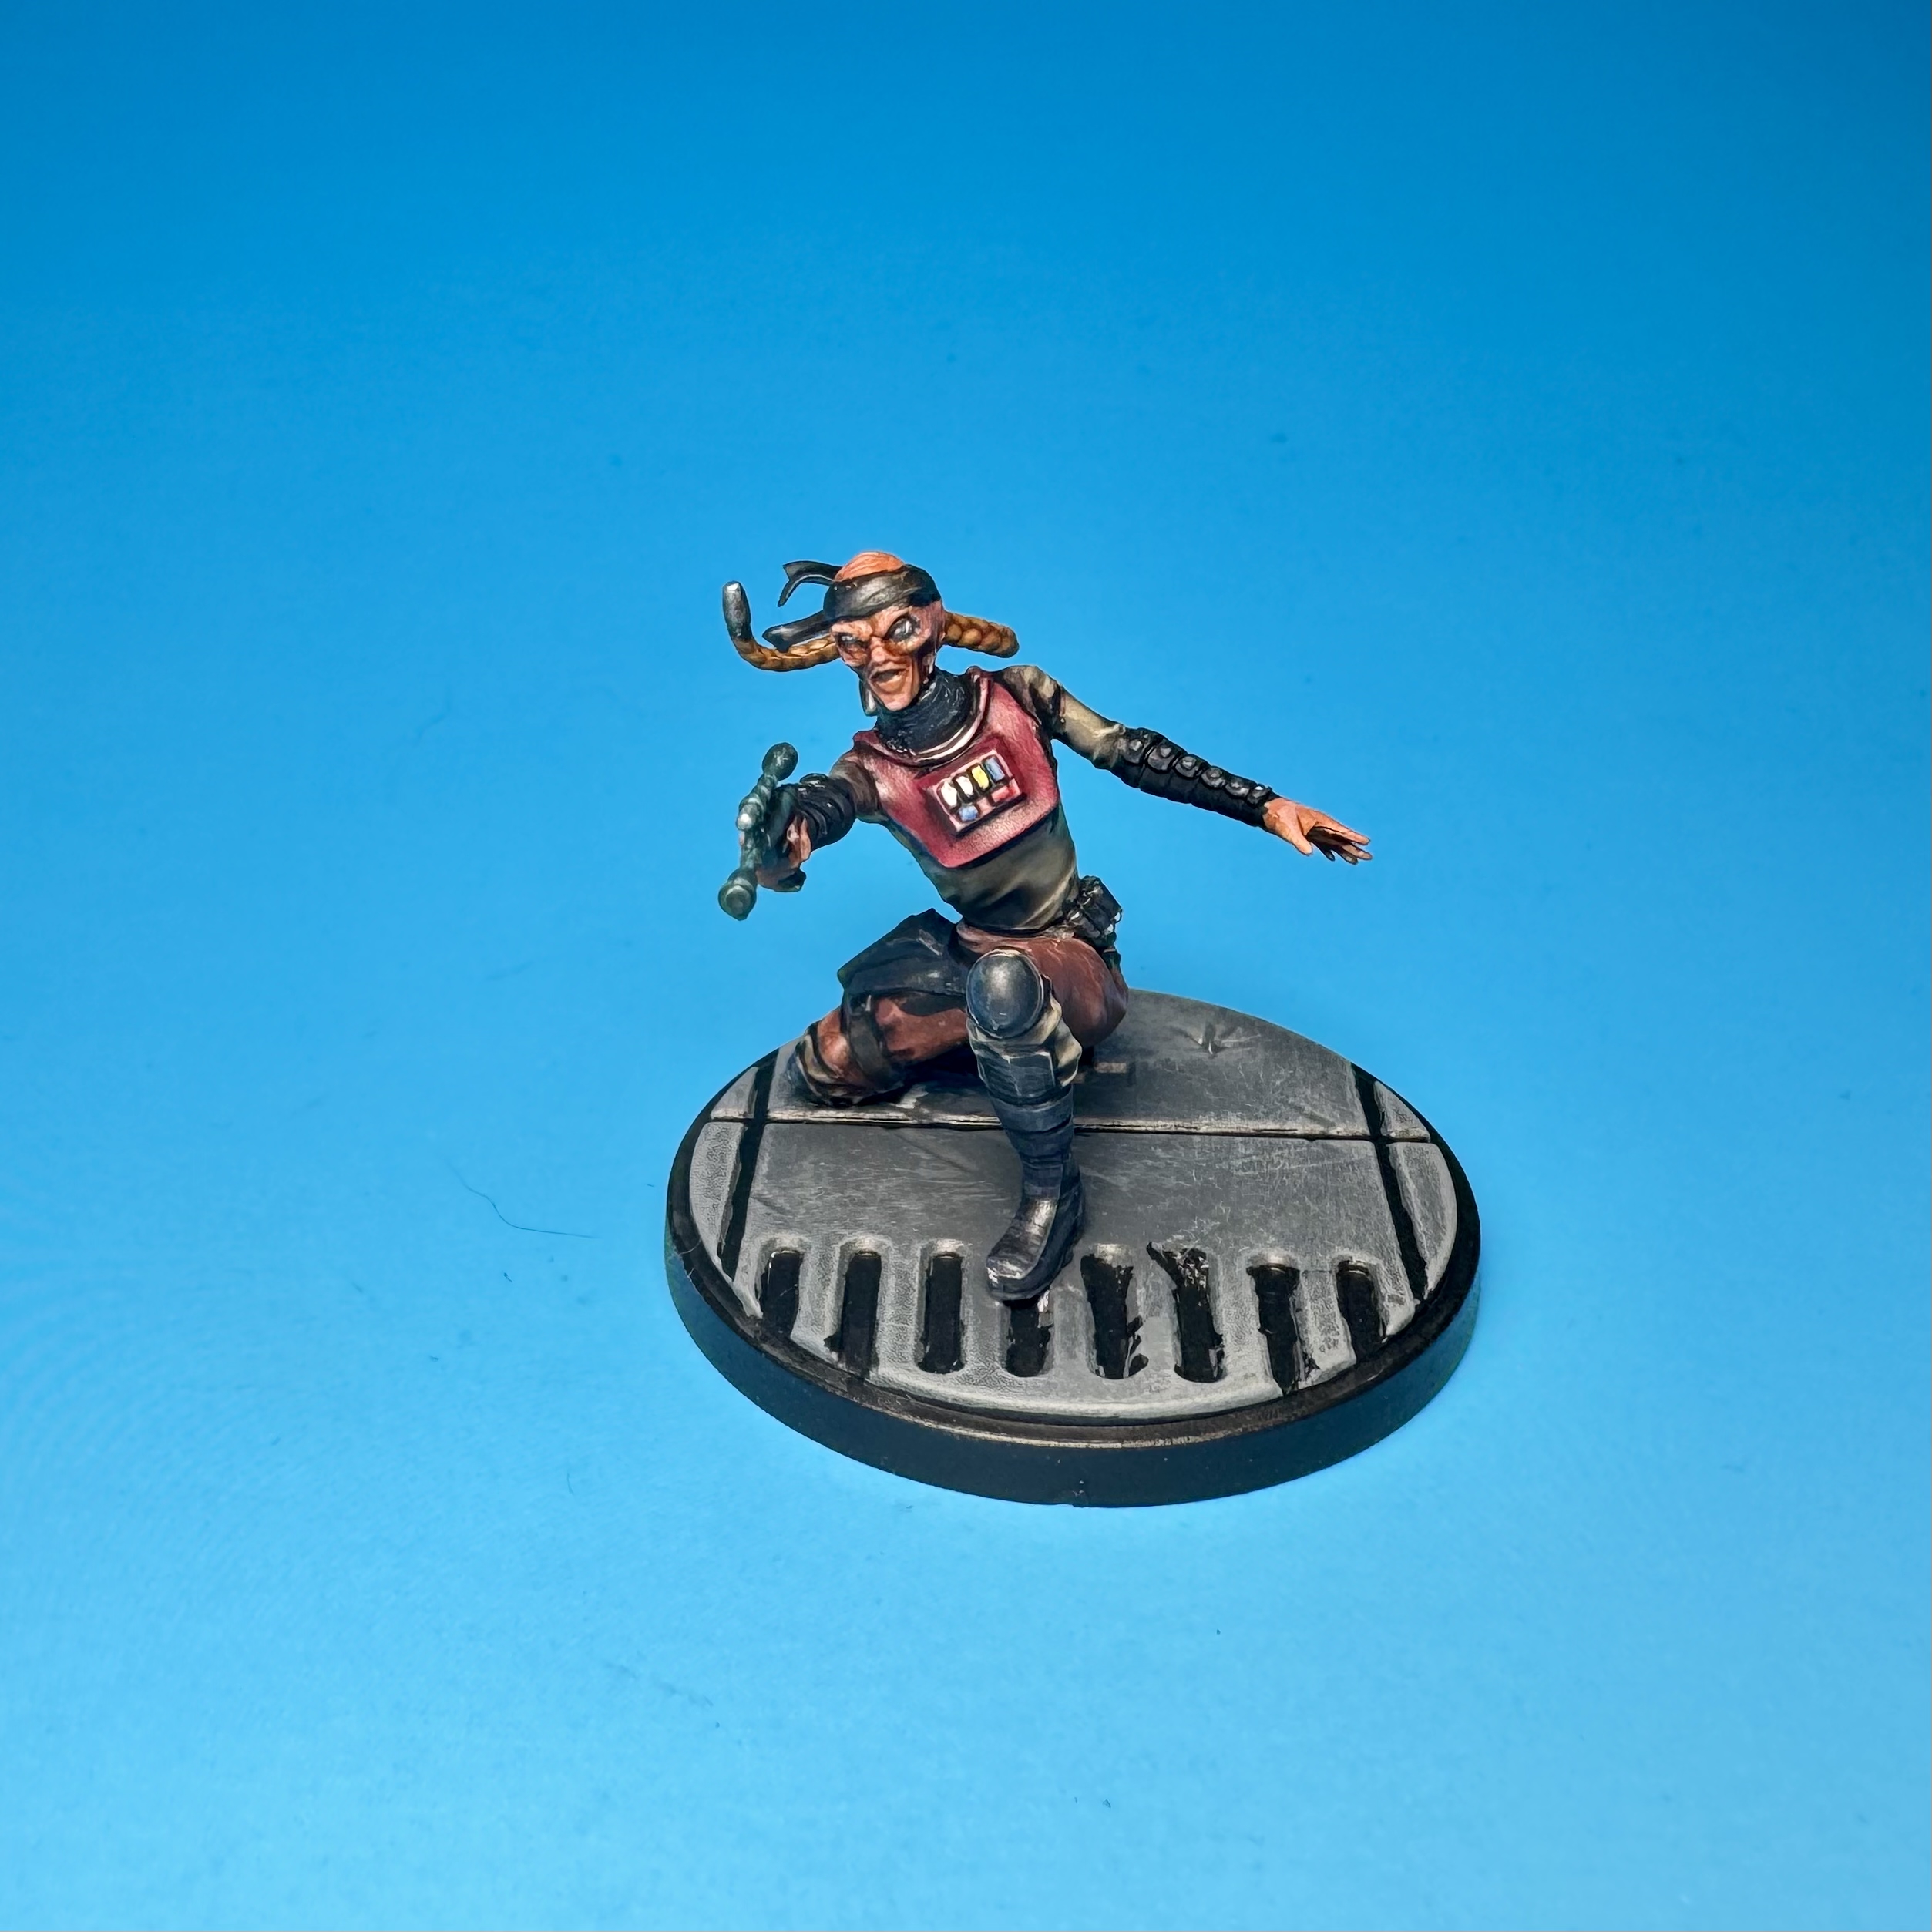
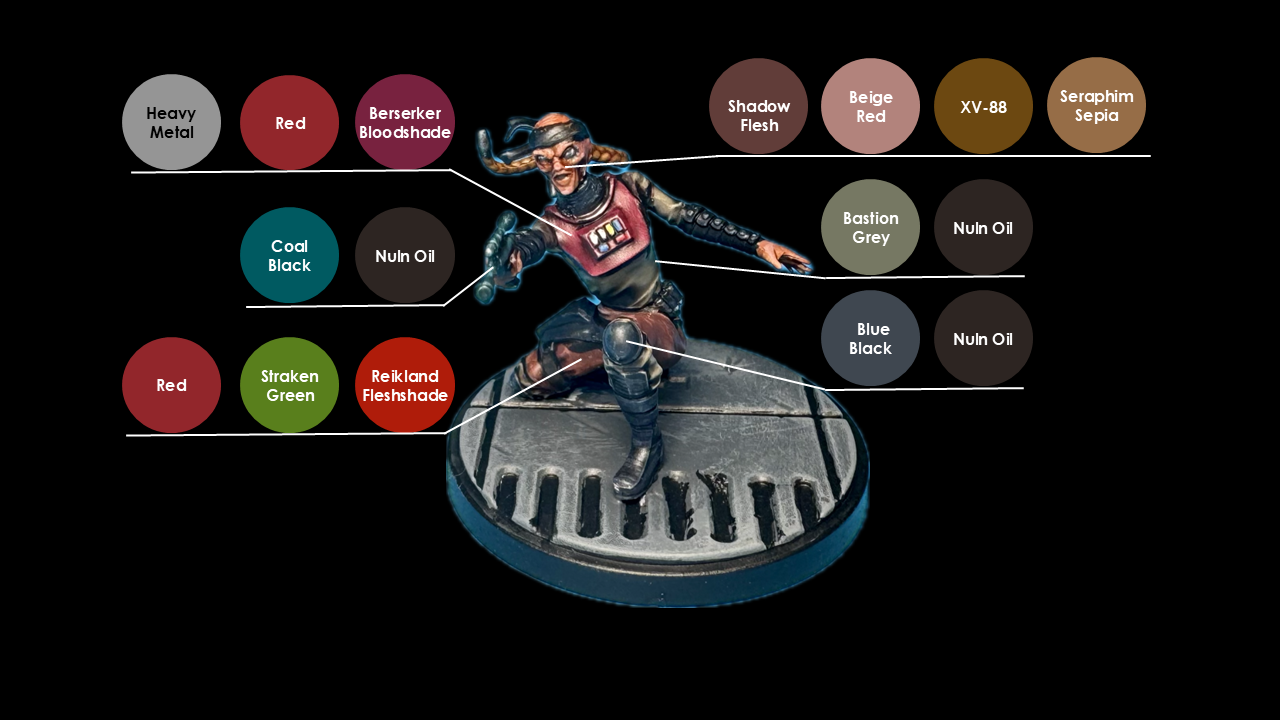
From here, the models diverge in approach. For sake of ease, I’ll refer to the kneeling model as Neil, and the standing one as Doordasher (or just Dash because that’s too much typing for a dumb joke).
- Neil’s pants were based with a mix of Vallejo Red and Straken Green. These colors cancel each other out, so I did less of the green. I was looking for a brown that skewed red a little bit. Really there are many shades that will work here, but I felt like playing with mixing and color theory. This was washed with Reikland Fleshshade.
- Neil’s armor started with a silver metallic (Scale75 Heavy Medal) that I then washed several times with Berserker Bloodshade. I wasn’t liking the result, so I covered most of the metal with VMC Red and washed one more time with the Bloodshade. Some of the metal still peeked through, creating a worn effect here.
- Neil’s skin was based with a mix of Pro Acryl Shadow Flesh, Beige Red, and XV-88. The ratio was approximately 1:2:1 here. This was washed with GW Seraphim Sepia, then highlighted with just Beige Red.
- Neil’s hair braid was based with XV-88 and washed Seraphim Sepia.
- Dash’s pants were based with Castellan Green and washed with Agrax Earthshade. I did a few quick line highlights again with the Castellan Green here.
- The light color leather was simply P3 Beast Hide washed with Agrax Earthshade.
- Dash’s armor was based with P3 Exile Blue. I washed this with GW Drakenhof Nightshade. I layered back up with the Exile Blue, and did some line highlights by mixing in Vallejo Wolf Grey.
- For Dash’s skintone, I started with the same base as Neil. This time, I experimented with washing it with SWM Baby Poop. Yes, Baby Poop. I couldn’t not buy something with a name that ridiculous. Secret Weapon Miniatures had some cool products, but this was a weird green/brown/yellow wash that I’ve rarely found a use for. It did ok here in giving a slightly different, alien tone to the skin.I highlighted with the base color. The bone on his face was painted similarly to Gwarm.
- As usual I finished by blacklining the whole model where appropriate.

And that’s it for totally legitimate and completely misunderstood Hondo and his crew. Thanks for reading, and I hope this helps you get your models in fighting shape.
Have any questions or feedback? Drop us a note in the comments below or email us at contact@goonhammer.com. Want articles like this linked in your inbox every Monday morning? Sign up for our newsletter. And don’t forget that you can support us on Patreon for backer rewards like early video content, Administratum access, an ad-free experience on our website and more.
