
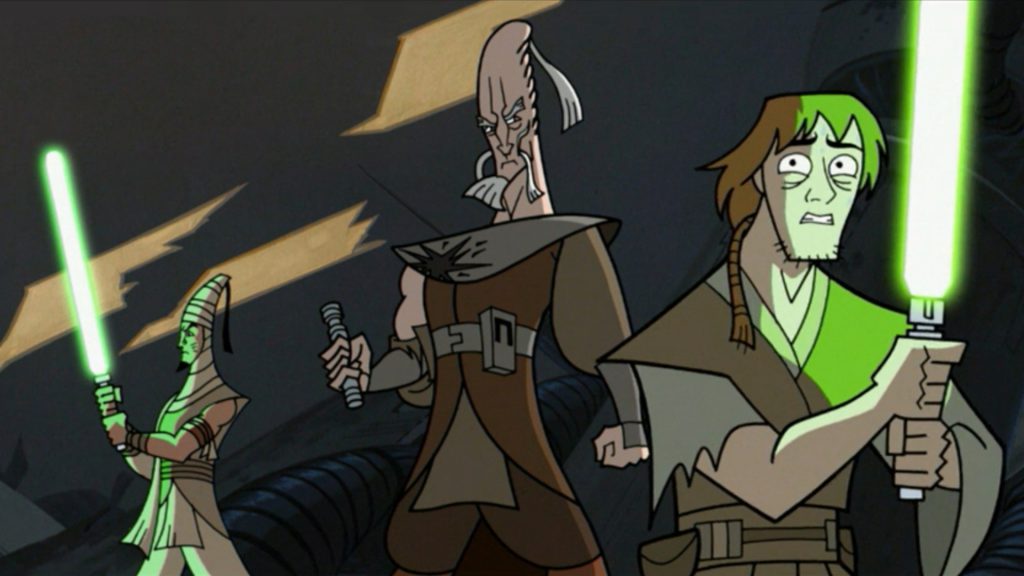
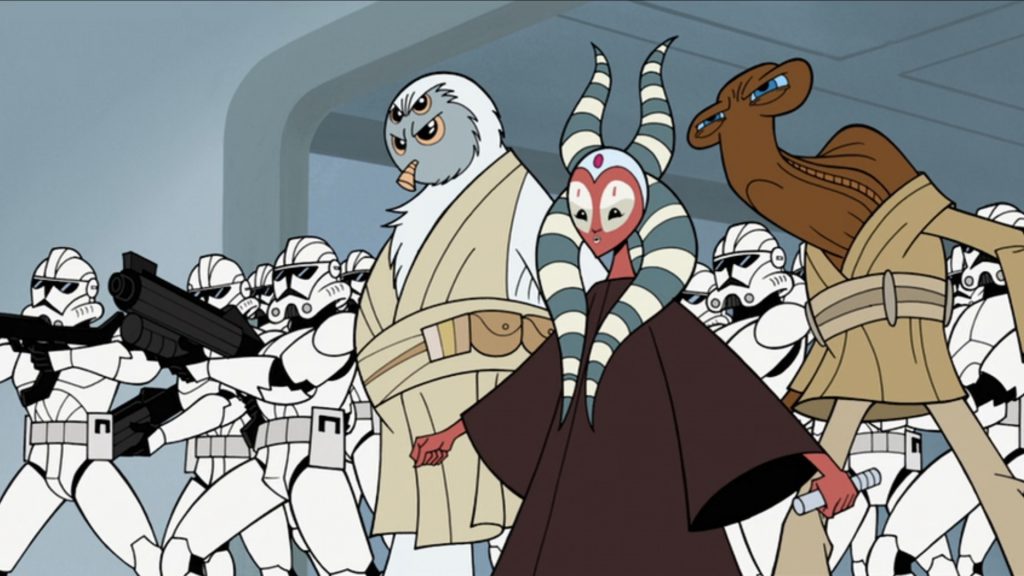
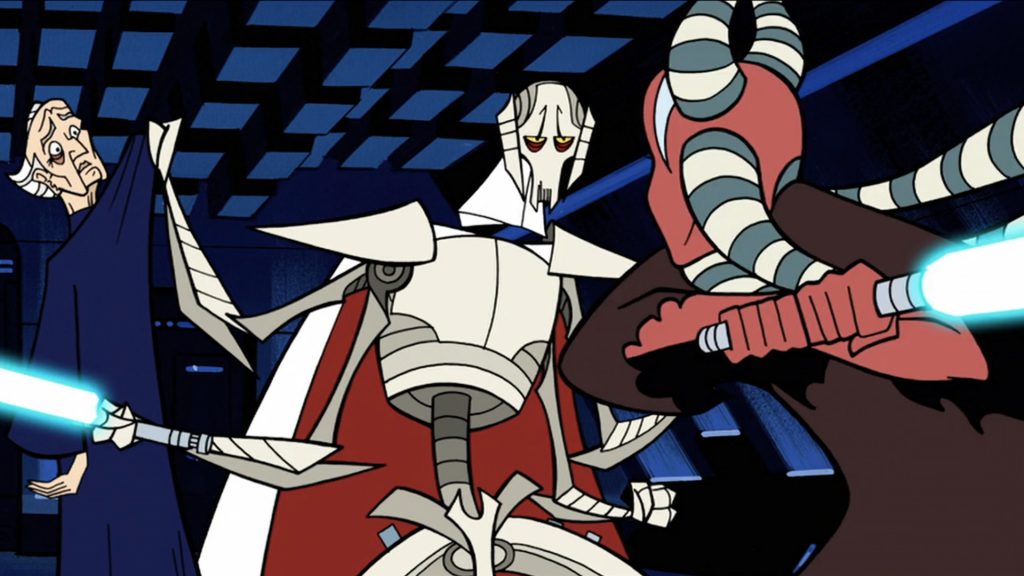
When I started seeing preview material for the Wisdom of the Council squad pack, I was immediately reminded of the 2-D animated Clone Wars micro-series by Genndy Tartakovsky. In the finale of the first volume, Jedi Masters Ki-Adi-Mundi and Shaak Ti lead a group of knights and padawans in a hopeless battle against General Grievous, and in the second volume finale that leads directly into the beginning of Revenge of the Sith, Shaak Ti and an unnamed Ithorian Jedi try desperately to get Chancellor Palpatine to safety during the Separatist invasion of Coruscant, again pursued by General Grievous.
With this in mind, I decided to paint my Wisdom of the Council models in a flat, 2-D animated style. Shatterpoint miniatures have a lot more detail than the character models for the television series, but I thought I would be able to manage a fair approximation. I have recently been reading a lot about the triad painting method pioneered by Kevin Dallimore, which uses flat areas of color (usually in sets of three shades), building up from dark to light, and sharp delineations between different areas of the miniature. This will be a great opportunity to put some of those ideas into practice.
Assembly and Preparation
The sprues for these models are on the easier side — Ki-Adi-Mundi is the most complicated at a mere 10 pieces, and the others are even fewer. One of the two padawans has four different head options, giving a choice of Nautolian, Rodian, human or what looks like a Zabrak. I chose the human head, as it most closely resembles the nervous padawan seen in the closing moments of Clone Wars volume one.
I primed all four models in Vallejo black brush-on primer, which is a key component of the triad method I’ll be using. After allowing the primer ample time to dry, I followed up with a heavy drybrush in Army Painter Bootstrap Brown, an undercoat that gives me a better view of each model’s details. It will also serve as the dark shade for some of the Jedi robes.
Ithorian Padawan
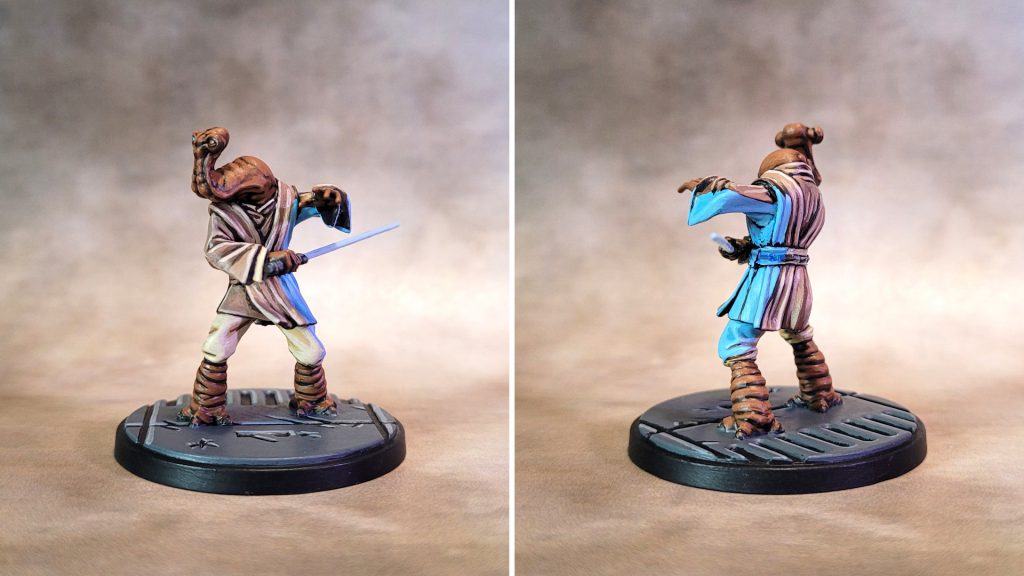
I decided to paint the Ithorian first as a “proof of concept” to make sure that what I have in mind will look good on a finished model. He has the fewest different colors, and not much in the way of tiny details.
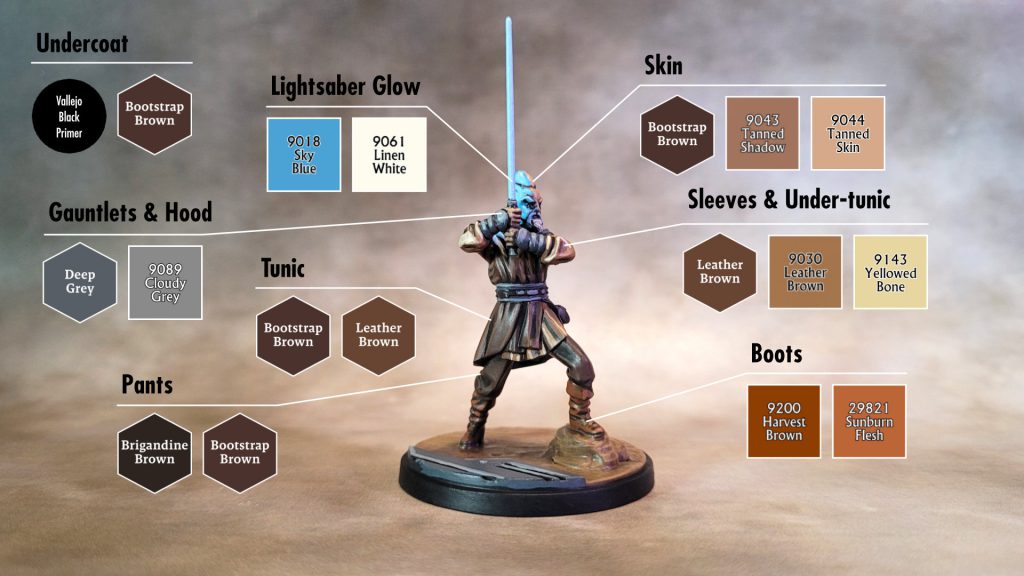
I usually find it easiest to paint from the inside out, starting with skin and working out from there to hair, clothes and finally carried items such as weapons. For the Ithorian’s skin I used the existing Bootstrap Brown drybrush layer as the darkest base layer. Over that I painted a layer of Reaper Harvest Brown, taking care to leave the darker brown shade visible in the deepest recesses of the Ithorian’s wrinkly legs and heavily textured hands and face.
Before applying the lightest tone, I painted in his eyes first with Reaper Polished Bone, then with Army Painter Tidal Blue, cleaning up the edges where needed with Army Painter Brigandine Brown. For the highlight tone I mixed some Reaper Yellowed Bone into the Harvest Brown to give me a lighter shade of reddish brown, layering that in over the highest textured parts of the legs, hands and face.
I painted the pants next, first base coating them in Army Painter Bootstrap Brown, taking care to leave a thin line of black/dark brown showing at the points where the pants meet the tunic and the bare skin of the legs. I then painted in the mid tone using Reaper Amber Gold, covering most of the area but leaving the darker brown showing in the folds and creases of the fabric. I highlighted the highest points of the creases in Reaper Yellowed Bone. Finally, I used Brigandine Brown to add few sharp lines to the deepest areas of the folds and creases, approximating the line art look of 2-D animation.
I painted the tunic in a similar fashion, first in Army Painter Leather Brown, followed by Paratrooper Tan and finally Urban Buff for the lightest areas, with Brigandine Brown again used to replace any lines in the deepest folds and creases that might have inadvertently been filled in by the lighter colors. I used Yellowed Bone to line the innermost collar of the tunic, as well as the belt sash. The belt was left in the undercoat color (Bootstrap Brown over black primer), with the metal parts of the belt picked out in Army Painter Deep Grey followed by a few touches of Reaper Cloudy Grey. I also used these two greys for the lightsaber handle.

Making lightsabers look like they’re glowing is a constant challenge for Shatterpoint painters. I get the best results by adding source lighting to the model itself — in this case, the Ithorian is holding his lightsaber fairly close to his side, giving me a large area to add a glow effect to. I started by painting a section of his left side, including the side of his left leg and under his arm, in Reaper Sky Blue. I then added a lighter blue shade by mixing some Reaper Linen White into the Sky Blue, painting in a highlight on the highest points of the creases in the tunic. For the saber blade itself I mixed in more Linen White to get an even lighter shade of blue.
Finally, I did his toenails in Brigandine Brown with a few touches of Army Painter Leather Brown for highlights.
Ki-Adi-Mundi and the Human Padawan

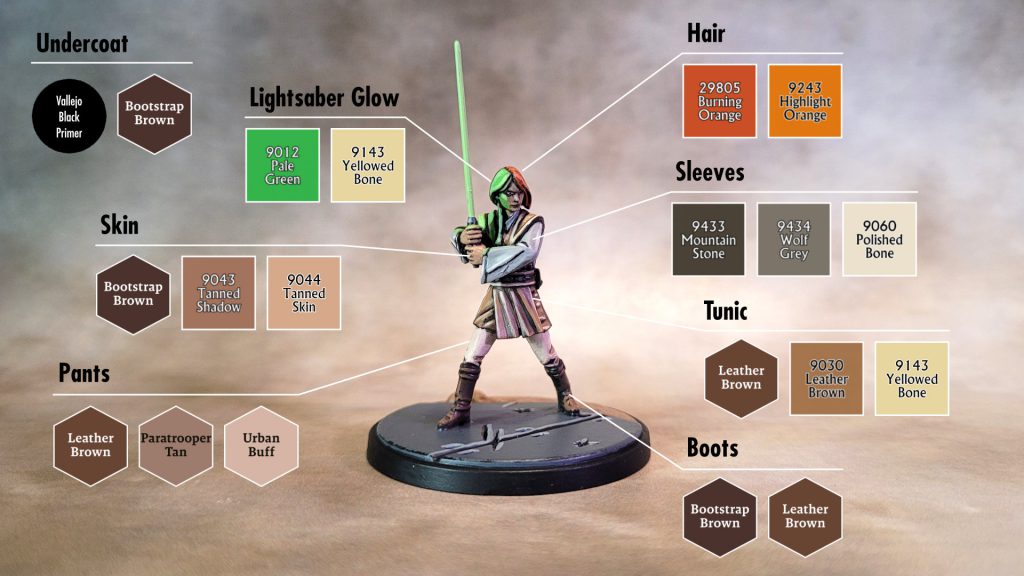
My scheme for these two models uses a lot of the same colors, so I painted them both at the same time. First I base coated the skin of their faces and hands in Army Painter Bootstrap Brown, letting the dark undercoat show through in deep recessed areas like the spaces between fingers and some of the wrinkles on the side of Ki-Adi-Mundi’s head. I then used Reaper Tanned Shadow for the mid tones, and Reaper Tanned Skin for the highlights. For the eyes on both models I used Reaper Misty Grey and Reaper Pure Black.
I did Ki-Adi-Mundi’s topknot and beard by painting in lines of Army Painter Deep Grey, followed by Reaper Cloudy Grey and finally a few wisps of Reaper Misty Grey. The padawan’s hair was base coated in Reaper HD Burning Orange, letting some of the underlying dark brown show through here and there, and then highlighted by Reaper’s appropriately named Orange Highlight.
For Ki-Adi-Mundi’s lightsaber glow source lighting, I used identical colors to the Ithorian’s. The human padawan’s glow was done pretty much the same way, but using Reaper Pale Green as the base and mixing in Yellowed Bone to get lighter shades for the raised areas on the padawan’s face, hair and shoulder, and for the lightsaber blade itself.
I wanted a warm grey for the padawan’s sleeves, so I used Reaper Mountain Stone, followed by Reaper Wolf Grey for the midtones and finally Polished Bone for the highlights. I painted the padawan’s pants using the same colors as the Ithorian’s: Army Painter Leather Brown for the base, Paratrooper Tan for mid-tones, and Urban Buff for highlights.
For the padawan’s tunic I started with the same Army Painter Leather Brown base, but I wanted a more yellow tone so I used Reaper Leather Brown for the midtones and Yellowed Bone for the highlights. I used this same combination for Ki-Adi-Mundi’s sleeves.
The rest of Ki-Adi-Mundi’s robes are fairly dark, and here is where the black/dark brown underpainting does a lot of the work for me. For the pants I just added a highlight in Army Painter Bootstrap Brown. The outer tunic is a little lighter, so for that I did midtones in Bootstrap Brown followed by highlights in Army Painter Leather Brown. The hood, gauntlets, and belt sash were done in Army Painter Deep Grey followed by highlights in Reaper Cloudy Grey. Finally, his boots were done using Reaper Harvest Brown and a highlight of Reaper HD Sunburn Flesh, a great reddish brown that is unfortunately long discontinued.
I painted the padawan’s boots using the same color combination as Ki-Adi-Mundi’s tunic: Bootstrap Brown midtones over the underpainting, followed by Army Painter Leather Brown highlights.
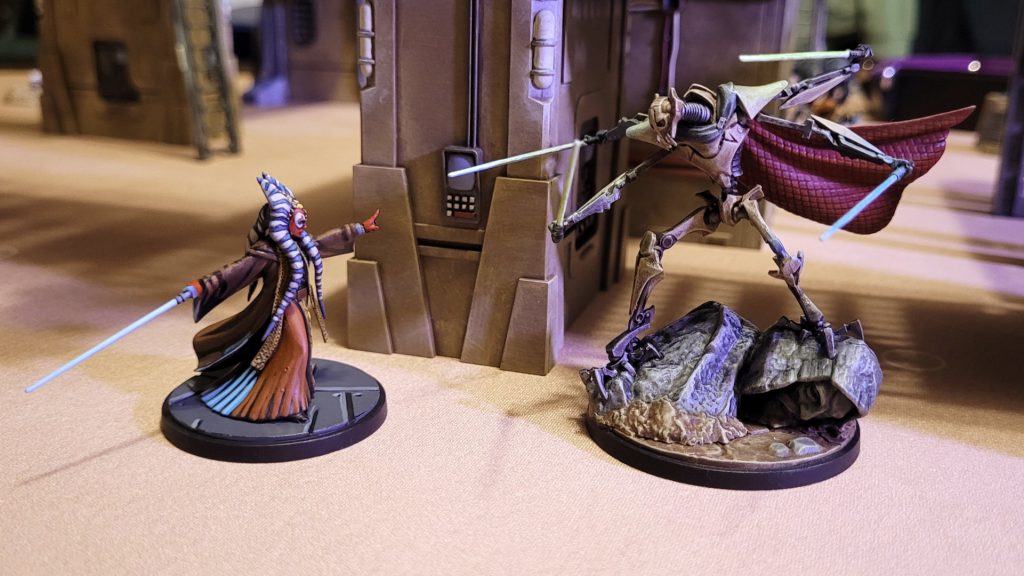
Shaak Ti
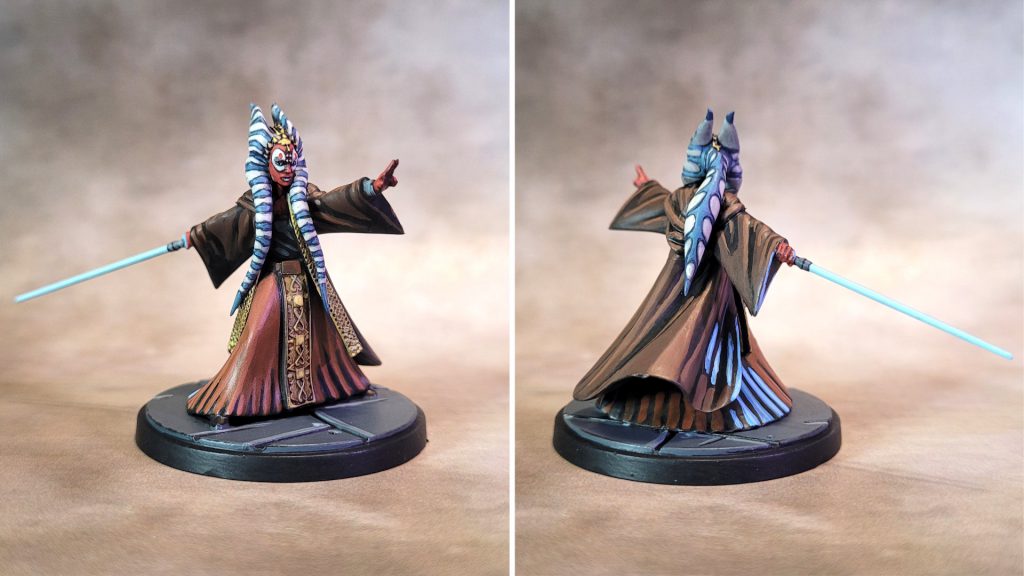
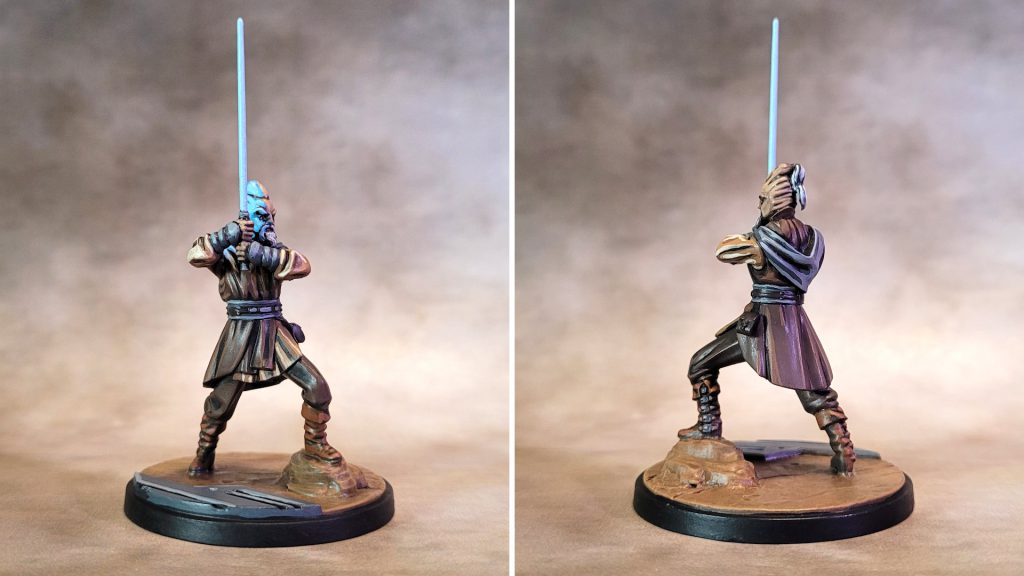
The Shaak Ti model has a lot more detail than the Clone Wars micro-series character design, so I used the Shatterpoint card artwork and occasionally images from both the later 3-D Clone Wars series and the live action films for additional reference where needed.

I started Shaak Ti’s skin with Reaper Crimson Red, followed by Reaper Rust Brown for the midtones. For the highlights I added a little Reaper Skeleton Bone to the Rust Brown to get a lighter shade. They eyes were done using Reaper Skeleton Bone and Pure Black. I painted the the circles around her eyes in Reaper Wolf Grey, then added Skeleton Bone, touching up the dark outline around the circles in Pure Black where needed. I added a tiny dab of Wolf Grey to her lower lip to make it stand out a bit from all the red.
For the jewelry around her face I used Army Painter Wasteland Clay, with a few dots of Reaper NMM Gold Highlight.
Since I wanted flat color and high contrast for these models, I rarely used any washes or drybrushing (other than the first undercoat), but the sashes on the front of Shaak Ti’s robes have too much detail and texture to do any other way. I painted them in a base coat of Wasteland Clay, then did a wash using Army Painter Strong Tone. After the wash had thoroughly dried, I drybrushed some more Wasteland clay to lighten up the raised details, then added some highlights with NMM Gold Highlight. I did all this before painting the robes so I wouldn’t have to worry about “splashing” drybrushed paint in areas I didn’t want it – drybrushing is great for highlight effects but it can be very messy and imprecise.
I painted in Shaak Ti’s undershirt in black, with highlights in Army Painter Deep Grey. The large belt buckle was done in Reaper Muddy Brown with a quick dab of Harvest Brown for a highlight. For the skirt I used Reaper Harvest Brown for the midtone areas, going back into the deep creases with Reaper Pure Black and Army Painter Brigantine Brown. I then highlighted in Reaper HD Sunburn Flesh.
Her outer cloak is a very dark brown, so I used the undercoat as a base and added midtones in Bootstrap Brown and highlights in Leather Brown.
This model is holding her lightsaber out away from her body, which makes figuring out where the object source lighting should go a little challenging. I settled on the area of the robes below her hand, using Reaper Sky Blue and Linen White as with the other blue lightsabers.

Finally, we come to the head tentacles, which involved a lot of tiny, painstaking detail. I started by base coating the whole headpiece in Reaper Wolf Grey, making sure to leave a thin black outline around the head jewelry, which I painted earlier when I did the face. After the base coat, I did a wash using Army Painter Dark Blue Tone, mixed with a few drops of Army Painter Speedpaint Medium (which makes a pretty good thinner for washes), in order to fill in the recessed lines between the stripes on the tentacles.
After giving the wash time to thoroughly dry, I painted every other stripe using Reaper HD Nightsky Blue, which is a good match for the Dark Blue wash. Following that, I cleaned up the Wolf Grey stripes where needed using slightly watered down Wolf Grey, and then added highlights to the white stripes using Reaper Polished Bone. Finally, I added a dab of Reaper Ashen Blue to each of the blue stripes, leaving enough of the darker blue to create an outline around each stripe.
And with a huge sigh of relief, Shaak Ti was done!
Bases
I wanted the bases to match the style I had used to paint the models, but at the same time, backgrounds in 2D animation are often fully painted rather than line art. I decided to split the difference, doing the dirt areas on Ki-Adi-Mundi and the human padawan’s bases by drybrushing Reaper Harvest Brown over a base coat of Army Painter Bootstrap Brown, and then following up with a lighter drybrush of Reaper Yellowed Bone. I painted the flooring with a more flat color style, starting with Army Painter Deep Grey as a base coat, painting in the deep recesses with Reaper Pure Black, and adding sharp highlights to the edges of the floor plates in Reaper Cloudy Grey.
Finishing Up
After letting everything dry overnight, I added a coat of Army Painter brush-on Matt Varnish.
Although this squad pack greatly tested the number of different shades of brown I could muster, I had a great time painting these. I think the 2-D animated style looks great, but there’s still enough detail that they don’t look too jarring alongside models I’ve painted more traditionally. I’m looking forward to getting these to the table, I think the Jedi Councillors need a rematch against General Grievous…
Have any questions or feedback? Drop us a note in the comments below or email us at contact@goonhammer.com. Want articles like this linked in your inbox every Monday morning? Sign up for our newsletter. And don’t forget that you can support us on Patreon for backer rewards like early video content, Administratum access, an ad-free experience on our website and more.
