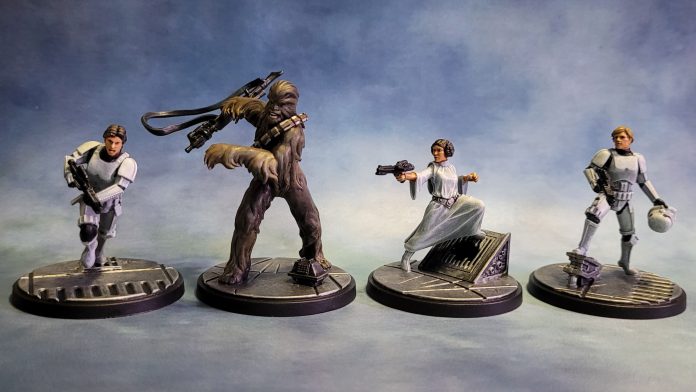
The This is Some Rescue Squad Pack is one I have wanted to see since Shatterpoint first came out. The escape from the Death Star is the main action centerpiece of the original Star Wars, so I’m very happy to be able to play out a version of that on the table top. And, getting these miniatures painted was a breeze after all the practice I’ve had painting Clone Troopers…
Assembly
As is usual for Shatterpoint kits that don’t include battle droids, assembly was reasonably straightforward. The only model in the set that was at all tricky was Princess Leia – my primary concern was getting the garbage chute grating centered on the base, so I glued that down first, but the way the figure is positioned in relation to the grating has her a little bit off center. I don’t think it’s a big deal, but if I had it to do over again I might try gluing the Princess to the grating first (setting them on a very flat surface to dry), and then positioning the assembled piece on the base.
The grating has a fairly large hollow area that will be difficult to get a brush into once it’s assembled and glued down. I would suggest painting the inside black before gluing it to the base, either with a quick spray or a brush before you finish assembling the piece.
Priming
For Leia, Luke and Han I primed the figures in Army Painter brush-on grey, and the bases in Vallejo brush-on black. If you use spray primer it should be just as easy to prime them in grey and then go over the bases with black paint. Chewbacca was primed in Vallejo brush-on black.
Bases
For the most part I try to do all the assembly before any priming or painting (with the occasional exception, see above) so that I’m always gluing plastic to plastic for the best bond. But I have started painting my bases before the rest of the model – since I’m not adding any sand or other scenery, it’s nice to get the base out of the way. More importantly, it will be a lot easier to touch up the base if any paint from the figure splashes, rather than the reverse.
I wanted all four of these to be “indoors,” so I swapped out two of the bases with some extras I had lying around. I try to keep all my Shatterpoint bases looking consistent, but I have tried a few different techniques to get them done. For these I started with a black brush-on primer, then a heavy drybrush in Vallejo Model Air Gunmetal followed by a lighter pass with Vallejo Model Air Steel. Then I went back over the “under the grating” areas in flat black, and the lines between the floor plates in Vallejo Model Air Metallic Black. No dirt ground for these, which saves a few steps. A final go around the base edges with Reaper Pure Black and they’re done.

Chewbacca
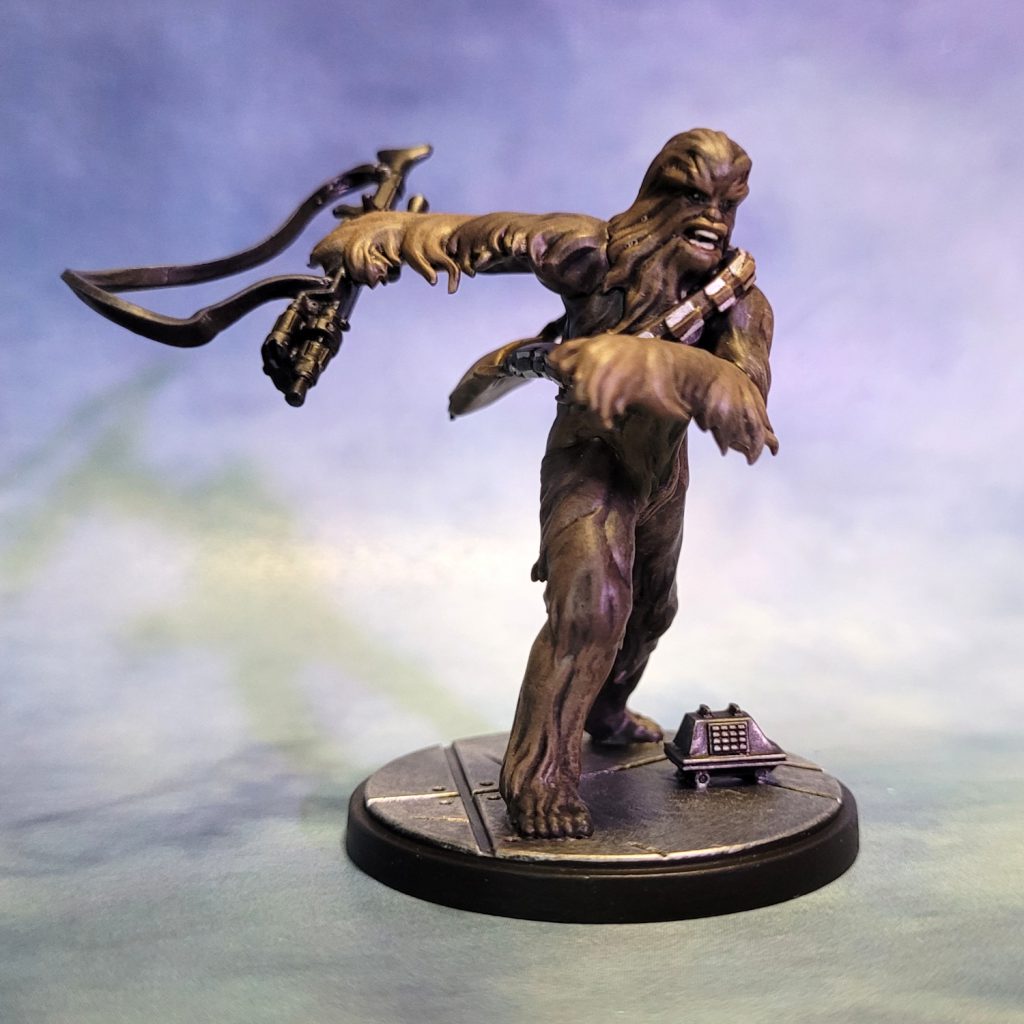

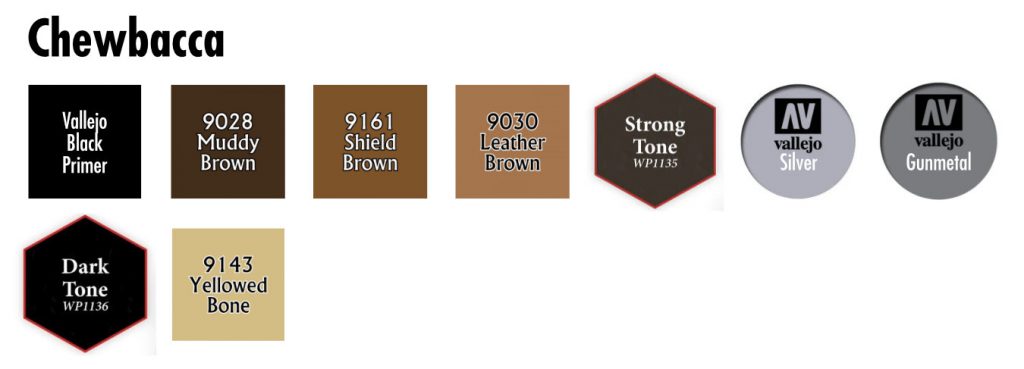
I though Chewie would be the most interesting model to paint in this group, so I did him first. I started with a heavy drybrush in Reaper Muddy Brown, followed by a lighter drybrush in Reaper Shield Brown, then a quick pass with Reaper Leather Brown. If you look at full figure photos of the Chewbacca costume, you can see that he’s not a uniform brown – his fur has darker patches on the top of his head as well as his shoulders, chest and the upper parts of his legs. I went over these areas with Army Painter Strong Tone wash to get that color differential.
I painted in the bandolier strap and satchel in Reaper Shield Brown, did the clips (or whatever those things are) in silver, and then went over the whole thing with a Strong Tone wash after letting the paint dry. His teeth were done with just a few quick swipes of Reaper Yellowed Bone, and the eyes just the tiniest dots of white.
The mouse droid and the rifle were painted Vallejo Air Color Gunmetal, with the strap on the rifle done in Reaper Stormy Grey. Once that had dried, I used Army Painter Dark Tone wash to dull down the metallic color and also bring out the details.
After everything had thoroughly dried (washes can take a few hours, I’ll usually wait until the next day) I did a very light drybrush with Reaper Yellowed Bone, my go-to color to bring out highlights. It was a relief to have the base already done.
Leia, Luke and Han
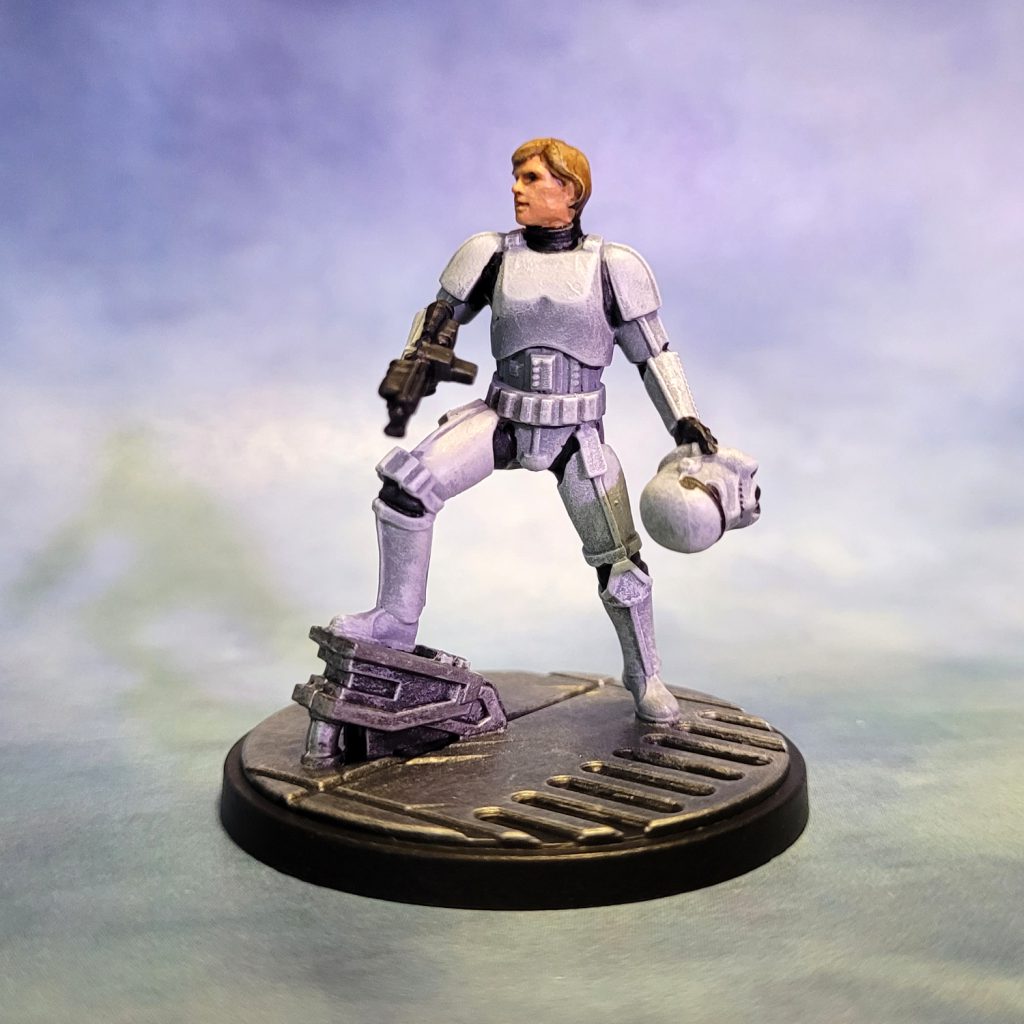
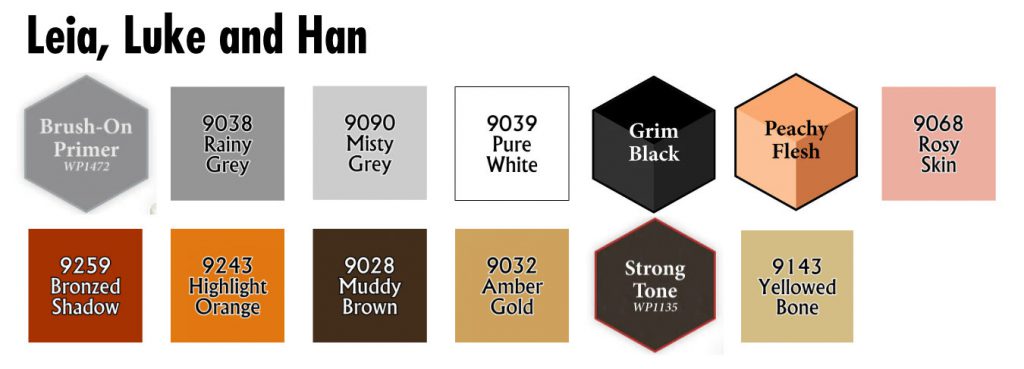
Our three humanoid heroes are all wearing the same color scheme, so it was pretty easy to do all three of these models in an assembly line. The grey primer was a bit warm in tone, so I started all three with a base coat of Reaper Rainy Grey followed by a drybrush of Reaper Misty Grey and a much lighter drybrush of Reaper Pure White. Drybrushing tends to bring out a lot of texture that you may not have even realized was there, so I went back over some areas here and there on all three models with Rainy Grey and Misty Grey to smooth things out a bit. These models are really well-sculpted, so figuring out where to put shadows and highlights is pretty easy.
From just over a year of painting Clone Troopers I’ve found that the easiest way to paint the black spaces between the armor pieces is with Army Painter Speedpaints. I have been using Gravelord Grey, but for Han and Luke I thought I’d try Grim Black instead, and I think it worked well. I used the same color for their rifles.
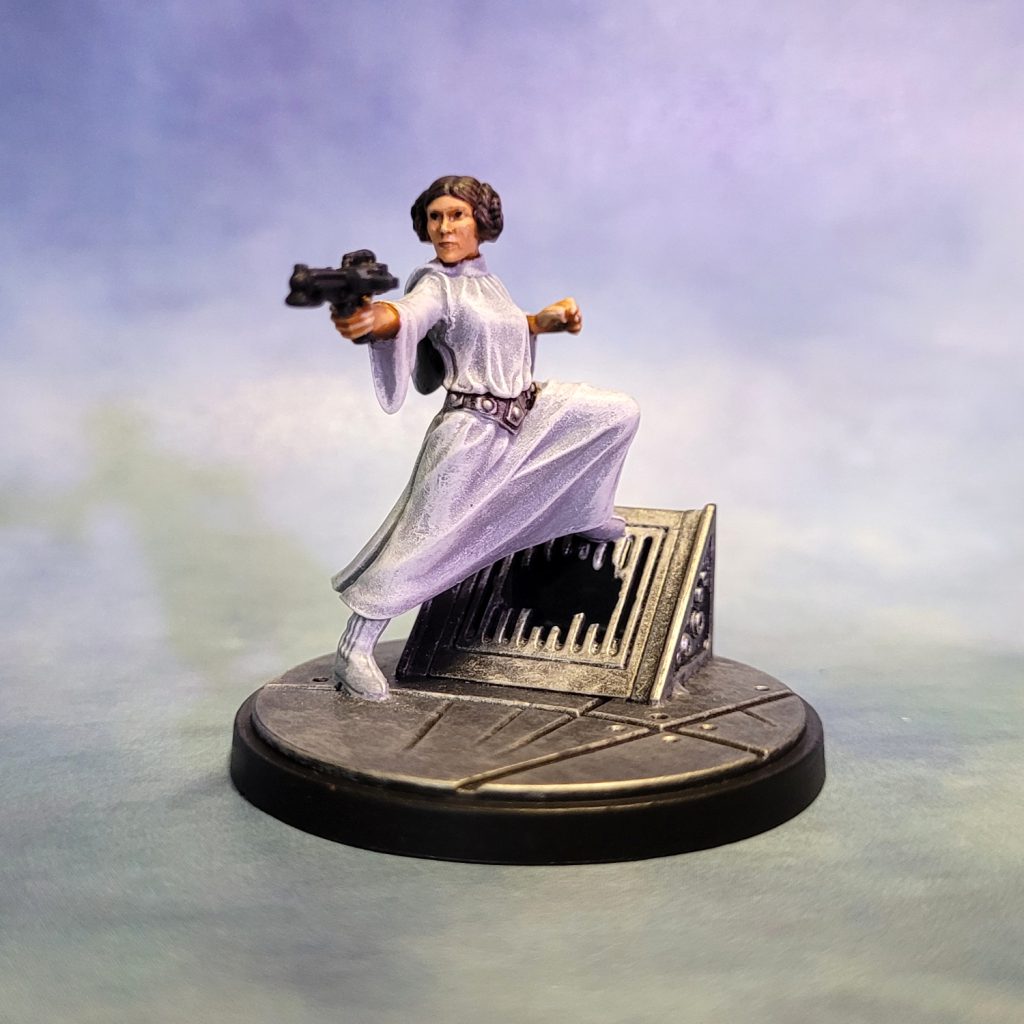
I’ve found that Speedpaints are great for darker colors but they frequently fall down when used for lighter shades, often looking blotchy. Nevertheless, I decided to try using Speedpaint Peachy Flesh for the skin on all three of these. It worked okay as a sort of wash to fill in the recessed areas on the faces and hands, but I didn’t really like the way the highlights looked so I went over them with a mix of Reaper Rosy Skin and Sunburn Flesh (a sadly discontinued color from their defunct High Density Pigment range, the closest thing they have to it now is Bronze Shadow). The Peachy Flesh Speedpaint has an orange hue to it, so I mixed in a little Reaper Highlight Orange to match.
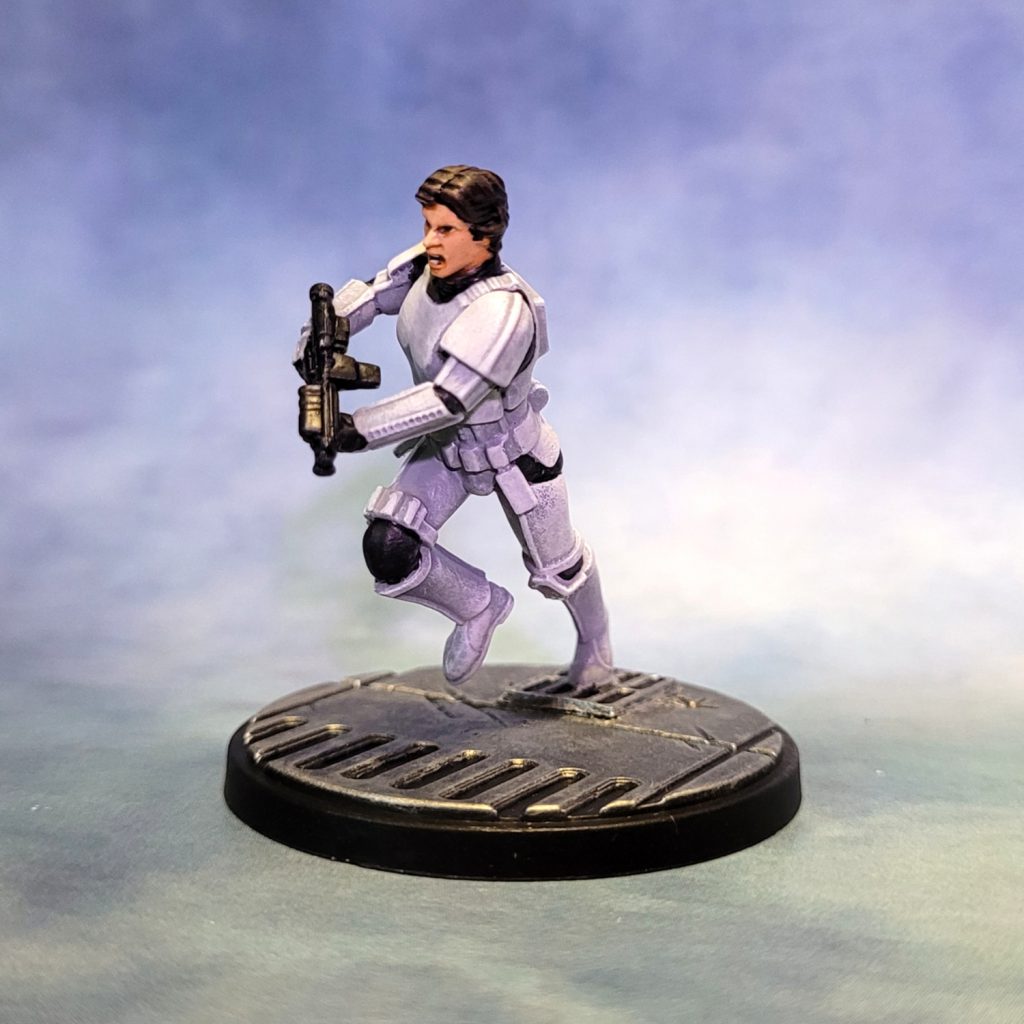
Han and Leia’s hair was done with a base coat of Muddy Brown; Luke’s was Amber Gold, with all of them getting a Strong Tone wash to bring out the details. Leia’s belt was painted Vallejo Air Color Silver, followed by a Dark Tone Wash to bring out the details a little. Eyes on all three were just black dots. Normally I would have gone over Leia’s lips with a dark pink, but looking at this model I didn’t think it was needed.
Once the heads were dry they got a quick, light drybrush with Yellowed Bone, really just a few swipes to bring out highlights on noses, cheekbones and hair. After giving them all a day or two to completely dry, I hit them with a coat of Army Painter Matt Varnish, and a few days after that they’re ready to escape the Death Star.
Fairly Easy, but Very Satisfying
I like to try out new ideas and techniques when painting miniatures, but at the same time there’s something very satisfying about getting a squad done and ready to play without too much effort. This was a set where I definitely felt like I got good results without having to work too hard. Hopefully you’ll do the same!
