
With the recent release of the ‘Not Accepting Surrenders’ Squad Pack for Star Wars: Shatterpoint, Empire players get a great new Primary in Grand Admiral Thrawn. The accompanying Agent Kallus and ISB Agents are no slouches either, so chances are you want to get these on the table ASAP. Read on to learn about one approach to painting the blue menace and his cronies.
ISB Agents
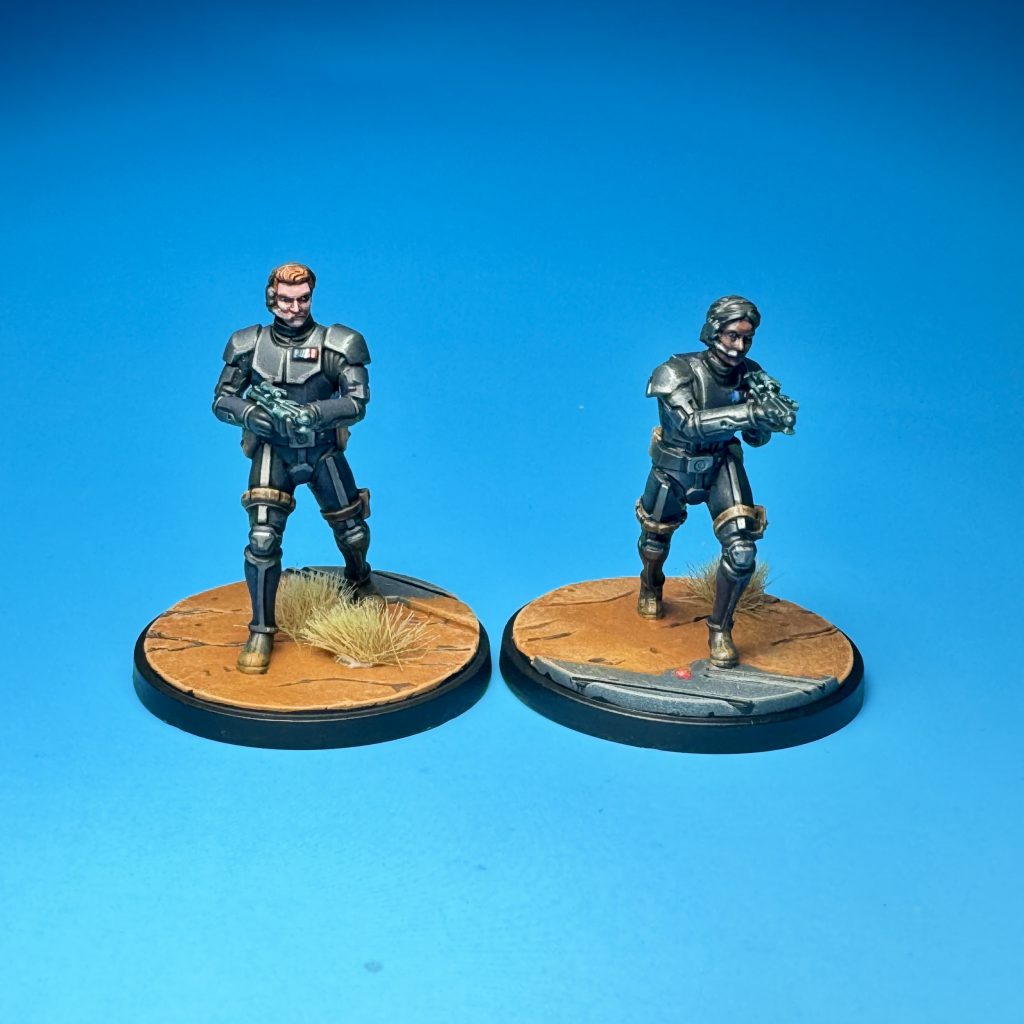
The ISB Agents and Kallus share many similar features, so most of the following steps ar3e shared between them.
- As always, I primed all the models with white primer.
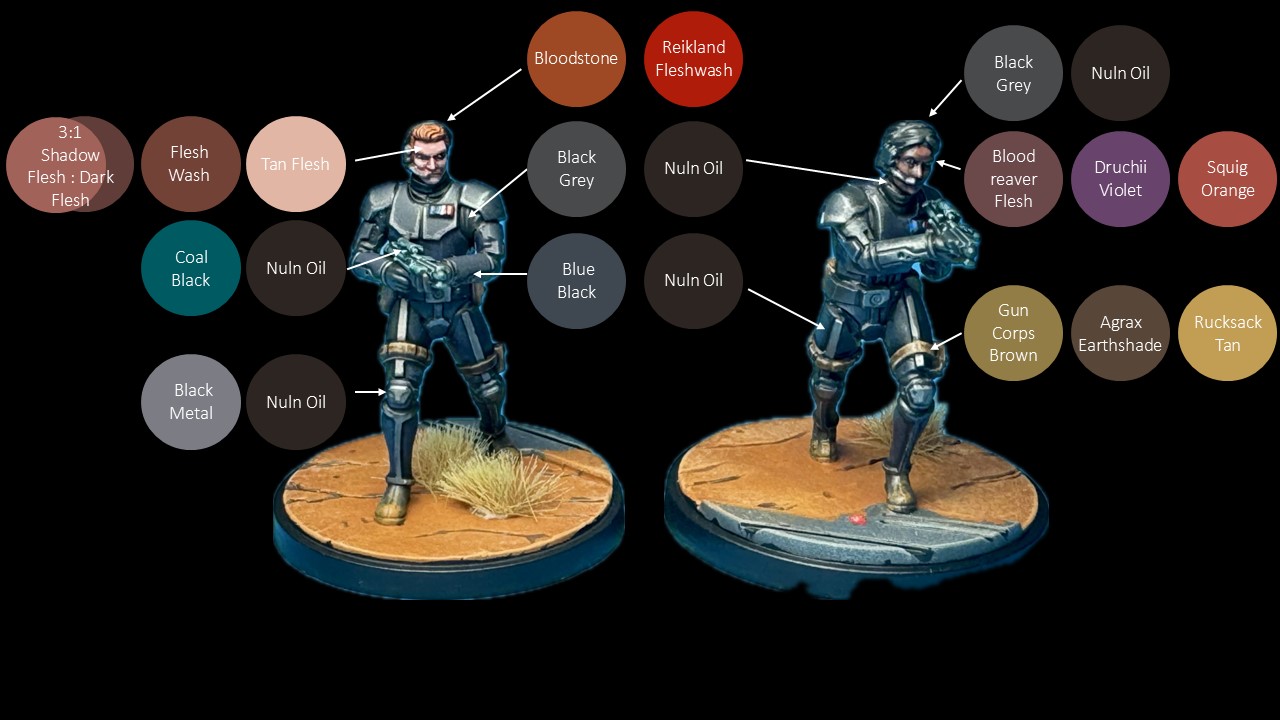
- I started by basing the body glove, boots, and gloves with VMC Black Grey. I then based all of the armor panels with Pro Acryl Blue Black. ISB Agent guns got a basecoat of P3 Coal Black. Armor trim and metallic areas were based with Scale 75 Black Metal.
- All of the above parts got washed with GW Nuln Oil. The guns got an extra coat or two of the wash, to really kill most of that greenish blue and leave only the highlights.
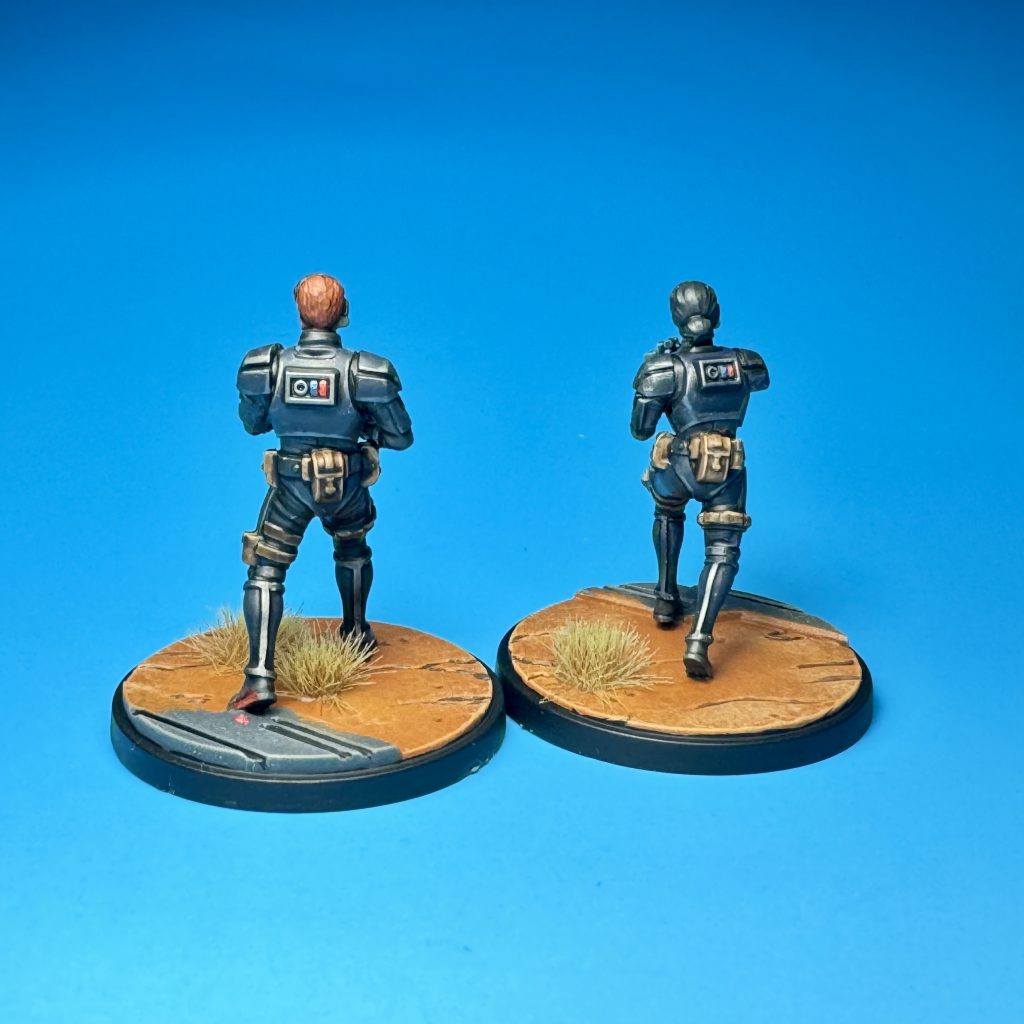
- I highlighted and touched up the armor panels with Blue Black again, then lined the edges of them with Black Metal.
- Pouches were based with P3 Gun Corp Brown, washed with GW Agrax Earthshade, then highlighted with P3 Rucksack Tan.
- For the ISB agent with a male appearance, I based the flesh with a 3:1 mix of Pro Acryl Shadow Flesh to Pro Acryl Dark Flesh. After basing the flesh with this, I washed it with the Flesh Wash. I then started mixing in Pro Acryl Tan Flesh to the basecoat mix, and used this to highlight. The hair was based with P3 Bloodstone, then washed with GW Reikland Fleshshade.
- The female-presenting ISB agent had flesh based with GW Bloodreaver Flesh. (Are we really still giving the “dark” fleshtones the ‘scary’ or ‘savage’ name treatment? Gross.) I then washed this with GW Druchii Violet. When that dried, I highlighted by mixing in an orange to the original flesh color. My notes failed me here, but it was probably GW Squig Orange. Use an orange that’s not hyper saturated/bright and it should work for you. The hair was based with Blackgrey and washed with Nuln Oil.
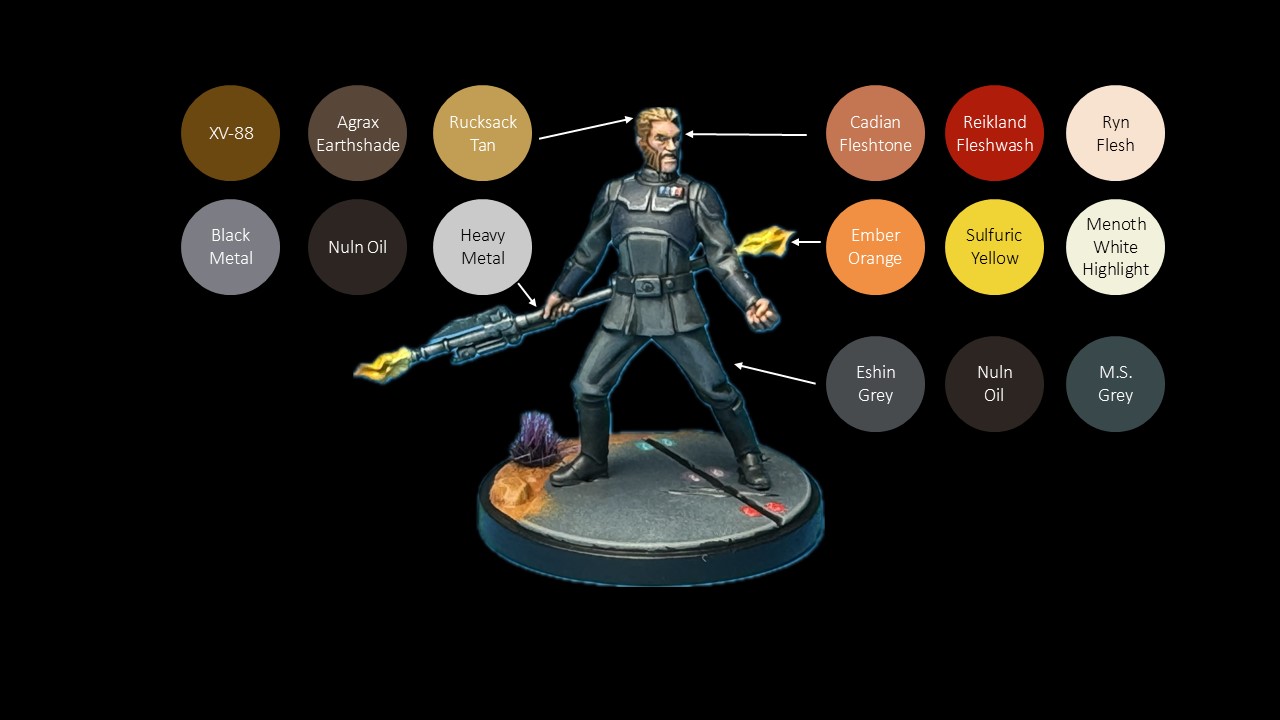
Agent Kallus
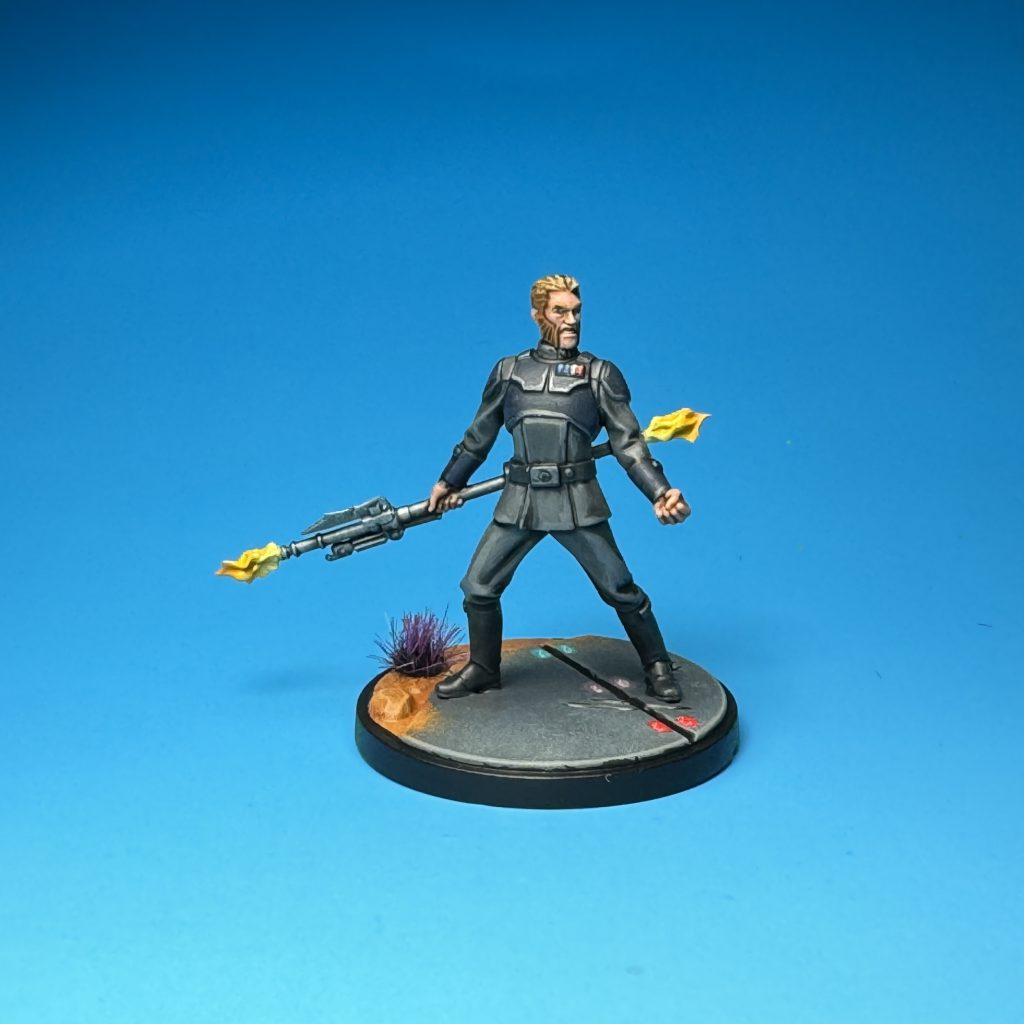
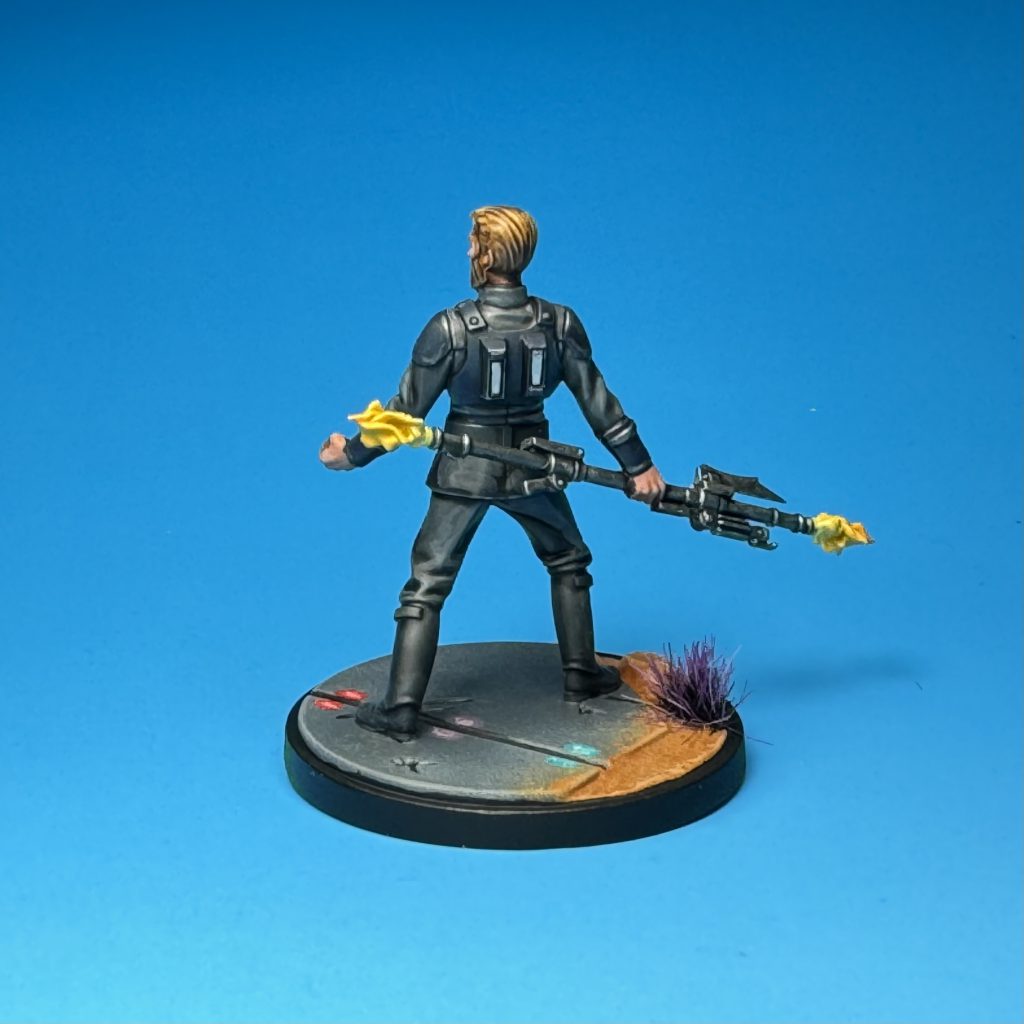
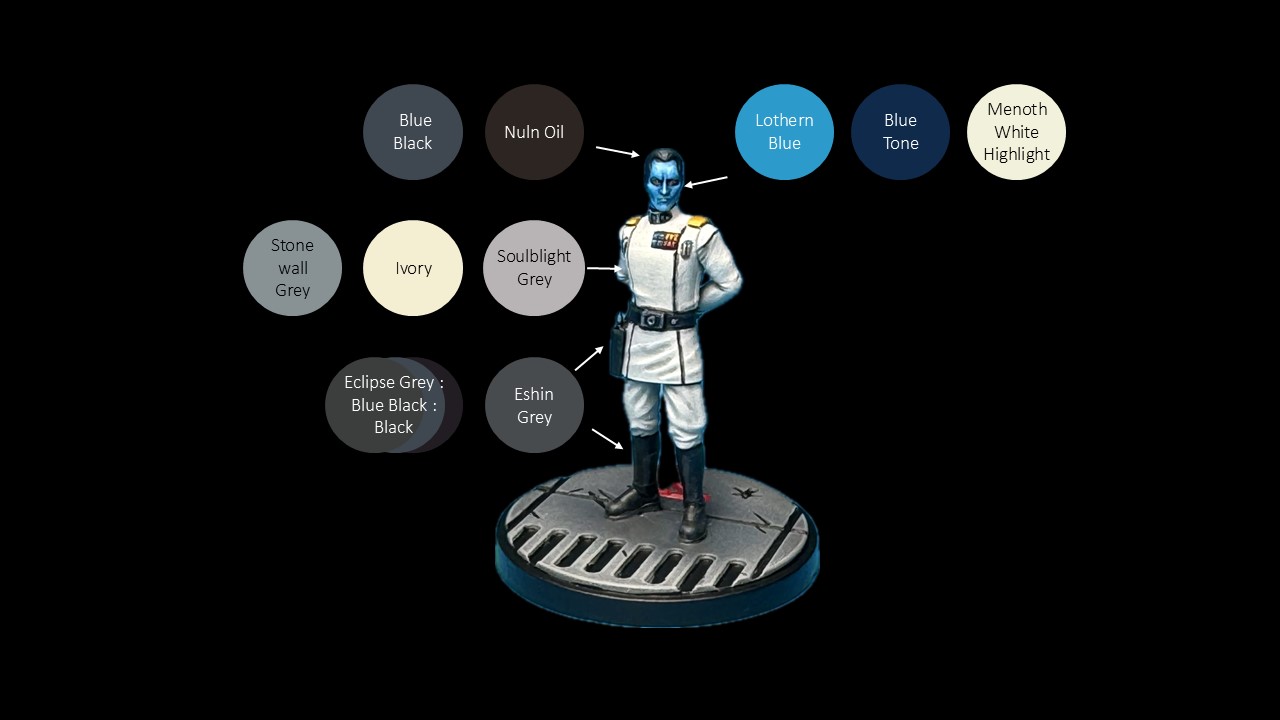
- Armor was painted as above. His uniform was basecoated with GW Eshin Grey, washed with Nuln Oil, then highlighted first with Eshin Grey and then with GW Mechanicum Standard Grey.
- For his skin, I basecoated with GW Cadian Fleshtone. I washed that with Reikland Fleshshade. I highlighted with a mix of the basecoat and P3 Ryn Flesh, mixing in more of the Ryn Flesh as I moved to smaller and smaller highlights.
- The hair was based with GW XV-88 then washed with Agrax Earthshade. I did a few sparing highlights with Rucksack Tan near his forehead and temples.
- The staff was basecoated with Scale75 Black Metal, washed with Nuln Oil, then drybrushed with Scale 75 Heavy Metal.
- The glow effect on the staff was based with P3 Ember Orange. I then mixed that with P3 Sulfuric Yellow and painted towards the center and source of the energy. As I moved closer in that direction, I moved to pure Sulfuric Yellow, then mixing that with P3 Menoth White Highlight. There are a few spots right in the center with just the MWH as well. My goal here was to have much more yellow then orange, hopefully avoiding it looking like a standard fire effect. The photo highlights the oranges more, but in person it’s more yellow and less bog standard fire effect.
With the various agents out of the way, it was time to tackle Thrawn himself. To be honest, I was intimidated to paint this guy. I have what I think is a pretty good recipe for white armor, but I wanted something different here. Befitting a Grand Admiral, the uniform needed to be crisp and clean. I also was concerned about getting the blue flesh color right. Luckily I stumbled my way into what I think was a decent result for both.
Grand Admiral Thrawn
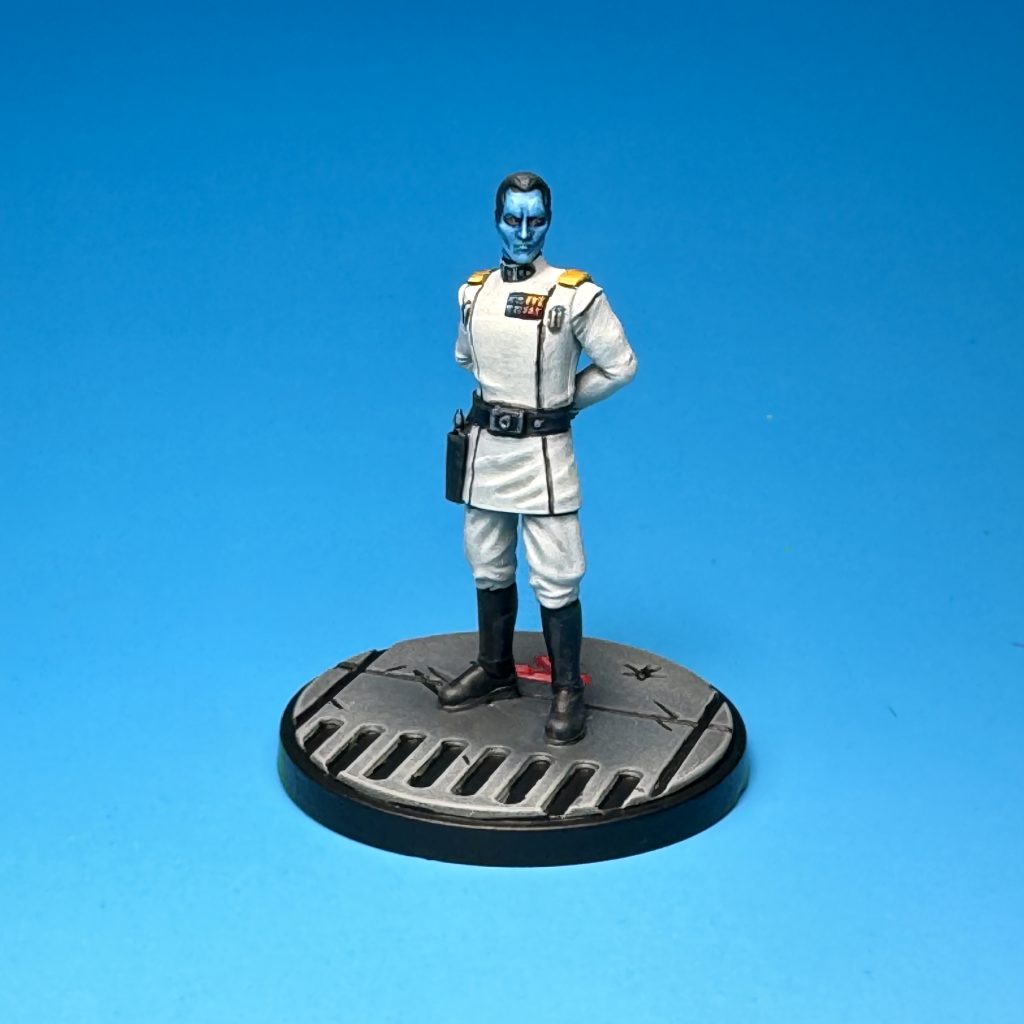
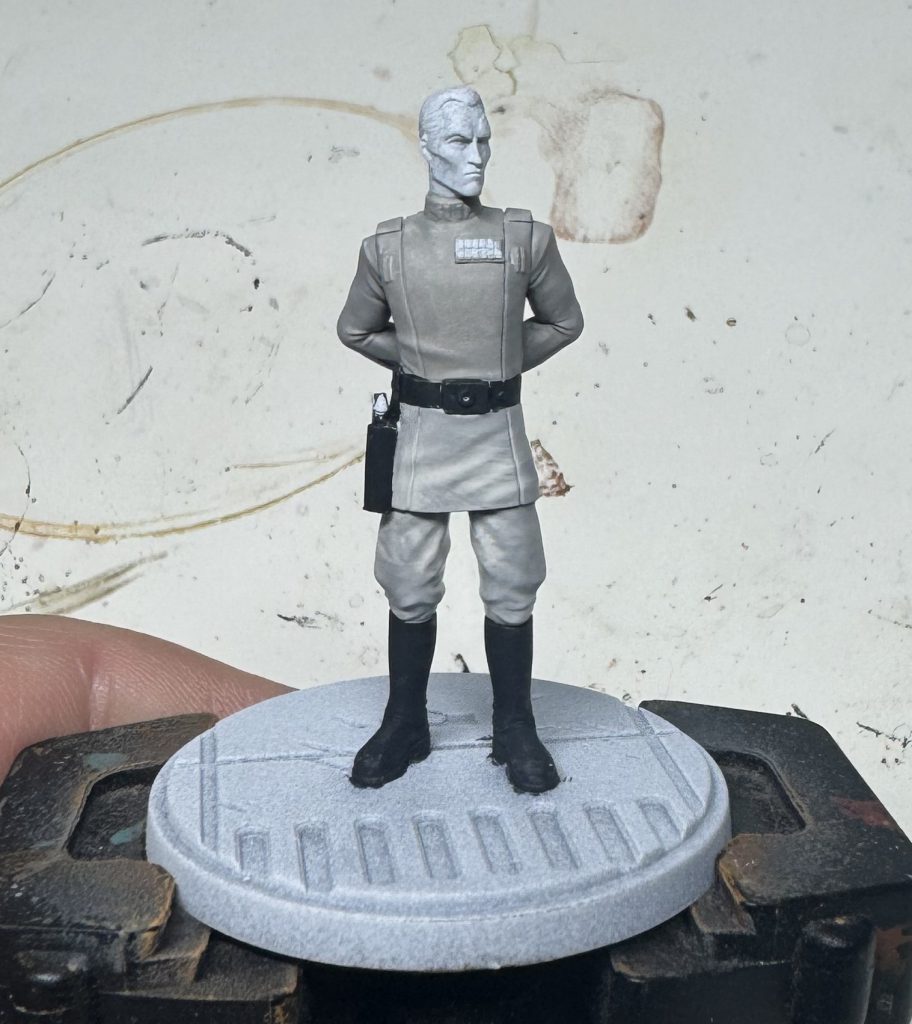
- I started by basecoating the uniform with Vallejo Stonewall Grey. When that dried, I continued painting the entire model with the Stonewall Grey mixed with a little Vallejo Ivory. Below is a picture of what that looks like. The torso shows just the Stonewall basecoat, while the lower body has gotten the second layer.
- I repeated the previous step multiple times, adding in more Ivory until I got to a moderately bright white. I then mixed in a good bit more Ivory, then drybrushed all of the uniform. I focused more on the top half and areas that would naturally receive more light. (“A good bit” isn’t a useful measurement. I do much of this by eye and feel. Just like with cooking, just add a little bit at a time until you’re happy. You can always add more, but can’t subtract it once it’s mixed.)
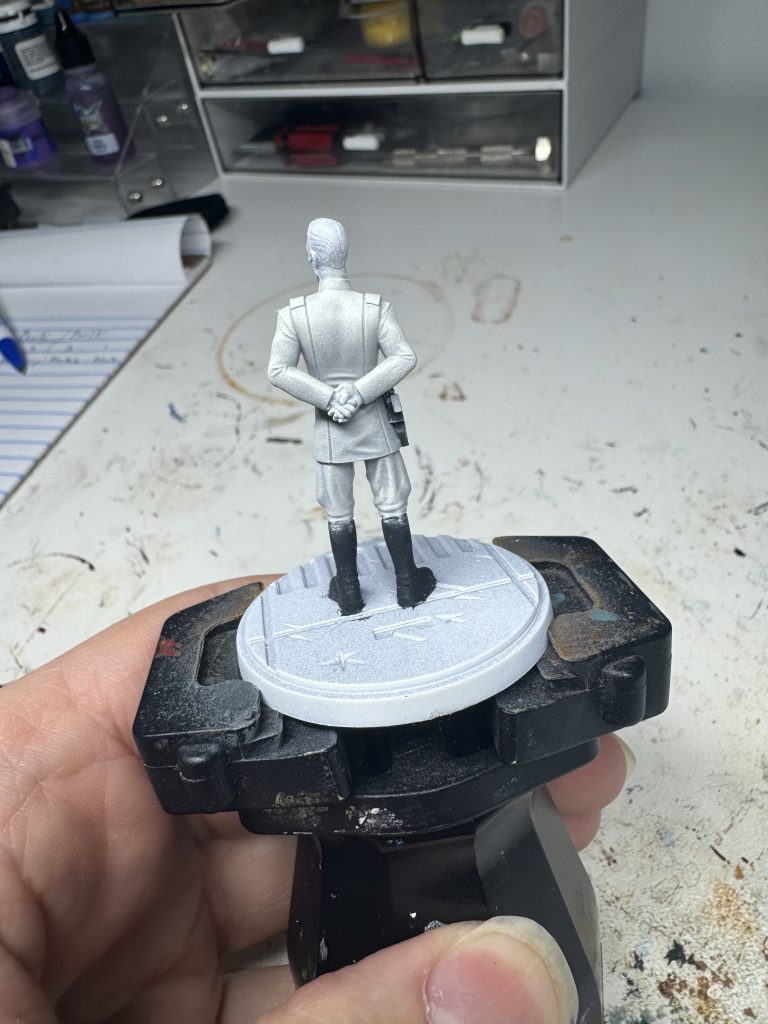
- I continued the drybrushing step by drybrushing smaller and smaller areas while mixing in Ivory. Towards the end, I switched to just the Ivory. I also directly painted a few highlights here and there, such as the folds in the pants. Below you’ll see what the model looked like after this.
- Later when the model was nearly finished, I decided I needed some additional shading. For this I did some sparing touches with GW Soulblight Grey. This is best seen in the folds of the uniform. (I can never escape my addiction to washes.)
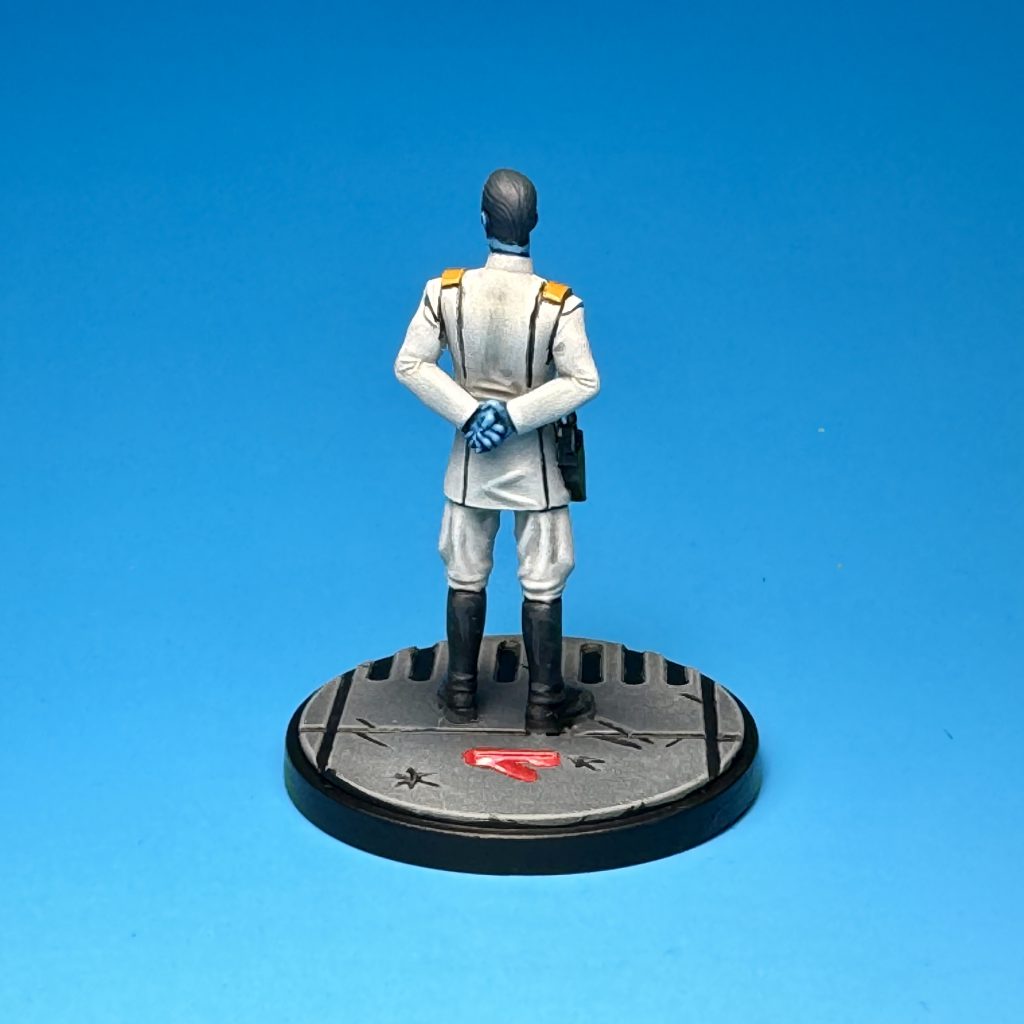
- The boots, belt, and holster with based with a 3:2:1 mix of Scale 75 Eclipse Grey, Pro Acryl Blue Black, and a pure black. (I initially tried just the 2 former shades mixed, but wanted something a little darker.)
- Since I was foolish and did the previous step before finishing the messy uniform process, I later touched up these areas with just the Blue Black. I washed these areas with Nuln Oil, and highlighted with Eshin Grey.
- Thrawn’s skin was basecoated with GW Lothern Blue. I washed that with Army Painter Blue Tone. (I typically use GW Drakenhof Nightshade, but a quick check on one of my tester models showed this would be way too dark.) Highlights were done by mixing Menoth White Highlight into the Lothern Blue.
- The hair was simple enough- a Blue Black basecoat washed with Nuln Oil. I lightly drybrushed it was the Blue Black, and that was it.
- From here, it was just the little details to do. These are important though, to break up all that white and black! Yellow bits were based with GW Zamesi Desert, washed with GW Casendora Yellow, and highlighted with Sulfuric Yellow. Blue bits were based with P3 Cygnar Blue Highlight, washed with Drakenhof Nightshade, and highlighted with Lothern Blue. Red bits were based with P3 Khador Red Base, washed with GW Carroburg Crimson, then highlighted with P3 Khador Red Highlight.
- After all that I did my usual blacklining on all the models (extremely carefully with Thrawn). Thrawn’s uniform needed a few touchups, but that was it thankfully. After basing the models, I have to say I was very pleased with the end results, particularly for Thrawn.
And that’s it for this box. Hope you found this helpful, and I hope you’ll share your takes on these models with us on the Goonhammer Discord server. Thanks for reading!
Have any questions or feedback? Drop us a note in the comments below or email us at contact@goonhammer.com. Want articles like this linked in your inbox every Monday morning? Sign up for our newsletter. And don’t forget that you can support us on Patreon for backer rewards like early video content, Administratum access, an ad-free experience on our website and more.
