
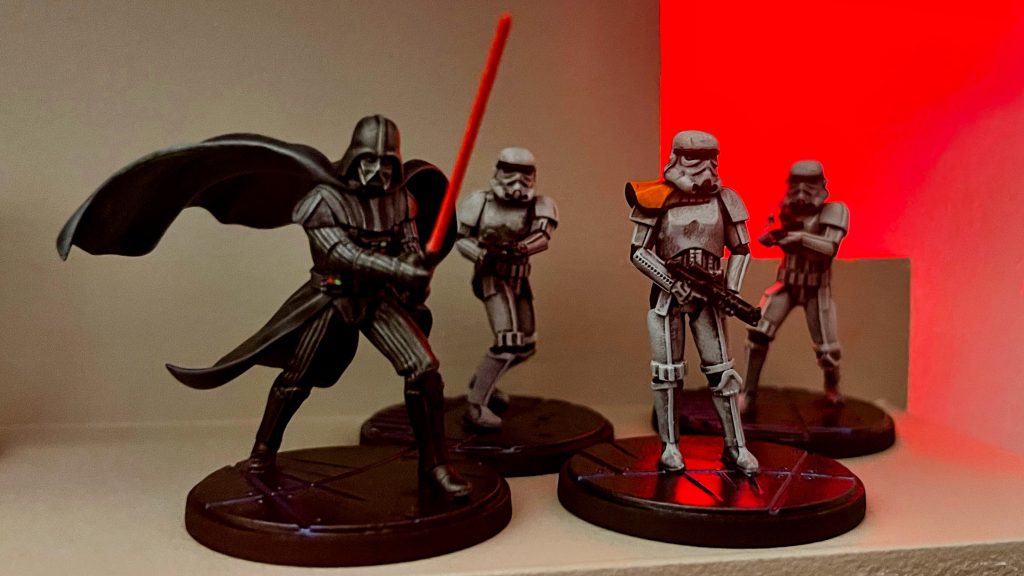
Darth Vader and crew have begun the reign of the Empire in Star Wars Shatterpoint. You can create a formidable strike team by combining them with other Empire miniatures and Bounty Hunters. I wanted to keep the painting on these simple and effective.
Preparations
Since you can paint Vader in a few different ways, whether you want him all black, with variant tones and a blue hue, or attempting a POL (point of light) color scheme, it’s best to find some reference photos to keep you on target.
Reference Photos
Vader
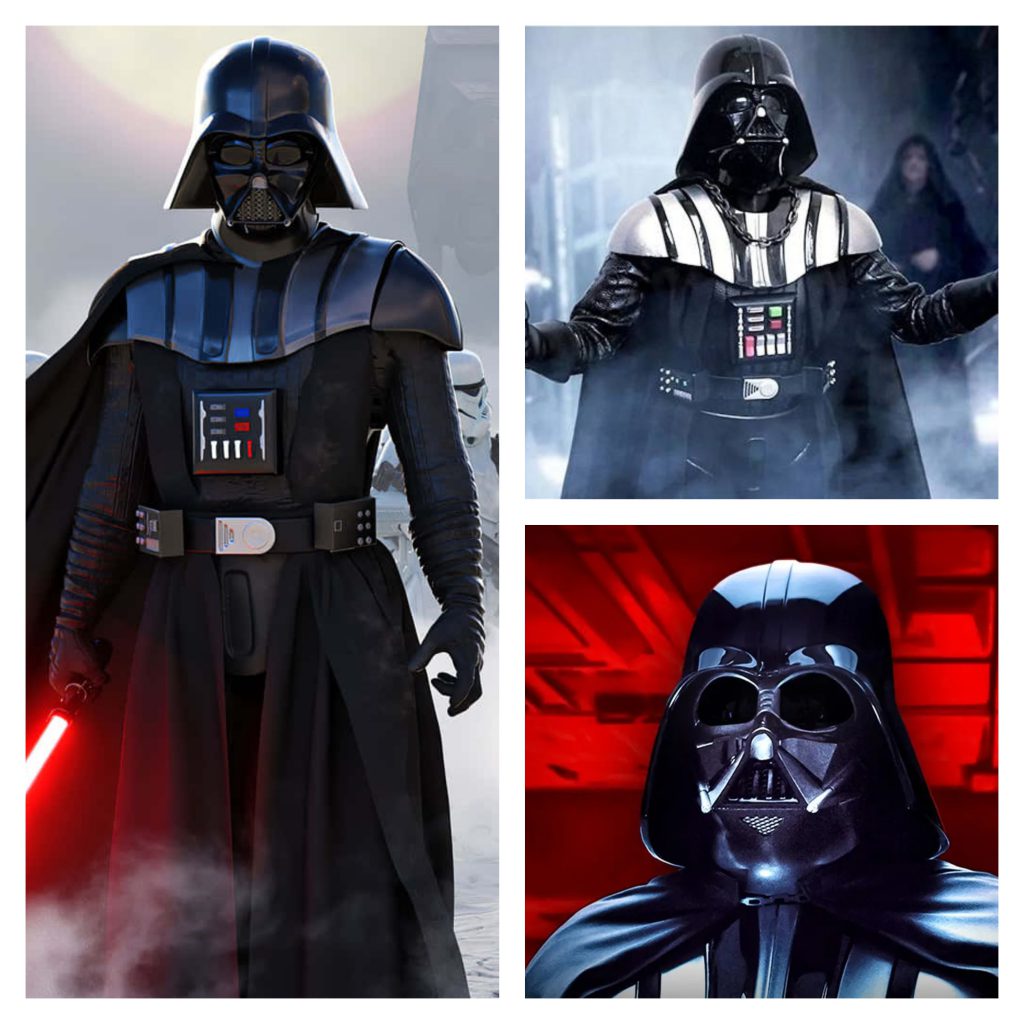
With Vader, I wanted to bring a slightly dark blue hue to my dark Black. I found source images that leaned toward that.
Commander and Troopers
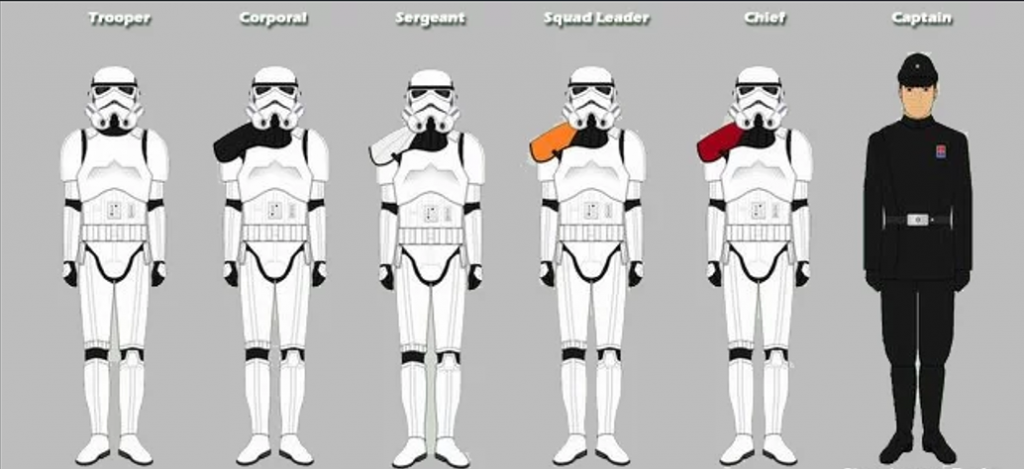
Stormtroopers are white and black. You need an image to show which parts are black under the white armor.
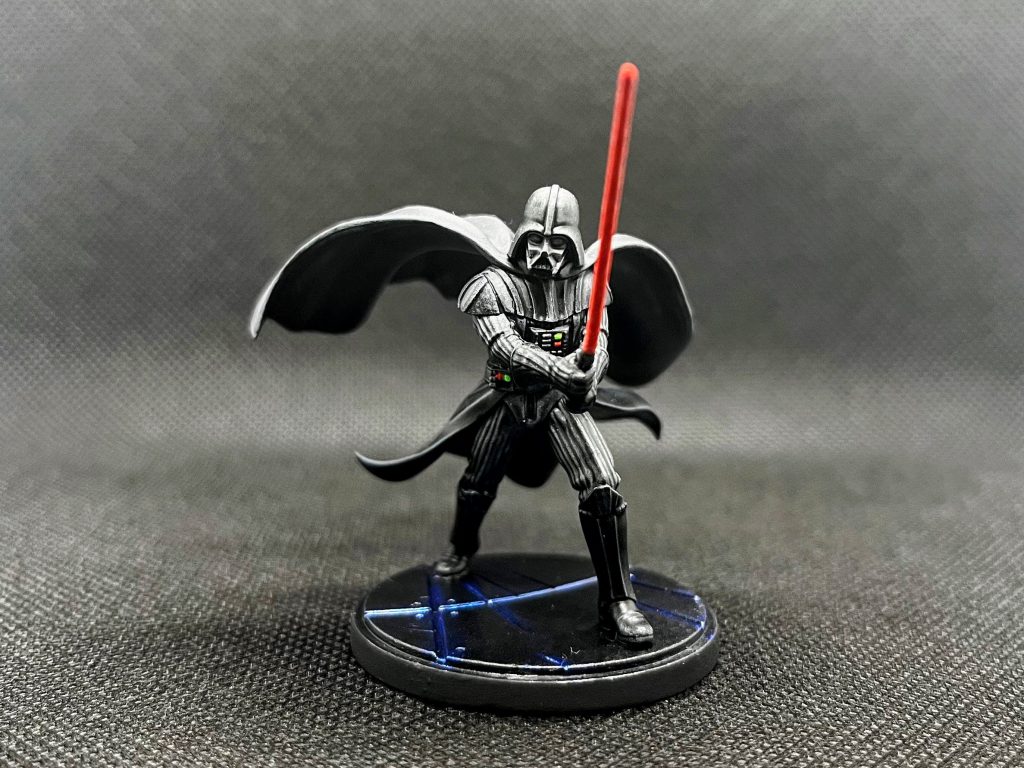
Darth Vader, The Emperor’s Servant
Vader Colors Used:
- Citadel Contrast Talassar Blue
- Citadel Contrast Basilicanum Grey
- Turbo Dork Six Shooter
- Pro Acrylic Fluorescent Green
- Pro Acrylic Fluorescent Red
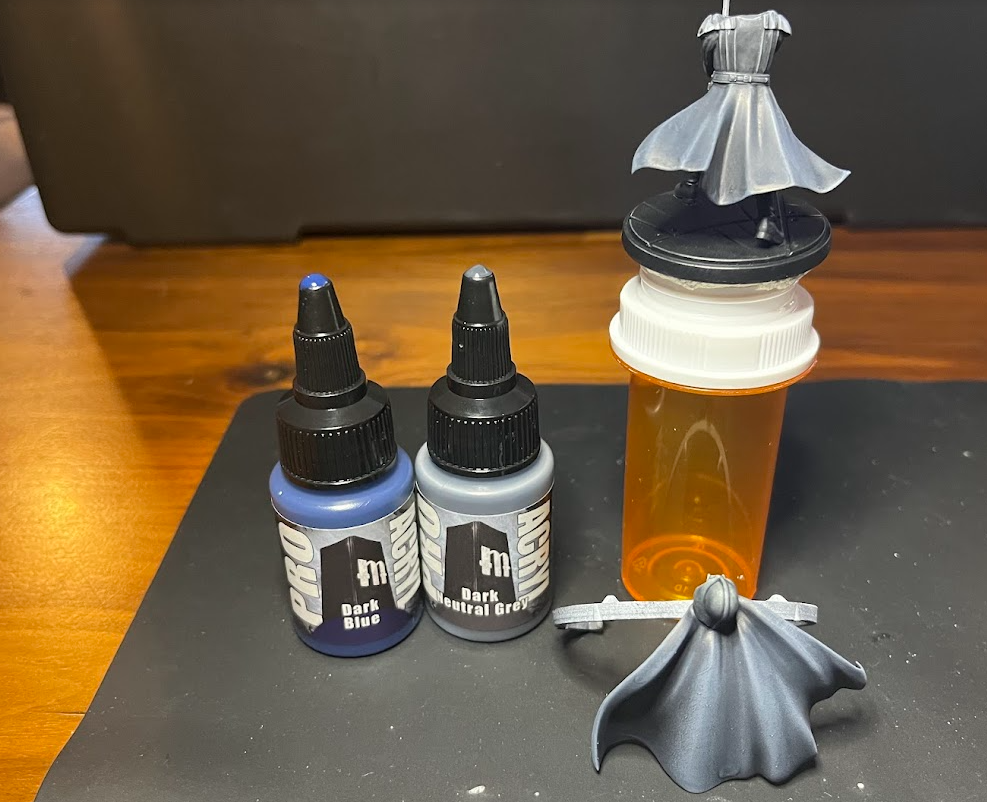
- Pro Acrylic Dark Blue
- Pro Acrylic Dark Neutral Grey
- Nuln Oil
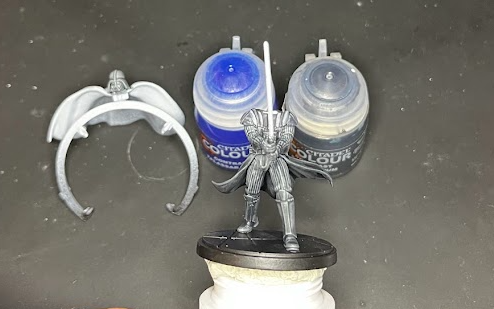
I covered Vader in Citadel Colour Chaos Black primer, let that dry, and then hit it with a light dusting of Citadel Colour White Scar primer. I did not go too heavy because I wanted to keep Vader dark.
I wanted to reach Vader’s tunic and undercoat, so I left his head and cape off for priming and painting. This is the first time I have done this, and I was really hoping to find an alternative head to utilize and attach it via magnet. Unfortunately, I ran out of time, so I will shoot for another project for this.
I started with a slathering of 90% Basilicanum Grey and 10% Talassar Blue, giving the absolute slightest hue of blue in the undercoat. This is not ‘is he blue’ but more to help the actual colors pop against the dark tones. Once the contrast paints had dried on both the body and cape/helm, I began to dry brush.
Dry brushing a Dark Neutral Grey with just a dot of Dark Blue mixed in.
Once I had the highlights to where I wanted them, I moved onto the shoulder pads. Every other rib/line on his shoulder pads is a more metallic black, so I used Six Shooter.
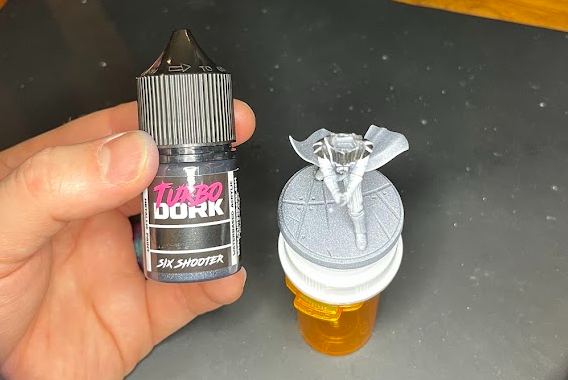
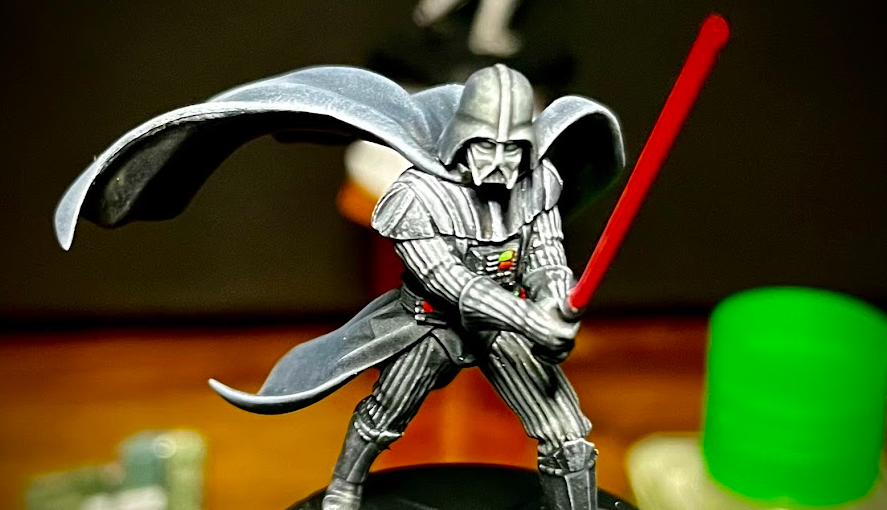
It provided a sheen that the Grey/Blue contrast paints did not have. It is enough tone difference but subtle enough to keep the same consistent color. Starting with the Fluorescent Green, I added a few coats of the buttons to ensure they were vibrant.

The Fluorescent Red buttons on the chest plate are next, and obviously, the light saber. I based the lightsaber in Fluorescent Red with a little Neutral Grey mixed in due to the fluorescents being slightly opaque and lacking consistent coverage. I then worked the base coat up to the Fluorescent Red and mixed some white in for a wet blend of the lightsaber hilt to the tip, giving it white stippling along the blade to give it an unstable look (intent).
Stormtrooper Sergeant
Stormtrooper Sergeant Colors Used:
- Citadel Contrast Basilicanum Grey
- Citadel Contrast Black Templar
- SoFlat Acrylics Titanium White
- Pro Acryl Orange
- Pro Acryl Fluorescent Orange
- Nuln Oil
I primed these in black but went light on the white since I was going to dry brush a large amount of white back onto the mini. I’ve experimented with various primers, but Citadel’s White Scar is my go-to for its smooth finish. However, if I’m working within a budget or need something quickly, Rust-oleum’s flat white primer is a reliable alternative. Since most of the armor is white, coming in with the dry brush will just punch out the white instead of getting it all over the black area.
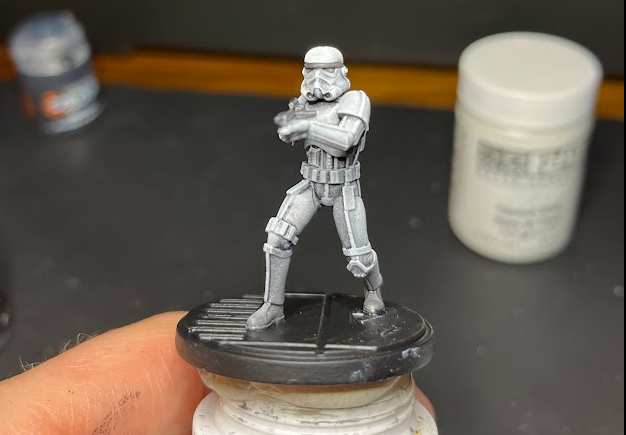
Next, I added some depth to the white armor using Citadel Basilicanum Grey Contrast Paint. Depending on how much wear and tear I want to show, I’ll sometimes thin the paint by mixing it in a 70/30 ratio with water or medium. The goal is to create subtle shadows, so you’re looking for a light wash effect rather than full coverage.
Once the Grey has dried, I bring the tone up a notch. My current favorite white for this is Golden SoFlat Acrylics Titanium White. I like mixing a small amount of Basilicanum Grey into the white to maintain some of the shadow depth we’ve established. Then, using a large dry brush from Artis Opus, I give the miniature a gentle dry brush. Dry brushing helps bring out the armor’s highlights while maintaining shadows underneath.
For the black details, like the helmet’s visor, the undershirt/under outfit, and the blaster, I used Citadel Contrast Black Templar. You can also use black ink if you don’t want to utilize paint. Be precise here to avoid overpainting the white areas, but don’t worry if you slip up. There’s always room for touch-ups.
After the black details are in place, it’s time for some cleanup. I use a mixture that closely matches my original dry brush mix to cover any spots where the black might have strayed. Depending on how meticulous you want to be, you might repeat this process a few times to get everything right.
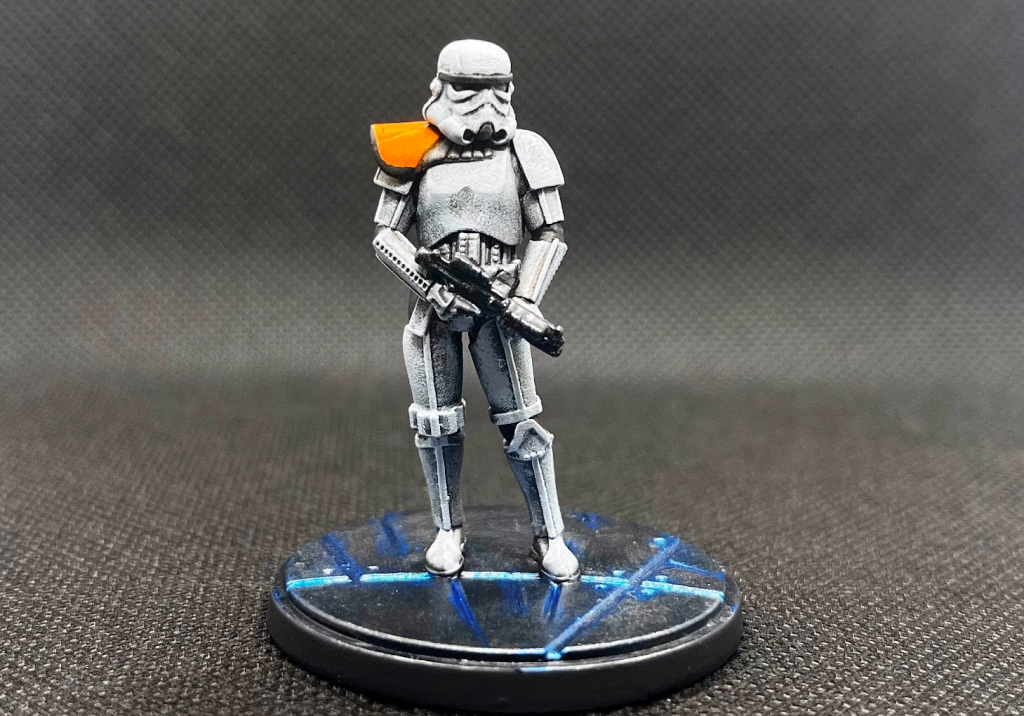
I then turned to the sergeant’s shoulder pad. I have seen a few colors, but Orange is the most iconic. I laid a base coat of Pro Acrylic Orange in about thin coats. Once dried, I applied the black line to the outside of the pad. I then came in with highlights using Pro Acrylic Fluorescent Orange. The Fluorescents are mildly transparent and don’t have great coverage, but they really make the color pop.
For the finishing touch, I like to go over the armor edges with pure white, this time using a smaller brush for precision. This helps accentuate the edges of the armor, making the miniature pop. However, be careful—dry brushing can sometimes stray into the black areas, so you might need to go back and forth a bit between the black and white to get everything just right.
Stormtrooper
Stormtrooper Colors Used:
- Citadel Contrast Basilicanum Grey
- Citadel Contrast Black Templar
- SoFlat Acrylics Titanium White
- Nuln Oil


The stormtrooper is the same receipt as the above Stormtrooper Sergeant; they just don’t have shoulder pads! It is worth painting all the stormtroopers at once to avoid redundancy of back-and-forth of White to Black to White to Black.
Bases
Bases Colors Used
- Turbo Dork Six Shooter
- Turbo Dork Cool Ranch
- Nuln Oil
I don’t typically include a base recipe because I prefer mine flat and not stand out. However, I wanted an extra layer with the squad having a small subset of base colors (black/white). I had a few extra bases from different Shatterpoint kits, so I was able to put together all the ‘metal’ bases.
Turning to Turbo Dork’s color-shifting line, I applied a base coat of Turbo Dork Six Shooter. It is a beautiful black with a galaxy-reflective sheen. It does require a few coats, and each bottle has recommended applications, so pay attention. In this case, I primed the base black and applied three coats of Six Shooter with a brush.
I then applied the Turbo Dork Cool Ranch over the Black, using it to all the seams and breaks on the bases. I applied two coats. Then, I splashed Nuln Oil all over the base and returned with the Cool Ranch, which was only in some places, giving the blue a bit of depth. After it was all dry, I came back with Six Shooter and gave the blue a ‘chipping’ look by applying random dabs to the blue/black areas.
Final Thoughts
Darth Vader was a blast to paint. I am very pleased that I kept him in two pieces to paint so I could reach his undercoat. When it comes to the Stormtroopers, it can be a slog. Painting Stormtroopers becomes a back-and-forth process, especially with all the touch-ups, but the results are worth it. With the Empire growing in the Meta, this is a perfect box to pick up and paint to destroy the rebellion!
Have any questions or feedback? Drop us a note in the comments below or email us at contact@goonhammer.com. Want articles like this linked in your inbox every Monday morning? Sign up for our newsletter. And don’t forget that you can support us on Patreon for backer rewards like early video content, Administratum access, an ad-free experience on our website and more.
