
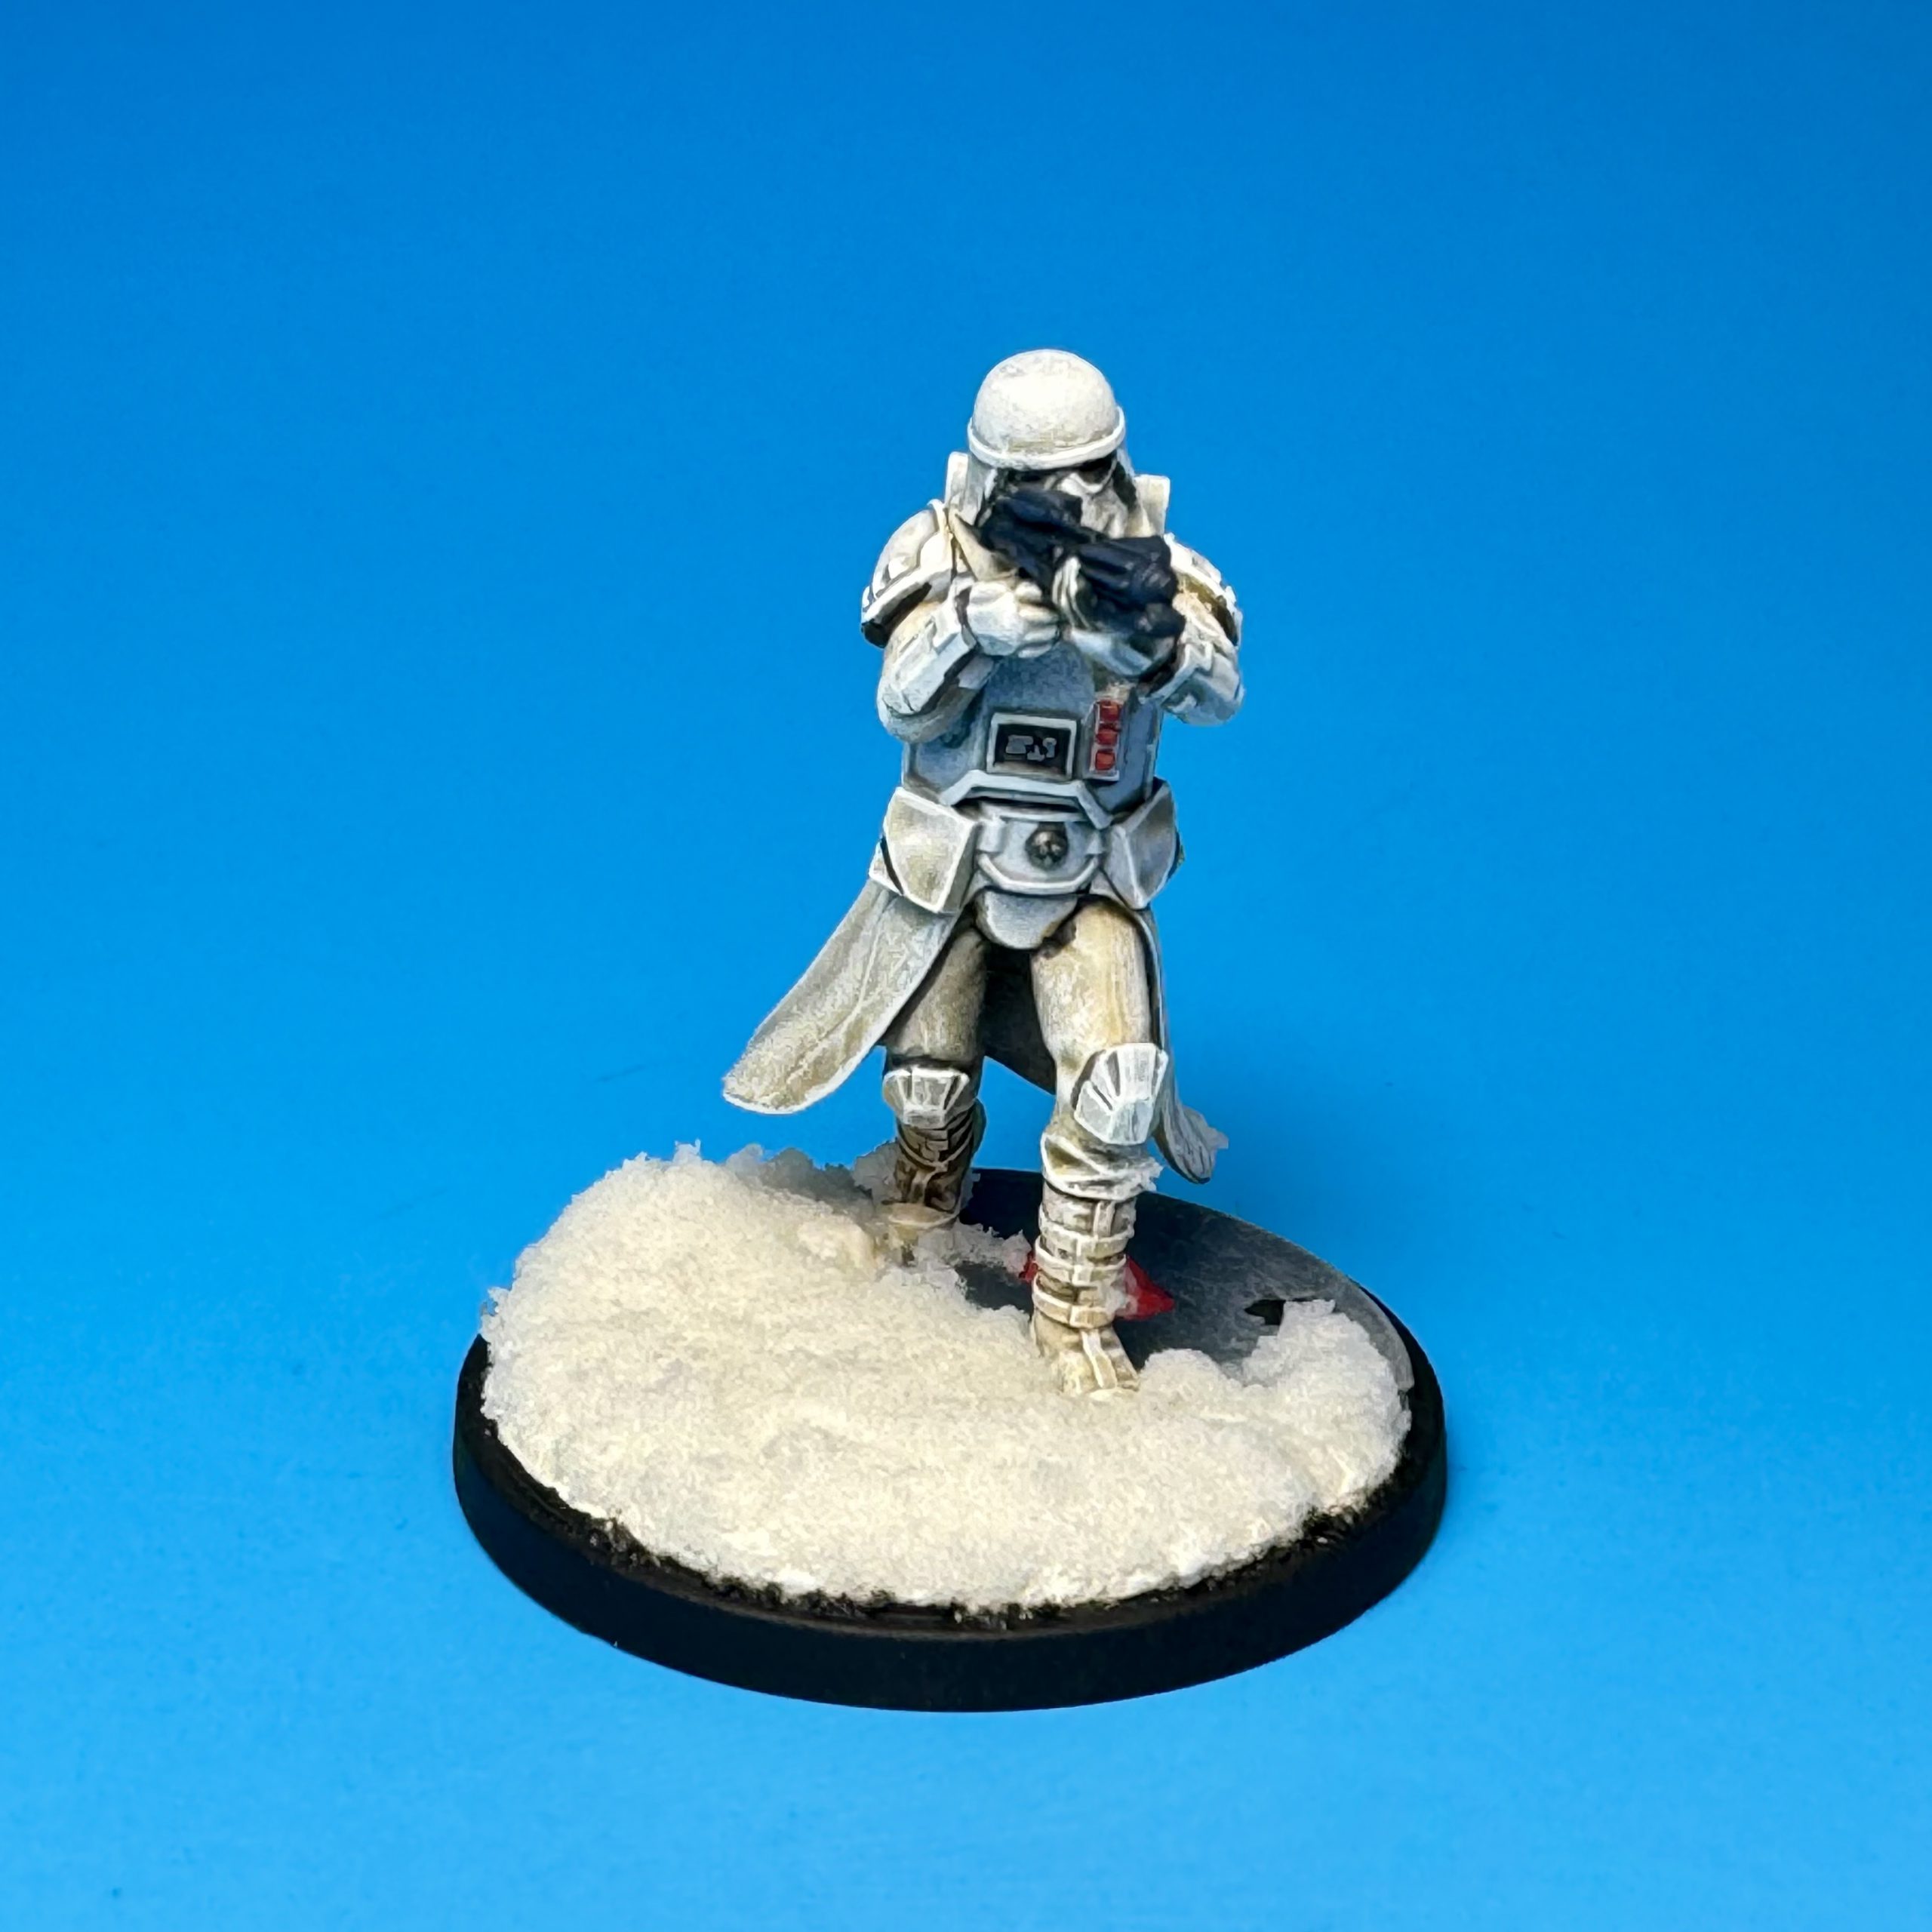
If you just picked up the Maximum Firepower Squad Pack for Star Wars: Shatterpoint, you’re looking at painting a bunch of white armor yet again. If, like me, you’re feeling a bit burnt out on painting all these clone troopers and stormtroopers, well, at least these look a little different? Specifically, film versions of snowtroopers tend to look much more weathered and grimy. Read on for my approach.
Snowtroopers
Honestly this approach has only one key difference from my standard approach to clones/storms as detailed in the article linked above. I’ll outline the full method here, but you can see some example WIP pics (as well as some other approaches) in that article.
- I start by priming all my models white. I honestly can’t imagine why you wouldn’t in the case of snowtroopers.
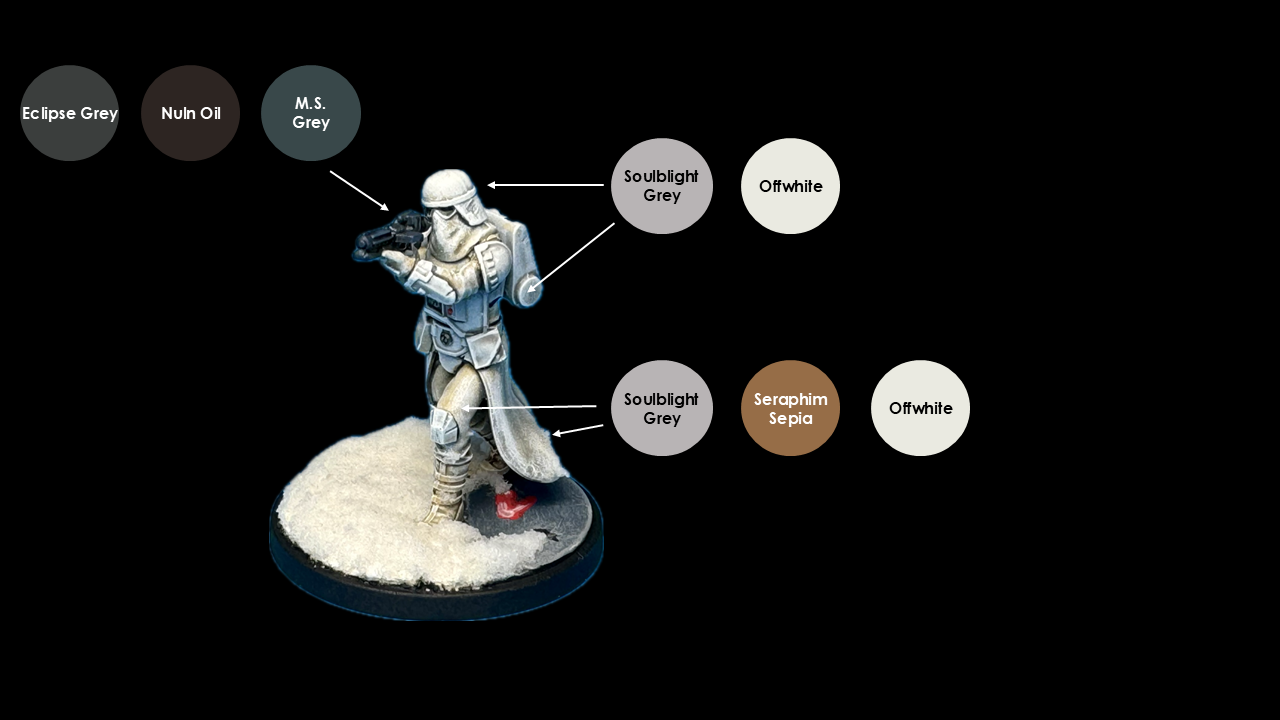
- I first washed the entire model with GW Soulblight Grey.
- When that wash dried, I washed just the cloth undersuit and cloak with GW Seraphim Sepia. This was the only difference to be honest.
- The next step was drybrushing the whole model with Vallejo Offwhite. This took a little more work for the worn cloth areas. Finding the balance of not too much or too little drybrushing took some effort. I wanted the yellowing to show through, but only slightly.
- There’s no black undersuit visible like on normal stormtroopers, so I was able to skip that process and move to line highlights with the Offwhite.
- The guns were painted with Scale75 Eclipse Grey, then washed with Nuln Oil. When that dried, I drybrushed the guns with Eclipse Grey, then lightly with GW Mechanicum Standard Grey.
- I painted small details such as lights and buttons, and did my standard blacklining technique between different areas of the model. I used the Offwhite one more time to touch up any areas that needed it, and that was it.
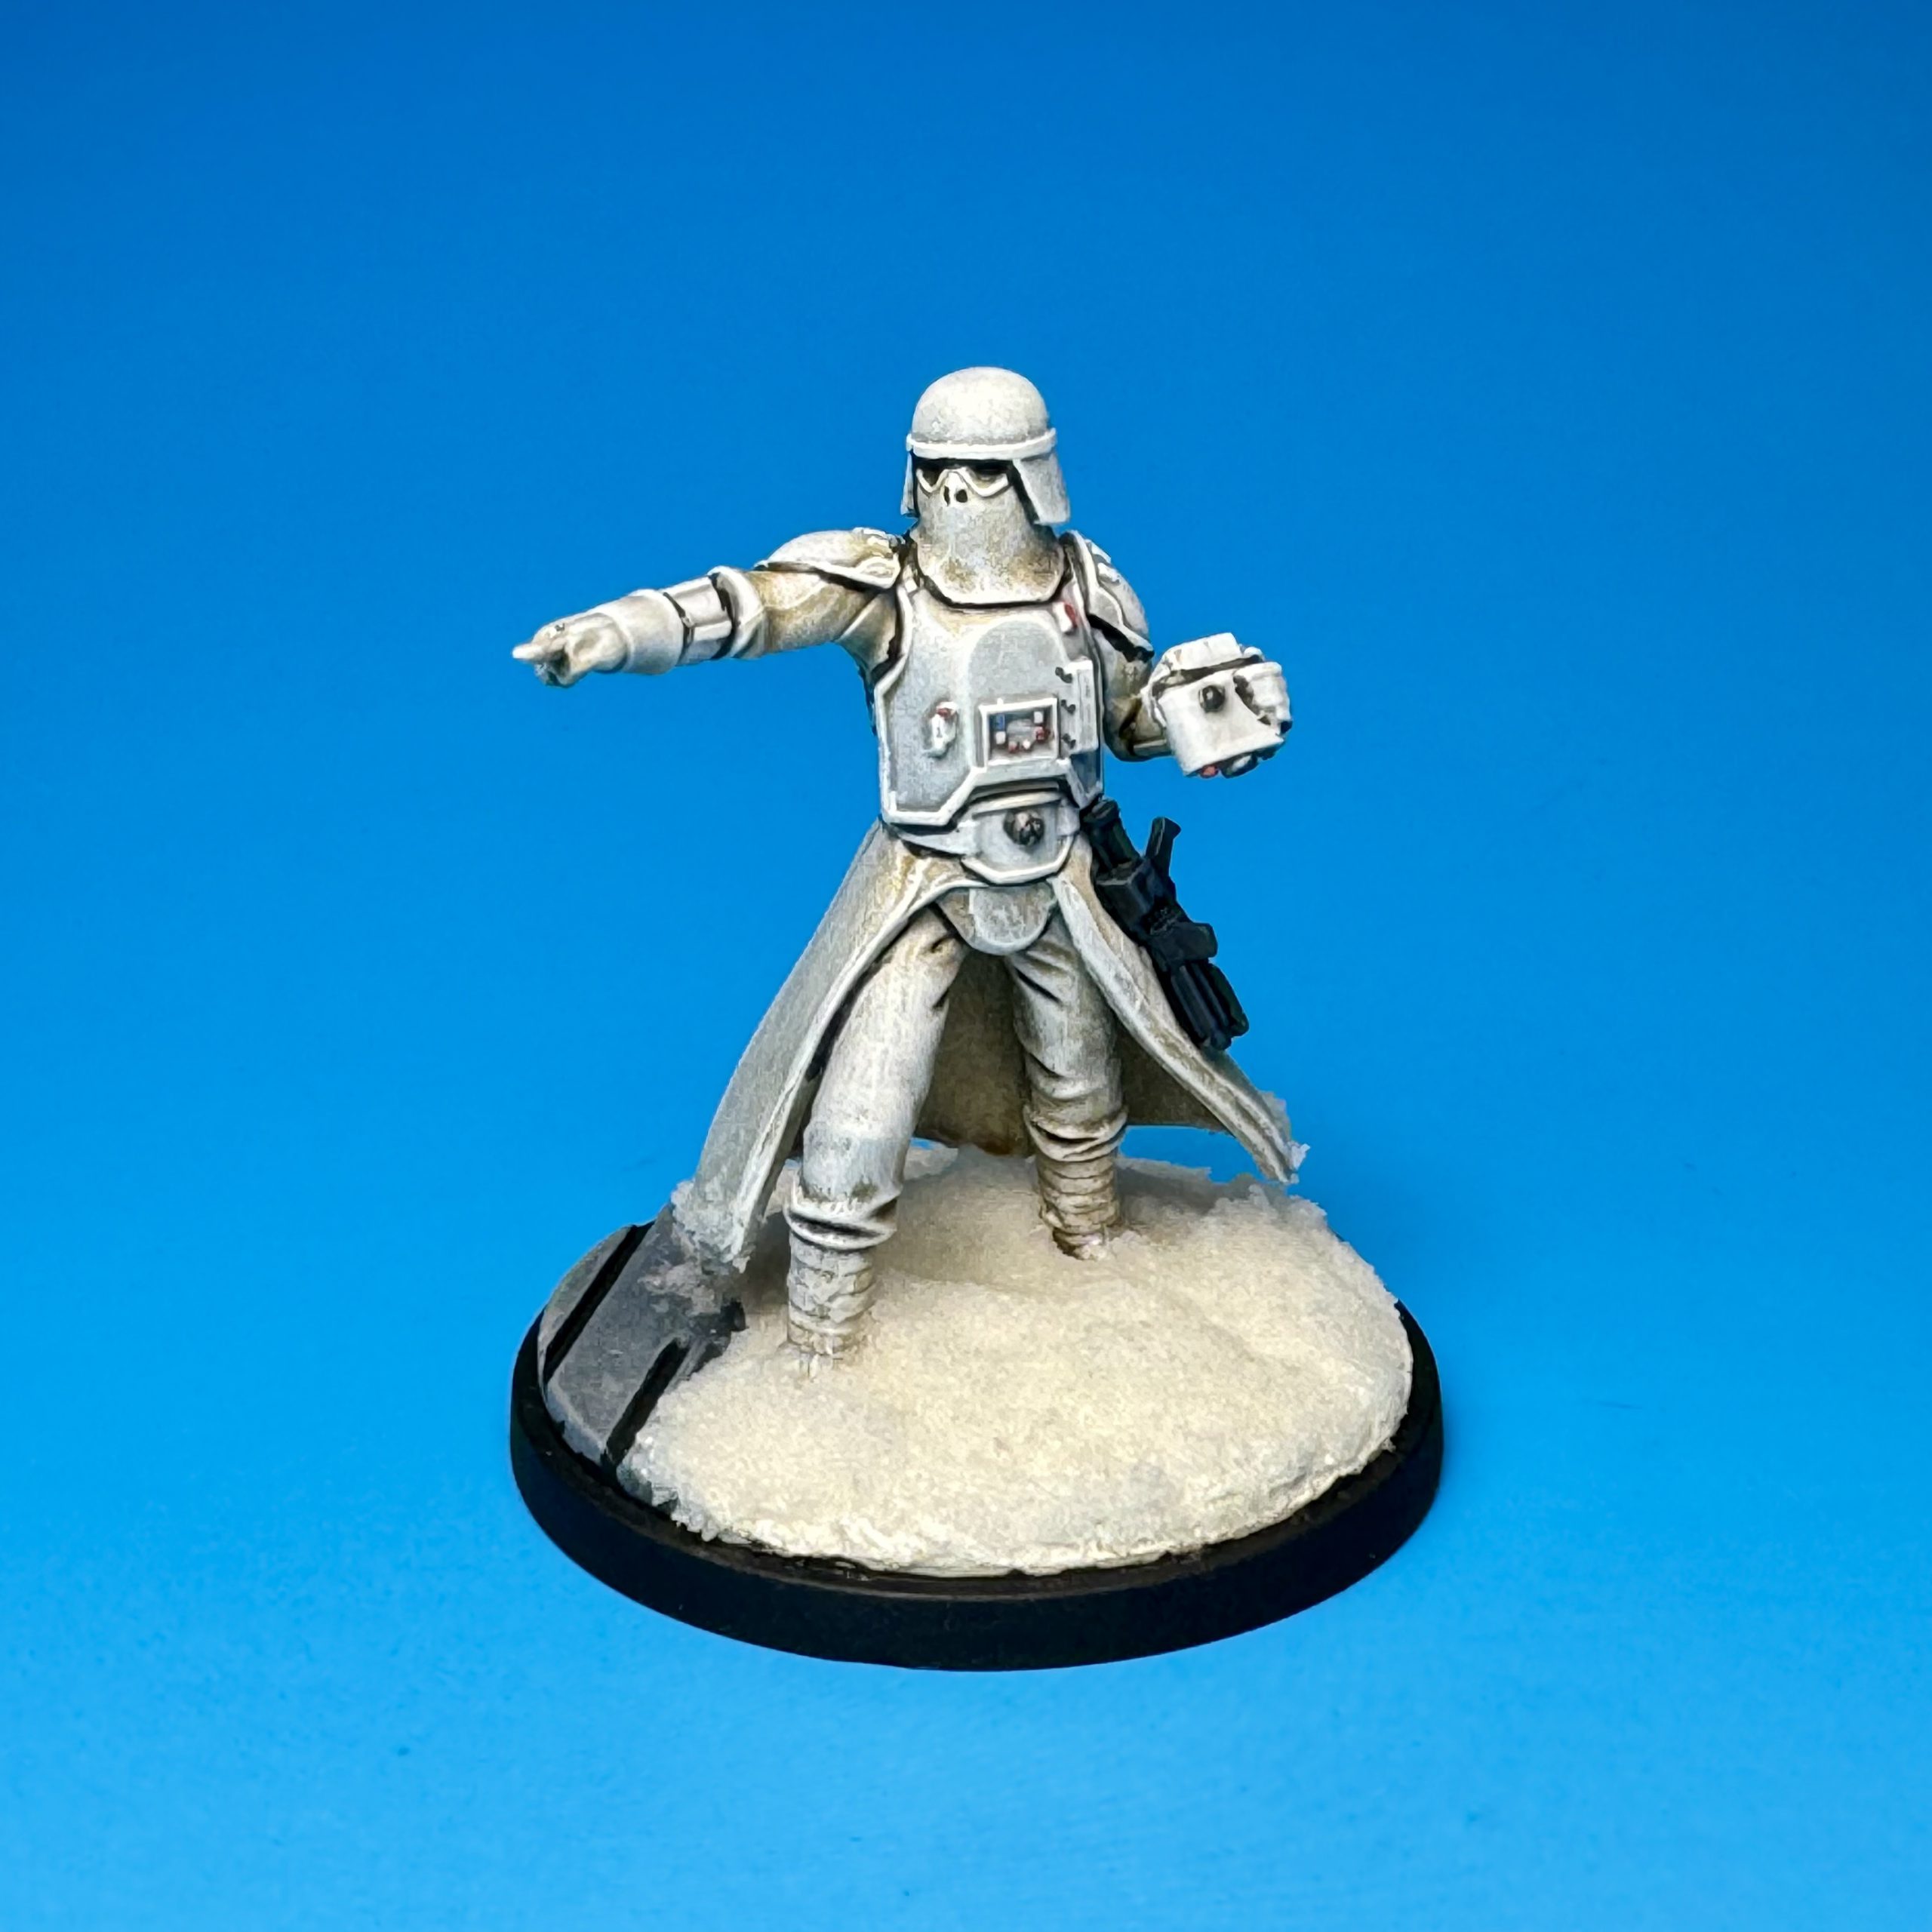
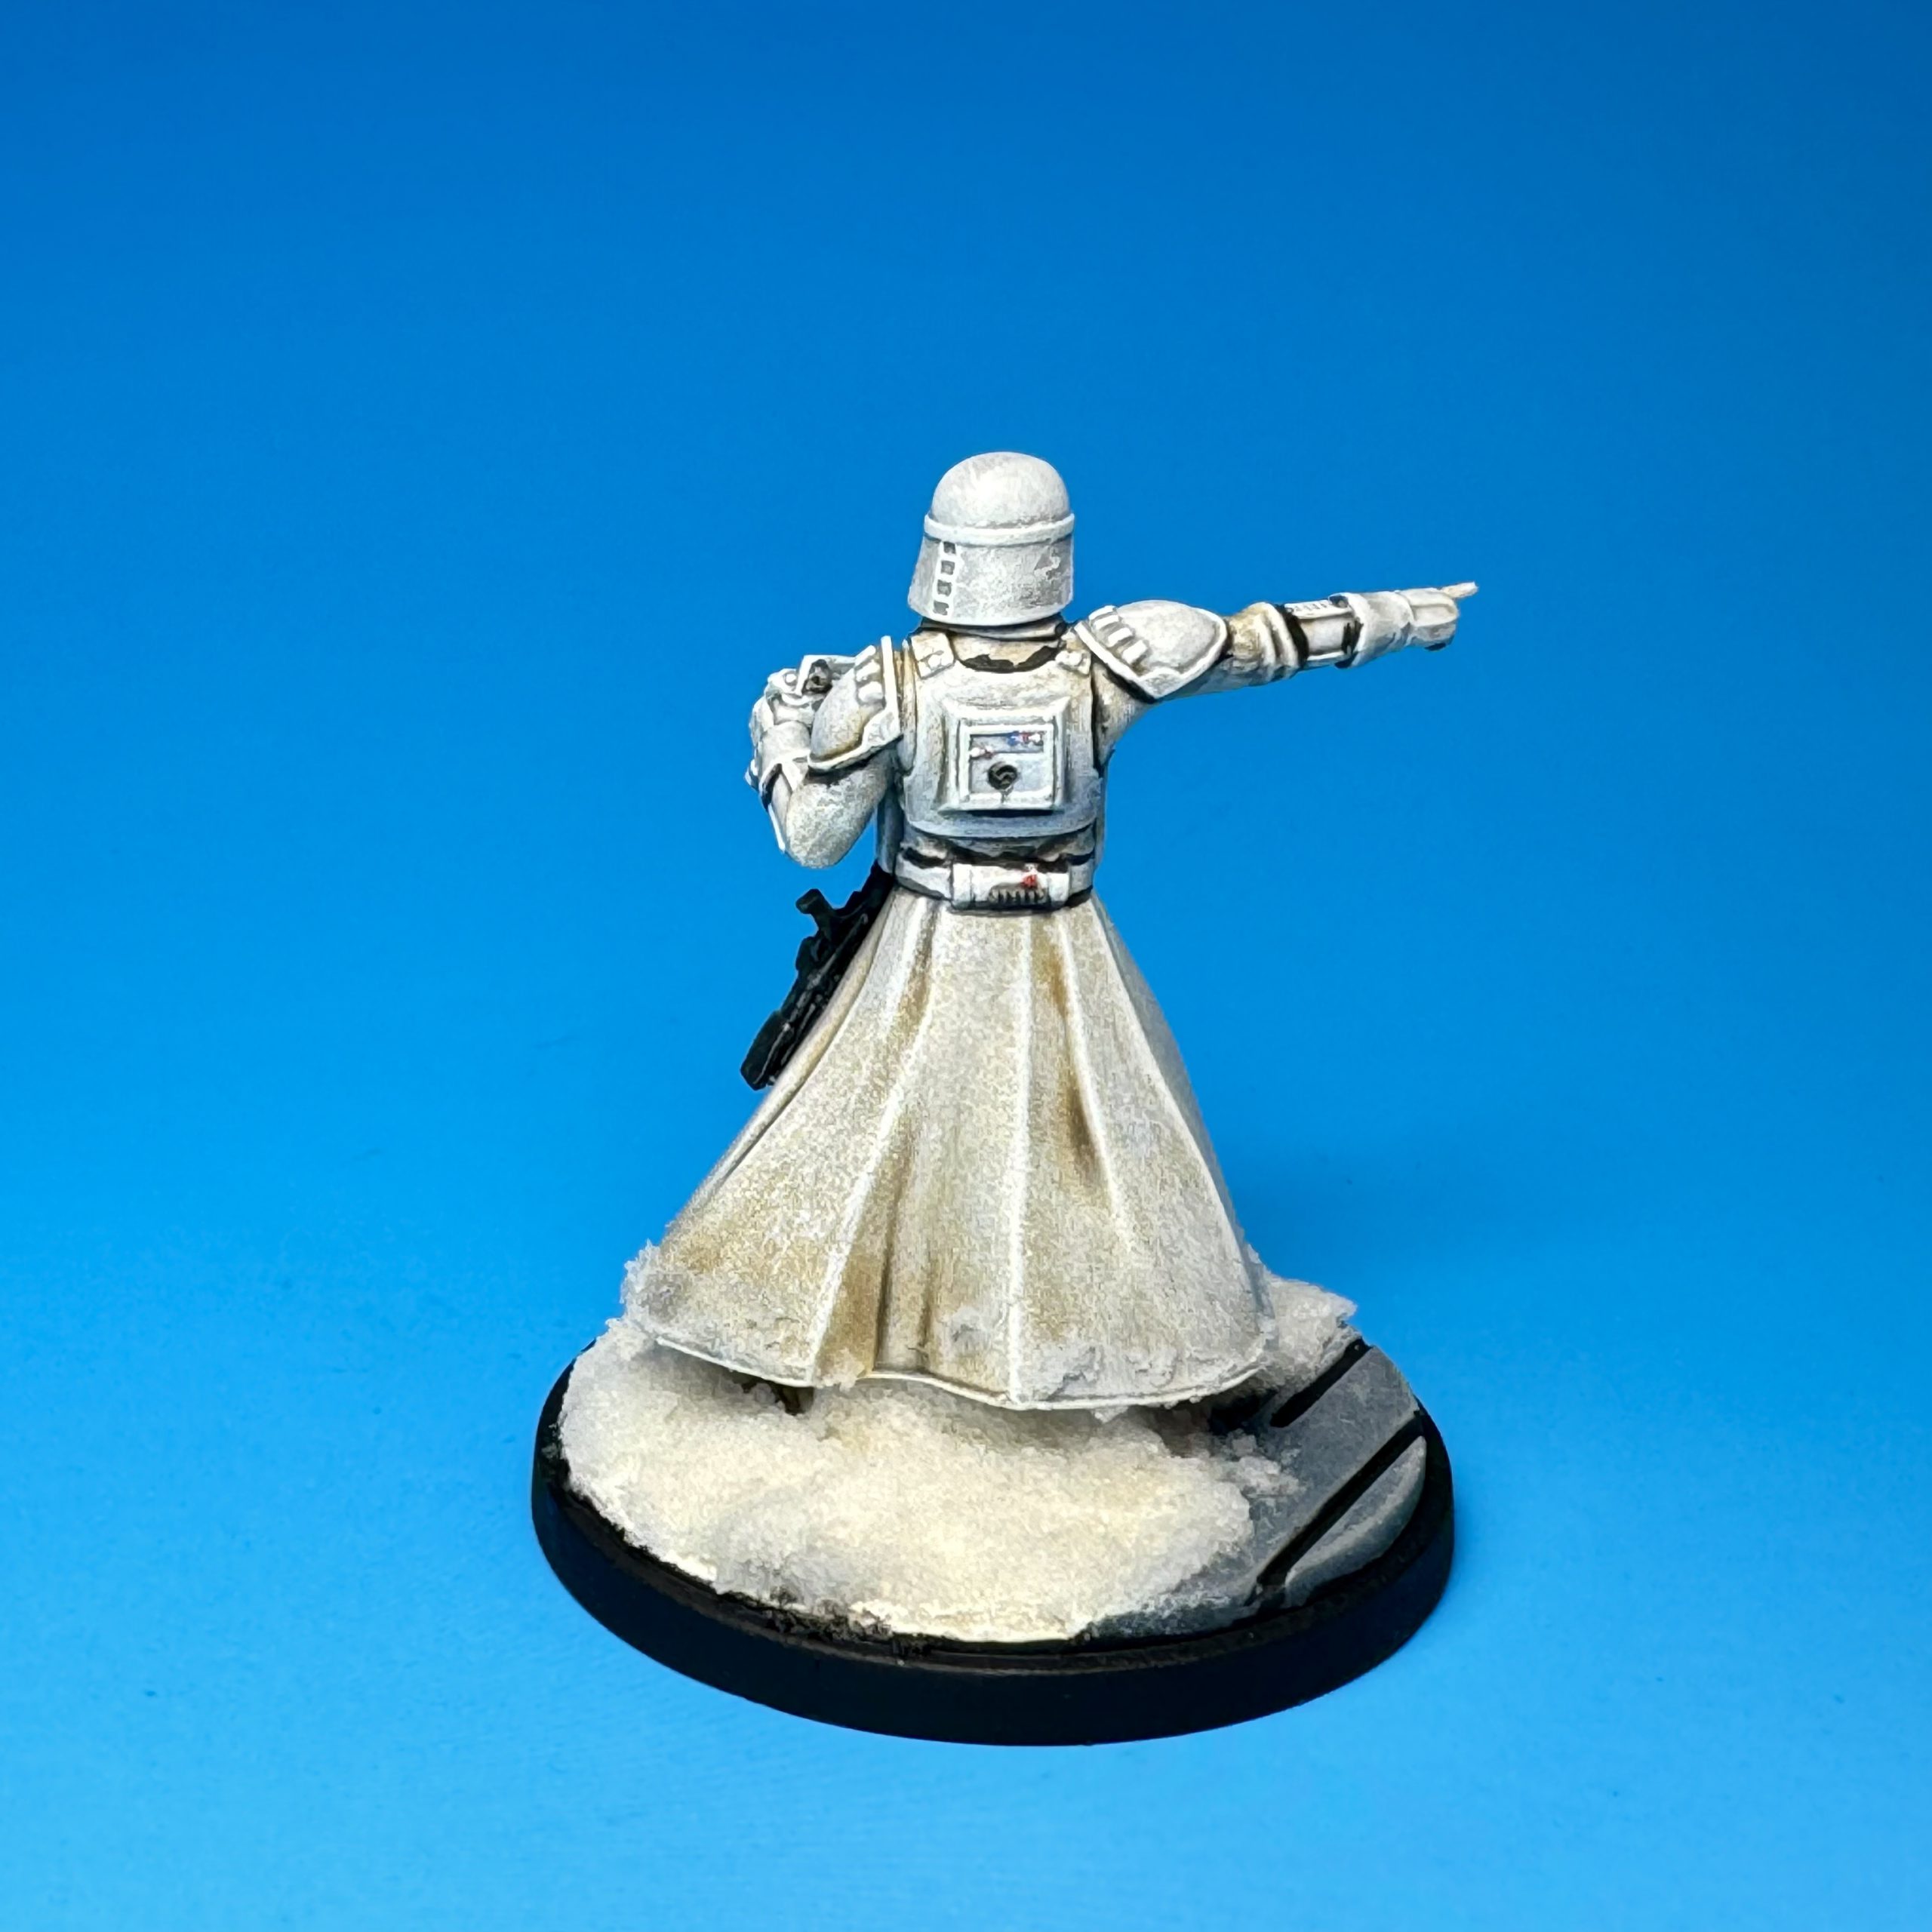
The primer dried a little funky on these models, leaving a weird pattern or texture on some of the cloaks. It’s not super noticeable from tabletop height, and honestly kind of makes it look more like fabric from a distance. This was a good reminder for me that what you see when painting inches from your face, or in giant blown up photos, doesn’t reflect the reality on the table!
Snow Basing
I couldn’t bring myself to have snowtroopers on my usual desert base. So I used wood filler and some sculpting tools to spread some around on the bases. I let it spread onto the walkway areas as well, as if the snow was drifting. I did paint and drybrush the filler with some shades of white once it had fully dried. But to be honest, I didn’t care for the look. So I then broke out my good old snow flock:
- I mixed the flock with a few drops of water, a bit of white glue, and some gloss varnish until I was happy with the consistency (slightly thinner than toothpaste).
- I spread that mix around with an old paintbrush, letting it get on boots and cloaks to tie the model into the base. Let that dry for several hours or better yet overnight.
- Feel free to experiment with your ratios and ingredients with the mix. I based 40k and WMH models for years with snow, but didn’t use gloss varnish. I instead used more white glue and water, and sprinkled dry flock on top. That will give a more powdery effect. This current version looks more like wet, partially melted snow. Others will use baking soda instead of flock. Some mix in paint such as white or even a tiny amount of blue, to counteract snow flock or especially baking soda yellowing over time. If you don’t like the result, it’s easy to clean the mix off with some water especially before it’s dried. Then just try again!
Hope this helps you in getting these models on the table. Feel free to share your approach and pictures on Discord or here in the comments. Thanks for reading!
Have any questions or feedback? Drop us a note in the comments below or email us at contact@goonhammer.com. Want articles like this linked in your inbox every Monday morning? Sign up for our newsletter. And don’t forget that you can support us on Patreon for backer rewards like early video content, Administratum access, an ad-free experience on our website and more.
