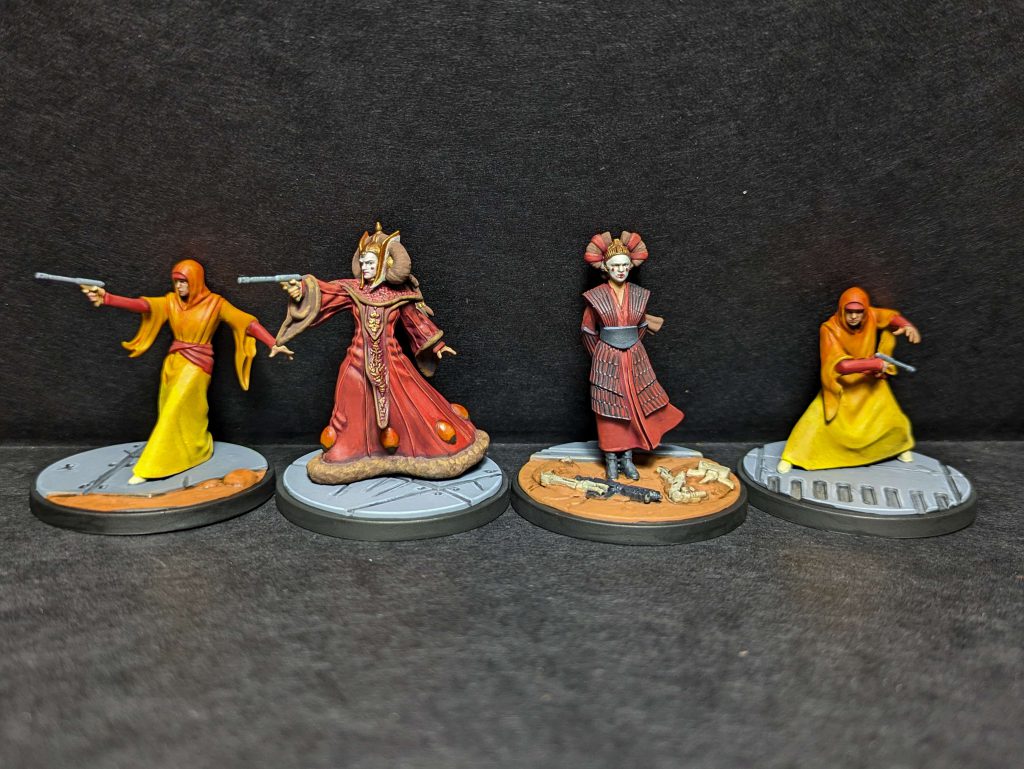
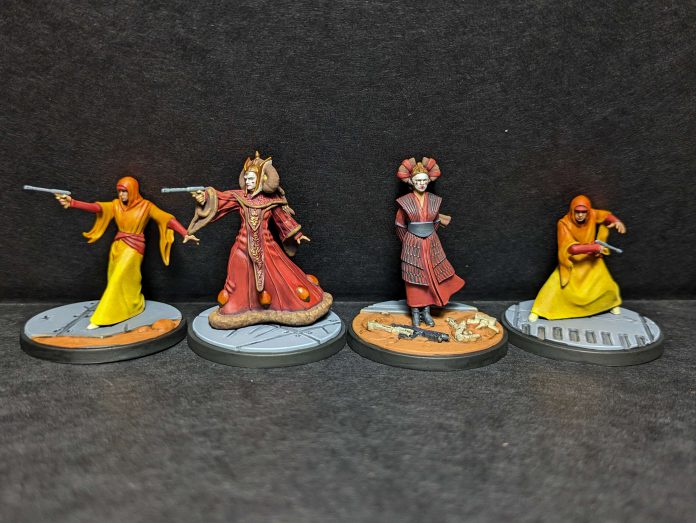
Shatterpoint has some fabulous miniatures, but there are a few that people can find very intimidating to tackle, and the box that has been mentioned again and again in this light is We Are Brave. From the transitions on the handmaiden’s outfits to the gems on Padme’s gown, there are some real technical challenges to get a handle on here. But don’t worry – we’re going to walk through each of them step by step, and show you some techniques that let you skip the most difficult aspects (with no airbrush required).
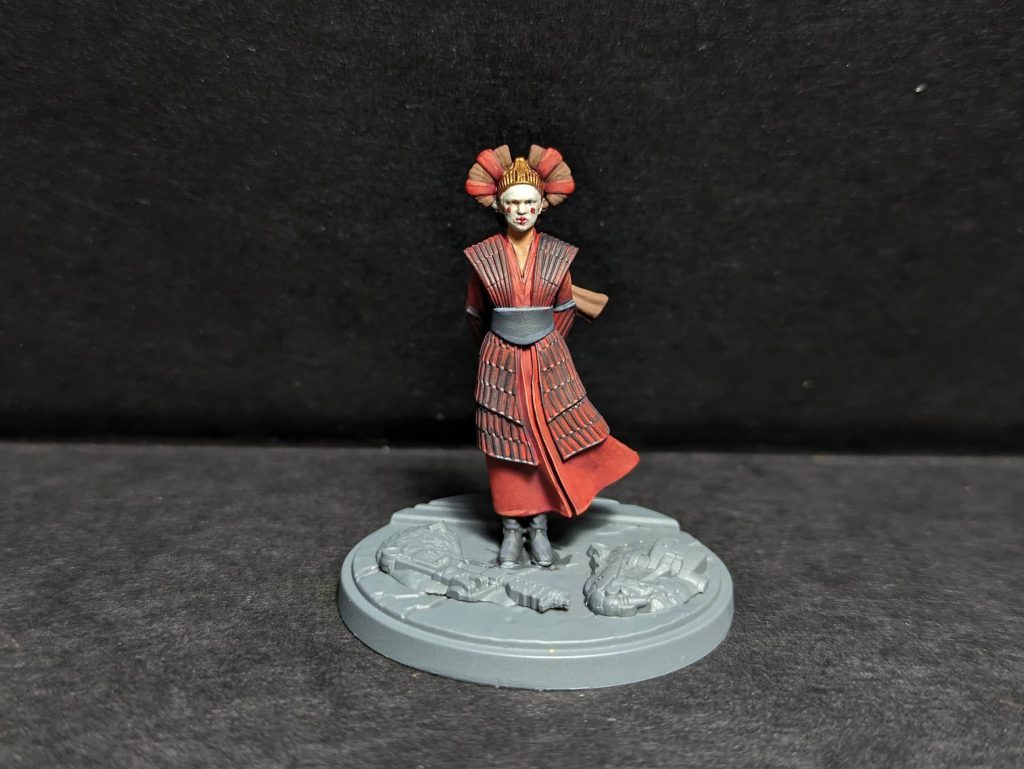
Padme
We’ll tackle this box two models at a time, because the handmaidens are obviously similar to approach, and there’s also a lot of crossover with Padme and Sabe too. I primed all the models in this box with a midtone grey primer (Colour Forge Standard Grey) as it’s an easy option if you’re not sure how you’ll be approaching this, but after having painted them I’d recommend going for either that or a white/pale primer. Black will make your life a lot harder, especially on the handmaidens.
Let’s tackle the queen herself first.
With the prime out of the way I began by blocking out the basecoats on Padme:
- Robes: Citadel Khorne Red
- Trim and hair: Scale75 Leather Brown, though any mid brown with warm tones will do here
- Gems: Vallejo Model Color Black Grey for the bottom area and Scale75 Mars Orange for the top half to provide a base then a nice clean Citadel Troll Slayer Orange basecoat over the top of that. Putting a basecoat down to build to a lighter basecoat is a good technique for getting clean colours, and you can use any kind of warm orange-brown to do it here
- Gun: Vallejo Model Colour Neutral Grey and New Wood
- Headpiece: Scale 75 Thar Brown (or any warm off white) for the light sections and Scale75 Viking Gold for the metallics. I did the metallics a bit later in my process as I don’t like contaminating my paint water, but that’s the only reason.
- Skin: Scale75 Basic Flesh (or any relatively pale neutral flesh tone you like)
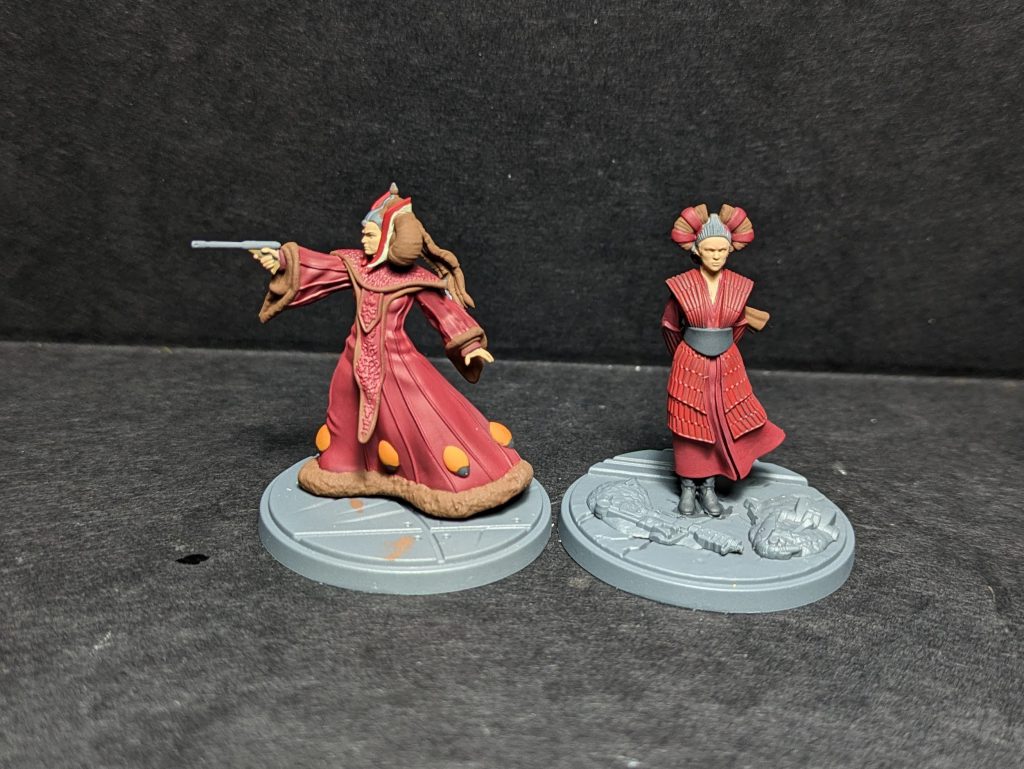
Once these are down, you can begin to layer some shades and highlights onto her. From this point on I generally work one area at a time, doing all of (say) the robes before moving onto something else. Work with the darker areas first, because if you slip it’s easier to retouch those ones after the layers are done. So here’s the steps for each of the areas in turn, including the basecoat again so you can follow the whole process if you want:
Robes:
- Basecoat Citadel Khorne Red (as above)
- Shade 1:1 Khorne Red:Black. This is really just to get in the deep folds and recesses. You’re not looking to cover much of the model with this tone, as it’s really quite dark, but just pick out the sharpest lowlights. Our Khorne Red will act as a natural shade (as well as the shading glazes we’ll add at the end) so no need to go overboard. We want these to read as rich, not dark.
- Layer Citadel Evil Sunz Scarlet. This is a zenithal layer, picking out all the areas that would get hit with direct light if there were a broad light source from above. You’re going to be covering a decent amount of the robes here – think of this as your midtone, with the Khorne Red as your soft shade and the red:black mix as your deep line shade. The bulk of the robes should probably get this layered on, but by layering with nice thinned coats we’ll get the richness coming through from underneath.
- Highlight with 1:1 Evil Sunz Scarlet:Citadel Squig Orange. Now we’re really highlighting, again with a zenithal. These aren’t sharp edge highlights, but just picking out the brightest points on the robes, where the light would hit most strongly.
- Final highlight Squig Orange. This is where we can do some edge highlighting on the hem of the robe, run a thin line on the folds, and anywhere else that an edge would catch the light.
- Glaze with Druchii Violet and Carroburg Crimson (both Citadel). This step is about giving some more depth, smoothing the transitions, and making it all more vibrant. Don’t allow these to pool, we’re not using them as a wash – get most of it off the brush before applying in a thin layer. The Druchii Violet is for the recesses and darker areas, and then the Crimson is over the midtones. You’re looking to cover the transitions between the red:black mix and the khorne red with the violet, and then the transition between the khorne red and the scarlet with the crimson. This just ups the richness so nicely, it’s definitely worth doing in my experience.
For the trim I used the following:
- Basecoat Scale75 Leather Brown (as above)
- Shade using Vallejo Model Color Black Grey. Thin this heavily and just run it in the recesses. You don’t need to go overboard here, we’re just making sure there’s some depth.
- Highlight with Scale75 Dubai Brown. This is a Zenithal, just catching the top of the peaks and folds of the trim, where the fur sticks up.
- Top highlight with VMC New Wood. A nice bright touch just on the very tips of protrusions and so on to bring it to life.
The hair has a slightly different approach from here:
- Basecoat Scale75 Leather Brown (as above)
- Mix a wash with a dark grey of your choice, or use a product like Nuln Oil. I used VMC Black Grey thinned to a wash, but you can use what works for you. Apply it all over letting it catch those fine recesses you couldn’t easily pick out with a brush.
- Mix a tiny bit of white in your Leather Brown and just apply a few fine streaks and lines across the hair where the light would catch it most. It doesn’t need to be much, just give it an illusion of shine.
For the gun I did the following:
- Basecoat: Vallejo Model Colour Neutral Grey and New Wood
- Wash it all over with Nuln Oil or a wash of your own mix (I used that VMC Black Grey again)
- Highlight the gun with a 1:1 mix of VMC Neutral Grey and White. You want to paint this in fine lines and hatching, hitting just the top side of the barrel, and edge highlighting the breaks in the shape. It’s not much, but it gives it a sense of being metallic.
For the headpiece I left the Thar Brown well alone, and then just gave the metallic parts a quick wash with Druchii Violet, nothing else. That just adds some depth and also knocks the shine back a little to fit with the rest of the model better.
For the gems we need to do something a little more complex than in other areas, and use a different kind of product:
- Base Vallejo Model Color Black Grey for the bottom area and Scale75 Mars Orange for the top half to provide a base then a nice clean Citadel Troll Slayer Orange basecoat over the top of that, as above.
- Thin some Citadel Mephiston Red down really really thin, to almost a wash. We’re going to be glazing with this, so get some on your brush, wipe most of it off, and then test it on a fingernail. You want to be able to see the nail through the glaze, and you want the glaze to leave a nice even coat on the nail, not pool or run off. When you have it at the right consistency and have the right amount on the brush for this, carefully shade the sides and bottom of each gem. You’re looking to create an almost U shape on it, with the raised top of the gem without the shade, and the shades either side of the very top narrowing to points.
- Now do the same thinning to a mix of 1:1 Troll Slayer Orange:White, and very carefully glaze the top of the gem and then down the front in a diminishing line that fades to nothing. Think of it like a V shape with more taper. This gives the impression of light hitting and diffusing through the gem. If it looks stark and weird at this point, don’t worry, the next step with blend it.
- Finally now we’re going to glaze the entire gem (including the black section) with a translucent gloss yellow. I used Citadel Sigismund Yellow Clear which I didn’t realise until I came to write this up has been discontinued for some time. However, you can get the same effect by glazing with thinned casandora yellow and then a coat of gloss varnish over it when it’s completely dried.
Last but not least, we’re onto the skin:
- Basecoat Scale75 Basic Flesh (or any relatively pale neutral flesh tone you like), as above
- Wash the entire skin with Citadel Reikland Flesh Shade, thinned with a little water to stop it being so harsh, making sure it settles in the recesses without flooding them. Don’t go overboard with this.
- For everything other than the face where the makeup will be applied, now use a skin highlight tone (I used Scale 75 Golden Skin) and apply a soft zenithal highlight, just catching the areas where light from above would hit. No harsh highlights, almost glaze it, thin your paint really well for this. You’re preserving the midtones and shadows as much as you can.
- For the face, we’re going to do something similar but with a near white with some grey tones – I used VMC Silver Grey. The goal here is that the top coat should be grey and unnatural, but you leave the recesses shading around the eyes and mount and other recesses, so the flesh tone underneath shows through. That gives the impression of makeup. When dry, add the red patterns with Mephiston Red very carefully.
And with that, Padme is ready for basing.
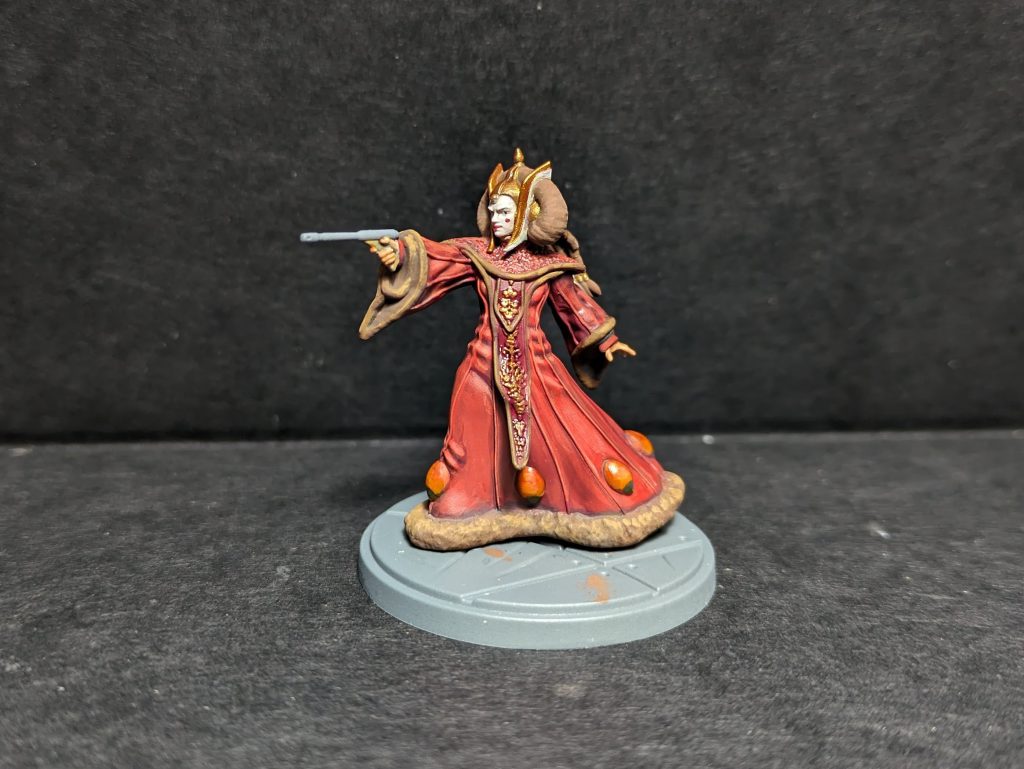
Sabe
Sabe has a lot of similar areas, and instead of providing the full basecoat step, I’m going to refer to what area is done with what process, but again do all the basecoats first then move on.
For her red robes, use the same mix as Padme used, and the same is true for her skin tones, her gun, and her hair. Just follow the guides above for those areas.
The armour provided a real challenge. I started trying to paint Mephiston Red onto it and then drybrushing on VMC Grey Black, but this ended up just obscuring the red too much. In the end I painted the entire armour, the boots and the middle band with the Grey Black, waiting for it to fully dry, heavily thinning the Mephiston Red and then running it onto the recesses. I did an edge highlight with a 1:1 mix of Grey Black:White where needed.
Handmaidens
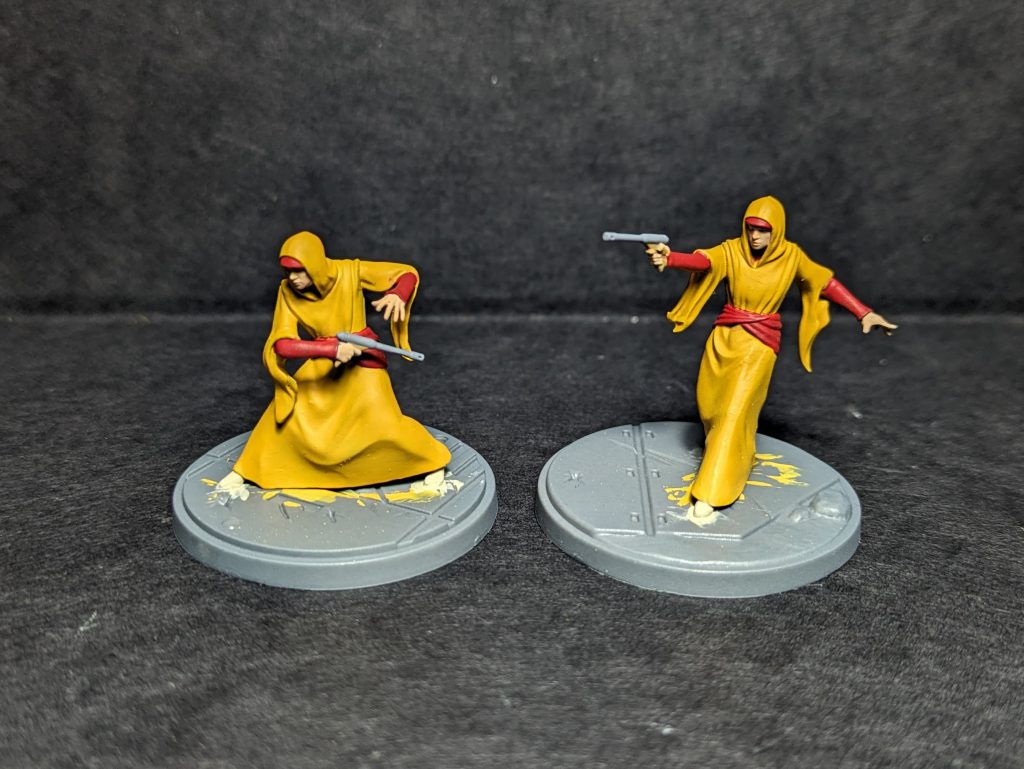
The handmaidens present quite a different challenge, with the big eye catching feature being their robes with a fade. I considered a lot of different ways of approaching this (if you have an airbrush you can use that, and if you’re a masochist you can do wet blending for several hours) but in the end what I landed on is kind of cheating but at a tabletop distance looks perfectly good.
First basecoat the robes with Citadel Averland Sunset. It’s a mustard/orange yellow, and quite dark and rich. Cover the entire robe with this, because this is our midtone, and we’ll be shading down and highlighting up from there.
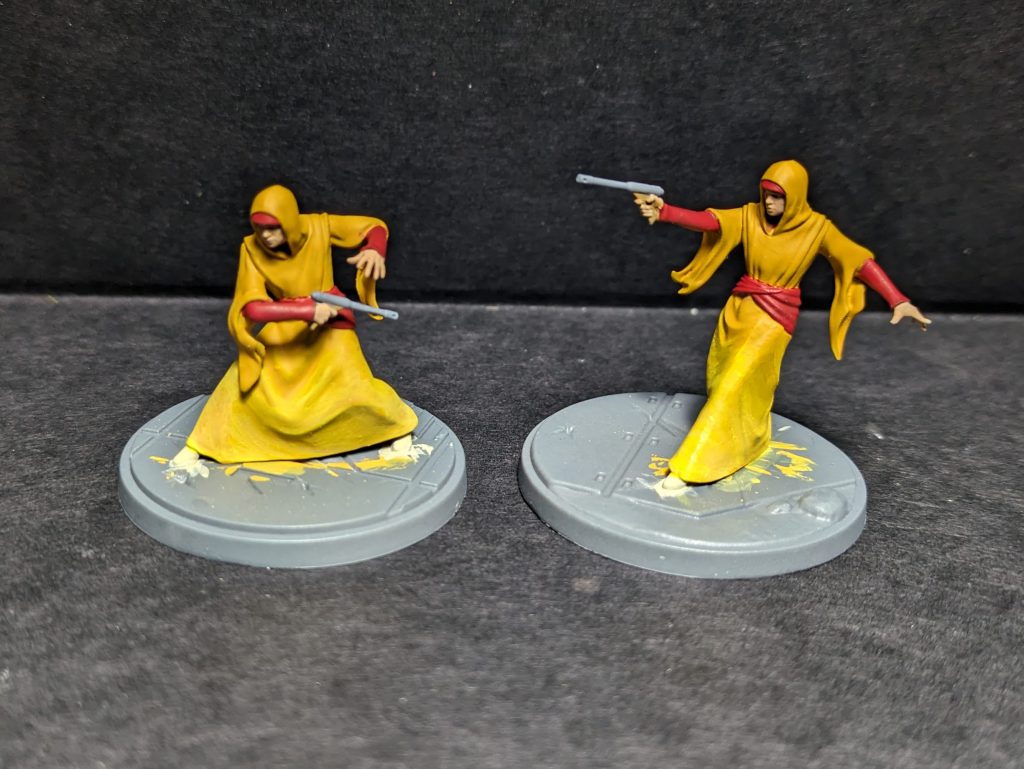
Once several thin coats are dry with good coverage, it’s time to start getting that fade effect in. I began with the highlights up. Starting at just below the waist I did a highlight with a 1:1 mix of Averland Sunset and Yriel Yellow. At the highest area this was a fine top highlight, but as it goes down I cover more and more of the robe until at the very bottom the entire cloth is covered in this, even the recesses. I then shift to pure Yriel Yellow and starting about half a centimetre lower I do the same again, but instead of covering everyting at the very bottom, I’m doing a broad zenithal highlight. Now I make a 1:1 mix of Yriel Yellow and white and do this again, another centimetre or so lower, just picking out the top points in a fine highlight until I’m at the bottom where I’m picking it out in a relatively targeted zenithal. Finally I go to a 1:2 mix of the yellow: white and do a fine highlight at the bottom of the robe, including an edge highlight around the hem.
With the highlights in, it’s time to move to shades, and we’re going to do pretty much the same thing but in reverse. I start with Citadel Troll Slayer Orange. Just below the waist in the little half a centimetre or so I use it as a deep line shade, keeping it in the deeper recesses. As I work up I make it a soft shade and then more until I’m painting all of the robes from the shoulders up. Now I mix a 1:1 Orange: Mephiston Red and go again, starting above the waist this time, starting with a deep recess shade and then widening as I go up and the hood is fully coated. Finally I shift to pure Mephiston, thinned well, and do the last pass, recess shading the shoulders and glazing to a pure red at the top of the head.
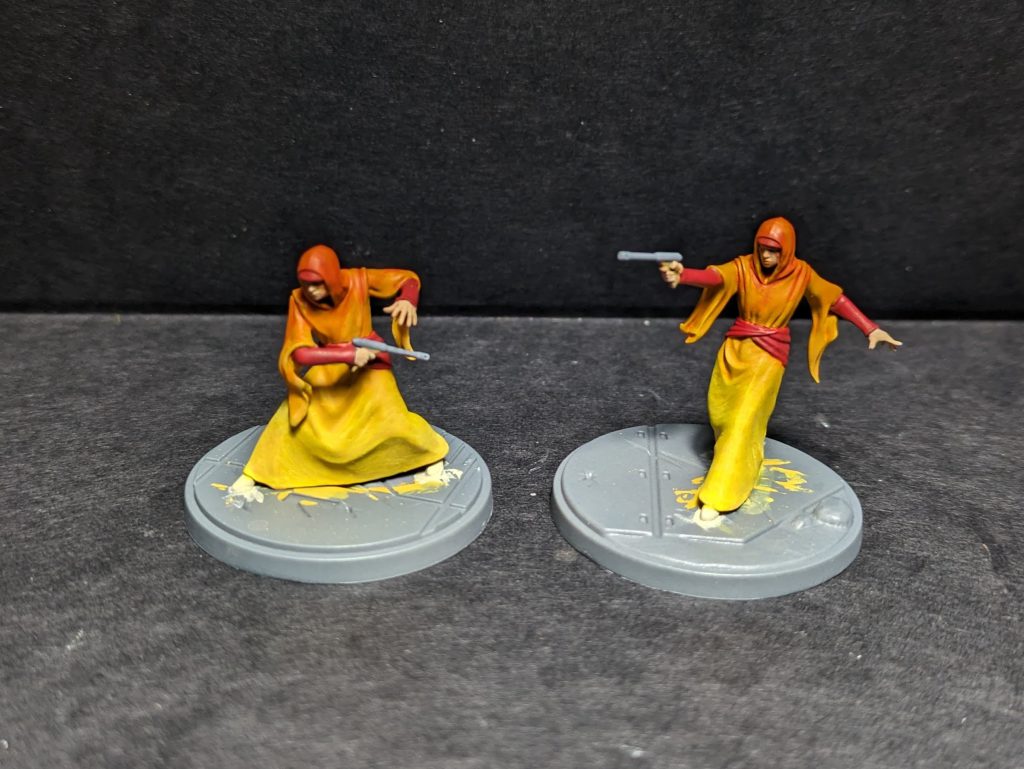
The effect can be left there, but if you want it to blend a little better, then heavily thinning a Casandora Yellow Shade with water (4:1 water:paint or so) then removing most of it from the brush and just applying it all over can smooth that transition, though be careful it doesn’t temper down the red or yellow the white too much, just avoid those extremes with it. That’ll just soften the blends a little.
The rest of the models gets similar work to Padme and Sabe: the red robe recipe we used on both on the armour and sash; the same gun recipe; the skin tone recipe (but not doing the makeup and keeping it more naturalistic all over). All done and based, the handmaidens are ready to protect their queen!
