
We recently saw the release of the long-awaited Shang-Chi and Silver Sable expansion box for Marvel: Crisis Protocol. We here at Goonhammer are fans of the model rules and Team Tactics Cards, (especially Shang-Chi) but we’re even bigger fans of playing it painted. Here’s how your reviewer approached painting these for the table.
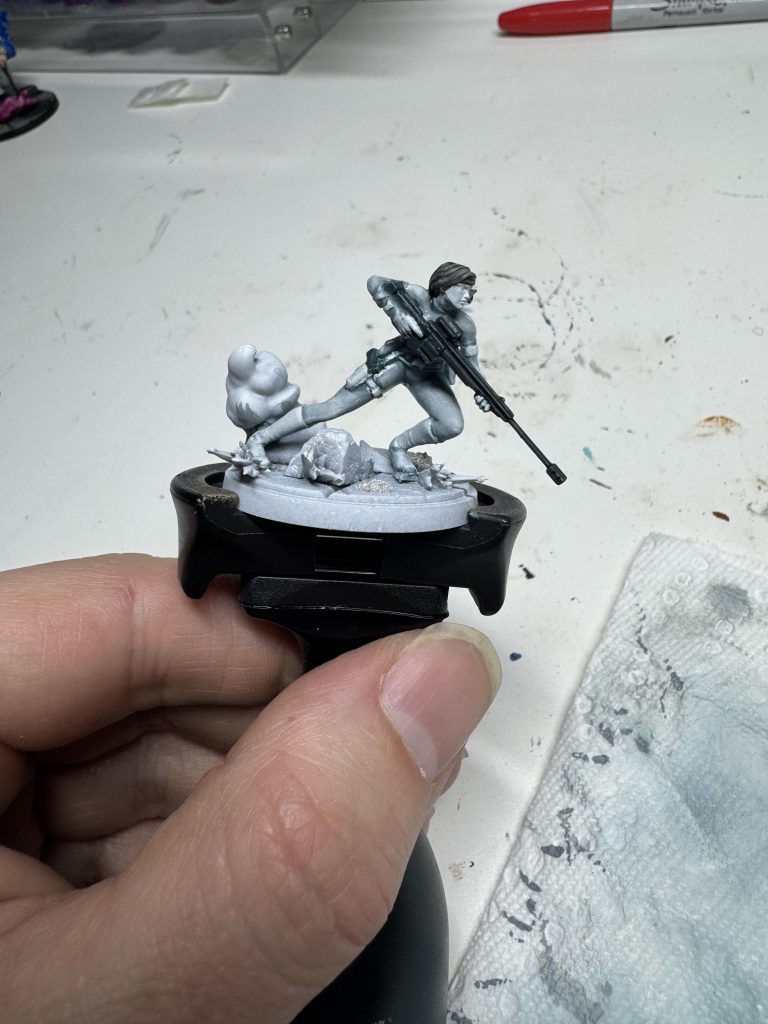
Silver Sable
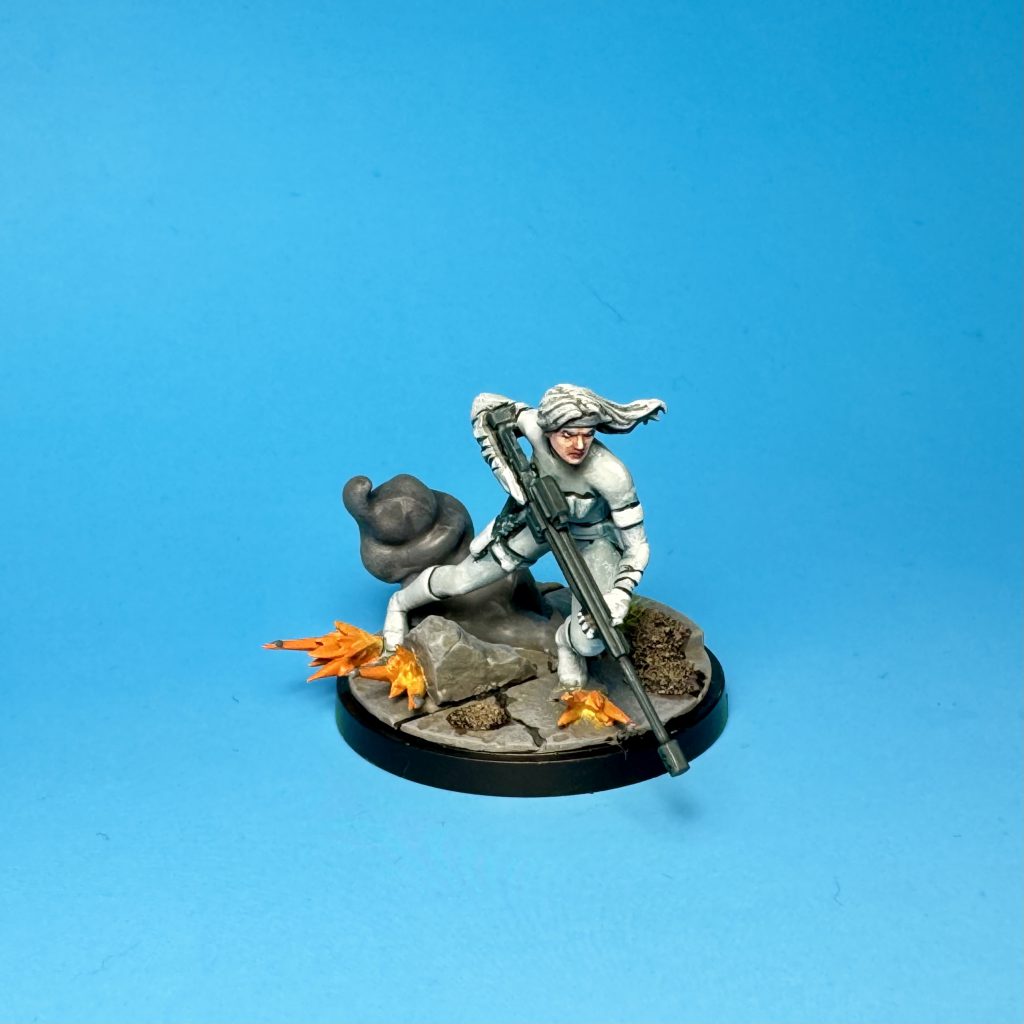

I tend to keep my paint jobs similar to studio schemes, particularly for models I receive for review. Others absolutely should flex their creativity with how they paint. Certainly there’s any number of different costumes and schemes as inspiration in comics and movies. But for these articles I usually try to serve those who also prefer using studio paint schemes as their inspiration. That meant that my Silver Sable would be mostly monochromatic, so I had to try and add some varying shades for more visual interest.
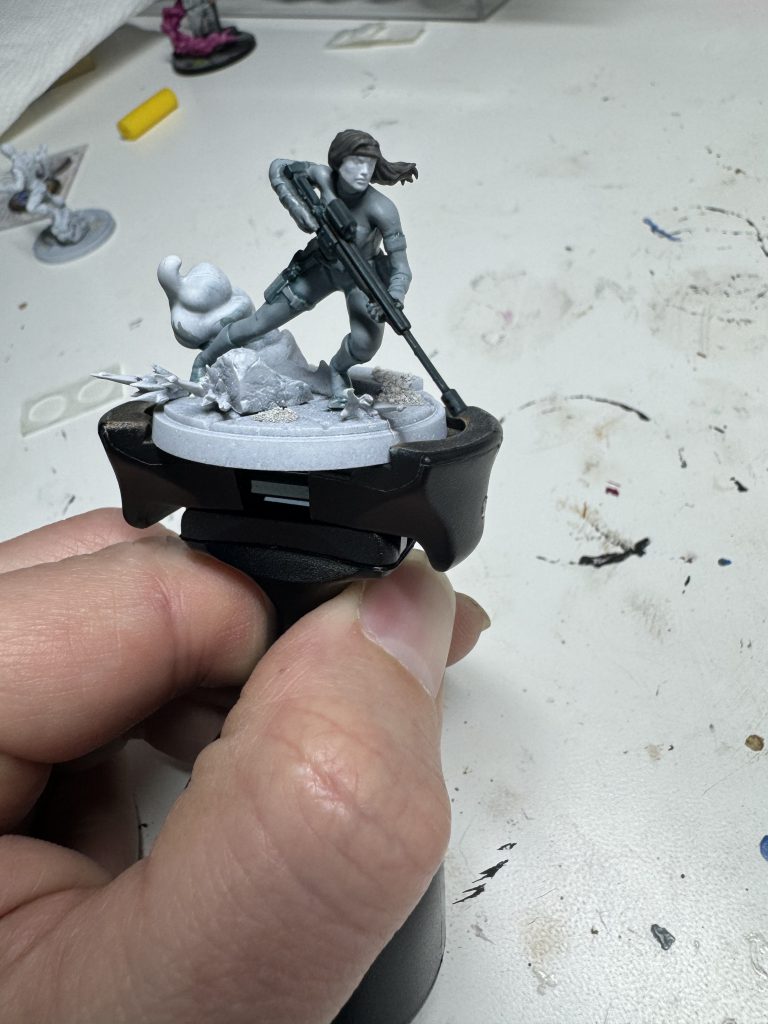
Like all my models, both of the models in this tutorial were primed white. If you’ve read any of my HtPE articles, you know I’m a firm believer in white primer. That’s especially true for Silver Sable. Please make your life easier and use a white or at least grey primer. (I’m willing to admit zenithal priming would probably work well here, if that’s your thing.)
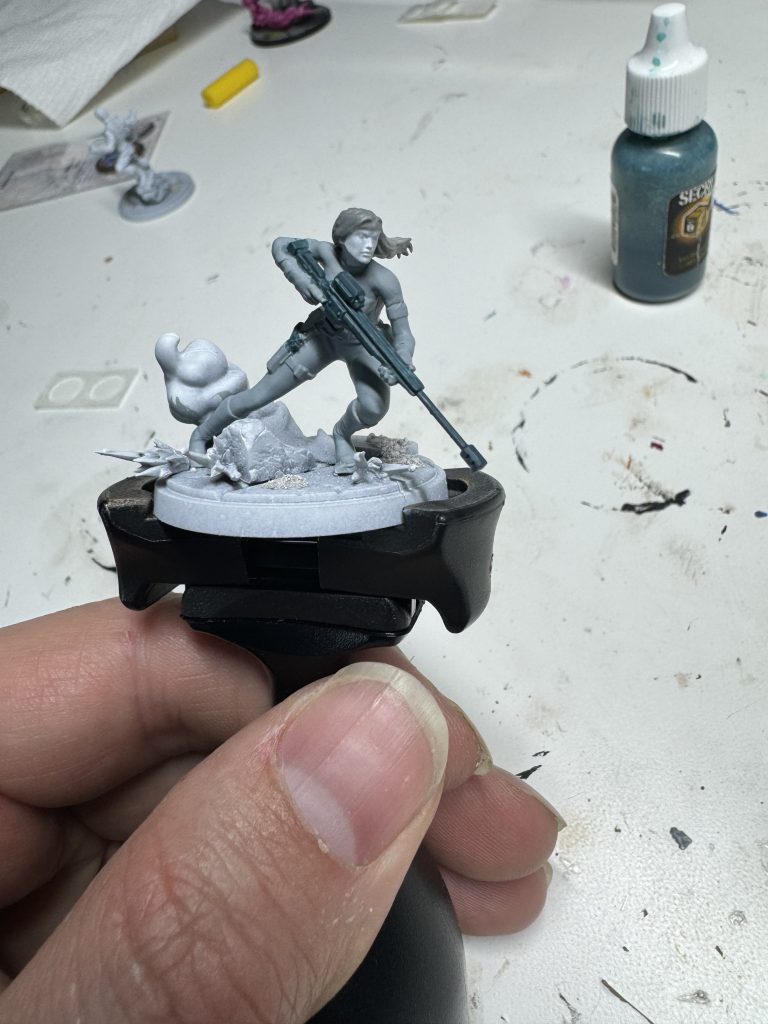
- I started by basecoating her entire uniform with VGC Heavy Bluegrey, the guns with P3 Coal Black, and her hair with VMC Dark Sea Grey.
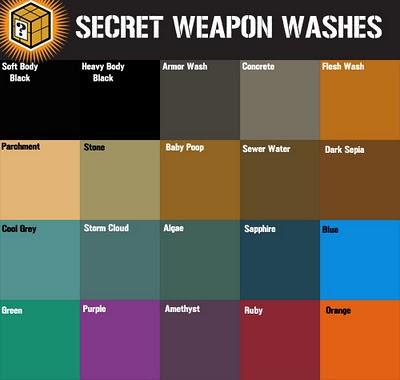
- I then washed her hair and the guns with GW Nuln Oil, and the uniform with SWM Cool Grey. This is no longer available with the unfortunate closure of Secret Weapon Miniatures, but look for (or make your own from paint) a desaturated slightly greenish blue wash. See reference image below.
- After the washes dried, I started reapplying the Heavy Bluegrey mixed with some VMC Offwhite, focusing on areas that would receive more light. As I applied additional layers, I mixed in more Offwhite until I was using nearly pure Offwhite.
- Features such as the belt and holsters were painted more uniformly with an even mix of the two before highlighting with pure Offwhite.
- I drybrushed the hair with Dark Sea Grey, but didn’t like the result here. The paint may have been too loaded on the brush, or too wet. I wound up going through a couple additional rounds of drybrushing and washing to get the hair where I liked it.
- I then drybrushed the hair with a mix of the Dark Sea Grey and Offwhite to act as a highlight.
- Once the hair was done, I basecoated her skin with P3 Midlund Flesh, followed by a wash of P3 Flesh Wash.
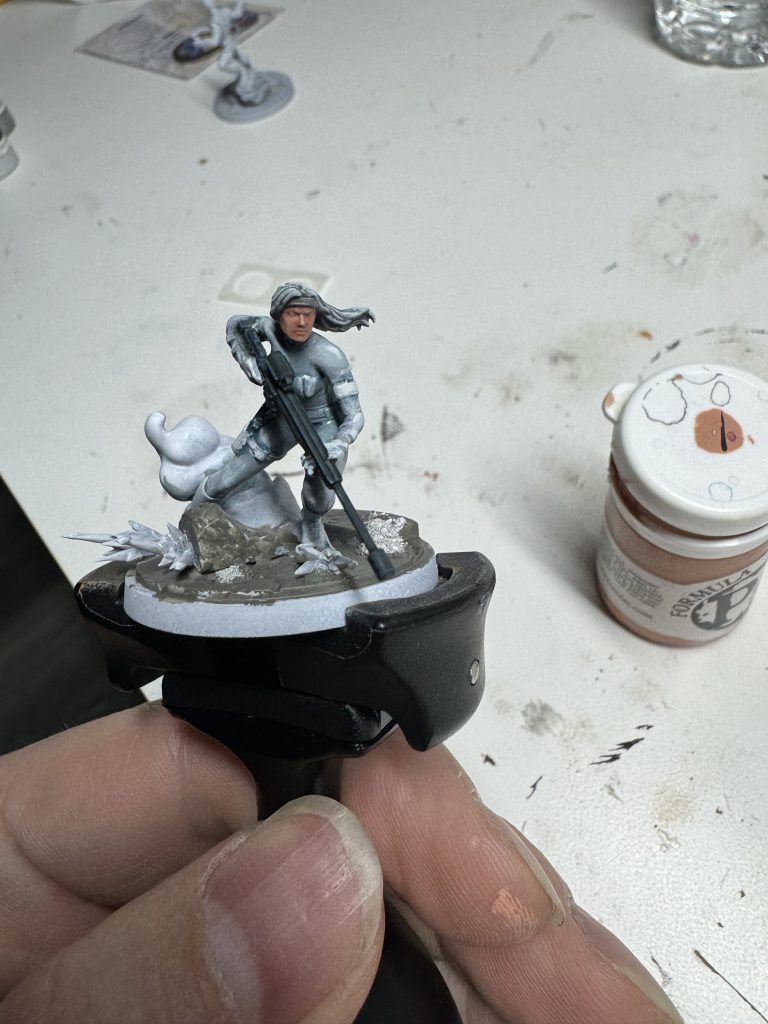
- Flesh was highlighted by mixing P3 Ryn Flesh into the Midlund Flesh base color, and highlighting raised areas. I did a tiny bit of a red wash around the lips just to define them and set them out from the other flesh.
- With Sable herself done, I moved to the base, using my usual MCP scheme. The base and stones were basecoated with P3 Bastion Grey. I then did a heavy drybrush of GW Dawnstone, followed by a lighter drybrush of VGC Stonewall Grey.
- The bits of soil I added to the base were basecoated with P3 Battlefield Brown. After a wash of GW Agrax Earthshade, I drybrushed with first P3 Gun Corps Brown, then P3 Rucksack Tan.
- I basecoated the smoke with (appropriately enough) Huge Miniatures Smoke Grey.
- I did some quick wet blending on the smoke, blending GW Dawnstone into raised areas. I then used first GW Eshin Grey wet blended into recessed areas, followed by wet blending that with Scale 75 Eclipse Grey. There are plenty of tutorials out there for wet blending, but in essence you’re working somewhat quickly with different shades and allowing them to mix on the model where they meet, creating an automatic transitional area between the two shades.
- I later went back and did a drybrush with a lighter grey to give the most raised areas a little more definition. Not gonna lie, I forgot to note which grey I used. If I had to guess, I’d say VGC Stonewall Grey.
- The little gunshot effects were based with P3 Ember Orange. Since it’s representing fire, the hottest, most internal areas were made brighter by mixing in P3 Sulfuric Yellow. Areas furthest from the center were made cooler by mixing the Ember Orange and P3 Khador Red Highlight.
- Don’t miss the tiny bits of chipped stone on those effects. They’re easy to miss but add nicely to the effect. I used my base grey colors, P3 Bastion Grey, on these.
- Finally, on all my models, I do a blacklining step where different elements on the model are visually separated with a thin line of black paint. This provides a high contrast, cartoony look I especially like for games like MCP. I also painted the base rim black, because I’m not a monster.
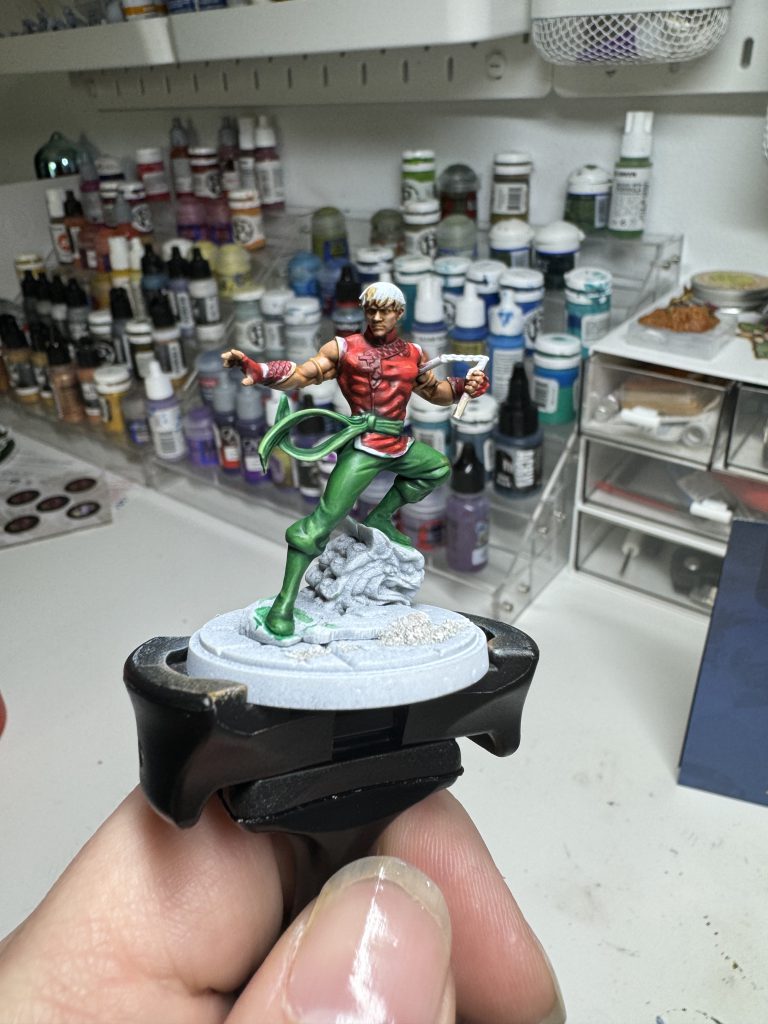
Shang-Chi
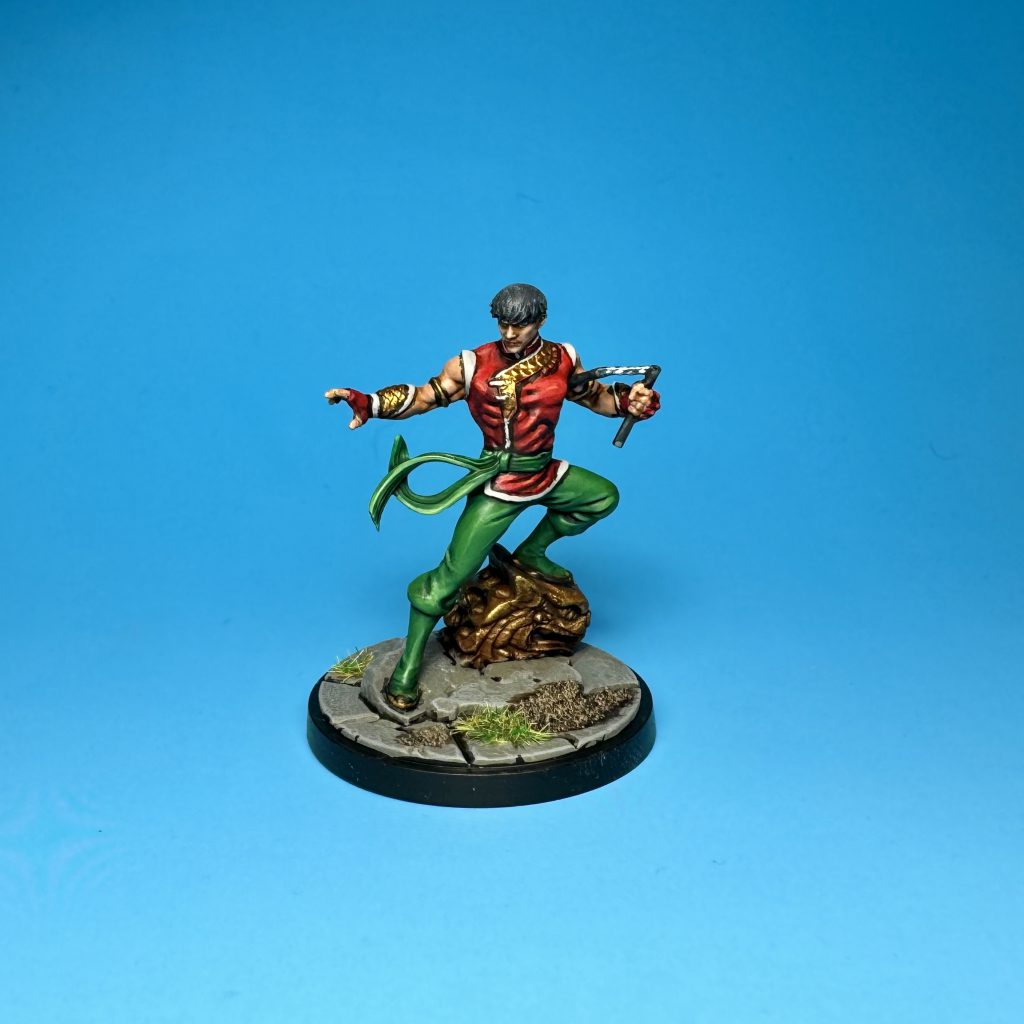
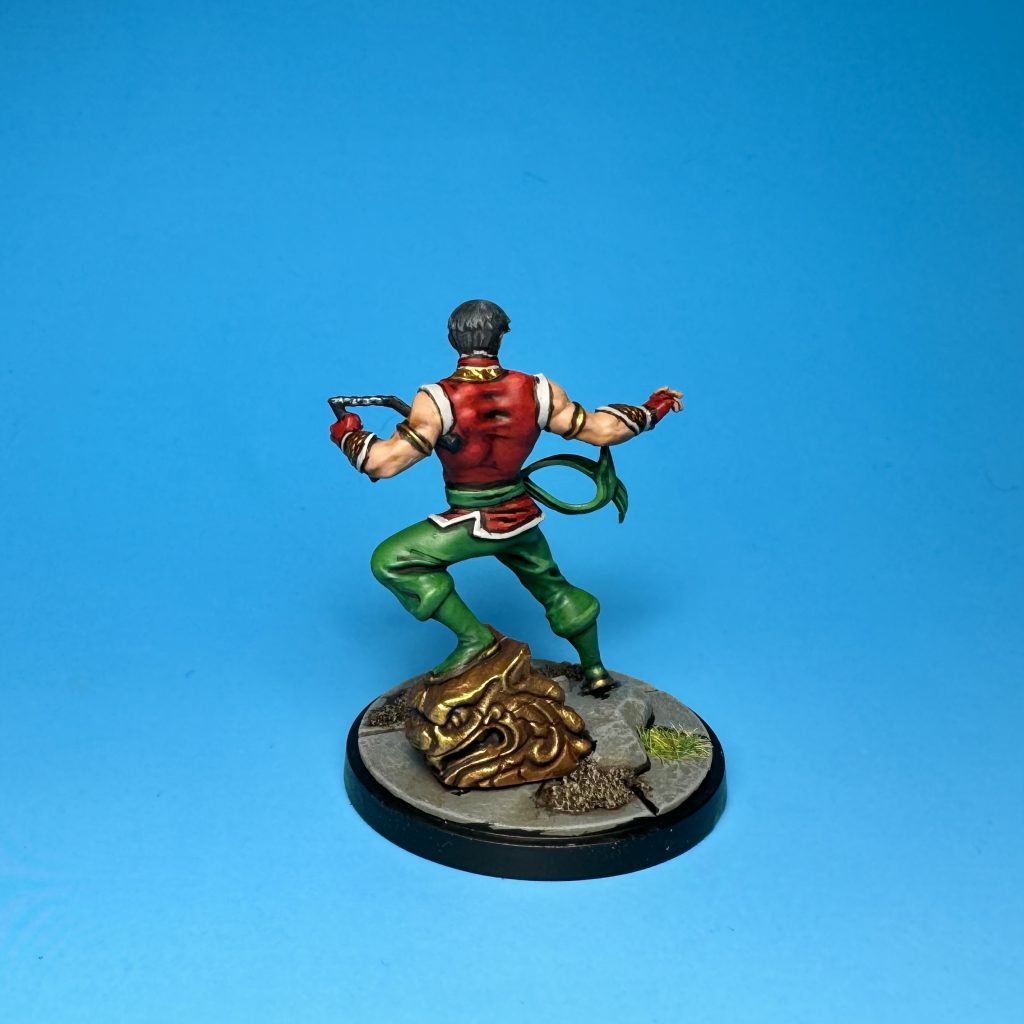
It’s fair to say that of the two, I was much more excited to paint and play Shang-Chi. I like the character, though shamefully I only know him via the MCU movie. (In fact I strongly considered a red and black scheme inspired by his MCU look.) And I definitely like his rules. I think you can tell when someone paints something they really like, and not afraid to say that’s true here. Silver Sable came out fine, but I’m very happy with how Shang-Chi came out. Here’s how I approached him.
- I started by basing the red portions of his outfit using GW Mephiston Red.
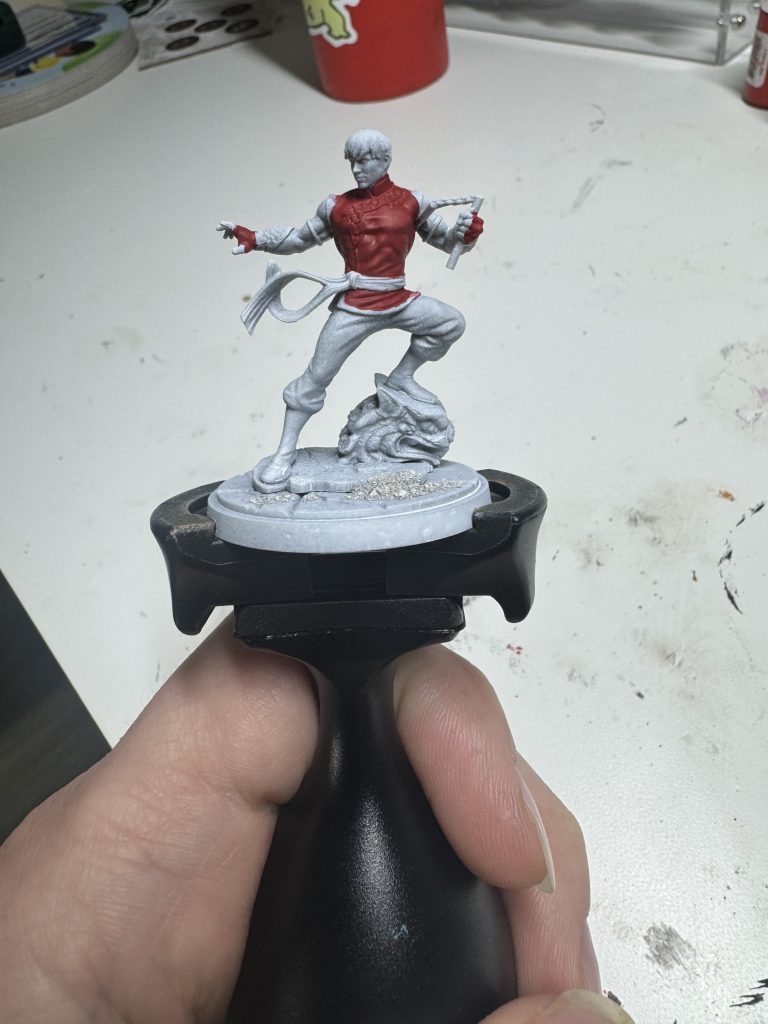
- Next, I washed the red areas with GW Carroburg Crimson.
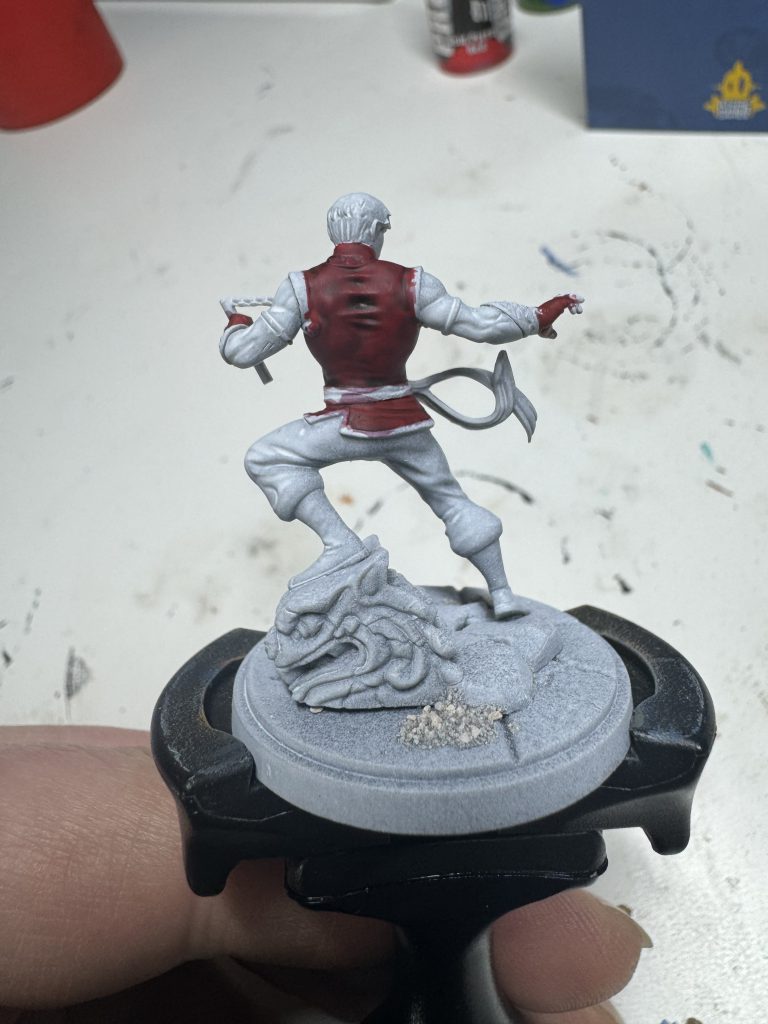
- I started highlighting raised areas and other spots that would receive more light. I first used the base color mixed roughly 1:1 with Pro Acryl Bold Pyrrole Red, then mixed in more for 1-2 more layers.
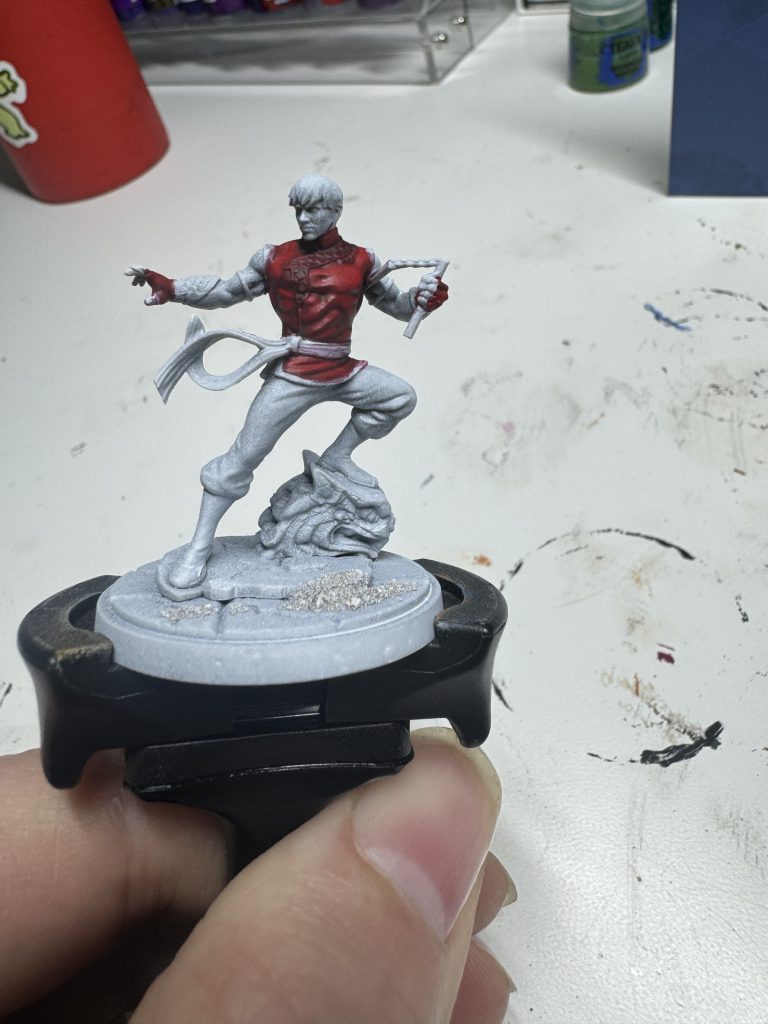
- For the final smallest highlights, I used the same mixture remaining from the last step, but started mixing in P3 Khador Red Highlight. (Sharp-eyed readers will notice I painted his arm guards red. This was intentional, as I’ll explain later.)
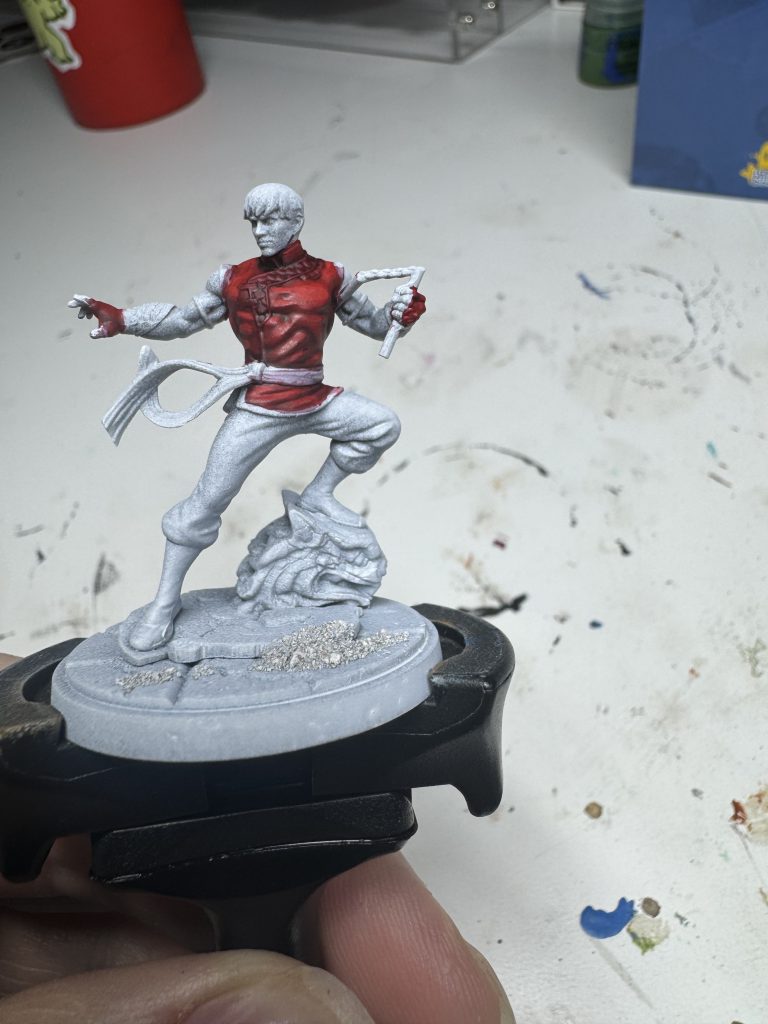
- Happy with the red, I started the green parts of the uniform. I based all of these with a 1:1 mix of two GW shades: Kabalite Green and Warpstone. (I don’t like using a mix for a basecoat if I’m going to have to paint it across multiple models, because I worry about keeping the ratio correct across them. But for a single model, I’m ok with it.)
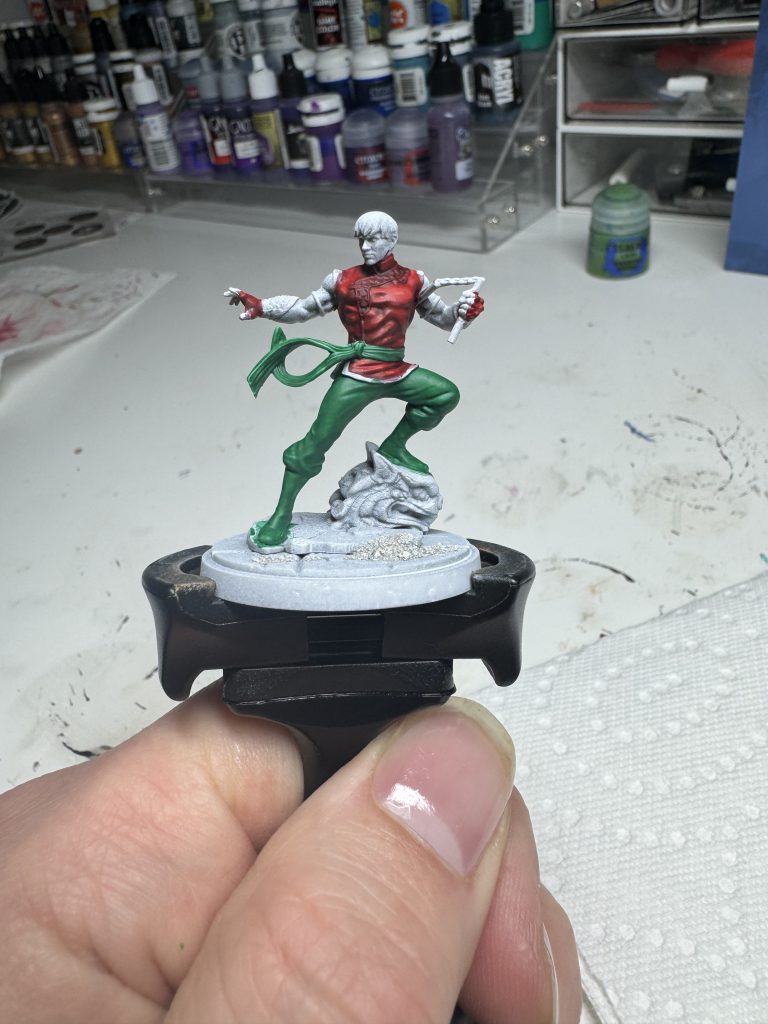
- No prize for guessing what’s next. I gave that a wash. Shocking, I know. This time I used GW Biel-Tan Green.
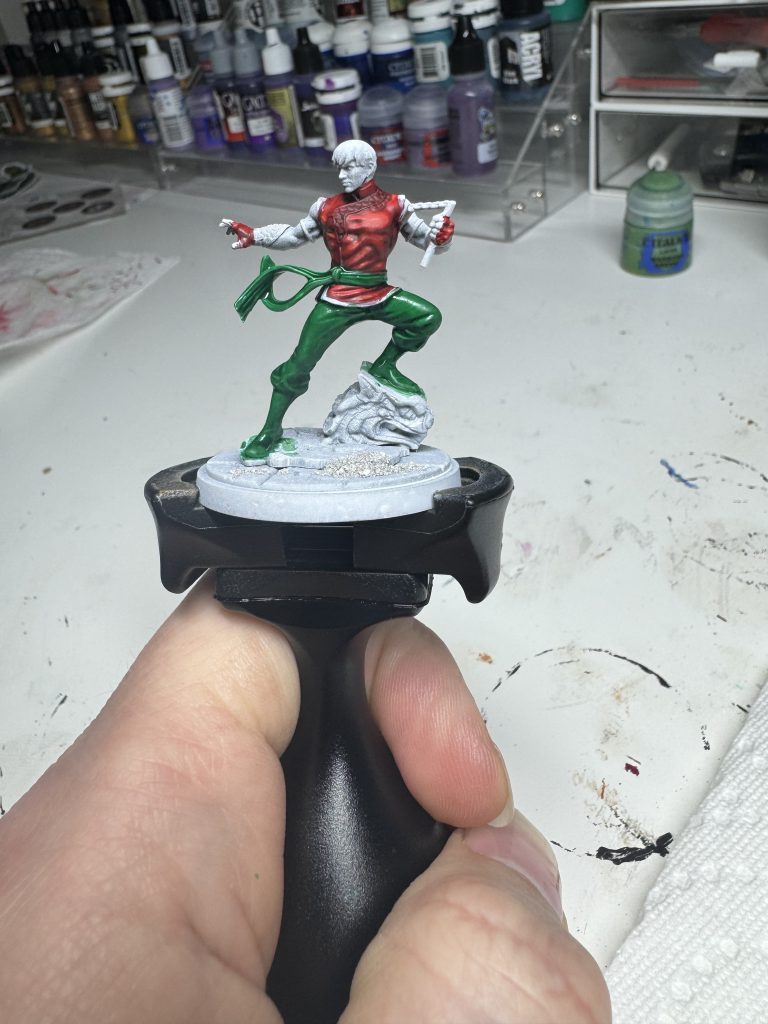
- From here I followed my usual formula, but instead of using the base color and adding brighter highlight color to it, I started with just Warpstone Green. To that I later added P3 Moldy Ochre for final highlights. Looking at my paint rack, I later realized that I had essentially created GW Warboss Green so maybe give that a whirl instead?
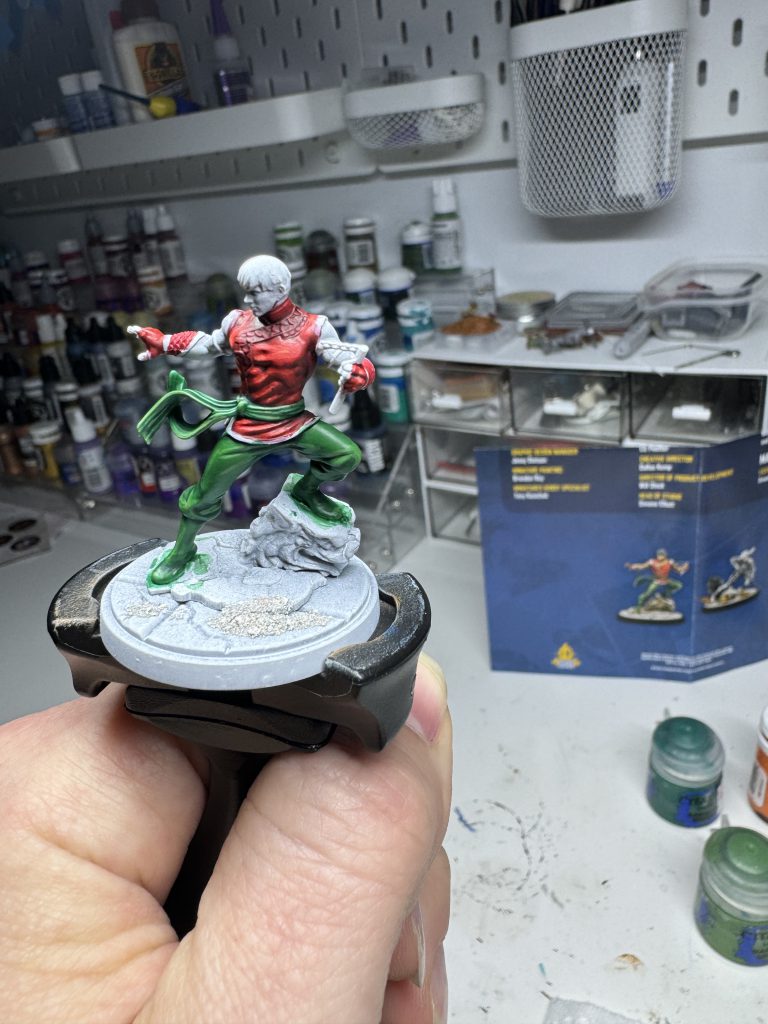
- Shang-Chi’s flesh was basecoated with GW Cadian Fleshtone.
- I then washed this with a 1:1 mix of GW washes Reikland Fleshshade and Seraphim Sepia.
- Highlights were done by mixing increasing amounts of Scale 75 Pale Skin into the Cadian Fleshtone
- I based the hair with P3 Coal Black, but I mixed in some Mephiston Red first. Why red? I was looking to cancel some of the greenish tint Coal Black can have. Red opposes green on the color wheel, so in theory that’s what it did. Did I use color theory correctly here? I have no idea!
- I washed the hair with Nuln Oil.
- When the wash dried, I drybrushed the hair first with a mix of the base color and Medium Sea Grey, then Heavy Bluegrey.
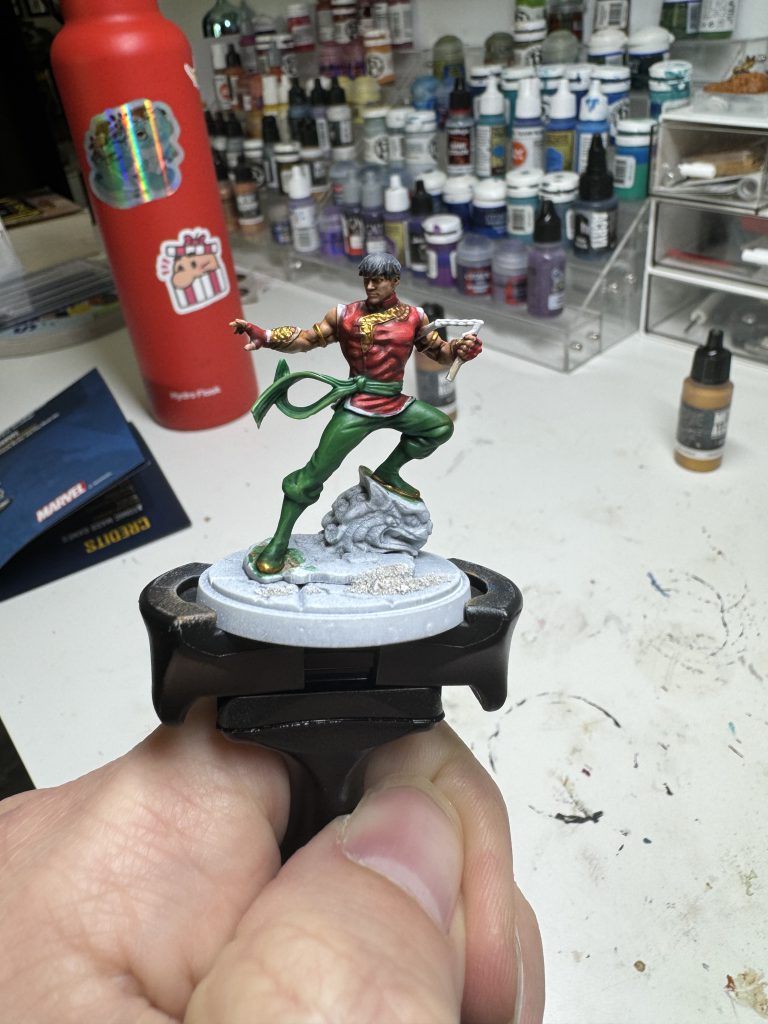
- Nearing the end, I tackled the gold trim. I knew it would slow me down too much to avoid earlier in the painting process, so I went ahead and just painted all of the trim on his top red. I later went and based+washed his arm guards red also, so the end result would be more consistent with the rest.
- When it came time to actually do the gold, I based it with Scale 75 Dwarven Gold.
- I washed the gold on Shang-Chi with Reikland Fleshshade. This would shade the gold, but not quite as strongly as say, Agrax Earthshade. It also ties in neatly with the red base under the gold.
- I followed this with very careful drybrushing and edge highlighting using Scale 75 Elven Gold.
- The white trim was based with VGC Stonewall Grey, then highlights applied with a mix of Stonewall + VMC Ivory, at roughly a 1:1 ratio.
- The nunchuku wasjust a quick metallic silver, and Scale 75 Eclipse Grey on the handles.The whole thing was washed with Nuln Oil. Quick edge highlights were done on the handle with a couple of small lines of GW Mechanicum Standard Grey.
- I based the model as detailed above. For the statue, I went with a gold look instead of the studio weathered stone look. This used the same paints as the gold trim above, except here I washed with Agrax Earthshade. This gives it an older, more weathered look and some contrast from the other gold on Shang-Chi,
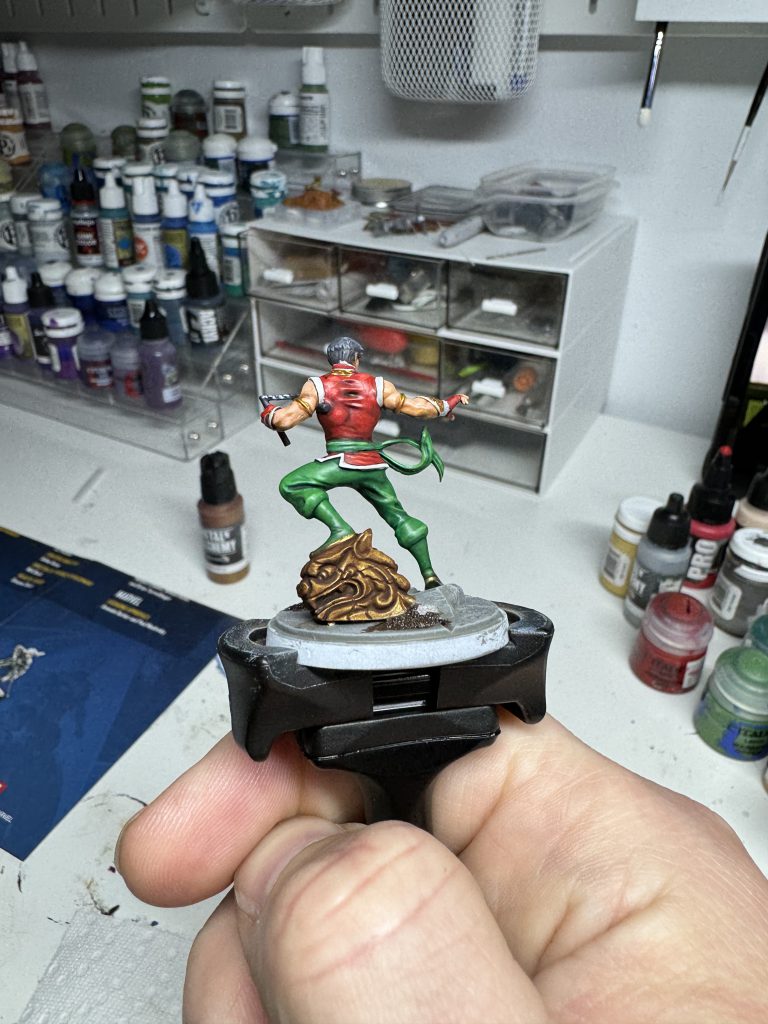
- After some careful blacklining and painting the base rim, Shang-Chi was done!
These models were fun to paint, especially Shang-Chi. They came together quickly and are great additions to my collection. I hope you enjoy painting and playing your own, and that this article helps with getting yours done. Thanks for reading!
Thank you to Atomic Mass Games for providing these models for review.
Have any questions or feedback? Drop us a note in the comments below or email us at contact@goonhammer.com. Want articles like this linked in your inbox every Monday morning? Sign up for our newsletter. And don’t forget that you can support us on Patreon for backer rewards like early video content, Administratum access, an ad-free experience on our website and more.
