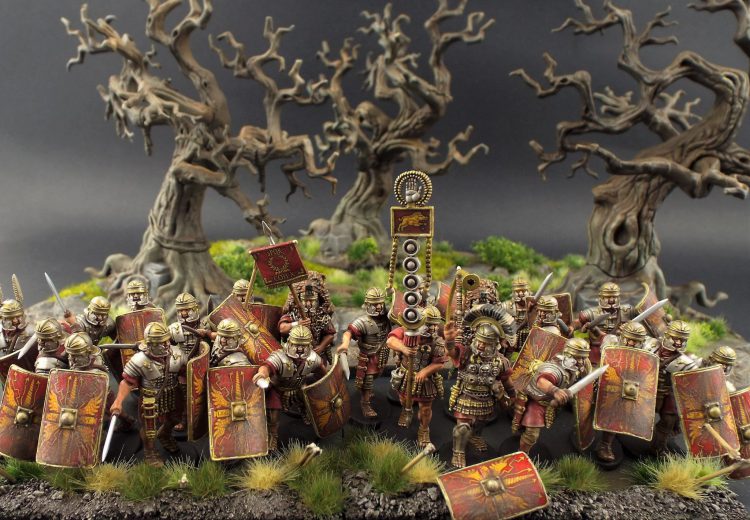
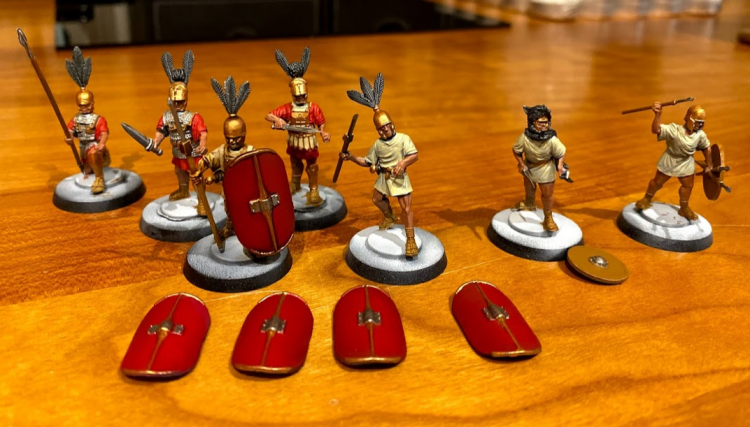
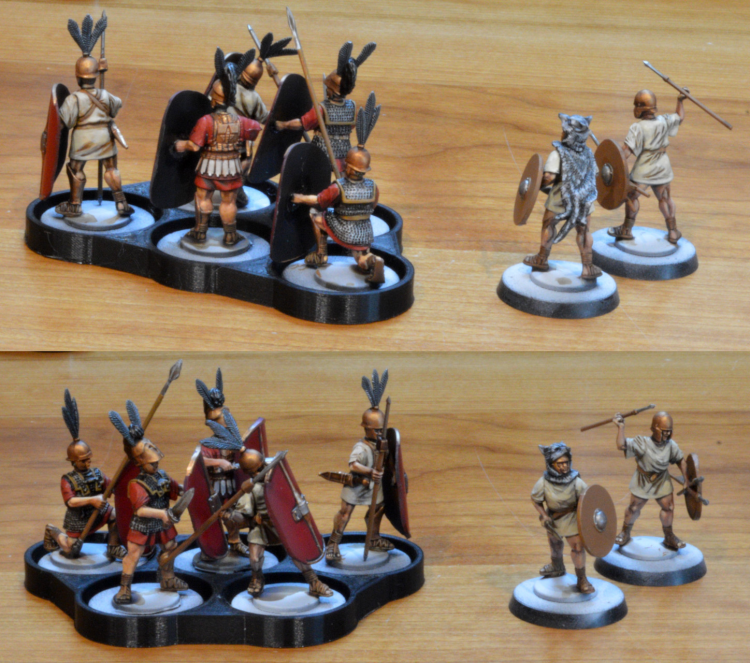
In this week’s Goonhammer Historicals, we take a look at how to paint some of the most iconic soldiers in history: the Roman Legionaries.
The Roman Legionary is one of the best-known historical soldiers in all of history. In reality there are several incarnations of these iconic fighters, with variations in armour and weaponry depending on the specific era they are found in.
Early Republican
The first soldiers of Rome that can really be considered Legionaries were those of the manipular legions. These were a fantastic innovation of military tactics that helped the Romans rise to become a prominent power in the Mediterranean, and also eventually ensured their victory over their main rival Carthage.
There were three types of legionaries at this point – the Hastatii, the Principes and the Triarii, from least to most veteran. this “triple line” was the key Roman tactic of the age. The Hastatii and the Principes were armed identically, with large Scutum, short sword and pila to hurl at their enemies. The Triarii were still armed with the long spear of their phalanx-fighting predecessors, marking them out.
Until recently there was a broad belief that the military of this period was relatively uniform, but recent evidence suggests that actually equipment was extremely varied within the broad guidelines. This is because the legionaries provided their own equipment, rather than the state, meaning that shield designs were often elaborate and individual, and a variety of armours and types of sword were used. The iconic gladius would not be introduced until after their wars in Iberia, so were not used amongst the soldiers of this era.
During the Punic Wars there was such an urgent need to recruit that the traditional requirements for service (that the soldiers were highborn and provided their own equipment), instead inducting huge numbers of the Plebeian class and providing kit by the state. This led to a short period where Scutum designs were not regulated, but plain ones were provided, leading to soldiers daubing them with rude messages and crude drawings. This influx of lower classes and more professional soldiers would eventually lead to the Marian reforms.
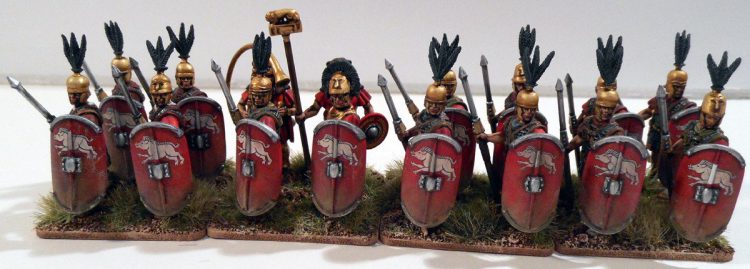
You can get these Early Republican Legionaries from Victrix’s website.
Marian/Caesarean
Introduced by Marius, the reforms were a sweeping change to the legions. They did away with the older three types of legionary, unifying their equipment and role to a single type. Armed with scutum, sword, pila and often mail armour, these soldiers fought in large close ordered blocks with great efficiency. The Marian army was still arranged into maniples, but this too would change over time to become the familiar Century and Cohort structure of the late Republican and early Imperial period.
Caesar’s wars in Gaul would bring further innovations and reforms, with the legions moving to become an incredibly effective professional force. When the Empire formed, these legions would be the bedrock upon which Augustus made his own innovations.
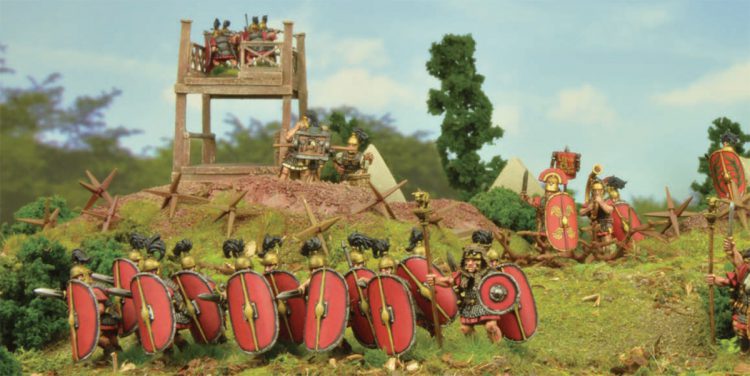
You can get these Late Republican Legionaries from Warlord’s website.
Early Imperial
The Augustan reforms made some key changes to the legions, but primarily not to the legionaries themselves. Instead the great innovation of this period was the regulation of auxiliaries into a standardised fighting force, with units of heavy infantry similar to the legionaries, as well as lighter troops, archers, and cavalry. The heavy infantry legions continued in much the same way, though the design of the scutum changed to the curved rectangle that is iconic today, and some legionaries were outfitted with the more advanced scalemail, lorica squamata, or platemail, lorica segmentata.
You can grab some of these great Early Imperial Legionaries from Victrix’s website.
Late Imperial
Beginning roughly from the ascension of the Emperor Diocletian, the legions began to change once more. Partly this was in response to new ways of fighting, but also it was to compensate for the increasing economic strain of the legions. The pila gave way to the heavier spiculum, before being eventually replaced by the hasta, a heavy thrusting spear. The scutum shifted back to an oval design, before becoming a little lighter and slimmer. Finally the gladius slowly fell out of favour and was replaced broadly by the spatha, a sword that previously had been used only by cavalry. The squamata and segmentata, armours that required huge investment to field in large numbers, was more or less entirely abandoned in favour of familiar chainmail.
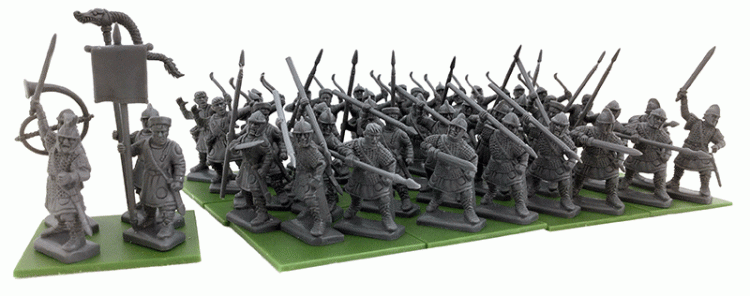
You can buy these Late Roman Legionaries from Gripping Beast’s website.
Republican Legionaries in 28mm (Lupe’s Method)
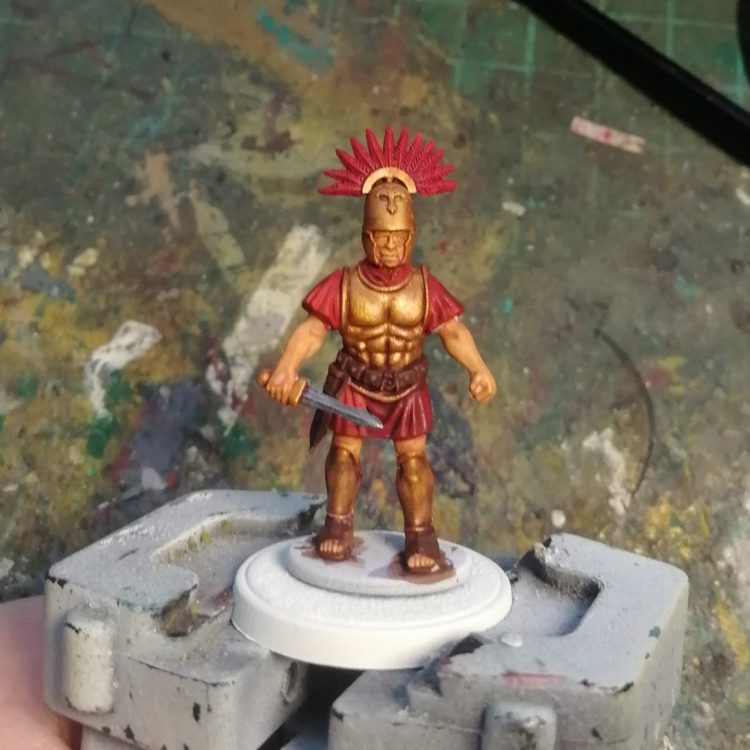
I was painting a Republican Centurion and Signifer from Victrix. My approach is to create good bright colours with strong contrast, and realistic metallics. This combination helps everything read well at a distance and on mass, while also giving a real sense of life and movement from the reflections on the metallics.
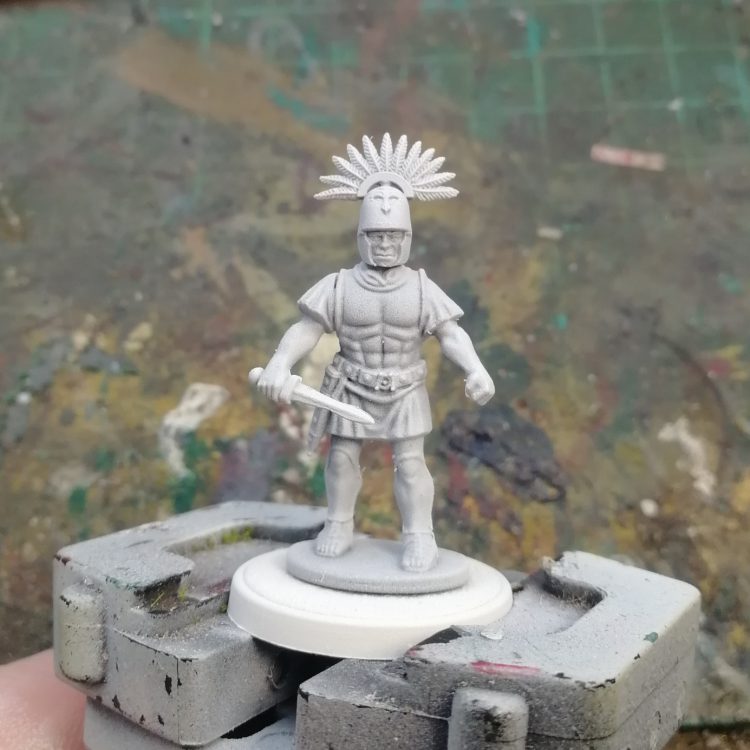
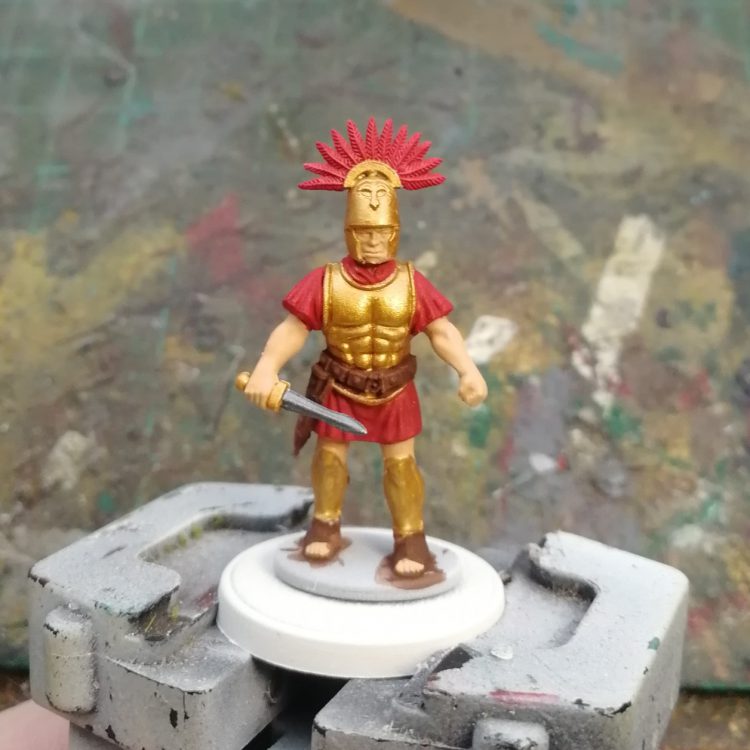
For the centurion, I started by priming the miniature white (which makes it easier to get strong colours with few coats) and then applying solid clean basecoats of all my base colours. Here are the colours I used:
- Cloth and feathers: Scale 75 Blood Red
- Skin: Vallejo Panzer Aces Flat Skin
- Hair: Scale 75 Dubai Brown
- Leather: Scale 75 Brown Leather
- Breastplate, Helmet and Greaves: Scale 75 Dwarven Gold
- Sword and buckles: Scale 75 Black Metal
The goal here is to set the right base tone for each area. The blood red is rich and saturated and makes the cloth really stand out immediately. I went for the iconic red, but it’s worth remembering the legions wore many different colours: blue, green and even some kinds of purple were common.
The skin tone I went for is a little more orange than I might normally choose, partly to reflect the Mediterranean complexion, but also to ensure it doesn’t clash with the red of the cloth.
This Roman soldier is about right for the Punic Wars, and at that point most soldiers wore pectorale, a small square bronze breastplate that covered the heart, rather than lorica (chainmail) which was expensive and difficult to produce, and reserved for the elites. Because this is a centurion, he’s in full pectoral armour, in the Greek fashion, which would have also been made of bronze. His greaves and helm, like those of his men, would have been bronze as well – the shining steel armour of later periods was well in the future at this stage.
Bronze is a tricky metal to paint because it honestly can look so different from place to place, ranging from a near silver to a dark greenish brown. I’ve gone for a burnished gold as a base tone, as the accounts of the time often describe them in similar ways. Don’t worry, it won’t stay just like gold as we work up the tones.
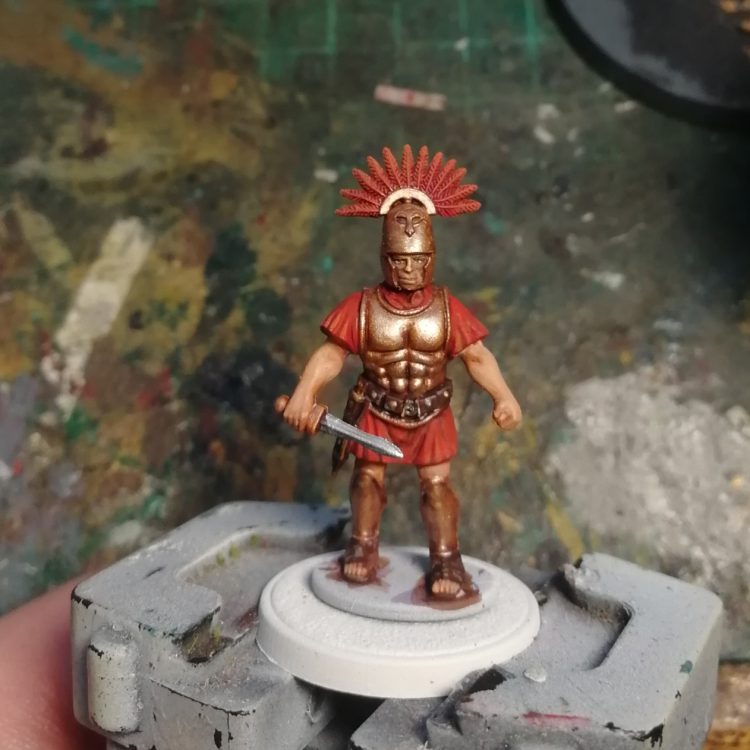
Once our basecoats are dry, I give the miniature some shading with a variety of washes. You could use almost anything for this but I find Citadel Shades are still a great standard product to rely on. Here’s what I used:
- Reikland Fleshshade over the skin
- Agrax Earthshade over the hair
- Nuln Oil over the steel sword and buckles
- Druchii Violet over the cloth, bronze and leather
So let’s talk about that purple shade because putting it on you might initially think you’ve made a terrible mistake (don’t worry, as it dries all will become clear). Purple is a pretty obvious shade for red, but it works brilliantly on golds and brown leather too. The purple really give it depth, with a good balance between cool tones (that make it read as shade) and warm ones (that keep the lustre of those base tones).
Once it’s all dry, it’s time for your layers. Nothing fancy here, just one step highlights picking out the detail.
- Cloth: Scale 75 Antares Red
- Bronze: Scale 75 Moonstone Alchemy
- Skin: Scale 75 Golden Flesh
- Steel: Vallejo Air Metallic Silver
- Leather: Karak Stone
- Hair: Karak Stone
All of these are simple zenithal highlights, with the exception of the leather, which was a fine edge highlight. With the bronze, use really thin layers, almost a glaze, and build it up slowly. It’ll help keep it smooth.
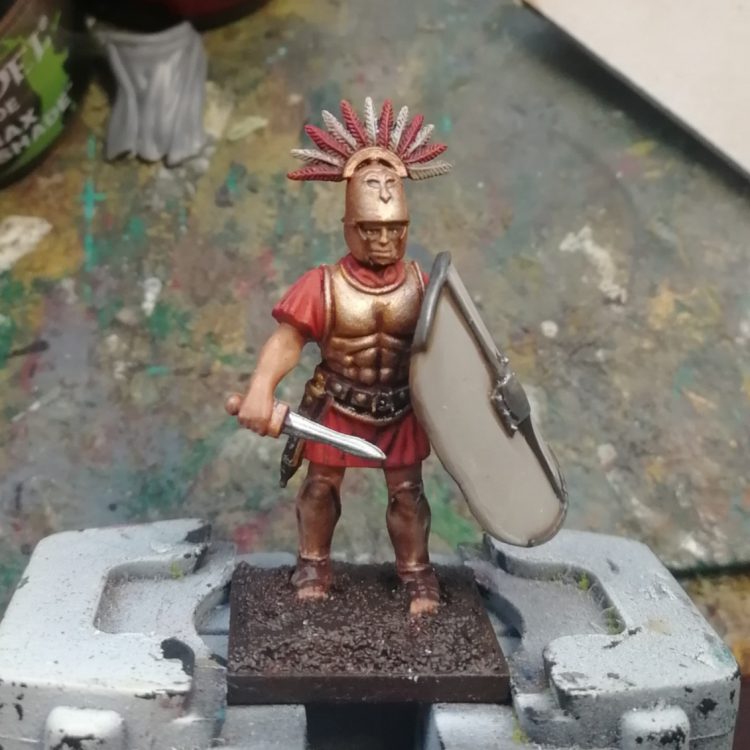
Finally I painted and added the shield. This used:
- Vallejo Deck Tan
- Scale 75 Black Metal
Before washing:
- Deck Tan with Agrax Earthshade
- Black Metal with Nuln Oil
That dry, I cleaned the surfaces back up, before adding a few scratches with Rhinox Hide, and then highlighted with:
- Vallejo Air Metallic Silver on the Black Metal
- Vallejo Silver Grey on the Deck Tan
I put little Silver Grey highlights under the scratches too to give the sense of depth. At this point I decided his feathers weren’t interesting enough so I also picked out half of them in Deck Tan, washed with Agrax, and highlighted with Silver Grey.
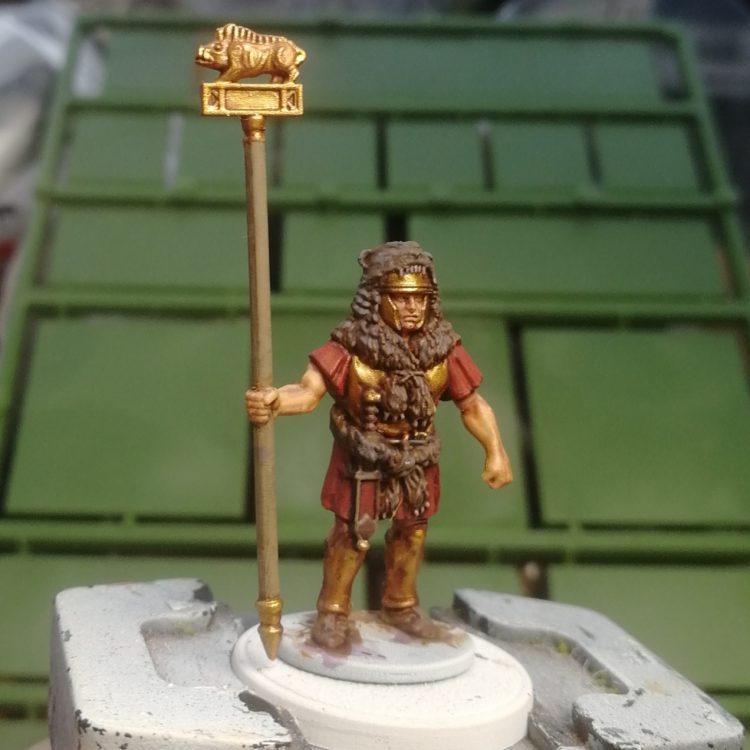
For the signifier, the big difference is the wolfskin that he’s wearing about his shoulders. I started with a brown here, Scale 75 Brown Leather. However, I then washed the entire fur with nuln oil and highlighted with Scale 75 Brown Grey. This helped keep the organic feel of the material, while pulling the tone towards the grey of the pelt.
Republican Legionaries in 28mm (Brin’s Method)
My Romans I was checking out for this feature were the Roman Legionnaire and Velites from Agema. These models appear to represent the equipment and garb from around the second punic war, so I started by having a quick google to see how things are generally assumed to have looked at the time.
Once I had a rough Idea of what colours to use I had to pick the specific paints. I wanted to make them stand out from a distance but not be overly bright, like my painting of more recent fantasy miniatures have been. To achieve this I picked a range of colours with a decent range of contrast but not enough to verge into that more fantastical side of things.
At the time the colour and style of many aspects were not in any way standardised, but I decided to use red as my primary colour for the unit because that’s the classic to me and it’s important to go with things that make you happy, even if they’re only “mostly” accurate.
I started by priming the miniatures black and applying a zenithal spray of white.
This provided a basic idea of where the highlights should be, helped details to stand out and let me think about how things might look more easily.
I did a test model to try out the colours I had in mind to make sure they worked, then started blocking in the colours on the other troops, using
- Citadel Khorne Red for Tunics on the more armoured guys
- Citadel Leadbelcher for details like the chainmail and pila heads
- Citadel Ushabti Bone for the Fabrics on the less armoured types
- Citadel Bugman’s Glow for the skin
- Citadel Contrast Black Templar for the Feathers and the wolf pelt
- Vallejo Game Color Beasty Brown for the leather and wooden details
- Vallejo Game Color Brassy Brass for the Bronze areas such as armour and helmets
By only having 1 or 2 bright colours, which have quite different levels of saturation and hue, they stand out from each other without being overwhelming. The red applied to the tunics of the more armoured legionaries looks a bit bright during this phase but that simply gives us more space to shift things with the wash and highlight steps.
Bronze is weird and often hard to capture accurately without it shifting into looking more gold, as such I went with a slightly more dull and tarnished look than they likely would have been, a bit too dark and a bit too brown but which reads as a somewhat aged Bronze.
After the base layers came washing. Being lazy I simply chose to use 2 main washes, one for the skin and one for everything else, this drew all the colours together and again, helped to avoid going too far with the tone contrast. I used a third simply for the chainmail and shield bosses where I wanted a darker look to the metal but hadn’t wanted to go so extreme as to start with the Black Templar.
- Army Painter Soft Tone applied to all the bronze and fabric areas
- Army Painter Flesh Tone applied to the skin areas
- Army Painter Dark Tone applied to the metal areas mentioned above
These washes can be pretty messy, but it really doesn’t matter that much because we can now re-layer things to bring them up to where we want them. I started by simply re-layering most of the areas with their initial base colours, except for the bronze which I simply left as-is, and the skin which got a more careful application of Bugman’s mixed with Vallejo Game Colour Elf Skintone. The re-layering of the chainmail can be done with a quick drybrush, although as I’m bad at drybrushing I also had to tap back in some dark tone to darken some of the more extreme shadows back to where I wanted them.
Finally we go back with some highlights on a few of the key colours, just mixing a small amount into the base colour to shift it up a bit; a little Vallejo Game Color Aged White for the off-white cloth, a little Vallejo Game Color Cadmium skin mixed into our skin tone paint for the faces and more noticeable muscle shapes and a bit of Vallejo Game Color Leather Brown on the leather and wood details.
Finally I used a black fineline pen to outline the details of the shields and then went over them with Vallejo Model Color Red. At this point if I could decorate these shields with some freehand or transfers, however I chose to leave them red for the time being so that If I can come back to them later I have that blank canvas to go off of.
For the Velite in the wolf pelt I simply did some highlights with a few random grays using a lot of small lines parallel to the sculpted fur, building them up towards a light gray while leaving the Black Templar’s nice dark shadow blacks and grays in the recessed areas.
And that’s it, our little huddle of men is done.
Early Imperial Legionaries in 6mm (Serotonin’s method)
As the great philosopher Cher Horowitz said, painting 6mm is “Full on Monet” – “It’s like a painting, see. From far away it’s okay, but up close it’s a big ol’ mess.”
Ok so maybe the movie Clueless didn’t have meaningful discussions about 6mm miniature painting but there’s a lot to be taken from the quote.
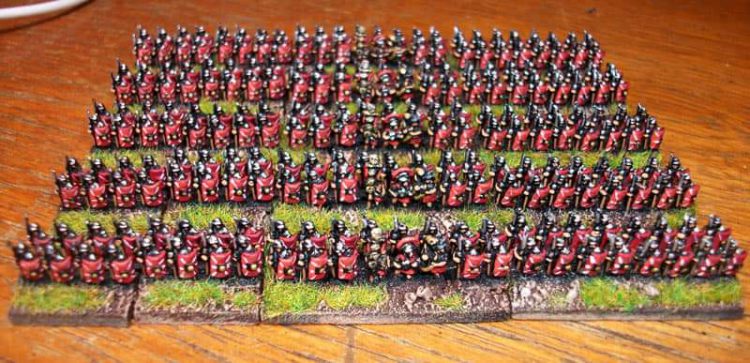
6mm is a scale that to many people, initially looks hugely daunting. Painting a model that’s at most the size of a Primaris Marine’s head seems a ridiculous challenge to set yourself, especially when you consider just how detailed and well cast many of the modern sculpts from companies such as Baccus or GHQ are. What is often overlooked in these moments of panic is that the intent is not to paint 1 model, but often several hundred and that when we consider a unit on the battlefield, we aren’t looking at a single 32mm round base with a heroic scale space marine on, but often a base with between 10-20 models on. The intent is to make that base pop, not each individual miniature on that base.
If you use Cher’s quote as your motivation then painting 6mm is a breeze.
In keeping with all of our excitement about the wonderful new game Infamy Infamy from Too Fat Lardies, I will give you a brief guide to how I painted a 6mm Roman force for it. I won’t be giving exact colour guides but I hope to give an idea of the approach I took and how it will be usable for any 6mm scale model from Napoleonics through to Epic 40k.
The first thing to say is the most obvious one. Batch painting is your friend. Glue those tiny soldiers to coffee stirrers or something similar. It speeds up painting and also improves the coherent look of the base load of miniatures you will be painting.
Colour selection is really important. My first 6mm army was a British armoured division for the Cold War. I spent ages researching camo colours and accurately paint matching and felt incredibly pleased at how accurately I’d selected my colours. The problem was that at 6mm everything looks darker than equivalent paint jobs at 28mm, so my models looked like dark indistinguishable blobs from anything over 6 inches away, which isn’t much use on the tabletop. My tip is your base colour should probably be the highlight colour you would use at larger scales. For these Legionaries, I painted the armour with a bright silver. Had I been doing 28mm I’d have gone for a darker more weathered metal colour such as Leadbelcher.
I undercoat my models black which, given my first piece of advice, sounds somewhat counter-intuitive. In the same way as you need to use bright colours when painting 6mm, you also want greater contrast. I essentially use the black lining to shade and add contrast to my 6mm miniatures. By using a black undercoat and adding small dabs of colour, I can leave areas of the undercoat exposed as a method of black lining. It speeds up the painting process and adds the contrast to help your models pop on the tabletop. This is where the Monet quote rings true for me. Up close the miniatures as individual components look “a big ol’ mess.” but from arms length or further, the lovely individual detail begins to shine.
I do however sometimes use a slightly different technique, especially for models with a lot of fine detail that require definition, for example cross belts on 6mm Napoleonics. After undercoating black, I will carefully and very lightly dry brush the models white. This gives the same sort of benefits that I see commonly used at larger scale these days when people zenithal highlight. You don’t lose the advantage of the black undercoat as previously mentioned, but it makes it much easier to paint any of the more intricate detail required.
My final tip is sometimes you have to cheat. If you have several hundred 6mm models to paint then time saving is no bad thing. If your models are closely ranked up, two to three deep, on a 40x20mm base then you don’t need to paint all of the minis. No one, even at closer scrutiny, is easily going to see the shins or front of the torso of the back or middle rank, nor will they see the back of the front rank. At 6mm these miniatures are going to have a couple of millimeter gap between ranks. My approach is if it’s not going to be seen, don’t paint it. This again is where undercoating black can really help. With some of my Napoleonic minis I came close to painting only half of each miniature dependent on what rank they were going to be in. Once you’ve glued them to the base and positioned them where they need to be, you can then go back and touch up any obvious areas where you haven’t painted that ‘read’ badly. It’s a much quicker approach than painting every model.
Hopefully these few tips will make 6mm seem less daunting. Its a fantastic scale to paint and play with, and I first fell in love with it when Epic first hit the shelves (please GW bring it back!). Personally I find it much easier to paint 6mm than 28mm, and as much as I love the look of my larger scale collections, there’s something about seeing several hundred Roman Legionaries or Napoleonic line laid out on a table top that stirs my soul. Its truly an inspiring sight and one that’s much more achievable than many wargamers realise.
Have any questions or feedback? Drop us a note in the comments below or email us at contact@goonhammer.com.
Some of the links in this article may take you to storefronts with which we have an affiliate relationship. Goonhammer receives a small portion of any purchase you make; we appreciate your support! For information on our program and affiliate policies, please see our official statement on affiliate links here.
